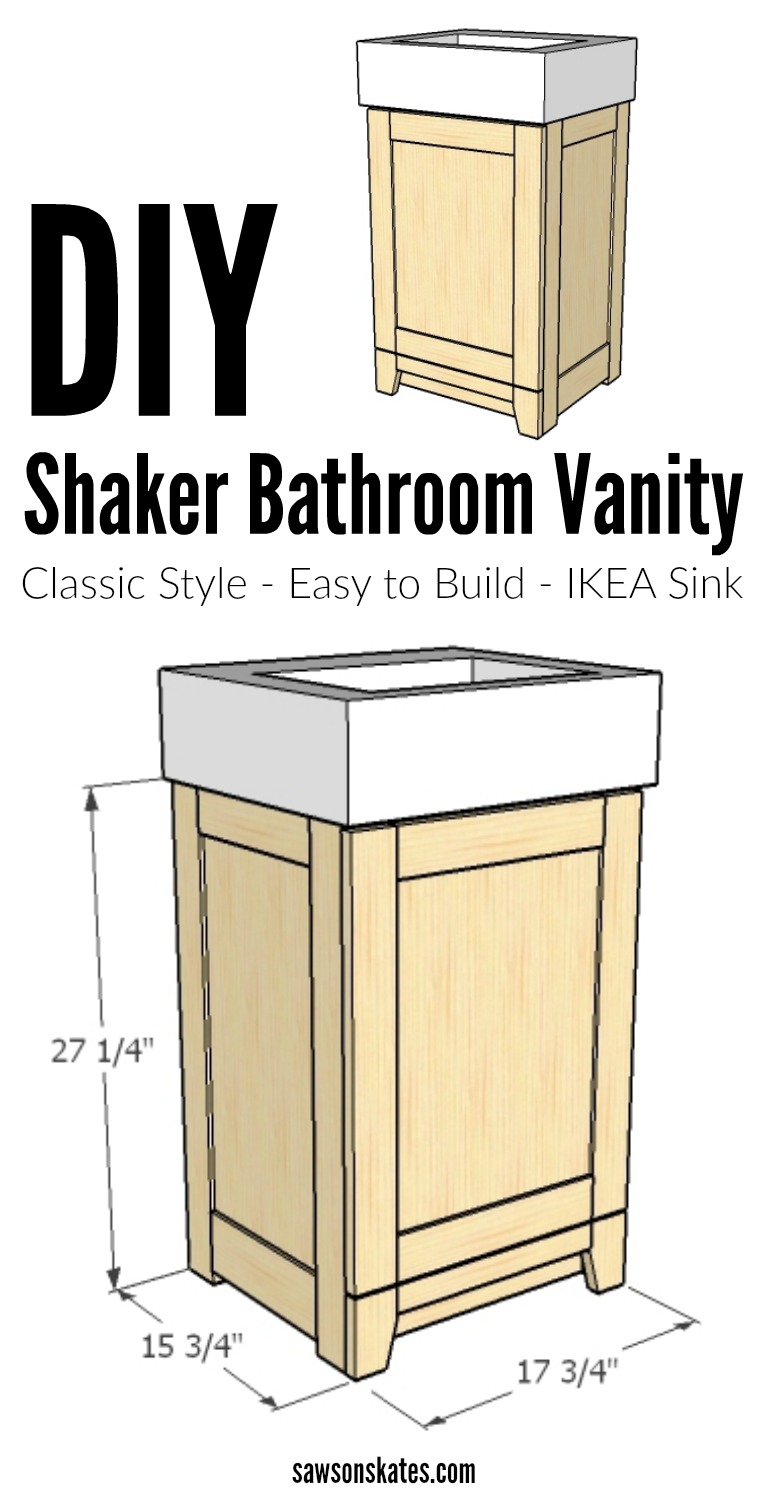
DIY Classic Style Shaker Bathroom Vanity
Do you like the classic look of Shaker style furniture? Do you have a small bathroom? Do you want to build a Shaker style vanity for your small bathroom? Then you’re in luck! Today, I’m sharing plans for an easy to build, classically styled Shaker bathroom vanity.

For your convenience, this post contains affiliate links to supplies or tools I used to complete this project. Purchases made using these links help support the Saws on Skates website and allow me to share more DIY projects. and DIY tips with you. There is no cost to you for using these links. Click here to visit my site policies.
A few weeks ago I shared the plans for the DIY bathroom vanity I designed and built for my friend Linda’s bathroom. The project featured faux drawers mounted to a door, an open storage shelf and book-matched panels. Linda loved the way it turned out, but it wasn’t the first vanity I designed for her bathroom.
The original vanity I designed for her was a looooong time in the making. First, I was going to make the vanity out of some rough sawn cherry wood I had, but I ran into a problem. I regrouped, built the vanity with select pine instead and stained it a shade of grey. I tested a sample of the grey stain next to the tile and it looked great. Then I stained the entire piece and it looked AWFUL! I guess the little sample swatch I made worked with the tile, but when the entire piece was stained… not so much. It didn’t coordinate with the tile at all! I tried stripping it and starting over, but the color still wasn’t right. That’s when I decided to start over. Not only did I start over, but I did a complete redesign. No worries, the mismatched vanity found a new home at my aunt’s house!
Because of all the frustrations surrounding the original vanity, I blocked it out of my mind. Then recently I found some photos of the original vanity and I decided it needed a second chance. After all, the problems didn’t have anything to do with the design, just circumstances related to the vanity. Awww, that little vanity needed a second chance and now is the time!
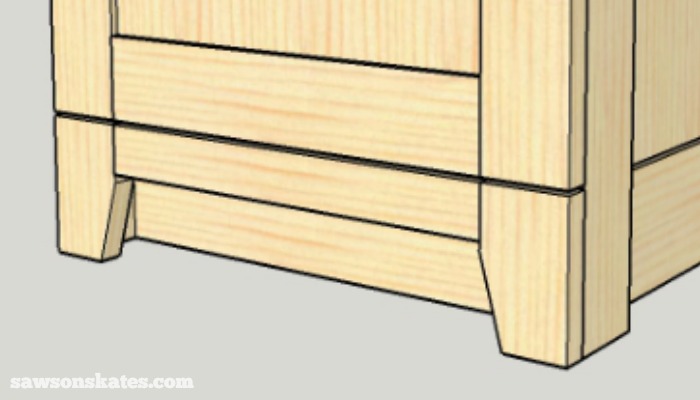
One of the things I like best about the Shaker bathroom vanity is the feet. Many bathroom vanities look like a cabinet floating on a base. I wanted this piece to have a furniture feel, so I designed the toe kick area with feet.
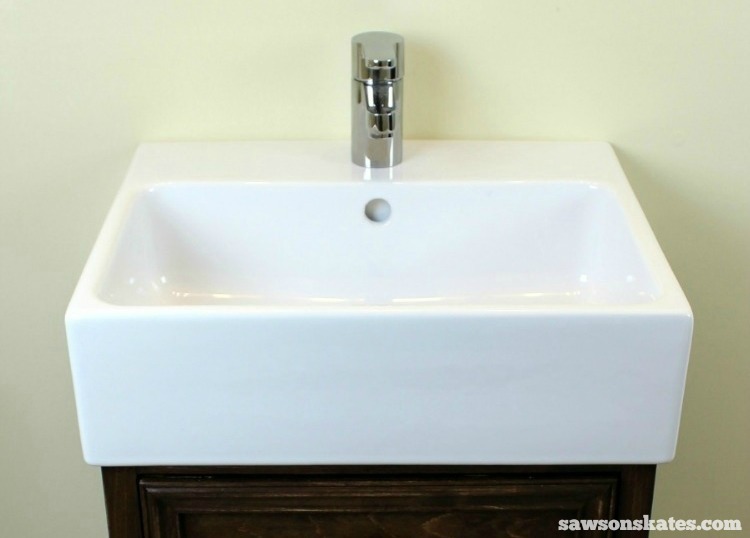
Just like the Small Size, Big Style Vanity, the Shaker bathroom vanity is designed to fit an IKEA Yddingen sink.
Are you ready to make some sawdust? Let’s build a Shaker bathroom vanity!
DIY Shaker Bathroom Vanity Plan
Supplies
1×2 about 14″
(3) 1x3x8
(1) 1x3x6
1/2” pin nails
1/2” plywood 24”x48”
3/4” plywood 24”x24”
1-1/4″ pocket screws
(2) Cabinet hinges
Elmer’s Wood Glue Max
Rust-Oleum Ultimate Wood Stain – Dark Walnut
Semi-Gloss Polyurethane
Tools
Stanley FatMax Tape Measure
Dewalt Cordless Drill
Kreg Jig
Miter saw
Circular saw or jig saw
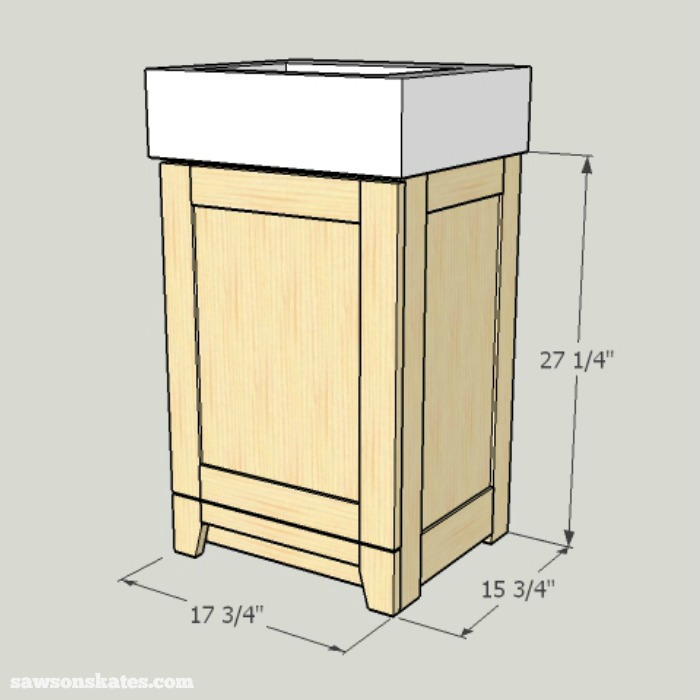
Dimensions
27-1/4″h x 17-3/4″w x 15-3/4″d
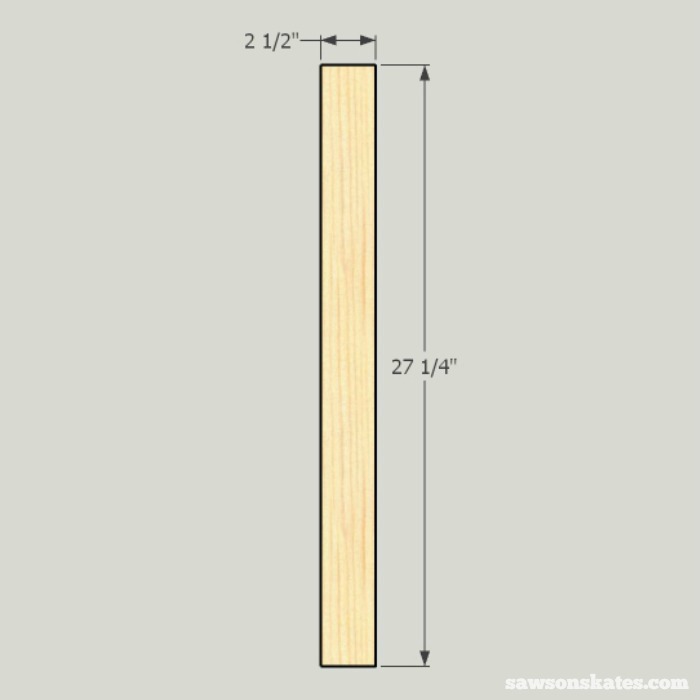
Step 1. Cut the Side Stiles. Cut 4 pieces of 1×3 to 27-1/4″.
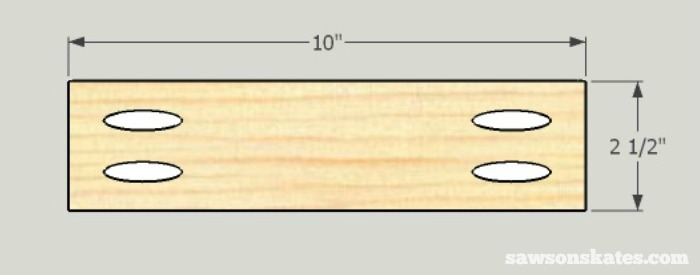
Step 2. Cut the Top Rails. Cut 2 pieces of 1×3 to 10″ and drill pocket holes in each end.
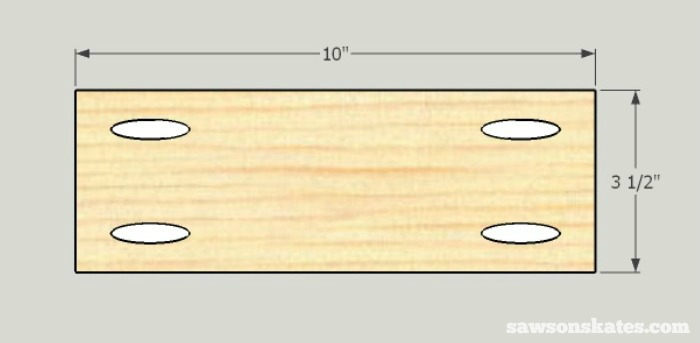
Step 3. Cut the Bottom Rails. Cut 2 pieces of 1×4 to 10″ and drill pocket holes in each end.
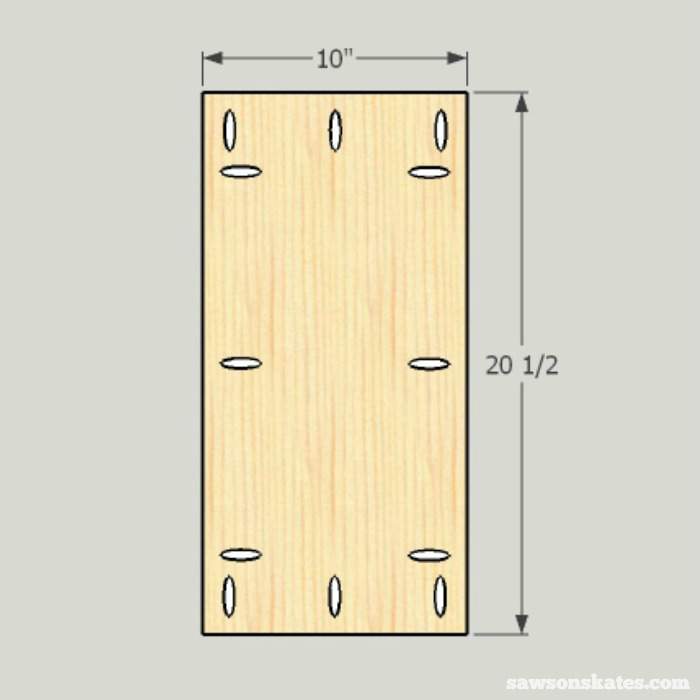
Step 4. Cut the Side Panels. Cut 2 pieces of 1/2″ plywood to 10″ x 20-1/2″. Alternatively you could make book-matched panels like I did for this vanity. In this case you would make 1/4″ book-matched panel and glue to 1/4″ plywood.
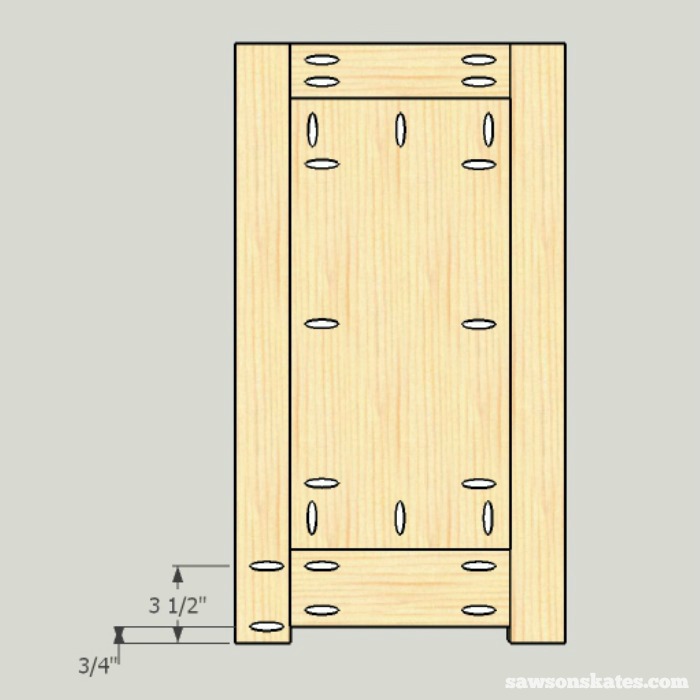
Step 5. Assemble the Side Frames. Layout two stiles, apply glue to the top rail, place the panel and apply glue to the bottom rail. Clamp the side frame and attach using 1-1/4″ pocket screws. Note the panel is flush to the inside of the frame and the bottom rail sets up 3/4″ from the bottom. Repeat for the other side frame.
Once the side frames are assembled, designate a right and left side. Then measure up 3/4″ and 3-1/2″ on the front stile and drill pocket holes at these marks. These pocket holes will be used to attach the foot assembly.
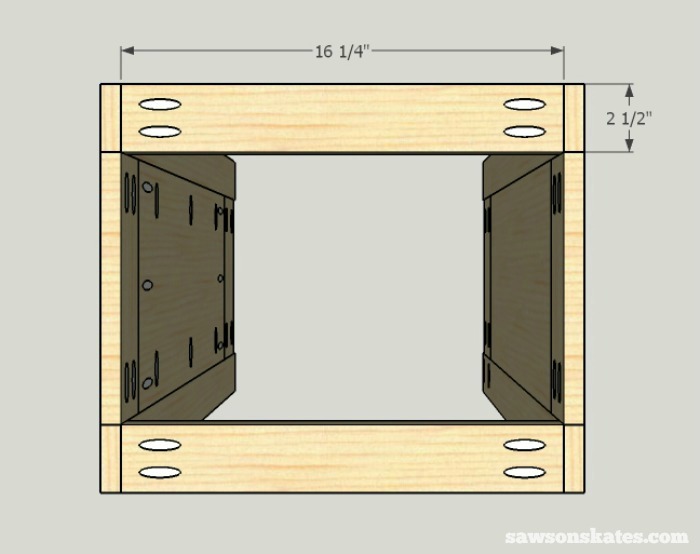
Step 6. Attach the Top Braces. Cut 3 pieces of 1×3 to 16-1/4″ and drill pocket holes in each end. Two of the pieces will be used as top braces and one will be used as a back brace in the next step.
Apply glue to two braces, position at the front and back of the side frames, clamp and attach using 1-1/4″ pocket screws.
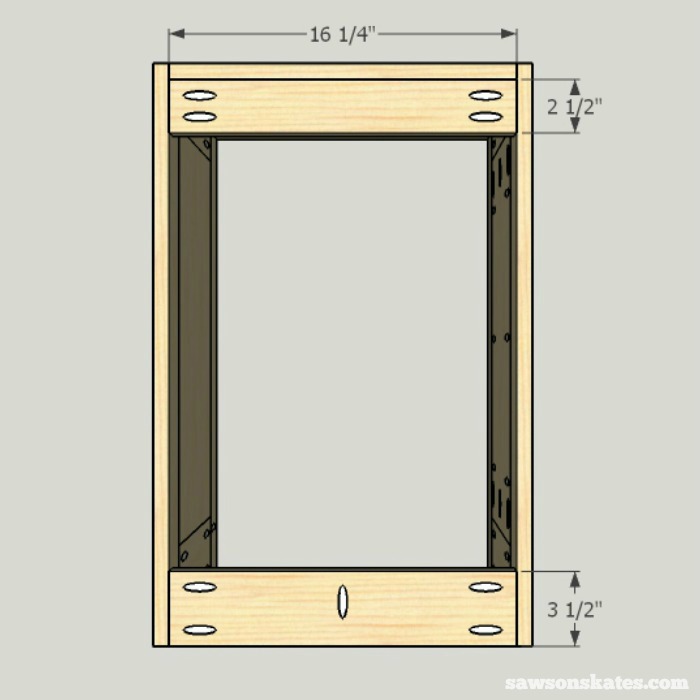
Step 7. Attach the Back Braces. Cut 2 pieces of 1×4 to 16-1/4″ and drill pocket holes in each end. One piece will be used as a back brace and one will be used as a toe kick in Step 13.
Before installing the back braces, be sure the pocket holes drilled in the stiles to attach the foot assembly are facing forward. Apply glue to the top back brace (from Step 6) and the bottom back brace. Clamp in position and attach using 1-1/4″ pocket screws.
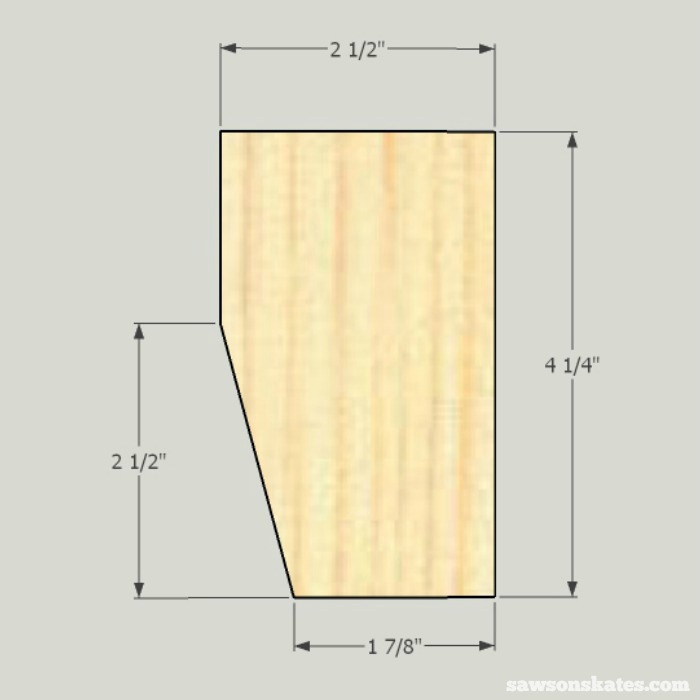
Step 8. Make the Feet. The feet are small, so it’s best to layout and cut the angles on a longer piece of wood and then cut the feet to length. On a piece of 1×3 measure in 1-7/8″ and up 2-1/2″, connect the marks and cut using a circular saw or jig saw. Once the angle is cut, measure 4-1/4″ and cut the foot to length. Repeat for the other foot.
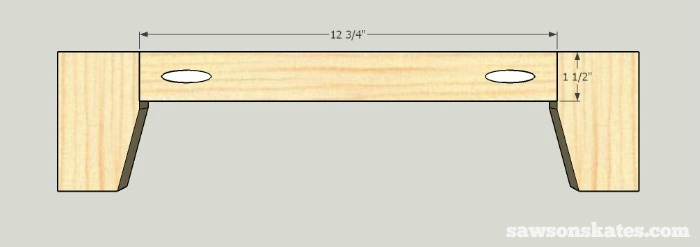
Step 9. Assemble the Feet. Cut 1 piece of 1×2 to 12-3/4″ and drill a pocket hole in each end. Apply glue to the ends of the stretcher, clamp to the feet and attach using 1-1/4″ pocket screws.
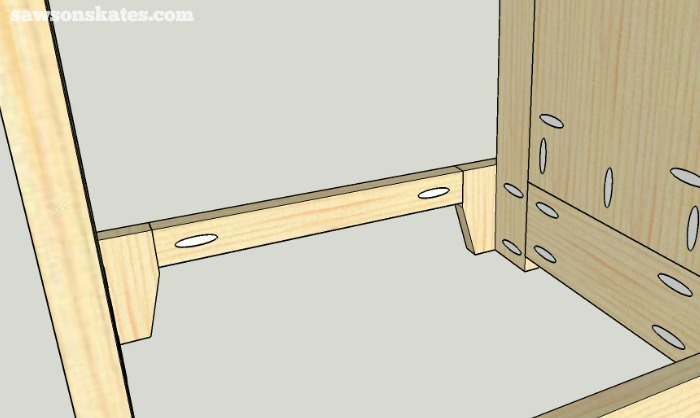
Step 10. Install the Feet. Apply glue to the backs of the feet, place at the front bottom of the carcass and clamp. Use the pocket holes drilled in the stiles in Step 5 and attach using 1-1/4″ pocket screws.
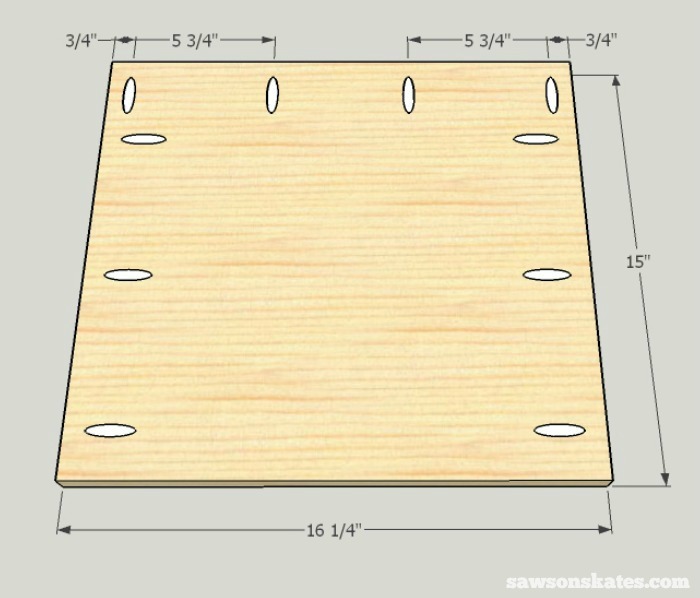
Step 11. Cut the Bottom. Cut a piece of 3/4″ plywood to 15″ x 16-1/4″. On the front edge measure in 3/4″ and 5-3/4″ on each side. Drill a pocket hole at each mark. These pocket holes will be used to attach the bottom to the foot assembly. Next drill several pocket holes on each side. These pocket holes will be used to attach the bottom to the side frames.
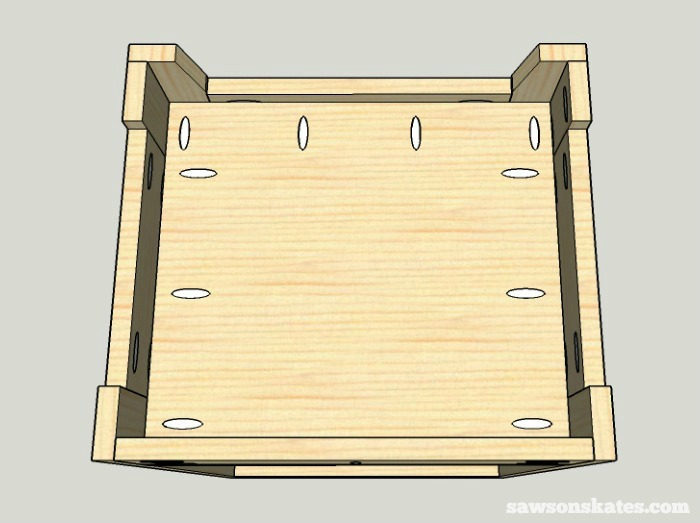
Step 12. Install the Bottom. The bottom sits on top of the back brace and is flush to the top of the the leg assembly. Clamp the bottom in position and attach using 1-1/4″ pocket screws.
Step 13. Install the Toe Kick. The toe kick is flush with the back of the front stiles. Slide in position, clamp and attach using 1-1/4″ pocket screws.

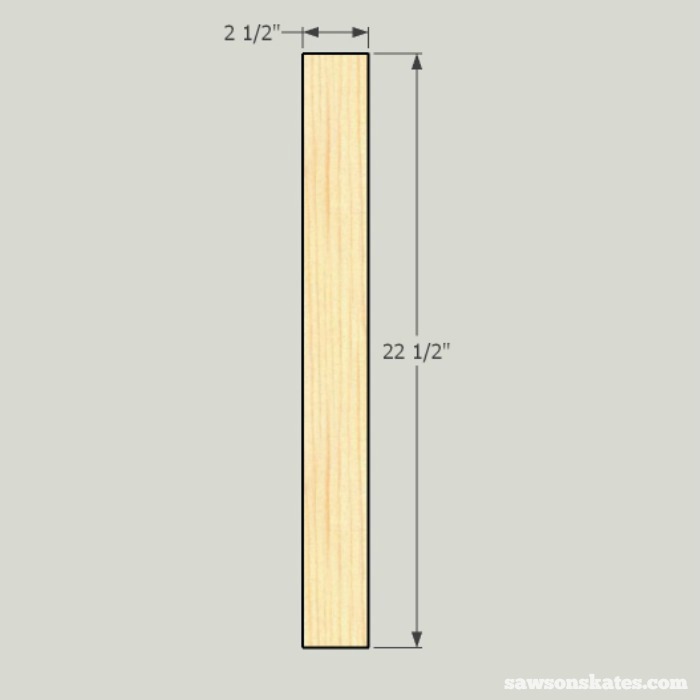
Step 14. Cut the Door Stiles. Cut 2 pieces of 1×3 to 22-1/2″.
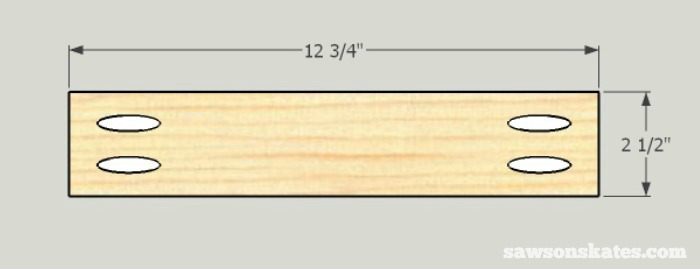
Step 15. Cut the Door Rails. Cut 2 pieces of 1×3 to 12-3/4″ and drill pocket holes on each end.
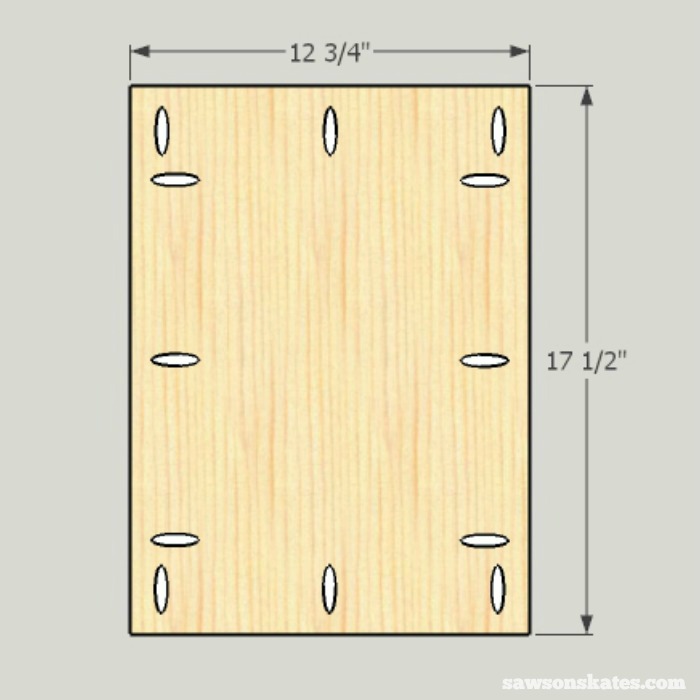
Step 16. Cut the Door Panel. Cut a piece of 1/2″ plywood to 12-3/4″ x 17-1/2″. Alternatively you could make book-matched panels like I did for this vanity. In this case you would make 1/4″ book-matched panels and glue to 1/4″ plywood.
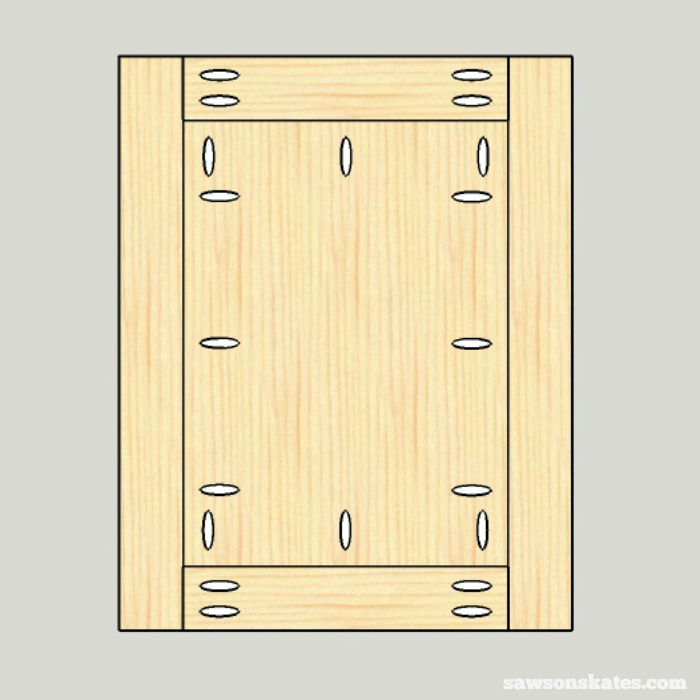
Step 17. Assemble the Door. Layout the stiles, apply glue to the top rail, place the panel and apply glue to the bottom rail. Clamp the side frame and attach using 1-1/4″ pocket screws. Note the panel is flush to the inside of the door frame.
Step 18. Install Hinges. Follow the manufacturer instructions for installing the hinges.
Step 19. Finish the Vanity. First, sand the vanity smooth and fill any holes or cracks with this DIY wood filler. Stain the piece with Rust-Oleum Ultimate Wood Stain and apply three coats of polyurethane.
PIN THIS!