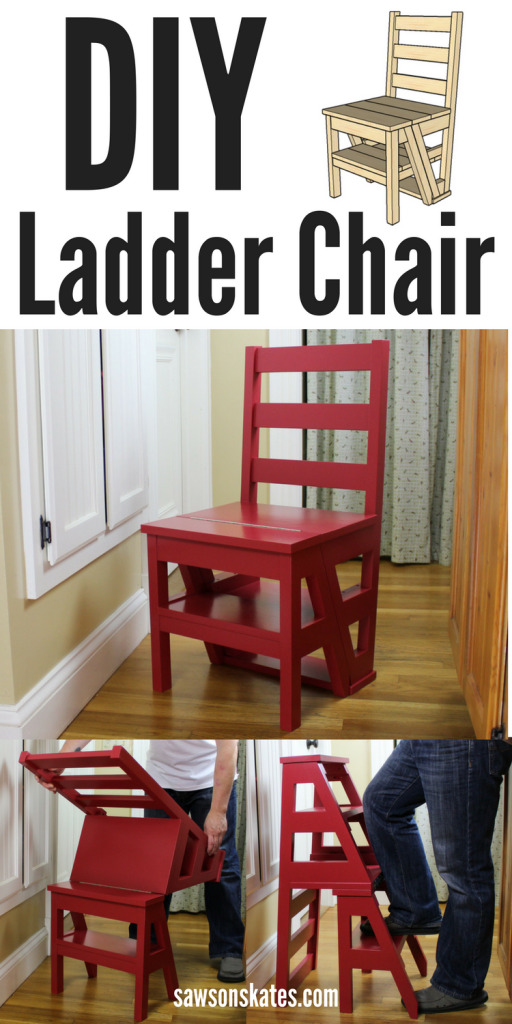
How to Make a DIY Ladder Chair
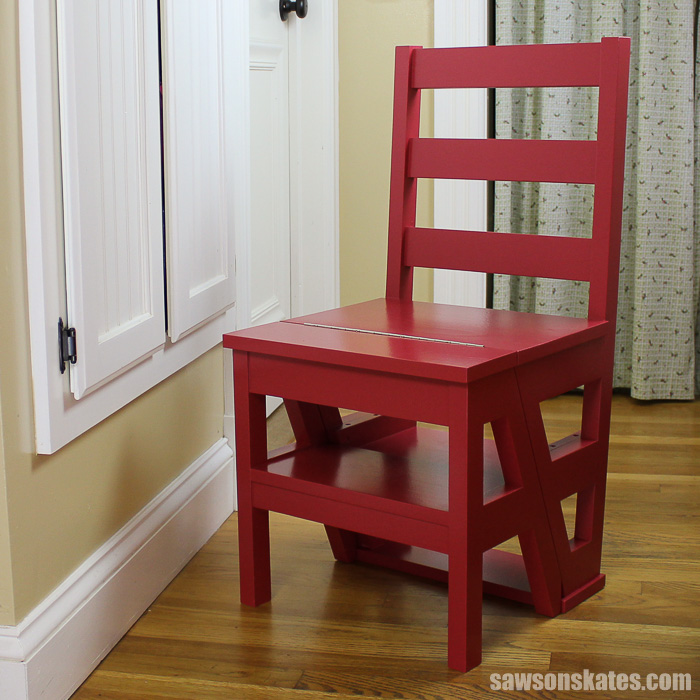
Learn how to make a step ladder chair with these free plans! This DIY chair serves as an extra seat and then flips to become a ladder for an extra boost!
More Than a DIY Chair
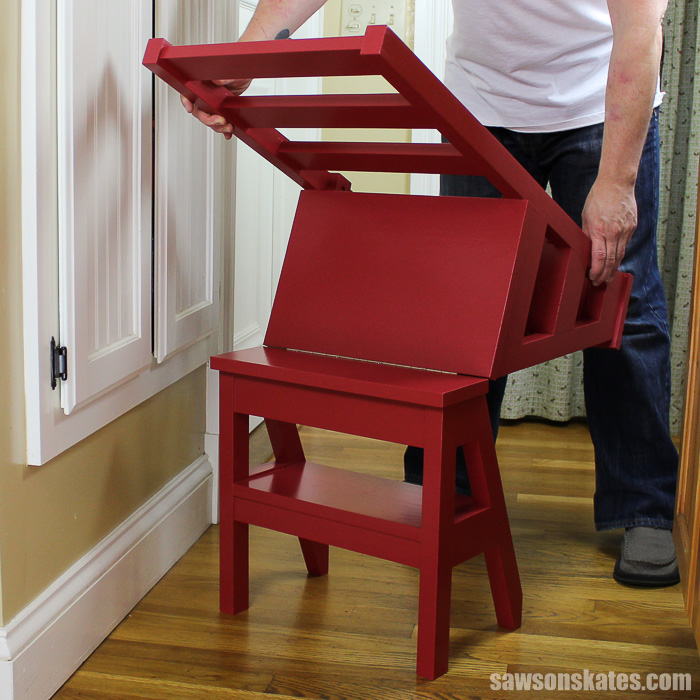
This is more than a DIY chair. It’s a DIY ladder chair! The back part of the chair flips over the front part of the chair and it becomes a step ladder. I would love to take credit for the clever design, but it was actually Benjamin Franklin who originally designed this ultimate form meets function piece of furniture!
Originally published December 12, 2017 updated November 16, 2021
This article contains affiliate links. If you purchase from these links, I may earn a small commission at no additional cost to you. Visit my site policies for more information.
Important Safety Information: I am not an engineer and this DIY ladder chair has not been weight tested or stress tested. Excess weight or excess stress may make the step ladder chair unsafe to use. Discontinue use if at anytime the ladder chair feels unsafe. Joints and connections may become loose over time and make the ladder chair unsafe to use. Please exercise caution when using. By using these plans and this ladder chair you are agreeing to do so at your own risk.
Designing a DIY Ladder Chair
Just like Mr. Franklin, I enjoy multipurpose furniture projects. My DIY kitty litter cabinet that hides an ugly litter box is one of those projects. It looks like an ordinary cabinet on the outside but opens to reveal a litter box an extra litter storage. Kitties enter through a “potty entrance” flanked by curtains – too cute!
My outdoor coffee table with four hidden side tables brings multipurpose to the backyard. It looks like an ordinary coffee table but reach under the table, pull out the four small side tables and you have quadrupled the serving space for entertaining.
A few months ago my aunt asked me if I remembered my grandmother’s “little chair”. She went on to say the chair had a permanent home in my grandma’s kitchen and the unique thing about this antique “blah brown” chair was that it had a multipurpose. It also flipped into a ladder. I didn’t remember the chair, but I knew exactly what she was talking about.
She wanted to buy a step ladder chair for her kitchen but was having trouble finding one and the ones she did find were really pricey. What do you do when you can’t find what you want at the price you want? That’s right, you design and build your own DIY furniture!
And that’s exactly what I did for this DIY ladder chair. I studied other ladder chairs and developed my own plan. An original step ladder chair would have been constructed with mortise and tenon joints, but thanks to pocket hole joinery, this project is easy to assemble.
Where to Use a DIY Ladder Chair
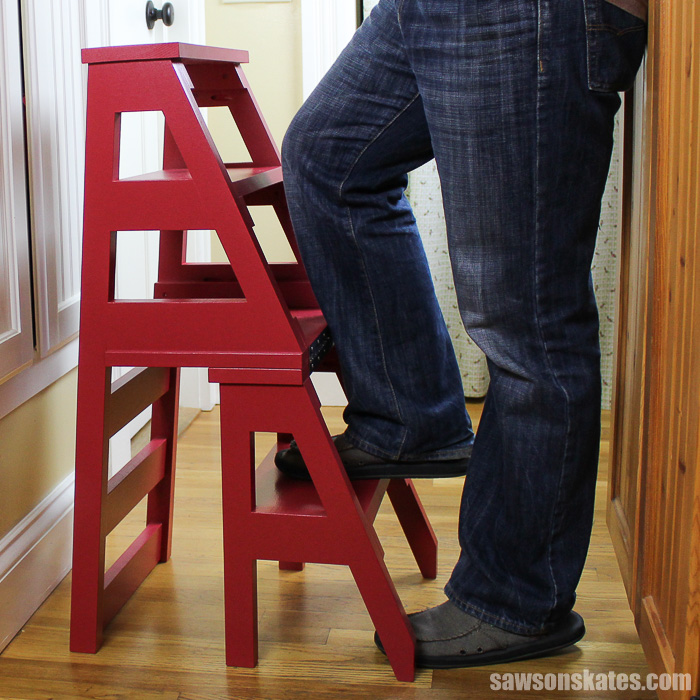
- Kitchen – This little multitasker is great when you need a little extra boost in the kitchen. And at 5′ 4″ those upper cabinets are always out of reach for me!
- Dining Room – This DIY ladder chair could serve as an extra seat in a dining room and then an extra lift when you need to grab the holiday dinnerware out of the hutch.
- Apartment – Don’t have room for a full-size ladder in your apartment, but sometimes need an extra boost? This DIY ladder chair is the perfect solution.
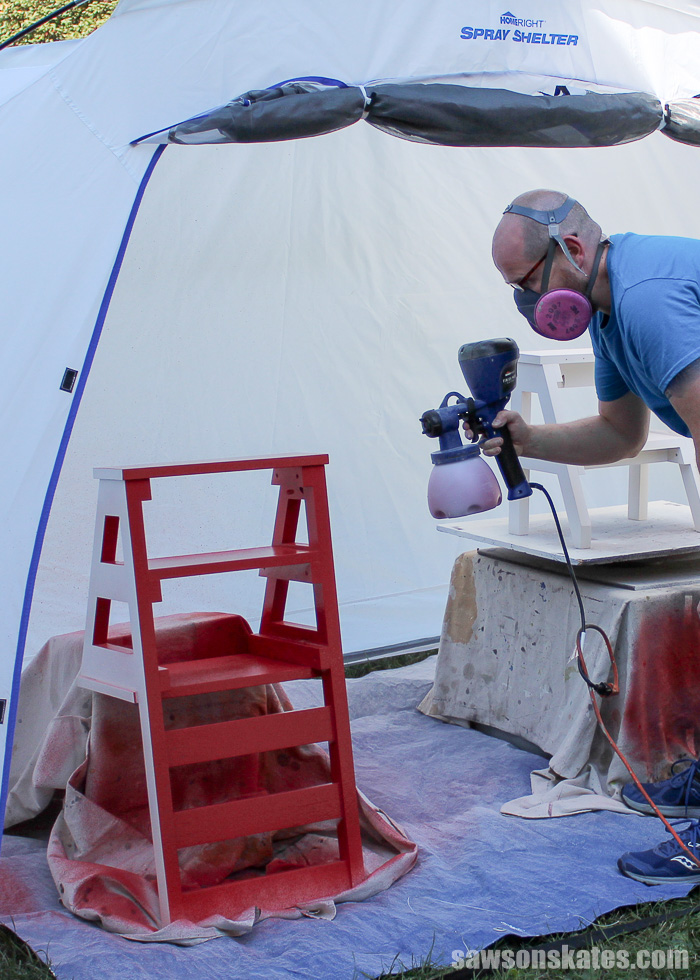
How to Finish the DIY Ladder Chair
This DIY ladder chair is loaded with nooks and crannies that would be difficult to brush by hand. Instead of brushing I used my HomeRight Finish Max Super paint sprayer which easily reached all of those tricky nooks and crannies. You may recognize the DIY ladder chair from the cover photo from my 9 Paint Sprayer Mistakes You Don’t Want to Make post.
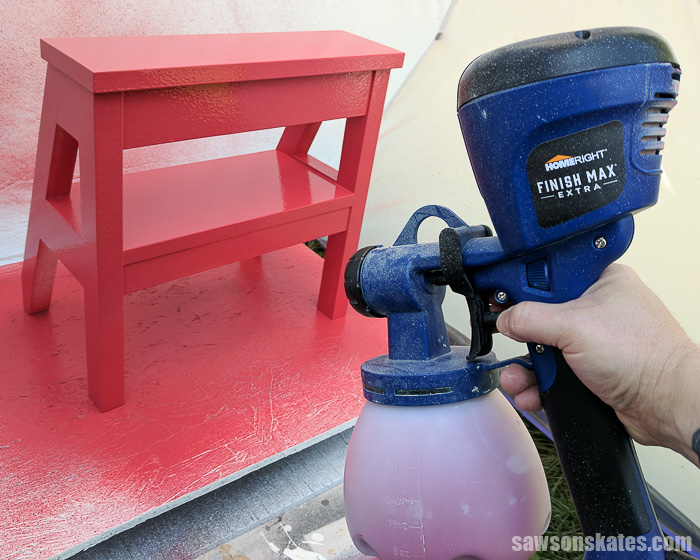
I set up my spray shelter to prevent the paint overspray from going where I didn’t want it and to protect the painted finish while it dried. The HomeRight Super Finish Max sprayer made quick work of the coat of primer and two coats of paint.
Related: How to Spray Paint Indoors Without Making a Mess
Where to Buy a Step Ladder Chair
You can buy a store-bought step ladder chair if you don’t have the tools or time to make one. Here are a few popular options you can buy online and have sent to your home.
Before we get into how to make a DIY ladder chair, be sure to click the subscribe button at the bottom of this page to sign up for my FREE weekly newsletter loaded with helpful pocket hole tricks, space-saving workshop ideas, clever DIY tips and more!
How to Make a DIY Ladder Chair
Printed Plan
Get the free printed plan here (includes detailed instructions, measurements, and bonus tips).
Supplies
Wood (per the printed plan)
1-1/4″ pocket screws
1-1/2″ pocket screws
1-1/4″ wood screws
2″ wood screws
Wood glue
1-1/2″x12″ piano hinge
Tools
Stanley FatMax Tape Measure
DEWALT Cordless Drill
Kreg Jig
Miter saw
Jig saw, circular saw or band saw
Table saw
Countersink drill bit
Pocket hole plug cutter (optional)
Note: I was not able to locate 5/4×2 at my local big box store. Instead, I used my table saw to rip 5/4×4 to 1-1/2″.
Step 1. Cut the Front Legs
Cut 2 pieces of wood to length for the front legs.
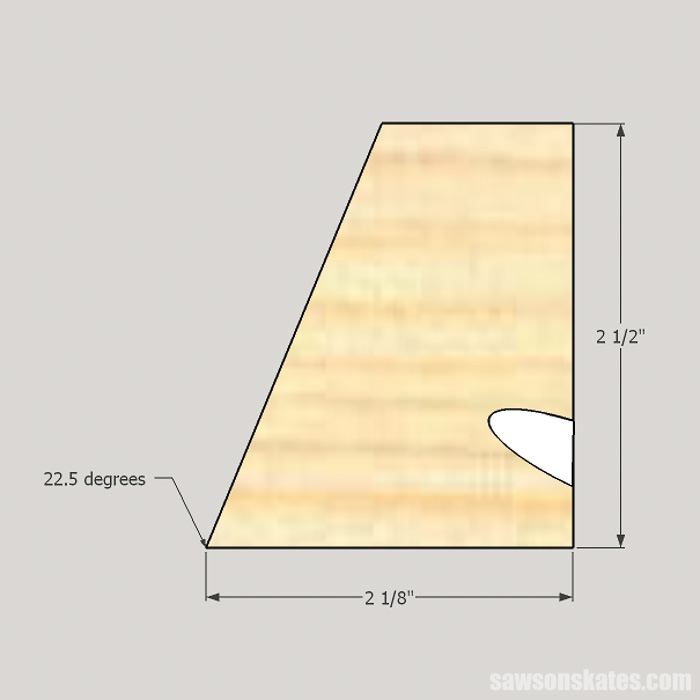
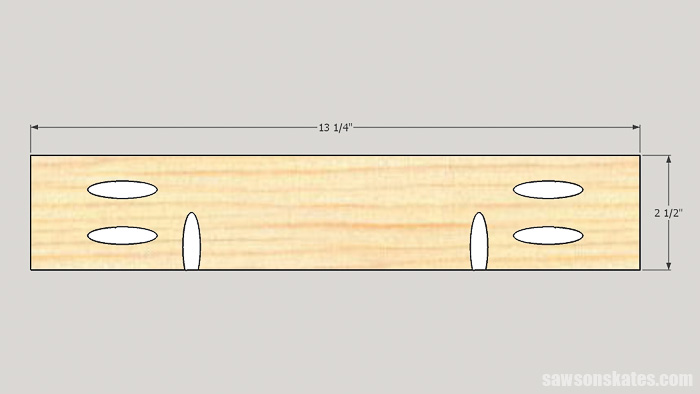
Step 2. Cut the Front Leg Rails
Cut an angle on a piece of wood, measure from the bottom of the angle and make a 90-degree cut. Drill one pocket hole into the front edge of the rail. Repeat for the other rail. Be sure to make a right and a left.
Related: How to Use a Kreg Pocket Hole Jig
Step 3. Cut the Front Slanted Legs
Cut an angle on a piece of wood, measure and cut a parallel angle.
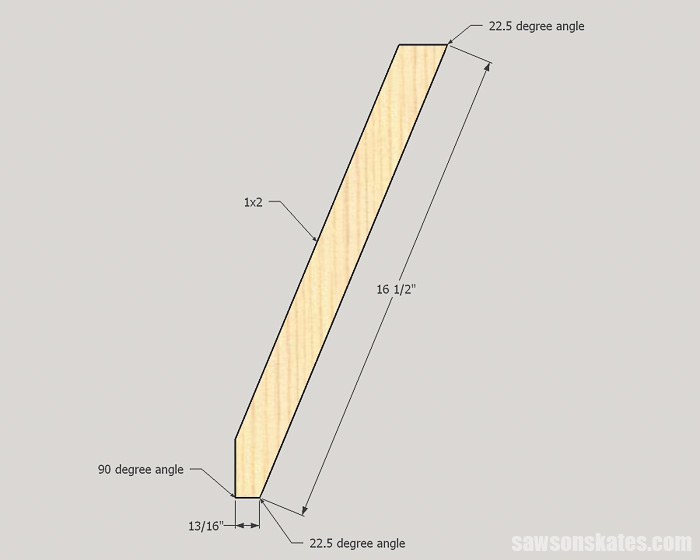
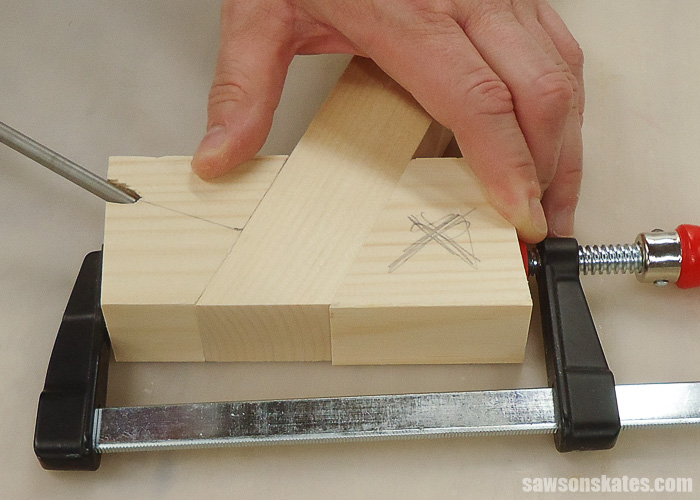
Measure 13/16″ on one end and make a 90-degree cut. This cut would be dangerous to make on a miter saw. I used my bandsaw to make this cut, but you could also use a jigsaw or crosscut jig and a circular saw.
Related: How to Make a DIY Circular Saw Crosscut Jig

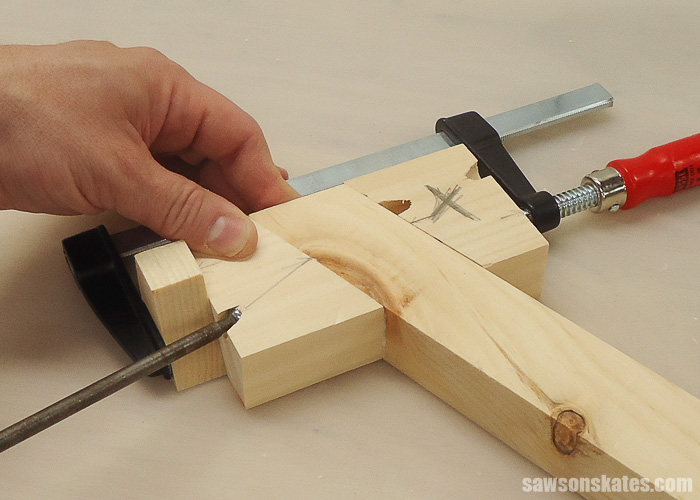
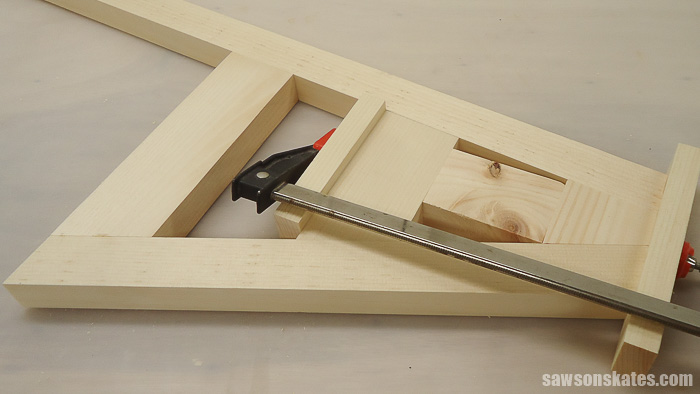
Step 4. Attach the Front Leg Rail to the Slanted Leg
Apply glue to the front leg rail, clamp and attach using a 1-1/2″ pocket screw.
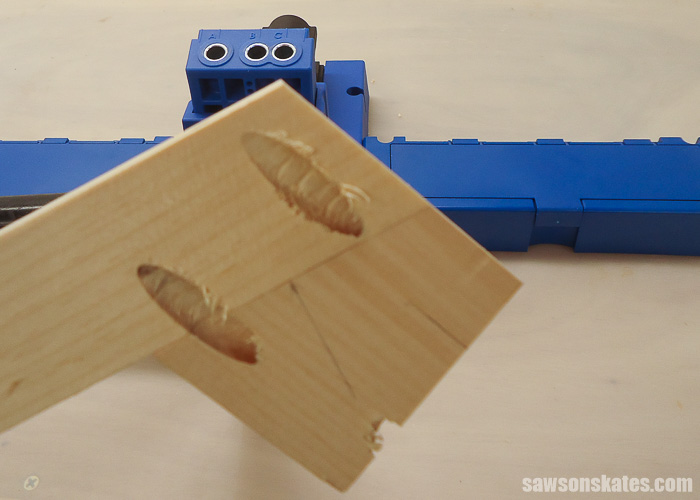
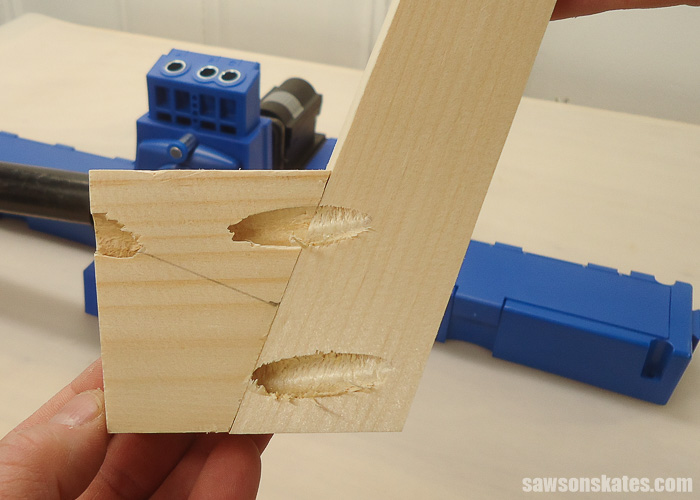
Place the assembly in your Kreg Jig and drill two pocket holes making sure to avoid drilling into the pocket screw. Repeat for the other side.
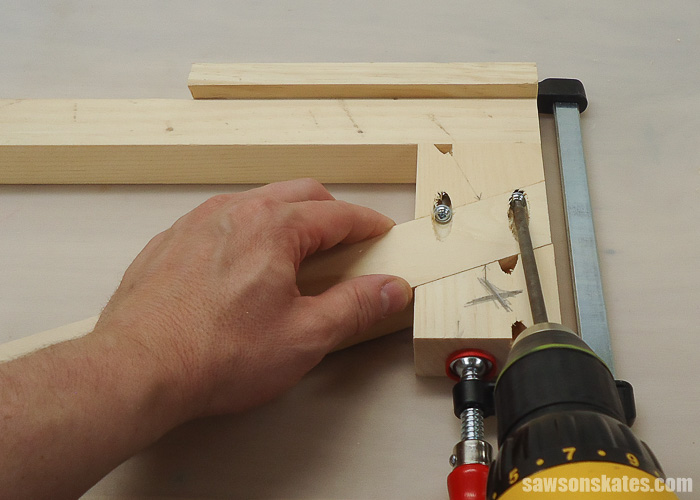
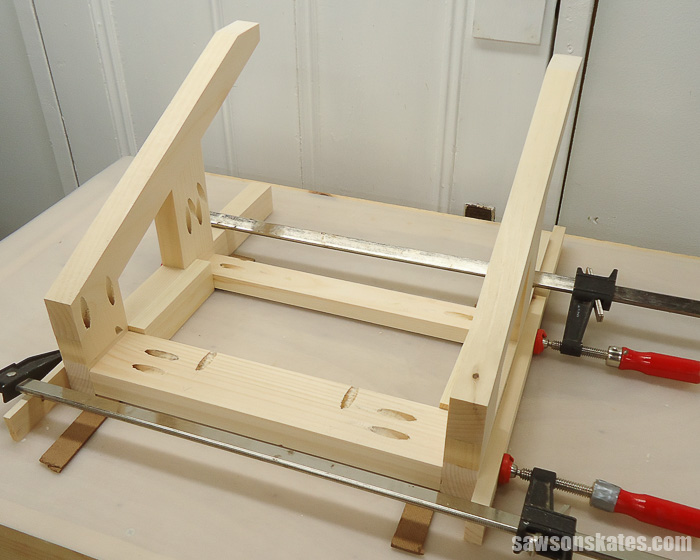
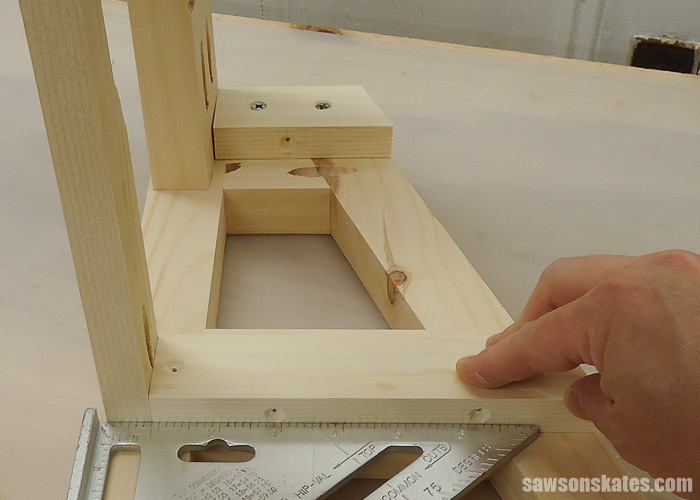
Step 5. Attach the Front Leg Assembly to the Front Leg
Apply glue to the front rail and clamp to the Front leg using the pocket holes drilled in Step 4. Attach using 1-1/2″ pocket screws.
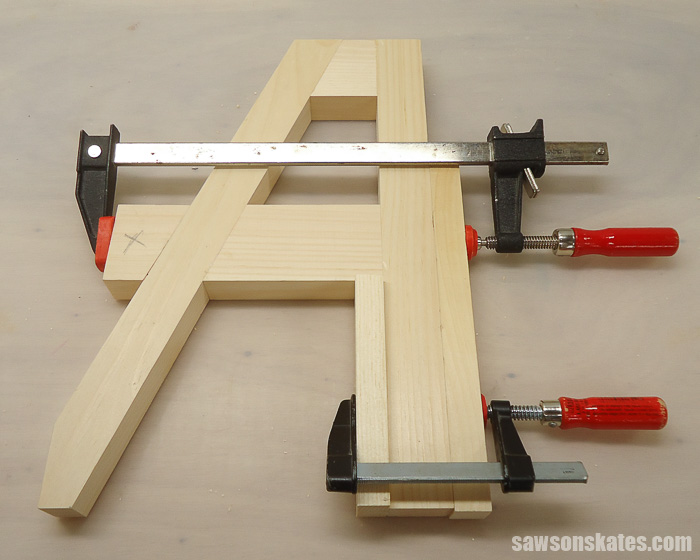
Step 6. Cut and Attach the Front Step Rail
Cut an angle on a piece of wood, measure from the top of the angle and make 90-degree cut. Drill two pocket holes in each end. Repeat for the other rail. Be sure to make a right and a left.
To help position the rails cut a piece of scrap wood to length and clamp the scrap to the front leg. Apply glue to the ends of the rail, clamp in position and attach using 1-1/2″ pocket screws. Repeat for the other side.
Step 7. Cut the Front Seat Rail
Cut a piece of wood to length. Drill pocket holes in each end and in one side.
Step 8. Cut the Front Step Rail
Cut a piece of wood to length and drill a pocket hole in each end.
Step 9. Attach the Front Rails
Place the legs on your workbench. Then place some scrap 1/8″ hardboard on your workbench. The hardboard will help to set the rails in from the front of the leg 1/8″. Apply glue to the ends of the seat rail and place at the top of the legs.
To help position the step rail cut a piece of scrap wood to length and place below the seat rail. Apply glue to the ends of the step rail and place below the scrap wood. Clamp rails in position and attach using 1-1/2″ pocket screws.
Step 10. Cut the Front Step Cleat
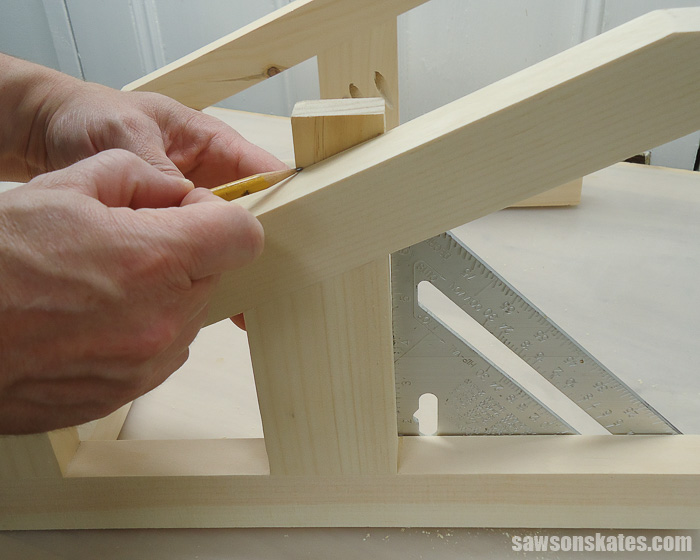
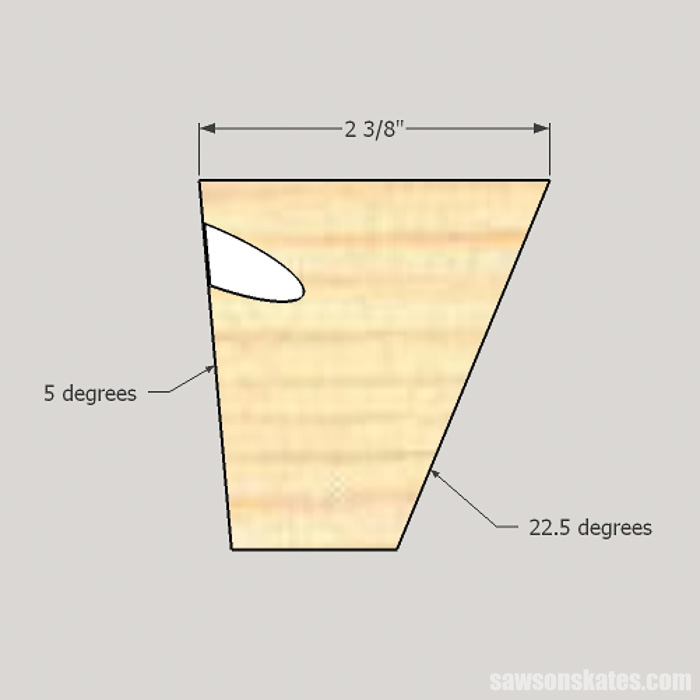
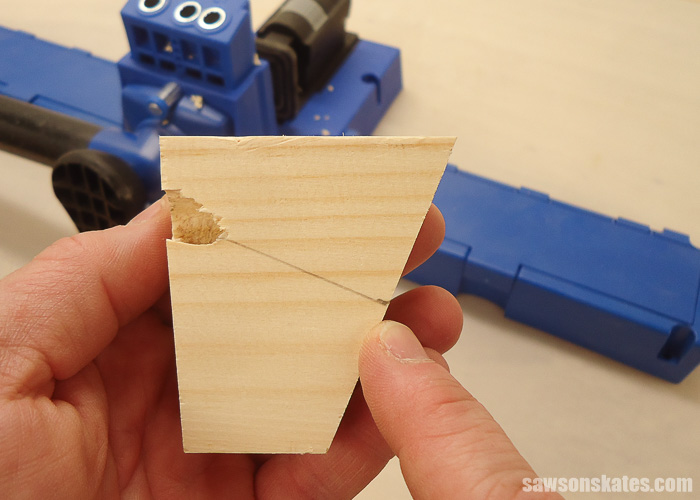
Cut an angle on a piece of wood, measure from the top of the angle and make 90-degree cut. You can also place the wood in position, mark the angle and cut. This method will ensure the best fit. Repeat for the other side.
Step 11. Cut the Front Seat Cleat
Cut an angle on a piece of wood, measure from the top of the angle and make a 90-degree cut. You can also place wood in position, mark the angle and cut. This method will ensure the best fit. Repeat for the other side.
Step 12. Attach the Front Cleats
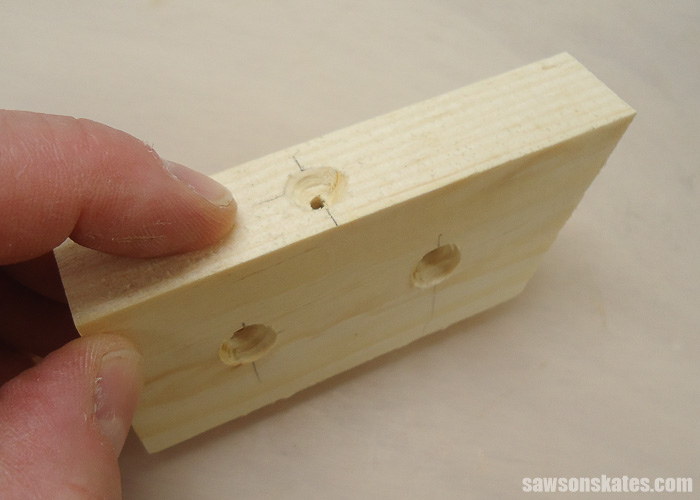
Drill countersink holes in the sides of the step and seat cleats. These holes will be used to attach the cleats to the legs. Be sure to make a left and a right. Then drill countersink holes in the bottom of the step and seat cleats. These holes will be used to attach the cleats to the step and seat.
Related: How to Use a Countersink Bit
Apply glue to the cleats, clamp in position and attach using 1-1/4″ wood screws. The top cleat is flush with the top rail and the bottom cleat is flush with the bottom rail.
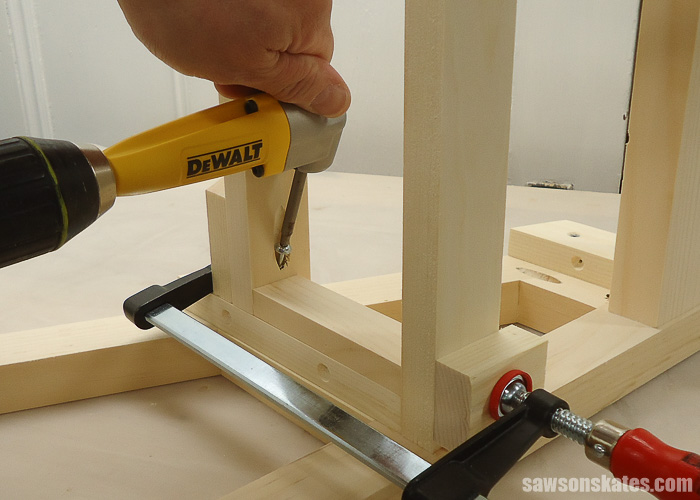
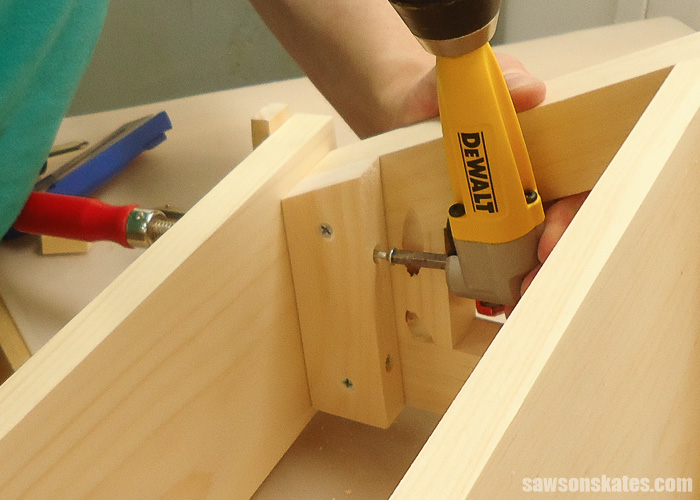
Step 13. Cut and Attach the Front Step Support
Cut a piece of wood to length and drill a pocket hole in each end. Apply glue to the ends of the step support, place 2-1/4″ from the back of the step cleat and clamp. I used a right angle attachment on my drill to attach the 1-1/4″ pocket screws.
Related: How to Screw in Hard-to-Reach Places
Step 14. Cut and Attach the Front Seat
Cut a piece of wood to length and rip to width. The seat is flush to the back of the legs, overhangs the front of the legs 1/2″ and overhangs the sides of the legs 1/4″. Clamp in position. Attach to the cleats using 2″ wood screws and attach to the front rail using 1-1/2″ pocket screws.
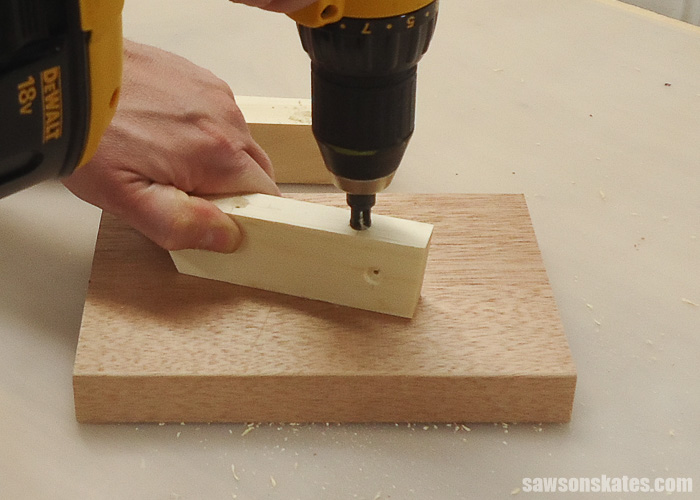
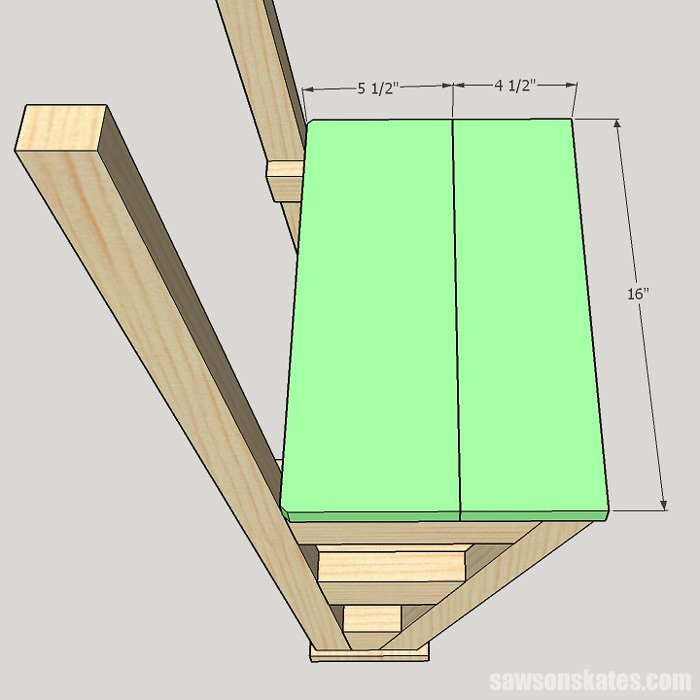
Step 15. Make and Attach the Front Step
Cut two pieces of wood to length for the front step. To make the step, drill pocket holes, apply glue and attach using 1-1/4″ pocket screws.
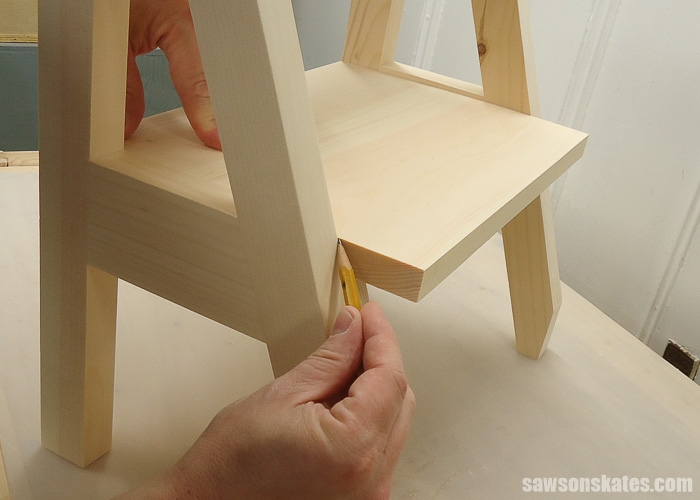
Place the step flush with the front of the legs and mark the angle at the back of the legs. Using a table saw or circular saw, cut an angle at this mark. Clamp in position. Attach to the cleats using 2″ wood screws and attach to the front rail using 1-1/2″ pocket screws.
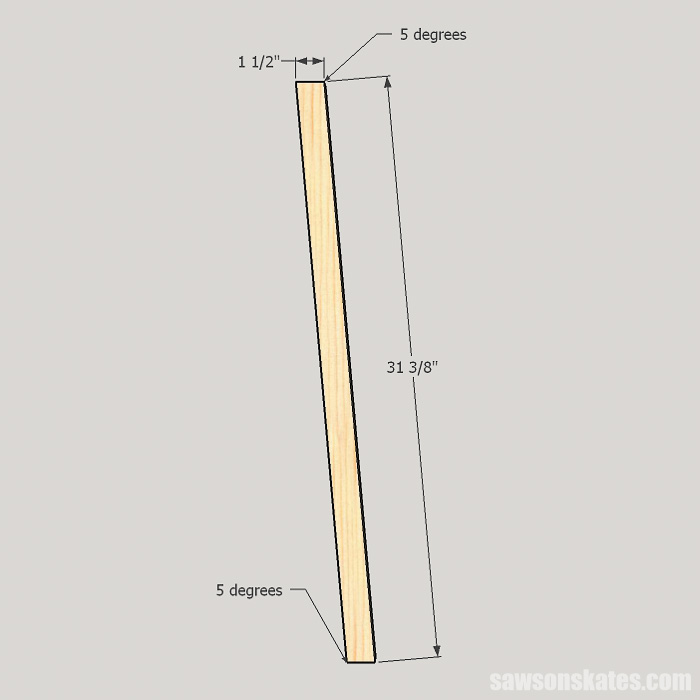
Step 16. Make the Back Legs
Cut an angle on a piece of wood, measure and cut a parallel angle. Repeat for the other leg.
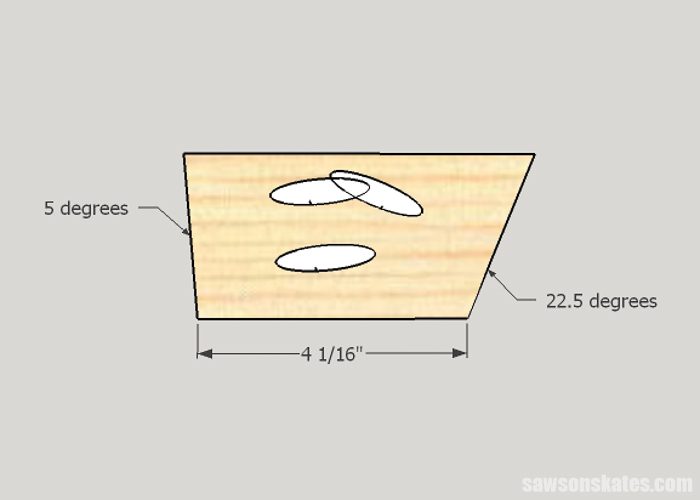
Step 17. Make and Attach the Back Bottom Rails
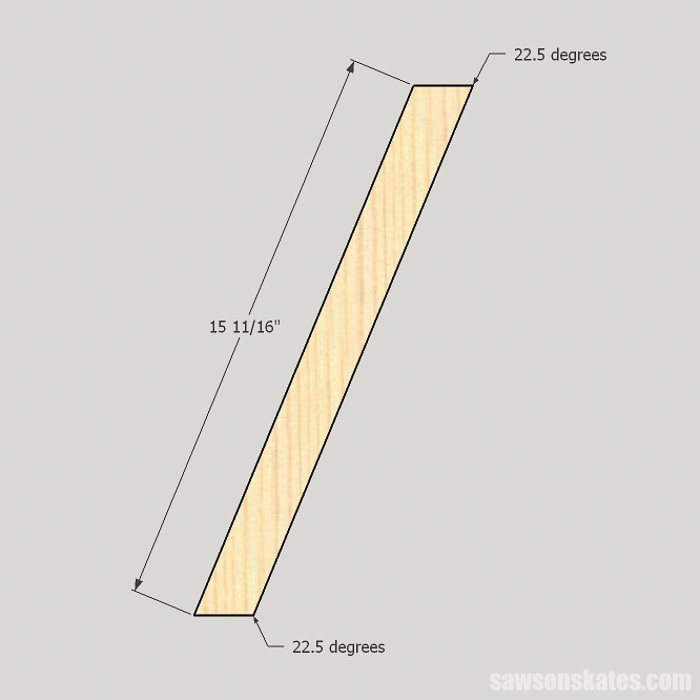
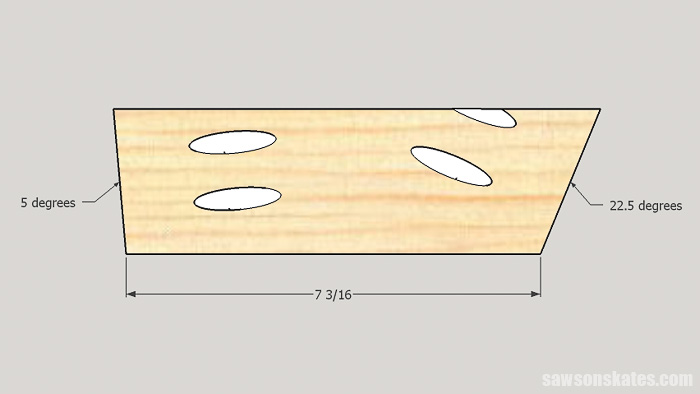
Cut an angle on a piece of wood, measure from the bottom of the angle and make 5-degree cut.
Drill a pocket hole to attach the bottom rail to the leg. Repeat for the other rail. Be sure to make a right and a left.
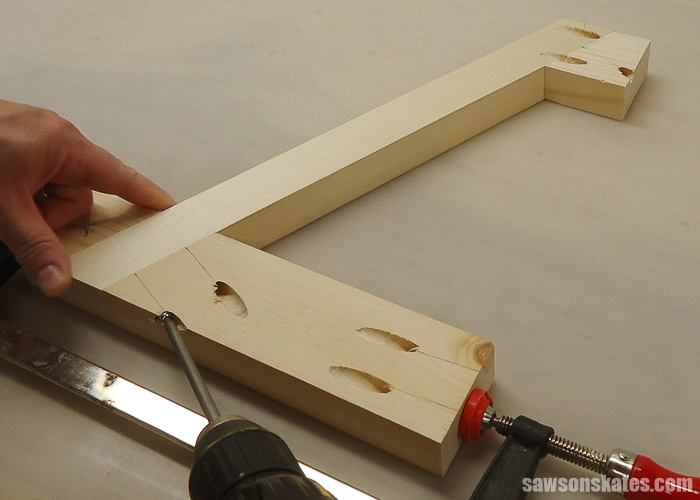
Apply glue to the front edge of the bottom rail, clamp to the front leg and attach using 1-1/2″ pocket screws.
Then drill two pocket holes to attach the bottom rail to the stile. Be sure to position the pocket holes to avoid the pocket screw you just attached.
Step 18. Make and Attach the Back Top Rails
Cut an angle on a piece of wood, measure from the bottom of the angle and make a 5-degree cut. Drill pocket holes in each end. Repeat for the other rail. Be sure to make a right and a left.
Apply glue to the front edge of the top rail, clamp to the front leg and attach using 1-1/2″ pocket screws.
Step 19. Make the Back Stiles
Cut an angle on a piece of wood, measure and cut a parallel angle. Repeat for the other stile.
Step 20. Attach the Stile
Apply glue to the ends of the rails, clamp to the stile and attach using 1-1/2″ pocket screws.
Step 21. Make and Attach the Back Middle Rails
Cut an angle on a piece of wood, measure from the bottom of the angle and make a 5-degree cut. Drill pocket holes in each end. Repeat for the other rail. Be sure to make a right and a left.
To help position the middle rail I cut a piece of scrap to length. Place the scrap on top of the bottom rail, apply glue to the ends of the middle and clamp in position. Attach using 1-1/2″ pocket screws.
Step 22. Make and Attach the Cleats
For the best fit of the cleats, it’s best to place the wood in position, mark the angles and cut. The top cleat is flush with the top rail, the middle cleat is flush with the top of the middle rail and the bottom rail is flush with the bottom of the bottom rail.
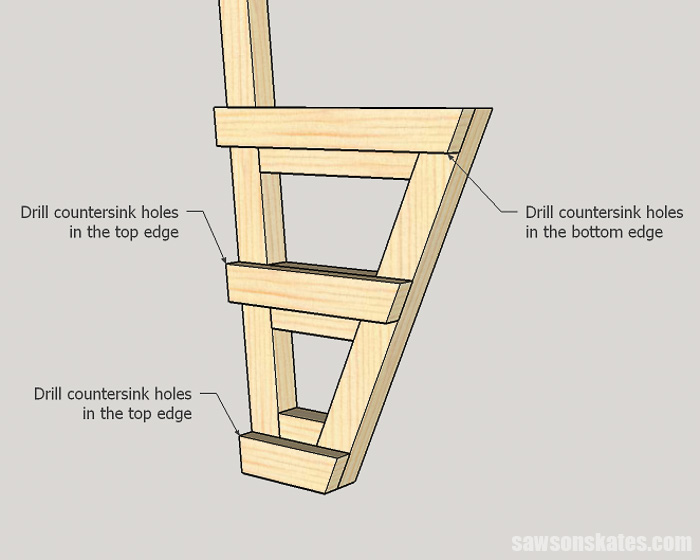
Once the cleats are cut, drill countersink holes in the bottom edge of the top rail to attach the seat. Drill countersink holes in the top edge of the middle and bottom rails to attach the steps. Then drill countersink holes in the faces to attach the cleats to the legs. Be sure to make a right and left. Apply glue to the cleats, clamp in position and attach using 1-1/4″ wood screws.
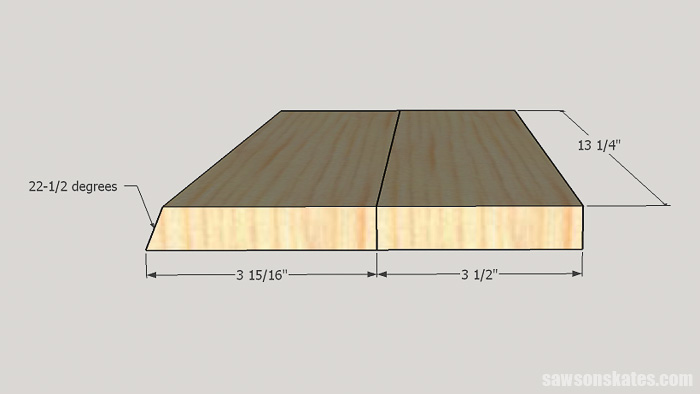
Step 23. Make and Attach the Middle Step
Cut two pieces of wood to length. Apply glue to the edge, clamp and allow to dry.
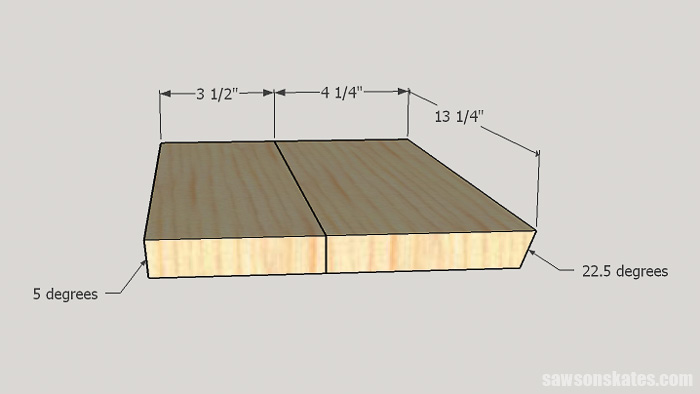
Once the glue is dry, rip a bevel on one edge. Place the angle under the middle cleat and against the back of the leg assembly. Mark the angle on the front edge. Rip a bevel at the mark. Clamp the step between the legs and attach using 2″ wood screws.
Step 24. Make and Attach the Bottom Step
Cut a piece of wood to length and rip to width. Position on the legs, clamp in position and attach using 2″ wood screws.
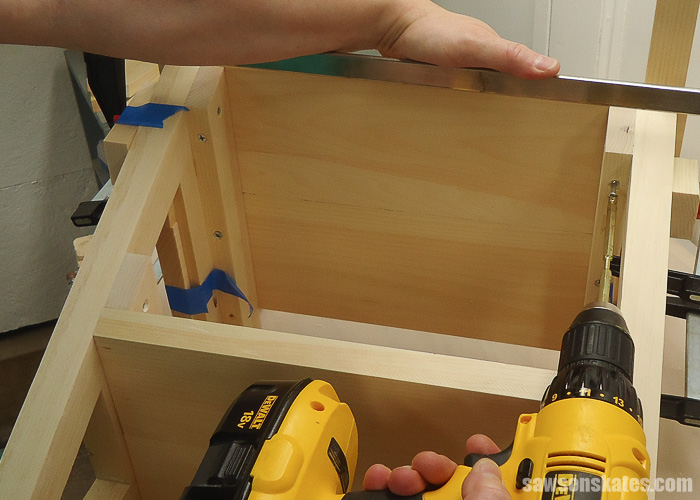
Step 25. Make and Attach the Seat
Cut two pieces of wood to length. Apply glue to the edge, clamp and allow to dry. Once the glue is dry, rip a bevel on one edge. Place the angle against the stile and mark the front edge. Rip the seat to this mark.
Center the seat on the legs, clamp in position and attach using 2″ wood screws.
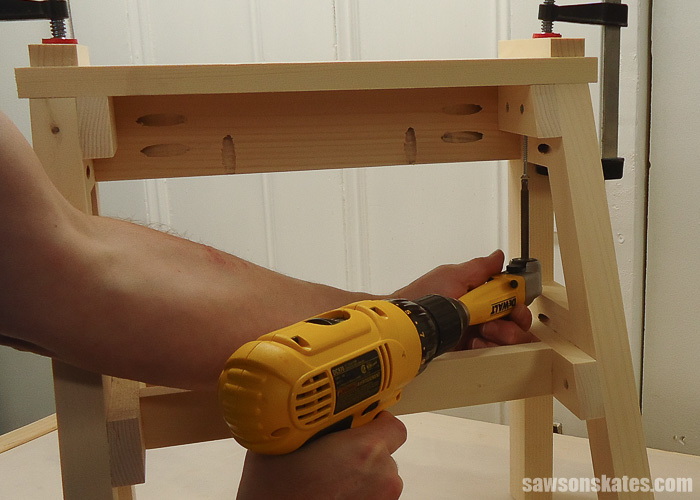
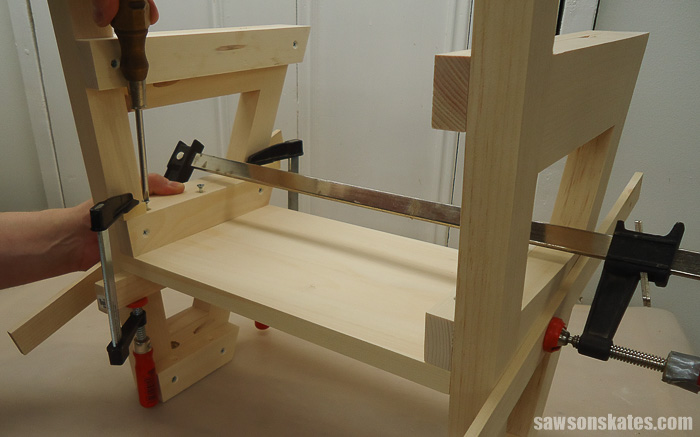
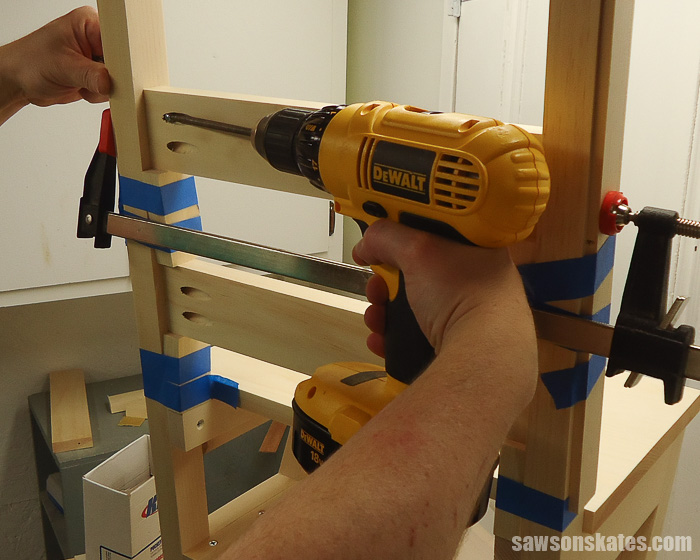
Step 26. Make and Install the Back Rails
Cut 3 pieces of wood to length and drill pocket holes in each end. I cut a few pieces of scrap wood to help position the rails. For the bottom rail, I cut a piece of wood with a 90 degree cut at the bottom, measured and cut an angle. For the remaining rails, I cut a piece of wood with an angle, measured and made a parallel cut.
Place the scrap on top of the seat rail and temporarily attach to the stile with painter’s tape. Place the bottom rail on top of the scrap, center on the stile, and clamp in position. Place the scrap wood on top of the bottom rail and temporarily attach to the stile with painter’s tape. Place the middle rail on top of the scrap wood, center on the stile, and clamp in position. Place the scrap wood on top of the middle rail and temporarily attach to the stile with painter’s tape. Place the top rail on top of the scrap, center on the stile, and clamp in position. Attach using 1-1/4″ pocket screws.
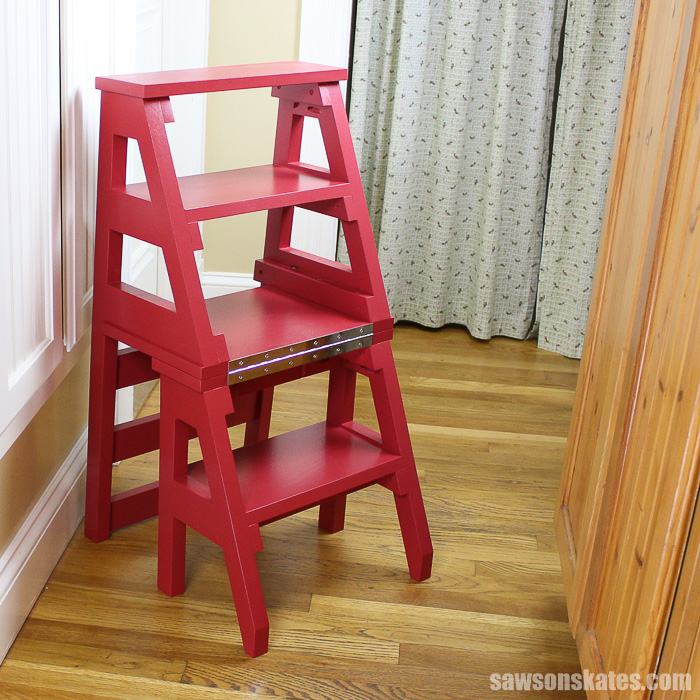
Step 27. Attach the Piano Hinge
Set the back leg assembly on top of the front leg assembly. Center the hinge and temporarily attach with painters tape. Attach using the screws included with the hinge.
Step 28. Fill the Back Rail Pocket Holes
The pocket holes in the back rails are exposed. For a more tailored look, I used my pocket hole plug cutter to make plugs to fill the holes. Apply glue to the pocket holes and insert the plugs. Trim flush once dry.
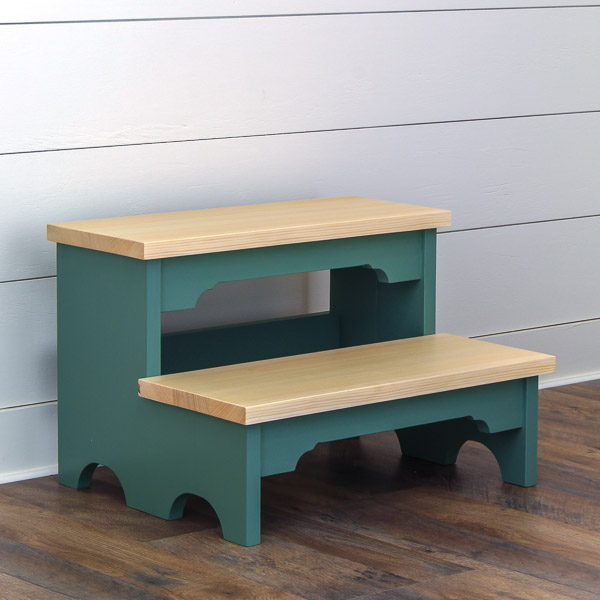
Step 29. Sand and Finish the Step Ladder Chair
Sand the ladder chair, then paint or stain to match your decor.
Final Thoughts
Now you know how to make a ladder chair! This DIY chair serves as an extra seat and then flips to become a ladder for an extra boost!
Get the free plan (including the detailed instructions and measurements) now!
Thank you for stopping by. If you found this information helpful, would you please pin it to Pinterest? Other DIYers would appreciate it and I would too! Thank you – Scott
Recommended For You
Pin This For Later
Hi Scott, Just a THANK YOU for the step by step detailed plans with great pictures and diagrams. I will enjoy making this chair/ladder after the holidays (too slow of a diy’er to make it in time for Xmas). I always look forward to your email of the next project. Keep up the good work as your fans certainly like the format.
Thank you Tom! Glad you like the project! Please share some pics when you build it.
Wow, that is very cool. I love it! Thanks!
Love the chair. My wife loves it as well. I want to try and make it. Can you tell me what type of lumber you used? Thanks
Hi Stephen – I’m glad you and your wife love the chair! I used 5/4 and 1x pine to build the chair.
I so look forward to making this for my “vertically challenged” wife. She is 4 foot ant 13&1/2″ You have made this look so easy, with your well detailed prints and photos. Thank You
Hi Daryl – Thank you for stopping by. I hope your wife like the ladder chair!
I am going to make 2 of these. What is the actual thickness of material. I know 1x is 3/4” thick. What is thickness of 5/4? Is it 1” or 1 1/4”?
Hi Rick – 5/4 material can range in thickness from 1″ to 1-1/4″. The 5/4 I used for this project measured 1-1/8″ thick.
TY Absolutely awesome. We have a houseboat and are always looking for minimalistic ideas that are dual purpose and reasonably light. Totally love it
Thank you Scott, your how to instructions, photos, images are second to none. Thank you for the write up and plans!!!!!!!