How to Replace Window Screen Mesh (Easier Than You Think)
Goodbye bugs and hello fresh air! Replacing a window screen is easier and cheaper than you think. I’ll show you how in this step-by-step tutorial.

Window screens are essential to any home, keeping out bugs and pests while letting in fresh air. But they’re also something we take for granted until they tear or become damaged. And, if you’re like me, you don’t want to pay a professional to replace them.
But don’t worry, replacing window screen mesh is a quick and easy fix that anyone can do themselves. In this tutorial, I’ll walk you through the steps and show you how simple it is. So don’t wait – replace that old screen today!
Originally published May 24, 2016 updated March 14, 2023.
Table of Contents
- What are the Parts of a Window Screen?
- What Tools Do You Need to Replace Window Screen Mesh?
- What Type of Mesh Should You Use?
- What Size Spline Do You Need?
- Window Screen Replacement Kits
- How to Replace Window Screen Mesh
- Frequently Asked Questions
This article contains affiliate links. If you purchase from these links, I may earn a small commission at no additional cost to you. Visit my site policies for more information.
What are the Parts of a Window Screen?
Before you begin, it’s helpful to familiarize yourself with the parts of a window screen. A typical screen consists of a frame, mesh, and spline.
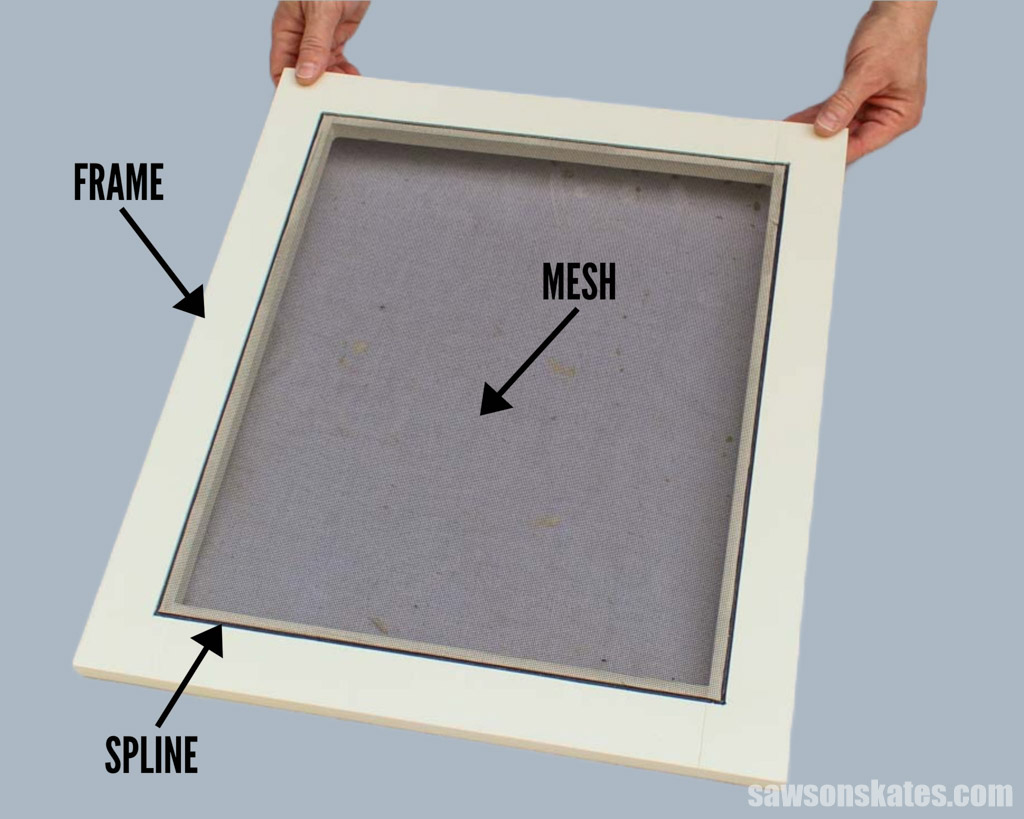
Frame
The frame is usually made of wood or aluminum and fits into your window’s opening.
Mesh
Mesh is the material that stretches across the frame, keeping bugs out and allowing air to pass through. It’s inserted into the frame’s groove or channel, which the spline holds in place. Mesh is usually made of fiberglass or aluminum and is available in different sizes and colors.
Spline
The spline is a rubber tube that fits into the frame’s groove, securely holding the mesh in place. The spline’s diameter varies depending on your groove’s width.
What Tools Do You Need to Replace Window Screen Mesh?
You’ll only need a few basic tools to replace a window screen, like scissors, a screwdriver, a utility knife, and a spline tool.
Scissors
You’ll need scissors to cut the screen to its required size.
Screwdriver
You’ll need a flat-head screwdriver to remove the old spline and push the new spline into the groove.
Utility Knife
Once installed in the frame, you’ll need a sharp utility knife to trim away the excess mesh.
Spline Roller Tool
A screen roller, also called a spline roller, is a simple tool with a wheel on each end. The tool rolls along the spline, pushing it into the groove.
What Type of Mesh Should You Use?
Window screen mesh or fabric comes in various materials, such as fiberglass or aluminum, and sizes to fit almost any window or door opening.
Aluminum Screen
When it comes to versatility, aluminum screen is a top contender. It’s sturdy, resistant to sagging, and less noticeable than other screen materials. However, aluminum is prone to creasing, and once it’s creased, it’s there forever.
You can choose from a shiny metal color or charcoal when buying aluminum screen.
Fiberglass Screen
Compared to aluminum, fiberglass screen does not crease and is easier to install. However, as it ages, I’ve noticed that it can fade, sag, weaken, and tear easily.
You can buy fiberglass screening in gray and charcoal, and it’s also available in a nearly invisible version and one that prevents tiny insects from squeezing through the holes.
Pet Screen
If you’re a pet parent, consider using pet screening that can withstand a pet’s weight and claws without being damaged.
For example, my friend Linda’s cats like to climb, so I used a pet-resistant mesh on the screen door I made for her.
Solar Screen
Solar screens significantly reduce the amount of heat entering your home, leading to cooler rooms and lower air conditioning bills. Solar screens also protect your floors and furniture from fading caused by the sun’s damaging UV rays.
What Size Spline Do You Need?
Once you decide what screen type to use, the next step is figuring out what size spline you’ll need to attach the mesh to your frame.
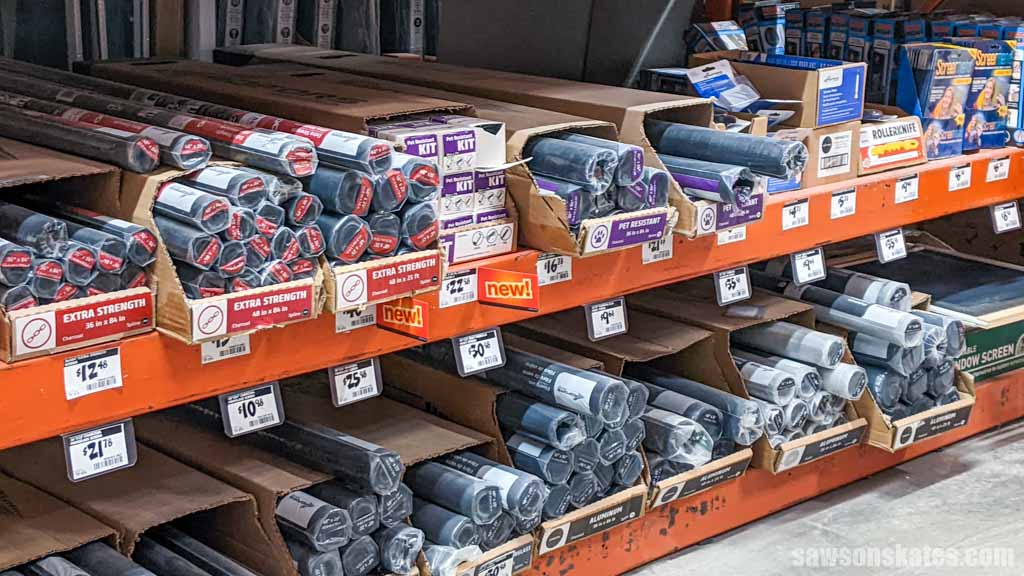
Spline is available in various sizes like .125″, .140″, .160″ and more.
To determine the right spline size for your project, you can either measure your old one or bring a piece to the hardware or home improvement store and match it up to the new spline.
I’m using .125″ spline in my wood window screen frame for this tutorial.
Window Screen Replacement Kits
You can purchase window screen mesh, spline, and a spline roller tool separately, or you can buy all of them together in a window screen replacement kit.
A window screen kit is an excellent place to start if you’ve never replaced a screen.
Before buying a kit, check that it contains enough screen to fit your frame’s opening and the right spline size for your frame’s groove.
How to Replace Window Screen Mesh
Supplies
- Window Screen Mesh
- Spline
Tools
- Scissors
- Screwdriver
- Utility Knife
- Spline Tool
- Clamps
Step 1. Remove the Old Screen
First, place your screen on a flat work surface. Then using a flat-head screwdriver, carefully pry the old spline out of the groove and remove the screen.
Step 2. Roll Out the New Window Screen
NOTE: For the best camera angle, I’m using photos from two screening projects – one with a red frame and one with a white frame.
Unroll your new screen material onto your frame, making sure it’s a few inches larger than the opening on each side, then use scissors to cut it to length.
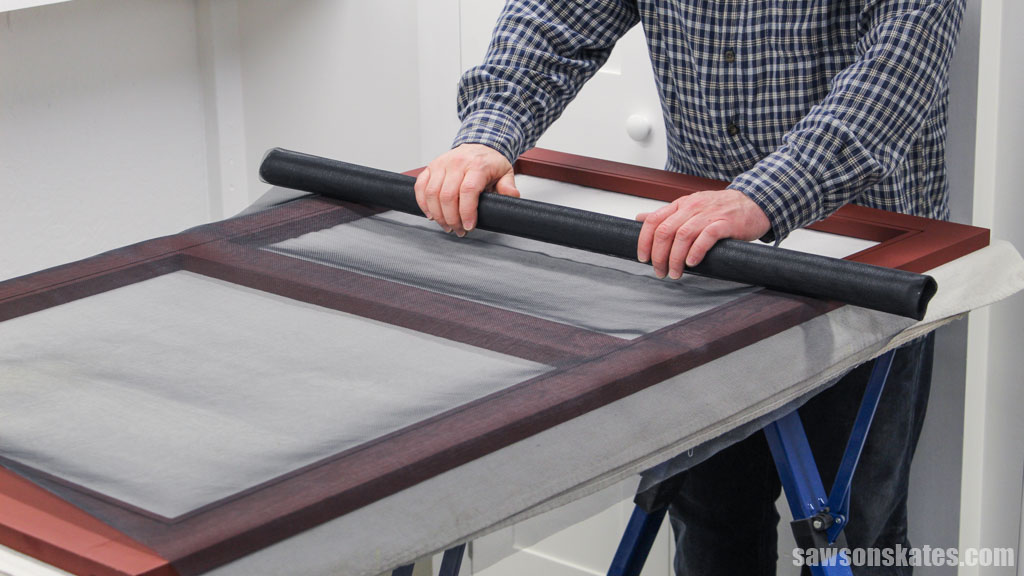
Using my Kreg Workbench Clamps, I gently clamped the mesh to the frame while installing it to ensure a tight and wrinkle-free finish. You could also use spring clamps instead.
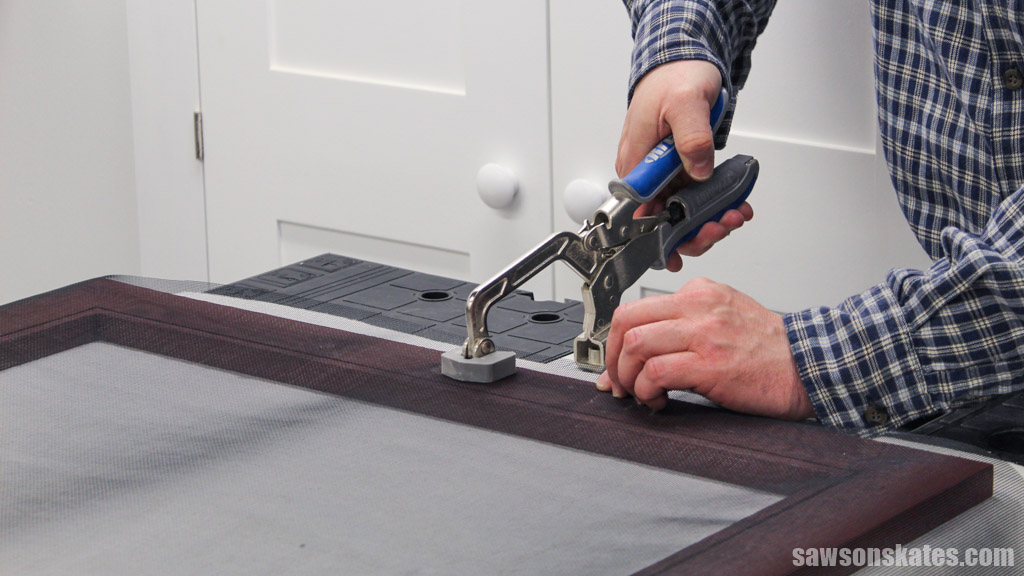
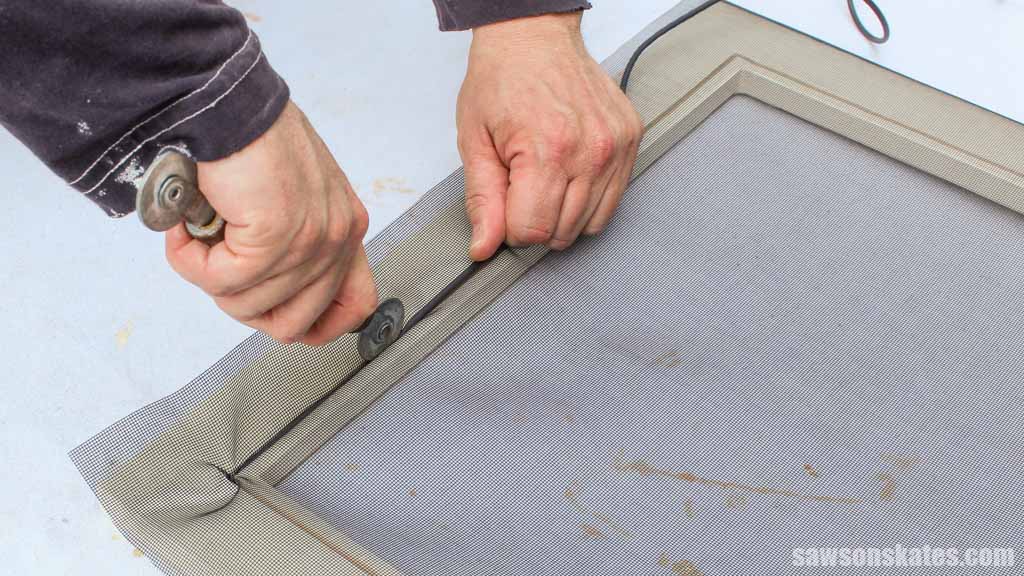
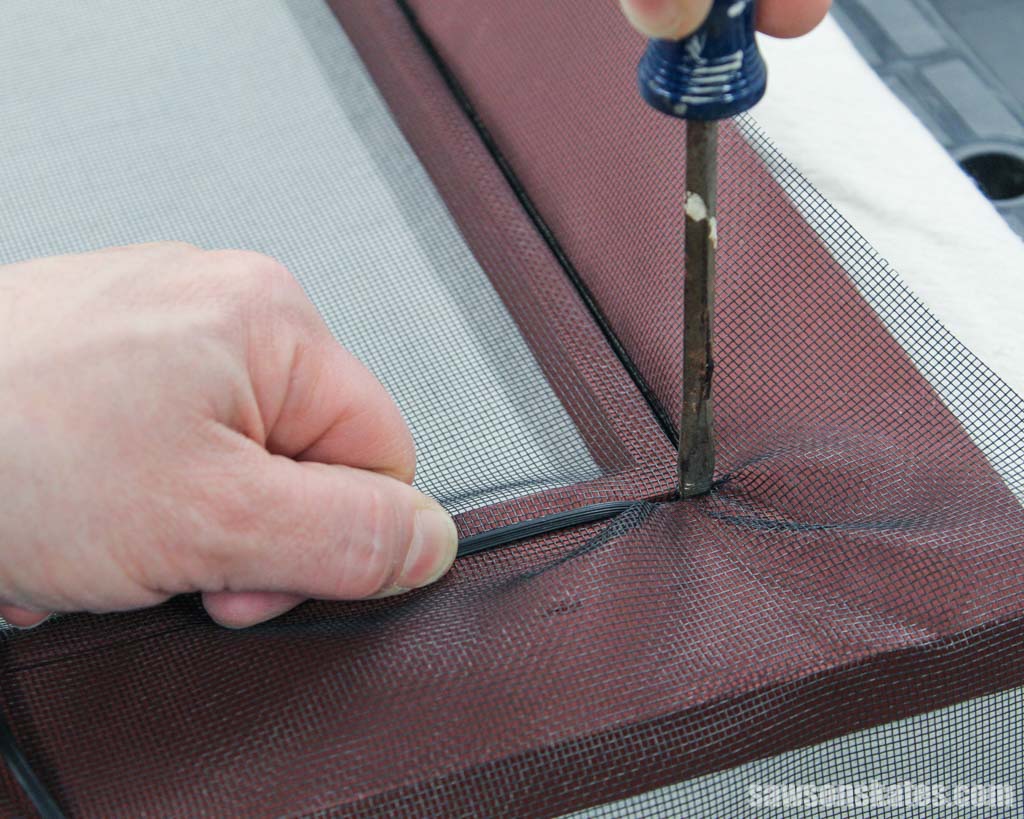
Step 3. Install the Spline
To begin, position the end of the spline into one corner and use a flat-head screwdriver to push it into the groove.
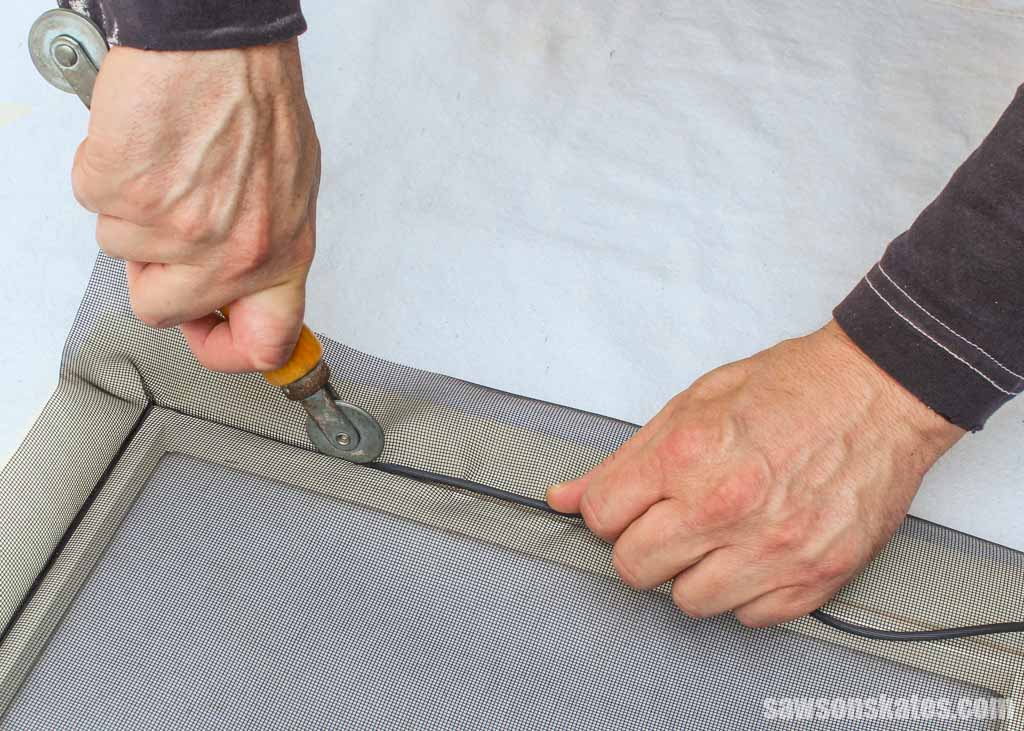
With one hand, gently stretch the spline while using your other to apply downward pressure on the spline tool. Roll it back and forth, pushing the spline into the groove until you reach the corner.
📝 NOTE: You may have to temporarily remove or reposition the clamps to continue installing the spline.
Using a flat-head screwdriver, push the spline into the groove on the next side.
Continue installing the spline around the perimeter of the frame until you reach the end.
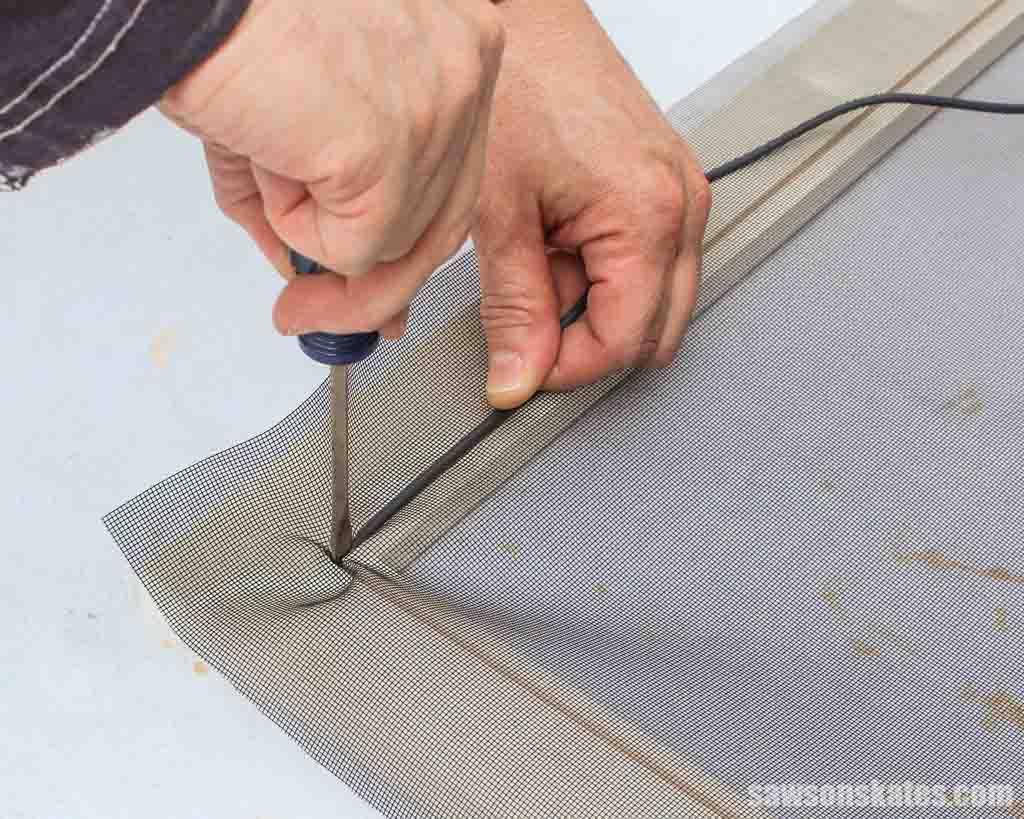
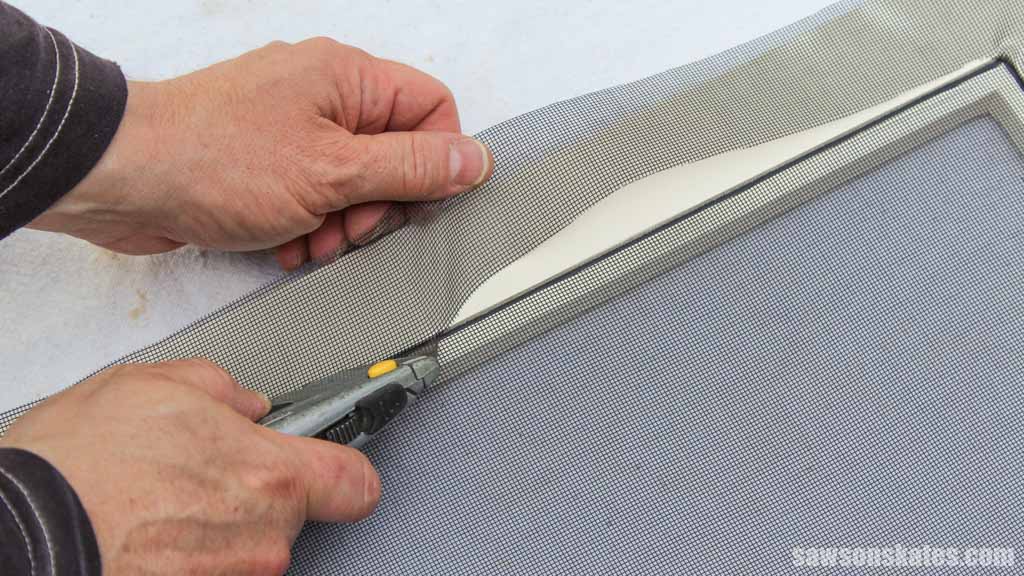
Step 4. Remove the Excess Screen Material
When you reach the last corner, cut away the excess spline with a utility knife.
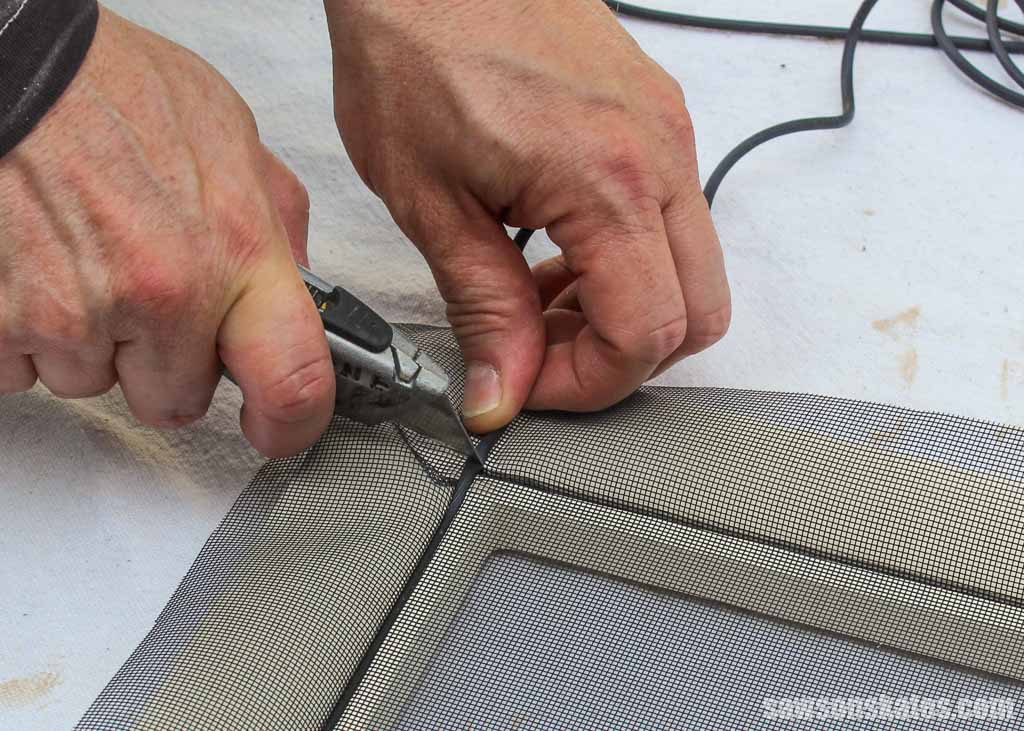
To remove the excess mesh, place the utility knife’s blade between the intersection of the spline and the groove and carefully trim the screen away.
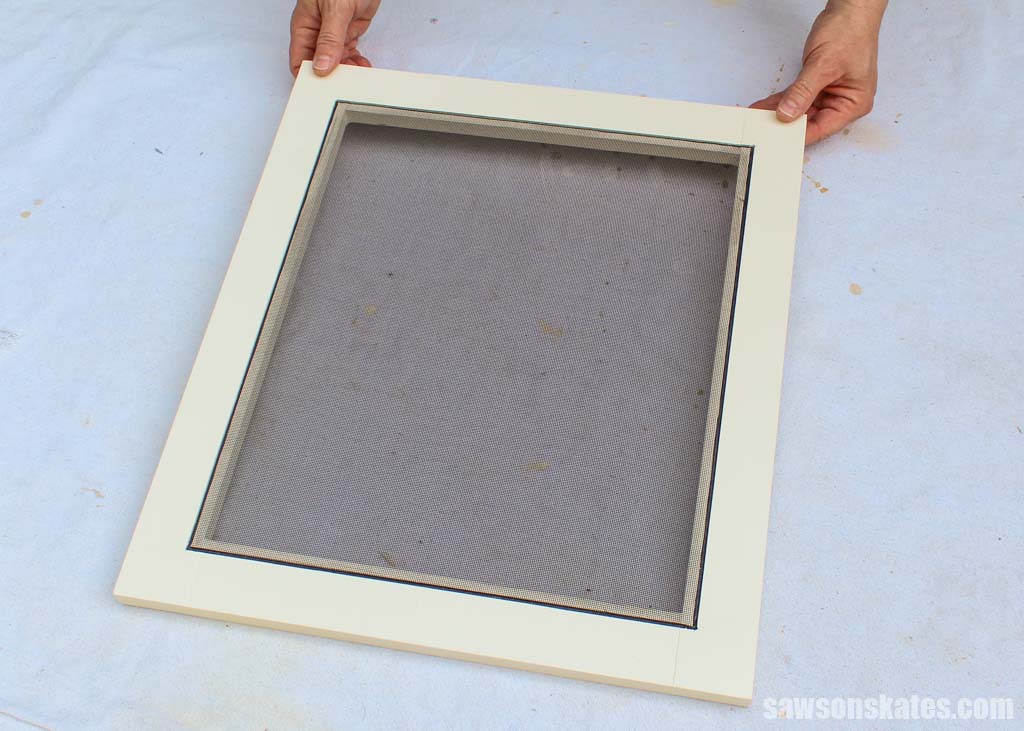
Repeat this process on each side until the excess screen has been removed.
Frequently Asked Questions
Is it hard to replace window screen?
No, replacing a window screen is an easy project that almost anyone can do. All you need is a few tools, new screen material, spline, and these step-by-step instructions.
Is it cheaper to repair or replace window screens?
The cost-effectiveness of repairing or replacing a window screen depends on the condition of your frame. Replacing the entire window screen may be cheaper if the frame is badly damaged. However, replacing the mesh will usually be more affordable if the frame is in good condition and only the mesh is ripped or missing.
Final Thoughts
Replacing a torn screen is a quick and easy way to save money, spruce up your home’s exterior, and keep out insects while letting in fresh air. With a few basic tools, new screen material, and spline, you can easily repair a damaged screen in a few simple steps.
Thank you for stopping by. If you enjoyed this tutorial, would you please take a moment and pin it to Pinterest? I’d really appreciate it!
Pin This For Later
How do you keep the screen straight when you put the spline in.
Hey Keith – After I initially get the first bit of spline in, I stretch the spline with my left hand while keeping my left hand on the screen to keep it straight. Once you get the first side done and start on the second side the screen pretty much keeps itself straight. Good luck and let me know if you have any other questions.
How do you actually attach the screen frame to the window frame? Are there special fasteners you use for that? I have a 1912 house with no screens at all in the wood windows now, and I am planning to make some. Some of my windows are double hung windows, but the upstairs are casement windows that swing inward. I’m trying to figure out how to install screens on both types, but especially the upstairs ones.
Hi Hannah – There is specific fasteners for antique style window screens. On the outside of the house there typically would be “window screen hangers” mounted on window trim and at the top of the screen. Then mounted lower on each side of the trim would be “window screen wing clips” that would hold the screens in place. I thought this would look a little “clunky” on my 1850s house so my aunt came up with a great idea. She suggested I attach two screws on the top of the window screen (one in each corner). Then using a Forstner drill bit, drill two corresponding holes in the underside of the top trim piece. The screws slip into the holes and the screen is held in place on the inside using a hook and eye. This way there is no clunky hardware to distract your eye on the outside of the house/window.