9 Paint Sprayer Mistakes You Don’t Want to Make
Paint sprayer mistakes can happen, but when used properly a paint sprayer can make quick work of any painting project and produce a professional finish.
Paint sprayer mistakes can happen to all of us and trust me, I’ve made most of them! To ensure your paint sprayer success today I’m sharing helpful paint sprayer tips and tricks.
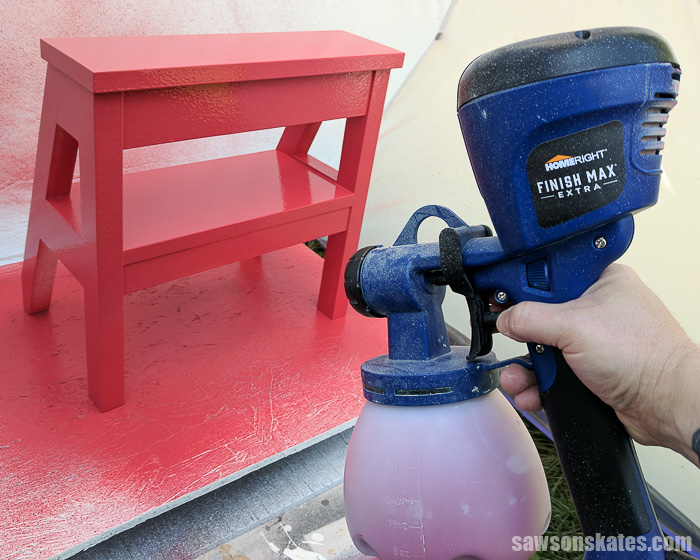
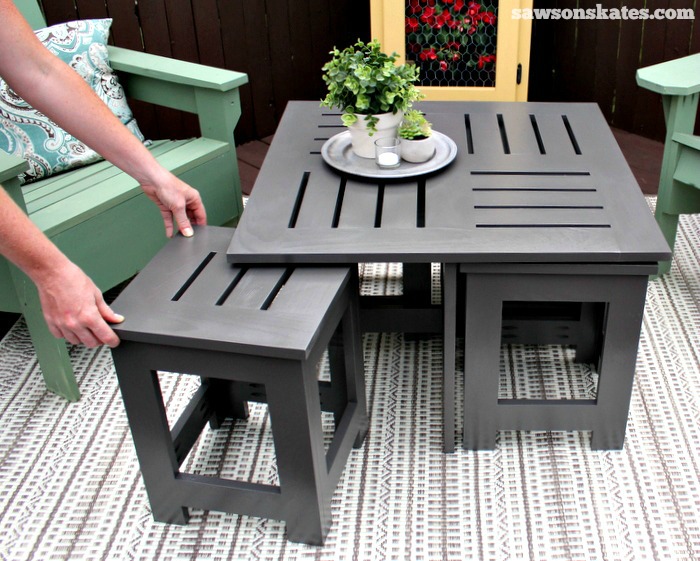
A few months ago I shared my DIY outdoor coffee table project. To prep it for paint I first gave all of the pieces a thorough sanding. Once the pieces were sanded I used a brush to prime the side tables. After I finished two side tables, I estimated brushing one coat of primer and two coats of paint would take me nearly seven hours to finish the project. SEVEN HOURS!!! That’s when I decided “I’m buying a sprayer!” Thanks to the sprayer I was able to finish applying the primer and two coats of paint in only a few hours. WHAT A TIME-SAVER!
Since spraying the outdoor coffee table I’ve sprayed the cedar clapboard siding of my house, sprayed a pair of Adirondack chairs and updated the look of my air conditioner dresser with a coat of paint. I’ve also primed and painted the doors I made for my small workshop and the door I made for DIY truck camper.
Not only have I completed all of these projects (plus a few more surprises I can’t share just yet), but I’ve learned a lot along the way. Just like with the Kreg Jig and the 9 pocket hole mistakes you don’t want to make post I’m sharing what I learned with you. Here are 9 paint sprayer mistakes you don’t want to make.
9 Paint Sprayer Mistakes You Don’t Want to Make
Safety First
Before we fire up our paint sprayer or pick up any tool for that matter we need to think about safety. Read, follow, and understand the safety instructions for your tools. If you don’t understand, contact the manufacturer or ask a pro.
Just like we protect our eyes when we’re cutting wood for our DIY furniture projects, we must protect our eyes when using a paint sprayer. Just take a look at my sunglasses that I was wearing when I was spraying the siding of my house and you’ll see why. See all of the little paint specks? We don’t want those specks in our eyes.
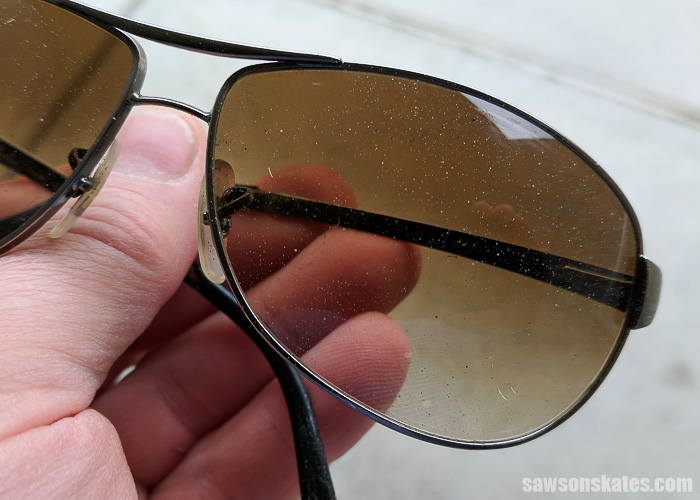
Remember those paint specks on my sunglasses? Well, we don’t want to breathe in those paint specks either. So just like we protect our lungs when cutting wood for our DIY furniture projects, we must protect our lungs when using a paint sprayer.
At the very least, I would recommend using a disposable mask, but personally, I use a respirator. I’ve tried a few respirators over the years, but right now I’m digging this respirator. It easily adjusts to my face and the cartridges are replaceable. You’re probably thinking respirator is overkill when using a paint sprayer, but with all of the wood cutting and paint spraying that I do, I want to do everything I can to protect my lungs. Plus, I already have the respirator in my workshop.
Prep Your Project
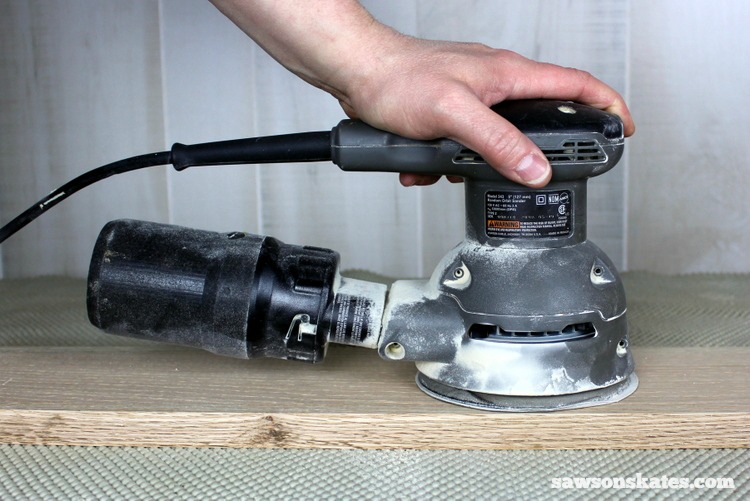
You guys have heard me say this before (well, you probably actually didn’t hear me say it, but you’ve probably read it!) a quality finish begins by prepping the surface of your furniture project. All the paint in the world won’t cover the mistakes of a poorly prepped project. How do you properly prep the surface? Yup, you have to sand. Sanding is the worst! I hate sanding! But trust me, take the time and do it.
Check out my how to sand your project for flawless finish post for easy tips and helpful tricks for properly prepping your project. Oh, and I don’t use a palm sander.
Related: What’s the Best Sander for Furniture? (Here’s the Answer)
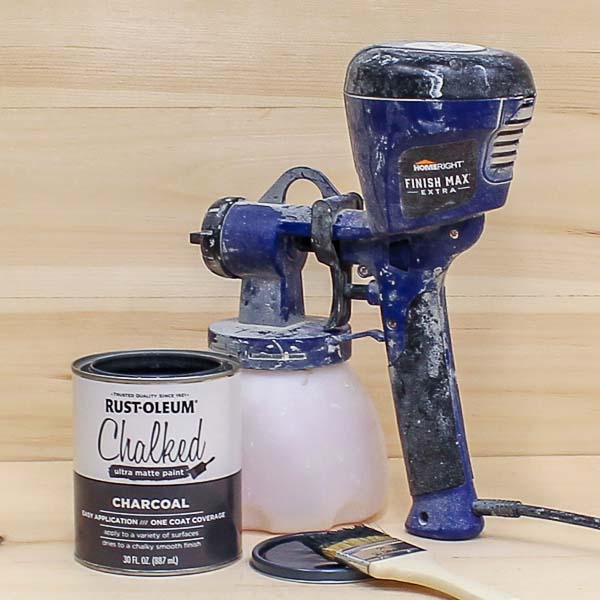
Choose a Quality Sprayer
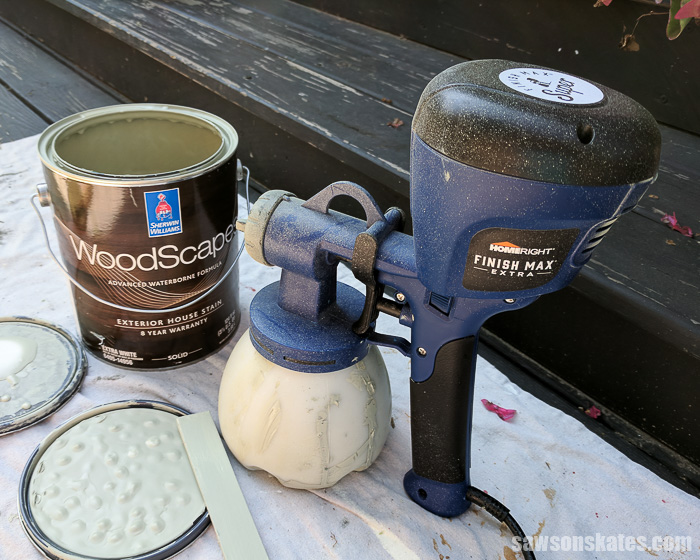
There’s a lot of sprayers out there, but here are 3 reasons why I bought a HomeRight Super Finish Max paint sprayer: it produces a professional finish, it works great for small and large projects and it’s easy to clean. I got my sprayer here, but be sure to check because sometimes the price can change.
Professional Finish
The HomeRight Super Finish Max paint sprayer gives DIYers the ability to produce a smooth, professional finish easily at home. A finish just like you would see on store-bought furniture. The Super has an adjustable nozzle that easily rotates for a horizontal, vertical and cone-shaped spray pattern. This adjustment allows you to spray in just about any direction you’ll need to cover the project you’re spraying.
Small and Large Projects
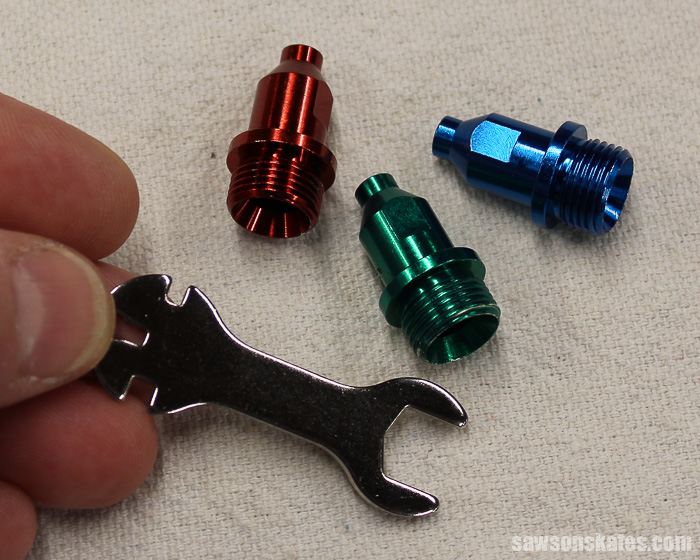
The HomeRight Super Finish Max paint sprayer includes three spray tips which allow you to spray both small and large projects. The blue tip sprays stain and polyurethane in a 1″-6″ spray pattern which is great for furniture projects. The green tip sprays latex paint, chalk paint and milk paint in a 1″-6″ spray pattern which is great for furniture projects. The red tip sprays primer and latex paint in a 10″-12″ spray pattern which is great for walls, ceilings, decks, and fences. The tips are easy to change with the wrench included in the kit.
As I mentioned earlier in addition to spraying the outdoor coffee table I’ve sprayed the cedar clapboard siding of my house, updated the look of my air conditioner dresser with a coat of paint. I’ve also primed and painted a new project I’m working on. I love the flexibility of this sprayer.
One note about working on larger projects like walls, ceilings, decks, and fences. I would recommend not filling the container to capacity. The sprayer itself is light probably only weighing about three pounds, but when completely filled with paint it can feel heavy. The easiest remedy is to not completely fill the container.
Easy to Clean
In the past, I’ve borrowed a few paint sprayers from friends and one of the things I disliked about them is they were difficult to clean. Cleaning felt like it took almost as much time as it did to spray the project. Not so with the HomeRight Super Finish Max paint sprayer, it’s super easy to clean! I’ve never actually timed it but I would guesstimate it takes about the same time to clean as it would to thoroughly clean two paint brushes. I will gladly trade a little cleaning time for saving HOURS of painting!
What to Look For When Buying a Paint Sprayer
- Produces a Professional Finish – When researching paint sprayers look for one that allows DIYers to easily and consistently produce a smooth, professional finish.
- Small and Large Projects – Look for a sprayer that works well for small projects like furniture projects and cabinets and large projects like walls, ceilings, decks, and fences.
- Easy to Clean – Look for a paint sprayer that cleans up quickly. You don’t want to spend as much time cleaning as you did spraying.
Quality Paint
Just like it’s import to properly prep your DIY furniture project or whatever you’re planning to spray, it’s important to choose a quality paint. You spent a lot of time prepping your project and assembling all of your tools now is not the time to be a skimp on your paint. Cheap paint will produce a cheap finish and will not be as durable as a quality paint.
Think about it this way. Let’s say you’re going to bake a batch of homemade chocolate chip cookies. (BTW I LOVE chocolate chip cookies!!!). You preheat the oven, get out the bowls, measuring cups and gather your ingredients. Instead of using real vanilla you go for the less expensive imitation vanilla. (I’m a chocolate chip cookie snob, so yes, I’ll be able to tell the difference!). Are you really going to invest all of that time for mixing, scooping, baking and cooling only too skimp and use imitation vanilla? Why invest all of that time investment and expense of ingredients and use imitation vanilla?! Don’t skimp on your vanilla, er I mean paint!
You’ve heard me say this before and most recently in the Dos and Don’ts of Buying Used Tools. Invest in the best your budget will allow. I’m not suggesting for you to max out your credit card. What I am suggesting is, sometimes it’s best to save until you have the money to get the best you can afford for your project. Anytime I have focused on the budget over quality, I was always disappointed. The bottom line is buy the best your budget will allow.
Strain the Paint
This is one of the biggest paint sprayer mistakes and it’s an important one. Strain your paint. Especially if it’s old paint. When I was reading the instructions for my HomeRight Super Finish Max I noticed it recommended straining the paint. I thought “I don’t need to do that.”
I had some old paint I wanted to use up, so I stirred the paint and it looked fine. Then I thought about those instructions. I had a bought a package of paint strainers, but had never used them. “Oh man, I guess to be on the safe side I should strain this old paint” You know what I found in the bottom of the strainer? Big chunks of old paint!
Chunks WILL NOT flow through your sprayer. They will get clogged in the sprayer. The sprayer will stop spraying and you’ll get angry. Lesson learned, strain the paint. I would say it’s a must for old paint, but I’ve heard you can even find debris in new paint. Straining all of the paint you put in your sprayer is cheap insurance that the sprayer will always function properly.
Related: How to Strain Paint (3 Easy Ways)
Mixing or Thinning
Paint sprayers typically require paint or stain to be mixed or thinned. The paint or stain needs to be thinned so that the sprayer will work properly. I think thinning is one of the things people find the most confusing about using a paint sprayer, but I’m going to help you take the guesswork out of the thinning process
What Do You Use to Thin Paints and Stains?
For water-based products like latex paint, the answer is easy. Water. For oil-based products you would typically use paint thinner. Not sure if your paint or stain is water or oil-based? It should say on the can, but if you don’t see it, check the “clean up” section of the instructions. If it says clean up with water, it’s water-based. If it says clean up with paint thinner or mineral spirits, it’s oil-based. It’s just that easy.
How Do You Mix Paint for a Paint Sprayer?
The instructions for my HomeRight Super Finish Max suggest thinning between 5% to 15%. How much is that? To figure it out, I sat there for awhile converting ounces and calculating and… arrrgggh! Lucky for you I have taken the math out of the equation! I created a handy-dandy paint mixing cheat that easily shows how to thin different amounts of paint, stain or poly. And… I’m giving it to you for FREE!
Click below to get your FREE paint mixing cheat sheet!

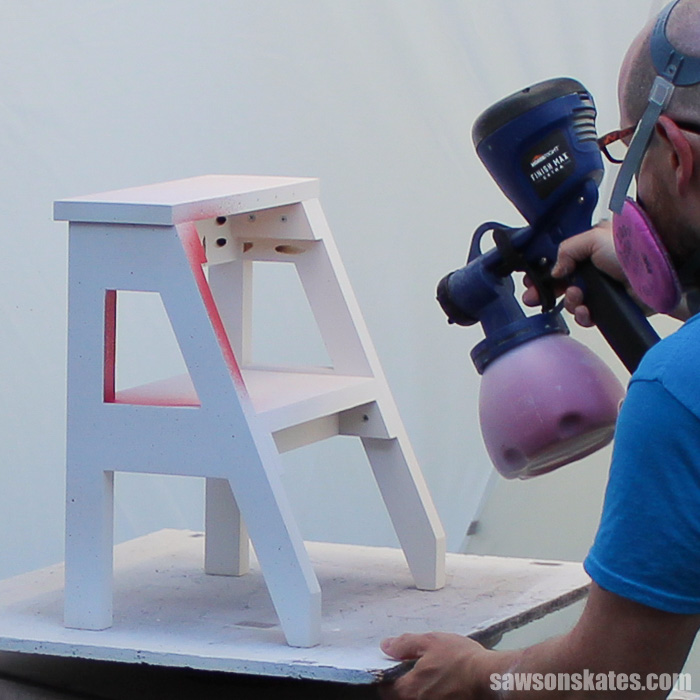
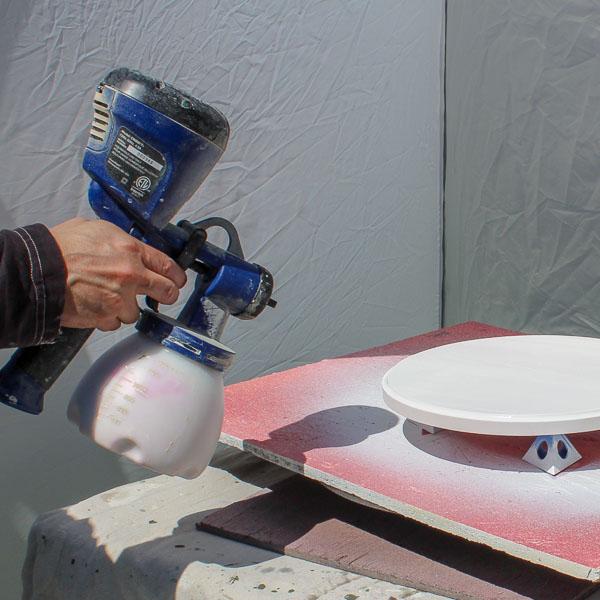
Practice
As they say, practice makes perfect. My HomeRight Super Finish Max paint sprayer is super easy to use, but I think one of the best things I did with my sprayer was to spray the siding of my house. There was a lot of repetitive motion. After spraying a small section I learned what worked best and perfected my technique.
My recommendation? Start with a project where there’s a lot of repetitive motions, so you can get your technique down. Spray the siding of your house, a shed, the walls of your garage, etc. Then you’ll be ready to spray any project.
Practice
Sometimes when you spray the surface of paint ends up being bumpy instead of being smooth. This unwanted texture is called orange peel. It can happen to any DIYer and it happened to me recently.
I reached out to my friends at HomeRight for some help about how to avoid orange peel on my painted projects. They shared some great advice with me and now I want to share it with you. Please skate over 7 Ways to Prevent Orange Peel Texture When Using a Paint Sprayer for some helpful tips and tricks to keep your paint smooth.
Clean Up
I mentioned earlier my HomeRight Super Finish Max is super easy to clean. It takes about the amount of time to properly clean two paint brushes. But you HAVE to clean it! Don’t finish spraying your project and then celebrate completing a project by having a few beers in the backyard!
Dried on, caked on paint is not only difficult to get off but will prevent your sprayer from working properly. Immediately start the cleaning process when you’re done spraying. Wet paint is sooo much easier to remove than dry paint. Be sure to follow completely the cleaning instructions for your sprayer.
Gimme Shelter
OK, we have our safety glasses and our respirator. We prepped our project and it’s ready for paint. We chose a quality paint sprayer and properly thinned our paint. Is there anything else we need? Yes, a place to spray!
You guys might remember a few months ago I went to the Haven Conference. The conference is geared towards DIY bloggers to help us create and develop amazing projects for you. It’s also a place where we can interact with DIY brands and check out their latest offerings. It’s at Haven where I got to meet the friendly folks from HomeRight. I purchased my sprayer earlier in the summer, so I was familiar with the HomeRight brand. What I wasn’t familiar with was they also offered spray shelter. Oh man… I needed this thing!
I spoke with my friends at HomeRight, told them about my DIY furniture projects and all of the DIYing going on here at Saws on Skates. Well, they hooked me up with my very own spray shelter!
Long-time Saws on Skates followers know that I’m always transparent with you guys, so I want to tell you I did not purchase this shelter, it was given to me. Also, I was not compensated for my opinions about the spray shelter, nor was I compensated for any portion of this post. All opinions are my own. I only promote things I’ve used, know work well and think you’ll love too.
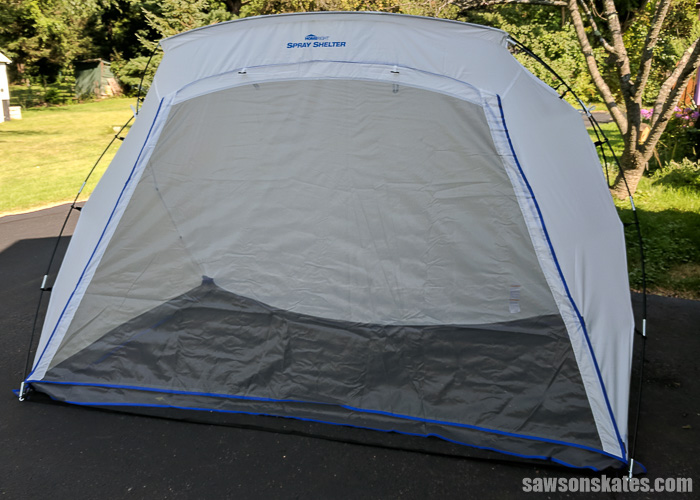
The spray shelter is the perfect place to spray furniture projects. It’s great for DIYer’s who don’t have a workshop, garage, shed to spray. Sure, you can spray outside, but leaves, debris, etc. can blow onto your project and will totally ruin your finish. This is especially true if you’re spraying a finish like polyurethane. Using a spray shelter protects surrounding objects from overspray and protects your projects while spraying.
The spray shelter goes together quickly. If you’ve ever gone camping in a dome tent, you’ll be familiar with the construction. It’s basically two poles that attach to the shelter with clips. Here’s a tip… After you assemble your shelter, paint a dot on each clip for one pole and then a different color for the second pole. This will help speed up the assembly process the next time.
I’ve used my spray shelter to paint a few furniture projects now and I’m so glad I have this in my paint spraying arsenal!
Final Thoughts
Paint sprayer mistakes can happen to all of us, but when used properly a paint sprayer can make quick work of any painting project and produce a smooth, professional finish.
If you found this information helpful, would you please pin it to Pinterest? I would really appreciate it! Thank you – Scott
Recommended For You

Pin This For Later
Great tips thanks
Thank you Lawrence – I’m glad you found it helpful.
Very interesting reading. I enjoy your articles. Thank you
Thank you Bob – I appreciate that!
I bought the spray shelter and it was THE MOST DIFFUCULT thing to put together let alone take apart. It was returned to Amazon! I hope you had better luck. I built a simple spray booth out of 2x4s and some heavy plastic sheeting.
Hi Janet – Thank you for stopping by. I’m sorry the spray shelter didn’t work out for you. I use mine all the time. It’s a game changer for me. In fact, I wrote another post about how I use the spray shelter to Spray Paint Furniture Indoors Without Making a Mess.