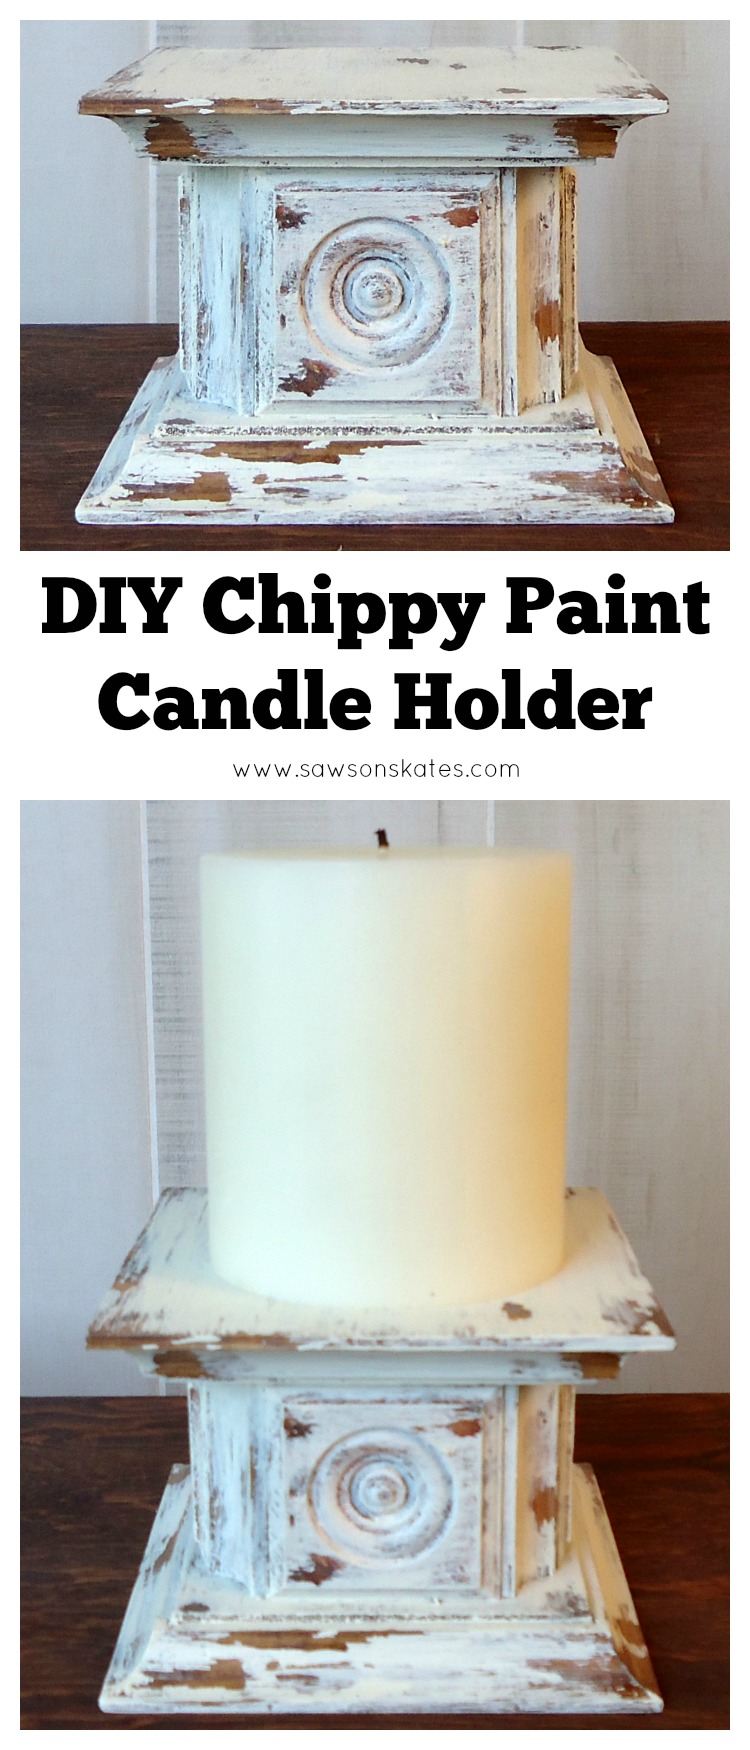
Easy Chippy Paint DIY Candle Holder
Hey there friends! Today scrap wood and an easy chippy paint finish come together for this chippy paint wood rosette DIY candle holder!

For your convenience this post contains affiliate links to products or tools I used to complete this project. Click here to visit my site policies.
I originally shared this DIY candle holder on Domestically Speaking and now I’m bringing it to you here on Saws on Skates. This is an easy home decor project to make for yourself and because it’s so easy to put together, it makes a great gift idea.
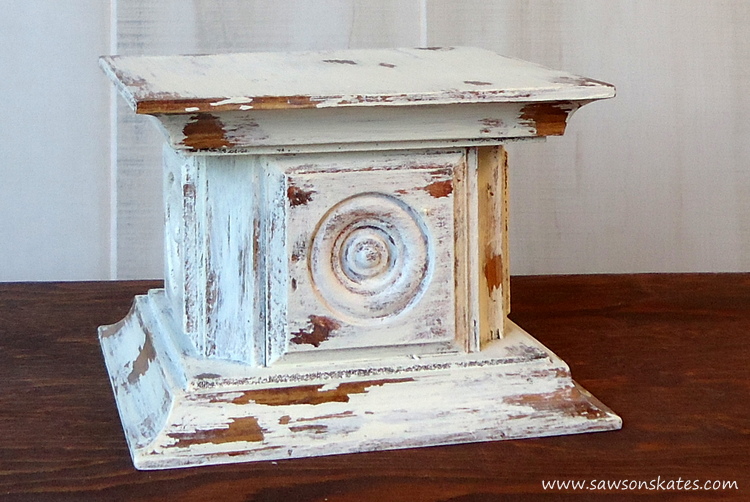
I took some inspiration from these candle holders made with scrap wood and came up with this antique style rosette DIY candle holder.
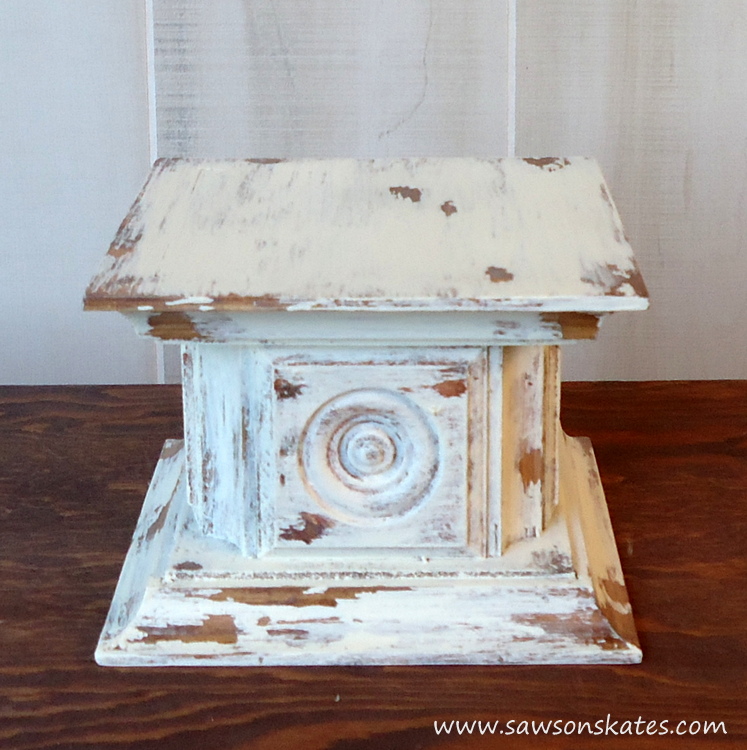
For the aged look I used my “no sanding required” chippy paint finish.
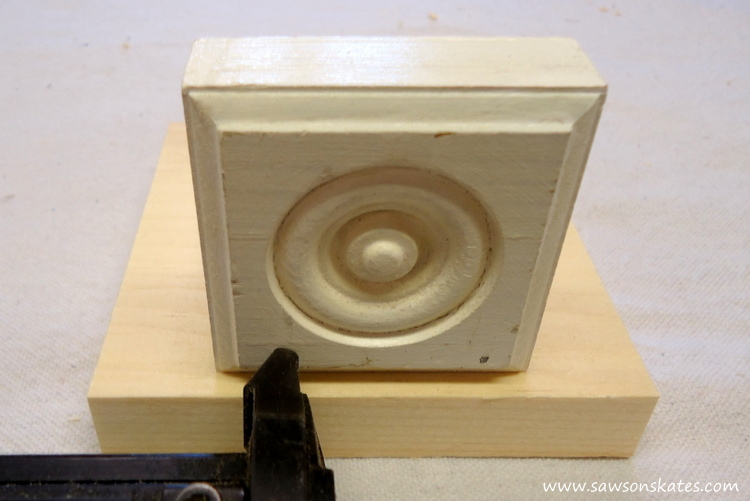
But first, what the heck are rosettes? Rosettes are decorative pieces of wood usually found in the corners of doors and windows of antique homes. Big box stores sell reproduction rosettes and that’s what we’re working with today.
A buddy of mine got a handful of rosettes to dress up a builder grade fireplace at his condo. He never ending up using them, so he gave them to me. Well guess what? I’ve had them kicking around my shop for a few years now and I never used them either. I thought it was finally time to do something with them. I used some of the rosettes to create these DIY Christmas ornaments and a few more to create this antique style rosette DIY candle holder!
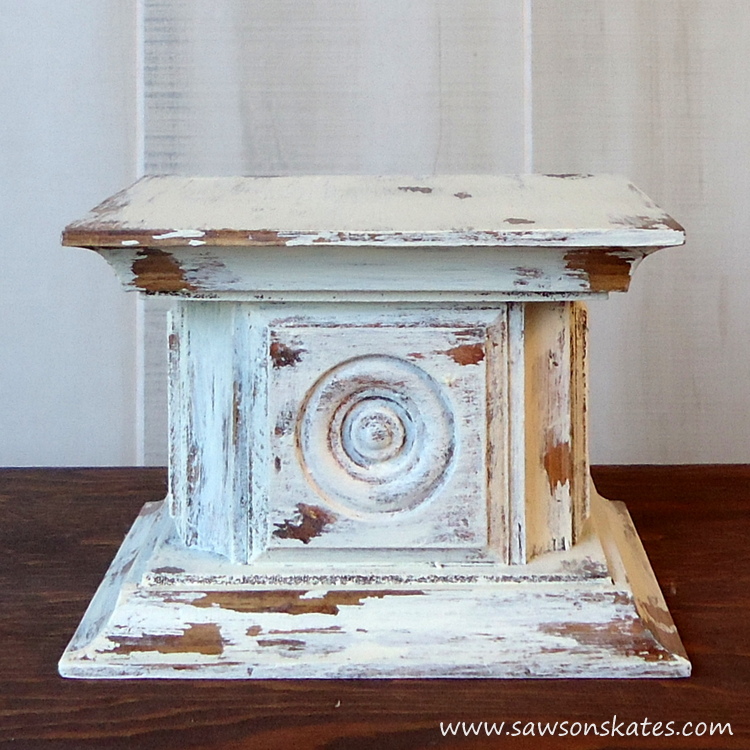
Chippy Paint DIY Candle Holder
Printed Plan
Click here to download a printed plan of the Chippy Paint Candle Holder plan
Supplies
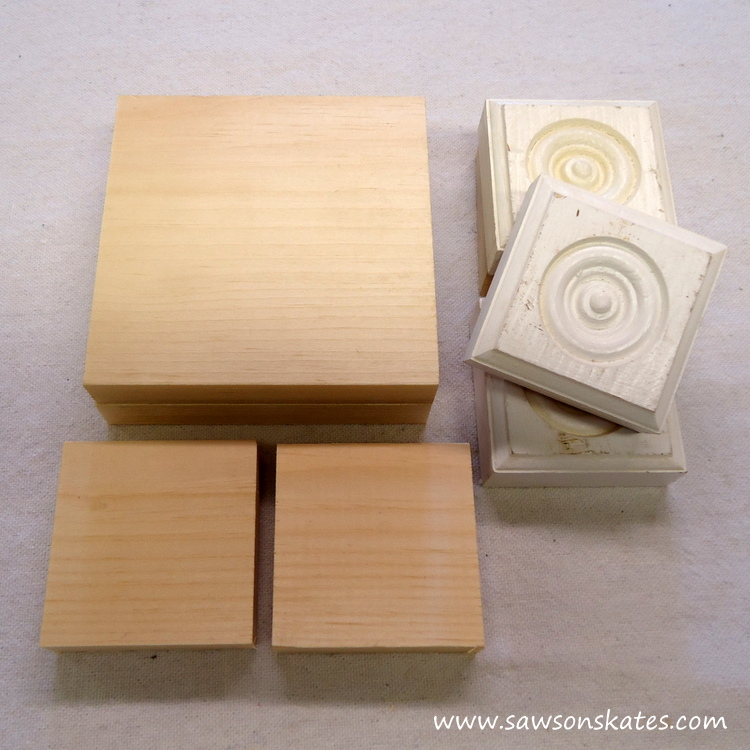
(4) 2-1/2″ x 2-1/2″ rosettes
1×3 – about 6″
1×5 – about 10″
Cove molding – about 48″
1-1/4″ wood screws
1″ pin nails or finish nails
1-1/4″ finish nails
Elmer’s Wood Glue Max
Ready Patch
Rust-Oleum Ultimate Wood Stain “Early American”
Petroleum Jelly
FolkArt Chalk Paint “Sheepskin”
Tools
Miter saw
DEWALT Drill
Hammer, brad nailer, pin nailer
Countersink drill bit
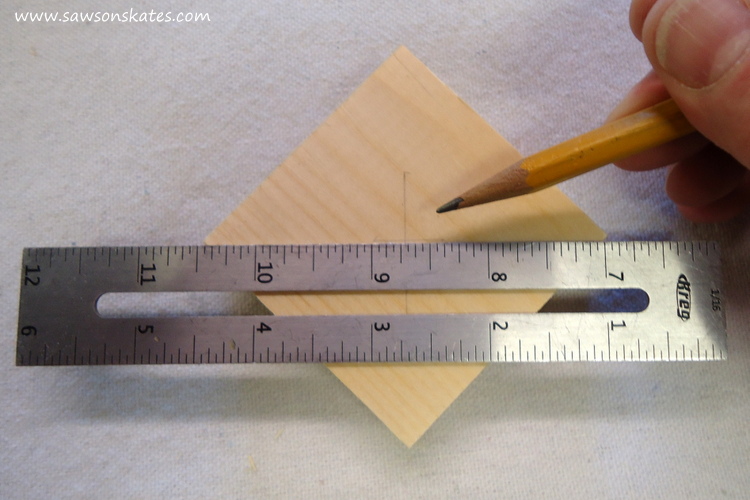
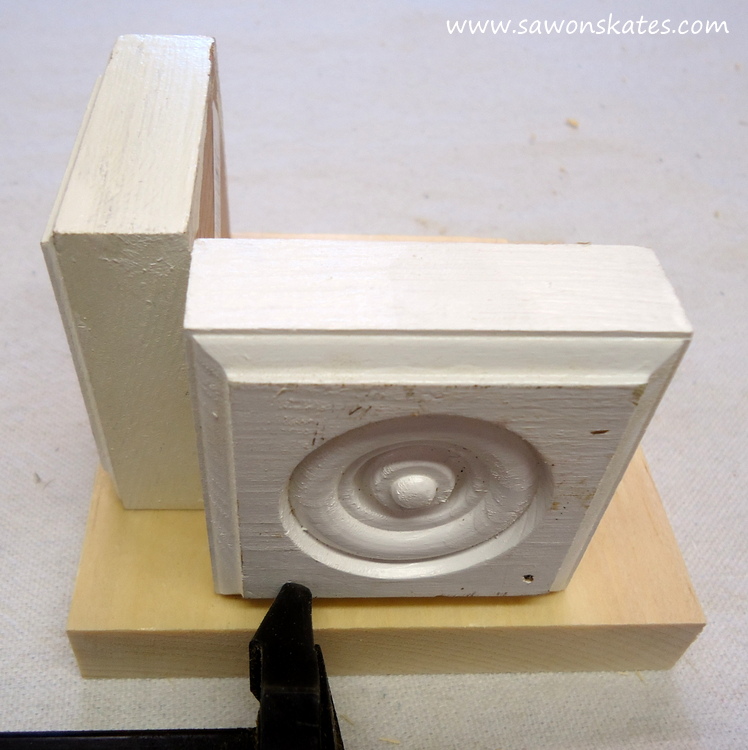
Step 1. Cut the Rosette Bases. Cut 2 pieces of 1×3 to 2-1/2″. Locate the center of the base using a straight edge.
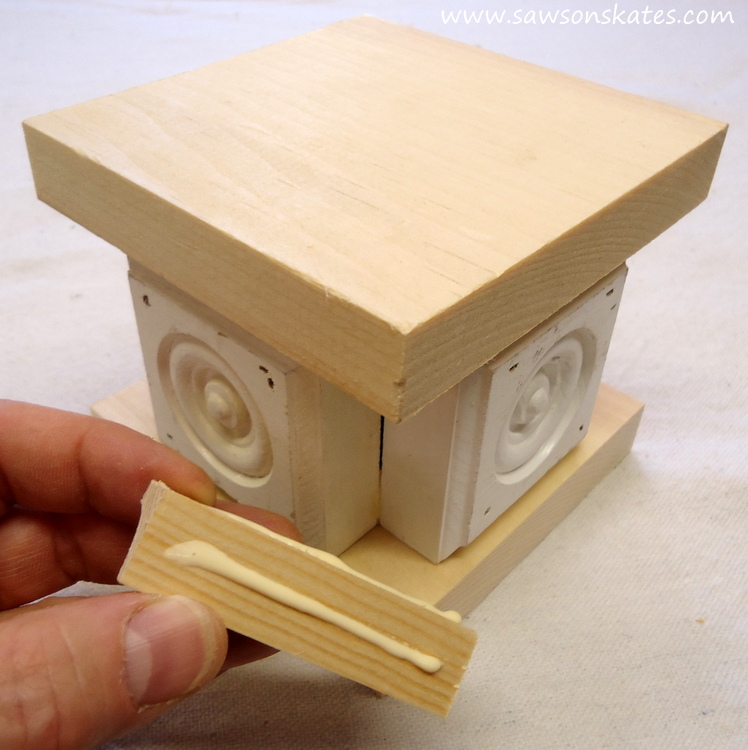
Step 2. Cut the Top and Bottom. Cut 2 pieces of 1×5 to 4-1/2″.
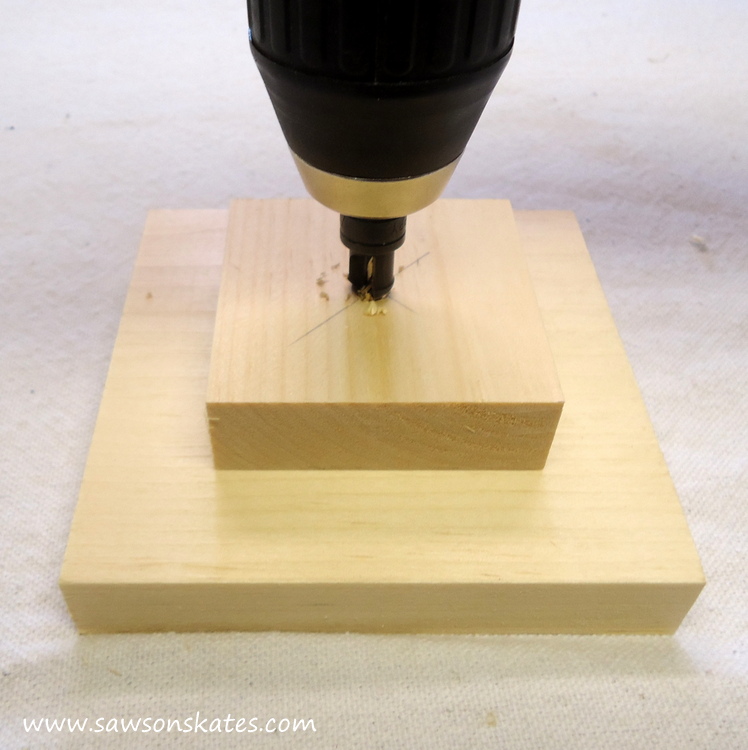
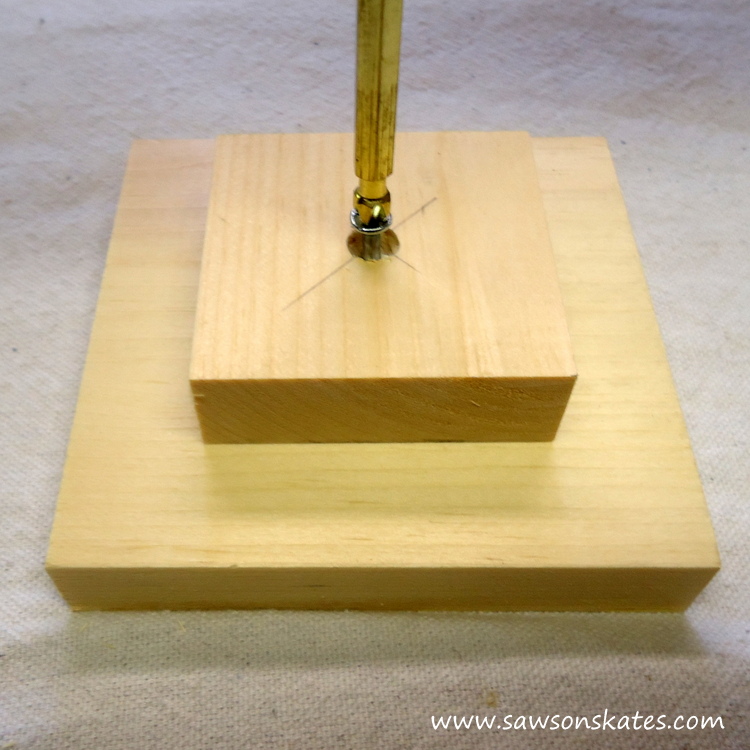
Step 3. Attach the Bases to the Top and Bottom. Apply glue to a base, center on the top and drill a countersink hole at the location you marked in Step 1.
Attach using a 1-1/4″ wood screw. Repeat for the bottom.
Step 4. Attach Rosettes to the Bottom. Apply glue to one side of the base.

Attach rosette to the base using 1-1/4″ finish nails.
Repeat for the remaining rosettes.
Step 5. Attach the Top. Apply glue to all 4 edges of the base, insert inside the rosettes and attach using 1-1/4″ finish nails.

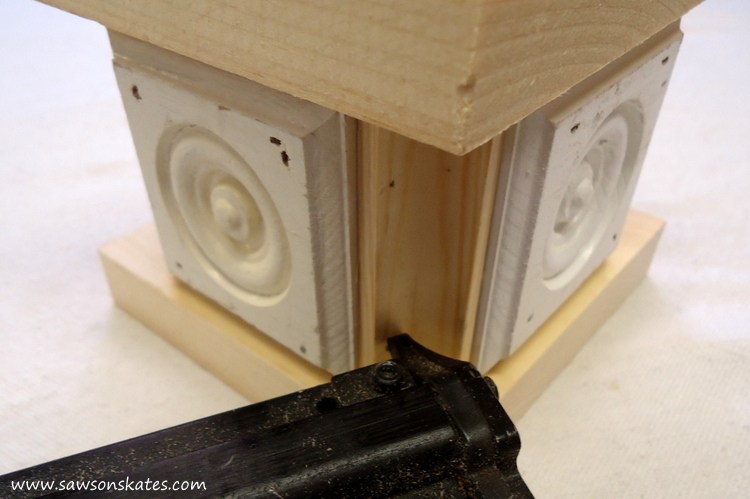
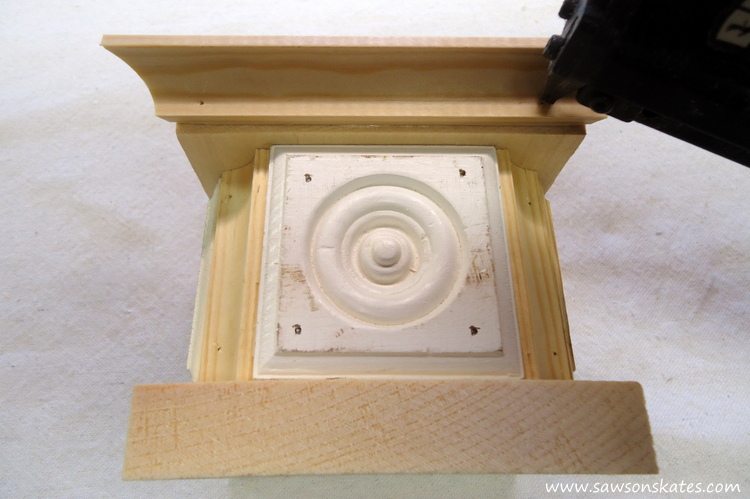
Step 6. Attach Cove Molding to Rosettes. I used cove moulding to fill the space between the rosettes. Cut 4 pieces of cove moulding to 2-1/2″. First apply glue to the moulding.
Then place the moulding between the rosettes and attach using 1″ pin nails. Repeat for the remaining pieces of moulding.
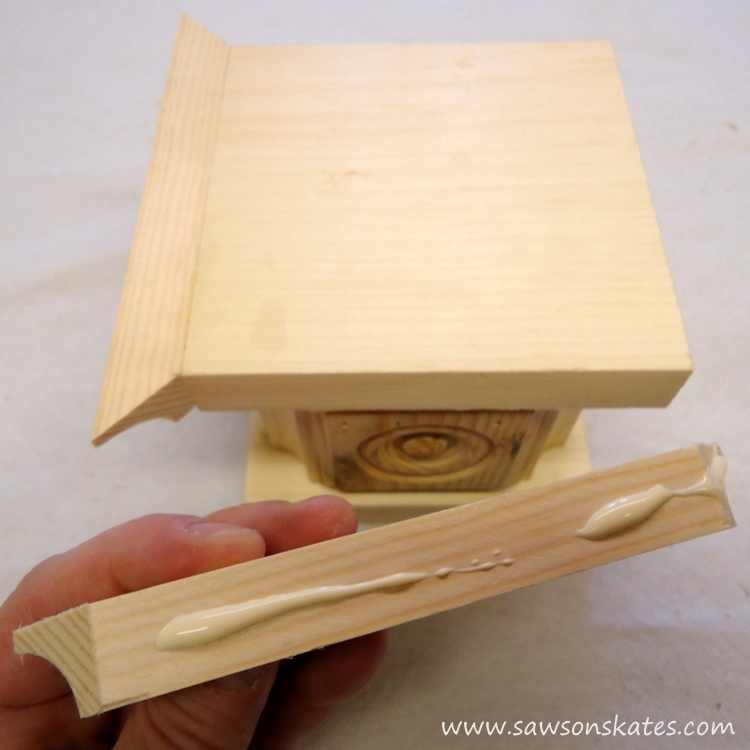
Step 7. Attach Cove Moulding to Top and Bottom. Place a piece of cove moulding against the top, mark each end and then cut a 45 degree angle on each end. Apply glue to the cove moulding.
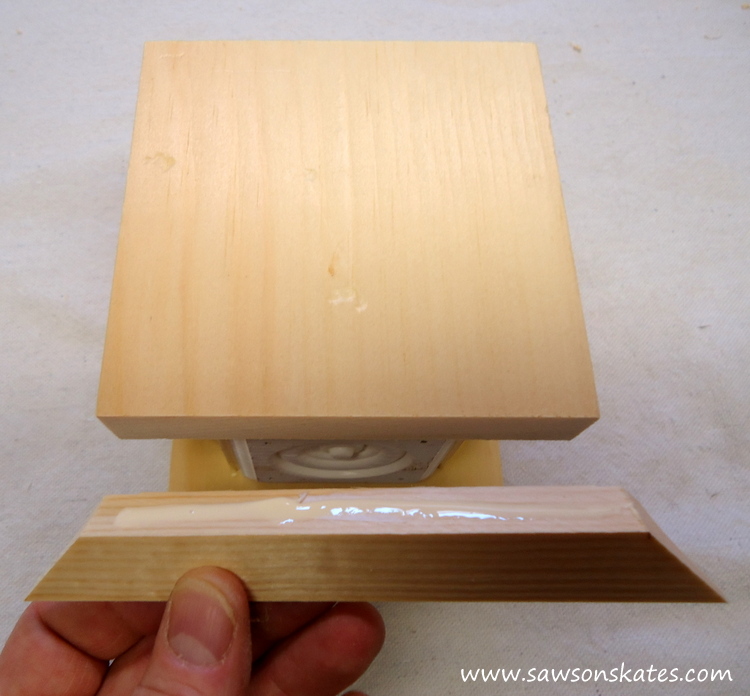
Attach the moulding with 1″ pin nails.
Repeat for the remaining sides. Need some help with miter cuts? Check out this post. Repeat for the bottom.
Finish
Fill the nail holes with Ready Patch and sand when dry. Stain the entire piece with Early American stain.
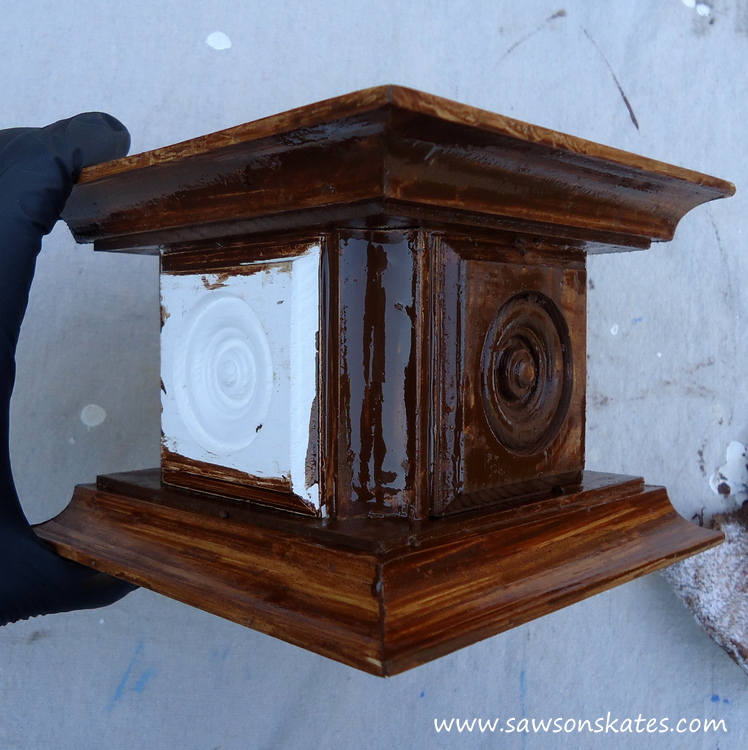
A few of the rosettes I was working with had previously been painted white. I painted the white rosettes with a craft paint close to the stain color because the stain wouldn’t cover the paint.
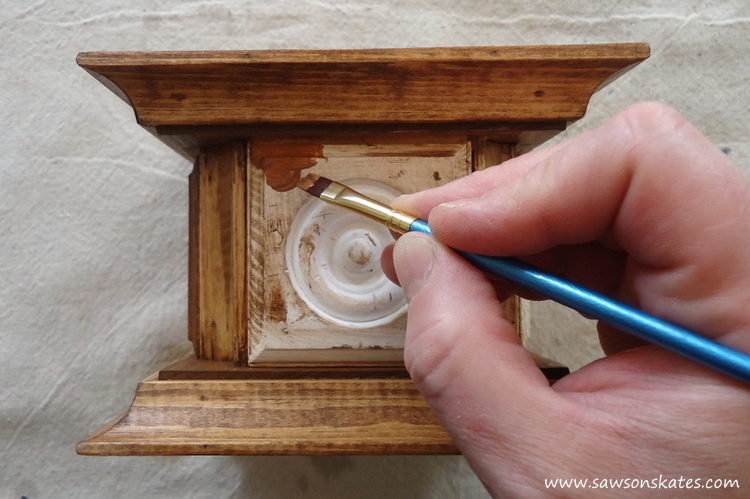
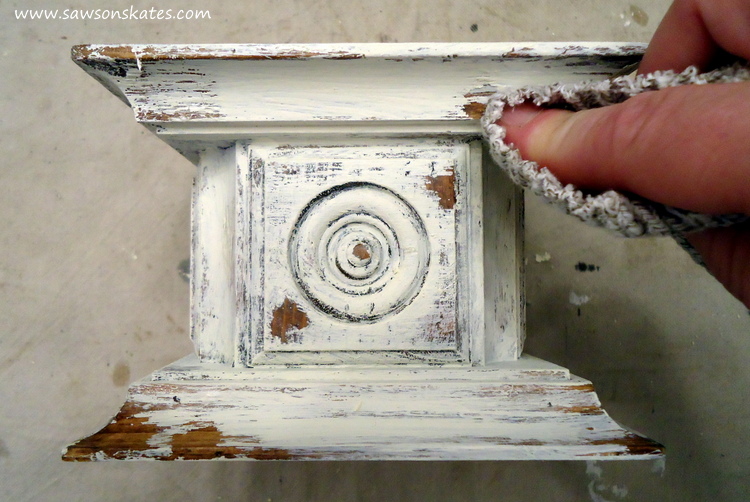
Here’s a quick look at how I did the chippy paint (full details and chippy paint tips here). First I applied some petroleum jelly where there would typically be wear from age and use. On the corners, edges and any where I wanted the stain to show through.

Then I applied the white chalk paint.
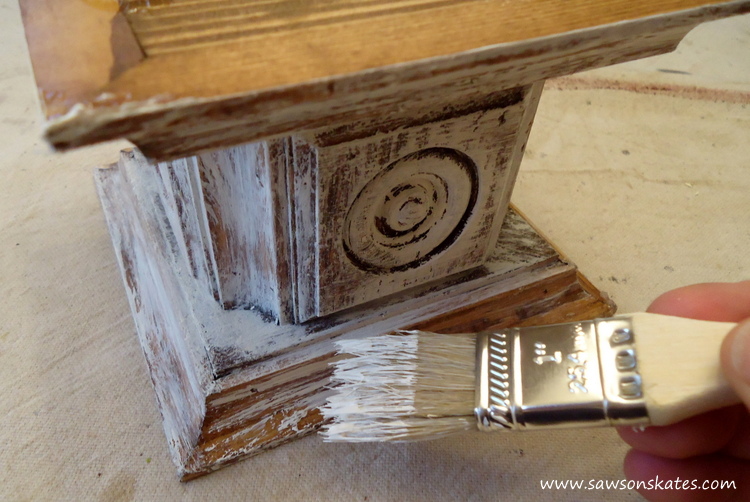
Once the paint was dry I removed the jelly with a rag.
Thank you for stopping by to check out my chippy paint wood rosette DIY candle holder!
PIN THIS!

Hi there – I’m Scott, a woodworking enthusiast and creator of Saws on Skates, a site I started in 2015 to share easy-to-follow tutorials, space-saving shop tips, and project inspiration for DIYers at any skill level. Learn more about my woodworking journey here.