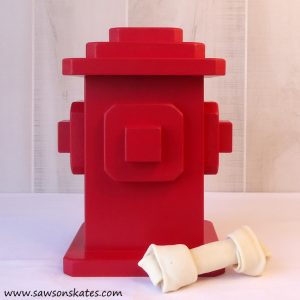
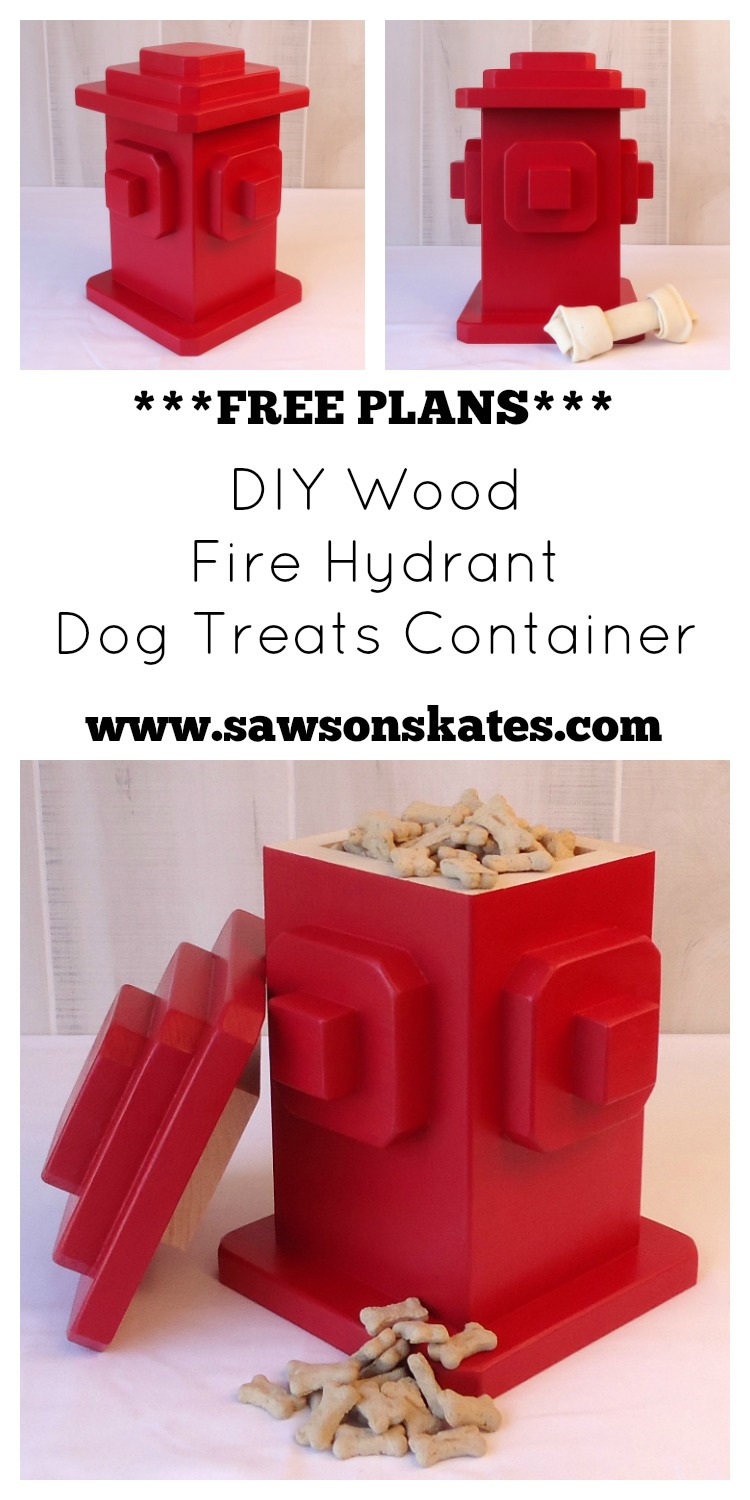
DIY Dog Treats Fire Hydrant Container
Hey there puppy parents! I have a treat for you today, well actually, a treat for your pooch. Today I’m sharing new DIY pet plans and showing you how to make a DIY Dog Treats Container shaped like a fire hydrant. Mine was made entirely with scrap wood I had in my shop, so this project was FREE! C’mon, I’ll show you how to make one in this easy tutorial 🙂
Before I show you how to make the fire hydrant, let me tell you how this DIY dog treats container project came about. Recently my buddy Jamie and his pup Glennberry (Berry for short) came to visit me and my pup Coco. Jamie always gives Berry “potty bones”, ya know, dog treats after doing his “business”. On this visit, Coco was getting potty bones too.
I was surprised Coco actually liked them because she never has been motivated by food. Suddenly she was looking forward to her dog treats… I mean potty bones! Jamie left some potty bones behind in a plastic bag. Once Coco finished those, I got her more. But instead of a plastic bag, I wanted a cool container for them. And you know my motto, “why buy when you can DIY!” And that’s exactly what I did.

Just a couple of notes about this project. Some of the parts are really small, so as with any project, please use extreme care. I rounded over the edges with sandpaper to give the fire hydrant a more realistic look. It’s a good idea to sand the parts as you go along as it would be more difficult to sand when the container is fully assembled.
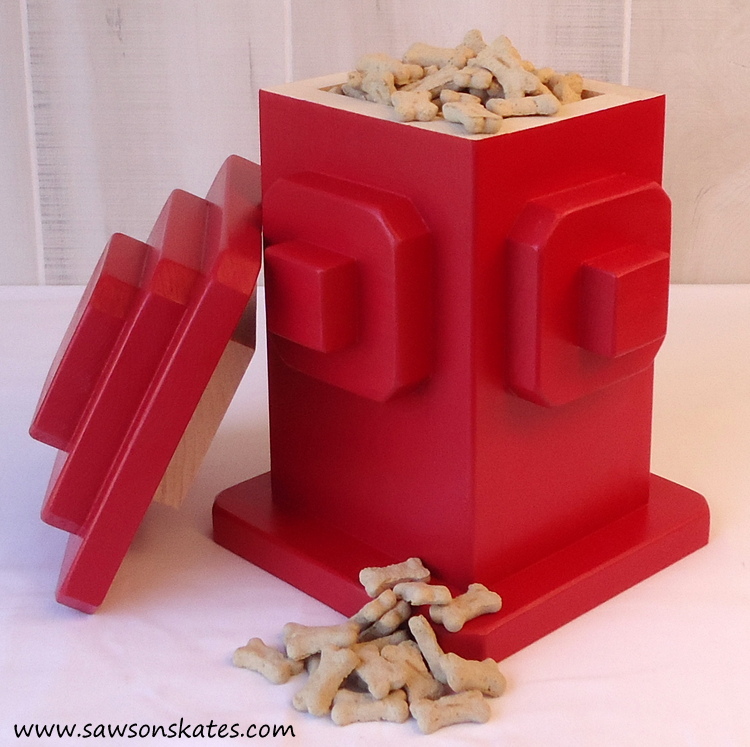
Oh, I only put the “nozzles” on the front and sides, so the back is flat. The container holds about a pound of these mini potty bones. I think one of these DIY fire hydrant containers and some homemade dog treats would make a great gift, don’t you?! Let’s get started and build this DIY dog treats container!
This post contains affiliate links to products I used to complete this project. Click here to visit my site policies.
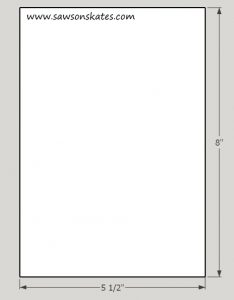
DIY Dog Treats Fire Hydrant Container Plan
Printed Plan
Click here to download a pdf of the DIY Dog Treat Fire Hydrant Container Plan
Supplies
1×2 – 6″
1×4 – 36″
1×6 – 22″
1×8 – 16″
1-1/4 finish nails
#8 1-1/4 wood screws
Sandpaper
Wood filler or Rust-Oleum Ready Patch
Tools
Miter saw
DEWALT Drill
Countersink bit
Hammer or nail gun
Kreg Multi-Mark Tool
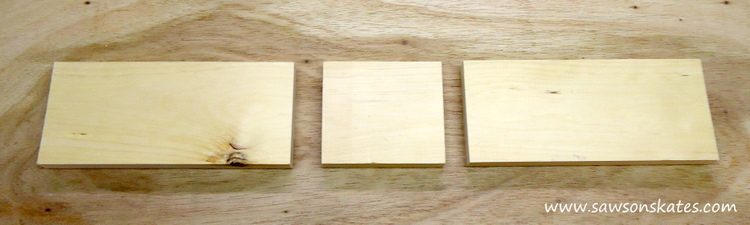
Step 1. Cut the Sides. Cut 2 pieces of 1×4 to 8″.
Step 2. Cut the Small Bottom. Cut 1 piece of 1×4 to 4″.

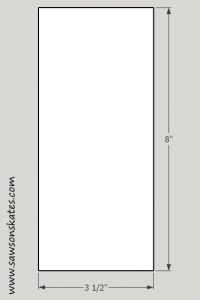
Step 3. Cut the Front and Back. Cut 2 pieces of 1×6 to 8″.
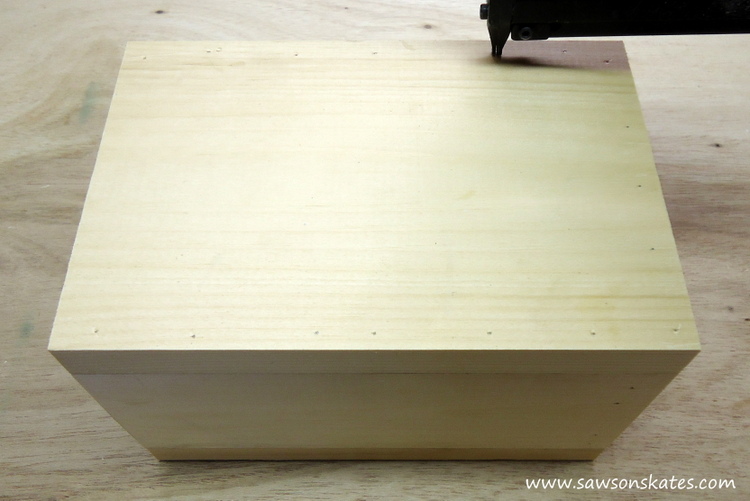
Step 4. Assemble the Container Sides. Apply glue to the 3-1/2″ sides of the bottom and attach the sides using 1-1/4″ finish nails.
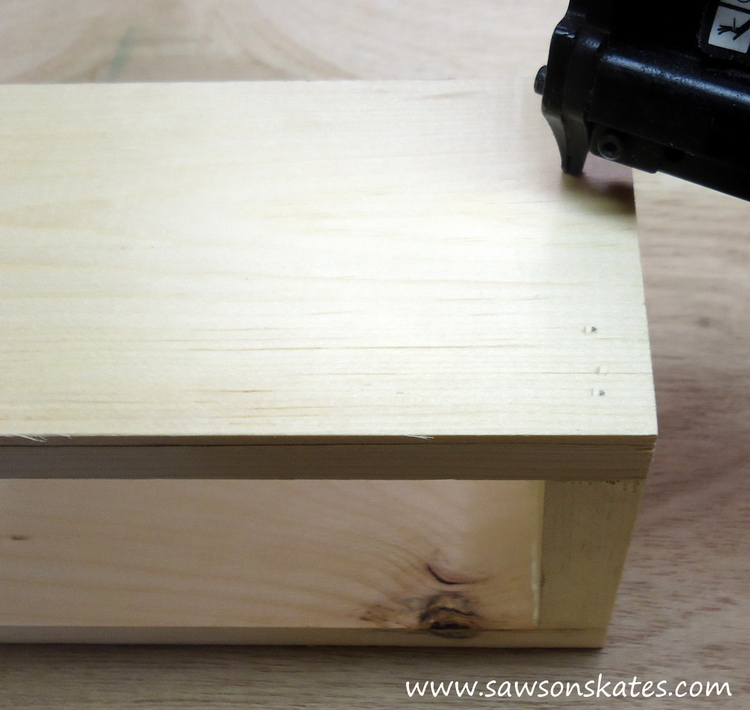
Step 5. Attach the Container Front and Back. Apply glue to sides and bottom and attach the front using 1-1/4 finish nails. Repeat for the back.
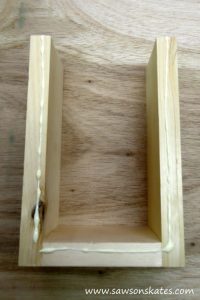
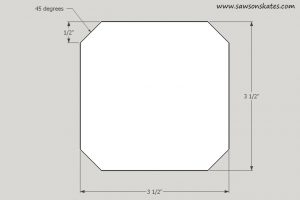
Step 6. Cut the Nozzle Bases. Cut 4 pieces of 1×4 to 3-1/2″. On all corners, measure in a 1/2″ and cut a 45 degree angle. Three pieces will be used on the sides and one will be used as the small top in Step 13.

Step 7. Cut the Nozzles. Cut 3 pieces of 1×2 to 1-1/2″.

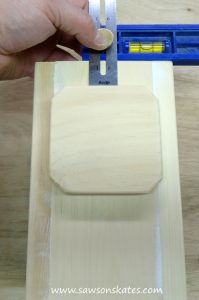
Step 8. Attach the Nozzle Bases. The nozzle bases are set down 1-1/4″ from the top. Apply glue, set the Kreg Multi-Mark Tool![]() (affiliate link) to 1-1/4″, position base and attach using 1-1/4″ finish nails. Repeat for the other two sides.
(affiliate link) to 1-1/4″, position base and attach using 1-1/4″ finish nails. Repeat for the other two sides.
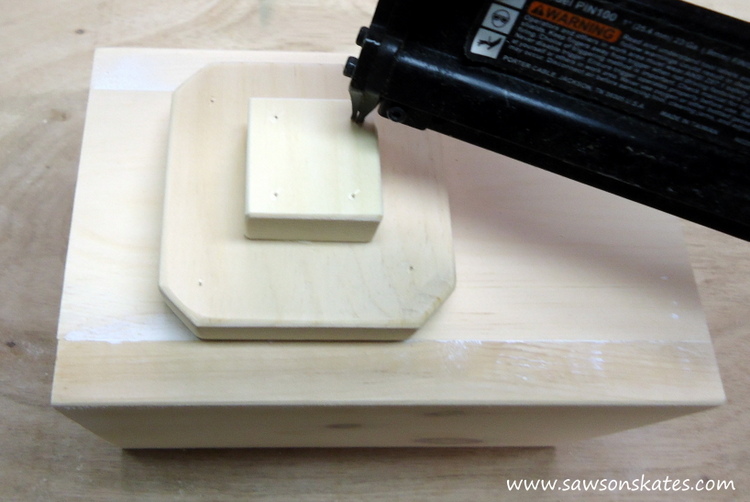
Step 9. Attach the Nozzles. Apply glue to the nozzle, center on the nozzle base and attach using 1-1/4″ finish nails. Repeat for the other two sides.
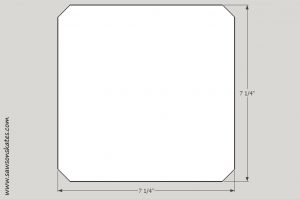
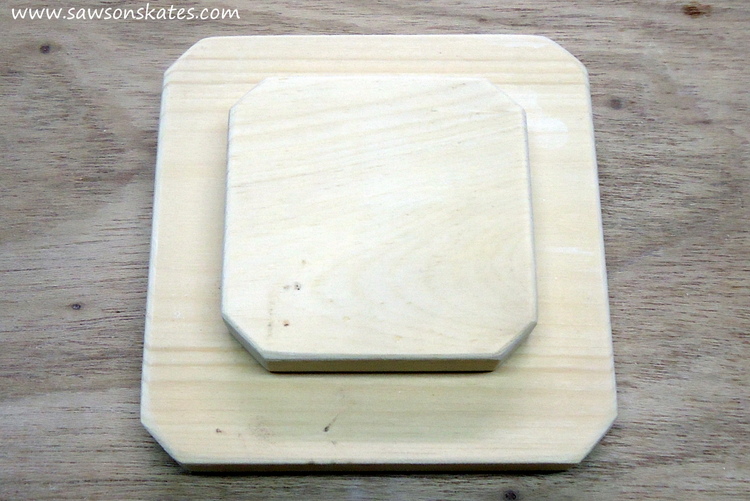
Step 10. Cut the Large Top and Bottom. Cut 2 pieces of 1×8 to 7-1/4″. Cut 45 degree angles just as you did in Step 6. One piece will be used in Step 11 and one will be used in Step 13.
Step 11. Attach the Large Bottom. Apply glue to the large bottom, center on the container, drill counter sink holes and attach using 1-1/4″ wood screws.
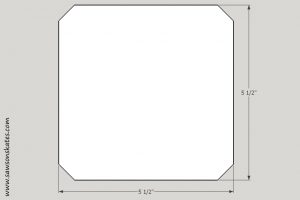
Step 12. Cut the Medium Top. Cut 1 piece of 1×6 to 5-1/2″.
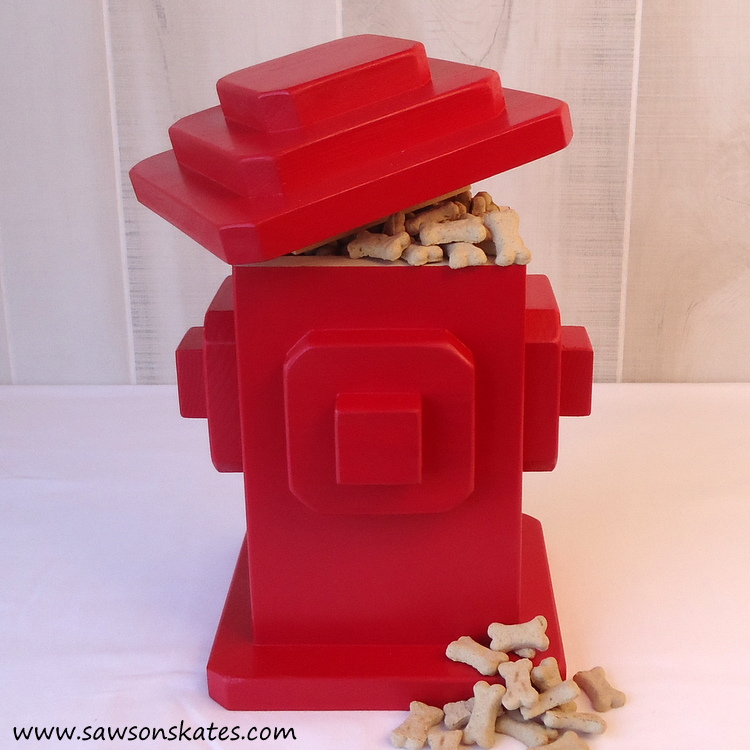
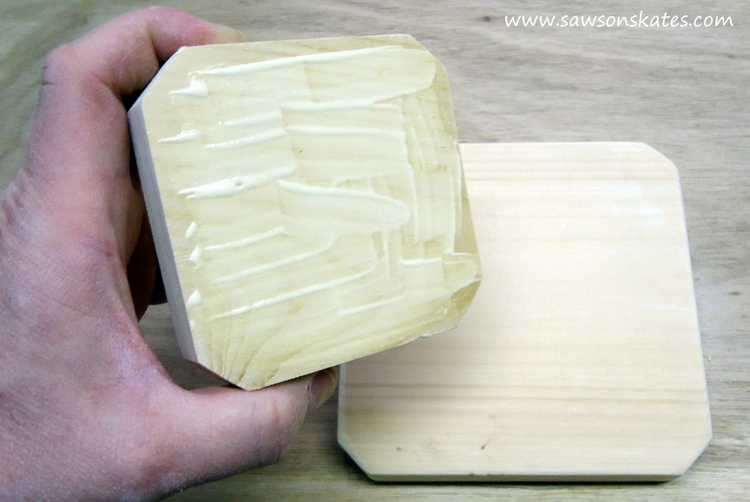
Step 13. Assemble the Top. Apply glue to the small top (Step 6), center on the medium top (Step 12) and attach using 1-1/4 wood screws. Apply glue to the medium top, center the large top (Step 11) and attach using 1-1/4 wood screws.
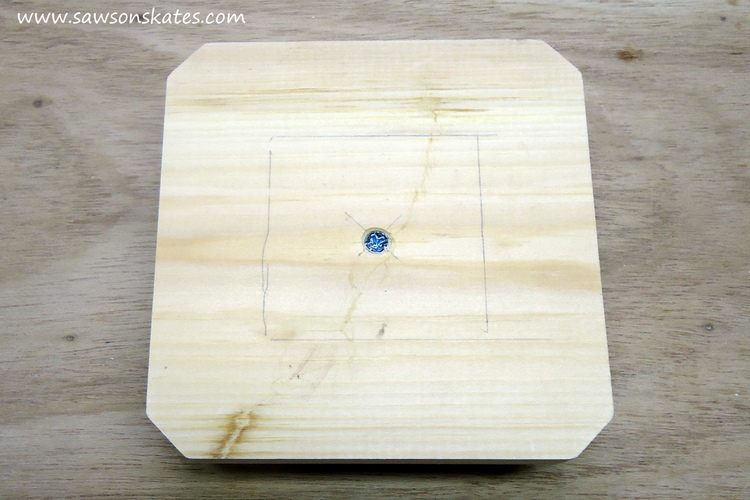
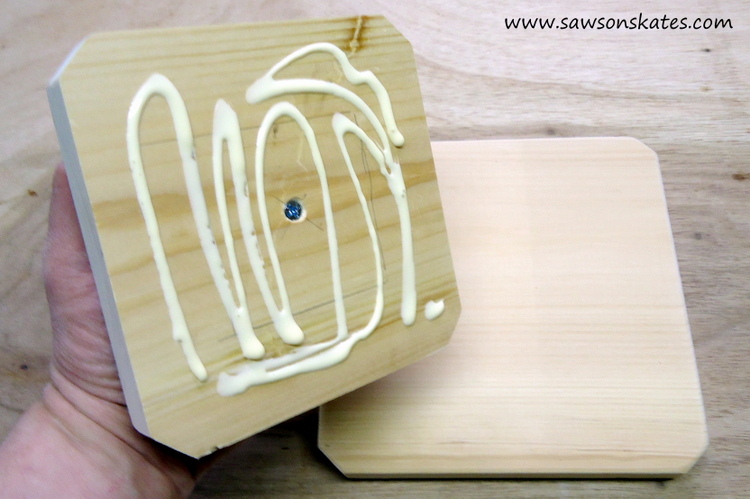
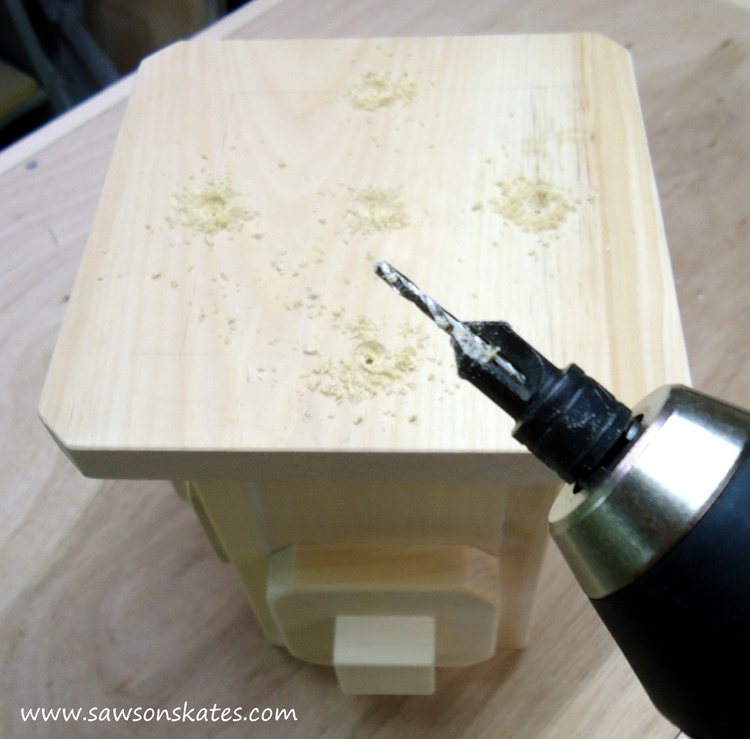
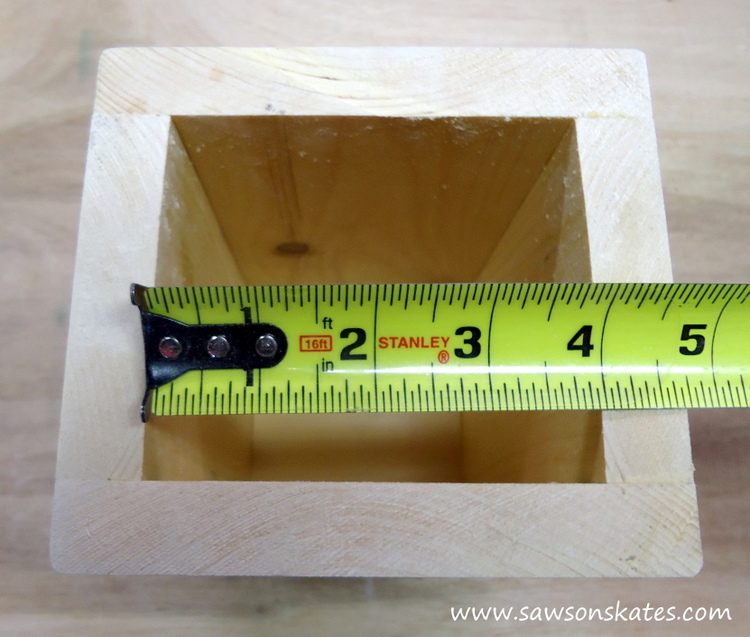
Step 14. Cut the Stopper. Measure the inside dimensions of the container and deduct an 1/8″ from each dimension. Cut a piece of wood to this dimension to form a stopper for the neck of the container. Drill a few countersink holes in the stopper. Apply glue to the stopper, center on the bottom of the top and attach using 1-1/4″ wood screws.
Fill nail holes with wood filler or Rust-Oleum Ready Patch (affiliate link), do any necessary final sanding, apply a couple coats of a gloss red paint and fill your DIY dog treats fire hydrant with potty bones 🙂

Hi there – I’m Scott, a woodworking enthusiast and creator of Saws on Skates, a site I started in 2015 to share easy-to-follow tutorials, space-saving shop tips, and project inspiration for DIYers at any skill level. Learn more about my woodworking journey here.
Cutest treat box ever! Thanks for the plans!
Thank you Sherry – I’m glad you like it! It looks cute on my kitchen counter 🙂
I made this as a gift. Mine was not as beautiful as yours of course Scott, but it was well received. Thanks again! Tracey
Hi Tracey – I bet it turned out AWESOME!
made 1 for our daughter’s dog so kids can give ,had them help build it, thanks //sorry for the loss, we lost our dog also, coco , of 17 yrs; 2 yrs ago still get misty thinking about her
I am planning on enlarging it. We have a red shed that has fire department related signs. I have been looking for a fire hydrant to put in front of it. I think that will really add to the theme! Thanks for sharing!