DIY Handheld Hook-and-Ring Game
Tired of hearing the dreaded words “I’m bored” from your kids? Keep them entertained with this easy-to-make DIY handheld hook-and-ring game!
What Should I Build Next?
That's the question I help answer.
Every week, I send woodworking ideas to 17,000 DIYers who love building things.
You'd fit right in.
Are your kids constantly glued to their screens? Looking for a fun and engaging way to entertain them while enhancing their hand-eye coordination? Look no further!
Turn a single piece of scrap wood into this exciting DIY handheld hook-and-ring game! This simple project will keep youngsters busy while developing their motor skills and concentration.
Grab the easy-to-follow plan, including a free template, and make one (or a handful) now!
Table of Contents
- What is a Hook-and-Ring Game?
- What Tools Do You Need?
- What Wood Should You Use?
- How Do You Draw the Game’s Shape?
- How Do You Finish the Hook-and-Ring Game?
- How to Make a DIY Handheld Hook-and-Ring Game
- Get the Free Plan
This article contains affiliate links. If you purchase from these links, I may earn a small commission at no additional cost to you. Visit my site policies for more information.
What is a Hook-and-Ring Game?
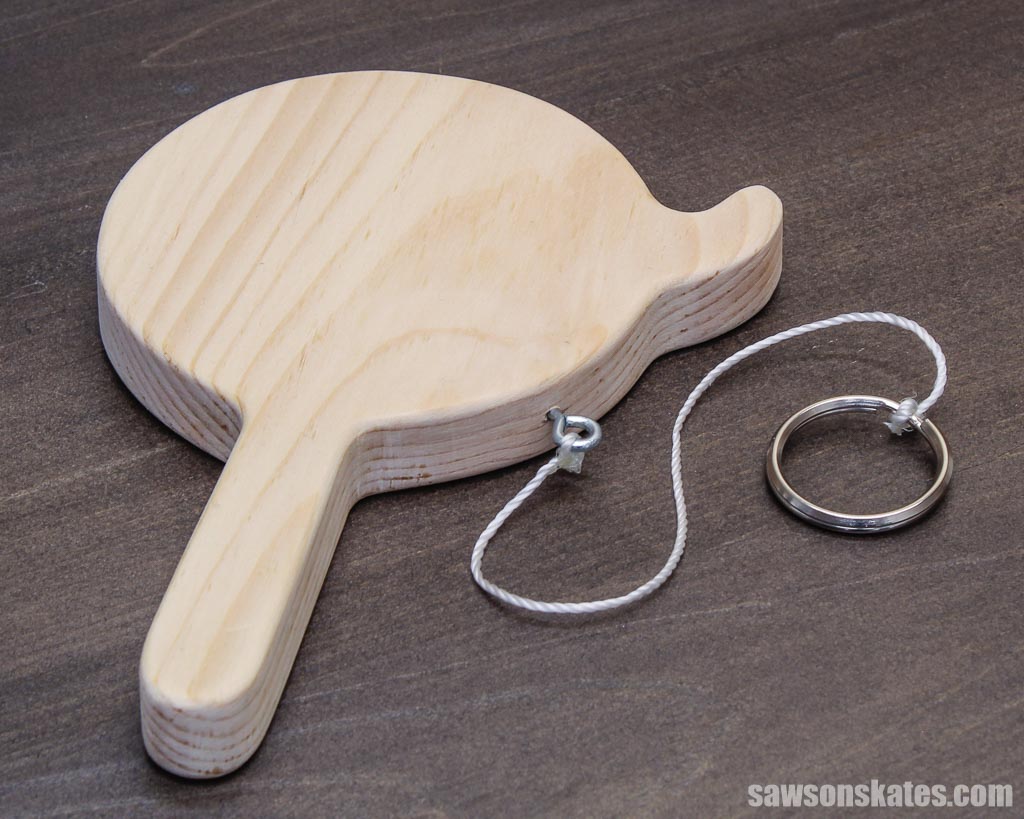
A handheld hook-and-ring game is a small, portable game that you can play in your hand. It consists of a hook and a ring connected to a string.
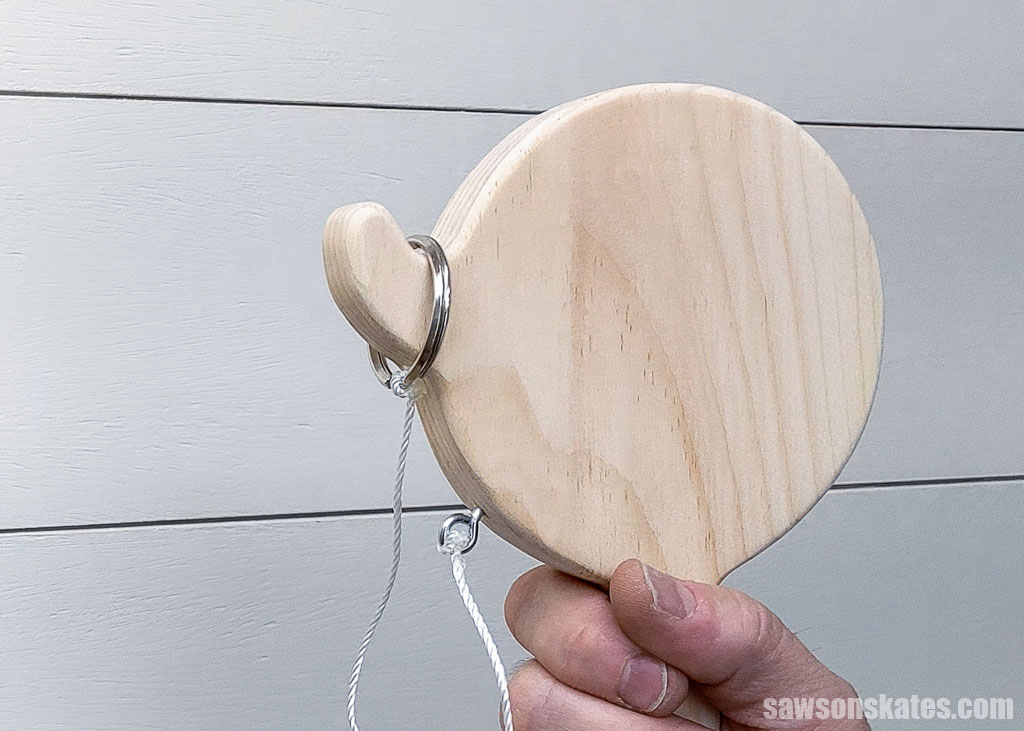
The game’s goal is simple: catch the ring on the hook. To play, simply hold the paddle in one hand and swing the ring, trying to catch it on the hook. If you land the ring on the hook, you score a point!
IMPORTANT: This Hook-and-Ring Game is a fun, challenging activity for age-appropriate children. However, adult supervision is recommended at all times to ensure their safety. Some materials in this project may pose a choking hazard to small children.
Inspiration for This Handheld Hook-and-Ring Game
While traveling recently, I stopped at an estate sale for a woodworker who ran a small wood crafts business. I was tempted to buy everything and start my own, but I couldn’t fit it all on the plane. Instead, I selected a few small projects to share with you, including a template for a hook-and-ring game.
I liked the concept, but the pattern was too large to fit on a common off-the-shelf board. So, I made a few adjustments to its size and shape.
Here’s what I came up with: a fun hook-and-ring game that can be made with a single piece of scrap wood.
What Tools Do You Need?
I made my hook-and-ring game with just a scroll saw. Although you might be able to use a jigsaw or band saw, a scroll saw’s smaller, more maneuverable blade is perfect for cutting the game’s tight corners.
I also used a disc sander to smooth the handle and outside curves and a portable spindle sander to smooth the inside curves, but you could use sandpaper instead.
You can use a handheld router with a roundover bit to smooth the game’s edges. This is an optional step, but it makes the handle feel more comfortable to hold and gives your project a more finished look.

What Wood Should You Use?
I recommend using a kid-friendly wood like pine for this project because it’s lightweight and soft. Species like oak and maple are heavy and hard which are more likely to cause injuries to little ones.
How Do You Draw the Game’s Shape?
Drawing the hook-and-ring’s shape is easy with the template in my free printable plan. Download the plan, print the pattern, and trace it onto your board. It’s that simple!
How Do You Finish the Hook-and-Ring Game?
I left my game unfinished, but you could apply a top coat like Polycrylic or polyurethane for protection. Or, let your kids get creative with craft paints. The hook sort of looks like an elephant’s trunk or a witch’s nose, doesn’t it?!
Related: Polycrylic vs Polyurethane (Are They The Same?)
DIY Handheld Hook-and-Ring Game
Printed Plan
Get the FREE plan here (includes detailed instructions, measurements, and bonus tips)
Supplies
- Wood (per the printed plan)
- #212 Screw Eye
- 1-⅜” (35 mm) Key Ring
- String, yarn, twine, etc. (about 12″)
- Hot Glue
Tools
- Tape Measure
- Scroll Saw
- Portable Spindle Sander (optional)
- Disc Sander (optional)
- Handheld Router (optional)
- ¼” Roundover Bit (optional)
Step 1. Make the Paddle
Print the paddle template at the end of this plan.
TIP: When printing the template, make sure the scale is set to 100%.
Tracing a template can be frustrating because the pencil point pushes into the flimsy paper, distorting the line. To avoid this, I mount my patterns on a manila folder using spray adhesive and cut them out with scissors. The folder provides a sturdy guide for my pencil to follow.
If you don’t have a manila folder, a reader, Gary told me he used a cereal box, which is a fantastic idea!
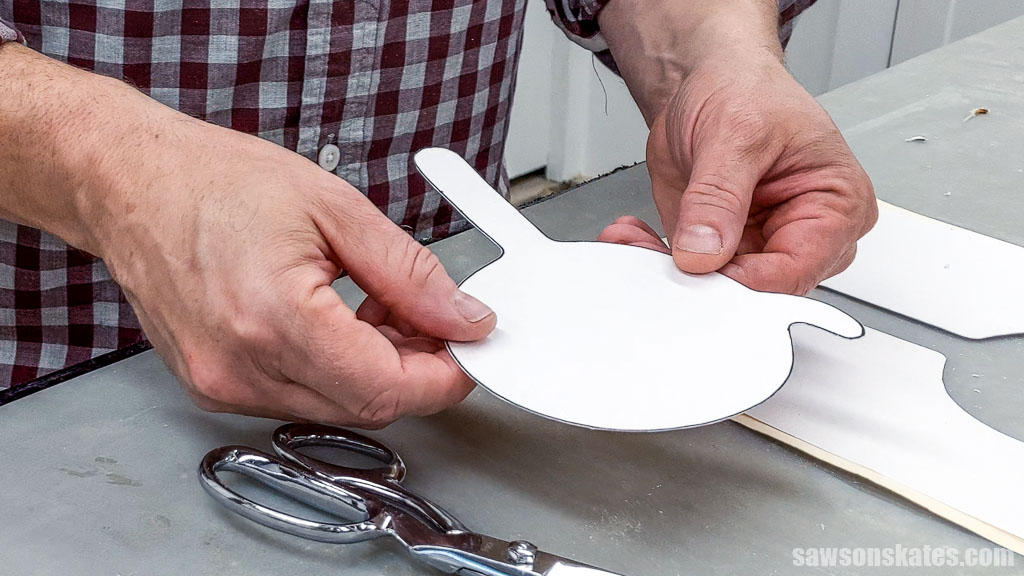
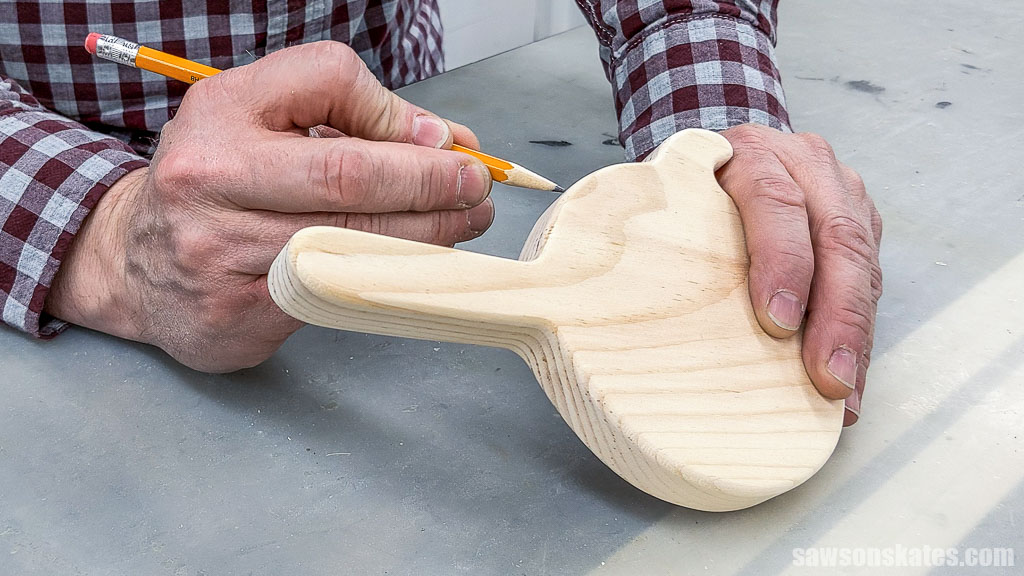
I used painter’s tape to temporarily attach the pattern to the board and traced its outline with a pencil.

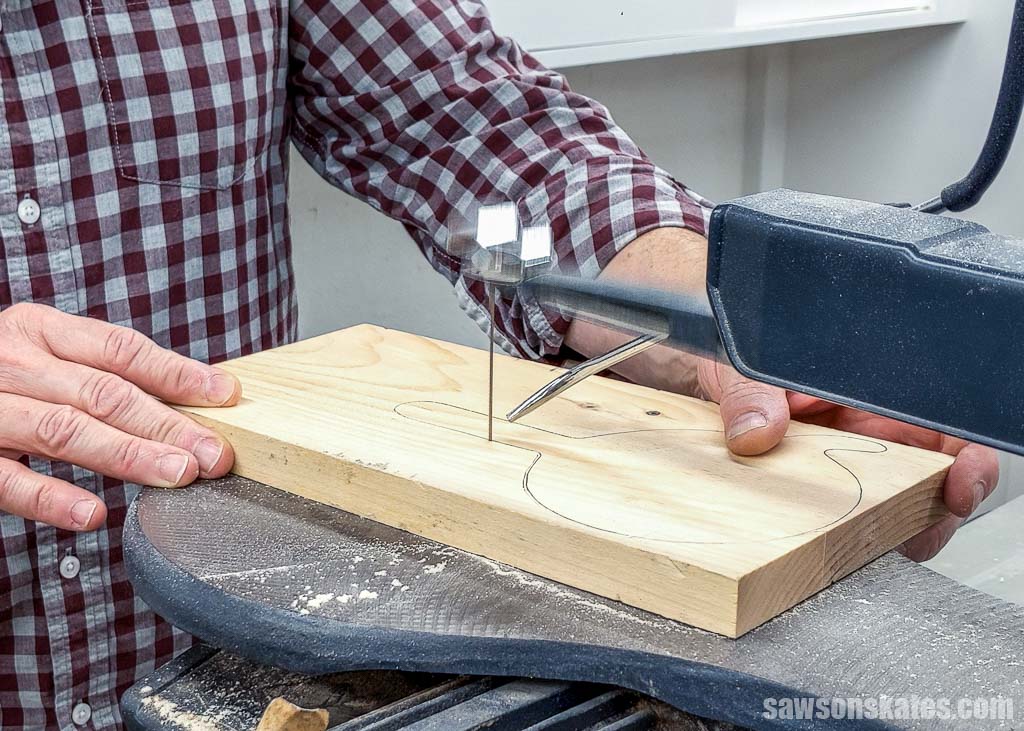
I cut the paddle using a scroll saw, but a jigsaw or band saw may also work.
I used a 18.5 teeth per inch (TPI) scroll saw blade to cut the paddle’s curves. This blade is ideal for making smooth cuts, and it is relatively thin, making it easy to maneuver around tight corners.
For best results, I recommend cutting slightly outside the line and then fine-tuning your cut by sanding up to it.
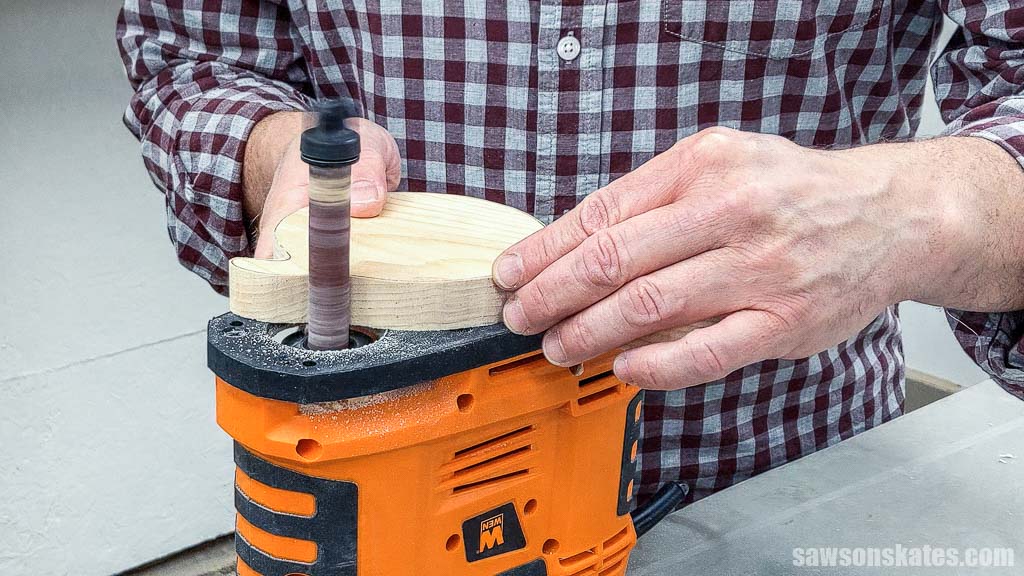
I think the easiest and fastest way is to smooth the inside curves using a portable spindle sander, and I used a disc sander for the outside curves and straight edges of the handle. If you don’t have these tools, you can smooth them by hand with sandpaper.
Next, I used a handheld router with a roundover bit to smooth out the edges. This step is optional, but it makes the game more comfortable to hold. Again, you can use sandpaper if you don’t have a router.
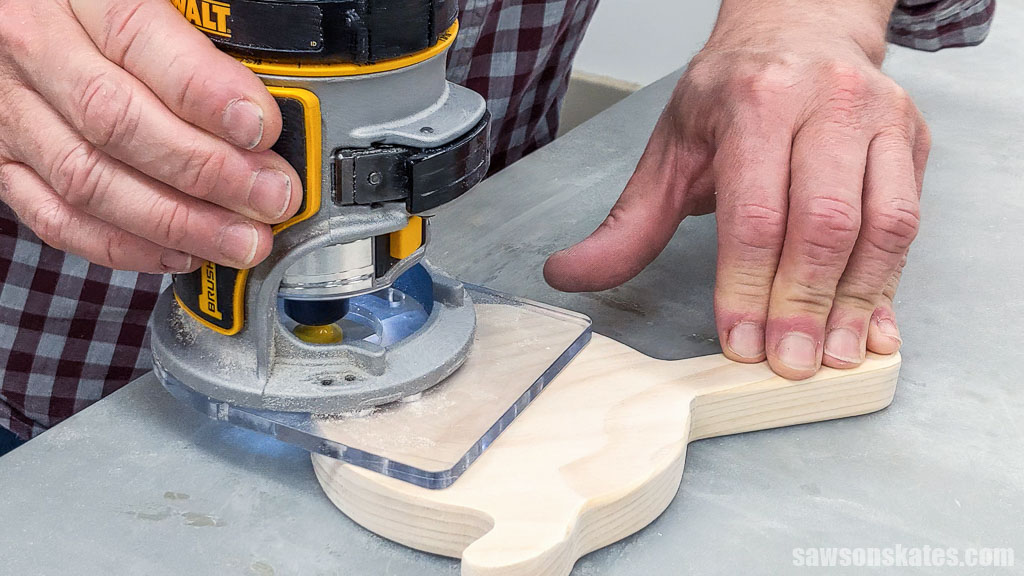
The bit couldn’t fit into the tight corners, so I used sandpaper to smooth those edges in a similar shape.
I also suggest sanding down the sides of the hook’s tip to make it thinner and easier to catch the ring.
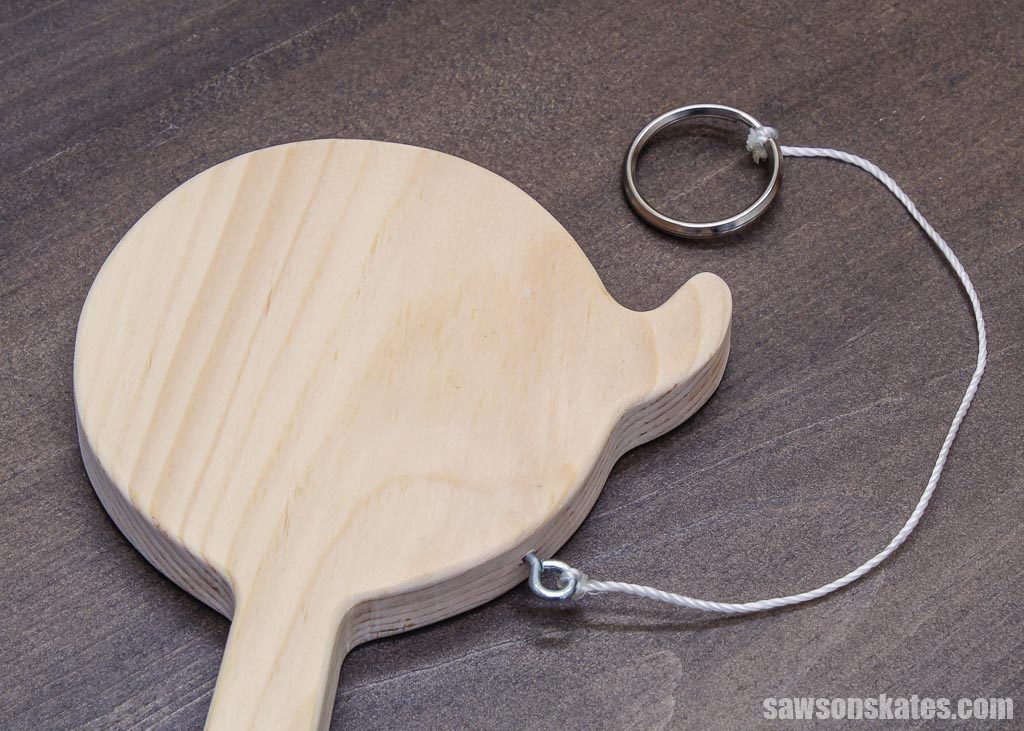
Step 2. Attach the Ring
I started by marking the location for an eye hook about halfway between the paddle’s hook and the handle with a pencil.
Then, I used an awl to make a starting point for the eye hook.
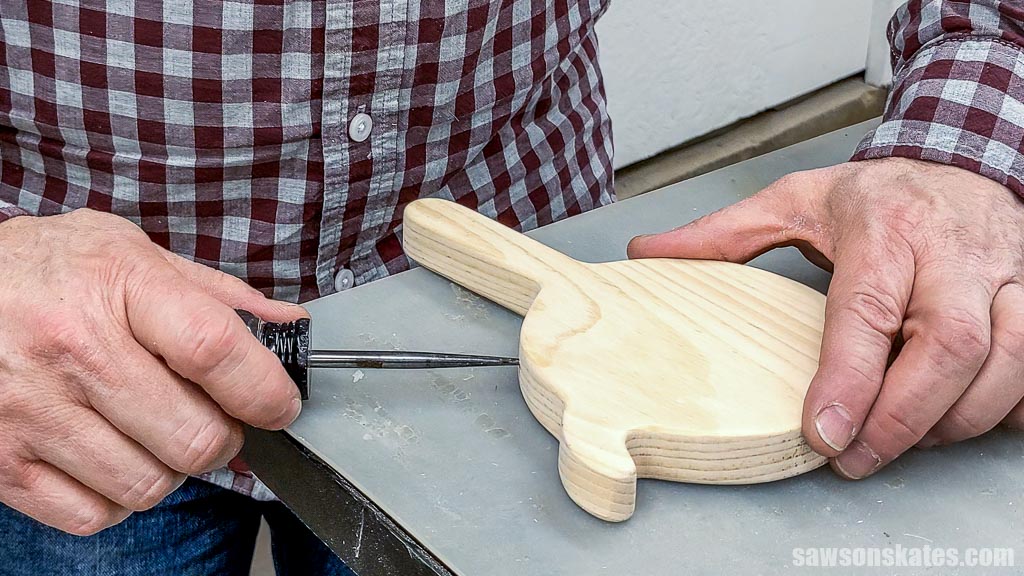
I began screwing the eye hook in with my fingers and then used my awl to twist it the rest of the way.
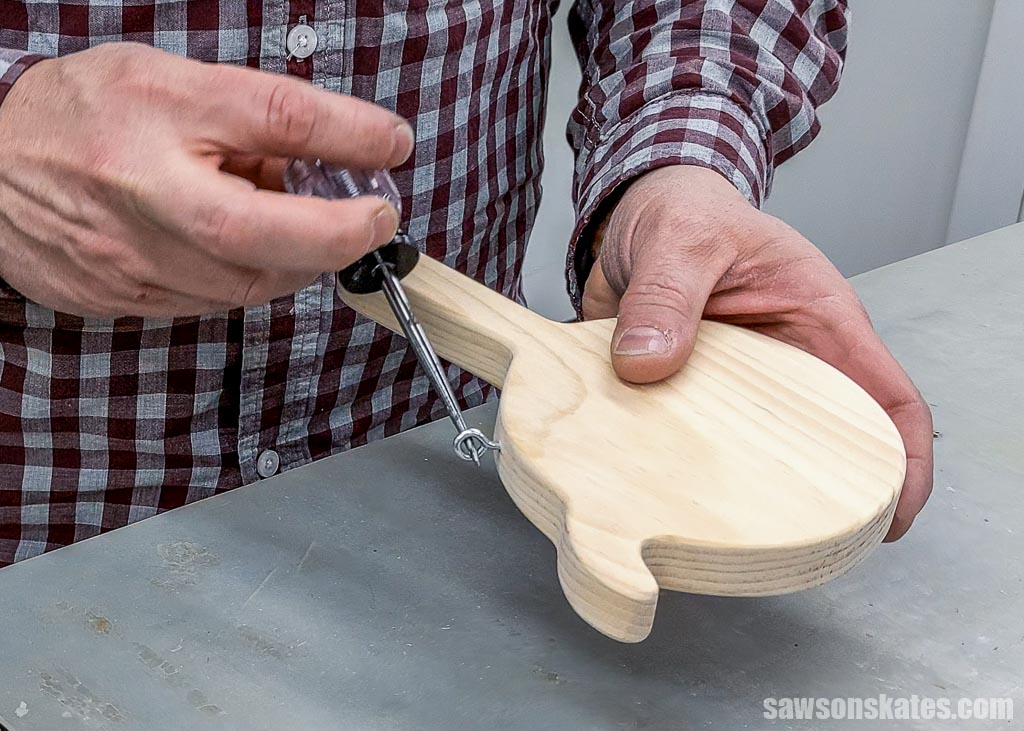
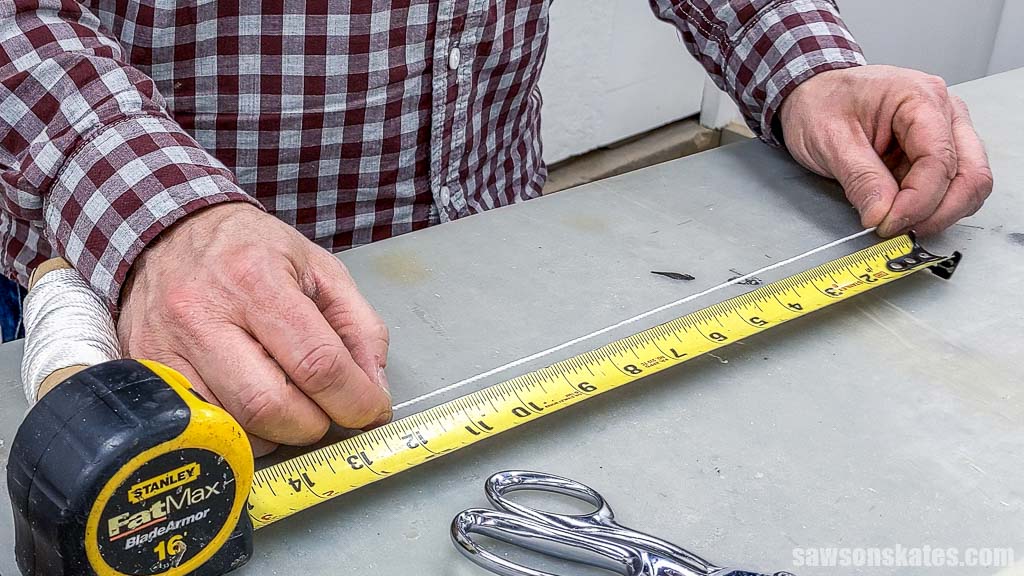
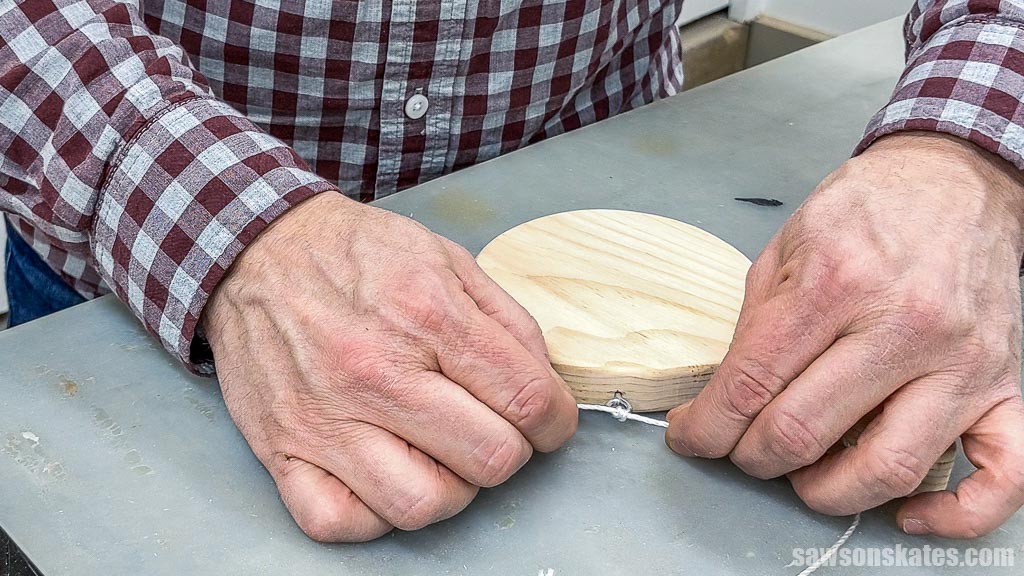
I cut a piece of nylon string to length, but you could use almost anything you have on hand, such as yarn or twine.
Then, I tied a knot around the eye hook.
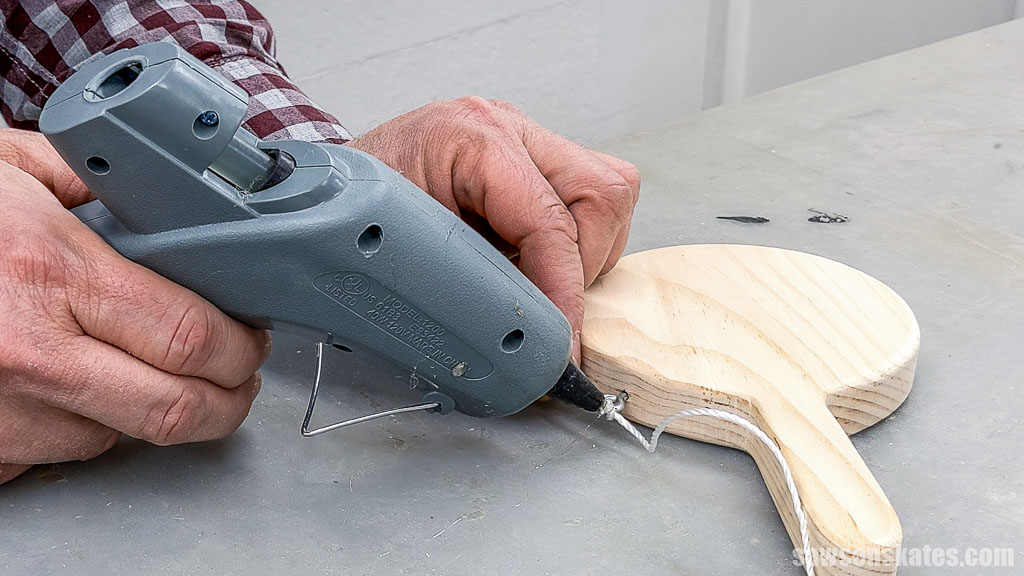
The inspiration piece used hot glue to keep the knot from coming untied, which I thought was a fantastic idea.
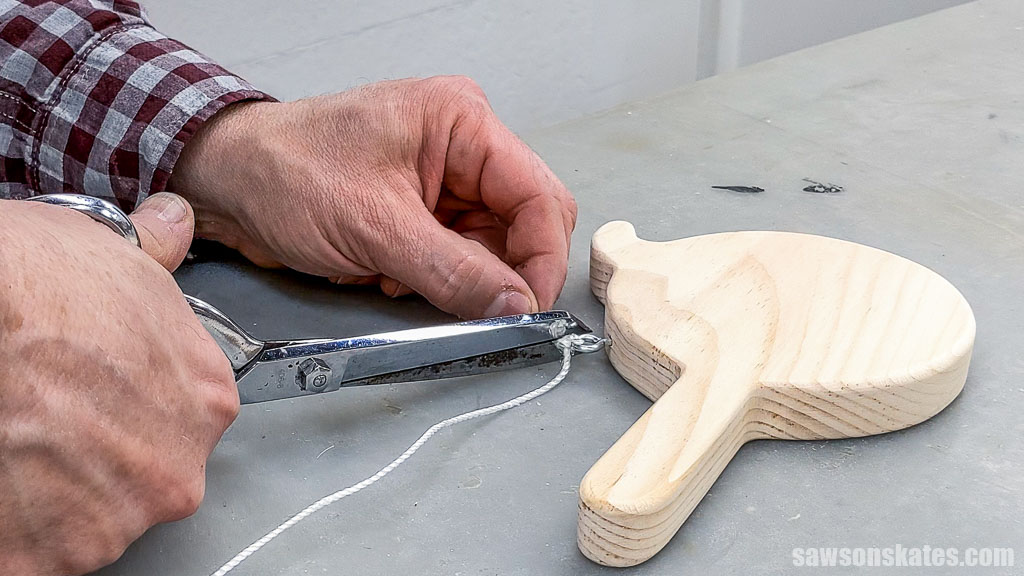
Next, I trimmed the extra string.
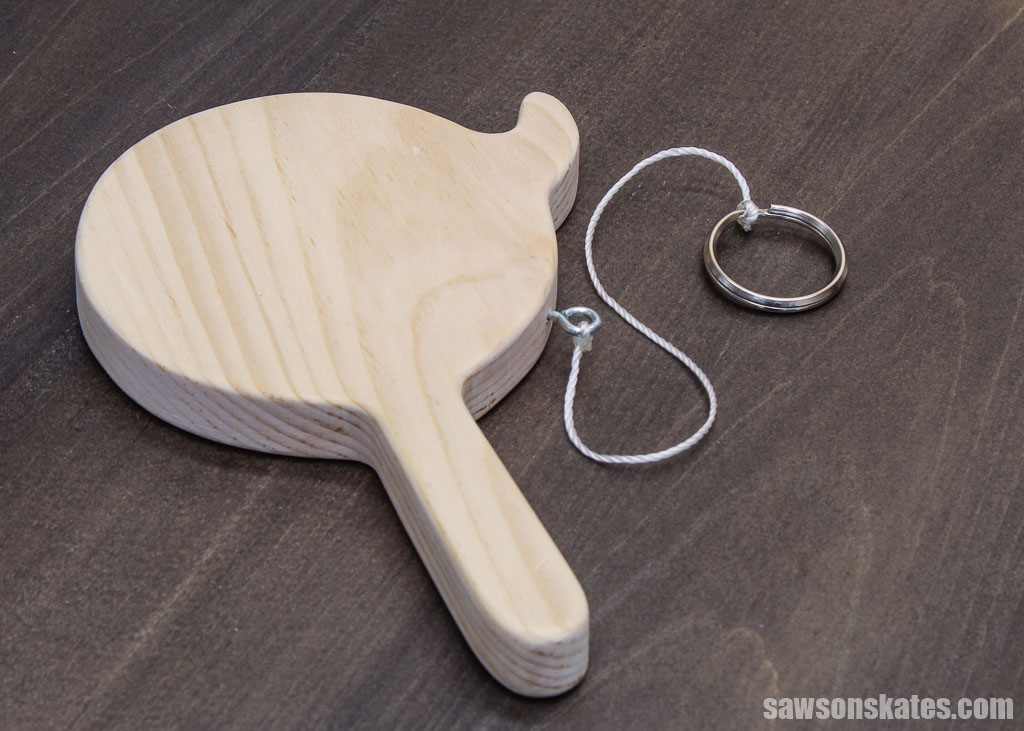
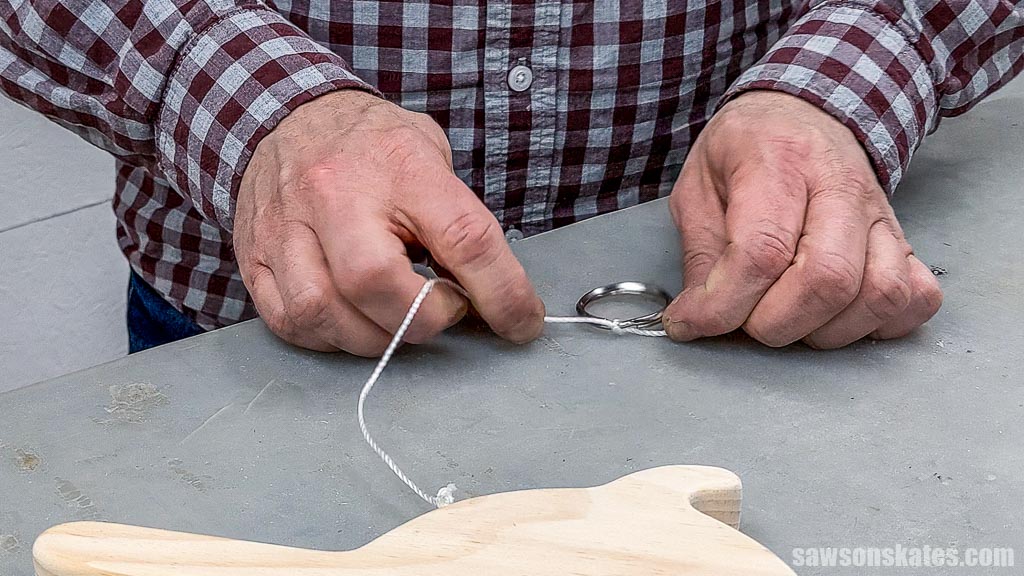
I repeated these steps for the ring. You can buy a key ring or remove one from an old key chain.
That’s it. Your hook-and-ring game is ready for action!
Final Thoughts
This DIY handheld hook-and-ring game is easy to make and provides hours of entertainment. Plus, it’s a great way to use up scrap wood.
Don’t wait. Get your free plan (including the detailed instructions and measurements) now!
Thank you for stopping by. If you enjoyed this tutorial, would you please take a moment and pin it to Pinterest? I’d really appreciate it!
Pin This For Later

Hi there – I’m Scott, a woodworking enthusiast and creator of Saws on Skates, a site I started in 2015 to share easy-to-follow tutorials, space-saving shop tips, and project inspiration for DIYers at any skill level. Learn more about my woodworking journey here.