DIY Mini Pallet Coasters (Fun & Functional)
Impress your guests and protect your furniture with these DIY mini pallet coasters. They’re easy to make with scrap wood and this step-by-step plan.
What Should I Build Next?
That's the question I help answer.
Every week, I send woodworking ideas to 17,000 DIYers who love building things.
You'd fit right in.
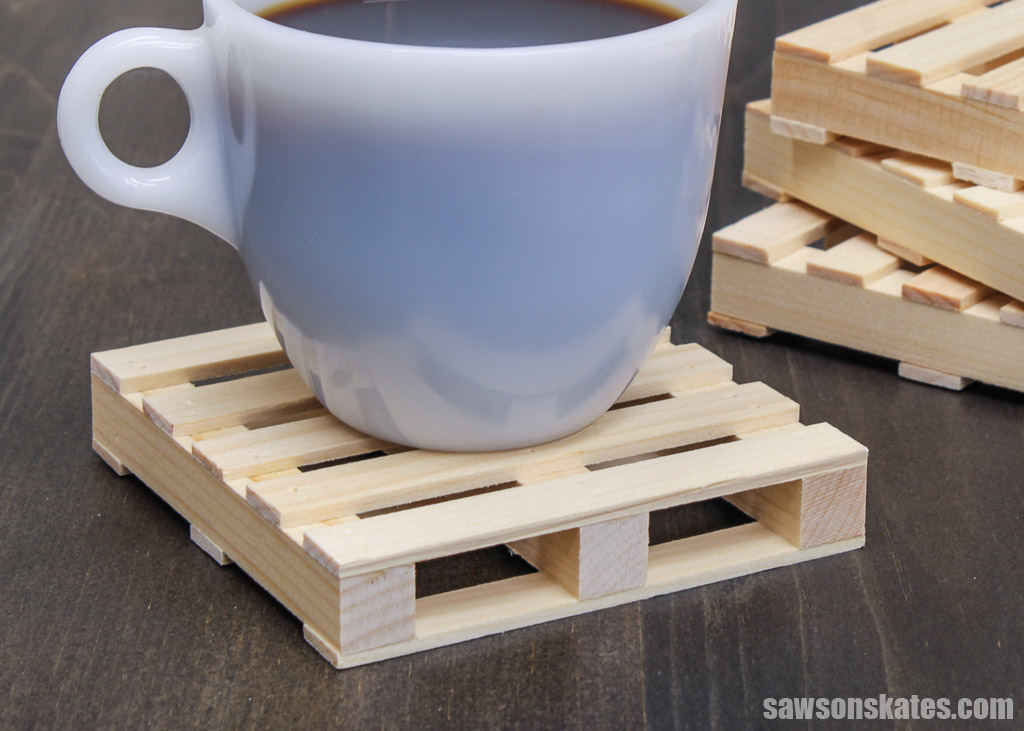
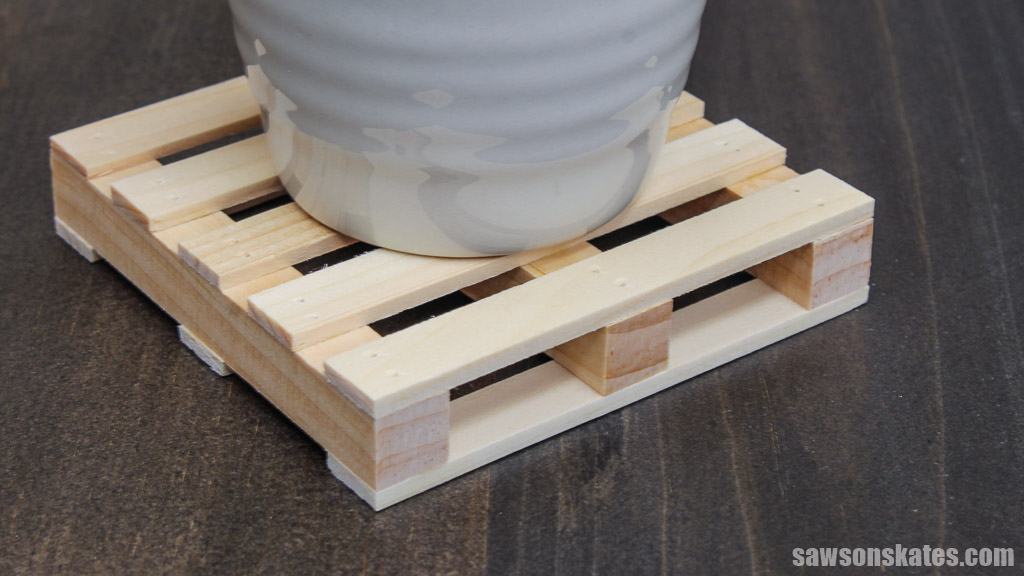
Are you tired of unsightly ring stains on your furniture? Want an easy, affordable, attractive solution? Step up your entertaining game with these DIY mini pallet coasters – the perfect combination of rustic charm and functionality.
With just a few simple tools, you can transform scrap wood into unique coasters that will protect your furniture and impress your guests.
So, grab your scraps, and let’s get building!
Table of Contents
- Inspiration for These DIY Mini Pallet Coasters
- What Tools Do You Need?
- What Wood Should You Use?
- How Do You Seal the Mini Pallet Coasters?
- How to Make DIY Mini Pallet Coasters
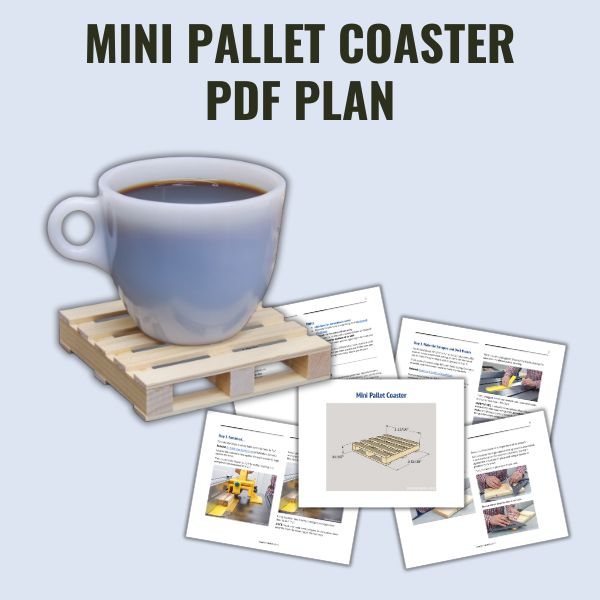
- Get the PDF Plan
This article contains affiliate links. If you purchase from these links, I may earn a small commission at no additional cost to you. Visit my site policies for more information.
Inspiration for These DIY Mini Pallet Coasters
My friend owns several vacation rentals, and one of the items he constantly needs to replace is coasters. He usually buys them at a thrift store and puts out a stack at the beginning of the ski season, but they’re all gone by springtime.
So when I saw a photo of miniature pallet coasters in a Facebook woodworking group, I had an idea: I could make him an endless supply of coasters using the scrap wood I have in my shop!
Here’s what I came up with: an easy-to-make mini pallet-shaped coaster that’s attractive and functional, protecting your furniture from ugly water stains.
What Tools Do You Need?
I used only four tools to make these mini pallet coasters: a table saw and my Grr-Ripper to rip the thin strips to width, my miter saw to cut them to length, and a pin nailer to assemble them.
What Wood Should You Use?
You could use almost any scrap wood to make a mini pallet coaster, but I recommend using a softwood like pine. I used a pin nailer to attach the parts, which can have difficulty penetrating hardwoods like oak.
I had a pile of narrow strips left over from ripping 1x boards to width, and that’s what I used to make my coasters.
Related: Beginner’s Guide to Wood Sizes
How Do You Seal the Mini Pallet Coasters?
Pallets often look worn and weathered when you find them on the side of the road, so I left my coasters unsealed for an authentic look. However, if you want to protect yours from spills and stains, you can coat them with a clear polyurethane spray.
DIY Mini Pallet Coasters
Printed Plan
Get the PDF plan here (includes detailed instructions, measurements, and bonus tips)
Supplies
- Wood (per the printed plan)
- Wood Glue
- ½” Pin Nails
- 1” Pin Nails
Tools
- Tape Measure
- Miter Saw
- Table Saw
- Zero Clearance Tape (if you don’t have a zero clearance insert)
- Grr-Ripper
- Pin Nailer
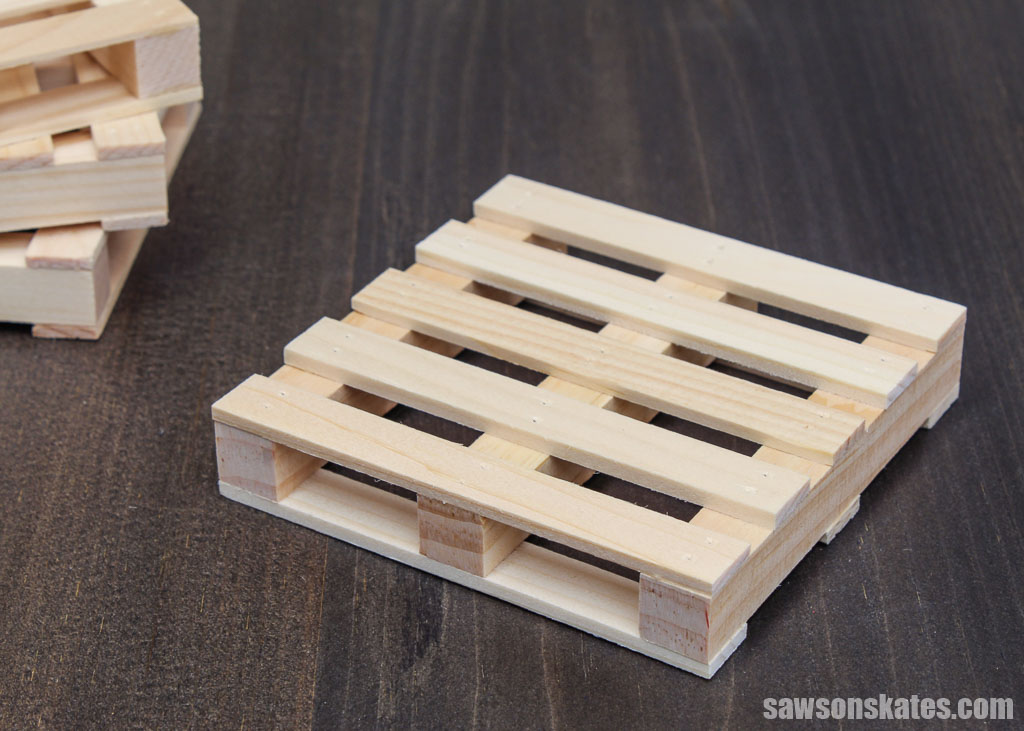
Step 1. Make the Stringers and Deck Boards
You’ll need narrow strips to make your pallet coaster.
Narrow wood strips can fall through the gap between the saw blade and the throat plate, or get caught causing a dangerous situation called kickback.
Related: Table Saw Kickback (Cause, Injuries & How to Avoid It)
A zero clearance insert is a replacement for your saw’s standard throat plate reducing this gap to nearly zero, making it less likely for workpieces to fall or become caught. However, I don’t have one for my table saw.
Instead, I used this zero clearance tape.

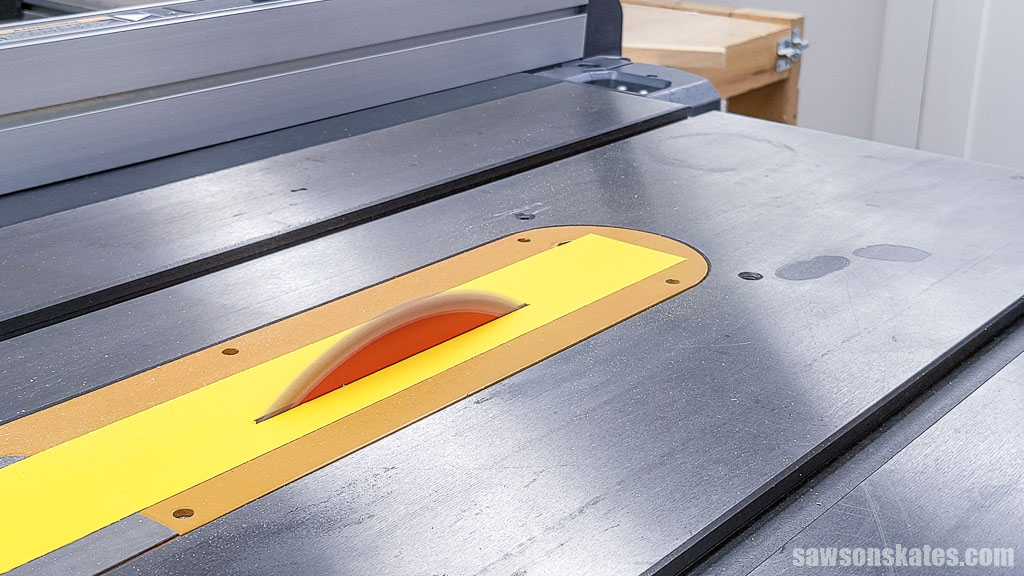
With the saw unplugged, I lowered the blade, placing the tape over the throat plate’s opening.
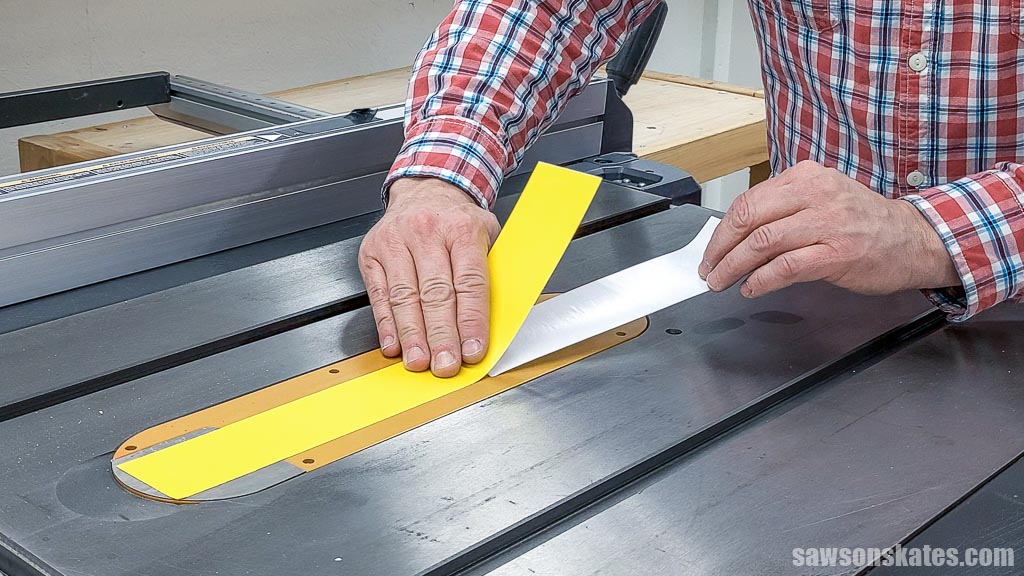
Then, I plugged in the saw, turned it on, raised the blade, and cut an opening in the tape.
SAFETY FIRST: I noticed in these photos that I forgot to reinstall my table saw’s riving knife, an essential safety feature that helps prevent kickback. Always install the riving knife before using your table saw.
To make the strips, I adjusted my saw’s rip fence and used a Grr-Ripper to rip the material to width.
Related: 21 Table Saw Safety Rules (& Mistakes to Avoid)
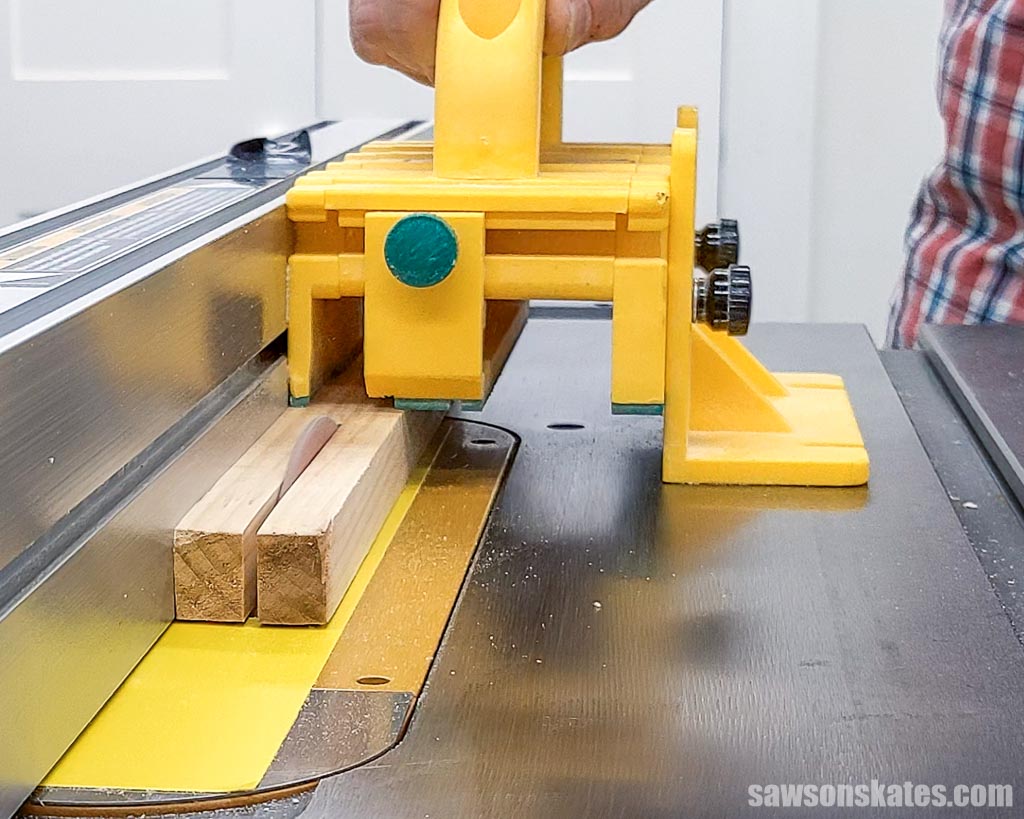
Next, I placed the workpiece’s side against the table, ripping it to width and creating the stringers and deck boards.
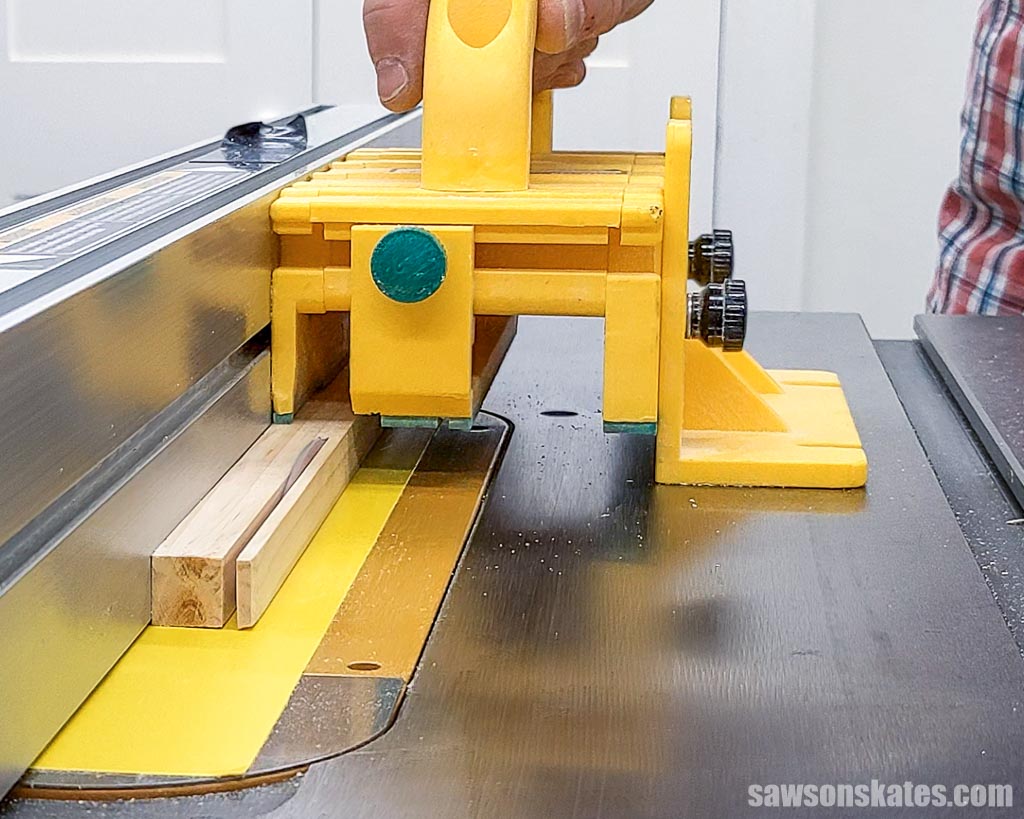
Then, using my miter saw, I cut four stringers and eight deck boards to length.
NOTE: You’ll only need three stringers for the coaster, but I used the fourth to make a jig in the next step.
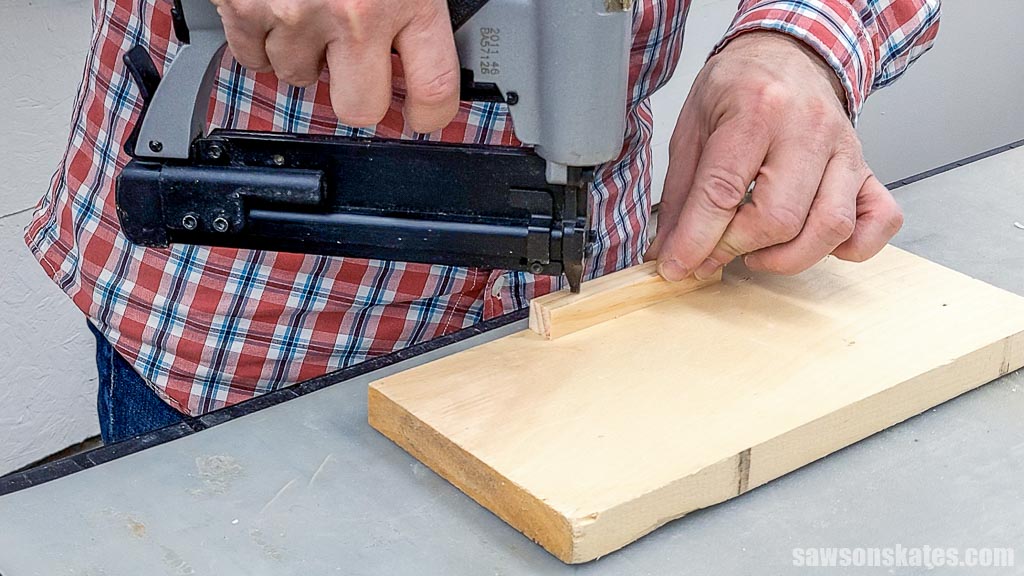
Step 2. Make the Jig
To help with aligning the pieces, I think it’s helpful to make a jig.
I used a scrap board for the base, but almost any piece of scrap wood will work.
I placed the extra stringer from Step 1 against the board’s edge and attached it with pin nails.
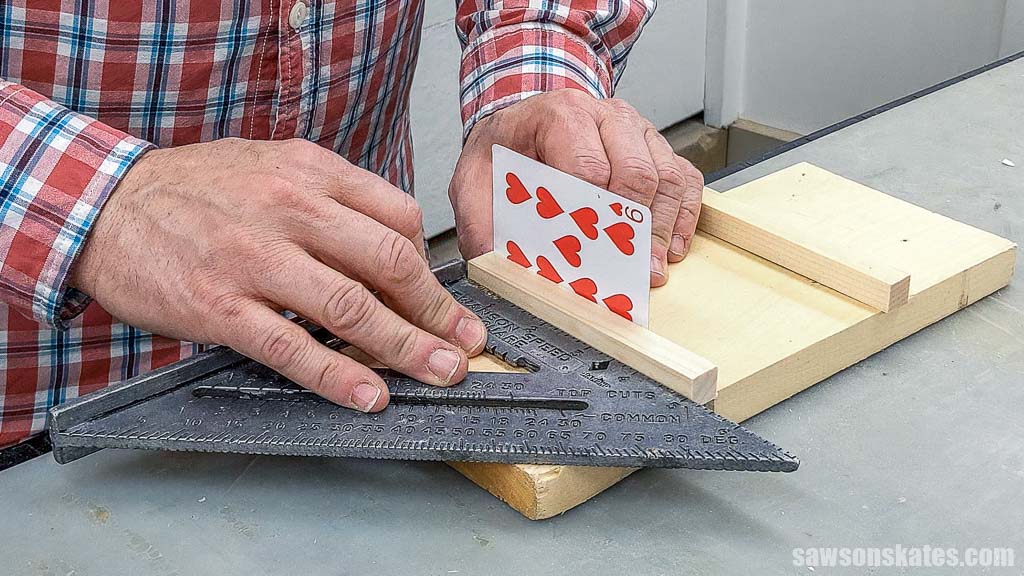
Next, I cut two pieces of stringer material to length.
So the coaster won’t get stuck in the jig once it’s assembled, I used a playing card to allow for clearance, placing it against the edge piece’s end and using a square to position the new piece. Then, I tacked it in place with pin nails.
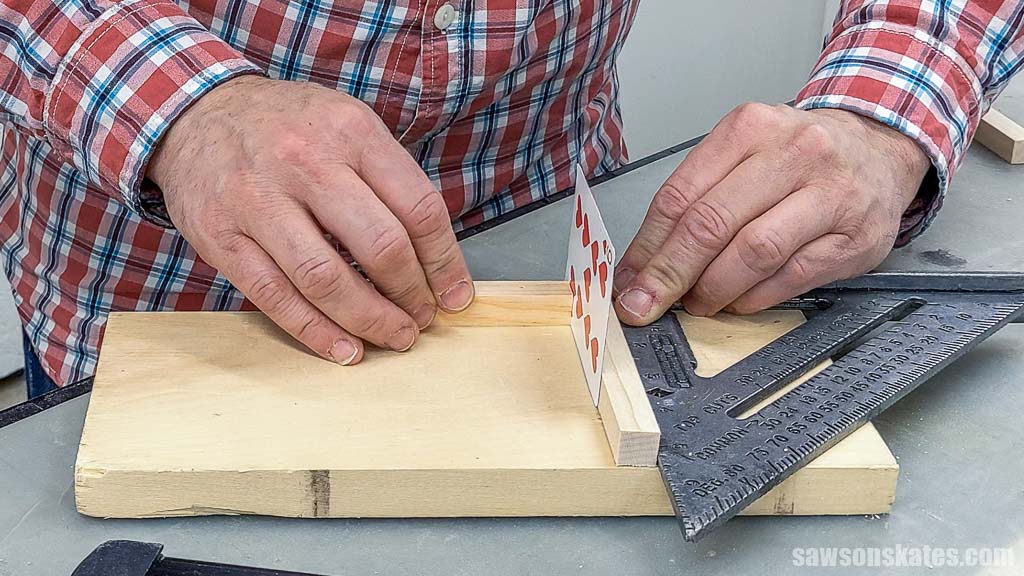
Repeat these steps for the other side.
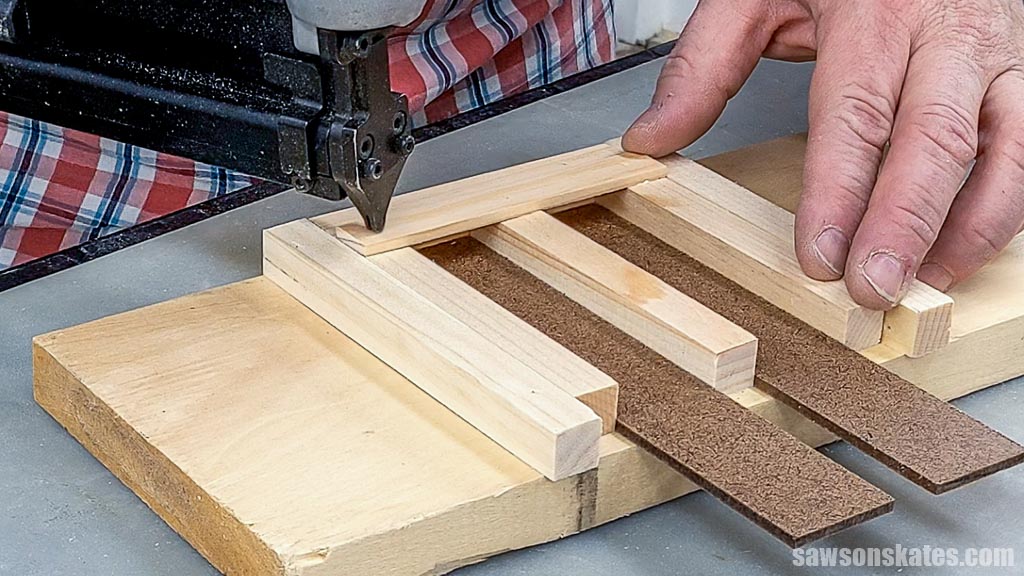
Step 3. Assemble the Mini Pallet Coaster
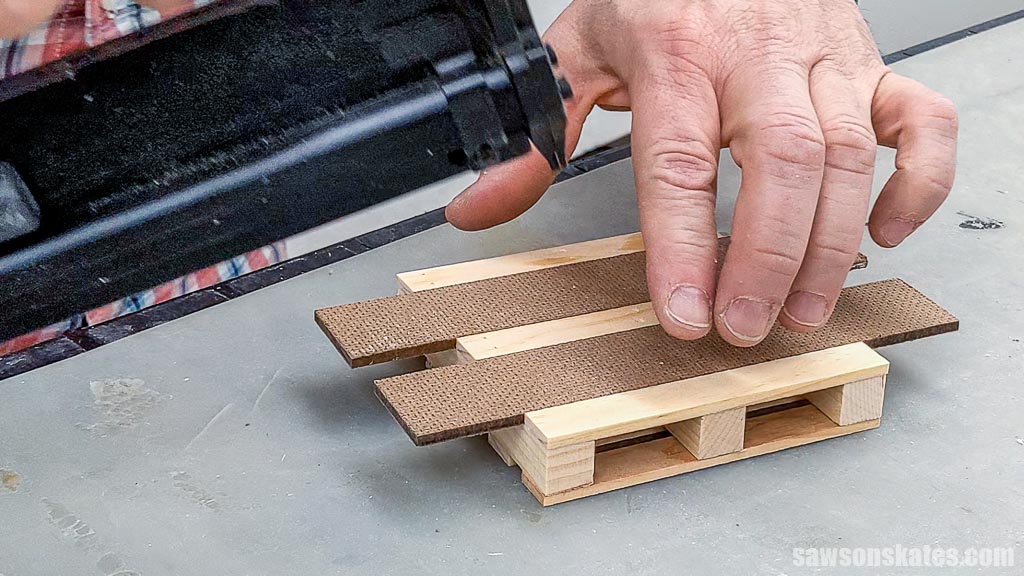
To help with spacing the stringers, I ripped two pieces of hardboard to width. I also cut four pieces of deck board material to length to act as spacers between the deck boards.
I placed three stringers and the hardboard spacers in the jig.
I applied a small dab of glue to the top of each stringer, positioned a deck board, and attached it with pin nails.
TIP: To make your coaster look more like an authentic pallet, I recommend using two pin nails per stringer.
I placed a spacer against the first deck board, applied a dab of glue to each stringer and positioned the second deck board. Attach using nails. I repeated these steps for the remaining deck boards.
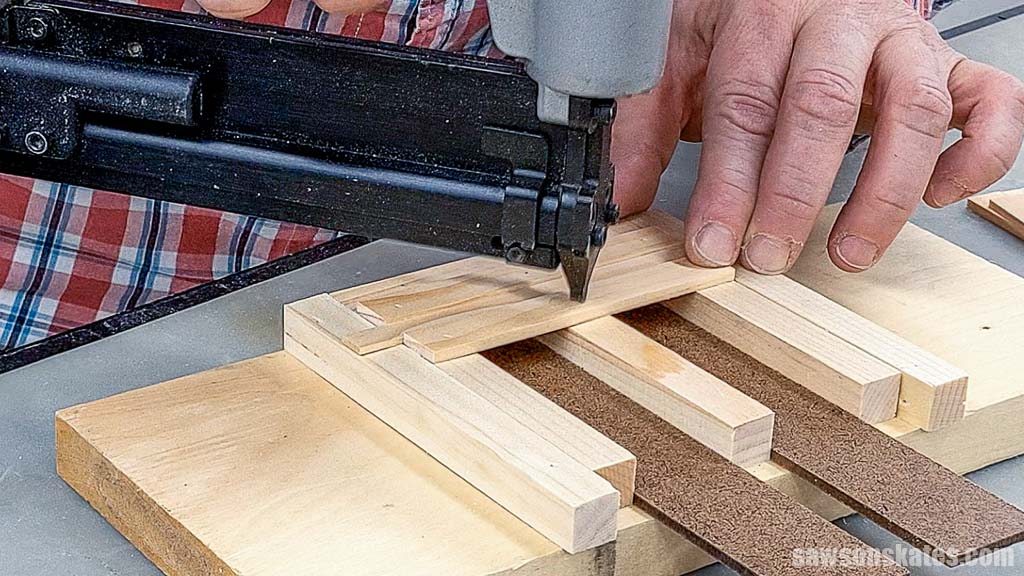
I flipped it over once the deck boards were installed and removed any glue squeeze out using a toothpick.
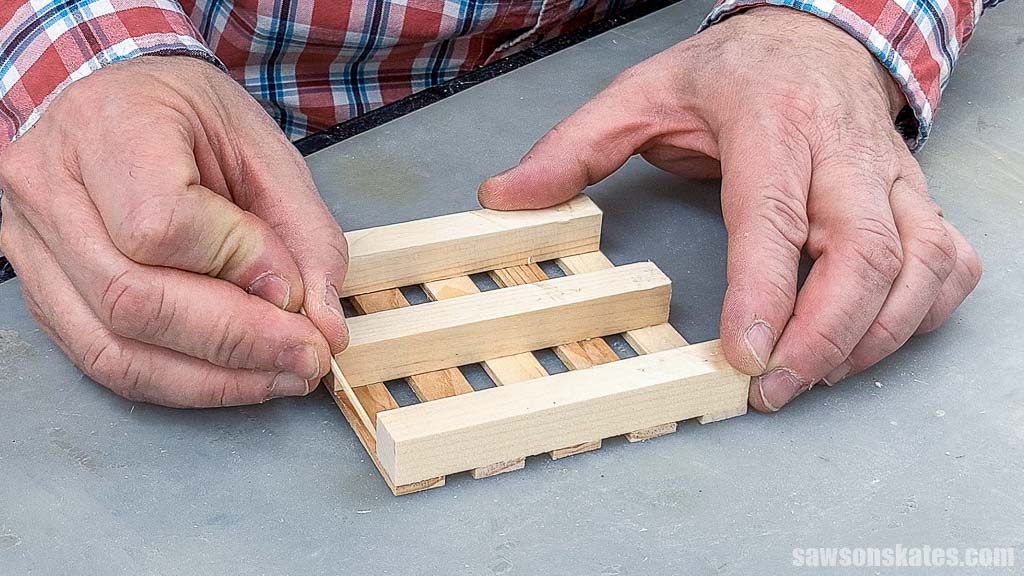
Next, I applied a dab of glue to the underside of each stringer, positioned a deck board and attached it using pin nails.
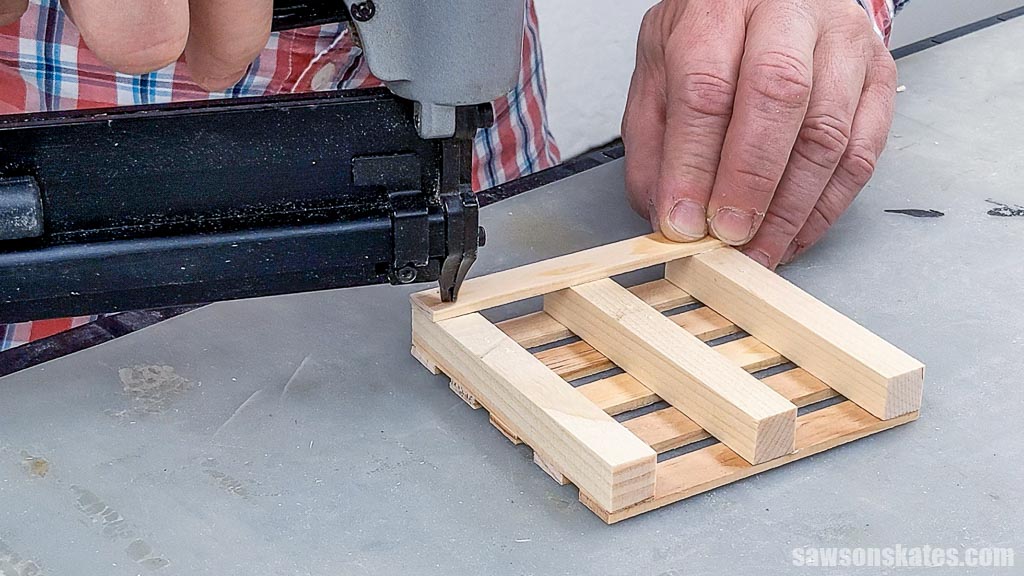
I placed the hardboard spacer against the first deck board, applied a dab of glue to each stringer and positioned the middle deck board. Attach using nails.

I repeated these steps for the remaining deck board.
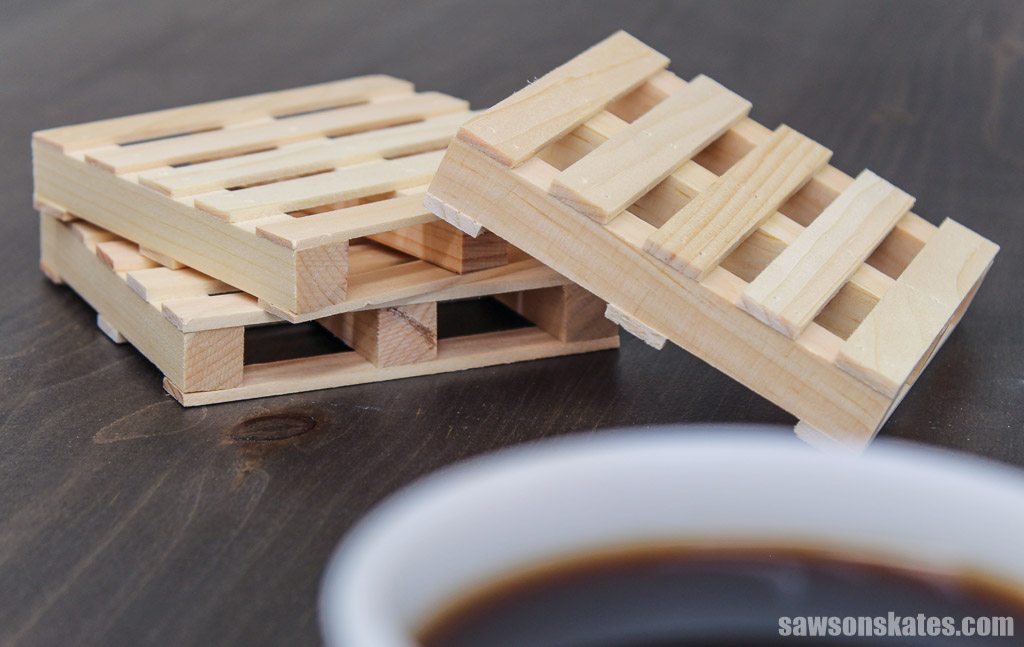
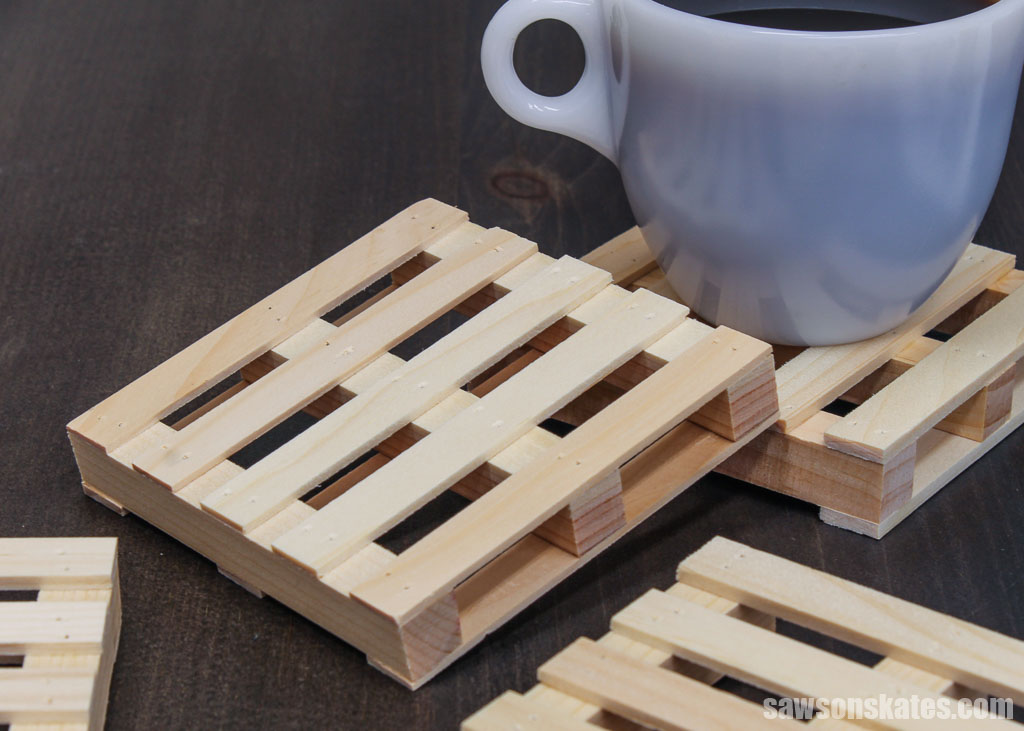
That’s it. Your mini pallet coaster is complete!
Includes:
- List of tools and materials
- Complete measurements (in inches)
- Easy-to-follow instructions
- Step-by-step photos
- Detailed diagrams
or get the best value:
Final Thoughts
These DIY mini pallet coasters are a fun and functional addition to any home, protecting your furniture while impressing your guests. They’re easy and affordable to make, using just a few simple tools and scrap wood.
Don’t wait. Get your PDF plan (including the detailed instructions and measurements) now!
Thank you for stopping by. If you enjoyed this tutorial, would you please take a moment and pin it to Pinterest? I’d really appreciate it!
Recommended For You
Pin This For Later

Hi there – I’m Scott, a woodworking enthusiast and creator of Saws on Skates, a site I started in 2015 to share easy-to-follow tutorials, space-saving shop tips, and project inspiration for DIYers at any skill level. Learn more about my woodworking journey here.