Ortur Laser Master 2 Assembly (Step-by-Step Guide)
The Ortur Laser Master 2 is a versatile laser engraver that works with various materials, including wood, metal, and glass. In this guide, we’ll focus on how to use it for woodworking and what you need to get started. Plus, I’ll walk you through a step-by-step assembly tutorial to get your laser up and running in no time.
As of 2025, the Ortur Laser Master 2 is still available, but Ortur has released upgraded versions with better performance and safety features. The Ortur Laser Master 2 S2 is the latest iteration, featuring an improved laser module with an ultra-fine spot size for more detailed engraving. It’s compatible with different laser modules, including the LU2-2 and the more powerful LU2-4 models.
Consider the LU2-4-LF (Long Focus) module for woodworking and cutting applications. It’s designed to handle deeper cuts in wood while still providing precise engraving. If you’re looking for even more cutting power, the Ortur Laser Master 2 Pro S2 is a great upgrade. It supports the same laser modules but offers faster speeds (up to 15,000mm/min) and extra safety features like position protection and an emergency stop switch.
Both models are available directly from Ortur and authorized retailers.
This isn’t a sponsored post. I purchased the Ortur Laser Master 2 myself and had it shipped to my home.
Table of Contents
- What is the Ortur Laser Master 2?
- Choosing the Right Wood for Laser Engraving and Cutting
- What You Need to Get Started
- How to Assemble the Ortur Laser Master 2
- My Experience: First Impressions & Thoughts
This article contains affiliate links. If you purchase from these links, I may earn a small commission at no additional cost to you. Visit my site policies for more information.
What is the Ortur Laser Master 2?
The Ortur Laser Master 2 is a laser engraver designed for precision marking and cutting. According to LaserAX , laser engraving is “a process that vaporizes materials into fumes. The laser beam acts as a chisel, incising marks by removing layers from the surface of the material.”
The Laser Master 2 comes in three versions: 7-watt, 15-watt, and 20-watt. For this tutorial, I’m using the 20w model.
All three versions offer a large engraving area of 400mm × 430mm (approximately 15-¾” × 17”), giving you plenty of space for various projects.
Ortur has also released upgraded models, like the Ortur Laser Master 2 S2 and Ortur Laser Master 2 Pro S2, which offer improved speed, precision, and additional safety features. If you’re considering an Ortur engraver, it’s worth comparing the different versions to find the best fit for your needs.

What Can You Make With the Laser Master 2?
The Laser Master 2 is a great choice for hobbyists, DIYers, and small business owners looking to create custom engravings on wood, metal, and glass. You can also use it to cut wood up to 3mm thick. Whether you’re personalizing gifts, making signs, or starting a laser engraving business, this machine offers a balance of affordability and performance.
For this tutorial, I’ll focus on how you can use it for woodworking.
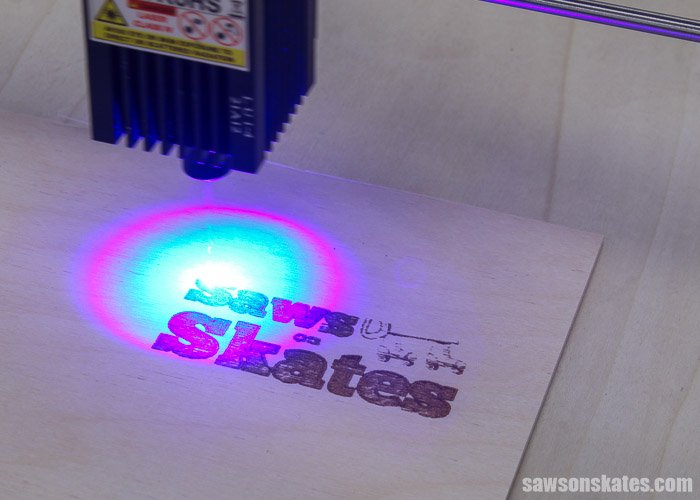
Engraving Wood Projects
A laser engraver makes adding custom designs to wood easy, allowing you to personalize coasters, cutting boards, signs, and more with names, text, logos, or even detailed photos. Whether you’re creating unique gifts or adding a decorative touch to your woodworking projects, laser engraving opens up endless creative possibilities.
Related: How to Make DIY Mini Pallet Coasters
Cutting Wood Projects
The Laser Master 2 isn’t just for engraving; you can also cut wood up to 3mm thick, making it great for 3D projects like Christmas ornaments, wooden jewelry, boxes, puzzles, and even dollhouse furniture.
The difference between engraving and cutting is the number of passes the laser needs to make over the material. In my experience, most engraving projects require just one pass to achieve the desired look. However, cutting takes multiple passes, typically six to seven for 3mm plywood.
Since cutting takes more time, it’s something to keep in mind when planning projects. For example, I made some 2-¼” in diameter wooden refrigerator magnets, and the process took around 30 minutes between engraving and cutting.
Choosing the Right Wood for Laser Engraving and Cutting
You can use the Laser Master 2 on almost any type of wood, but different species react differently to the laser. That’s why it’s always a good idea to test your material first and adjust the speed and power settings as needed to get the best results.
When it comes to cutting, the laser can handle wood up to 3mm thick. I’ve been working with these 1.5mm and 3mm plywood sheets, but from what I’ve read, solid wood is easier to cut than plywood because the glues used in plywood can be tougher for the laser to cut through, requiring more passes.
What You Need to Get Started with the Ortur Laser Master 2
Before using the Laser Master 2, you’ll need a few essentials:
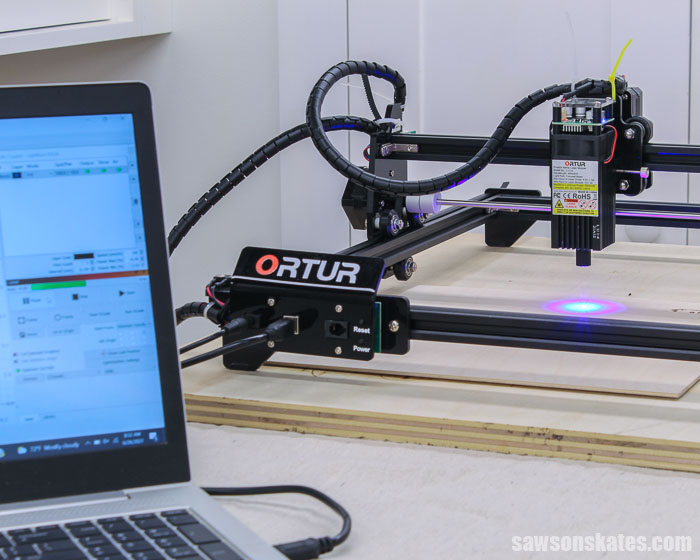
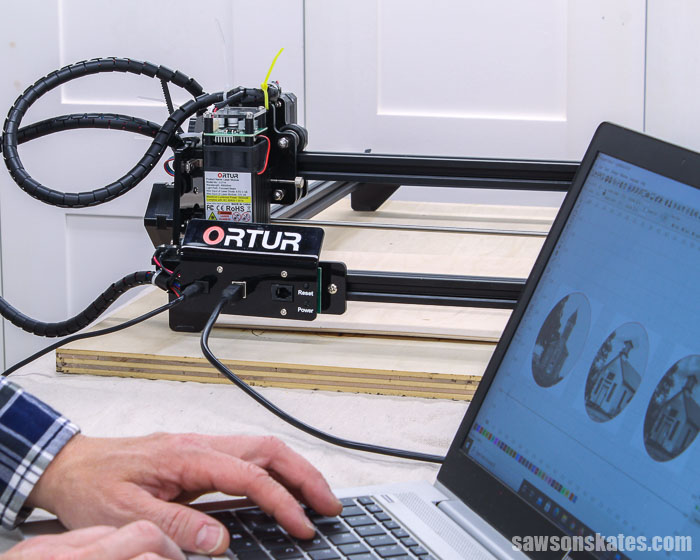
- A Computer – The engraver needs to be connected to a computer to run engraving and cutting jobs.
- Software – The instruction manual recommends LightBurn, a popular, user-friendly software for controlling the engraver. LightBurn offers a 30-day free trial; after that, it costs $99 per year. I’ve found it easy to use, especially with the help of a few YouTube tutorials.
Setting Up Your Workspace
You’ll need a dedicated area for your laser engraver. Here are a few important considerations:
- Good Ventilation – The laser burns the wood as it engraves or cuts, which produces smoke. A well-ventilated space will help manage fumes.
- Safety First – Always keep an eye on the engraver while it’s running. Wood can catch fire, so never leave it unattended.
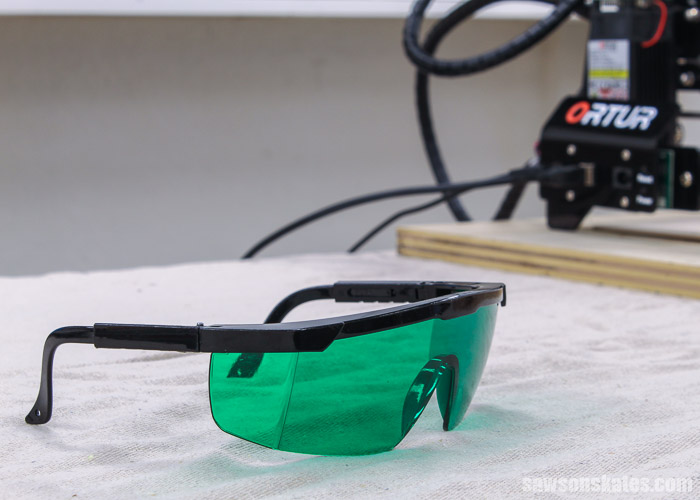
Laser Safety Glasses
Protecting your eyes is critical when using a laser engraver. The Ortur Laser Master 2 comes with a pair of safety glasses, but you may want to upgrade to a higher-quality pair for better protection. The laser is powerful enough to cause severe eye damage, so wearing the proper safety gear is a must.
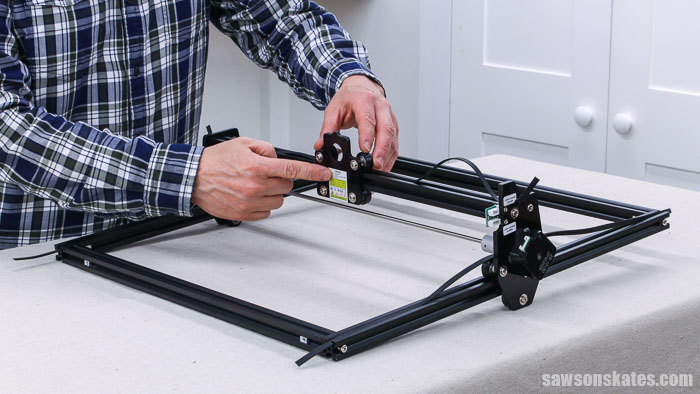
Step 1. Assemble the Frame
Slide a corner connector in each end of one of the long aluminum frame sections.
💡 TIP #1: Be sure to slide the corner connectors into the groove with the holes.
💡 TIP #2: Be sure the corner connector can slide along the groove. If the connector can’t move past the end, remove it and insert the other end into the groove.
Slide a short frame section onto each corner connector and attach through the predrilled holes with 2 long screws.
💡 TIP: The connectors might need to be adjusted later, so don’t fully tighten the screws.
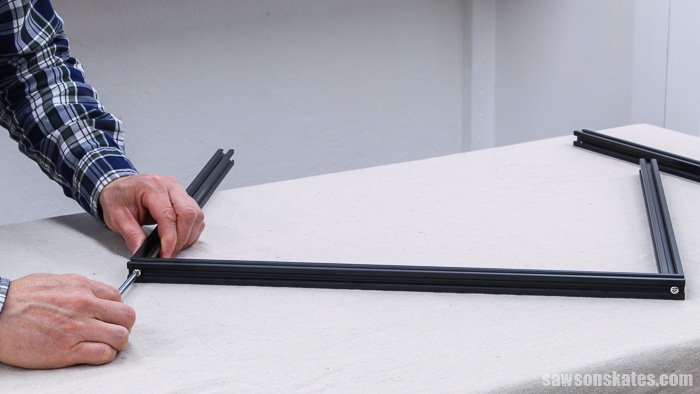
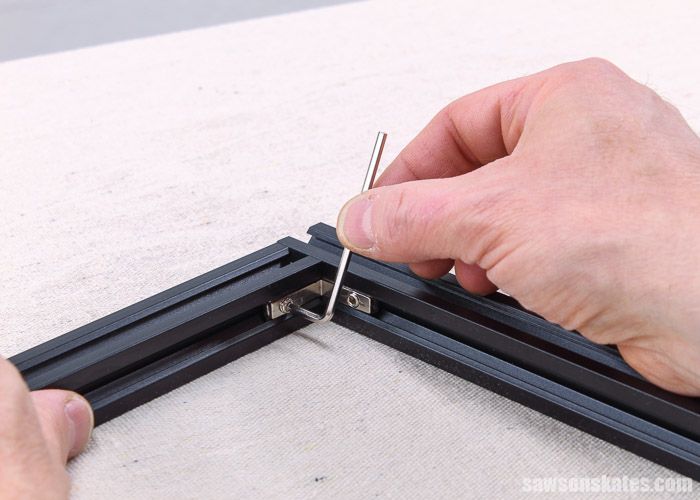
Use the Allen wrench to tighten the set screws in the corner connectors. Again, don’t fully tighten the set screws.
Slide 2 nuts into the outside groove of each of the short frame sections.
Slide a corner connector in each end of the second long aluminum frame section. Then attach through the predrilled holes with the remaining 2 long screws. Again, don’t fully tighten the screws.
❕ IMPORTANT: It’s a good idea to make sure the frame is square.
I measured from corner to corner. If the measurements are the same, the frame is square.
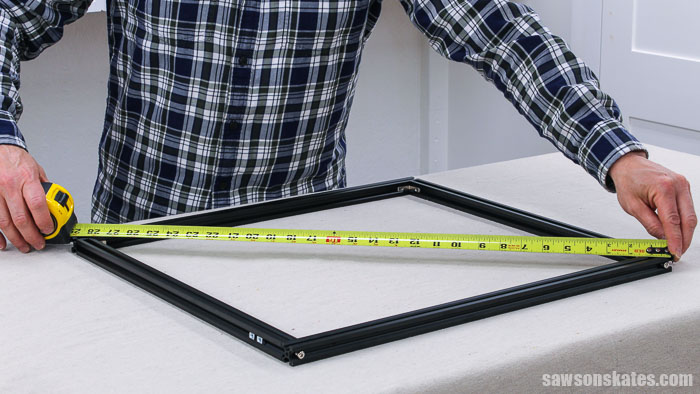
My measurements were not the same, so I loosened the screws and adjusted the frame until the measurements were the same.
Then, I tightened the four screws and eight set screws.
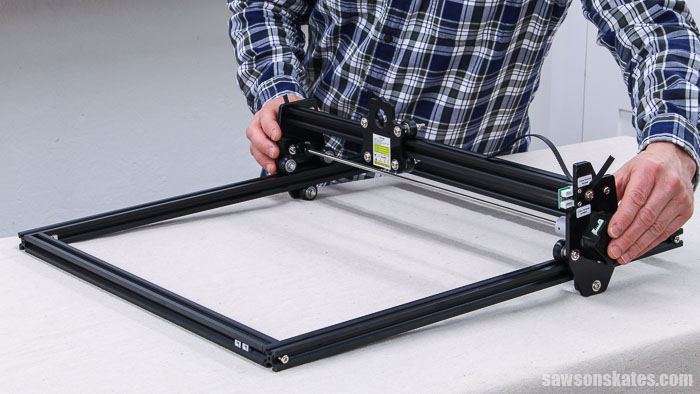
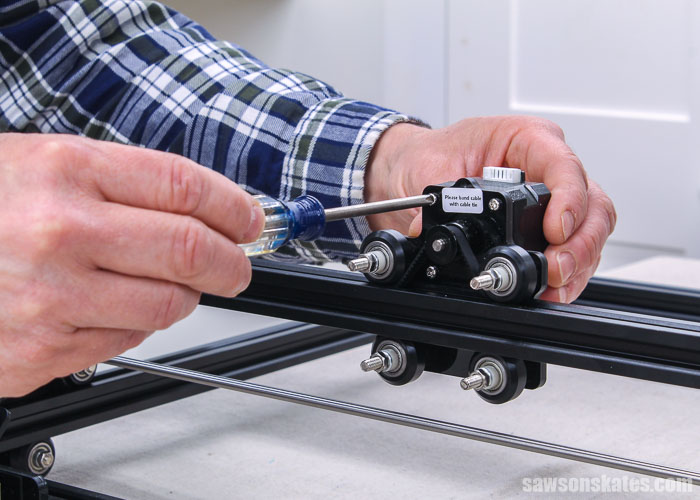
Step 2. Install the X-Axis Assembly
Slide the X-axis assembly on the short sides of the frame. The single roller goes on the bottom and the two rollers go on the top.
Step 3. Attach the Feet
The manual said to “take out 2 timing belts” but it didn’t say what to do with them. So I placed them in the grooves with the ridges facing down.
Next, I installed the rear feet. The flat side of the X-axis assembly is the back of the engraver.
Push the timing belt through the flat hole in the foot.
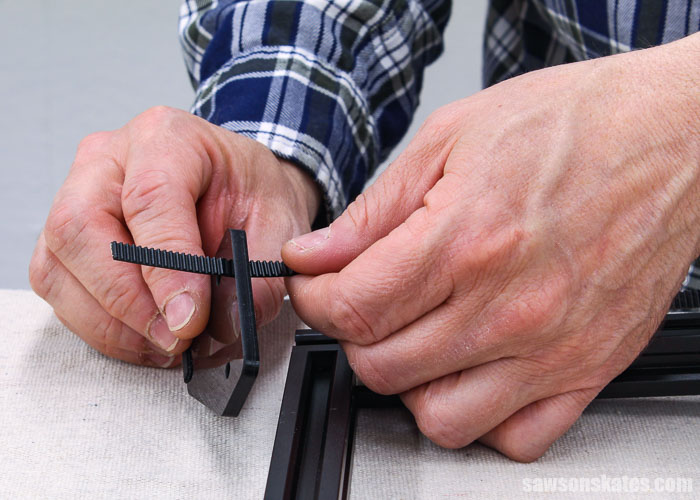
Attach it to the hole drilled into the frame with a washer and small screw. Attach the other side of the foot with a screw into the nut in the groove. Repeat for the other rear foot.

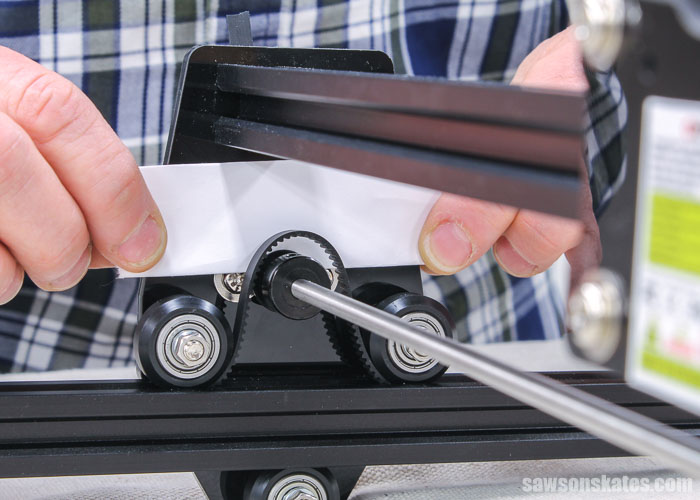
Then, working from the feet that were just installed, slide the belt under the first roller, over the timing pulley, and under the second roller.
💡 TIP: I used the tip of a pencil to help work the belt around the rollers and pulley.
I held a piece of paper behind the belt so that you can see how it goes over the timing pulley.
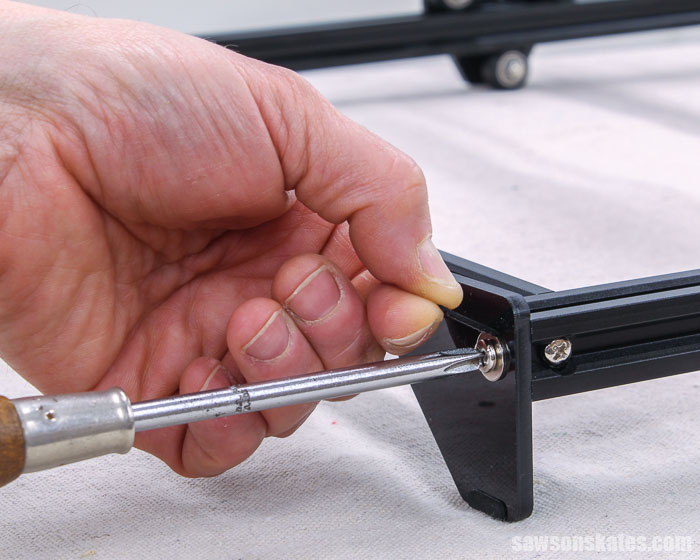
Next, I installed the front foot. When you’re looking at the front of the engraver, the foot is on the right side. Remember, the flat side of the X-axis assembly is the back of the engraver.
Push the timing belt through the flat hole in the foot. Attach it to the hole drilled in the frame with a washer and small screw. Attach the other side of the foot with a screw into the nut in the groove.
Next, slide a nut into the top groove of the left side (the side without a foot).

Push the timing belt through the flat hole in the Y-limit switch.
Attach it to the nut in the frame with a washer and small screw. Just snug the screw, the switch can be positioned properly later.
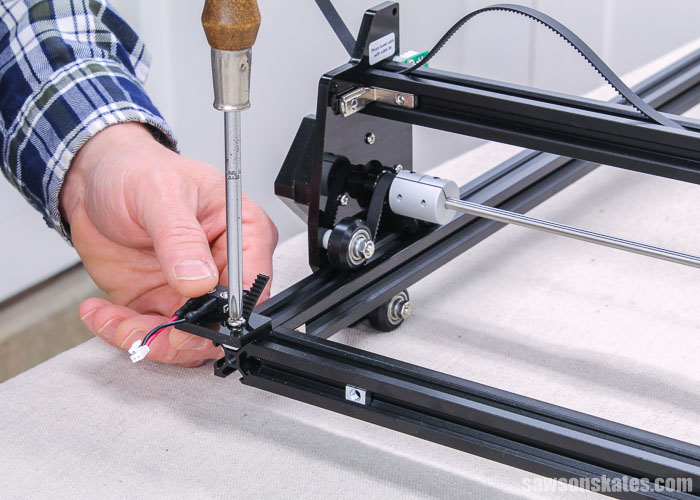
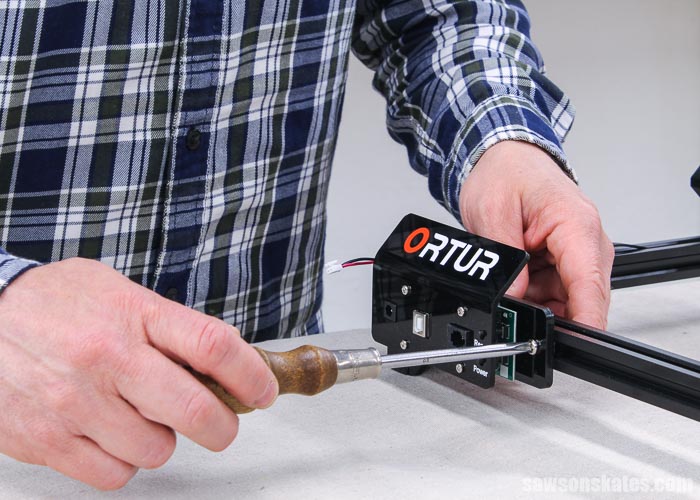
Then, attach the mainboard assembly with two short screws through the holes drilled in the frame and the nut in the groove.
Next, I tested the movement of the X-axis assembly. It felt like there was some slack in the belt, so I loosened the screw and adjusted the tension of the belt.
Step 4. Install X-Axis Motor
Gently pull up on the X-axis belt, position the motor from the back of the engraver with the gear under the belt.
💡 TIP: Be sure the wire connector on the motor is facing up.
Attach the motor with four screws.
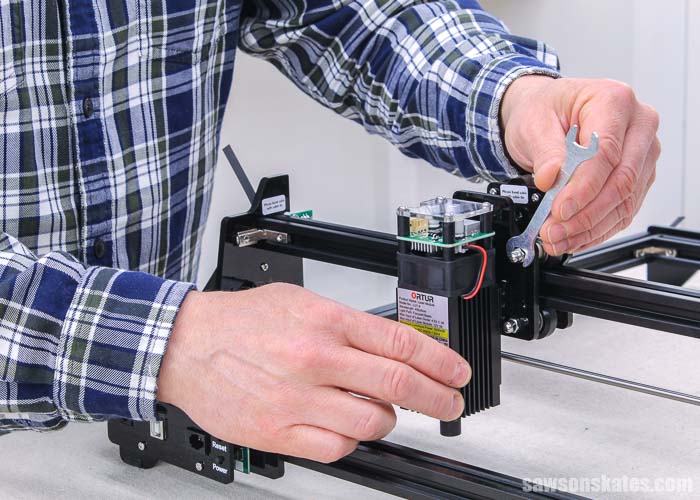
Step 5. Attach the Laser
Remove the paper from the backboard.
💡 TIP: I had trouble lifting the paper, so I used an X-Acto knife to lift the corner of the paper.

Attach the laser to the backboard using 2 screws.

Attach the laser assembly using 4 cap nuts.
💡 TIP: Be sure the laser is pointing down.
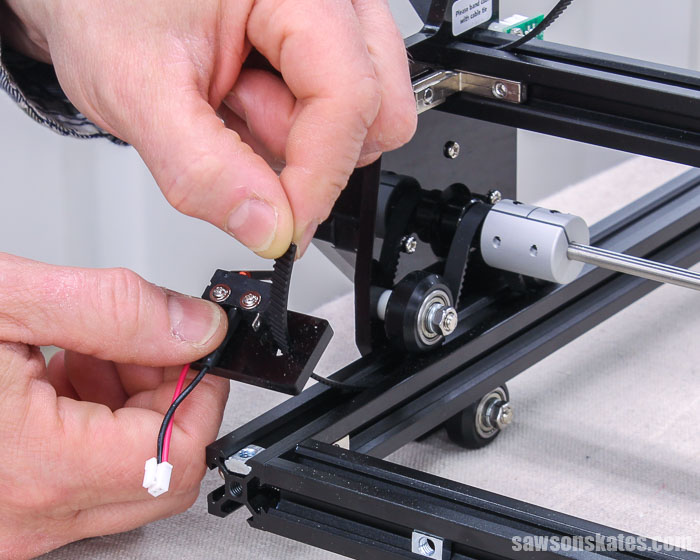
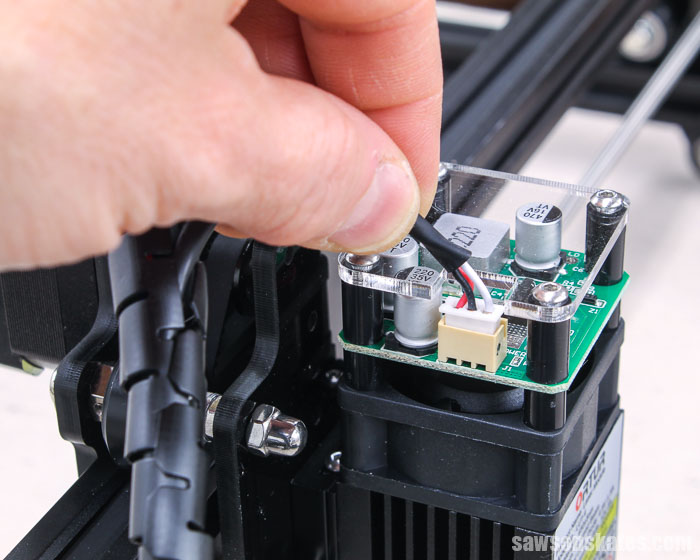
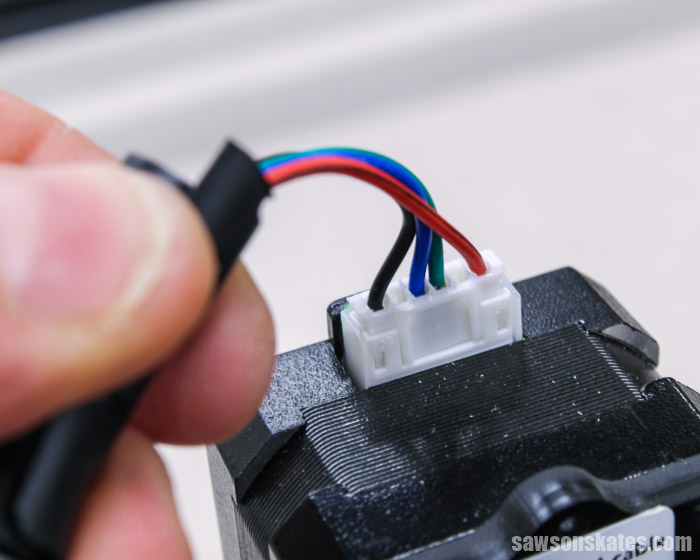
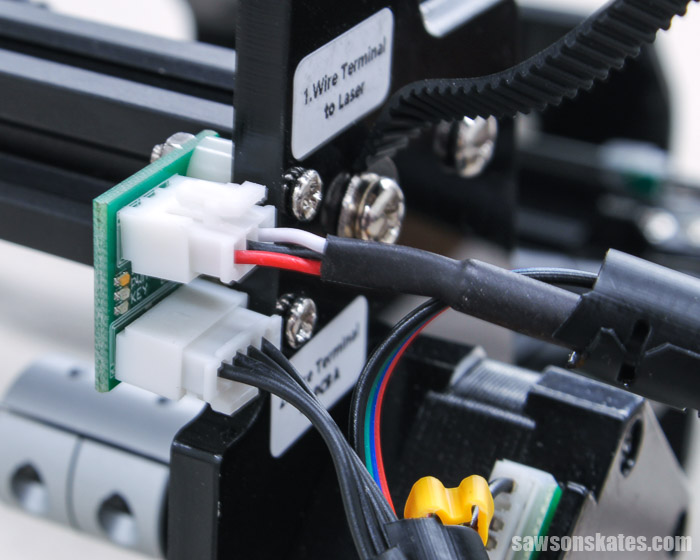
Step 6. Connect the Wires
The three pin plug connects to the laser.
The six pin plug connects to the X-axis motor.
On the side of the X-axis assembly, the three pin plug connects at the top, the four pin plug connects at the bottom, and the six pin plug connects to the Y-motor.
At the mainboard, the 4 pin plug connects at the top, the two pin plug connects at the bottom, and the eight pin plug connects at the bottom.
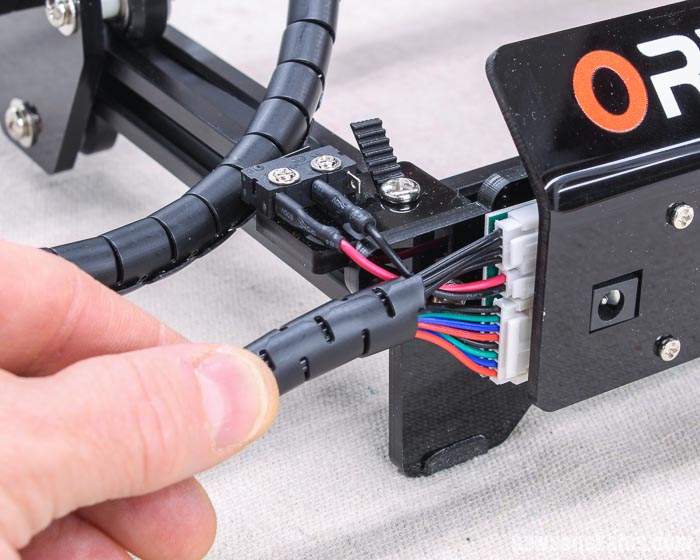
After the wires were connected, I used the enclosed zip ties to connect the wires to the engraver. I noticed sometimes the wires would get caught while the engraver was in use. So I removed some of the original zip ties, repositioned the wires, and reattached them with some zip ties that I had on hand.
The Laster Master 2 is now ready to use.
My Experience with the Ortur Laser Master 2: First Impressions & Thoughts
This was my first experience with a laser engraver, and overall, I’m happy with my purchase. Compared to other models I researched, the Ortur Laser Master 2 was one of the more affordable options while still offering a good range of features.
Assembly & Setup
The instruction manual’s assembly instructions were a bit vague, but thankfully, the actual setup process was quick and straightforward. All the pieces fit together correctly, and even with no prior experience, I had it up and running in no time.
What Surprised Me
I wouldn’t necessarily call these “cons,” but there were a couple of things I didn’t expect:
- Engraving and cutting take longer than I anticipated, but the results are worth the wait.
- Cutting requires multiple passes; it can take six to seven passes to cut through 3mm plywood. Higher-powered lasers can do this faster but also have a much higher price.
Like anything new, there’s a learning curve. My first few projects didn’t turn out as well as I had hoped, but I’ve gotten much better results with practice.
My First Upgrade: Air Assist
Through research and trial and error, I’ve learned that adding an air assist system can make a big difference in cutting performance. Air assist blows away smoke and debris, allowing the laser to cut more efficiently and reducing burn marks.
To add air assist, you’ll need:
- A nozzle attachment for the laser (which can be 3D printed or purchased from Etsy).
- A hose to connect the nozzle.
- An aquarium pump to provide airflow.
This will be my first upgrade to the Laser Master 2, and I’m excited to see how much it improves cutting performance.
Where to Get the Ortur Laser Master 2
I purchased my Laser Master 2 here and had it shipped directly to my home. If you’re looking to get one, you can find it from several retailers, including Ortur’s website. Be sure to compare prices and check for bundles or upgrades that might be available.
Final Thoughts
The Ortur Laser Master 2 is a versatile, budget-friendly laser engraver that’s great for woodworking projects. It’s easy to assemble, simple to use, and offers a balance of affordability and functionality. Whether you’re engraving or cutting, it’s a great tool to add personalization and detail to your work.
Thank you for stopping by. If you enjoyed this tutorial, would you please take a moment and pin it to Pinterest? I’d really appreciate it!
Pin This For Later

Hi there – I’m Scott, a woodworking enthusiast and creator of Saws on Skates, a site I started in 2015 to share easy-to-follow tutorials, space-saving shop tips, and project inspiration for DIYers at any skill level. Learn more about my woodworking journey here.
I just wondered now after having used this engraver, would you consider purchasing a larger size? I know I purchased a smaller CNC machine and within a month, I was wishing I had waited and bough a larger machine. We appreciate your weekly information and enjoy reading about new DIY projects.
Thanks, Frank
Hi Frank – Thank you for the compliments. So far I’m pleased with my purchase… it does just about everything that I want to do. Larger engravers can cost several thousand dollars. The Laser Master 2 was a fraction of that. For me, it was a good way to get into laser engraving. And an inexpensive way to make sure it was something that I enjoyed doing. That said, down the road, I may consider purchasing a larger engraver.
How much did the Kit & accessories cost to get it to a turn-key system?
Does it come with design software and is it user friendly?
Hi Terry – I bought the Laser Master 2 here. As I mentioned in the What Do You Need to Use the Laser Master 2 section of this tutorial it does not come with design software. I also mentioned: “The instruction manual for the Laser Master recommends using LightBurn. LightBurn has a free 30 day trial period. After 30 days there is a $40 annual charge. So far I’ve found LightBurn easy to use (with the help of a few YouTube videos!)”
The only items I purchased for this tutorial were the Laser Master 2 and the LightBurn software.
Despite what the website says, the Ortur LM2, and pretty much any diode laser, is not really meant to cut wood. Especially not the “20w” since you’re not actually getting 20w output, it’s more like 4.5w. It also cannot engrave metal, unless it is anodized aluminum, and in that case, it’s just removing the top coat off and not really “engraving” it. You’ll burn out the laser fast if you try to cut wood with it, just fyi. I have 3 of these machines and they are good for engraving, but you gotta be really focused to get good results.
I bought the same exact system and software. I agree 100% with your finding and tutorial.
I to thought this was a great starting point for my investment in time and expense.
Good burning to all.