Kreg Straight Edge Guide: How to Use and Review
Circular saws, jigsaws, and routers are handy tools, but let’s be honest; getting a perfectly straight cut with them isn’t always easy. That’s why I was excited to try out the Kreg Straight Edge Guide. It’s designed to help circular saws and jigsaws make precise rip cuts, and it even works with a trim router for clean, accurate grooves and dados.
In this tutorial, I’ll show you how I set it up and how it works. Plus, I’ll share my honest thoughts. Will this be a tool I reach for again?
A big shoutout to my friends at Kreg Tool for sending me the Straight Edge Guide to test out. They provided the tool, but as always, all opinions are my own.
Table of Contents
- Compatible Tools: What Works with the Straight Edge Guide?
- What Can You Cut with the Kreg Straight Edge Guide?
- How to Assemble the Straight Edge Guide
- My Honest Review of the Kreg Straight Edge Guide
This article contains affiliate links. If you purchase from these links, I may earn a small commission at no additional cost to you. Visit my site policies for more information.
Kreg Straight Edge Guide: A Versatile Cutting Solution
Kreg has been rolling out some great cutting solutions lately, and I’ve been keeping an eye on their lineup. You might already be familiar with the Kreg Rip-Cut, which attaches to a circular saw for precise rip cuts, or the Kreg Accu-Cut, which turns a circular saw into a track saw.
Related: 4 Ways to Make Straight Cuts With a Circular Saw
More recently, they released the Crosscut Station, which acts like a miter box for your circular saw, allowing you to make precise crosscuts and miter cuts.
Related: Kreg Crosscut Station Review (It’s Not for Everyone)
Now, Kreg has added the Straight Edge Guide to the mix, and I have to say, it’s a solid addition. What sets it apart is its versatility. It helps make long, accurate rip cuts with a circular saw, but it also works with a jigsaw and even a trim router. That’s something the Rip-Cut and Accu-Cut don’t offer.
Related: Trim Router vs Full-Size Router (Which is Right for You?)
Another difference? The Straight Edge Guide clamps directly to the workpiece instead of attaching to the tool. This makes setup easier and more flexible, especially when switching between different tools.
It comes in two sizes:
- The standard version, with a 4-foot cutting capacity
- The XL version, which extends to 8 feet
And if that’s not long enough, Kreg offers an expansion pack to extend the cutting capacity even more.
What’s in the Box?
Here’s what you get with the Kreg Straight Edge Guide:
- (2) 28” Guide Rails
- (2) Paired Connector Bars
- (2) Cutline Indicator Arms
- Adjustable GripMaxx™ Clamp
- Handle
- Owner’s Manual
If you go with the Straight Edge Guide XL, you’ll get everything listed above, plus:
- (2) Additional 24” Guide Rails
- A total of six Paired Connector Bars (instead of two)
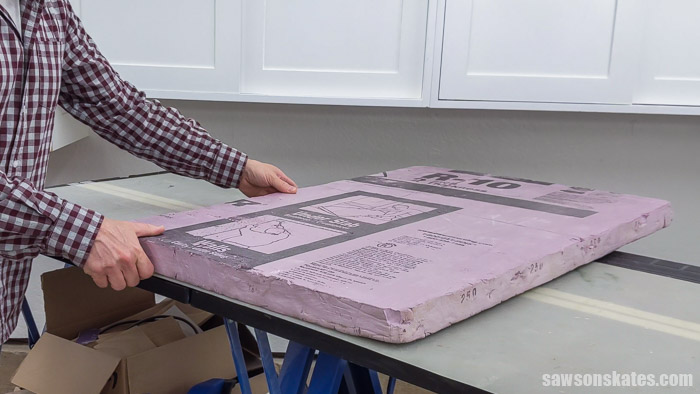
One thing to keep in mind is that you’ll need to provide your own tool, whether it’s a circular saw, jigsaw, or trim router. You’ll also want to get a piece of rigid foam board insulation.
Why the foam board? It makes a great cutting surface when working with large sheets of plywood or MDF, and more importantly, it protects your workbench (or whatever surface you’re cutting on) from getting damaged by the saw blade. If you’re working on the ground, it also keeps you from accidentally cutting into pavement or concrete.
TIP: You can find rigid foam board insulation at most big-box home improvement stores. It’s usually in the insulation aisle and comes in a 4’ x 8’ sheet, but you can easily cut it down to a more manageable size if needed.
Compatible Tools: What Works with the Straight Edge Guide?
The Kreg Straight Edge Guide works with circular saws, jigsaws, and most trim routers with the baseplate attached. Here’s a breakdown of what to check before using your tool with the guide.
Circular Saw
- Works with circular saws with a 5-½” blade or larger
- The baseplate needs to have 1” to 5-½” between the blade and the edge of the baseplate
- The low profile of the Straight Edge Guide (⅜”) shouldn’t interfere with most circular saw motors
- Works with saws with the blade on the left or right side
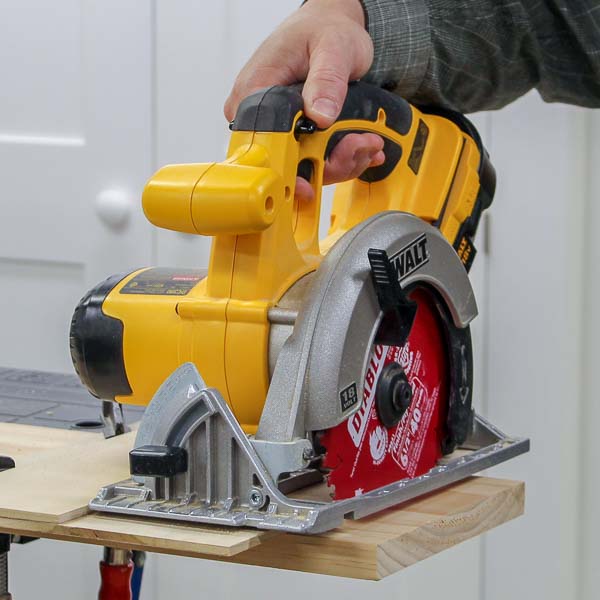
📝 NOTE: I’m using my DeWalt circular saw for this tutorial.
Jigsaw
- The baseplate needs to have 1” to 5-½” between the blade and the edge of the baseplate
- Requires a slightly different setup when calibrating
Trim Router
- The baseplate needs to be installed on the router
- The baseplate needs to have 1” to 5-½” between the blade and the edge of the baseplate
What Can You Cut with the Kreg Straight Edge Guide?
The Straight Edge Guide is designed for making straight rip cuts on ¾” thick sheet goods like plywood and MDF. It can also handle ¼” and ½” material, but you’ll need to ensure it’s well-supported to prevent flexing.
Tip for Cutting ½” Plywood (or ¼” Materials)
I’ve had this guide for a few years and cut ½” plywood with it a few times. I’ve noticed that because the clamp grips both edges of the workpiece, thinner materials like ½” plywood can flex in the middle. When that happens, the saw’s baseplate can slip under the guide, leading to a crooked cut.
When working on the ground, I press my knee against the guide to keep it tight to the workpiece, prevent flexing, and ensure my cuts are straight.
Bevel & Angle Cuts
- Bevel Cuts? ✅ Yes. The Straight Edge Guide works for bevel cuts with a circular saw or jigsaw, just tilt the blade to your desired angle.
- Angle Cuts? ❌ Nope. This guide is only made for straight rip cuts, so if you need precise angle cuts, you’ll want a different tool.
Cutting Dados & Grooves
The Straight Edge Guide also works with a trim router to cut dados and grooves, making it even more versatile for woodworking projects.
Choosing the Right Blade
To get the best results, you’ll want to use a blade designed for rip cuts in whatever material you’re cutting, such as plywood, MDF, or something else.
Rip blades usually have fewer teeth (24 to 30) than combination blades (around 50). Fewer teeth help prevent binding, reduce friction, and make pushing the saw through the material easier.
Related: How to Change a Circular Saw Blade
TIP: Be sure to choose a blade that matches the blade size and arbor size of your saw. These sizes are usually printed on the saw. For example, my circular saw requires a 7-¼” blade with a ⅝” arbor.
How to Assemble the Kreg Straight Edge Guide
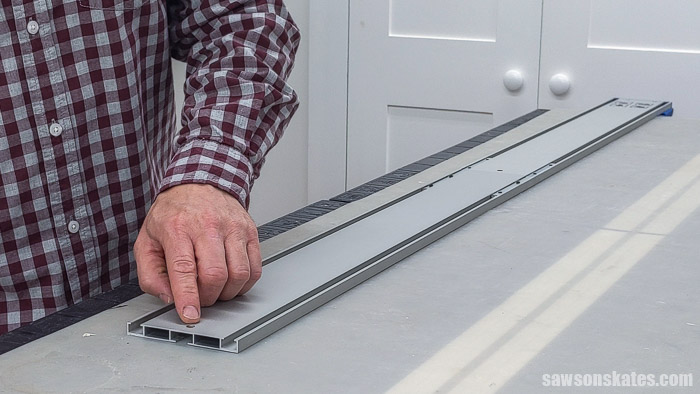
📝 NOTE: I have the XL version, but my workshop is small, so I only used the two 28” guide rails for this tutorial.
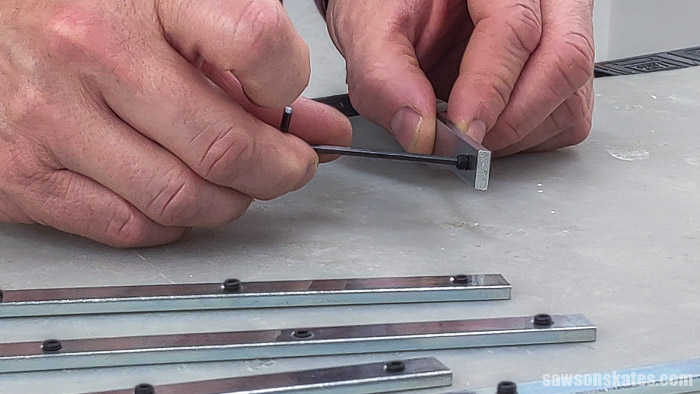
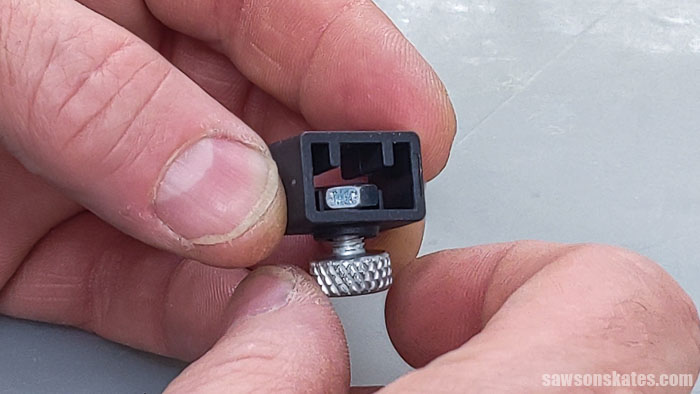
Step 1. Assemble the Connector Bars
Thread the set screws into the connector bars.
💡 TIP: The set screws are small and tricky to thread into the holes by hand. Instead, I found it was easier to place the set screw on the Allen wrench and then thread it into the hole.
Place an upper connector bar on top of a lower connector bar.
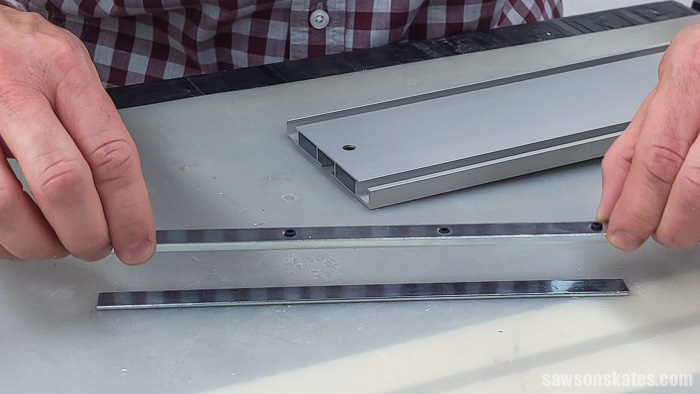
Slide both connector bars about halfway into the groove in the guide rail with the clamp. Repeat for the other side.

Then, partially snug the set screws. The connector bars might need to be adjusted so don’t fully tighten the screws.
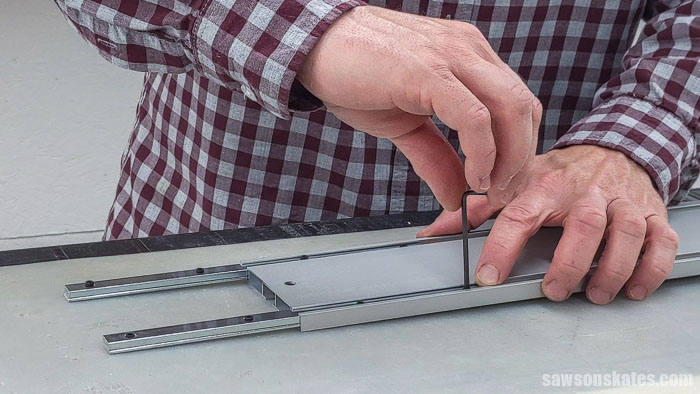
Step 2. Attach the Guide Rails
Slide a guide rail section onto the connector bars.
📝 NOTE: I had to loosen the set screws so that I could slide the next guide rail over the connector bars.
💡 TIP: Be sure the hole in the guide rail is facing outward.
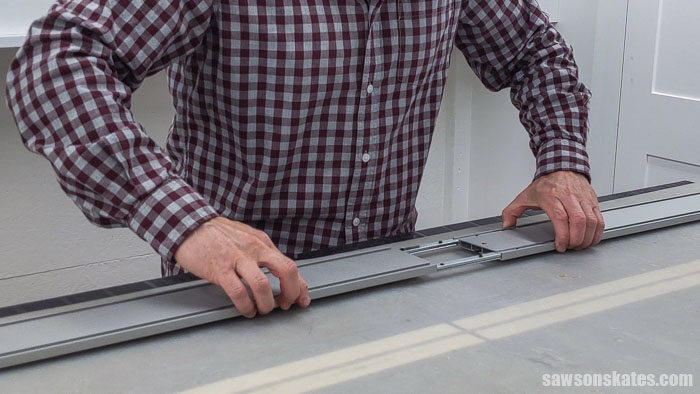
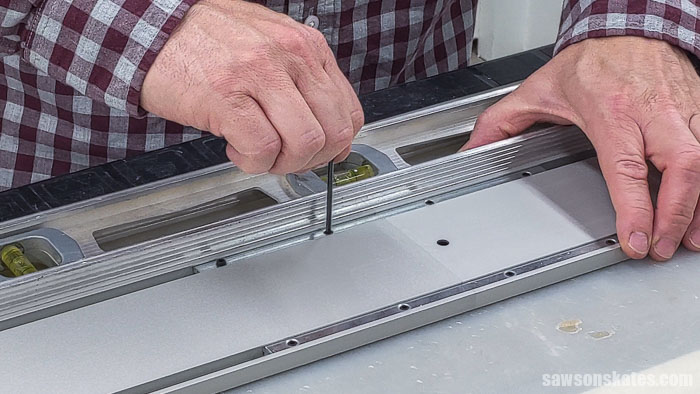
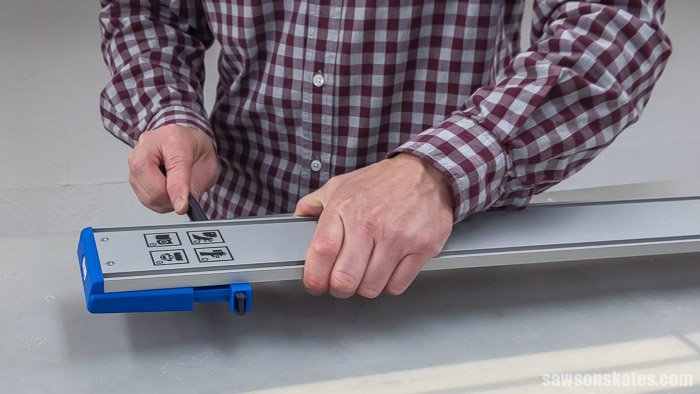
Use a straightedge to align the two guide rail sections. I used a 24″ level. Then use the Allen wrench to fully tighten the set screws.
Repeat this step to attach the remaining sections for the XL or expansion pack.
Step 3. Install the Clamp
Slide the adjustable clamp into the groove on the bottom of the guide rail.
Step 4. Attach the Handle
Slide the handle into the grooves in the guide rail. Then, attach the handle with a screw and nut.
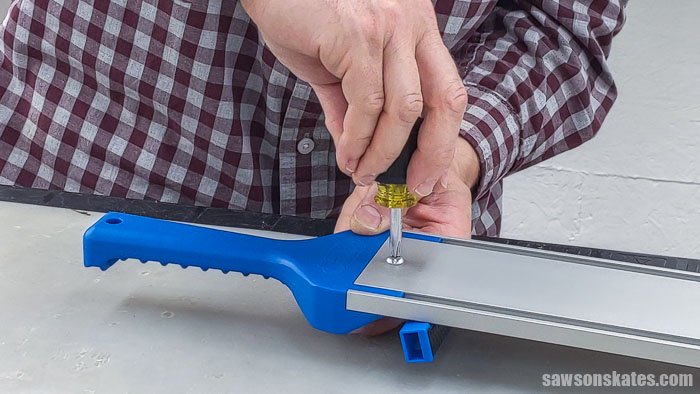
There’s a place to store the Allen wrench on the underside of the handle.

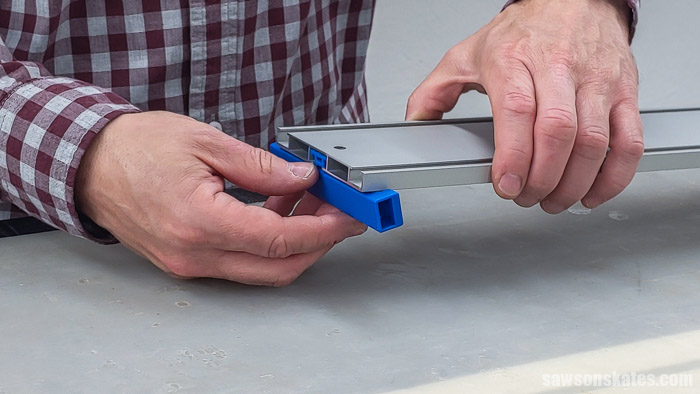
Step 5. Assemble the Cutline Indicator Stops
Slide a nut into the cutline indicator stop. Then, attach a thumbscrew.
Step 6. Install the Indicator Arms
📝 NOTE: The wider side of the indicator arm should face inward when installed in the clamp.
Slide the indicator arm into the slot in the guide rail. Then, slide a cutline indicator on the other end of the indicator arm.
How to Calibrate the Kreg Straight Edge Guide
Step 1. Make the Reference Marks
❕ IMPORTANT: Unplug or remove the battery from the saw.
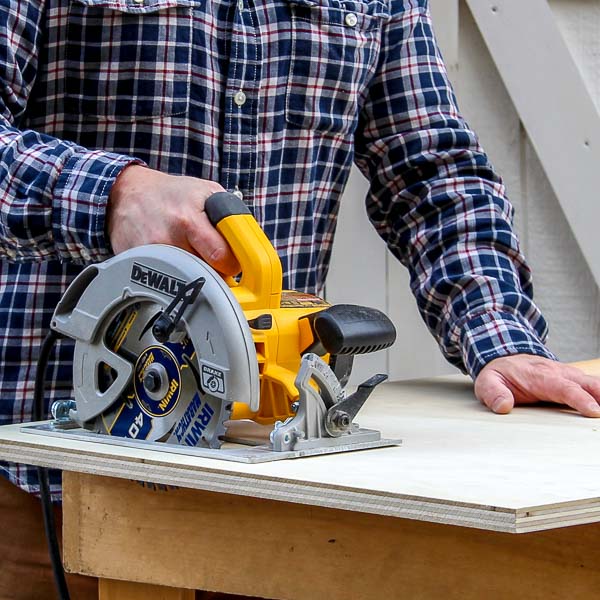
Position the circular saw on a piece of ¾” plywood and set the blade so that it will cut an ⅛” deeper than the plywood.

Next, I placed a piece of rigid foam insulation on my workbench. The foam will protect the workbench when making cuts.
Lift the blade guard and position the saw at the back of the plywood with the blade against the plywood.
💡 TIP: Don’t push too hard on the saw. Otherwise it could cause the blade to flex and make the location of the marks inaccurate.
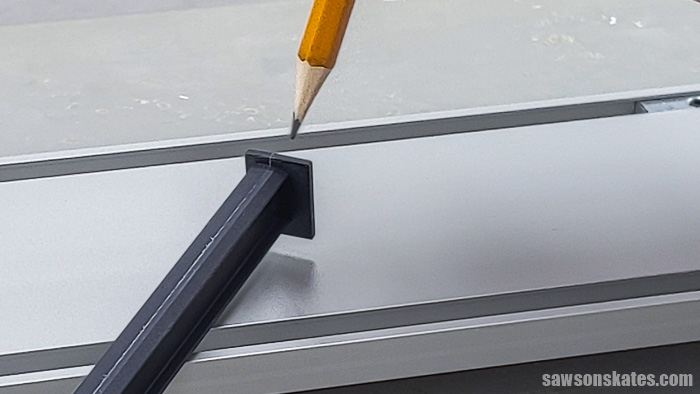
Use a pencil to mark the edge of the baseplate on the back edge of the plywood.

Then, move the saw and mark the baseplate on the front edge of the plywood.
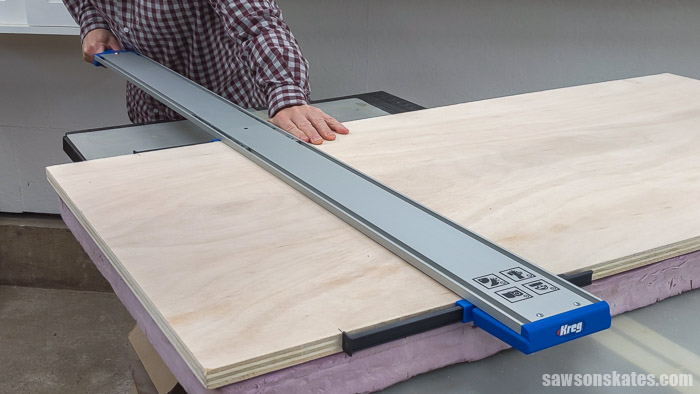
Step 2. Position the Guide Rail
Place the guide rail on the plywood and position it on both reference marks.
📝 NOTE: The guide rail will only be positioned on the marks when it’s being calibrated. After it’s calibrated the indicator arms will be positioned on the marks.
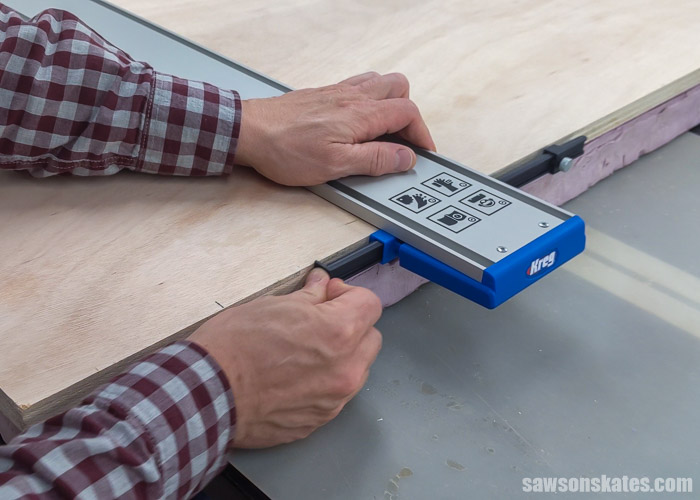
Slide the clamp against the plywood. Then, use one hand to hold the clamp against the plywood and use the other hand to pull the handle to tighten the clamp.

Loosen the stop and position the cutline indicator arm against the end of the plywood.
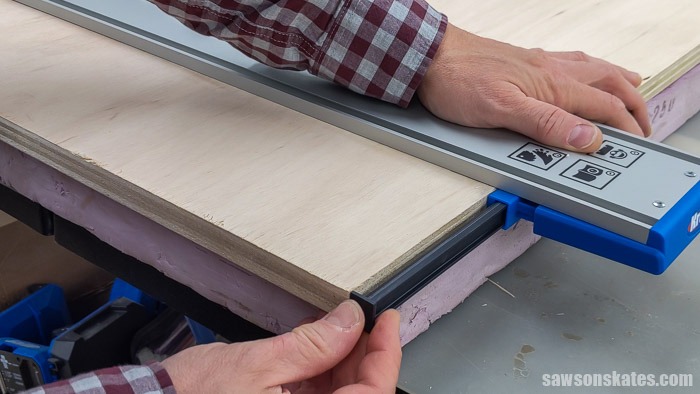
Then, push the stop against the clamp and tighten the thumbscrew.
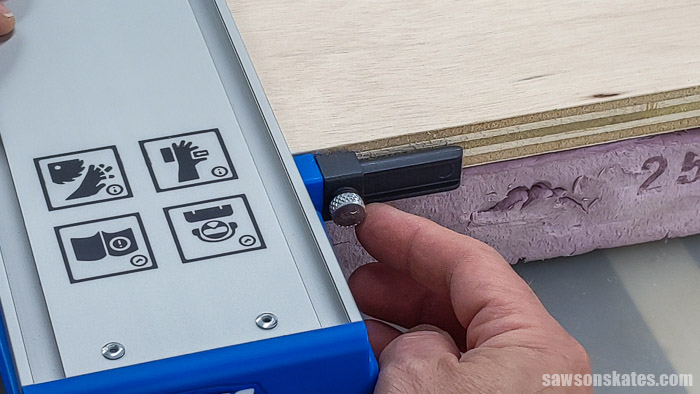
Repeat this step for the other cutline indicator arm. The Straight Edge Guide is now calibrated and ready to make some cuts.
How to Use the Straight Edge Guide
Step 1. Mark the Workpiece
Measure and make mark on one edge of the workpiece.
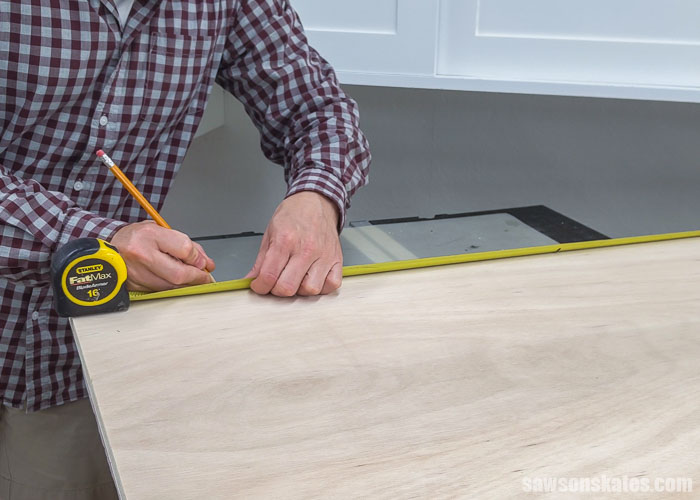
Measure and make mark on the other edge of the workpiece.

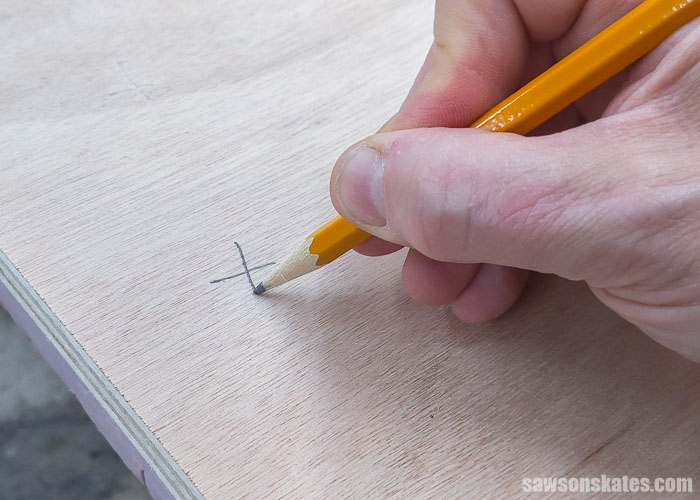
Mark an “X” on the waste side. The waste side is the side you don’t want.
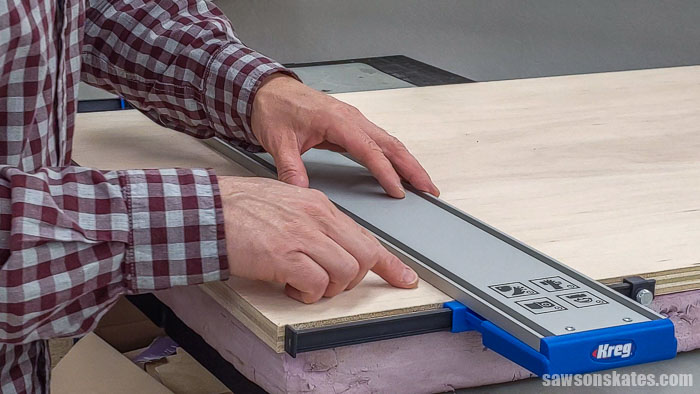
Step 2. Position the Cutline Indicators
Position the guide rail on the side of the workpiece that you want to keep with the cutline indicator arms facing towards the waste side. Then, slide the clamp towards the workpiece.
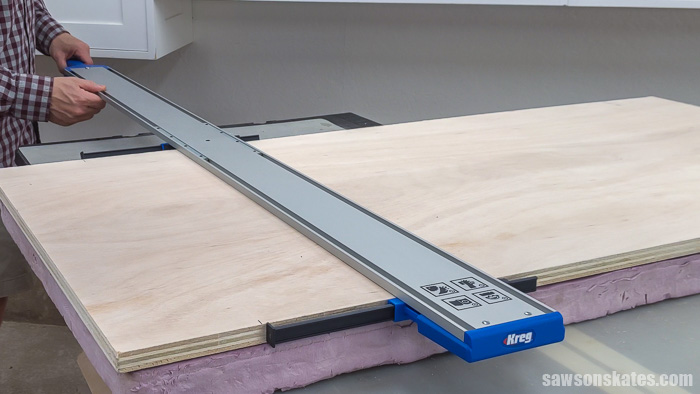
Slide both of the cutline indicator arms so the face is aligned with the marks.
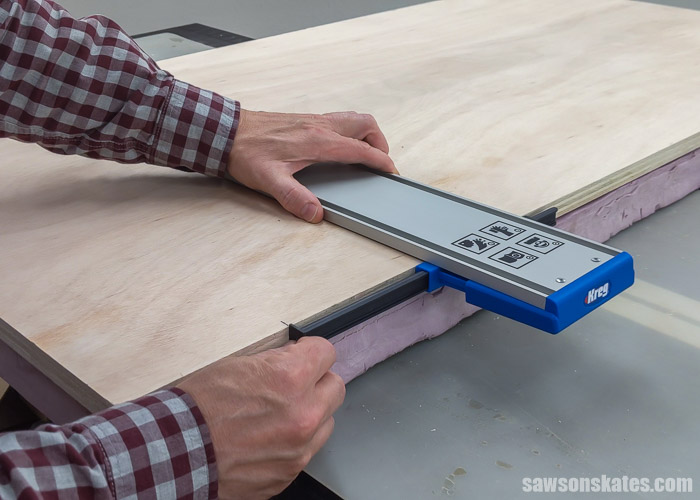
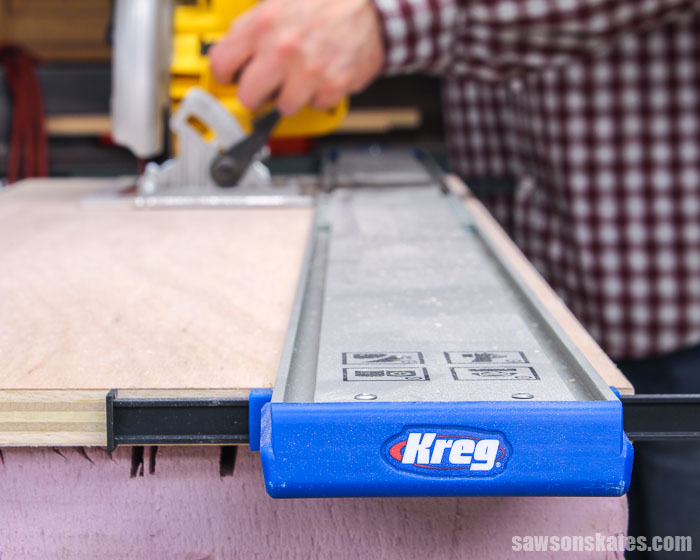
Use one hand to hold the clamp against the workpiece and use the other hand to pull the handle to tighten the clamp.
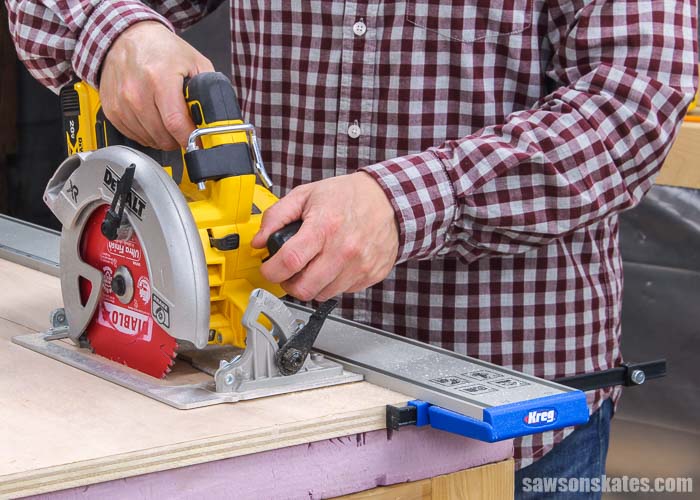
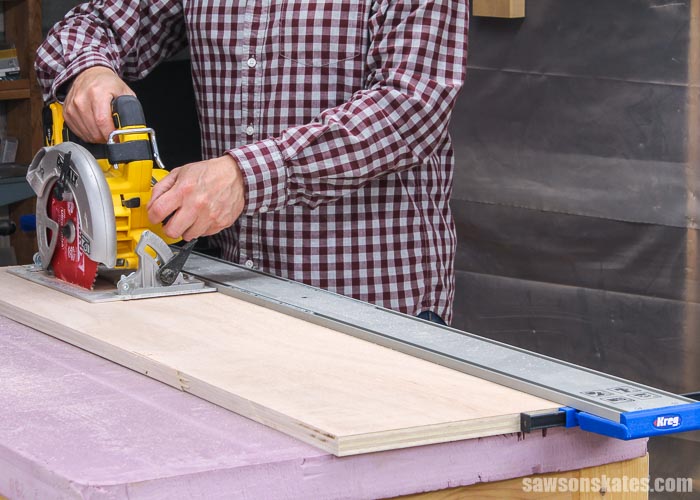
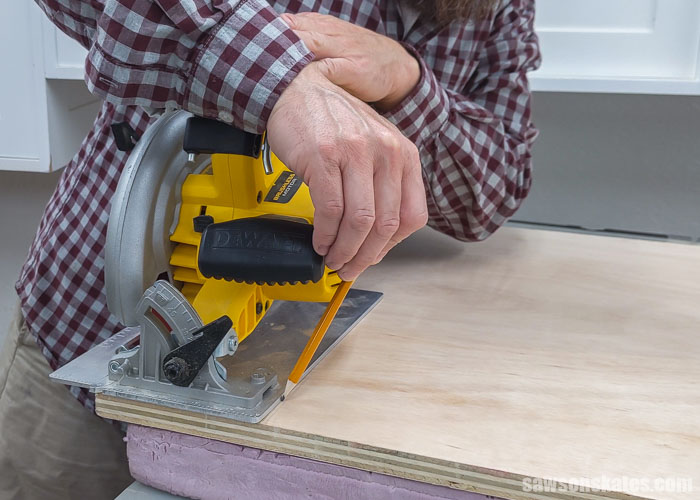
Step 3. Make the Cut
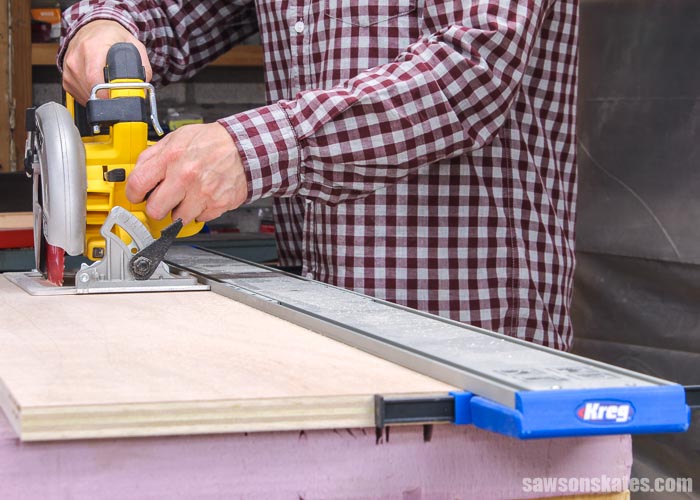
Slide the cutline indicator arms back towards the clamp.
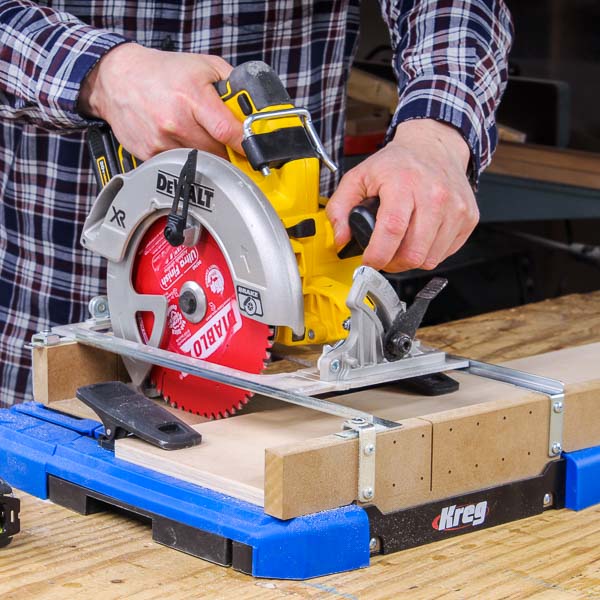
💡 TIP: Be sure to set the blade so that it will cut an ⅛” deeper than the workpiece.
Position the saw on the guide rail. Make sure the blade is not touching the workpiece. Turn the saw on and let it come up to full speed.
Then make the cut. Be sure to keep the baseplate against the guide rail for the entire length of the cut.

To remove the guide, just pull up on the handle.
My Honest Review of the Kreg Straight Edge Guide
I’ve been using the Kreg Straight Edge Guide for a while now, and overall, I like it. It’s reasonably priced, easy to assemble, and simple to set up. It does exactly what it’s supposed to: help me make accurate rip cuts. But like with any tool, I had a few concerns when I first started using it.
Storage Concerns
One of my first concerns was storage, especially with the 8-foot XL version. I initially thought I’d have to assemble and disassemble it every time I used it because I wouldn’t have a place to keep it in my small workshop.
Related: My 12×13 Small Woodshop Layout
Since then, I’ve installed a French cleat wall in my garage and these lumber racks above it. The rack’s top tier is the perfect spot to store the guide. So, what I thought would be an issue ended up being no problem at all.
Related: Bora Lumber Rack (Installation and Review)
Durability of the Indicator Arms
Another thing I worried about was the indicator arms. I’m not always the most careful with my tools, and I thought I might bend or break them over time. But here I am, several years later, and they’re still intact and working great!
That said, I still think it would be a great design improvement if the indicator arms could be easily removed or rotated under the guide for storage. It’s not a deal breaker, but it would make storing the guide even more convenient.
Would I Use the Kreg Straight Edge Guide Again?
So, the big question is, would I use the Straight Edge Guide again?
I should start by saying that I don’t use plywood often in my projects, so I don’t always need a tool like this. But when I do need it? Yeah, I’d use it again, and I have.
Why I Don’t Always Use It First
One thing about the Straight Edge Guide is that it requires a little extra setup. I have to measure twice, position the guide, and carefully line up the cutline indicators with my marks every time I need to make a cut. The accuracy of the cut is entirely on me and how well I line things up.
And while I haven’t run my saw into the cutline indicators yet, I know me. At some point, I will forget to move them and accidentally cut them off, lol.
So, most of the time, I’ll reach for one of these instead:
Table Saw
Why I Use It:
- I can measure once, set the fence, and get repeatable cuts without any extra fuss.
- It’s just faster and more precise for most of my straight cuts.
Why I Don’t Always Use It:
- Cutting large sheets on a table saw can be dangerous.
- Some people (especially beginners) find table saws intimidating, so based on this, I sometimes choose a different tool for a tutorial.
Kreg Rip-Cut
Why I Use It:
- It works similarly to a table saw; I attach my circular saw, measure once, set the fence, and go.
- The fence follows the material’s edge, so I can make consistent, repeatable cuts.
- If a sheet is too big for my table saw, this is what I usually grab first.
Why I Don’t Always Use It:
- Limited to 24″ wide cuts, which isn’t always enough.
DIY Crosscut Jig
Why I Use It:
- It works a lot like the Straight Edge Guide, but for me, it’s easier to align.
- Instead of messing with cutline indicators, I place the jig directly on my marks and cut.
- Plus, the jig doesn’t have any cutline indicators sticking out, so it’s easier to store.
Related: How to Make a DIY Circular Saw Crosscut Jig
When the Straight Edge Guide Makes the Most Sense
Even though it’s not always my first choice, there are times when the Straight Edge Guide is the best tool for the job.
For example, I had to cut large sheets of plywood that would’ve been too dangerous for my table saw, and the required width exceeded the Rip-Cut’s 24″ cutting capacity. The Straight Edge Guide was perfect because I could safely cut the workpiece on the ground without worrying about lifting the heavy sheet onto my table saw.
Another time, I needed to cut repurposed plywood with jagged edges for this Halloween Cat project; that would’ve been nearly impossible with my table saw or Rip-Cut since they both require a straight reference edge. But with the Straight Edge Guide, I just clamped it and made the cuts: super easy.
So, would I use it again? For sure. But is it the first tool I grab for every rip cut? Not always.
The Straight Edge Guide is great for certain situations, especially when my table saw isn’t safe or the Rip-Cut can’t handle the width. It’s a solid backup option for me, and I’m glad to have it in my shop.
Where to Get the Kreg Straight Edge Guide
You can order the Straight Edge Guide online here and have it shipped straight to your door.
Final Thoughts
Circular saws, jigsaws, and routers are versatile tools, but they don’t usually cut straight without a little help from a fence or a guide. The Kreg Straight Edge Guide turns a circular saw and a jigsaw into a tool that makes accurate rip cuts. And it turns a trim router into a tool that makes accurate grooves and dados.
Thank you for stopping by. If you enjoyed this tutorial, would you please take a moment and pin it to Pinterest? I’d really appreciate it!
Recommended For You
Pin This For Later

Hi there – I’m Scott, a woodworking enthusiast and creator of Saws on Skates, a site I started in 2015 to share easy-to-follow tutorials, space-saving shop tips, and project inspiration for DIYers at any skill level. Learn more about my woodworking journey here.