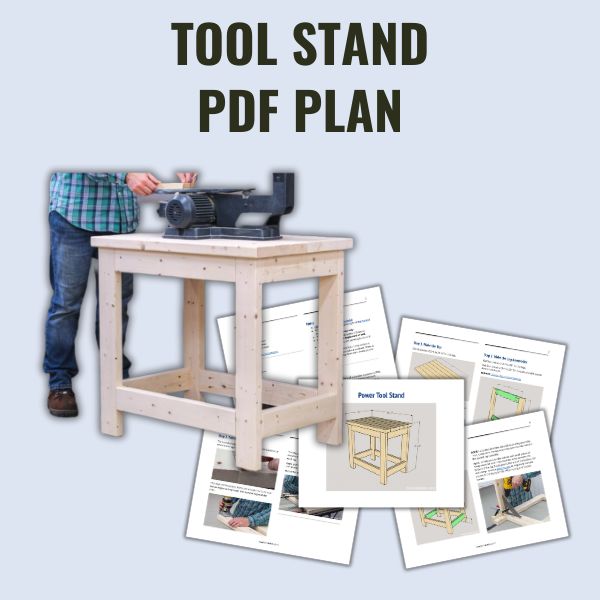
DIY Power Tool Stand
Get your benchtop tools organized with this DIY power tool stand. This sturdy stand is easy to make with only six 2×4s and these simple step-by-step plans.
What Should I Build Next?
That's the question I help answer.
Every week, I send woodworking ideas to 17,000 DIYers who love building things.
You'd fit right in.
DIY Power Tool Stand
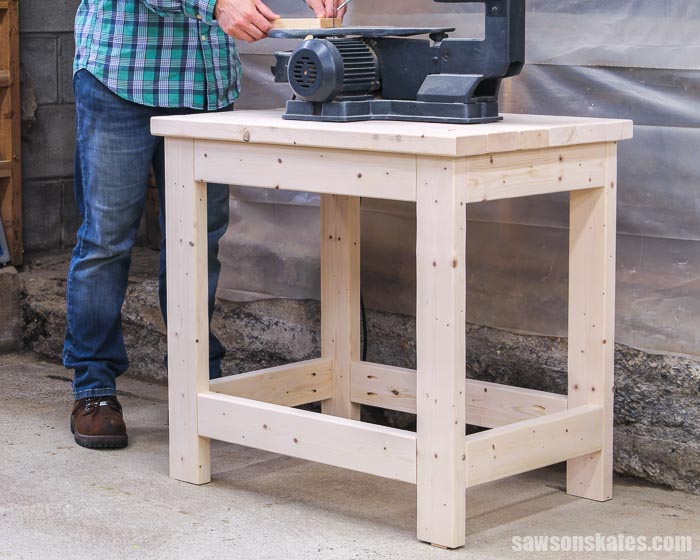
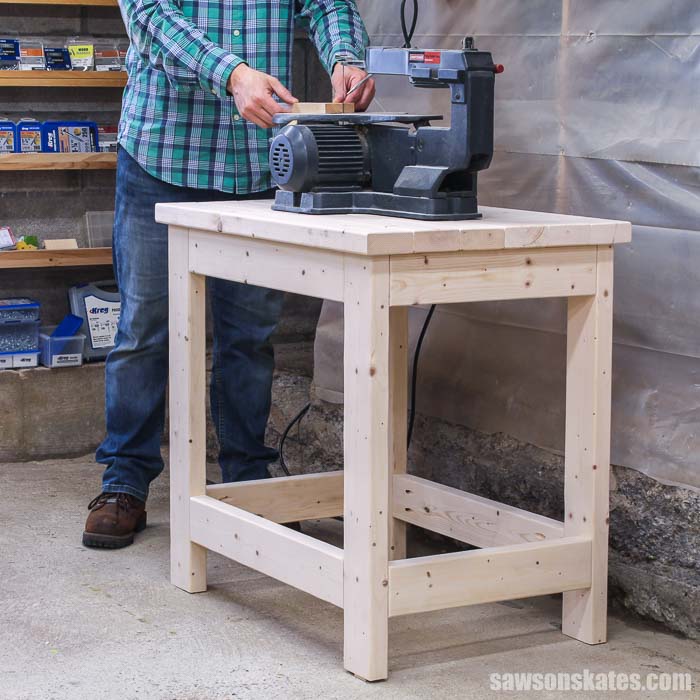
Are your benchtop tools sitting on the floor of your shop or taking up valuable space on your workbench? Give them a permanent home with this DIY power tool stand!
This sturdy tool stand is easy to make with a few 2×4s, a few simple cuts, and a few common woodworking tools.
The small size makes it perfect for a workshop, garage, or shed shop. Up top, there’s space for tools like a scroll saw, lathe, drill press, planer, table saw, miter saw, and more. Below there is space to add a shelf for more storage.
The plan includes all of the measurements and detailed step-by-step instructions. Get the your plan now and build one today.
You may also enjoy this DIY folding workbench and DIY flip top workbench cart.
This tutorial contains affiliate links to supplies and tools. Purchases made using these links help support the Saws on Skates website and allows me to share more projects and tips with you. There is no cost to you for using these links. Visit my site policies for more information.
Table of Contents
- Inspiration for This Project
- What Power Tools Can You Mount on the Tool Stand?
- Where Can You Use This Power Tool Stand?
- What Tools Do You Need to Make a Power Tool Stand?
- What Wood Should You Use?
- How Do You Attach the Top?
- Customize the Power Tool Stand
- How Do You Finish the Power Tool Stand?
- How to Make a DIY Power Tool Stand
- Get the PDF Plan
Inspiration for This Project
In a couple of the tutorials, I’ve mentioned that I volunteer at a local historical society. A few of the furniture plans have been inspired by pieces that I’ve seen at the museum or ideas from my fellow volunteers. Projects like this display cabinet and this tabletop book rack.
This time, I was inspired by an antique saw sharpener in the carriage barn. We were planning to do some restoration work on it, but the base for the sharpener was missing, so it was sitting on two old rickety sawhorses.
We needed a sturdy tool stand so that we could safely do the restoration work. I looked around for an antique stand, but couldn’t find anything that fit. So instead, I decided to make my own tool stand.
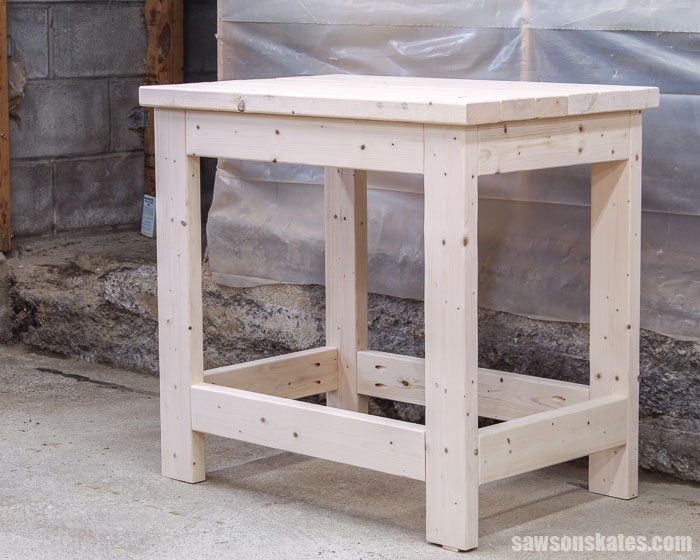
Here’s what I came up with. A small, sturdy, easy-to-make power tool stand.
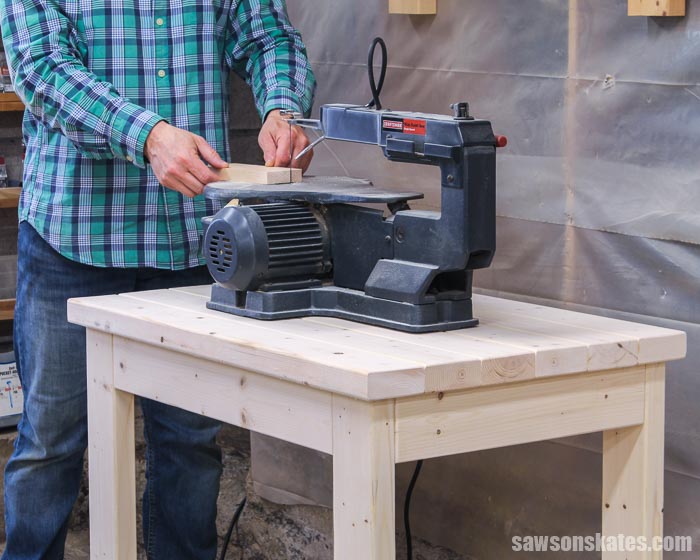
What Power Tools Can You Mount on the Tool Stand?
This power tool stand would be great for benchtop tools like:
- Lathe
- Drill Press
- Planer
- Table Saw
- Scroll Saw
- Grinder
- Miter Saw
📝 NOTE: This tool stand is about 30” tall. This height may be too low for some tools or DIYers who are tall. You can adjust the length of the legs to make the tool stand a height that works best for you.
Where Can You Use This Power Tool Stand?
This small power tool stand would be perfect for a small shop, garage, or shed workshop.
What Tools Do You Need to Make a Power Tool Stand?
This tool stand is a simple afternoon project. It can be made using basic woodworking skills and just a few common woodworking tools.
Tools like a miter saw, pocket hole jig, and a drill.
Miter Saw
I used a miter saw to cut all of the parts to length for this project.
Related: 7 Miter Saw Tricks Every DIYer Should Know
Pocket Hole Jig
We can use any pocket hole jig to drill the pocket holes for this project. I used the Kreg Jig 720PRO to drill the pocket holes for my tool stand.
Related: How to Use a Kreg Pocket Hole Jig 720
Drill
The drill was used to drill the pocket holes and with a Forstner bit to make holes for the table top fasteners. The drill was also used to drive the pocket screws and wood screws that join the pieces together.
Related: Impact Driver vs Drill: What’s the Difference?
What Wood Should You Use?
I used 2×4s to make my power tool stand.
Related: Beginner’s Guide to Wood Sizes
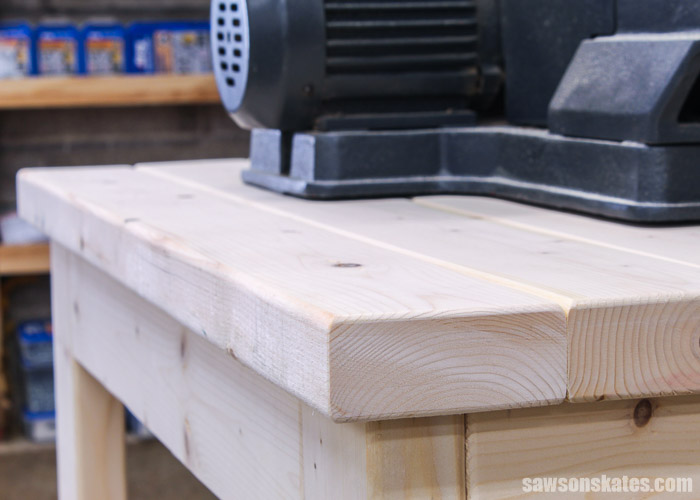
How Do You Attach the Top?
It’s important that you attach the table top to the base of the tool stand the right way otherwise the top could crack.
Wood moves with seasonal changes. You need to attach the top in a way that allows the wood to move with those seasonal changes.
Related: Mistakes with Wood Can Cause Your DIY Furniture to Crack
I don’t recommend attaching a solid wood table top to the aprons or legs with pocket holes. Pocket holes prevent the table top from moving with seasonal changes which could cause the top to crack.
Instead, you should use table top fasteners to attach the top. The fasteners allow the top to move with seasonal changes and reduces the chances of cracking the wood.
Related: How to Attach a Table Top (the Right Way)
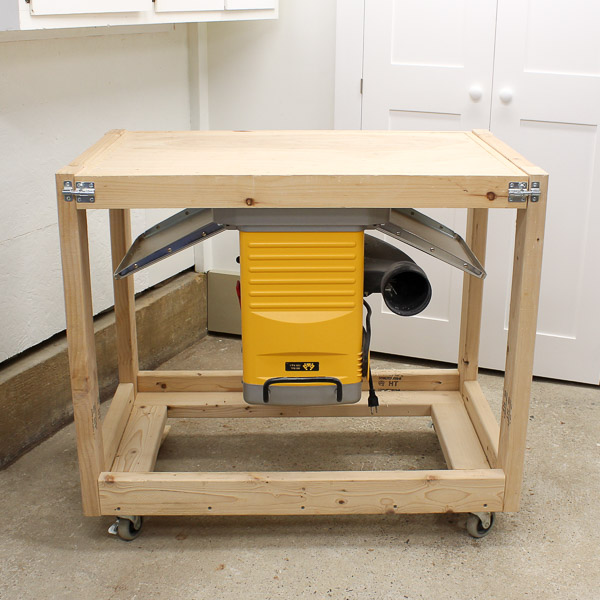
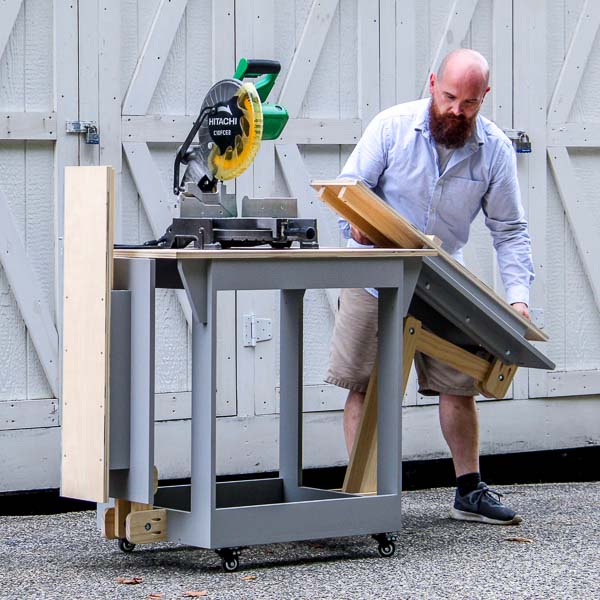
Customize the Power Tool Stand
There are several ways to customize this power tool stand. Customizations include adjusting the height, adding a shelf, and adding wheels.
Height
This tool stand is about 30” tall. This height may be too low for some tools or DIYers who are tall. You can adjust the length of the legs to make the tool stand a height that works best for you.
Shelf
I mentioned earlier that this project was inspired by the historical society where I volunteer. We didn’t need a storage shelf, so I didn’t add one to the base of this project. You could easily add a shelf to the bottom for additional storage.
Wheels
I usually add wheels to make all of my workshop projects mobile. But again, I made this for the historical society, and we didn’t need this to be mobile. This workbench caster kit would be an easy way to add wheels to the legs to make this project mobile.
How Do You Finish the Power Tool Stand?
This power tool stand could be finished in a variety of ways. It could be left natural, painted, etc.
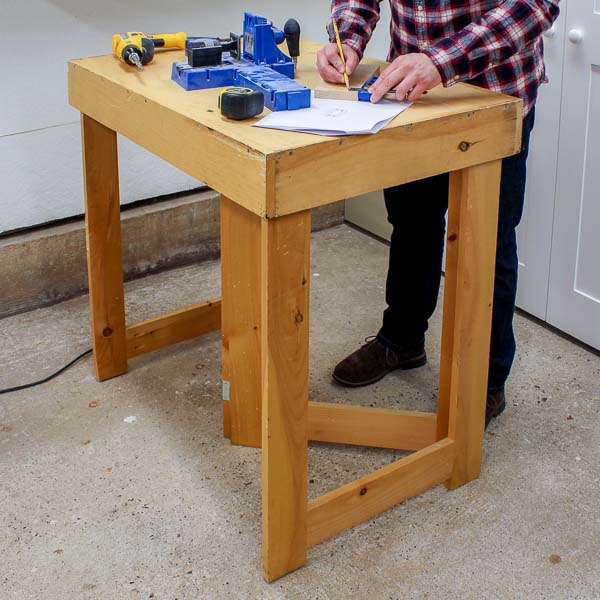
I usually paint workshop projects. But again, I made this for the historical society and we didn’t need this project to be finished, so I left the wood natural.
DIY Power Tool Stand
Printed Plan
- Click here to get the PDF plan (includes detailed instructions, measurements, and bonus tips)
Supplies
- Wood (per printed plan)
- 2-½” Pocket Screws
- #6 1” Wood Screws
- #8 1-¼” Wood Screws
- Wood Glue
- Figure-8 Table Top Fasteners
Tools
- Tape Measure
- Drill
- Kreg Jig
- Kreg Multi-Mark
- Miter Saw
- Awl
- ⅝” Forstner Bit
- Chisel
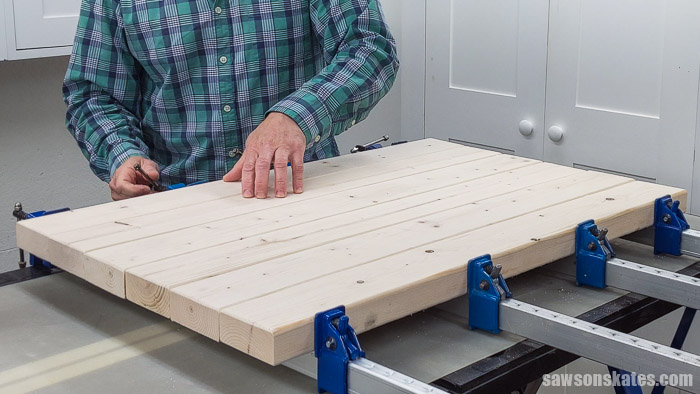
Step 1. Make the Top
Cut six pieces of wood to length for the top. Apply glue to the edges and clamp. I moved on to Step 2 while the glue was drying.
🔄 OPTIONAL: You can use pocket holes to edge join the top.
Related: How to Edge Join with Pocket Holes
Step 2. Make the Leg Assemblies
Cut four pieces of wood to length for the legs. Cut four pieces of wood to length for the rails and drill pocket holes in each end.
Related: How to Use a Kreg Jig 720
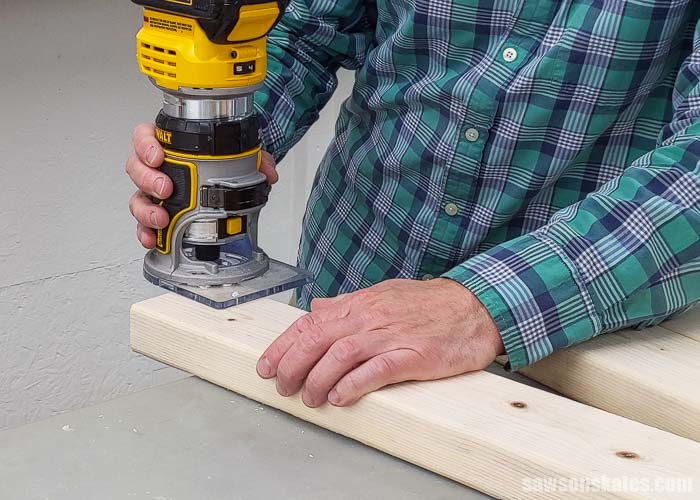
📝 NOTE: The edges of 2×4s are rounded. Cut edges butted up to rounded edges doesn’t look right to me.
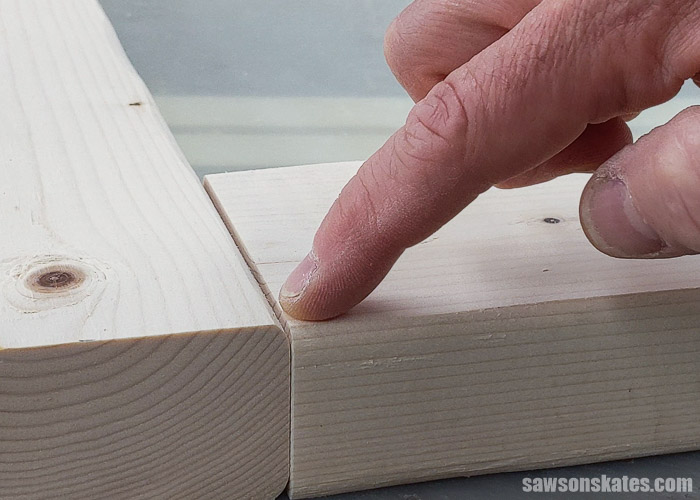
This step isn’t necessary, but I used a router to round over the cut edges so they will match the rounded edges of the 2×4s.
To help position the bottom rail I cut two pieces of scrap wood to length. I clamped the scrap wood to the bottom of each leg.
Apply glue to the ends of the rails and clamp. Attach using 2-½” pocket screws.
Repeat for the other leg assembly.

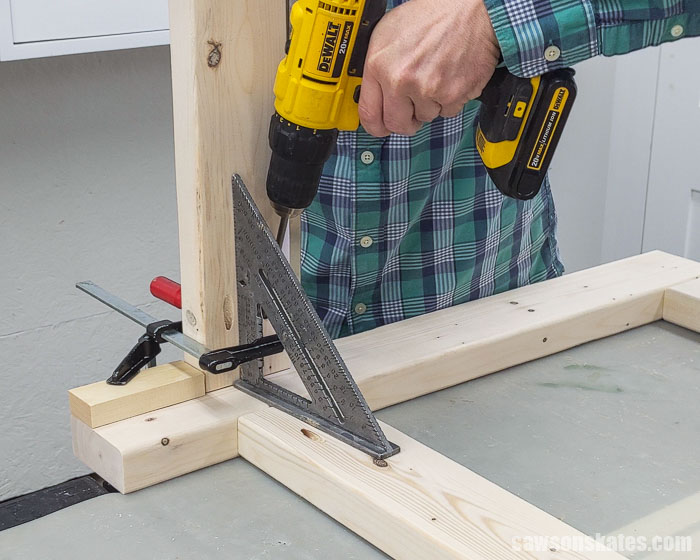
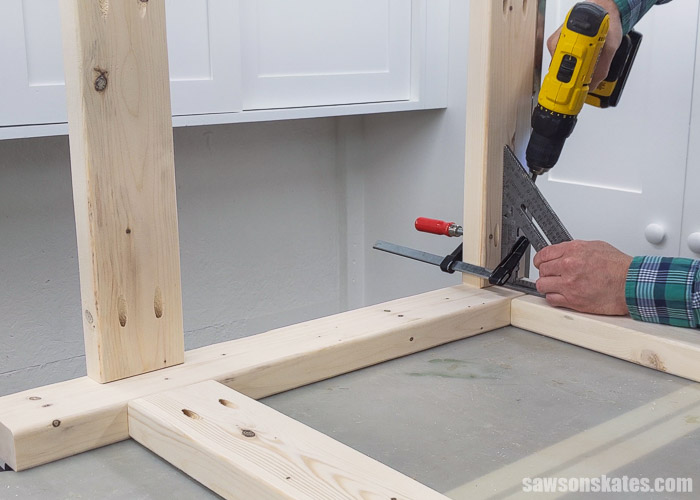
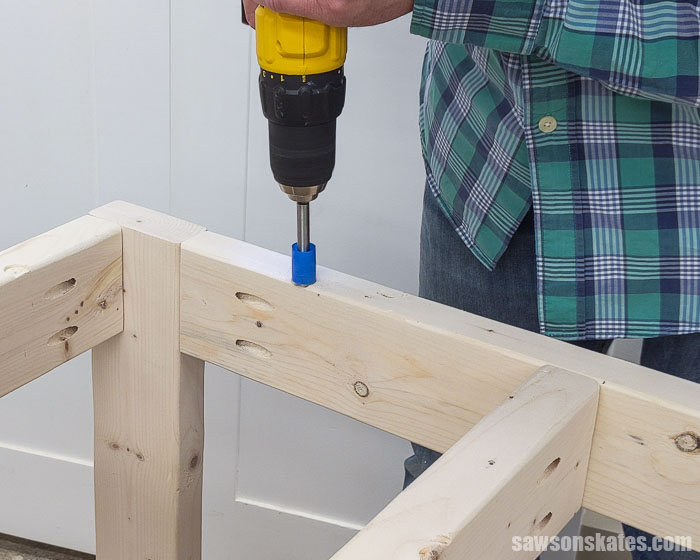
Step 3. Attach the Side Rails
Cut five pieces of wood to length for the rails and drill pocket holes in each end. four of the pieces will be used as side rails and 1 will be used as a stretcher in Step 4.
📝 NOTE: I attached all of the side rails to one leg assembly. Then I joined the first leg assembly (with the side rails) to the second leg assembly.
Again, to help position the bottom rail I used pieces of scrap wood cut to length. I clamped the scrap wood to the bottom of the leg. Apply glue to the end of the bottom rail and clamp. I used a speed square to help keep the rails square to the leg assembly. Attach using 2-½” pocket screws.
Apply glue to the top rail, position flush with the top of the leg assembly, and clamp. Attach using 2-½” pocket screws.
Repeat for the remaining rails.
Apply glue to the ends of the side rails, position the first leg assembly on the second leg assembly, and clamp. Attach using 2-½” pocket screws.
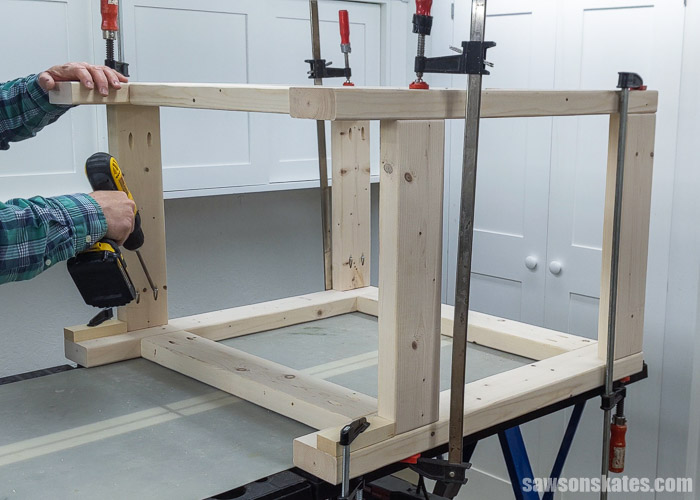
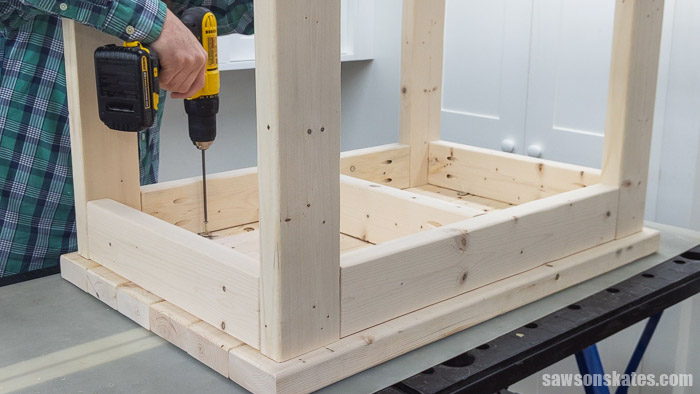
Step 4. Attach the Stretcher
Apply glue to the ends of the stretcher (from Step 3) center on the long rails and clamp. Attach using 2-½” pocket screws.

Step 5. Attach the Top
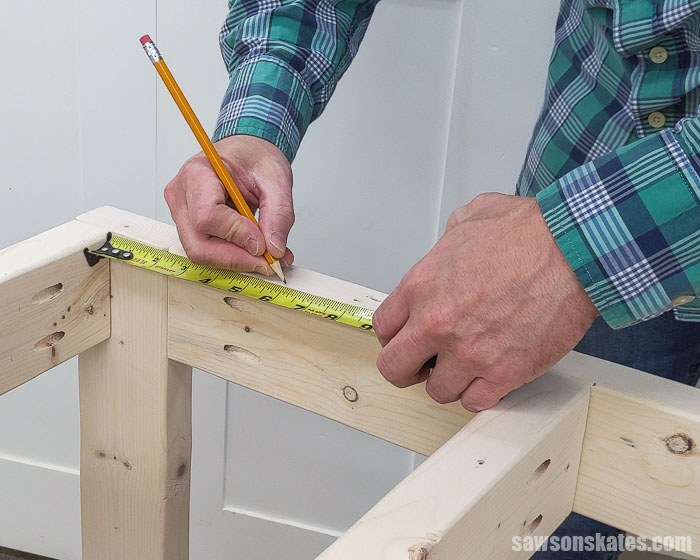
Use the diagram in the printed plan to lay out the locations for the table top fasteners.
I used an awl to make a starting point for the drill bit.
Related: What is an Awl?
I used a Forstner bit to drill the holes for the fasteners. The holes need to be about an ⅛” deep. I used painter’s tape to make a depth stop on the drill bit.
Related: What is a Forstner Bit? (& How to Use It)
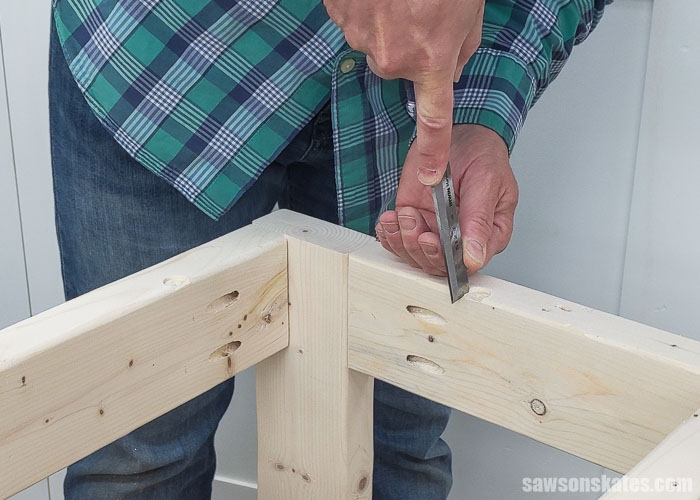
I used a chisel to square the corners of the hole.
Attach a table top fastener to each hole using a #6 1” wood screw.
Related: How to Attach a Table Top (the Right Way)
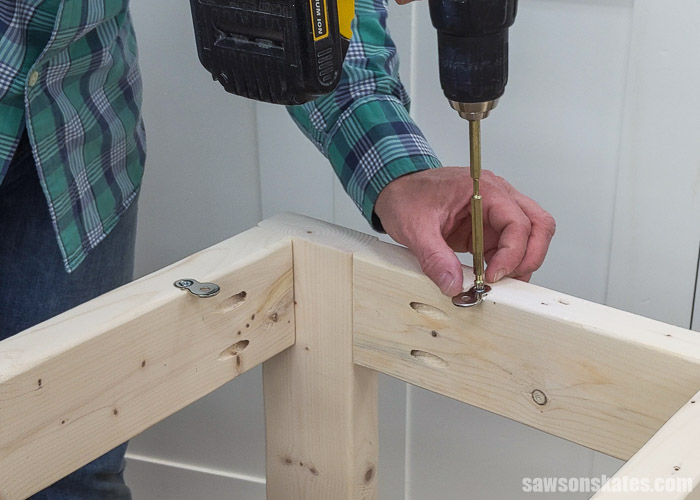
Center the top on the legs. Attach using #8 1-¼” wood screws through the table top fasteners.
Video: How to Make a DIY Power Tool Stand
Includes:
- List of tools and materials
- Complete measurements (in inches)
- Easy-to-follow instructions
- Step-by-step photos
- Detailed diagrams
Final Thoughts
Give your benchtop tools a permanent home with this DIY power tool stand! This sturdy tool stand is easy to make with a few 2×4s, a few simple cuts, and a few common woodworking tools.
Click here to get the PDF plan (including the detailed instructions and measurements) now!
Thank you for stopping by. If you enjoyed this tutorial, would you please take a moment and pin it to Pinterest? I’d really appreciate it!
Recommended For You
Pin This For Later

Hi there – I’m Scott, a woodworking enthusiast and creator of Saws on Skates, a site I started in 2015 to share easy-to-follow tutorials, space-saving shop tips, and project inspiration for DIYers at any skill level. Learn more about my woodworking journey here.
Thank you for another excellent article, but I have a question. Why did you use clamps to glue the top boards together as opposed to using the Kreg system to join the boards?
You’re welcome, Jan. You can definitely use pocket holes to edge join the boards for the top. Honestly, I just didn’t feel like drilling all of those pocket holes and I was running low on 2-1/2″ pocket screws, so I decided to edge glue the top.
I like the simple design. I have a suggestion for those of us that have less space. I have several black and decker workmates. I have several tools like my miter saw or scroll saw mounted on plywood with a 1×4 on the bottom for clamping to a workmate. I have a cabinet with 2×2 forming shelf supports that let me store the tools out of the way when not needed.
Do you have wheel recommendations to add to this?
Hi Kerry – I have never used this workbench caster kit, but it might be a good option because the wheels raise and lower. That way, you can lower the wheels when you need to move it and raise them when you’re ready to work.