How to Make Box Joints (3 Easy Ways)
Box joints are one of the most popular ways to join wood. Learn whether they’re strong enough, when to use them, and three easy ways to make them.

What Should I Build Next?
That's the question I help answer.
Every week, I send woodworking ideas to 17,000 DIYers who love building things.
You'd fit right in.
If you’re looking for a versatile joint that adds a decorative touch to your woodworking projects, look no further than the box joint. I’ll break down everything you need to know, including what they are, whether they’re strong, some practical applications for them, and how to make them using three different tools.
This tutorial contains affiliate links to supplies and tools. Purchases made using these links help support the Saws on Skates website and allows me to share more projects and tips with you. There is no cost to you for using these links. Visit my site policies for more information.
Table of Contents
What is a Box Joint?
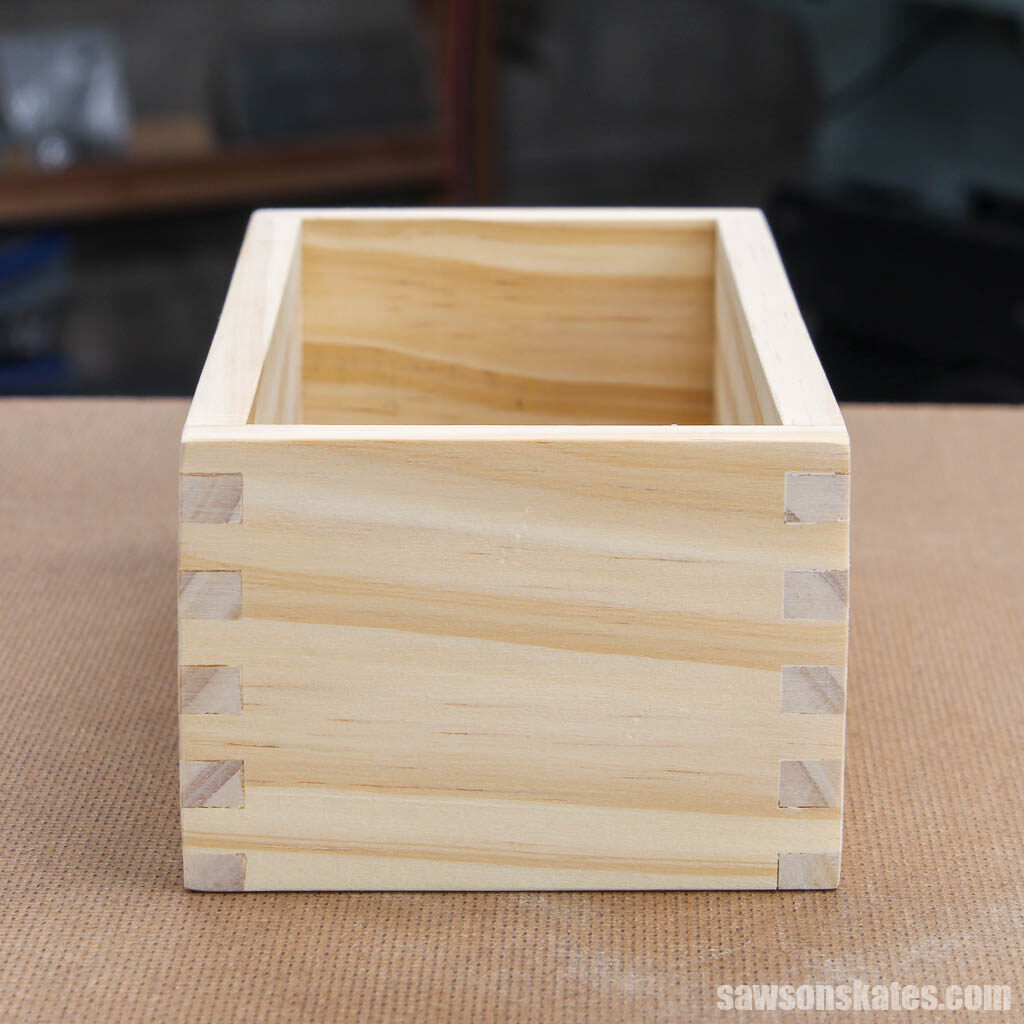
A box joint is a woodworking joint used to connect pieces of wood together at a corner.
Box joints are sometimes referred to as finger joints, but finger joints are used to connect boards end-to-end rather than at a corner. Box joints are used to make boxes, whereas finger joints are frequently used to create one larger board out of several smaller pieces of wood, such as molding and trim work.
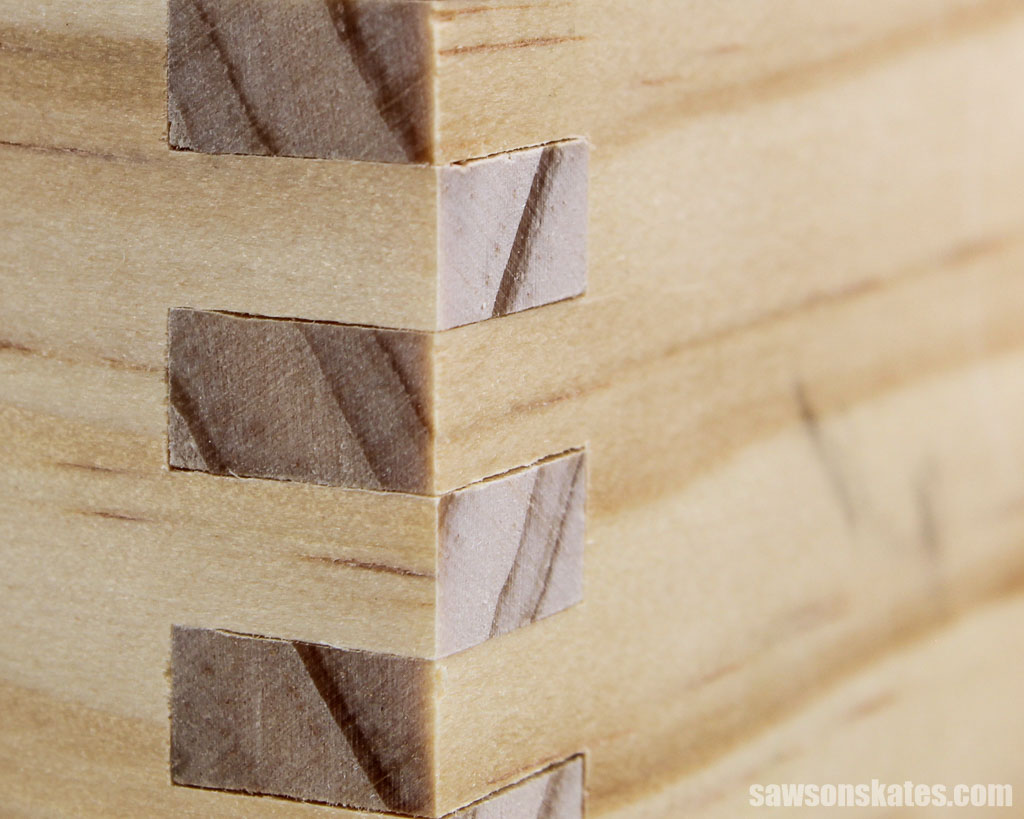
A box joint looks similar to a dovetail joint but rather than interlocking angled tails and pins, a box joint’s pins are straight.
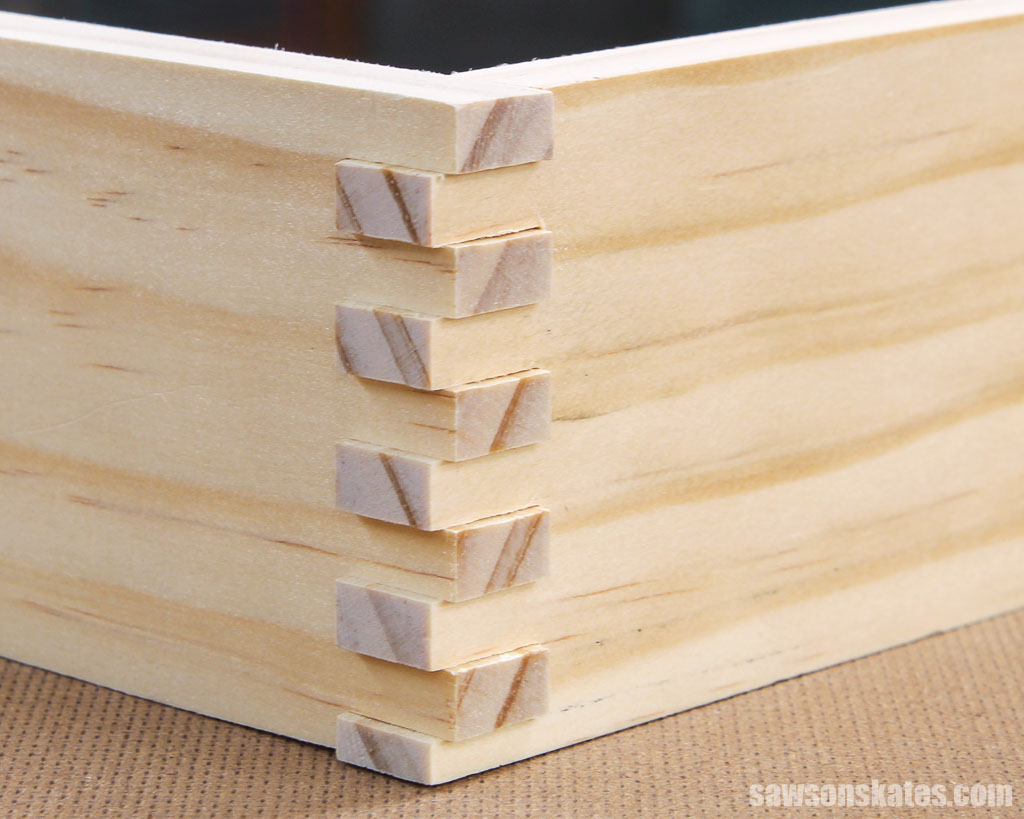
Many woodworking joints conceal the end grain from view. In contrast, box joints are designed to be seen rather than hidden, and the exposed alternating end grain adds a decorative appearance to projects.
Are Box Joints Strong?
Yes, box joints are quite sturdy and have comparable strength and similar mechanical qualities to dovetail joints. Instead of self-locking angled tails and pins like dovetails, box joints rely on glue to keep the pins from separating.
To better understand what makes this joint strong, first, we should discuss the parts of a box joint and the types of wood grain.
Parts of a Box Joint
- Pins
The pins are the interlocking fingers. - Sockets
The sockets are the spaces between the pins. - Shoulder
The shoulder is the bottom of the socket.
Wood Grain
- Face
The face grain is the widest side of a board and, when finished, is usually the surface that is seen. - End
The end grain is the side of the board where the pores are exposed. The pores are like drinking straws used to bring water from the roots to the tree’s branches. - Edge
The edge grain is the long, narrow side perpendicular to the board’s end.
The interlocking pins provide a large surface area for glue, which gives this joint its strength. Today’s PVA wood glues are so strong that the wood around the joint will break before the glue fails.
Related: What is PVA Glue? (Types, Benefits & Uses)
The shoulders are end grain, and applying glue to end grain does not provide a good bond because it’s absorbed into the pores. The alternating pins and sockets, on the other hand, are edge gain and gluing edge grain to edge grain results in an extremely strong connection.
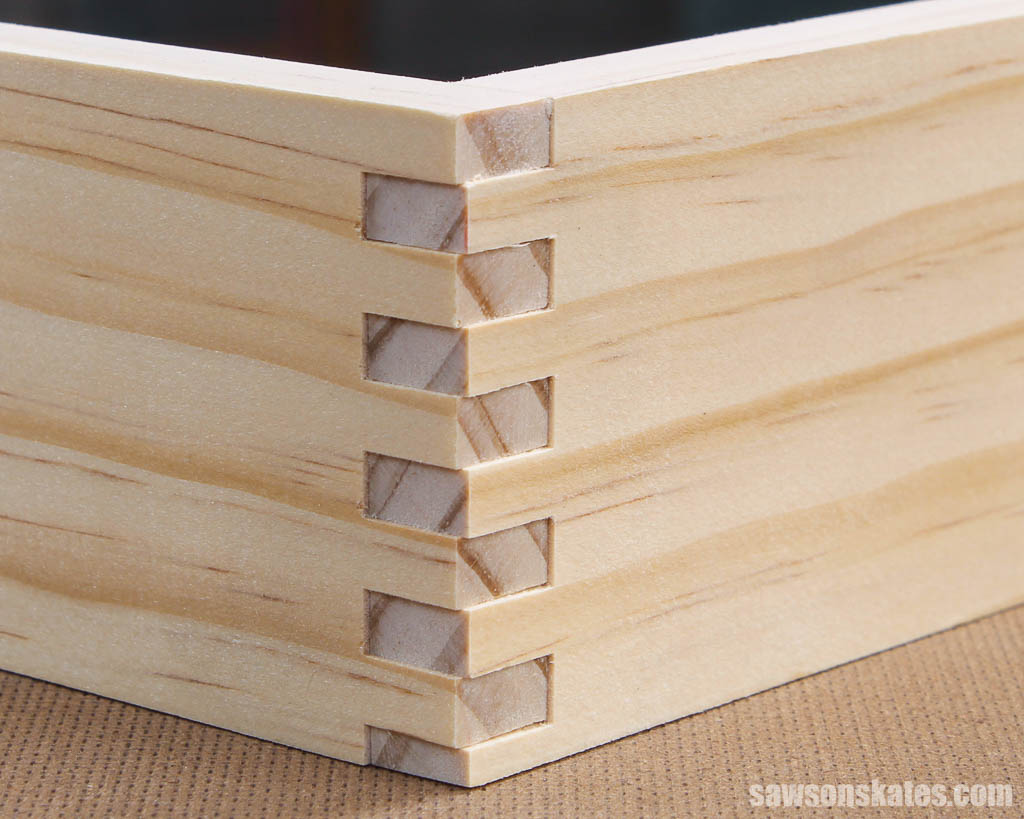
It’s essential that the pins fit together firmly without any gaps. It should only take a few gentle taps with a mallet to assemble. If the fit is too tight, the glue will squeeze out when you assemble the joint, and it won’t provide a solid bond.
Here’s a video that demonstrates the strength of a dovetail joint vs a box joint.
Box Joint Uses
Box joints are used for a variety of woodworking projects, and their decorative appearance adds visual interest to projects such as furniture, cabinets, jewelry boxes, and more.
The joint was said to have become popular during the machine age since they were easy to mass-produce. The first practical application was for the production of storage and shipping boxes.
📝 NOTE: If you’re building a period piece, only consider this joint for more modern projects built after 1900 since they were not widely used before then.
Many tool companies used box joints to construct storage boxes for their tools, and some still do. A few years ago, I bought a Harbor Freight Forstner bit set, and the wooden storage container was constructed with box joints.
Today, these easy-to-make joints are used for more than just storage and shipping containers.
The box joint, which is both attractive and durable, has grown in popularity due to its simplicity and ease of construction. It’s often the preferred joint for making nearly any decorative box.
The alternating grain pattern is beautiful on its own, but combining different wood species with contrasting colors elevates the joint to the next level.
The most common use of box joints is to join right angles, but they may also be used for hexagonal boxes and other shapes. The joint is also used to make a variety of woodworking projects beyond decorative boxes such as, drawers, lids, toolboxes, chests, and other furniture.
Box joints are also an excellent alternative to dovetails if you have a lot of pieces to assemble because they’re quick and easy to make.
How Do You Cut a Box Joint?
Traditionally, box joints have been cut entirely by hand. However, using a table saw, or router is the most popular and efficient approach today. Using power tools is both quicker and more precise than cutting by hand.
The two halves of the joint are nearly identical. The first and last pins are the exceptions, which are offset, allowing the halves to interlock.
General Guidelines
The width of the pins is entirely your preference; however, box joints are most pleasing to the eye when the width is equal to half the material thickness. For example, if you’re using 1/2-inch material, you’ll want the fingers to be 1/4-inch wide.
The most common finger widths are 1/4″, 3/8″, and 1/2″.
It’s more visually attractive if the material is divisible by the width of the pins; otherwise, you might be left with partial fingers at the end of your workpiece, which would look unbalanced. If you intend to use 1/4-inch wide pins, for example, your workpiece’s width should be easily divided by 1/4-inch.
The width of the pins should be adjusted on narrow workpieces to allow at least three pins on one board and two on the other.
How to Cut Box Joints by Hand
For anyone wanting to learn how to make dovetails, hand-cutting box joints is a fantastic place to start woodworking because you’ll learn some important hand tool skills, and the method used to cut them is similar to hand-cutting dovetails.
To cut box joints by hand, you’ll need a marking gauge, square, marking knife, dovetail saw, chisel, and a hammer.
First, use the marking gauge to lay out the depth of the pins on the workpiece. Next, draw perpendicular lines for the width of the pins with the square and marking knife. Then, score along the lines using a chisel before cutting them with a dovetail saw. Finally, use the hammer to knock out the waste material.
Here’s a short video that explains the basics of making box joints by hand.
How to Cut Box Joints with a Table Saw
To cut box joints with a table saw, you’ll need a jig and dado blades.
Box Joint Jig
You can buy a store-bought jig like this one, or you can make your own DIY jig.
Many woodworkers choose to build their own box joint jigs since they are inexpensive and easy to make.
Most do-it-yourself jigs use an indexing key or indexing pin. The indexing pin is the same width as the fingers and is used to position the workpiece and space the width of the fingers.
After the first finger is cut, the gap left by the cut is placed over the indexing pin, which precisely positions the workpiece for the next cut. This process is repeated until all of the fingers are cut.
Dado Stack
A stacked dado blade or a dado set is a saw blade specifically designed to cut dadoes, grooves, or slots into wood. Dadoes are often used for joinery, like creating rabbets or making slots for two parts to fit together, such as drawer bottoms or door panels. Dado blades are also used to cut the fingers for box joints.
DIY Box Joint Jig
Here’s an excellent video explaining how to make a simple box cutting jig with a table saw.
How to Cut Box Joints With a Router
There are two common ways to make box joints with a router, either with a handheld router or a router table.
Handheld Router
To cut box joints with a handheld router, you’ll need a jig and a straight bit.
Some dovetail jigs like this one also include a template for box joints. If not, check with the manufacturer of your dovetail jig to see if they offer one for an additional charge.
You can also make your own DIY router jig.
Store-Bought Jig
This simple jig mounts to a user-provided beam and allows you to cut 1/2-inch and 3/4-inch pins. An adjustable bushing attaches to the base of the router follows the teeth of the comb-like jig to cut the pins and sockets. The bushing may be adjusted to fine-tune the joint’s fit.
📝 NOTE: Each store-bought jig works a little differently, so refer to the instructions for your specific jig.
Here’s a short video that shows how to set up and use the jig.
DIY Handheld Router Jig
Here’s a video that shows how to make and use a DIY router jig.
Router Table
To cut box joints with a router table, you’ll either need a sliding jig that looks similar to table saw jig or a jig that clamps to the top of the router table like the Multi-Joint Spacing System.
Related: How to Use a Router Table for Beginners
Router Table Box Joint Jig
The Rockler Router Table Box Joint Jig is a jig for router tables that works similarly to a table saw jig, but it cuts the fingers using a bit rather than a blade.
The indexing key on the router table jig positions the workpiece precisely for the following cuts after the first finger has been cut. This procedure is repeated until all of the fingers have been cut.
Here’s a video that shows how to use the Rockler Jig.
Multi-Joint Spacing System
The Multi-Joint Spacing System can cut fingers in widths of 1/4″, 3/8″, and 1/2″. It has a fence that clamps to the top of the router table. A right-angle block straddles the guide rail in the fence and supports workpieces as they pass over the bit.
Here’s a video that shows how to use the Multi-Joint Spacing System.
Troubleshooting
Loose Pins
If there are gaps between the pins, you’ll need to:
- Table Saw: move the indexing pin away from the blade
- Handheld Router: move the bushing away from the bit
- Router Table: move the indexing pin away from the bit
Tight Pins
If the pins are too tight, or the joint doesn’t fit at all, you’ll need to:
- Table Saw: move the indexing pin toward the blade
- Handheld Router: move the bushing toward the bit
- Router Table: move the indexing pin toward the bit
Short Pins
If the pins are too low, you’ll need to:
- Table Saw: Raise the blade
- Handheld Router: Lower the bit
- Router Table: Raise the bit
Long Pins
If the pins extend more than 1/32″ you’ll need to:
- Table Saw: Lower the blade
- Handheld Router: Raise the bit
- Router Table: Lower the bit
Tips for Success
After you’ve made any necessary adjustments to the jig and your test joints fit properly, it’s time to cut the parts for your project. There are a few things to remember to maximize your success.
- At all times, keep the workpiece firmly pressed against the fence. Consider clamping the piece to the fence for bigger workpieces, such as heavy 3/4-inch material or wide and tall material. Clamping will improve safety and accuracy while making the cuts.
- For each cut, make sure the end of the workpiece is flat against the table or jig. The joint will not fit together properly if one or more pins are not cut to the correct length.
- It’s a good idea to check each matching set to make sure the fit is good and that the jig hasn’t moved out of adjustment.
How to Assemble
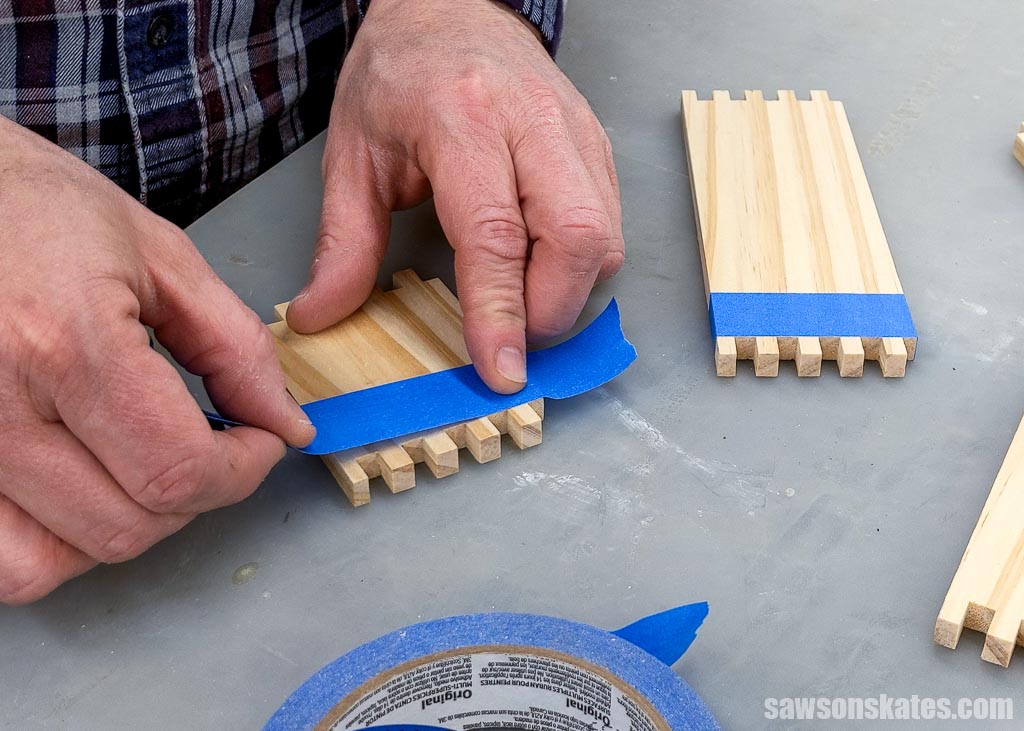
Applying painter’s tape will make it easy to remove any glue squeeze-out after the joint has been assembled.
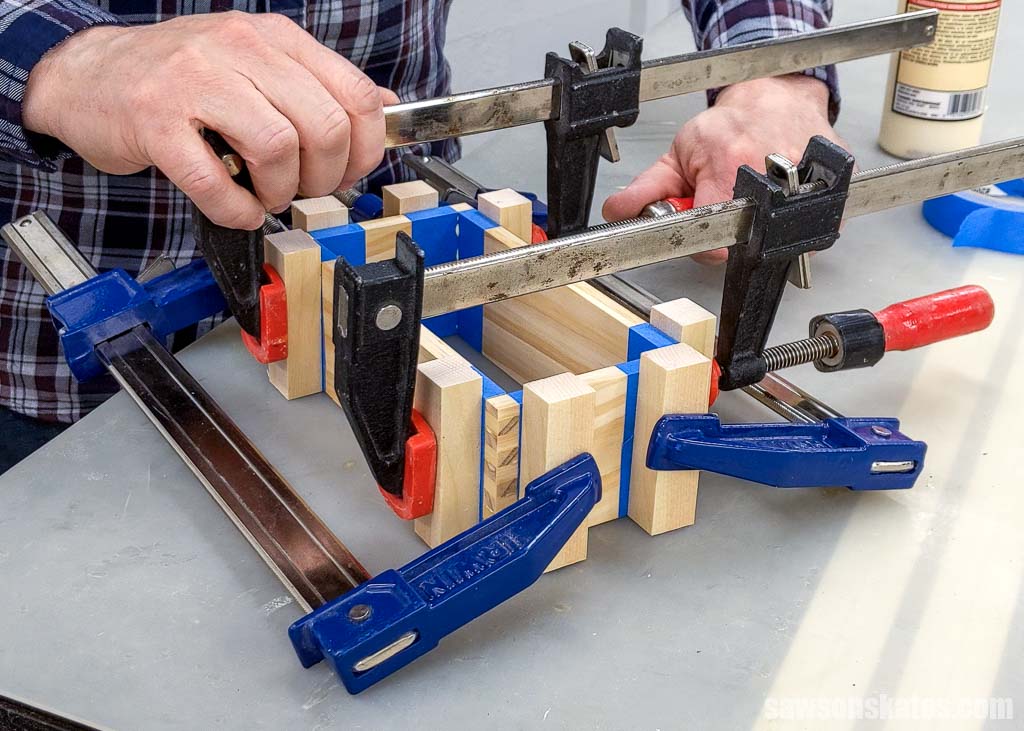
Use a small brush to apply a thin coat of glue on the pins and sockets, then work quickly to assemble the four corners before the glue begins to set.

Use clamps to hold the joints in place until the glue dries.
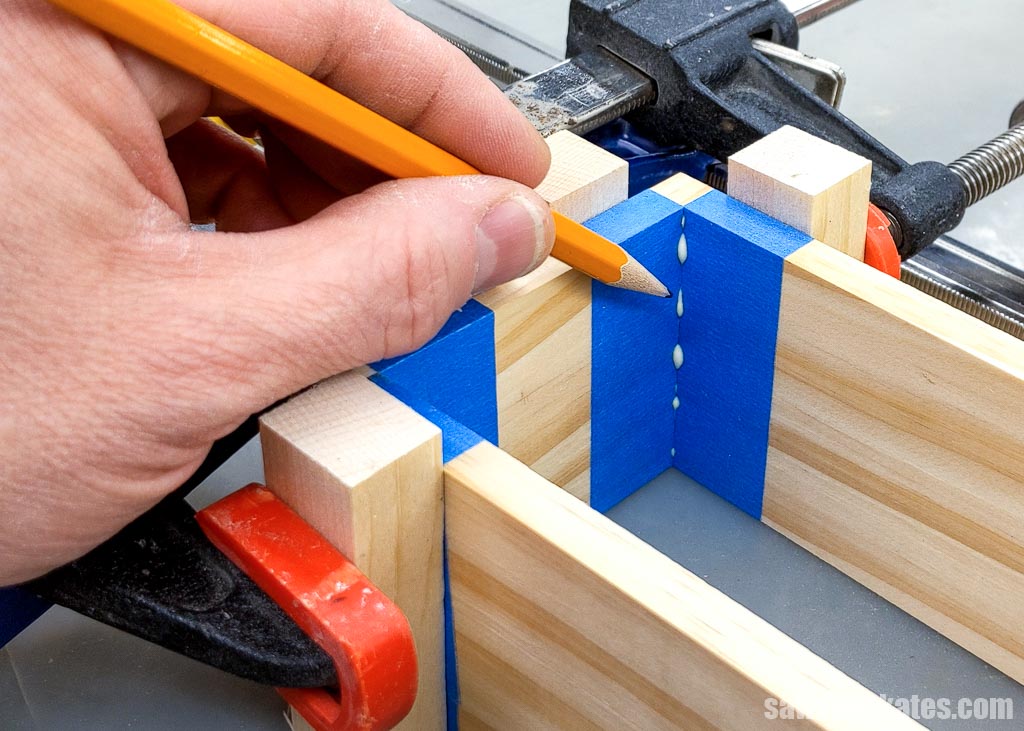
When the glue begins to form a skin, remove the painter’s tape along with any glue squeeze-out.
Final Thoughts
So, there you have it – everything you need to know about box joints. They’re strong, versatile, and add a touch of elegance to your woodworking projects. You can make them with three different tools, so they’re perfect for any skill level. Give them a try on your next project!
Thank you for stopping by. If you enjoyed this tutorial, would you please take a moment and pin it to Pinterest? I’d really appreciate it!
Pin This For Later

Hi there – I’m Scott, a woodworking enthusiast and creator of Saws on Skates, a site I started in 2015 to share easy-to-follow tutorials, space-saving shop tips, and project inspiration for DIYers at any skill level. Learn more about my woodworking journey here.
I made a small box using these box joints and once together I drilled a hole through each corner, then tapped in a cutoff length of wire coat hanger down each hole. That sucker ain’t never coming apart.