DIY Bar Cart (Easy, Stylish + Budget Friendly)
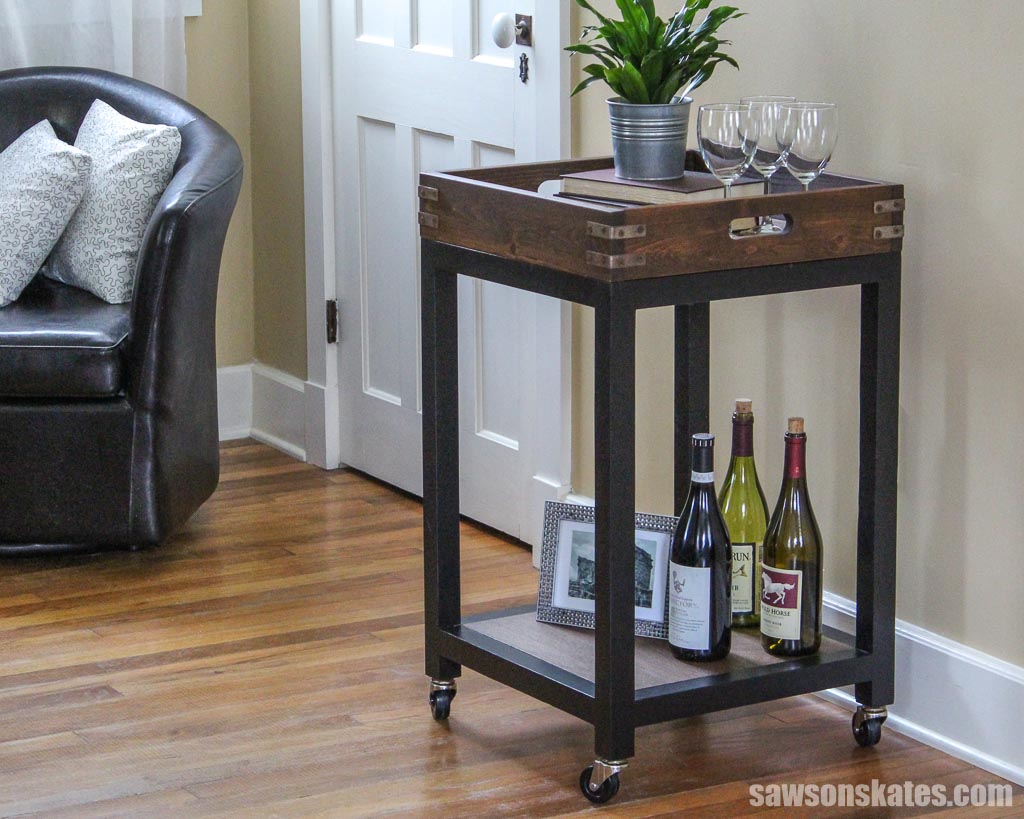
With a removable serving tray and plenty of storage, this easy-to-make DIY bar cart is a stylish and budget-friendly way to serve drinks for a party!
What Should I Build Next?
That's the question I help answer.
Every week, I send woodworking ideas to 17,000 DIYers who love building things.
You'd fit right in.
Are you looking for an attractive and affordable way to add a bar area to your home? Look no further than this DIY bar cart! With just a few simple supplies, you can create a handsome and functional bar cart that will complement any decor.
Plus, this project is budget-friendly, so you can save your hard-earned money for other things (like cocktails). So what are you waiting for? Grab the plan and get started on your DIY bar cart today.
Originally published June 21, 2016, republished May 9, 2022.
Table of Contents
- What Tools Do You Need?
- What Wood Should You Use?
- Customize Your DIY Bar Cart
- How Do You Finish the Bar Cart?
- How to Make a DIY Bar Cart
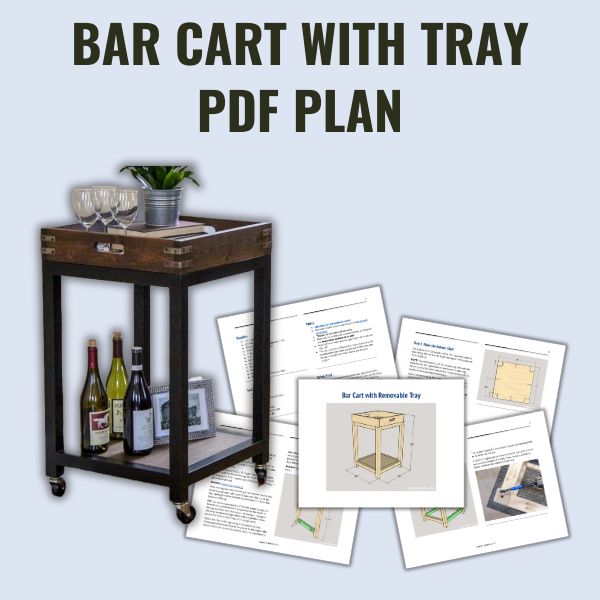
- Get the PDF Plan
This article contains affiliate links. If you purchase from these links, I may earn a small commission at no additional cost to you. Visit my site policies for more information.
Inspiration for This DIY Bar Cart
As a fellow do-it-yourselfer, I’m sure you know that inspiration can strike at any time. While meandering down an aisle at Target, I spotted a bar cart with a gold metal frame and a white plastic tray. I liked the overall design of the store-bought version, but I wanted to put my own spin on it.
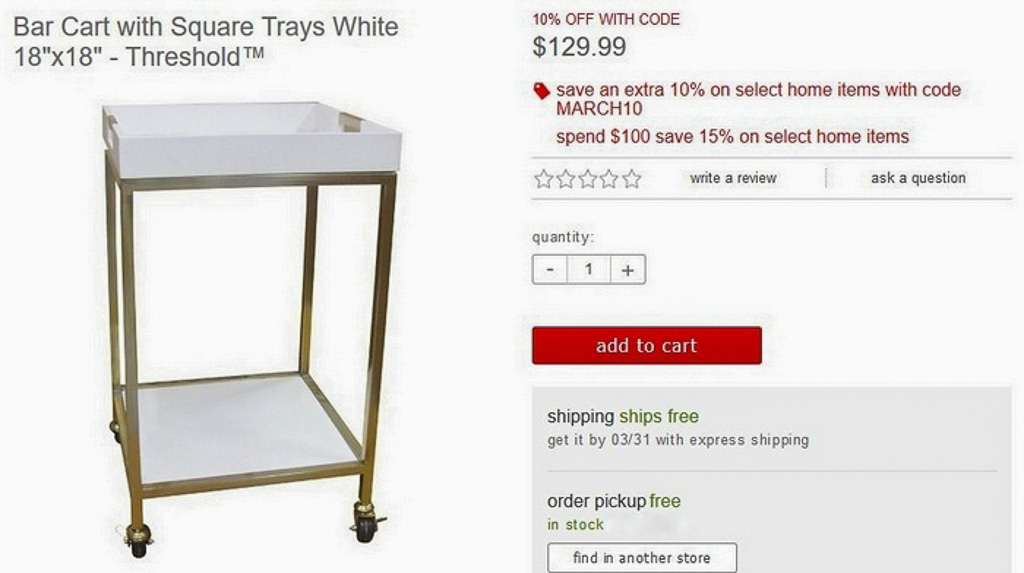
The first thing I wanted to do was swap the gold metal frame for a painted wood one.
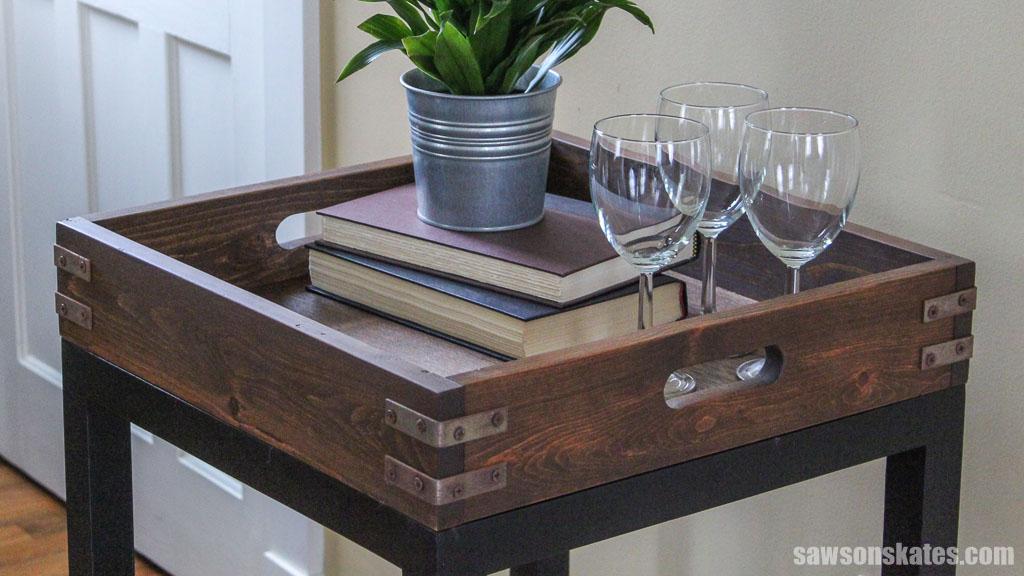
Next, I replaced the white plastic tray with a stained wood one accented with aged metal corner braces.
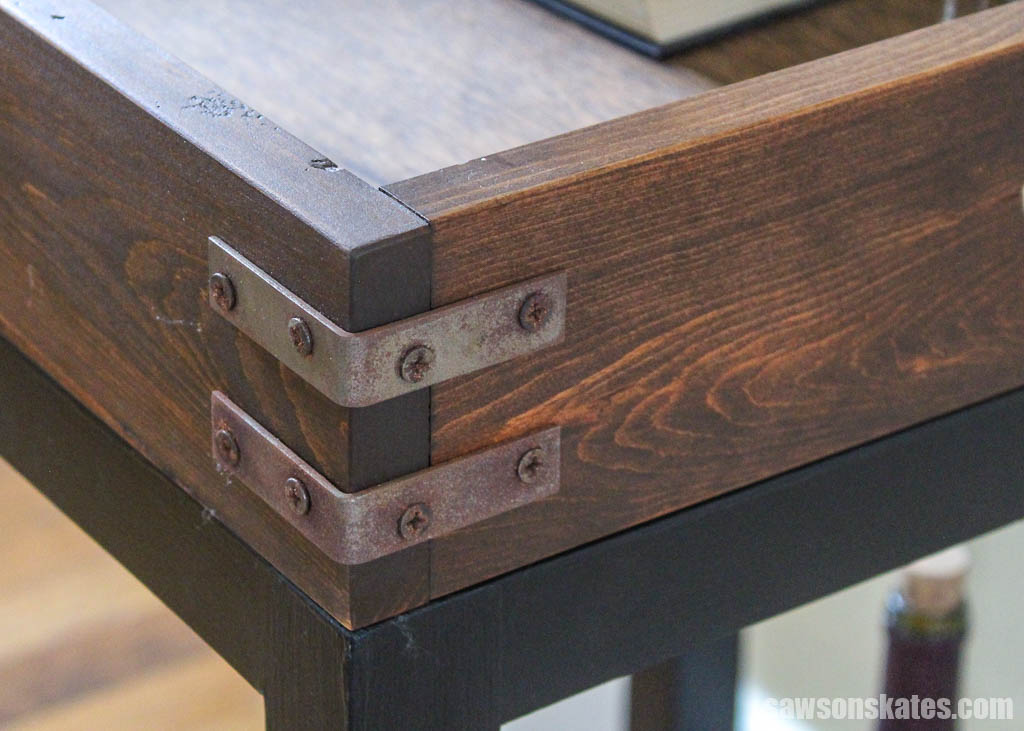
The metal corner braces are also a DIY project. I aged them with household supplies to make them look old, but you might also use spray paint on them instead.
Related: How to Age Metal
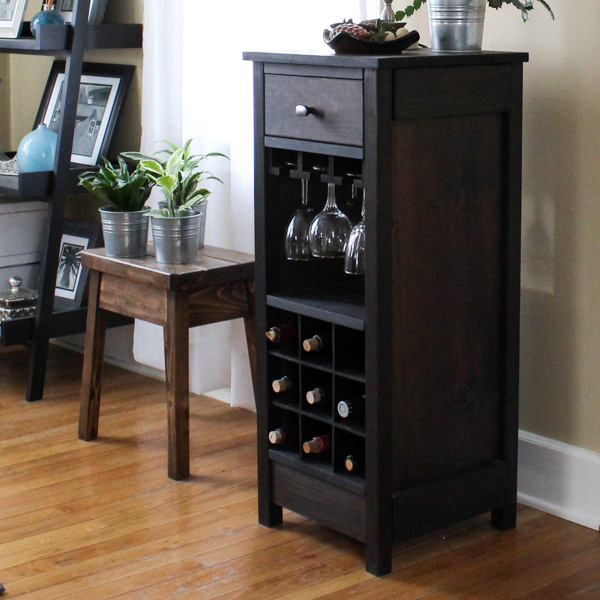
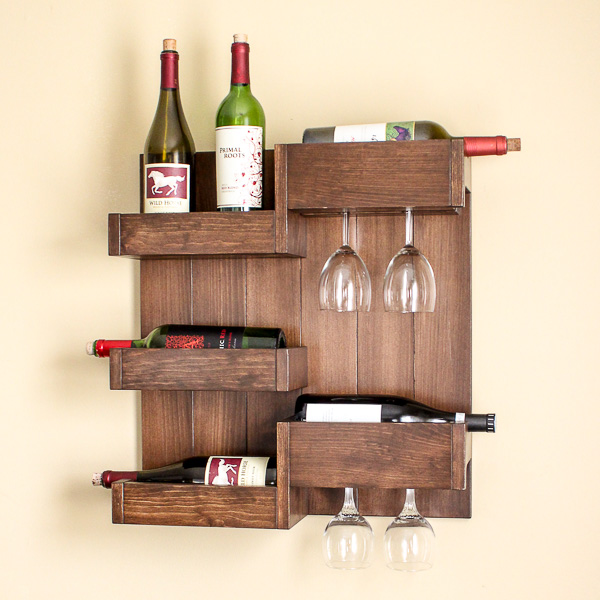
You may also enjoy this wine cabinet and this wine bar.
Where to Use a DIY Bar Cart
This stylish bar cart may be used in a variety of places around your home, such as your dining room, living room, or kitchen. You can also use it for entertaining outdoors on a patio or porch. The options are endless!
Wouldn’t this cart be an excellent addition to your next gathering? Use the bottom shelf to store your accessories, such as liquor, ice bucket, or coasters. Then fill the removable serving tray with your essentials, top it off with fresh flowers, and bring it to wherever your guests are!

This cart also makes a fantastic coffee bar. All you need is a coffee maker, sugar container, mugs, and you will have the ideal spot for your morning coffee.
What Tools Do You Need to Make a Wood Bar Cart?
This DIY bar cart can be completed in a weekend using only simple woodworking tools and skills, such as a miter saw, pocket hole jig, drill, and jigsaw.
You’ll also need an additional saw to cut the shelf and the bottom of the tray.
Miter Saw
I used my miter saw to cut all of the parts to length for this project.
Related: 7 Miter Saw Tricks Every DIYer Should Know
Pocket Hole Jig
This project was assembled using pocket hole joinery. To make the pocket holes, you may use whatever jig you have.
Related: Which Kreg Pocket Hole Jig Should You Buy?
Drill
You will need a drill to make the pocket holes and drive the pocket hole screws that connect the pieces together. I also made the holes for the handles with the drill and a Forstner bit.
Related: Impact Driver vs Drill: What’s the Difference?
Jigsaw
The handle area between the Forstner bit holes was removed with a jigsaw.
Additional Saw
You’ll need another saw to cut the shelf and the bottom of the serving tray. For my cart, I used a table saw to cut these pieces. If you’re not comfortable with a table saw, you could use a circular saw instead.
A circular saw and a Kreg Rip-Cut or Kreg Accu-Cut would be an accurate way to cut the parts to the proper dimensions.
Related: 4 Ways to Make Straight Cuts with a Circular Saw
What Wood Should You Use?
This project was made with wood that I bought at my local home improvement store, including 1×2s, 1×4s, and 2×2s.
I designed the cart’s frame so it can be made with 2×2s. The advantage of 2×2s is they’re relatively inexpensive, but the downside is that straight ones are difficult to come by. Most of the ones I’ve seen are shaped like a banana!
Related: Beginner’s Guide to Wood Sizes
Take your time and go through the lumber pile, looking for the straightest boards with the fewest knots.
Related: How to Buy Wood (Top Tips for Choosing Woodworking Lumber)
You may have noticed how the edges of 2×2s are rounded. I wanted the legs of my bar cart to have square edges. To make the legs for this project, I used 2×4s rather than 2×2s.
I began by removing the rounded edge from one side of the 2×4 with my table saw. Then, I ripped the 2×4 to 1-½” wide, making it the same dimension as a 2×2.
Related: Table Saw Safety Rules (Every DIYer Should Know)
I made the wooden tray using 1x lumber for its sides, but it may also be made of pallet wood.
Related: Building with Pallets Has Pros and Cons
I also used a small sheet of ½” plywood to make the shelf and the bottom of the tray.
Customize Your DIY Bar Cart
Your bar cart may be customized to fit your needs and style.
Add a Storage Crate
For additional storage, you could add a crate underneath the bar cart. This is an excellent place to store extra glasses, napkins, and other party supplies. You may buy a store-bought crate or simply build your own.
Add Pipes
Another way to customize the look of your bar cart is to add pipes between the legs. This will give your project an industrial look. You could use galvanized iron or copper pipes or even wooden dowels instead.
Install them near the top as a towel bar or near the bottom to keep objects from rolling off. You could also install them at both the top and bottom.
Install Wine Glass Racks
If you plan to use your bar cart for wine, you could install wine glass racks. This will keep your glassware from tipping over and breaking. You could purchase wine glass racks or make your own.
How Do You Finish the Bar Cart?
The possibilities for finishing your cart are endless. You might leave it natural, paint it, stain it, or a combination of the two.
I chose to paint my cart’s frame and stain the tray and shelf.
Cart Frame
I sanded the frame smooth and applied several coats of a shellac-based primer to prevent any knots from bleeding through the paint.
Related: How to Stop Knots from Bleeding Through Paint
Then, I painted the legs with two coats of black satin paint. You may paint your cart’s legs black, white, or any color you choose.
Top Tray and Shelf
The tray and shelf were sanded and stained with Rust-Oleum Early American Stain.
Related: How to Get Wood Stain Off Skin (10 EASY Methods)
I allowed the stain to dry for about 24 hours and sealed these pieces with three coats of Bob’s Miracle Finish. You could also seal these parts with polyurethane or Polycrylic.
Related: Polycyrlic vs Polyurethane: Are They The Same?
DIY Bar Cart
Printed Plan
Get the PDF plan here (includes detailed instructions, measurements, and bonus tips)
Supplies
- Wood (per the printed plan)
- 1″ Pocket Screws
- 2-½” Pocket Screws
- #8 1″ Wood Screws
- (8) 2″ Corner Braces
- Wood Glue
- Painter’s Tape
- (4) 2″ Casters
- Rust-Oleum Early American Stain
Tools
- Tape Measure
- Miter Saw
- Table Saw or Circular Saw
- Jigsaw
- Kreg Jig
- Kreg Multi-Mark
- Countersink Drill Bit
- 1″ Forstner Bit
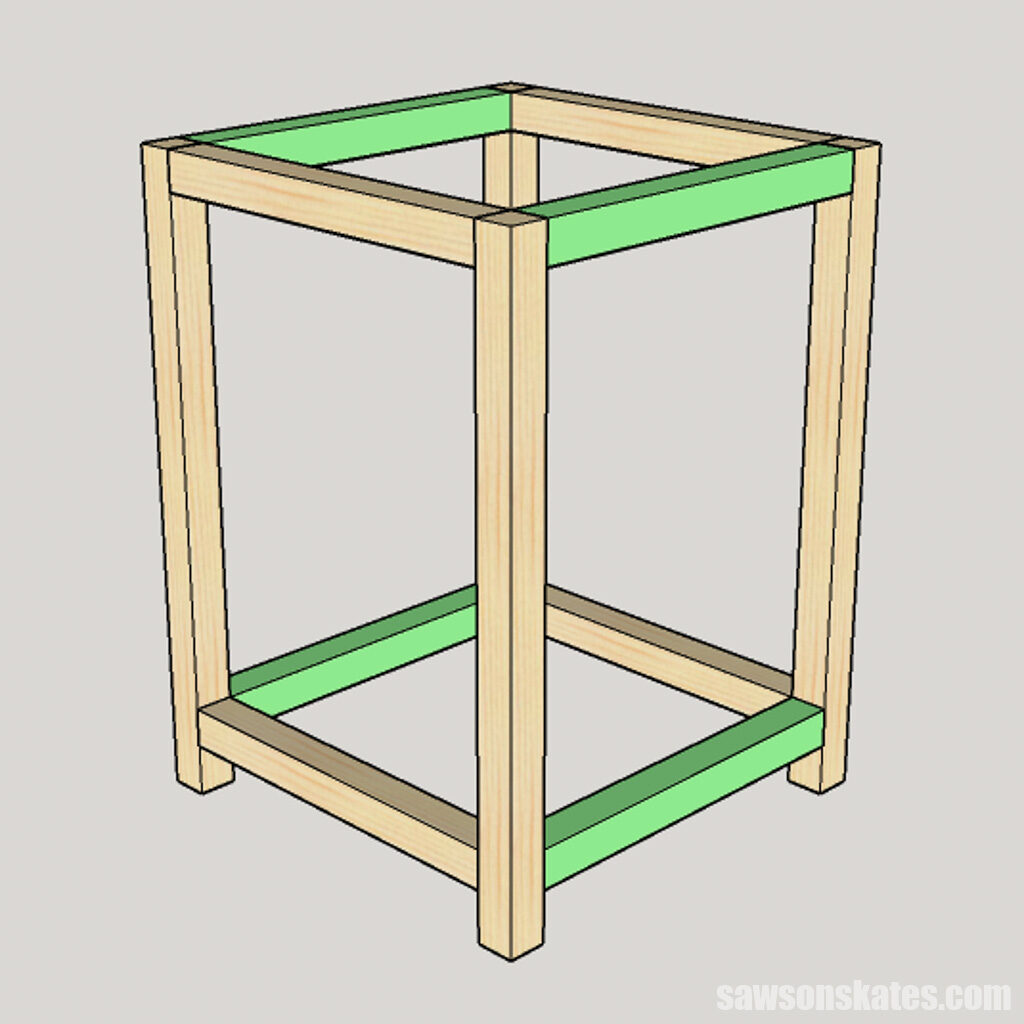
Step 1. Make the Cart Frame
Measure and cut four pieces of wood to length for the legs.
Related: How to Use a Tape Measure Correctly (Tips for Success)
Cut eight pieces of wood to length for the rails and drill pocket holes in each end.
Related: How to Use a Pocket Hole Jig
Place two legs and two rails on your workbench. Apply glue to the top rail and make sure it’s flush with the top of the legs. Apply glue to the bottom rail and place it up from the bottom of the leg.
💡 TIP: I cut some scrap wood to length to help position the bottom rail. I placed the scrap wood on the inside of the legs and flush with the bottom of the legs. I clamped the scrap wood to the legs when it was in position. Next, I placed the bottom rail on top of the scrap wood.
Attach the rails to the legs using 2-½” pocket screws. These pocket holes are located very close to the edge of the board, which can cause the wood to crack. It’s important to drive the screws slowly. Using a Kreg Face Clamp and lubricating the screws with candle wax can help prevent cracking the wood. Repeat for the remaining set of legs and rails.
Related: 7 Ways to Prevent Pocket Screws from Splitting Wood
Next, connect the two side frames with the remaining frame pieces.
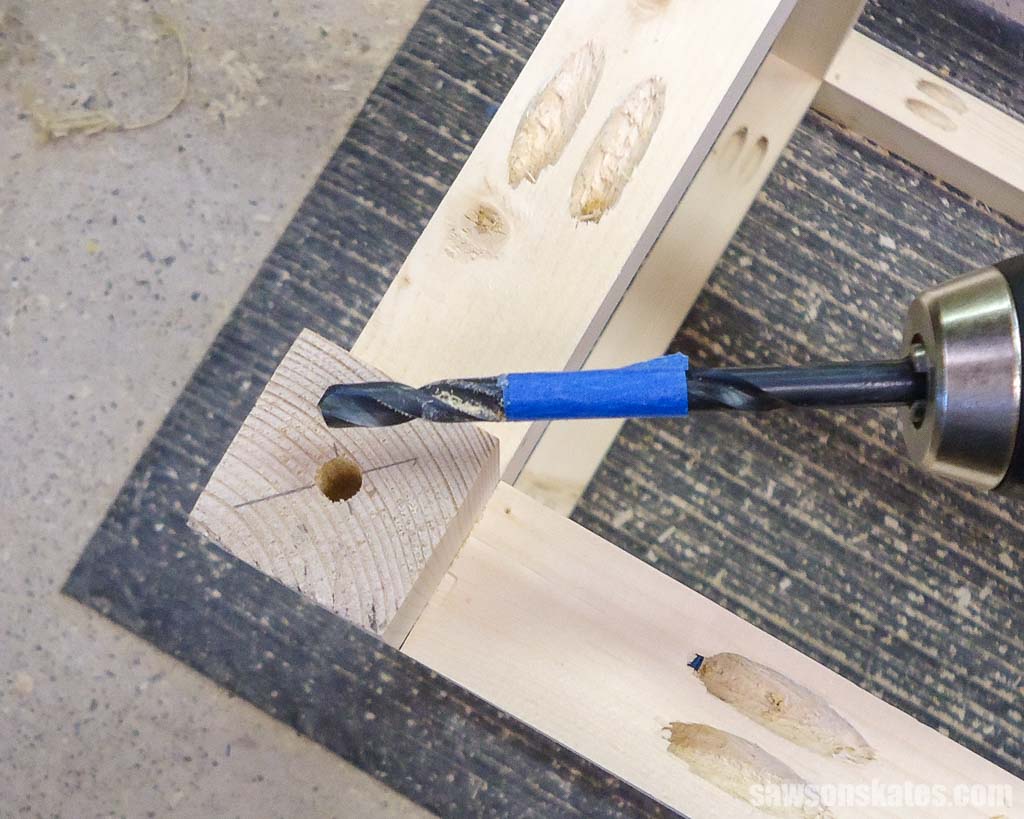
The casters I used for this project require a mounting hole in the leg. I used a straightedge to draw a line from corner to corner to locate the center of the leg. Then, I used a drill bit to make a hole in the bottom of each leg.
Step 2. Make the Bottom Shelf
Cut a piece of plywood to size for the shelf. I applied painter’s tape along the cut lines to keep the edges of the plywood from chipping.
📝 NOTE: The shelf needs to fit in the opening between the bottom rails. It’s a good idea to measure the opening before cutting the shelf. Adjust the measurements of the shelf to fit the opening if necessary.
Next, I set my Kreg Jig for ½” material and drilled several pocket holes around the edge of the shelf. These holes will be used later to attach the shelf to the rails.
Don’t attach the shelf now. It’s easier to paint the legs and stain the shelf separately and attach it to the bottom of the frame when the paint and stain are dry.
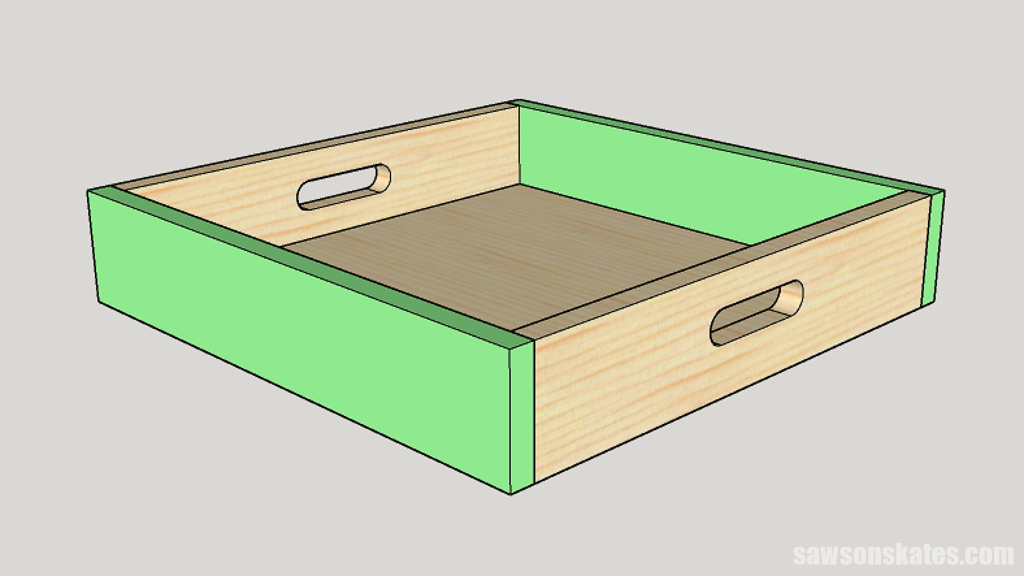
Step 3. Make the Serving Tray
Cut a piece of plywood to size for the bottom of the tray. I applied painter’s tape along the cut lines to keep the edges of the plywood from chipping.
Next, I drilled several pocket holes around the edge. These holes will be used later to attach the bottom to the sides.
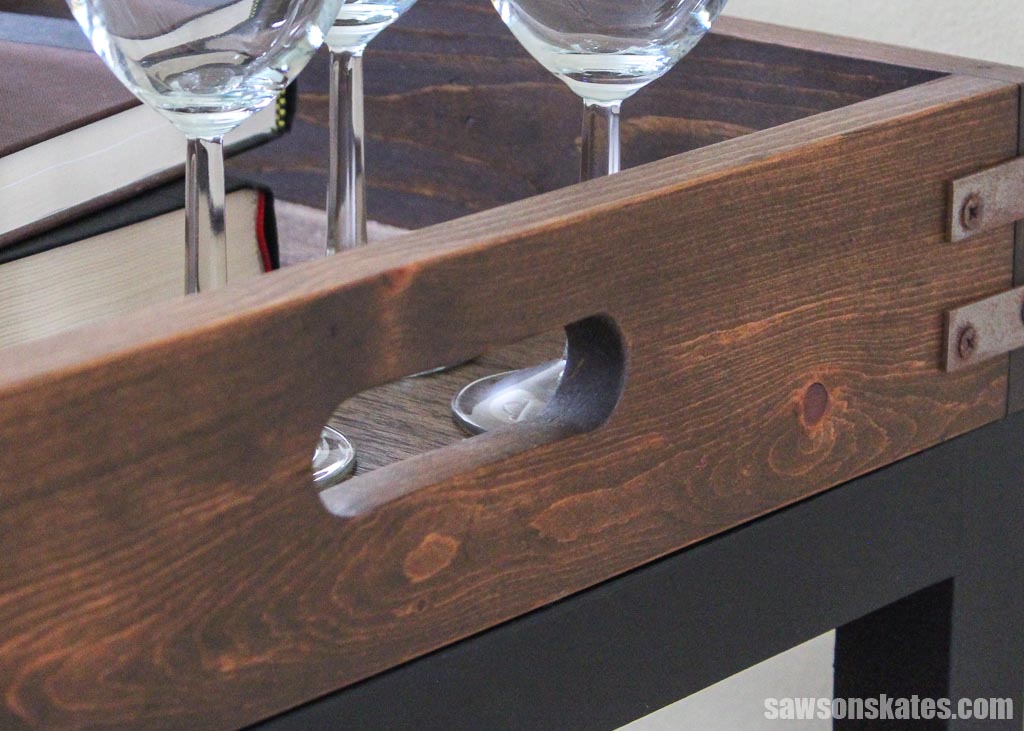
Cut two pieces of wood to length. Use the diagram in the printed plan to layout the location of the handles. Then, use a Forstner bit to drill a hole at each mark.
Related: What is a Forstner Bit? (& How to Use It)
Next, use a Kreg Multi-Mark to draw lines to connect the top and bottoms of the holes. Use a jigsaw to cut the remaining material between the holes. Use sandpaper to smooth the inside edges of the handles.
🔄 OPTIONAL: You can attach store-bought cabinet door handles, or drawer pulls instead of cutting out handles in the tray.
Apply glue to the edges of the plywood, clamp the sides, so they are flush with the bottom, and attach using 1″ pocket screws.
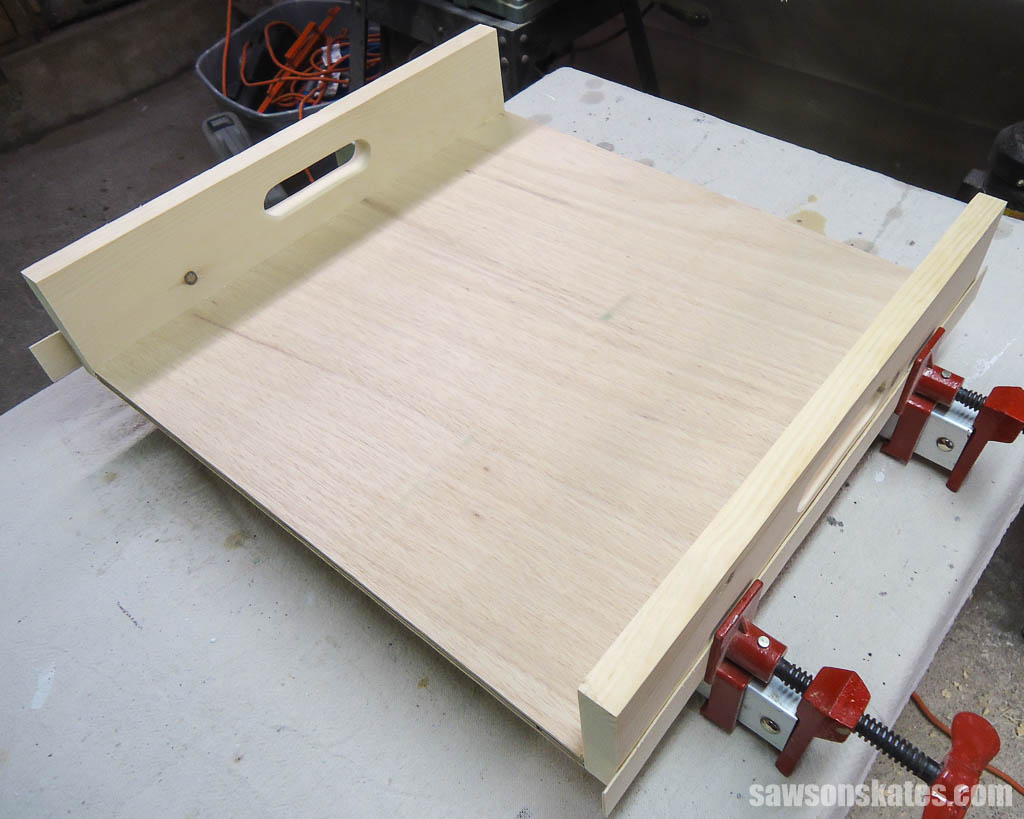
Cut two pieces of wood to length for the front and back. Apply glue to the edges of the plywood, clamp the front and back so they are flush with the bottom, and attach using 1″ pocket screws.
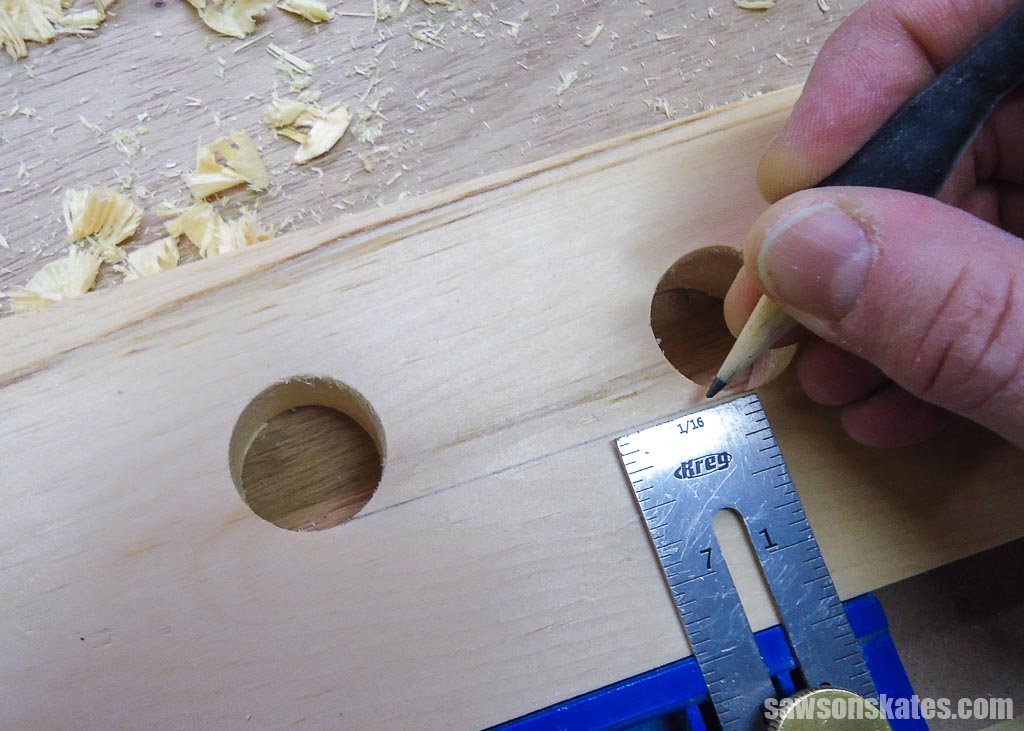
Cut four pieces of wood to length for the feet. The feet serve double duty and help lock the tray into the framework of the legs.
Use a straightedge to draw a line from corner to corner to locate the center of the foot, then use an awl at each intersection to make a starting point for the drill.
Related: What is an Awl? (+ How to Use It)
Next, use a countersink bit to drill a hole at each mark.
Related: How to Use a Countersink Bit
I placed the tray upside down on my workbench and positioned the legs on top. Then, I marked the corners on the bottom of the tray.
I set my Kreg Multi-Mark on the bottom of the tray, so the ruler was even with the pencil mark. Next, I moved the ruler to add about an ⅛”. This will position the feet a little farther into the tray, which will give it a little wiggle room when placing it on the legs.
Apply glue to the feet, position with the Kreg Multi-Mark, and attach using 1″ wood screws.
You could also attach the feet with a brad nailer and brad nails if you have one.
Related: Pin Nailer vs Brad Nailer (Differences + Which to Use)
Step 4. Finish the DIY Bar Cart
See How Do You Finish the Bar Cart for more information.
When the finish is dry, position the shelf flush with the top of the rails and attach using 1″ pocket screws.

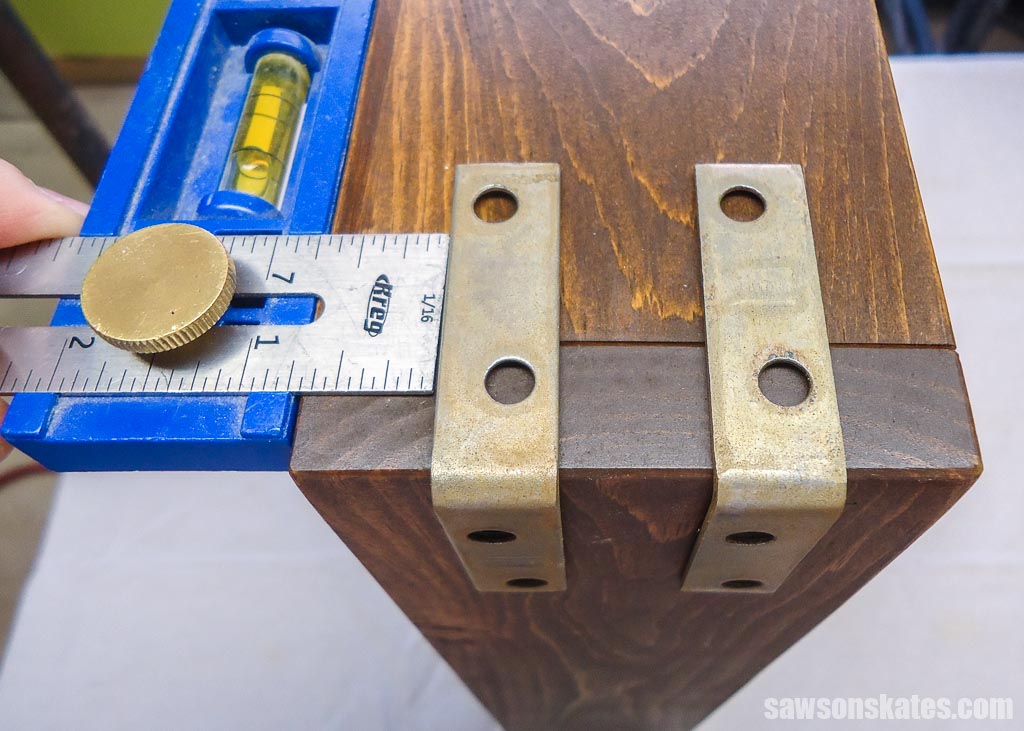
I set my Kreg Multi-Mark to ¾” and used it to position the braces on the tray. Attach with the screws included with the corner braces.
Push the casters into the holes in the ends of the legs.
Includes:
- List of tools and materials
- Complete measurements (in inches)
- Easy-to-follow instructions
- Detailed diagrams
Final Thoughts
Ready to make your own DIY bar cart? Follow the plan, and you’ll be enjoying your new bar in no time. This project is easy and budget-friendly, so it’s perfect for beginner DIYers. Plus, you can customize your bar cart however you want to fit your own style. So what are you waiting for? Get started today!
Thank you for stopping by. If you found this information helpful, would you please pin it to Pinterest? Other DIYers would appreciate it and I would too! Thank you – Scott
Recommended For You
Pin This For Later

Hi there – I’m Scott, a woodworking enthusiast and creator of Saws on Skates, a site I started in 2015 to share easy-to-follow tutorials, space-saving shop tips, and project inspiration for DIYers at any skill level. Learn more about my woodworking journey here.
Scott, as always, your projects are awesome! Your bar cart with the removable tray shines compared to the Target one! Thanks for the the plans and your awesome website!
Thank you so much for your kind words Tracey – I really appreciate it!
Scott, as an addition just looking at the top, and as a simple modification, extend two sides of the top tray 1/4 to 3/8″ and add a top to the cart separate from the top tray. this would allow a second surface for entertaining items. The top tray could then be removed or left in place, depending on the needs of the entertainer.
Thank you for the suggestion, Jim!