How to: Stencil a Designer Lamp with Cutting Edge Stencils

When Hometalk invited me to make a project using stencils the first thing I thought was… I haven’t used stencils since I was in elementary school – how I’m going to make something cool with stencils?!
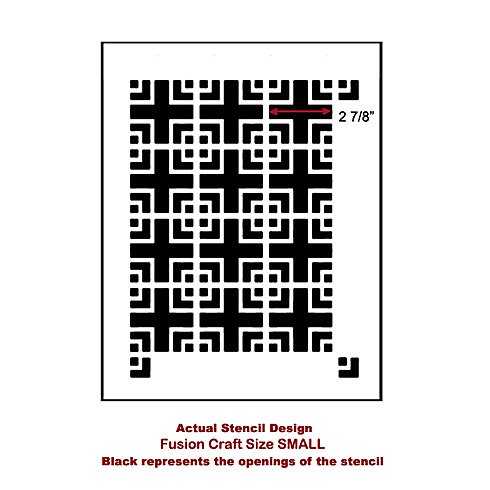
Then I went to the Cutting Edge Stencils website. Man, was I WRONG! These aren’t your elementary school stencils. These stencils are grown up, sophisticated, modern and funky! Many of the stencils are for large projects like walls, but there are also stencils for smaller projects like furniture. That’s where I found the stencil for my project – a pattern called “Fusion” size small. Once I ordered my stencil, it arrived lightning fast. If I didn’t know better, I would have thought they delivered it with a drone!

Now that I had chosen a design, I needed to decide what I was going to stencil. Again I went to the Cutting Edge Stencils website for inspiration. There are many project ideas on their site to get your creative juices flowing. Walls, curtains, pillows and furniture projects like dressers, tables, chairs and more. I knew I wanted to make a unique project. Something as unique as Cutting Edge Stencils. There was one project I didn’t see there and that’s what I was going to make…
Here’s the before…

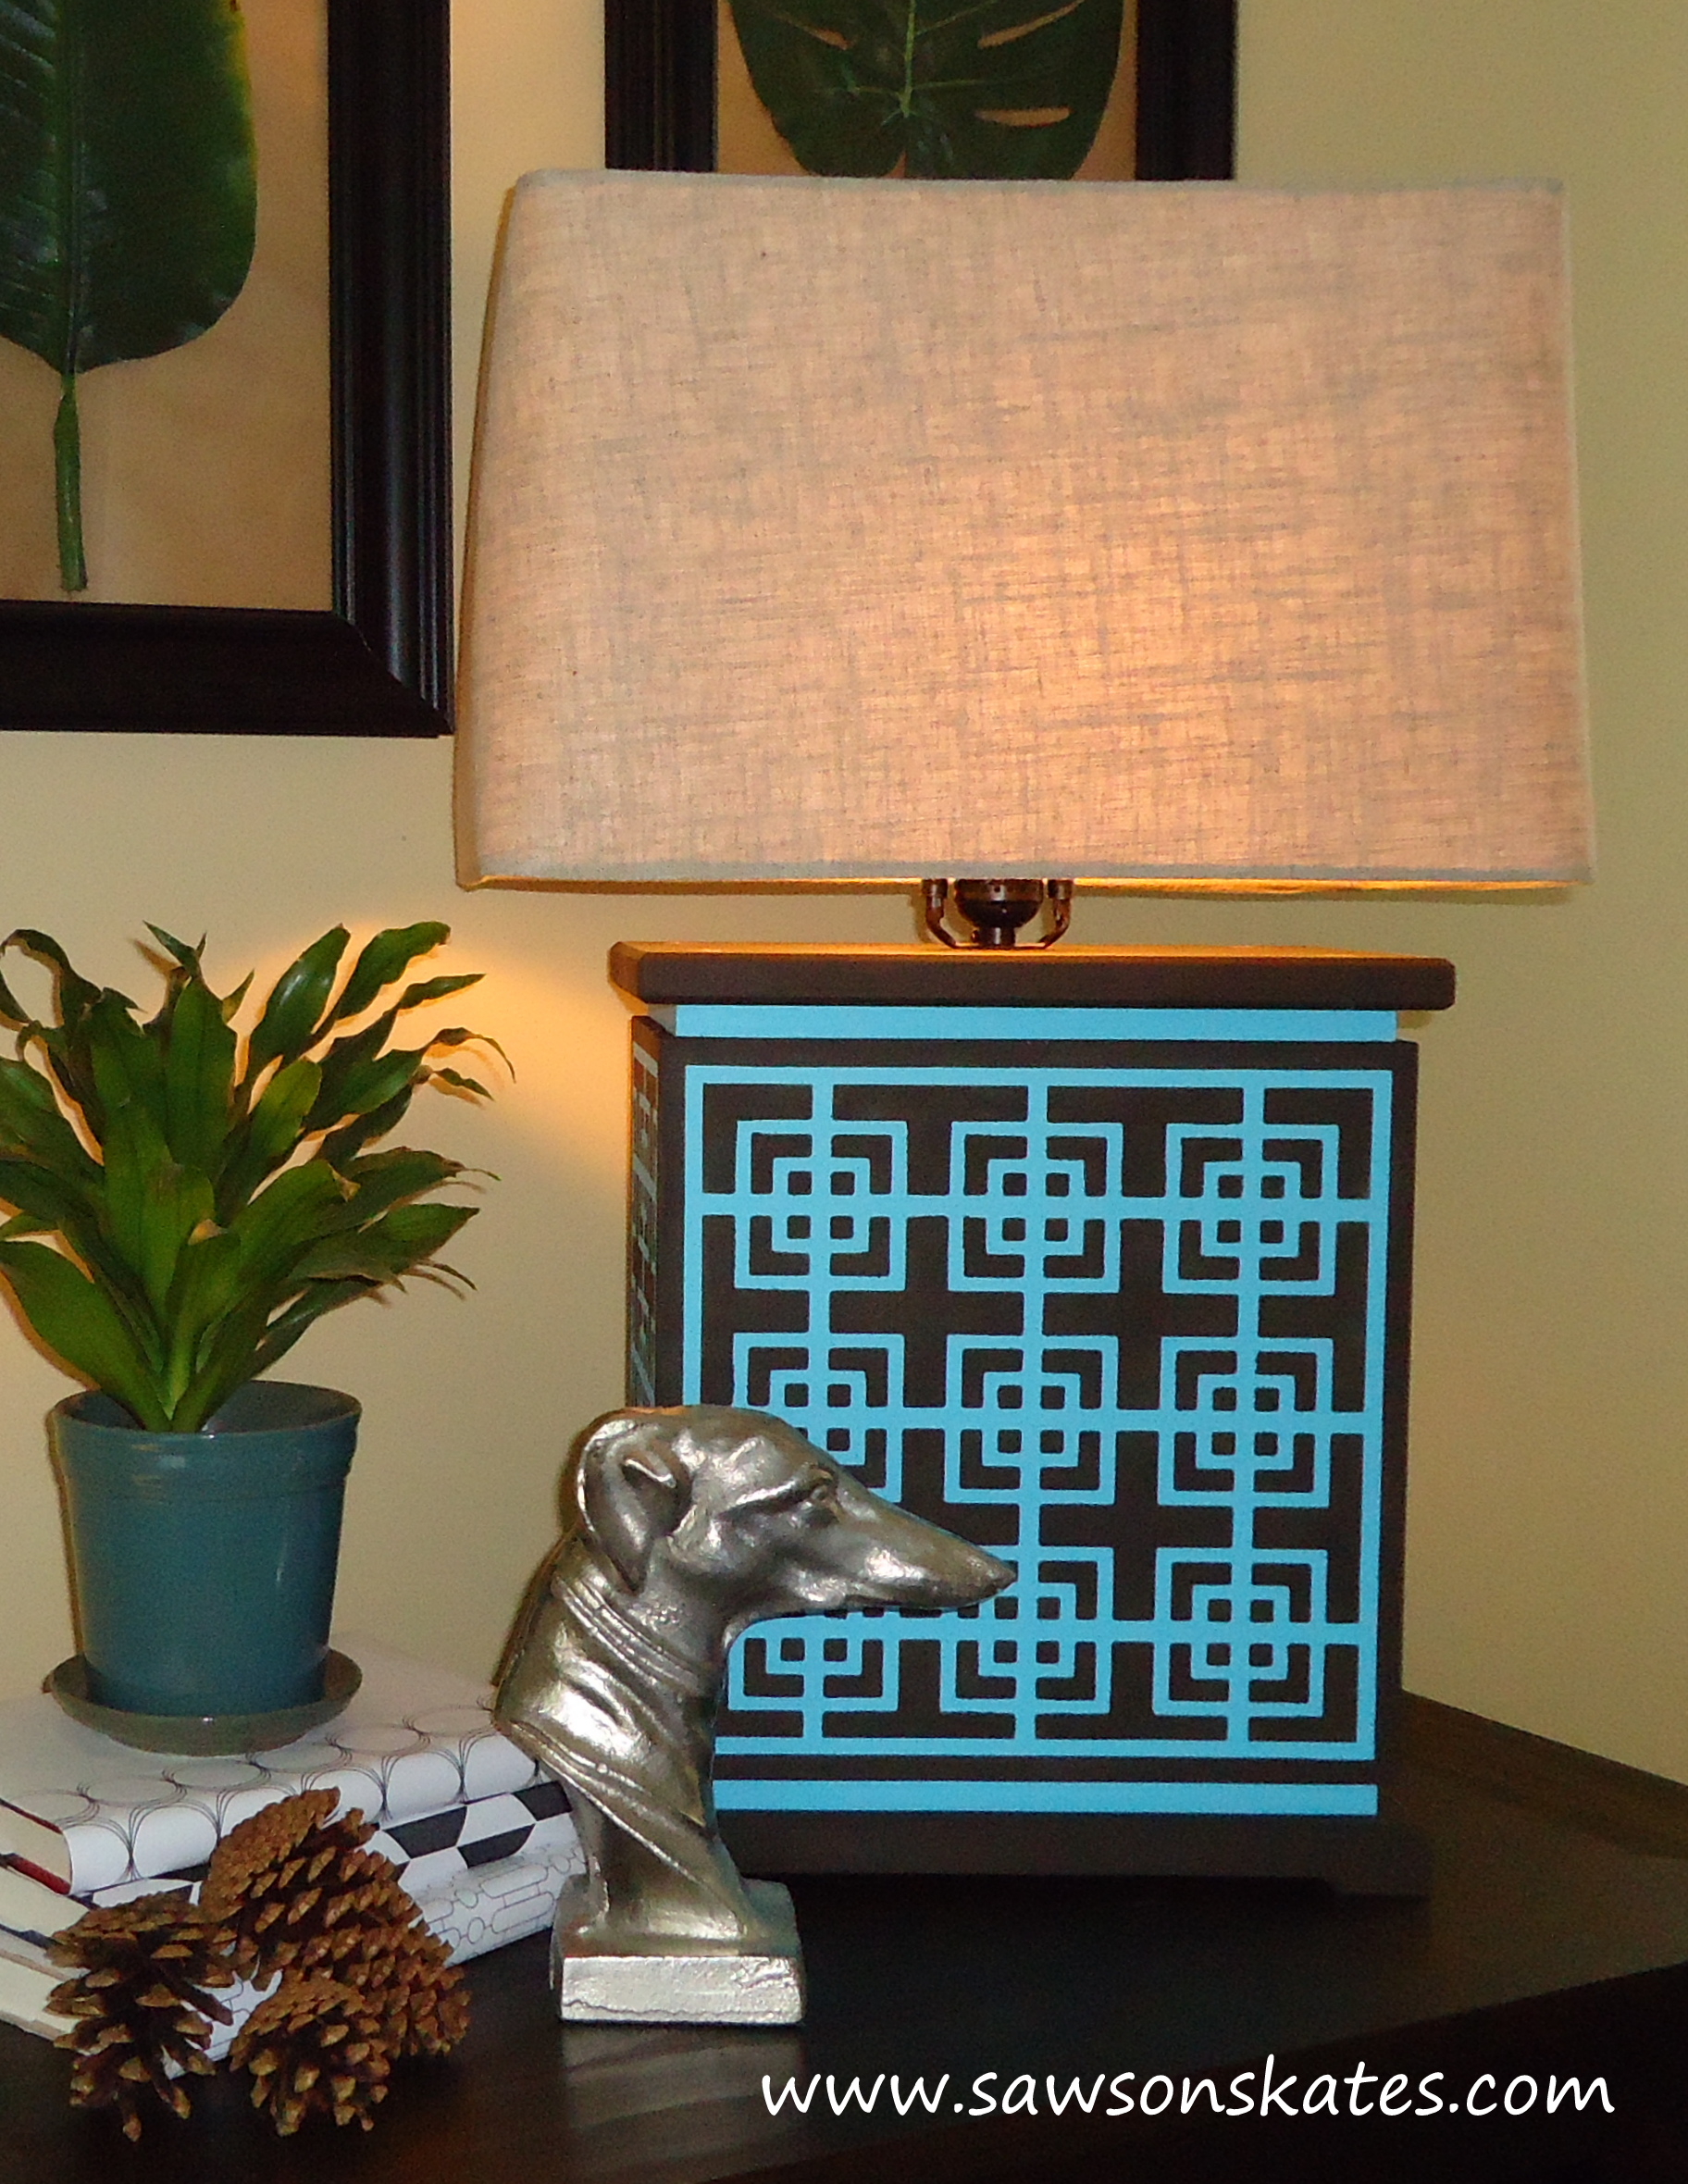
And here’s the after…
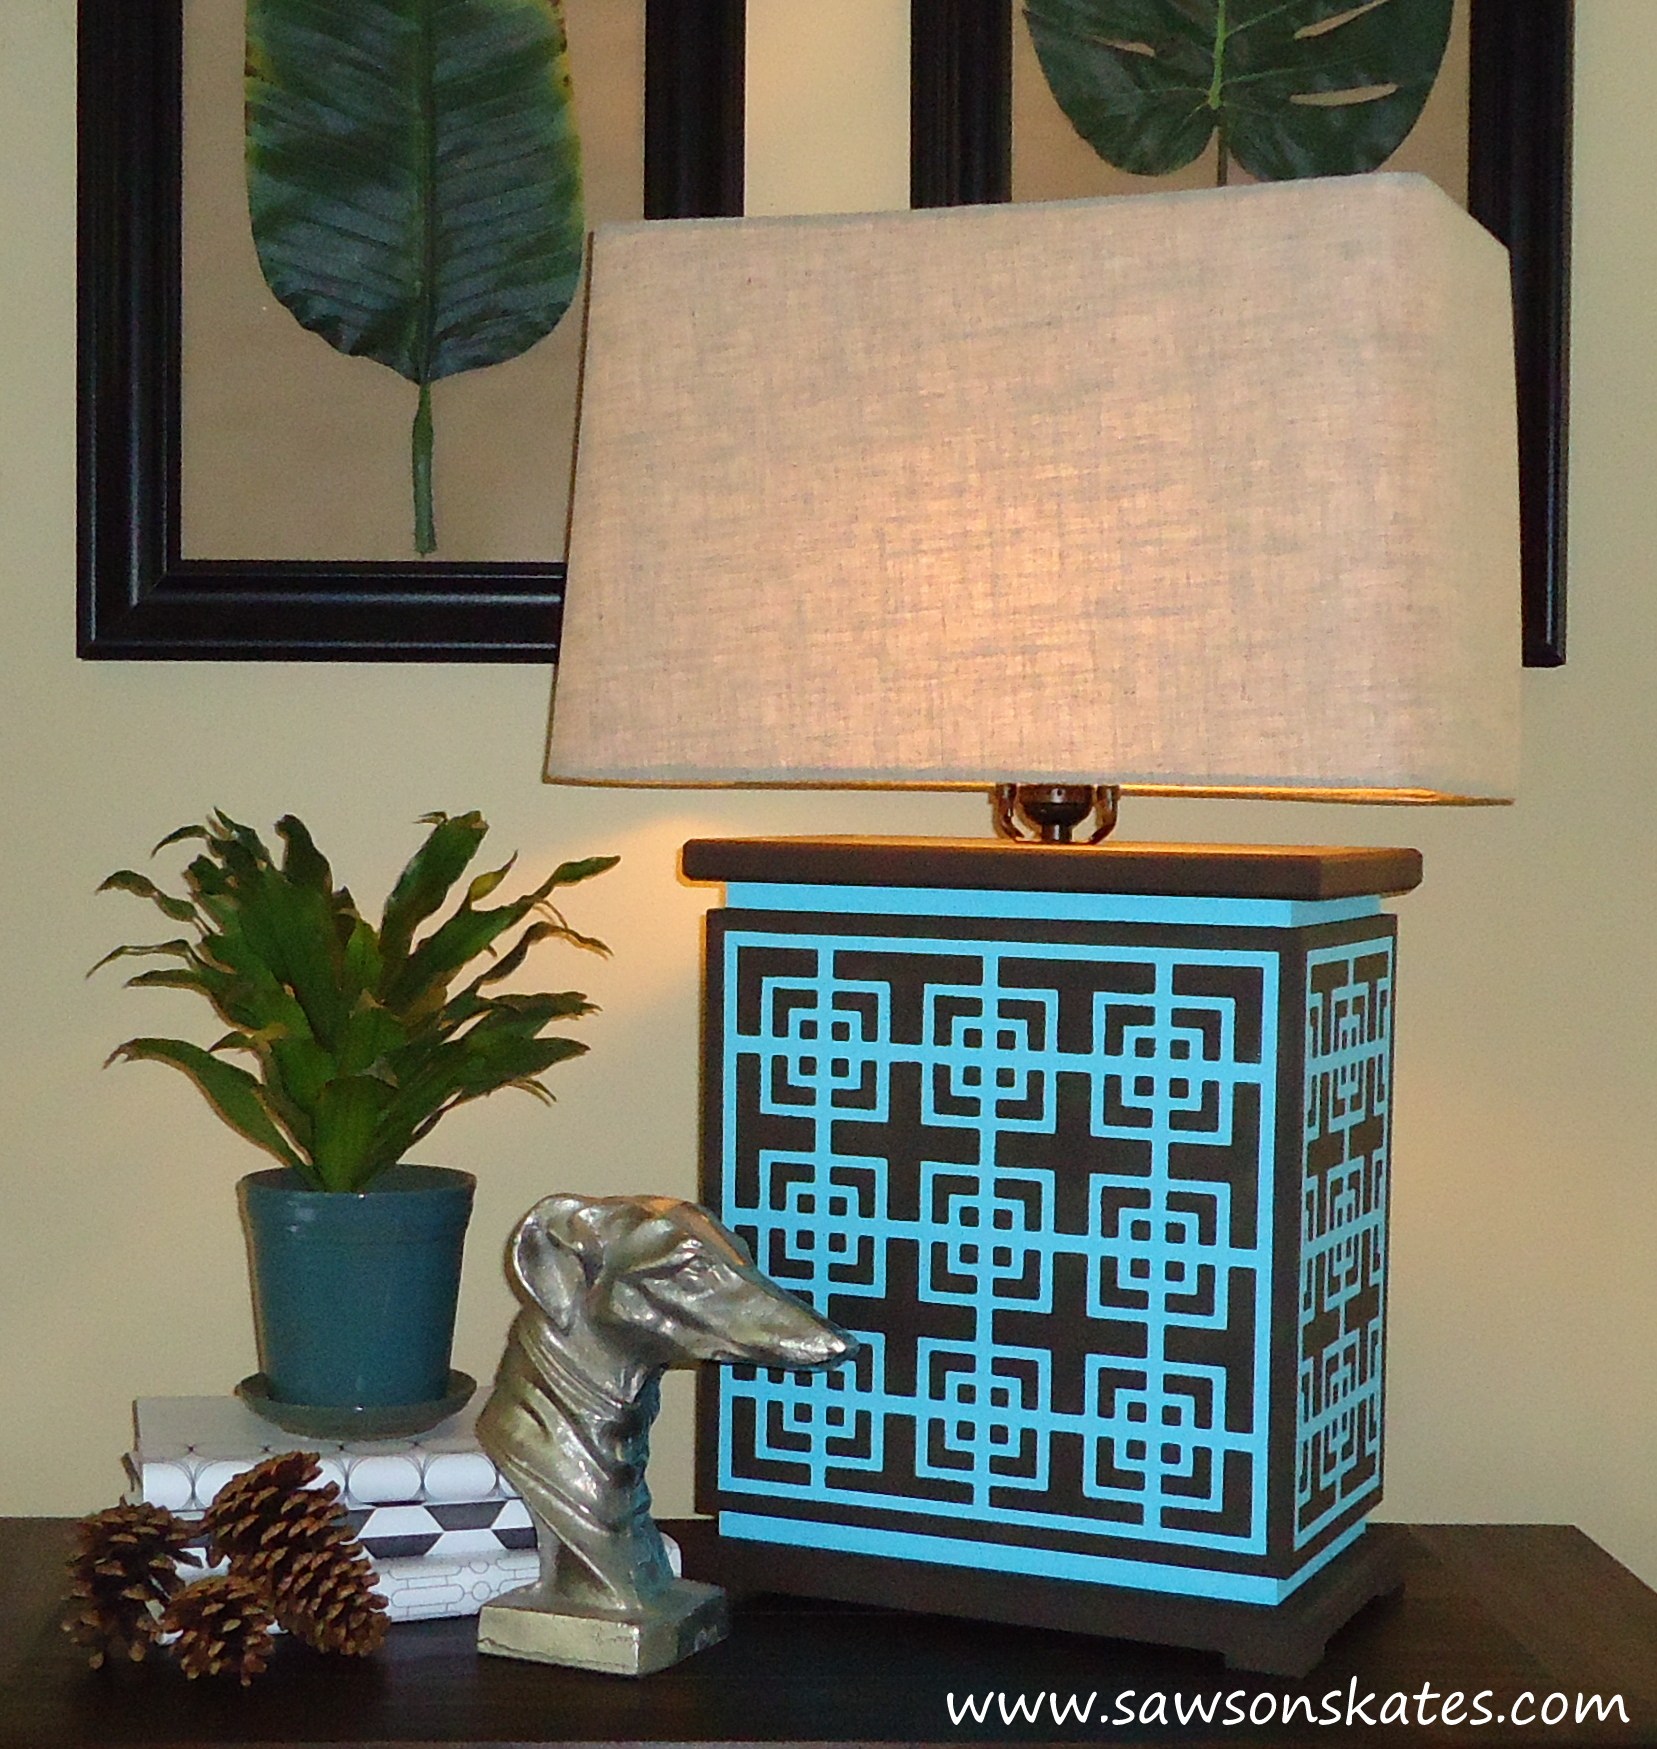
The tagline of my blog is “Big impact projects in a small space” and without a doubt there is big impact packed in the small space of this lamp! I designed and built this project exclusively for Cutting Edge Stencils! I don’t like common and this lamp is anything but! Starting with the uncommon rectangular shape to the bold Fusion stencil. This project looks complicated, but is easy to do. You too can have a designer looking lamp that you made yourself.

Click here for the FREE Lamp plans!
If you followed the lamp plans, the nail holes have been filled, sanded and your project has been primed. This is where this tutorial picks up…
Let’s get started!!!
Stencil a Designer Lamp with Cutting Edge Stencils
Supplies
Bittersweet Chocolate (Brown) acrylic craft paint
Behr “Gem Turquoise” (Home Depot)
“Fusion” Cutting Edge Stencil, size small
Roller
Foam Roller Cover
Painter’s tape
1/4″ automotive pinstripe (or 1/4″ painter’s tape if you can find it)
Painter’s tape
Step 1
Paint the box turquoise.
Step 2
I wanted to “frame” my stencil with a painted a border around the edge of the lamp. Measure in 3/8″ on all sides and mask using painter’s tape, paint the exposed area (around the edges) brown and remove painter’s tape. It’s also a good idea to paint the top and bottom (not attached) at this time.


Step 3
To finish the frame/border look, I applied automotive pinstripe next to the brown that was just painted (the pinstripe will be removed later). Then position the stencil and secure in place with painter’s tape.


Step 4
Pour a few tablespoons of the brown paint into a paper plate. Roll the roller into the paint, then roll on paper towel to remove excess paint. The roller should look nearly dry. It’s important the roller is properly loaded with paint. I would recommend rolling on a few pieces of scrap first to be sure it’s properly loaded before starting on your project. Once your roller is properly loaded, roll over the stencil using medium pressure.


Step 5
On the front and back sections, position the stencil, roll, then reposition the stencil and roll again to finish the pattern.

Step 6
Clean your stencil (the clean up is really easy!) and admire your work! Oh yeah, you have to attach the top, bottom and wire the lamp. Click here to go back to the Lamp assembly tutorial.
Thank you to Hometalk for inviting me to do this project and to Cutting Edge Stencils for totally changing my mind about stencils! Be sure to check out their website for a HUGE selection of stencils and decorating ideas. You can do this! The instructions are easy to follow and the results are nothing less than AMAZING!
[wysija_form id=”3″]

Hi there – I’m Scott, a woodworking enthusiast and creator of Saws on Skates, a site I started in 2015 to share easy-to-follow tutorials, space-saving shop tips, and project inspiration for DIYers at any skill level. Learn more about my woodworking journey here.