How to Wire a Plug
Learn how to wire a plug! I’ll show you step by step how to wire a 2 prong plug and how to wire a 3 prong plug. Wiring a plug is simple. You CAN do this!
How to Wire a Plug
Wiring a plug is easy! I recently noticed the 3 prong plug on my table saw was missing one of the prongs. I’m going to show you step by step how I fixed it. Plus we’ll look at wiring a 2 prong plug, which wire goes where, which side of the plug is the black wire, and more!
This post contains affiliate links to supplies or tools I used to complete this project. Purchases made using these links help support the Saws on Skates website and allow me to share more DIY projects. and DIY tips with you. There is no cost to you for using these links. Click here to visit my site policies.
Before we get into how to wire a plug, be sure to click the subscribe button at the bottom of this page to sign up for my FREE weekly newsletter loaded with helpful pocket hole tricks, space-saving workshop ideas, clever DIY tips and more!
Table of Contents
Can I Wire a Plug Myself?
Yes, absolutely! Wiring a plug is an easy DIY project. As I mentioned I recently noticed the plug on my table saw was missing one of the prongs. I replaced the broken plug with a replacement plug in less than 15 minutes.
I know working with electricity can be intimidating. But don’t worry. I’ll walk you through each step and you’ll see wiring a plug is simple to do.
Which Wire Goes Where on a Plug?
If you’ve ever used any electrical appliance, you’ve no doubt noticed there are two types of plugs. There are 2 prong plugs and 3 prong plugs. Below, we’ll review the basics of which wire goes where on these two types of plugs. Then later, I’ll show you step by step how to wire a 2 prong plug, and how to wire a 3 prong plug.
Wiring a Plug: Basics of a 2 Prong Plug
2 prong plugs have a plug with two metal prongs. When we look at a 2 prong plug we’ll notice in most cases that one prong is slightly wider than the other.
The plug connects to a power cord. There are two wires inside the cord. When we look at the cord we’ll notice one side of the cord has ridges and the other side is smooth.
These differences help us to know how to wire a plug. The side of the cord with the ridges is connected to the wider prong. The smooth side of the cord is connected to the narrower prong.
2 prong plugs are typically found on small appliances like lamps, toasters, etc.
Jump to: How to Wire a 2 Prong Plug
Wiring a Plug: Basics of 3 Prong Plug
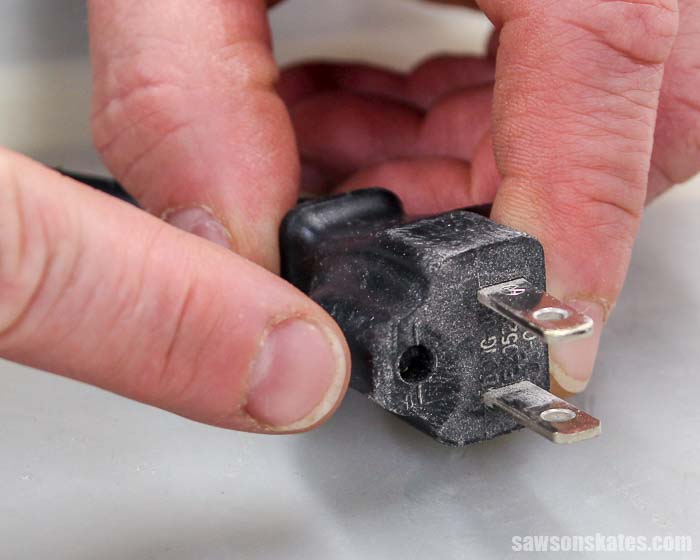
3 prong plugs have a plug with three metal prongs. When we look at a 3 prong plug we’ll notice one prong is slightly wider than the other and there’s also a third round prong. When we look inside the plug we’ll see a silver screw, a green screw, and a gold screw.
What are the Colors of Wires in a Plug?
The 3 prong plug connects to a power cord. There are three wires inside the cord. When we look inside the power cord we’ll see a black wire, a white wire, and a green wire. The green wire is connected to the green screw.
Which Side of Plug is White Wire?
The white wire is connected to the silver or light colored screw.
Which Side of Plug is Black Wire?
The black wire is connected to the gold or dark colored screw.
3 prong plugs are typically used on larger appliances like table saws, miter saws, etc.
Jump to: How to Wire a 3 Prong Plug
What Tools Do I Need for Wiring a Plug?
- Utility Knife
- Wire Strippers
- Screwdriver
Step 1. Disconnect the Plug
The first thing we need to do is disconnect the plug from the outlet.
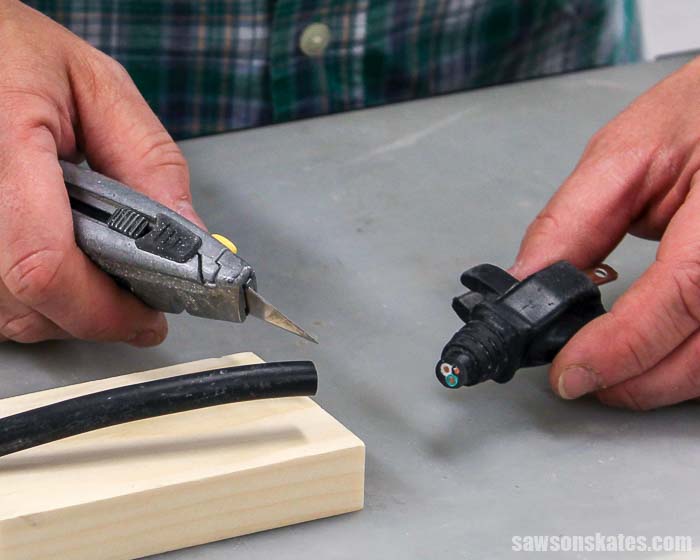
Step 2. Remove the Old Plug
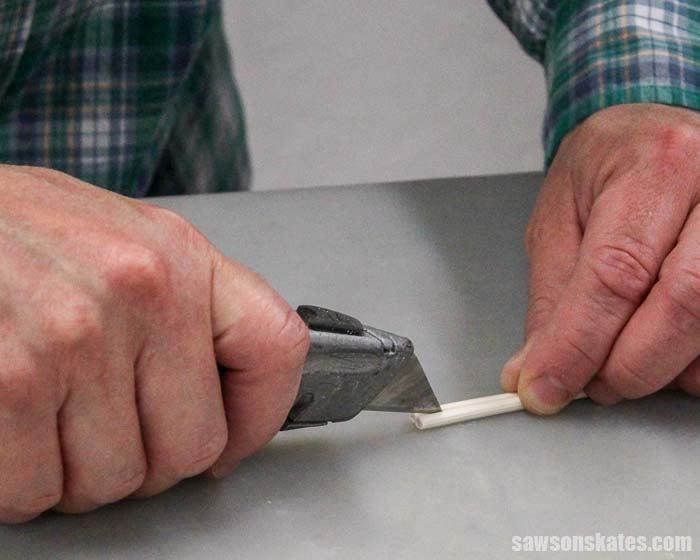
Cut the broken plug off of the power cord using a utility knife or wire strippers.
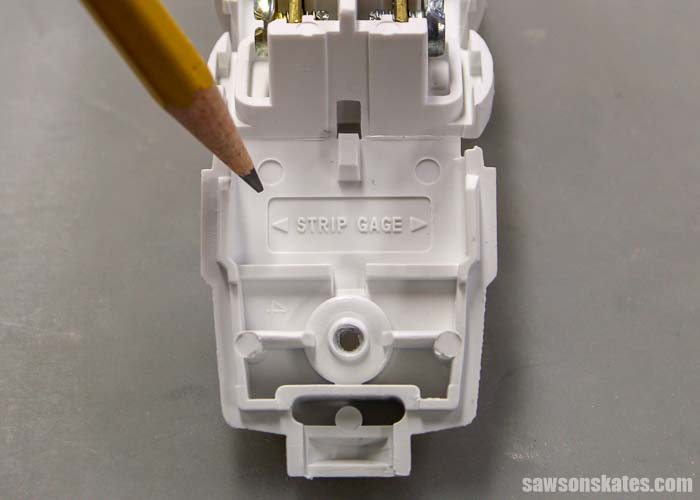
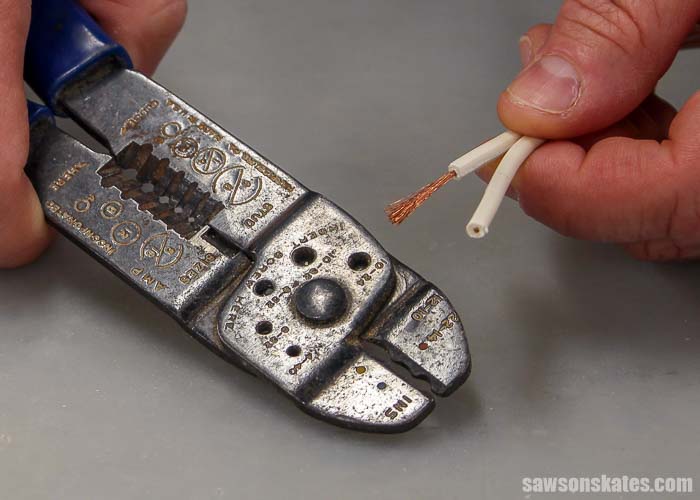
Step 3. Strip the Wires
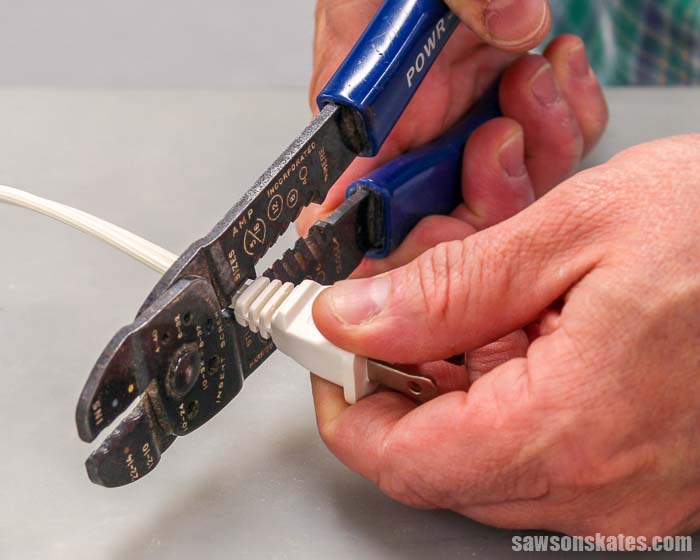
We need to strip the wires so we can insert them into the plug. First, we’ll make a slice in the insulation so we can separate the wires.
The plug has a strip gauge which tells us how much of the insulation we need to remove.
Then we’ll use wire strippers to remove the insulation. I placed the wire strippers over the wire. I gave it a few turns and pulled the wire stripper away from the wire to remove the insulation.
We only want to remove the insulation. If we cut the wires while removing the insulation we should use a larger hole in the wire stripper.
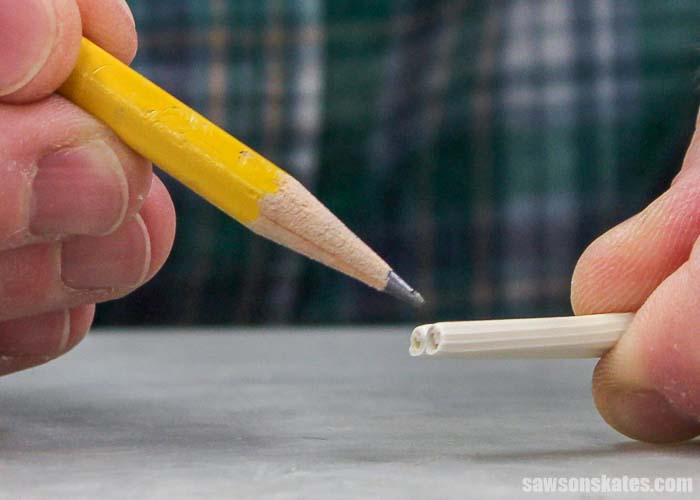
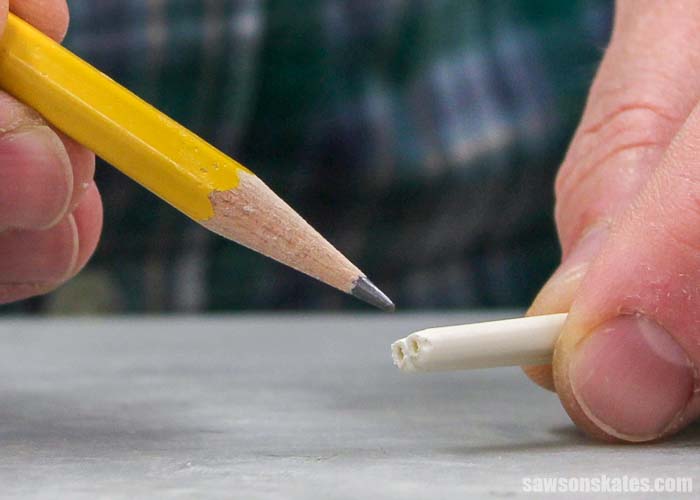
I gave the wires a little twist so it will be easier to wrap them around the screws in the plug.
Step 4. Wiring a 2 Prong Plug
One side of the power cord has ridges.
And the other side of the cord is smooth.
The side of the cord with the ridges is connected to the wider prong with the silver screw. The smooth side of the cord is connected to the narrower prong with the gold screw. Wrap the wire around the screw and tighten the screw.
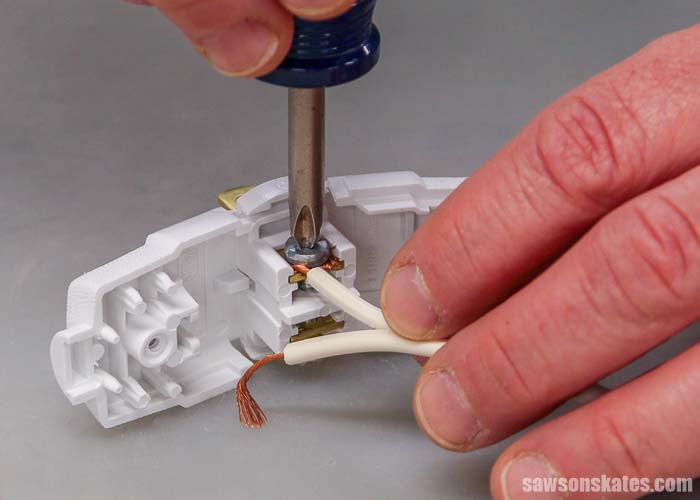
Close the cover and tighten the screws. That’s it. The plug is ready to use!

VIDEO: How to Wire a 3 Prong Plug
Watch me wiring a plug on my table saw in this quick video!
Step 1. Disconnect the Plug
The first thing we need to do is disconnect the plug from the outlet.
Step 2. Remove the Old Plug
I used a utility knife to cut the broken plug off of the power cord.
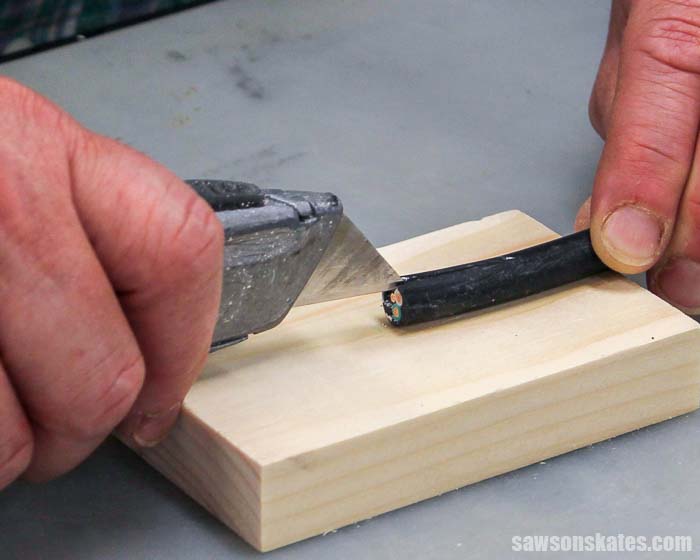
Step 3. Remove the Insulation
Next, remove the insulation from the power cord. We need to be careful when making this cut. If we go too deep we could cut the insulation on the wires. A slice in the insulation of the wires could cause a short which can be dangerous.
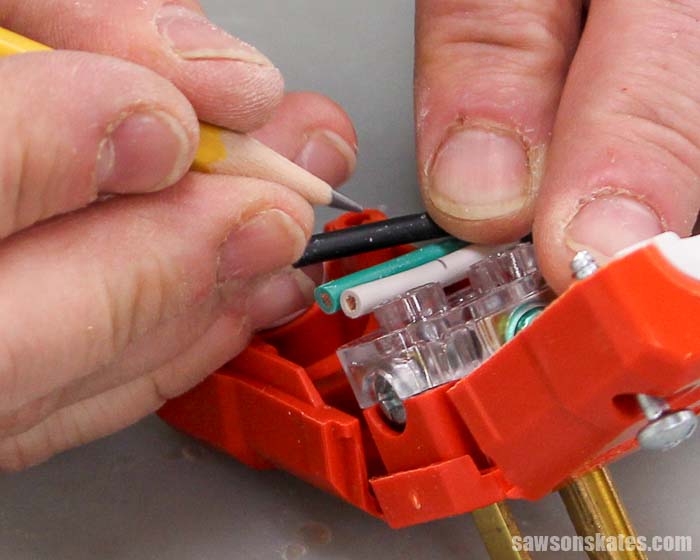
Step 4. Strip the Wires
We need to strip the wires so we can insert them into the plug. The plug has a strip gauge which tells us how much of the insulation we need to remove. I used the gauge to mark where to strip the wires.
We’ll use wire strippers to remove the insulation. I placed the wire strippers over the wire. I gave it a few turns and pulled the wire strippers away from the wire to remove the insulation.
We only want to remove the insulation. If we cut the wires while removing the insulation we should use a larger hole in the wire stripper.
I gave all of the wires a little twist so it will be easier to insert them into the plug
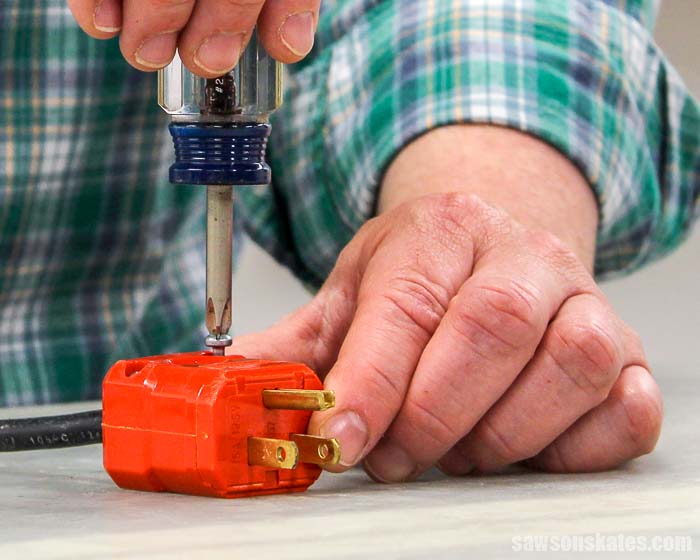
Step 5. Wiring a 3 Prong Plug
The plug has a silver screw, a green screw, and a gold screw. The power cord has a white wire, green wire, and a black wire.
The white wire is connected to the silver or light colored screw, the green wire is connected to the green screw and the black wire is connected to the gold or dark colored screw.
After all of the connections were made I gave the wires a gentle tug to be sure they were secure. Then we’ll close the cover and attach the screws.
That’s it. The plug is ready to use!

Final Thoughts
Now you know how to wire a plug. And I’m sure you’ll agree that wiring a plug is easy!
First, we’ll disconnect the plug from the outlet. Then we’ll cut the old plug off the cord and use wire strippers to remove the insulation from the wires. Next, we’ll connect the wires to the correct terminals in the plug and gently tug on the wires to be sure they are secure. Then we’ll close the cover and attach with screws.
Thank you for stopping by. If you found this information helpful, would you please pin it to Pinterest? Other DIYers would appreciate it and I would too! Thank you – Scott

Hi there – I’m Scott, a woodworking enthusiast and creator of Saws on Skates, a site I started in 2015 to share easy-to-follow tutorials, space-saving shop tips, and project inspiration for DIYers at any skill level. Learn more about my woodworking journey here.