How to Make a DIY Circular Saw Crosscut Jig for Straight Cuts Every Time
Make a DIY circular saw jig in about 10 minutes using scrap wood. This simple cutting guide helps you make accurate crosscuts and miter cuts.
DIY Circular Saw Guide
Circular saws are great for breaking down sheet goods, but making straight, accurate crosscuts can be challenging. That’s where this simple jig comes in. It’s quick to build, made from scrap wood, and helps guide your saw for clean, accurate crosscuts and miters. Best of all, I’ve included free plans to make it even easier.
You may also enjoy 4 Ways to Make Straight Cuts with a Circular Saw and How to Change a Circular Saw Blade
Originally published July 4, 2015, republished July 26, 2019.
This article contains affiliate links. If you purchase from these links, I may earn a small commission at no additional cost to you. Visit my site policies for more information.
Why Circular Saws Need a Cutting Guide
Before building this jig, it helps to understand the types of cuts you can make with a circular saw. The most common are rip cuts, crosscuts, and miter cuts.
- A rip cut is made with the grain of the wood or along the length of the board.
- A crosscut is made across the grain of the wood or across the width of the board.
- A miter cut is made diagonally across the grain of the wood or across the width of the board.
Circular saws can make all of these cuts, but there’s one challenge. Unlike a table saw or miter saw, a circular saw typically doesn’t include a fence to guide the cut. That means you often have to guide the saw by hand.
For rip cuts, I often use my Kreg Rip-Cut or Kreg Straight Edge Guide to keep the saw tracking straight along the length of the workpiece.
But how do you make accurate crosscuts with a circular saw? One common method is using a speed square as a guide.
All you have to do is line up the blade on your cut line and place the speed square on the board. Then you push the base plate of the saw against the square and make the cut.
A speed square works great as long as the cut you need to make is shorter than the length of the speed square. But what if the cut you need to make is longer than the square? That’s where the DIY circular saw guide comes in.
What is a Crosscut Jig?
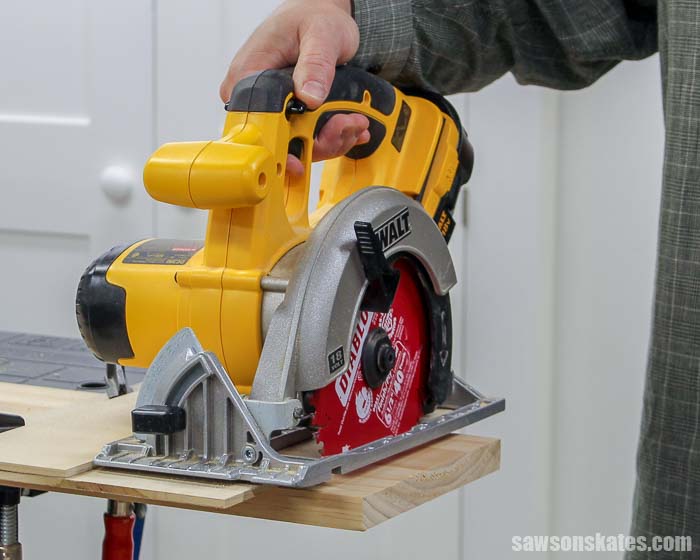
A crosscut jig helps you make precise crosscuts and miter cuts. It acts like a fence or cutting guide for your circular saw. The base plate of the saw rides against the fence of the jig. The fence forces the saw to make cuts exactly where you want them.
I made my cutting guide in about ten minutes with just two scrap pieces of 1/4″ plywood. You can also use MDF instead of plywood.
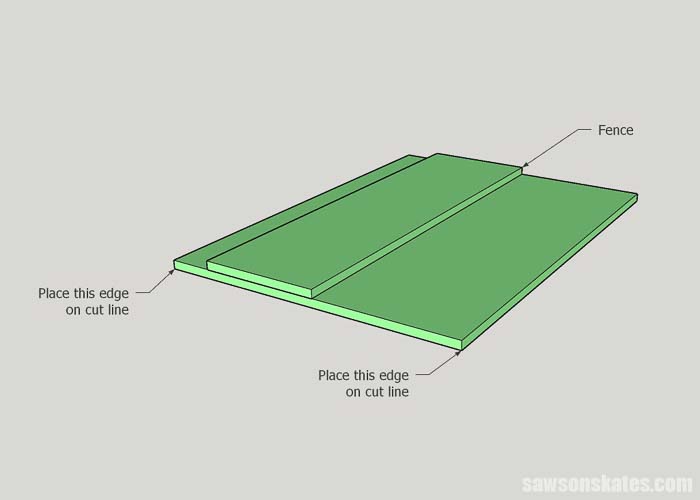
The larger piece of plywood acts as a base for the jig. It’s also a guide for the saw blade. The edge of the jig is placed exactly where you want to make our cut.
The narrow piece of plywood is glued to the larger piece. This narrow piece acts as a fence for the base plate of the saw.
NOTE: The circular saw jig can be used on the right side or left side of the saw.
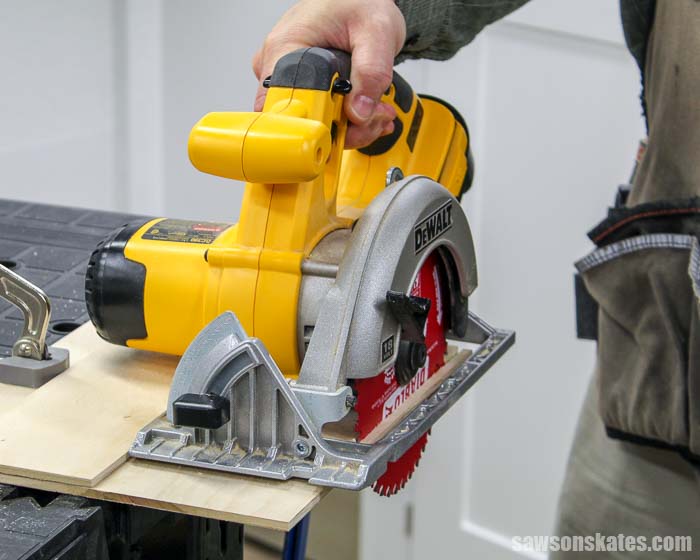
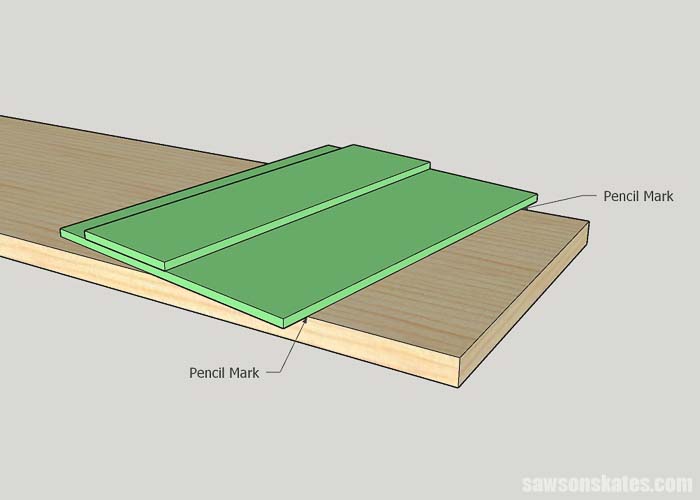
To use the jig, measure and make pencil marks on the board where you want to cut. Place the edge of the jig on the marks and clamp it to the board. Then set the circular saw on the jig. The base plate rides against the fence, guiding the blade so it cuts exactly where you want.
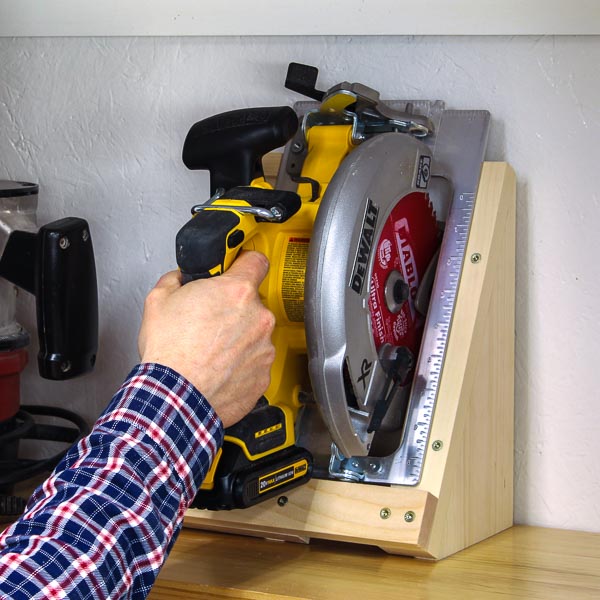
I’ve used this jig on several projects, like cutting the angled side pieces for my French cleat circular saw holder and Kreg Rip-Cut holder. I also used a longer version when cutting the back panel for my printer cabinet.
How to Make a Circular Saw Guide
Printed Plan
Get the PDF plan here (includes detailed instructions, measurements, and bonus tips)
Materials
- Wood (per the printed plan)
- 2” Wood Screws
Tools
- Tape Measure
- Kreg Multi-Mark
- Circular Saw
- Table Saw
- Spring Clamps
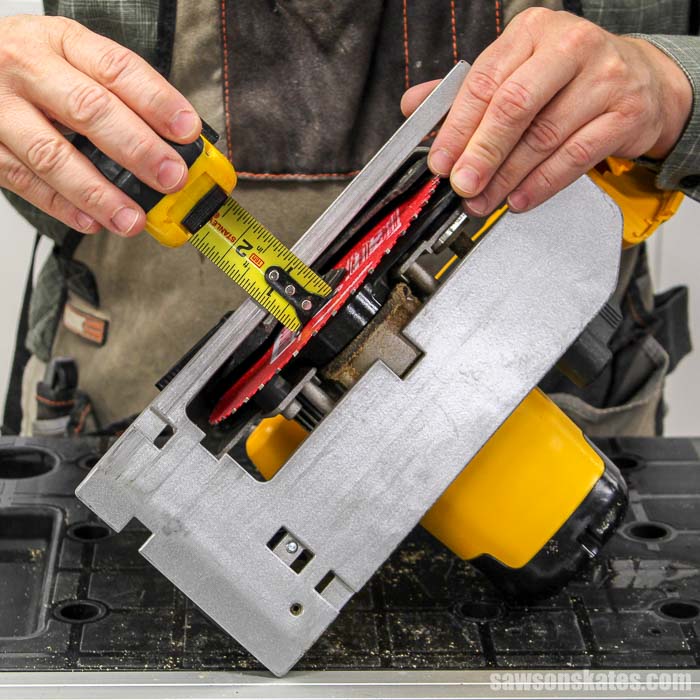
Step 1. Measure the Circular Saw
You’ll need two measurements from your circular saw. Start by measuring from the blade to the left edge of the base plate.
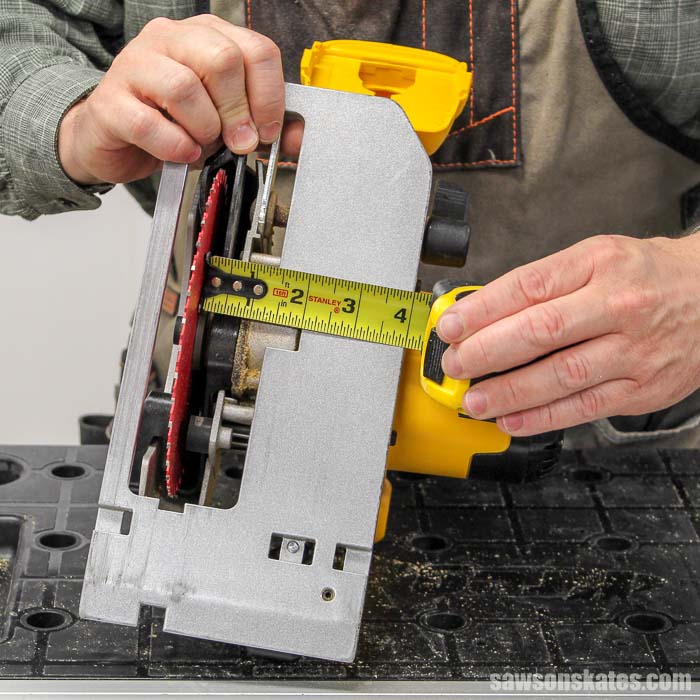
Next, measure from the blade to the right edge of the base plate.
Next, you’ll add these two measurements. Later, you’ll add this total to the width of the fence that you’ll cut in Step 3.
This will be the minimum width for the base of the jig. You actually need to trim a little off the base to make it square (see Step 5), so you need to make the width of the base larger than the minimum width.
Step 2. Make the Base
Using my table saw, I cut a piece of plywood to size for the base.
Related: Table Saw Safety Rules (Every DIYer Needs to Know)
Step 3. Make the Fence
Using my table saw, I cut a piece of plywood to width for the fence.
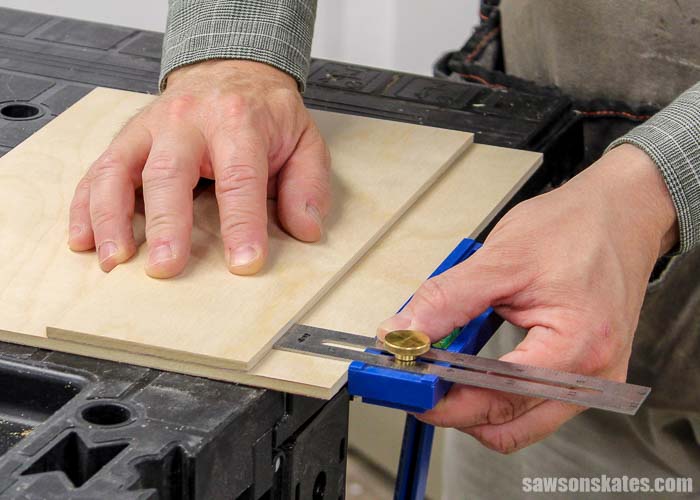
Step 4. Attach the Fence
Next, I took the narrow measurement of my saw and added about an 1/8”. Then, I set my Kreg Multi-Mark to this measurement.
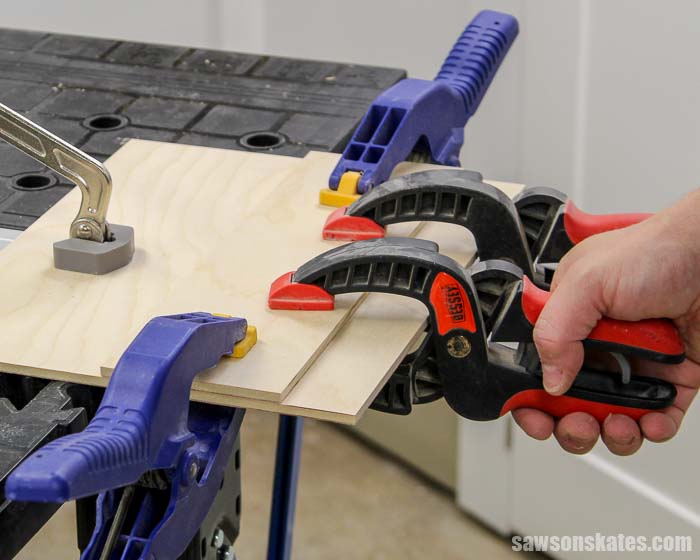
Then, I applied glue to the back of the fence and used the Kreg Multi-Mark to position the fence on the base.
IMPORTANT: Remove any glue that squeezed out in between the fence and the base. The jig may not cut accurately if glue is allowed to dry in this area
I used several spring clamps to hold the fence in place.
Step 5. Prepare the Jig for Use
I removed the clamps when the glue was dry. Next, I clamped the jig to my workbench. I placed the base plate of the saw against the fence and trimmed the excess off the base of the jig.
I repeated this step on the other side of the jig. Now the fence is square to each side of the jig and the cutting guide is ready to use.
How to Use the Circular Saw Cutting Guide
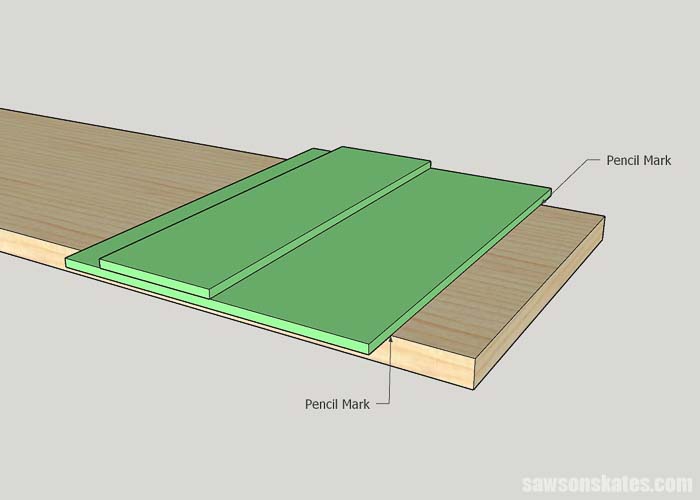
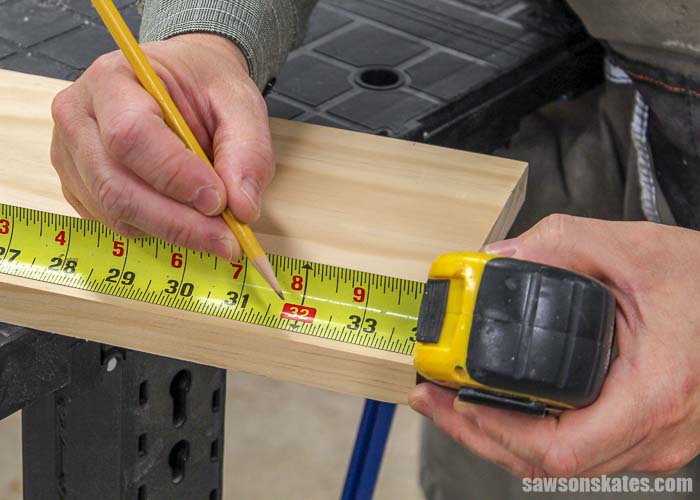
Step 1. Measure the Board
First, you’ll measure and make pencil marks on each edge of the board you want to cut.
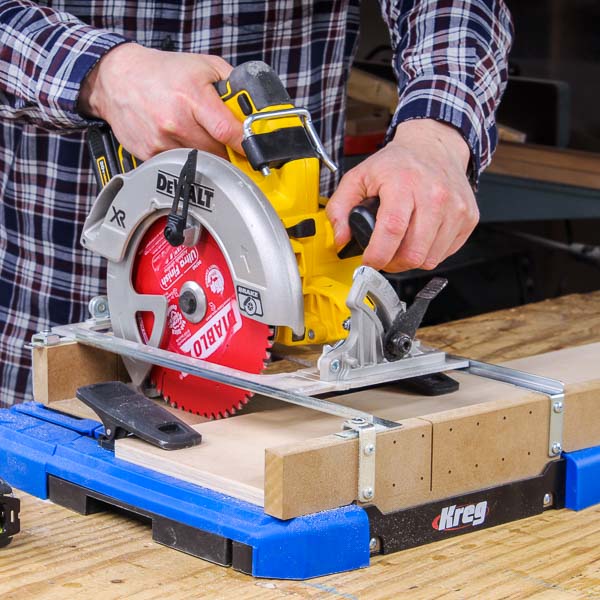
Step 2. Position the Jig
Next, you’ll place the edge of the cutting guide on the pencil marks. I used two small bar clamps to hold the jig in place.
The guide can be used for crosscuts.
And it can also be used to make miter cuts.
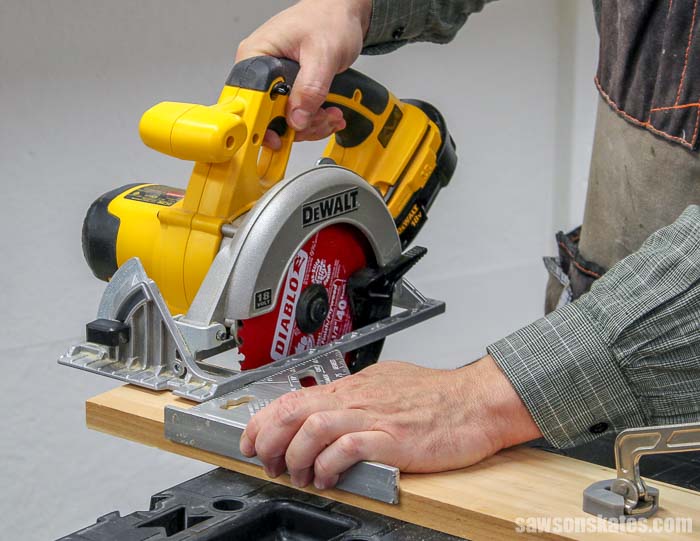
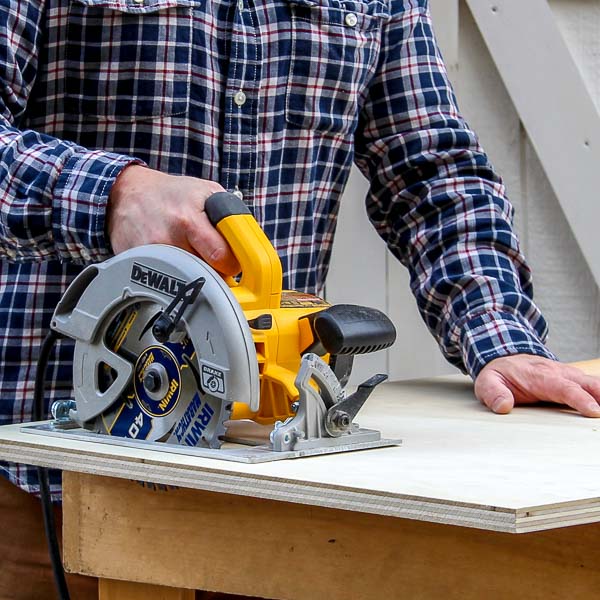
Step 3. Make the Cut
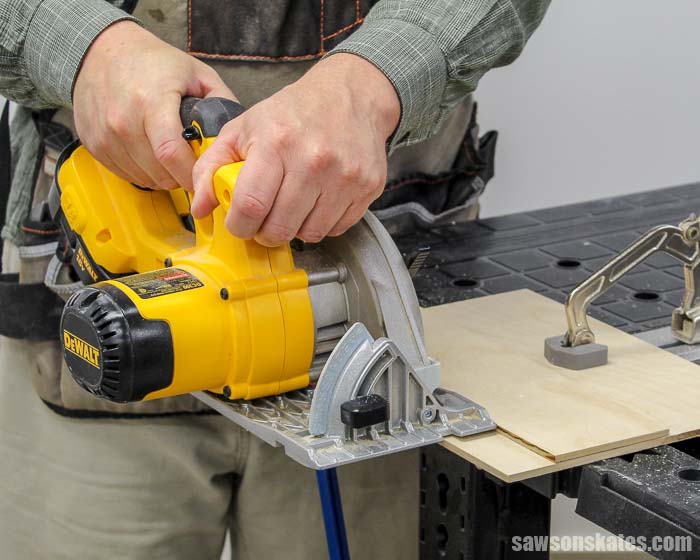
Place the circular saw on the jig. Start the saw and make the cut. Be sure to keep the base plate of the saw against the fence of the jig.
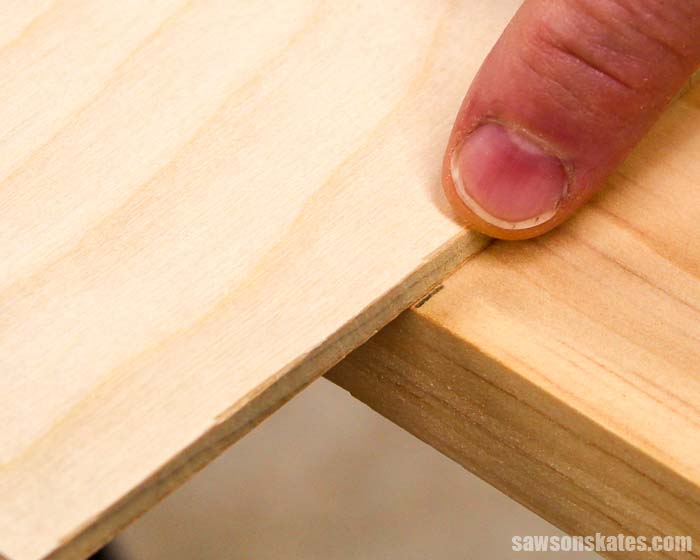
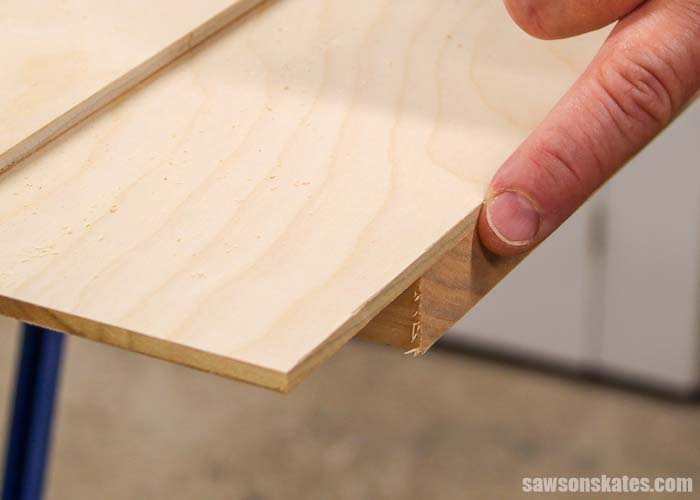
The saw blade cuts exactly on our pencil marks.
Final Thoughts
What should you do when a piece of wood is too wide to cut with your miter saw? Make this simple DIY circular saw guide! It works great for both crosscuts and miter cuts.
I made my cutting guide in about ten minutes using some scrap wood. That means this project was quick, easy and free!
Click here to get the free plan (including the detailed instructions and measurements) now!
Thank you for stopping by. If you found this information helpful, would you please pin it to Pinterest? Other DIYers would appreciate it and I would too! Thank you – Scott
Recommended For You
Pin This For Later

Hi there – I’m Scott, a woodworking enthusiast and creator of Saws on Skates, a site I started in 2015 to share easy-to-follow tutorials, space-saving shop tips, and project inspiration for DIYers at any skill level. Learn more about my woodworking journey here.
Thankyou for the informative article on the cross cut jig . The store versions cost an arm and a leg here in SA.
Hi there – Thank you for stopping by. I’m glad this was helpful for you!
Thanks very simple and easy to follow better than most
Hi Al – Thank you for stopping by and for the compliments!
Thanks, very nice quick and easy design. Used your basic design when replacing my deck boards recently. Saved a lot of setup time cross cutting deck boards to size.
Hi Patrick – Thank you for stopping by. I’m glad the jig was a time-saver and worked well for you!
I like your jig – I have found that sometimes my speed square can move just slightly, and my cut is spoiled, so this makes a lot of sense. I might add one more piece to the jig; I’m thinking that I could glue a piece of plywood at precisely 90 degrees to the underside at the leading edge, which would work well for 90 degree cross cuts. What do you think?
Hi Marc – Thank you for stopping by. Adding a stop to the jig is a great idea. Please let me know if you try it. I would be interested in hearing how it turns out.