How to Make Book-Matched Panels
Today we’re going kick up our woodworking skills and add style to our DIY furniture projects with book-matched panels. Book-matched panels are beautiful and transform the look of DIY furniture from ordinary to upscale!
For your convenience this post contains affiliate links to products or tools I used to complete this project. Click here to visit my site policies.
What is Book-Matched?
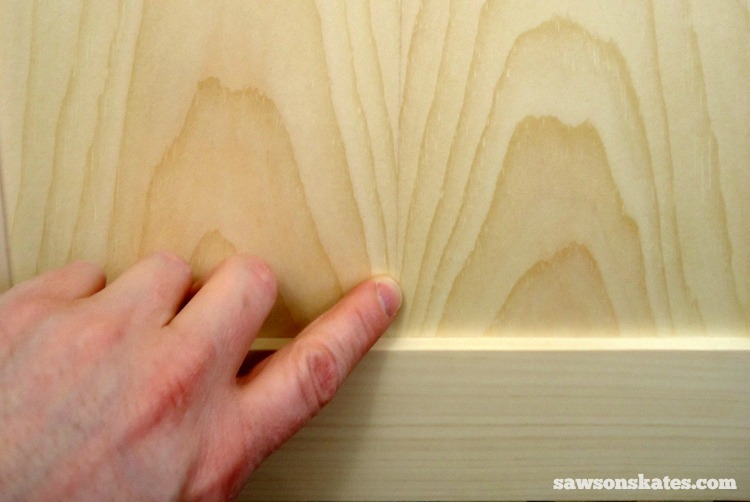
What am I talking about when I say book-matched? Imagine splitting a piece of wood lengthwise and then opening it like a book. Once it’s opened the edges are glued to form a panel.
Why Book-Match?
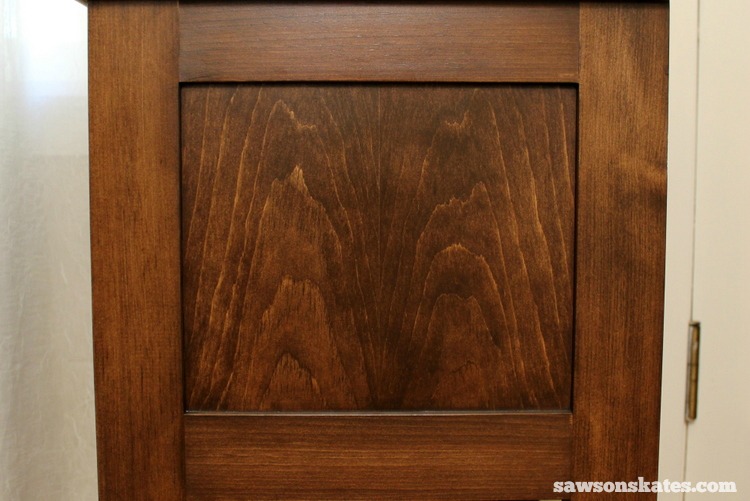
I know what you’re thinking… making book-matched panels is an extra step, so why take the time to do it? Book-matched panels give the appearance of a single piece of wood with mirrored, symmetrical patterns which are pleasing to the eye. These beautiful patterns, depending on the wood, can range from subtle to dramatic.
I had always edge glued pieces of 1x material to form panels. Then a few years ago I learned how to book-match in an advanced furniture making class. Book-matched panels are a signature of quality furniture and fine furniture craftsmanship. They totally change the look of furniture projects and give your pieces a high-end look.
Where to Use
Book-matched panels can be used anywhere you would use regular panels like for the side panels of a wine cabinet, wine credenza, fireplace mantel or air conditioner “dresser”.
Rather than a regular panel or plywood, I opted to make a book-matched panel for this project and you can see how the grain pattern is mirrored on the left and the right side of the panel.
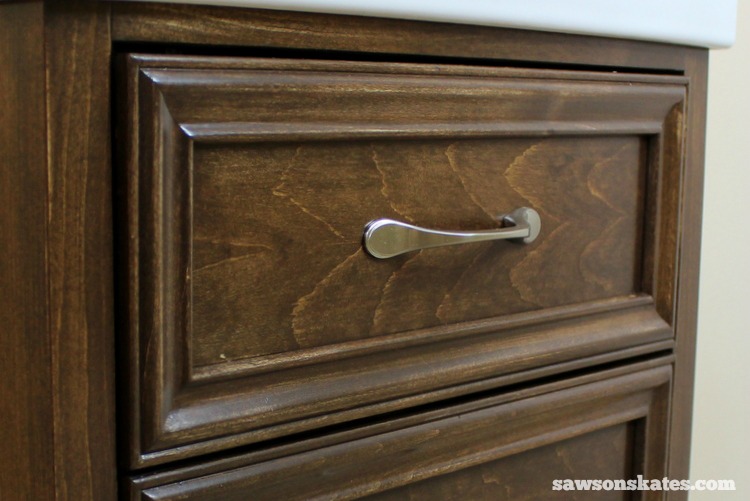
You can even create book-matched drawer fronts like I did for this project. The book-matched drawer gives this piece an elegant, upscale look.
Let’s get started and transform our DIY furniture from ordinary to upscale!
How to Make a Book-Matched Panel
Tools
Band Saw
Timber Wolf Resaw Blade
Kreg Featherboard
DEWALT Benchtop Planer
Elmer’s Wood Glue Max
Clamps
Painter’s Tape
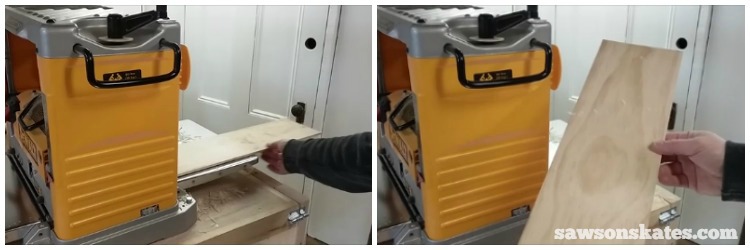
Step 1. First, we’ll split the wood lengthwise with a band saw outfitted with resaw blade. Resaw blades are typically wide with a small kerf. For this project I used a Timber Wolf Resaw Blade. You’ll need to attach a fence to the band saw. The fence will keep the wood upright as it travels through the blade. It’s helpful to position a featherboard opposite the fence to keep the wood square to the fence.

Step 2. The band saw leaves the pieces rough. We’ll smooth the faces with a planer.
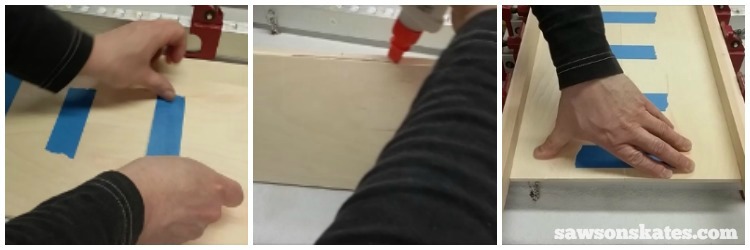
Step 3. Next the pieces will be edge glued. Lay the pieces side by side and place painter’s tape across the joint.
Flip the piece over and apply a bead of glue. I used Elmer’s Wood Glue Max for this project because it’s stainable.
Flip the piece over again and place in the clamps. Use clamping cauls to ensure even clamping pressure and to avoid damaging the edges of the panel. We want the panel to be flat. If the clamps are too tight, the panel can bow. Adjust the clamps if necessary.
Step 4. Once the glue is dry, remove from the clamps, scrap off any excess glue, cut to length, sand smooth and install.
PIN THIS!

Hi there – I’m Scott, a woodworking enthusiast and creator of Saws on Skates, a site I started in 2015 to share easy-to-follow tutorials, space-saving shop tips, and project inspiration for DIYers at any skill level. Learn more about my woodworking journey here.