DIY Wine Cabinet Displays Entertaining Essentials
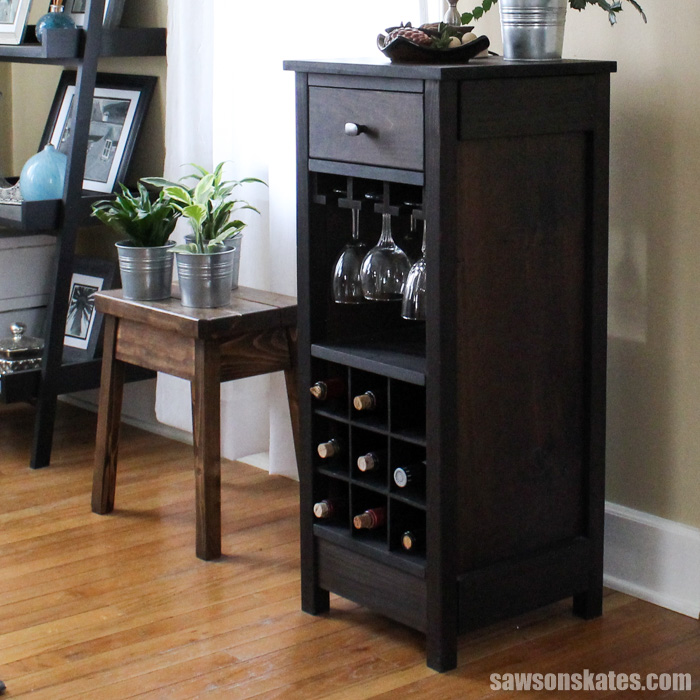
This DIY wine cabinet attractively displays entertaining essentials like wine bottles and wine glasses and the drawer provides a place to store accessories.
What Should I Build Next?
That's the question I help answer.
Every week, I send woodworking ideas to 17,000 DIYers who love building things.
You'd fit right in.
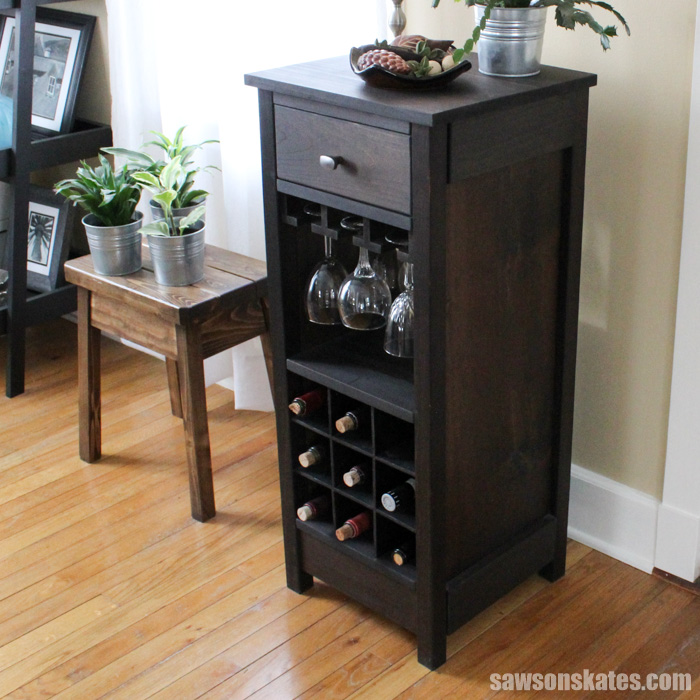
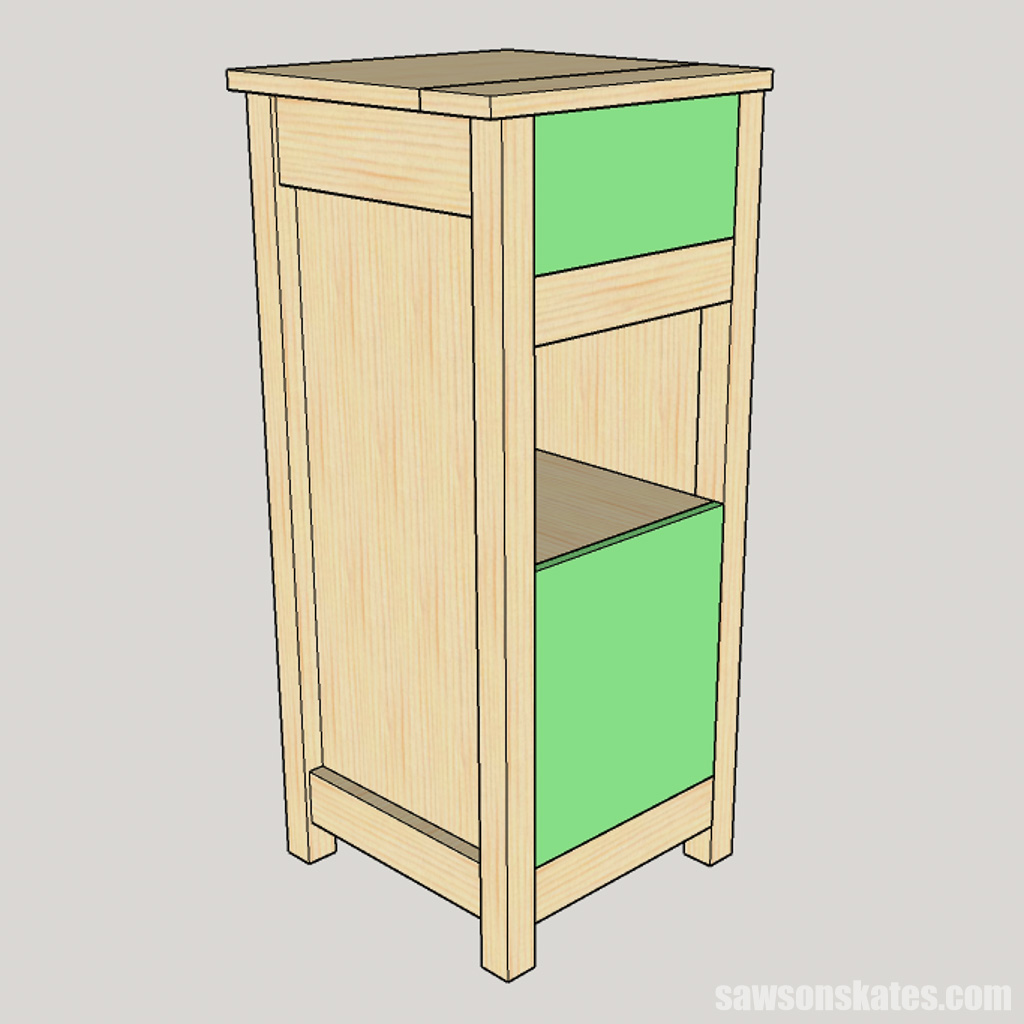
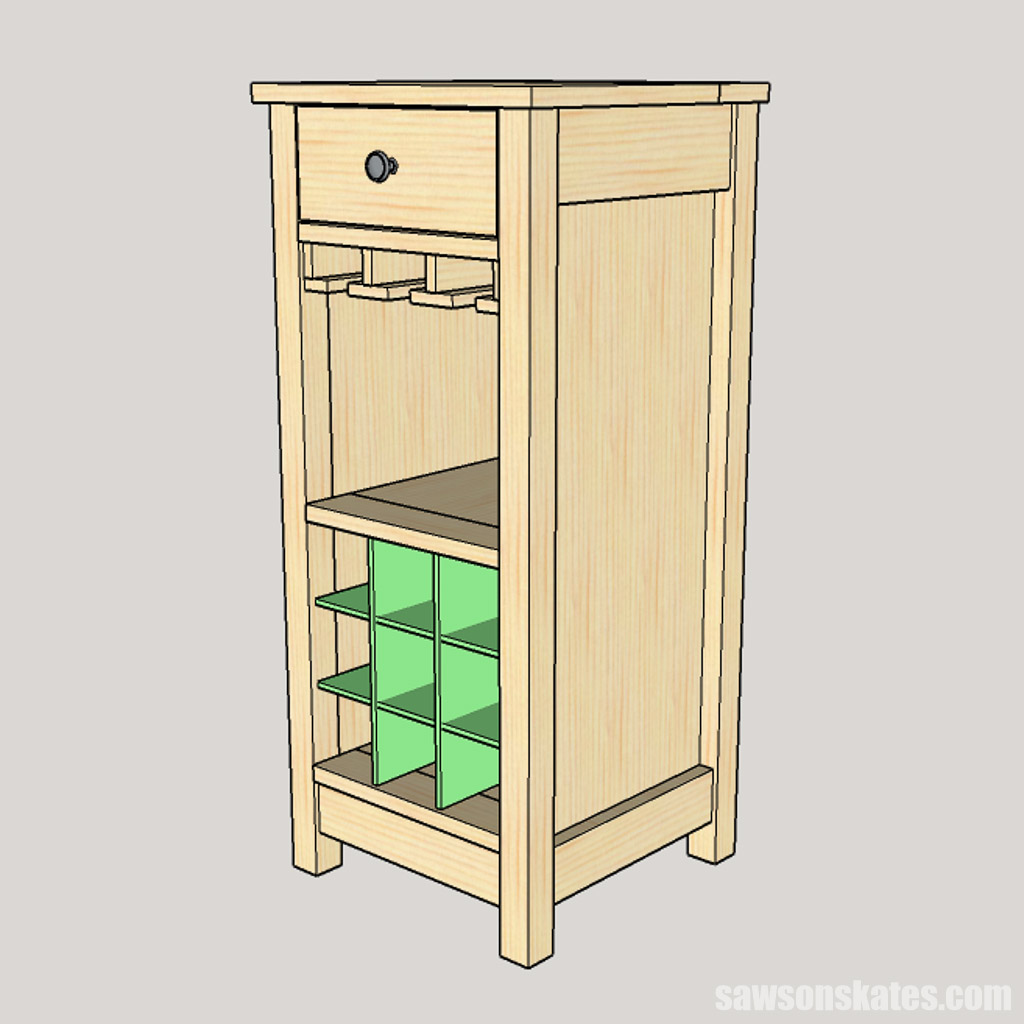
This wood DIY wine cabinet boasts nine spaces for wine bottle storage, three stemware holders for displaying up to twelve wine glasses and a drawer perfect for storing accessories like a bottle opener. The wine cabinet is easy to assemble thanks to the Kreg Jig and pocket hole construction.
Originally published April 7, 2015, updated December 19, 2017
Table of Contents
- Inspiration for This DIY Wine Cabinet
- How Do You Finish the DIY Wine Cabinet?
- How to Make a DIY Wine Cabinet
- Get the PDF Plan
This article contains affiliate links. If you purchase from these links, I may earn a small commission at no additional cost to you. Visit my site policies for more information.
Inspiration for This DIY Wine Cabinet
The DIY wine cabinet was built for an empty wall in my dining room. It’s a short wall between a door and a window that was begging for a cool piece of furniture. This Mod Wine Bar by Lady Goats was talking to me, but it was too large for my space. I also liked this wine cabinet plan on woodcraft.com that incorporates the stemware in the cabinet.
I combined the best elements of each plan and came up with a plan for my own DIY wine cabinet. After I built my original cabinet I thought the piece needed a tweak here and there. Those tweaks are incorporated in this new plan.

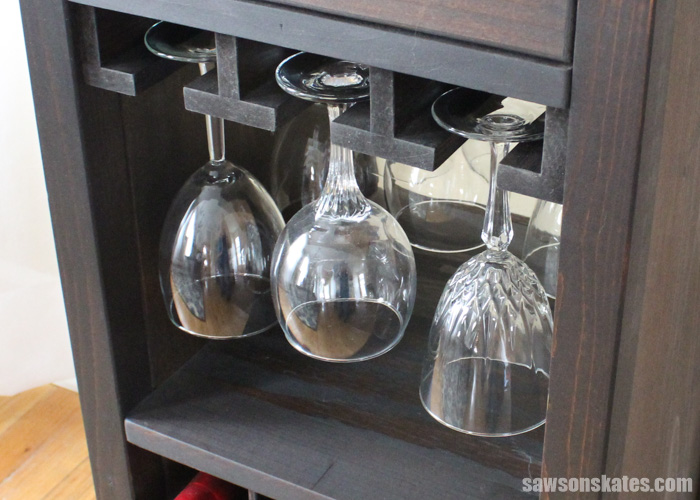
The cabinet features three stemware holders that can hold up to twelve wine glasses.
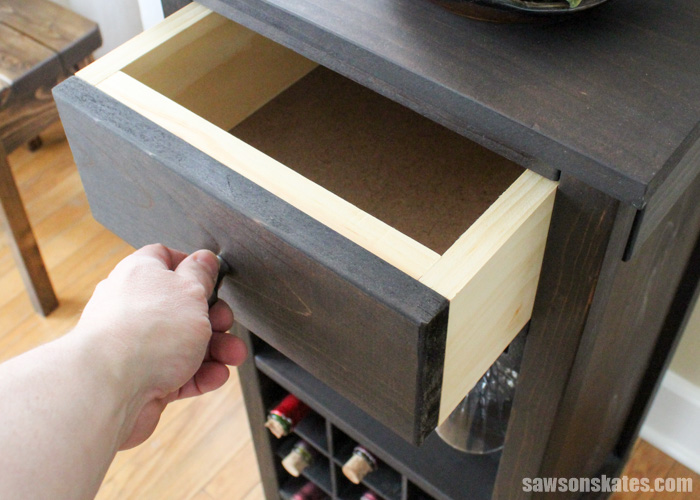
The cabinet also features a storage drawer for wine accessories like bottle openers, etc. There are no drawer slides, so the drawer is super easy to build.
Related: How to Build DIY Drawers
How Do You Finish the DIY Wine Cabinet?
Years ago, when I finished this cabinet, I applied a coat of wood dye and three coats of Bob’s Miracle Finish for Wood. Maybe I need more practice with wood dye, but for me, it didn’t knock my socks off. It was sort of just OK. I want more than “OK” for my DIY furniture, so this is how I would finish the cabinet now.
First, I always prep all of my furniture projects for finishing by thoroughly sanding the piece. Then, fill any holes or gaps with a wood filler. Next, apply a tea stain. Don’t skip this step. The tea preps the wood for the next step. Check out why I always apply a tea stain to my furniture projects here.
Rather than wood dye, I would opt for a coat of my favorite wood stain – Dark Walnut Rust-Oleum Ultimate Wood Stain. The Rust-Oleum stains always provide a deep, rich color.
For a finish, I would either apply three coats of Bob’s Miracle Finish for Wood or use my new favorite technique for applying polyurethane, spraying with a HomeRight Super Finish Max sprayer. Check out how easy it is to spray polyurethane here.
How to Make a DIY Wine Cabinet
Printed Plan
Get the PDF plan here (includes detailed instructions, measurements, and bonus tips)
Supplies
- Wood (per the printed plan)
- Wood Glue
- #8 1-¼” Wood Screws
- ½” Pin Nails
- 1″ Brad Nails
- 1-¼” Brad Nails
- 1″ Pocket Screws
- 1-¼” Pocket Screws
- Knob
Tools
- Tape Measure
- Kreg Jig
- Drill
- Miter Saw
- Table Saw or Circular Saw and Kreg Rip-Cut
- Hammer or Brad Nailer
- ¼” Drill Bit
- Countersink Drill Bit
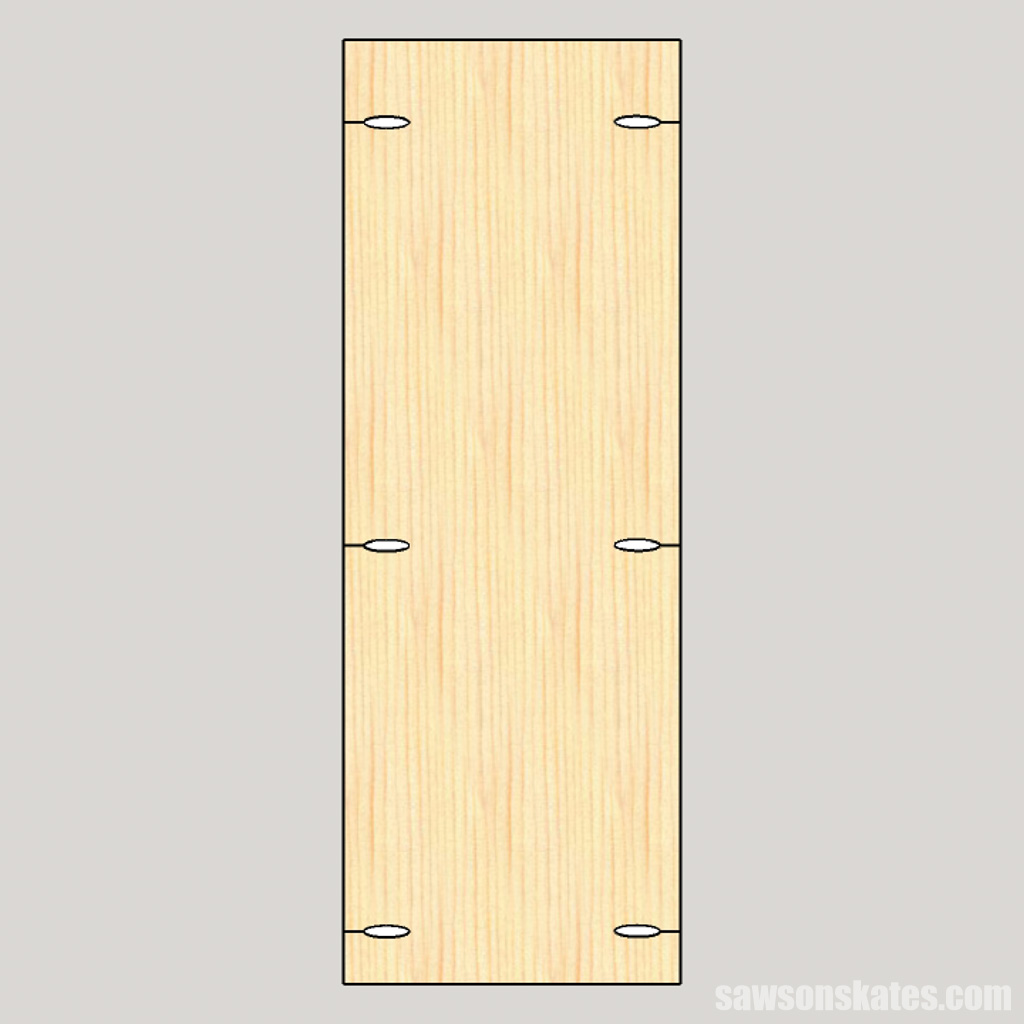
Step 1. Make the Side Panels
I used my table saw to rip two pieces of plywood to width for the side panels.
Related: 21 Table Saw Safety Rules (& Mistakes to Avoid)
If you don’t have a table saw or aren’t comfortable using one, you can use a circular and a Kreg Rip-Cut instead.
Related: How to Get into Woodworking Without a Table Saw
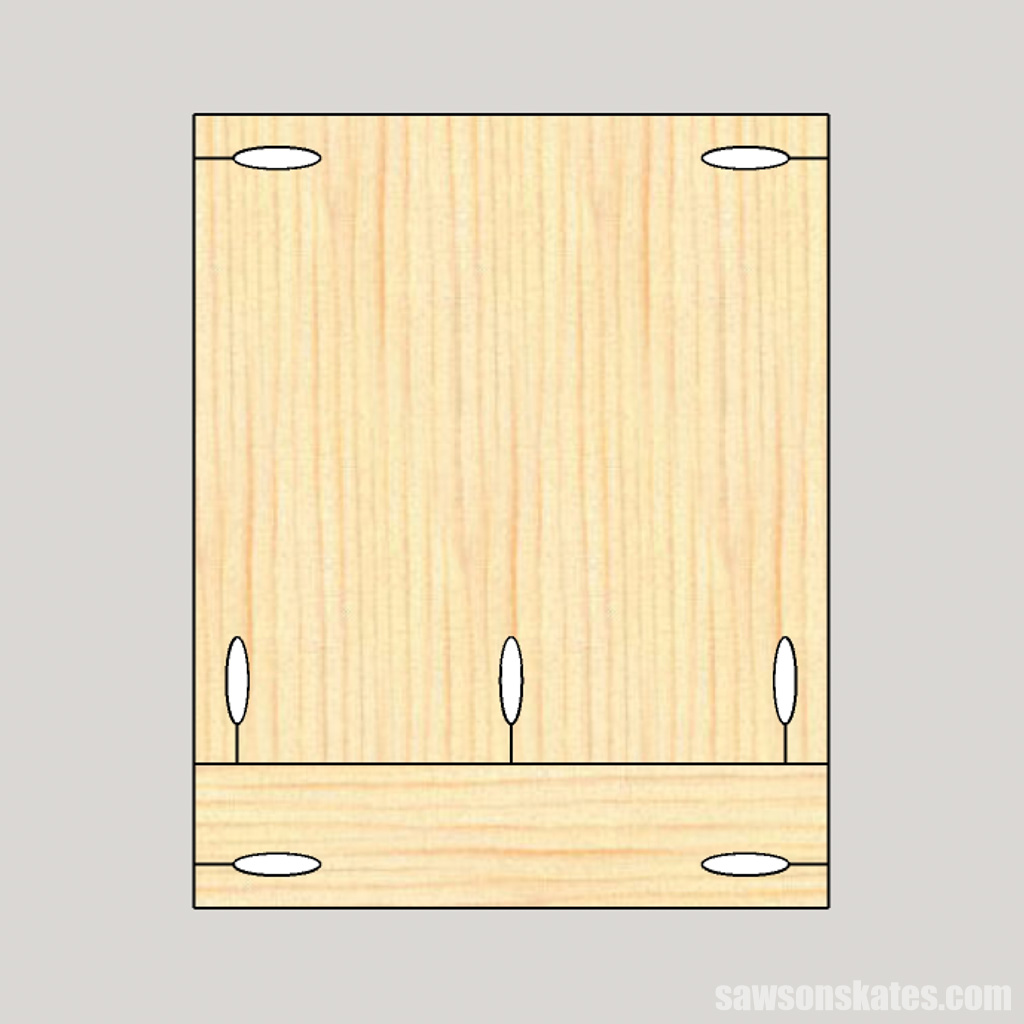
Then, I used my sliding miter saw to cut the panels to length. Next, use the diagram in the printed plan to drill pocket holes at each location.
Related: How to Use a Pocket Hole Jig (& Beginner Pitfalls to Avoid)
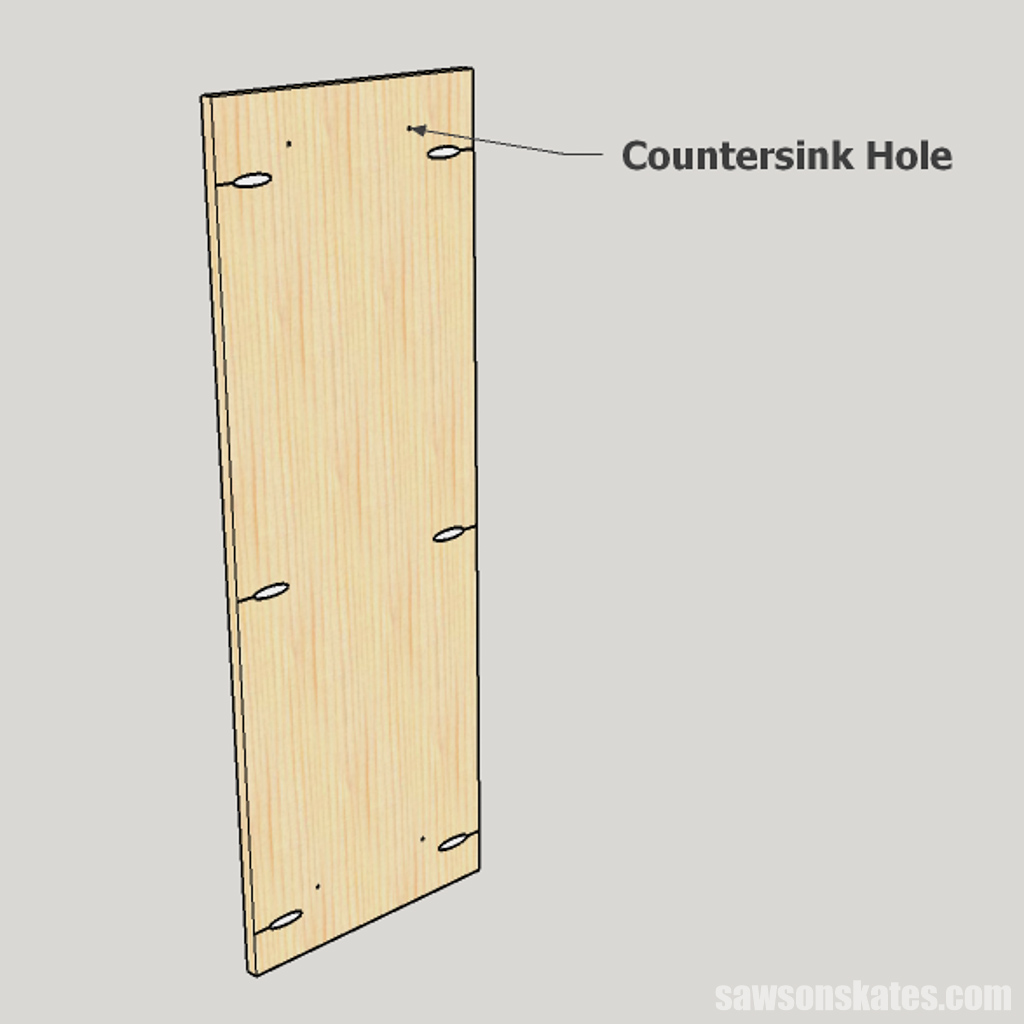
Next, use the diagram in the printed plan to mark the location for countersink holes that will attach the side panels to the top and bottom rails.
Use an awl to make a starting point for the drill bit.
Related: What is an Awl? (& How to Use It)
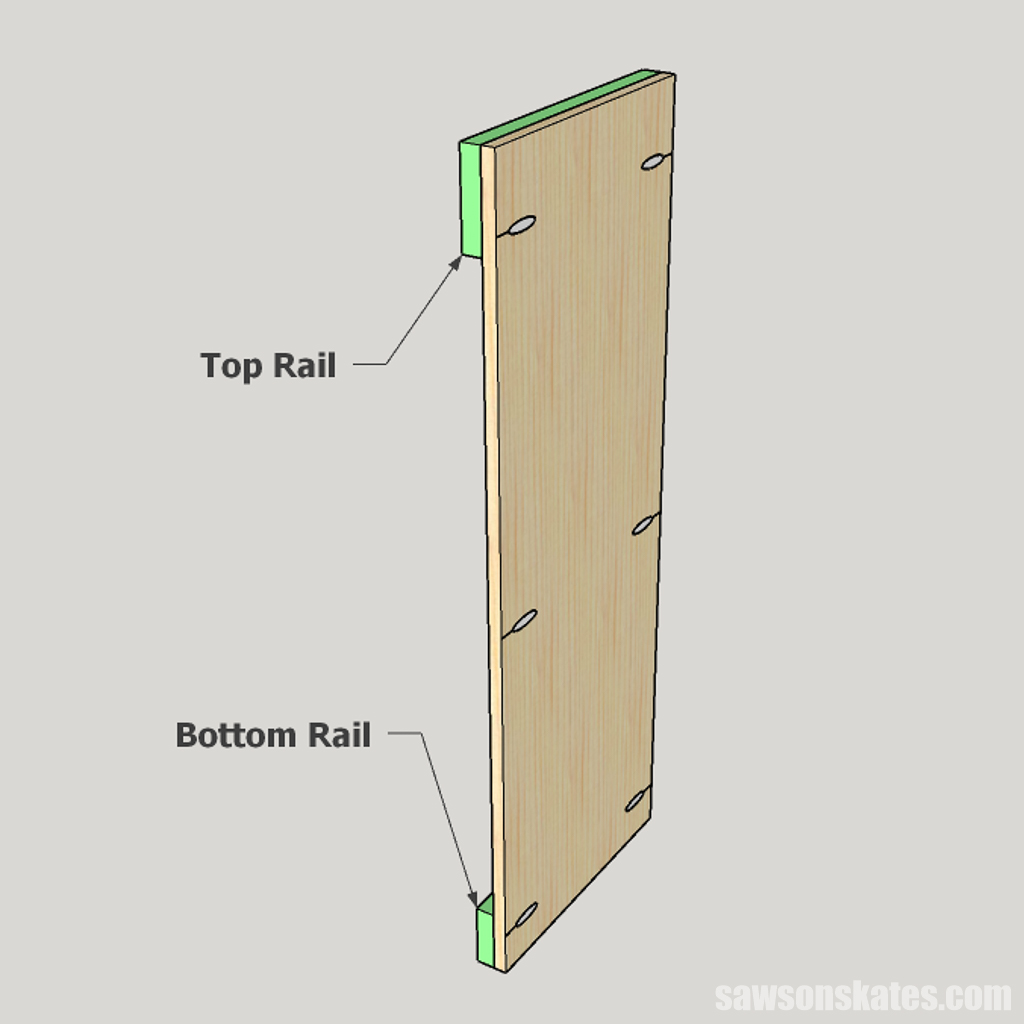
Cut two pieces of wood to length for the top rails and two to length for the bottom rails.
Position the rails on the side panel and clamp.
Use a countersink bit to drill a hole at each mark.
Related: How to Use a Countersink Bit
Attach using 1-¼” wood screws. Repeat these steps for the other side panel.
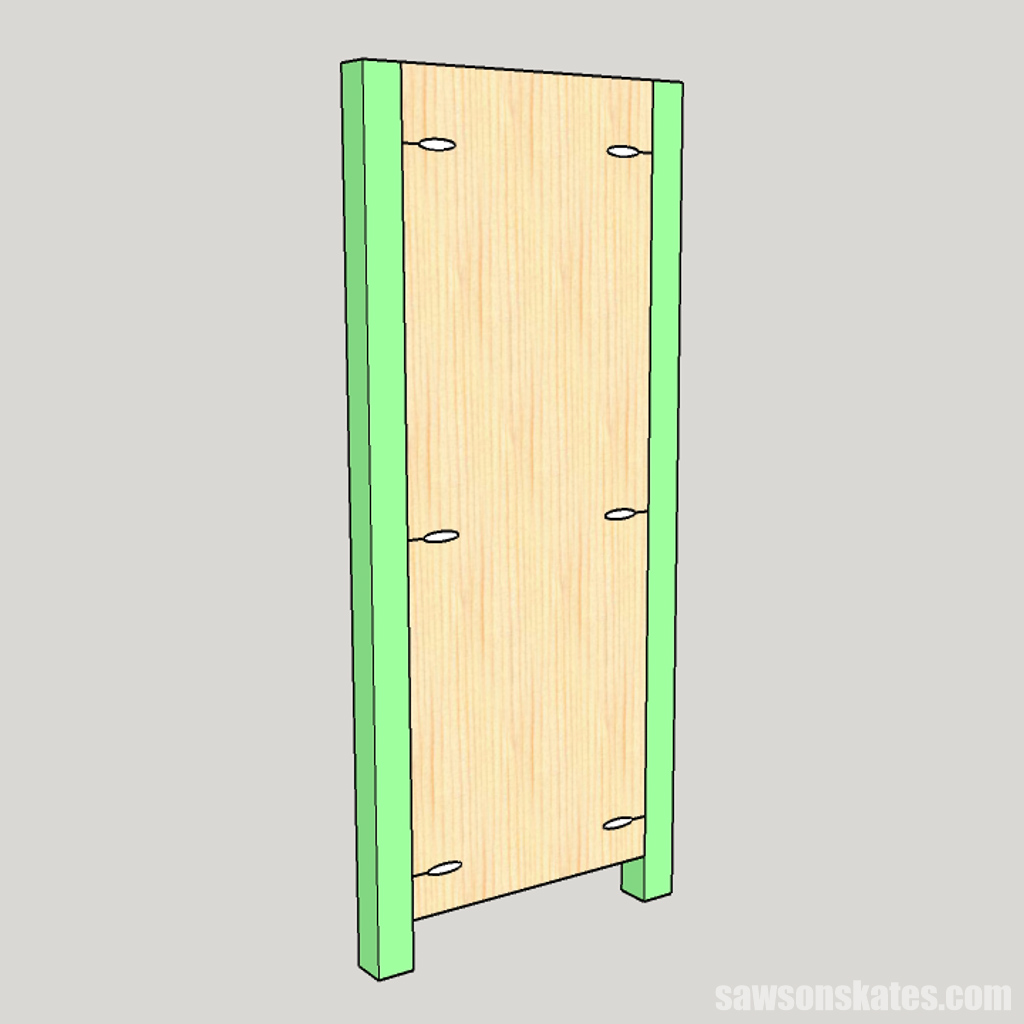
Cut four pieces of wood to length for the legs.
Apply glue to the edge of the panel, position the panel’s back so that it’s flush with the back of the legs, and clamp.
Attach using 1″ pocket screws. Repeat these steps for the other side panel.
Step 2. Attach the Shelves
Rip three pieces of plywood to width and cut to length.
Again, I used my table saw to cut the plywood, but you can also use a circular saw and Kreg Rip-Cut instead.
Related: 4 Ways to Make Straight Cuts with a Circular Saw
Use the diagram in the printed plan to drill pocket holes at each location.
To conceal the plywood’s raw edge, I cut three pieces of wood to length and used the diagram to drill one pocket hole in each end.
Apply glue, clamp and attach using 1-¼” pocket screws. Repeat these steps for the remaining shelves.
It’s easiest to install the bottom shelf first and work upward. To help with the spacing, I cut four pieces of scrap wood to length and clamped them to the bottom of each leg.
Then, I placed the shelf on the scrap wood and clamped it to the side panels. Attach using 1-¼” pocket screws.
For the next shelf, I cut several pieces of scrap wood to length, placed it on top of the first shelf, and clamped it to the side panels. Then, I positioned the middle shelf on the scrap wood and clamped it to the side panels. Attach using 1-¼” pocket screws. I repeated this step for the top shelf.

Step 3. Attach the Rails
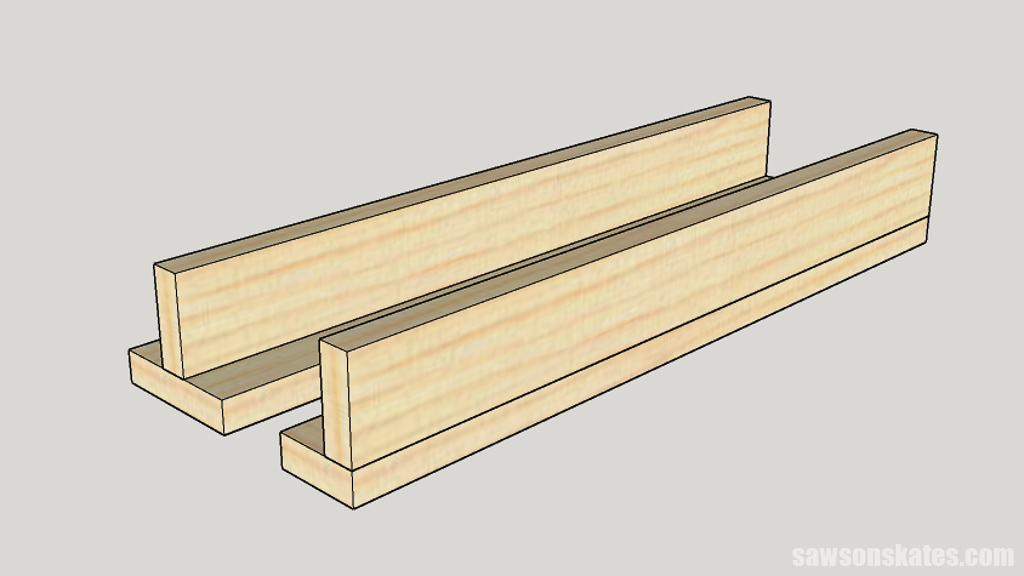
Cut five pieces of wood to length and drill pocket holes in each end. One piece will be used as the front rail, two as back rails and two as the top stretchers in Step 5.
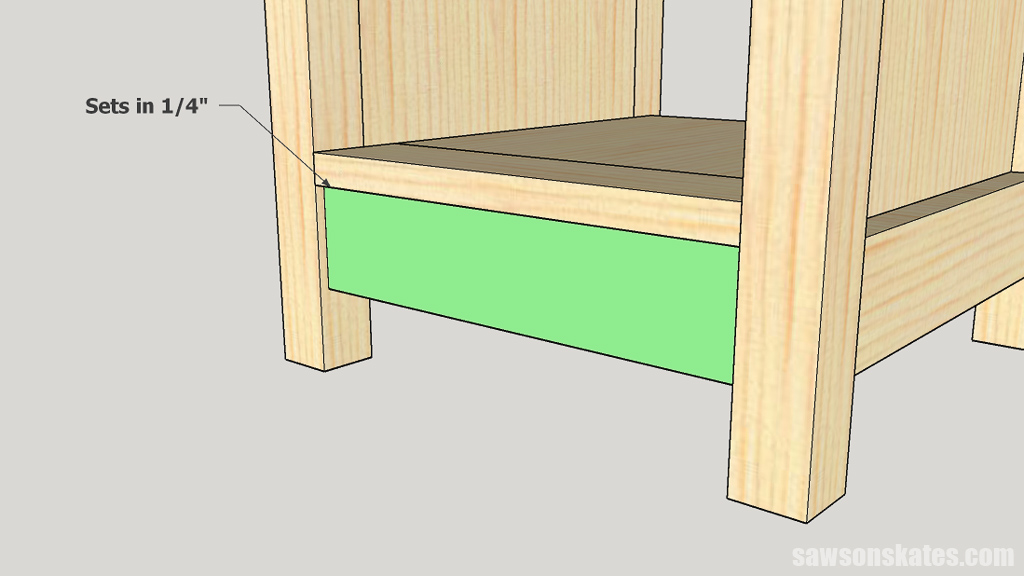
Place the rail below the bottom shelf and set in from the front of the legs. Clamp in position and attach using 1-¼” pocket screws.
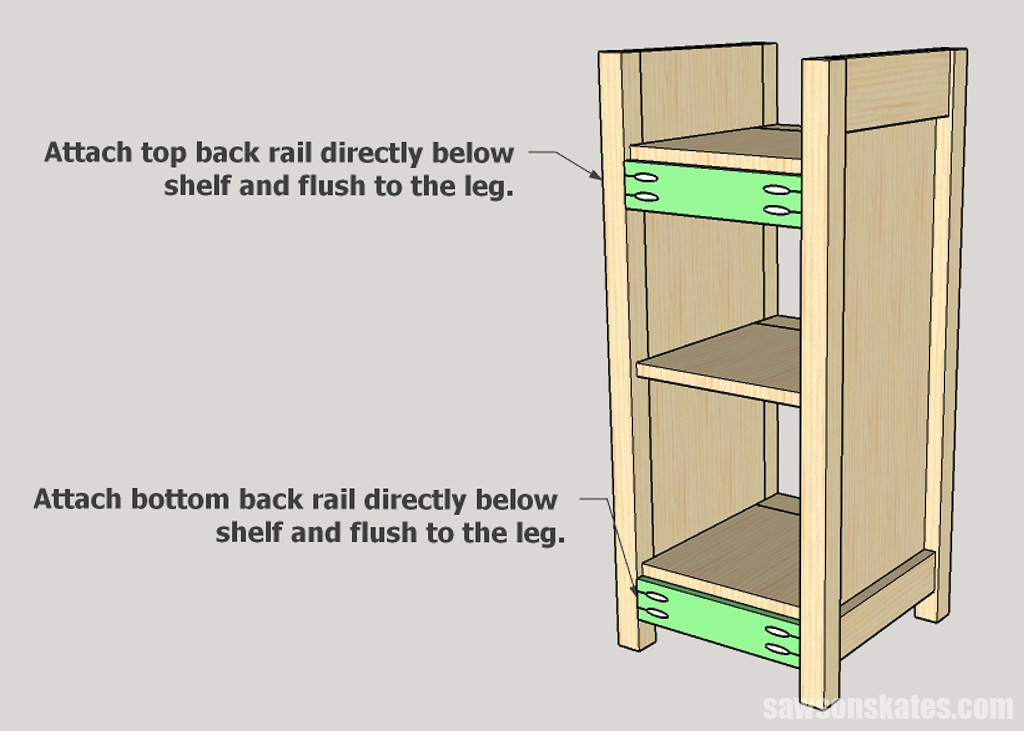
Place the rails below the shelves and flush with the backs of the legs. Clamp in position and attach using 1-¼” pocket screws.
Step 4. Attach the Stemware Holders
I used my table saw to rip four pieces of plywood to width for the uprights and cut them to length with my miter saw.
Outside Holders
Rip two pieces of plywood to width and cut to length for the outside horizontal pieces. Apply glue to the edge of an upright, clamp to a horizontal piece, and attach using 1″ brad nails. Repeat for the other outside holder.
Inside Holders
Rip two pieces of plywood to width and cut to length for the inside horizontal pieces. Apply glue to the edge of an upright, clamp to a horizontal piece, and attach using 1″ brad nails. Repeat for the other outside holder.
Apply glue to the top edge of an outside holder’s upright, position it below the shelf, and clamp. Attach it from the shelf’s top side using 1-¼” brad nails. Repeat this step for the other outside holder.
Apply glue to the top edge of an inside holder’s upright, position it against the scrap wood, and clamp. Attach it from the shelf’s top side with 1-¼” brad nails. Repeat this step for the other inside holder.
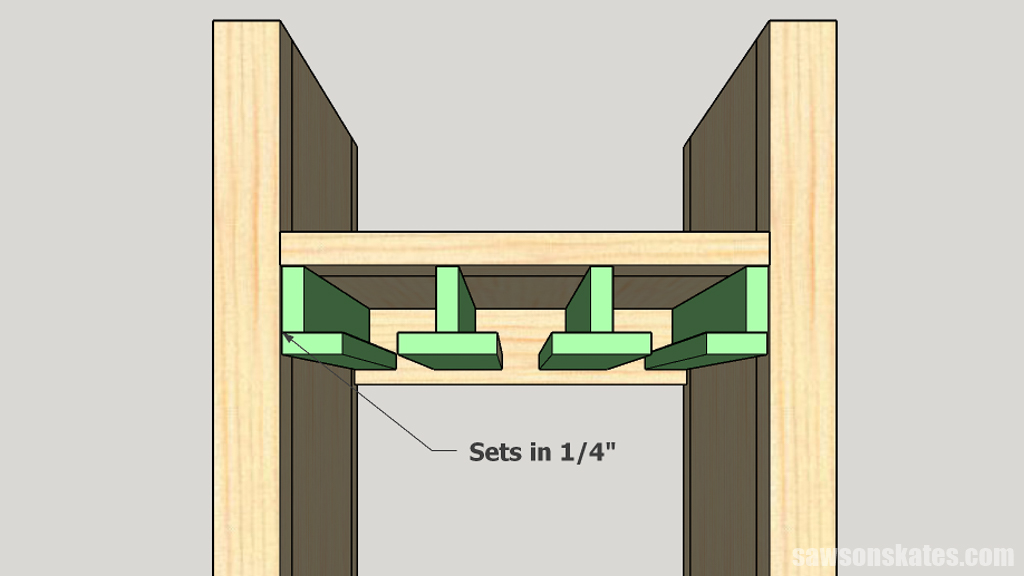
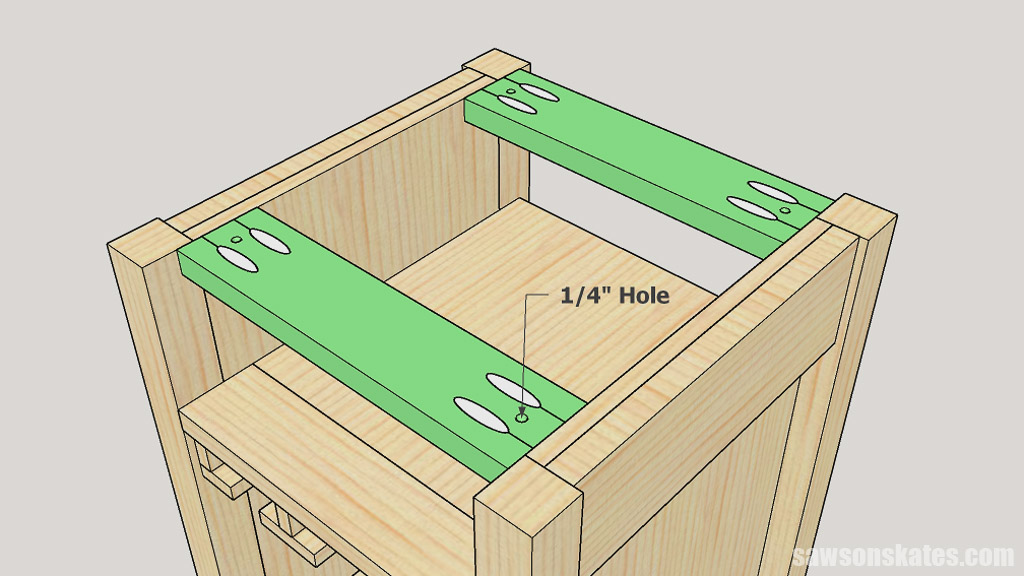
Step 5. Attach the Top Stretchers
Position the front stretcher in from the front legs and the back stretcher in from the rear legs. Clamp in position and attach using 1-¼” pocket screws.
Drill a ¼” hole in each corner that you’ll use to attach the top in the next step.
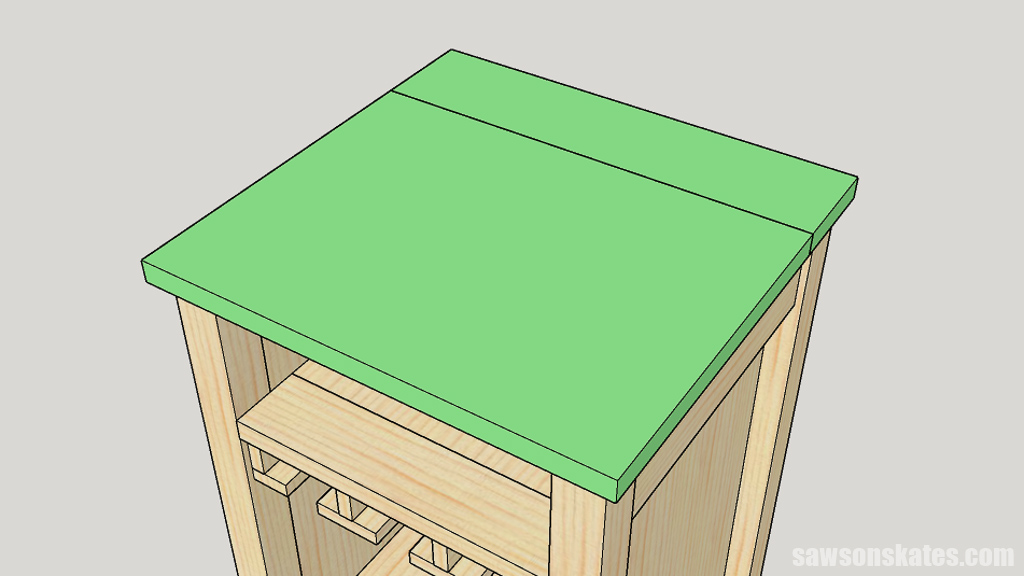
Step 6. Attach the Top
Cut two pieces of wood to length for the top. Apply glue to the edge and clamp until the glue is dry.
Position the top on the cabinet. The top is flush with the back and centered from side to side.
Attach the top to the stretchers using 1-¼” wood screws driven through the four holes drilled in Step 5 from within the drawer area.
Be sure the holes are slightly oversized so the top can move with seasonal changes.
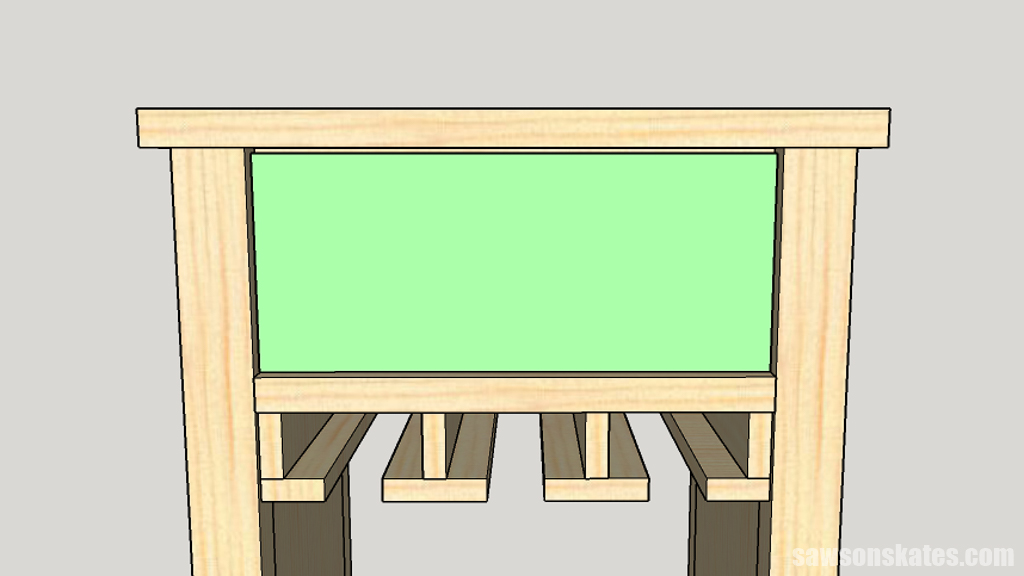
Step 7. Attach the Back Panels
Rip pieces of plywood to width and cut to length for the back’s top and bottom panels.
Position the panels and attach using 1″ brad nails.
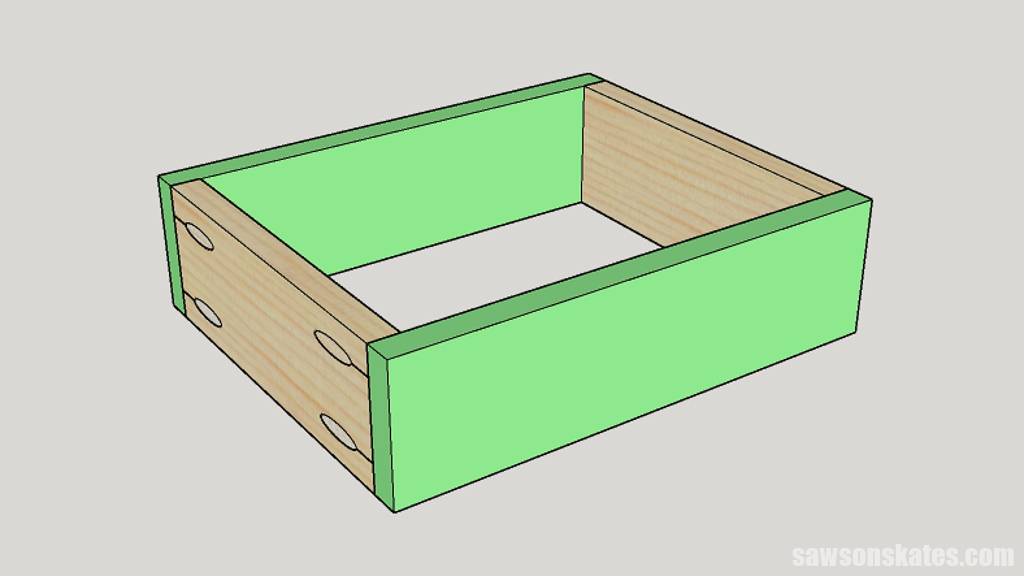
Step 8. Make the Drawer
Cut two pieces of wood to length for the drawer’s front and back and drill pocket holes in each end.
Cut two pieces of wood to length for the drawer’s sides. Apply glue to the ends of the front and back and clamp to the sides. Attach using 1-¼” pocket screws.
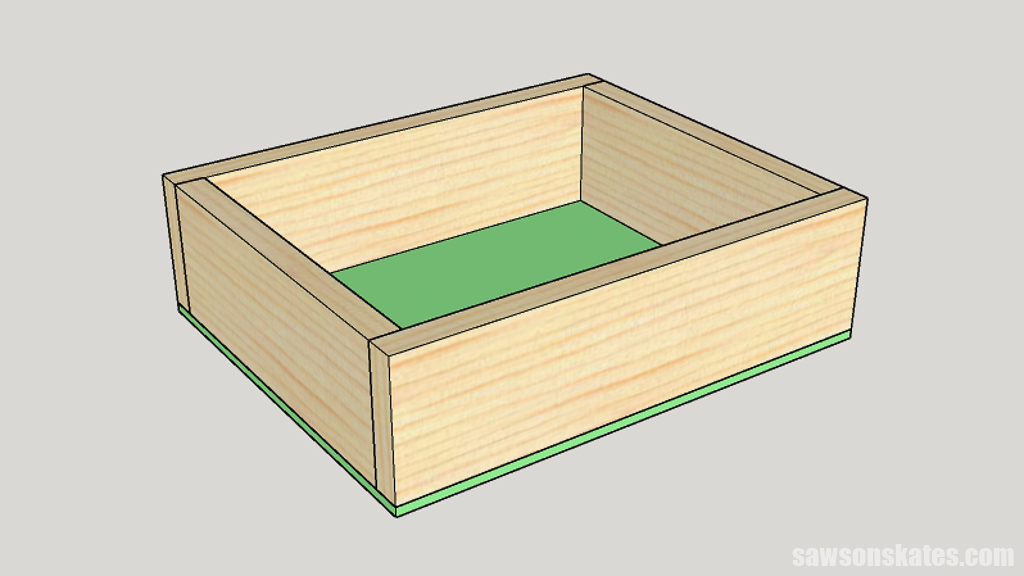
Rip a piece of hardboard to width and cut to length. Apply glue to the bottom of the drawer box, position the bottom, and attach it using ½” brad nails.
To ensure proper fit, allow for an ⅛” clearance on each side of the drawer front. To achieve this, deduct ¼” from the drawer opening’s top-to-bottom and side-to-side dimensions.
Next, determine the knob’s location. Using a straightedge, draw a line from one corner to the opposite corner. Repeat for the other corners. The intersection of these lines marks the center point.
At the center point, drill a hole slightly larger than the screw that came with your knob.
Next, I placed a few pieces of ⅛” hardboard on the bottom of the drawer opening and on each side.
Position the drawer front in the drawer opening. Using the hole in the drawer front, drill a hole through the drawer box.
Remove the drawer front and box from the opening and attach the knob until it’s just snug. Place the box in the open and fine-tune the drawer front’s fit to center it in the opening. Then tighten the knob to hold the drawer front in place.
From inside the box, drill a countersink hole on either side of the knob and attach using 1-¼” wood screws.
Step 9. Make the Bottle Dividers
Rip four pieces of plywood to width and then cut to length.
The easiest way to make the slot is with a router table and a straight cutting bit.
Related: How to Use a Router Table for Beginners
Set the router table’s fence for and make a pass to the mark indicated in the printed plan, then flip and make a second pass.
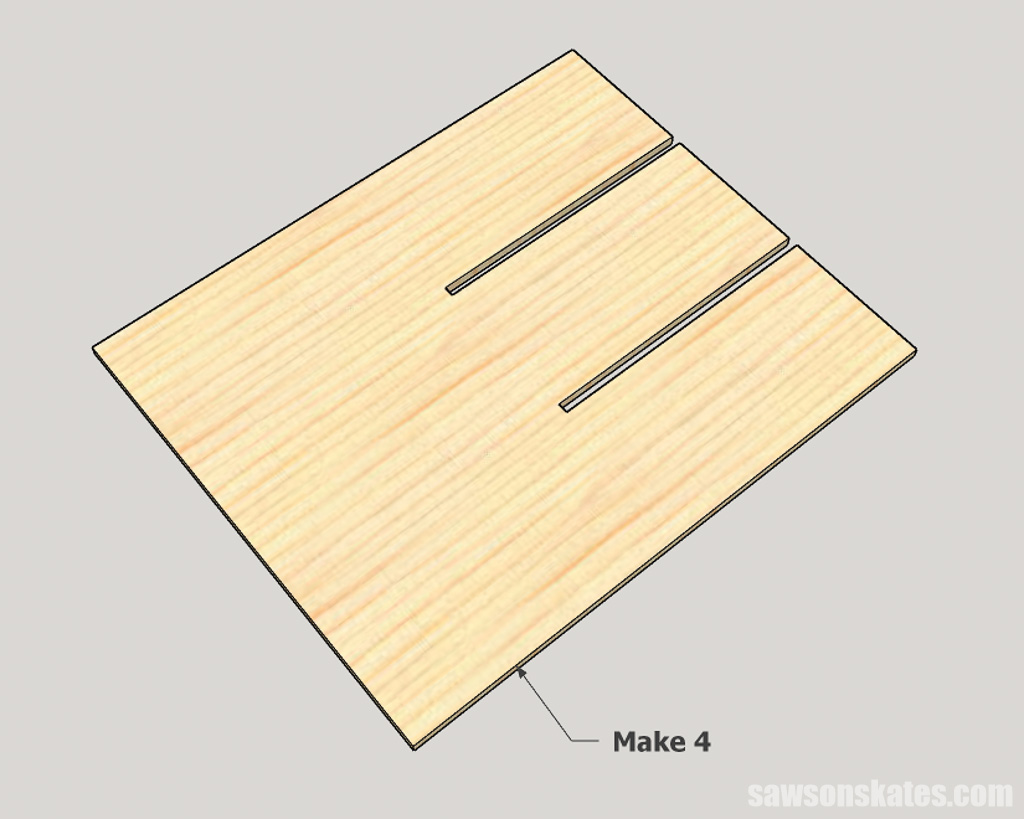
Interlock the slots and install in the bottle divider area. It will be a snug fit, so glue you won’t need glue.
That’s it. Finish your wine cabinet to match your decor, and fill it with wine and glasses.
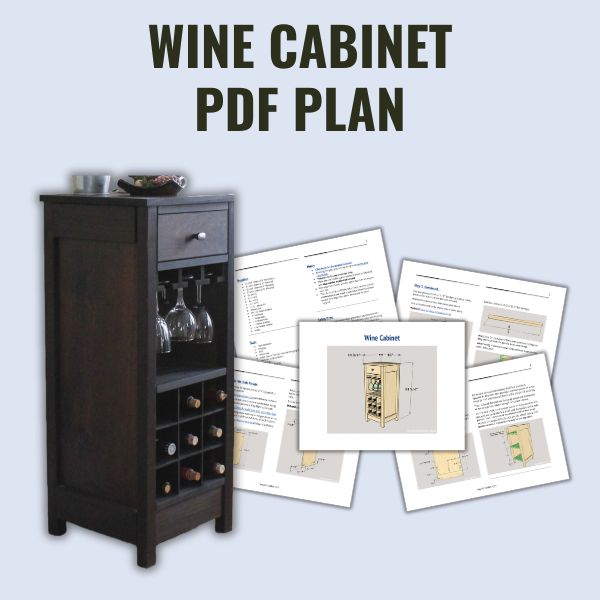
Includes:
- List of tools and materials
- Complete measurements (in inches)
- Easy-to-follow instructions
- Step-by-step photos
- Detailed diagrams
Final Thoughts
Thank you for stopping by. If you enjoyed this tutorial, would you please take a moment and pin it to Pinterest? I’d really appreciate it!
Recommended For You
Pin This For Later

Hi there – I’m Scott, a woodworking enthusiast and creator of Saws on Skates, a site I started in 2015 to share easy-to-follow tutorials, space-saving shop tips, and project inspiration for DIYers at any skill level. Learn more about my woodworking journey here.
would love to see a few more similar designs of wine cabinets
Hi Ron – Thank you for stopping by! What are you looking for in wine cabinet? More wine bottle storage? More wine glass storage? Something else? Let me know and I can try to put something together 🙂
I don’t see in the instructions where the 1×2 is used?
Good catch Mitchell! I’m not sure how that got in there, because I don’t see where it’s used either. Thank you for the message – I’ll update the plan.
Do you have a wine cabinet plan with built in wine fridge?
Hi Dennis – Thank you for stopping by. I don’t have a wine cabinet plan with a fridge, but it’s a great idea! I have a few ideas – I’ll try to put a plan together.
Do you have plans for the little plant table to the left of your cabinet? I especially love the finish on it, is it poly?
Hi Robin – Thank you for stopping by. Yes, I have the plans for the stool here. The finish on the stool is Bob’s Miracle Finish. You can get the recipe for Bob’s here.
Hi Scott. I can not figure out how the top piece is installed. Thanks!
Hi Carlos – I drilled four oversized holes, one on each side of the stretchers (Step 13). Then, I positioned the top. I put a washer on a 1-1/4″ wood screw and attached the top through the oversized hole in the stretcher. I repeated for the remaining holes. The oversized hole allows the wood top/screws to move with seasonal changes.
Ps: I love the wing cabinet! I’d like to make something similar but with the finish of the plant stool next to it.
Great job on the cabinet but where do you find the material to make it. I can never find that good of wood at the box stores by me?
Hi John – Thank you for stopping by. I usually get my wood at my local Lowe’s store. I have been known to sort through every piece of wood until I find just the right one! Do you have a local lumber yard? They’re a great place to check out if you can’t find what you need at your local big box store.