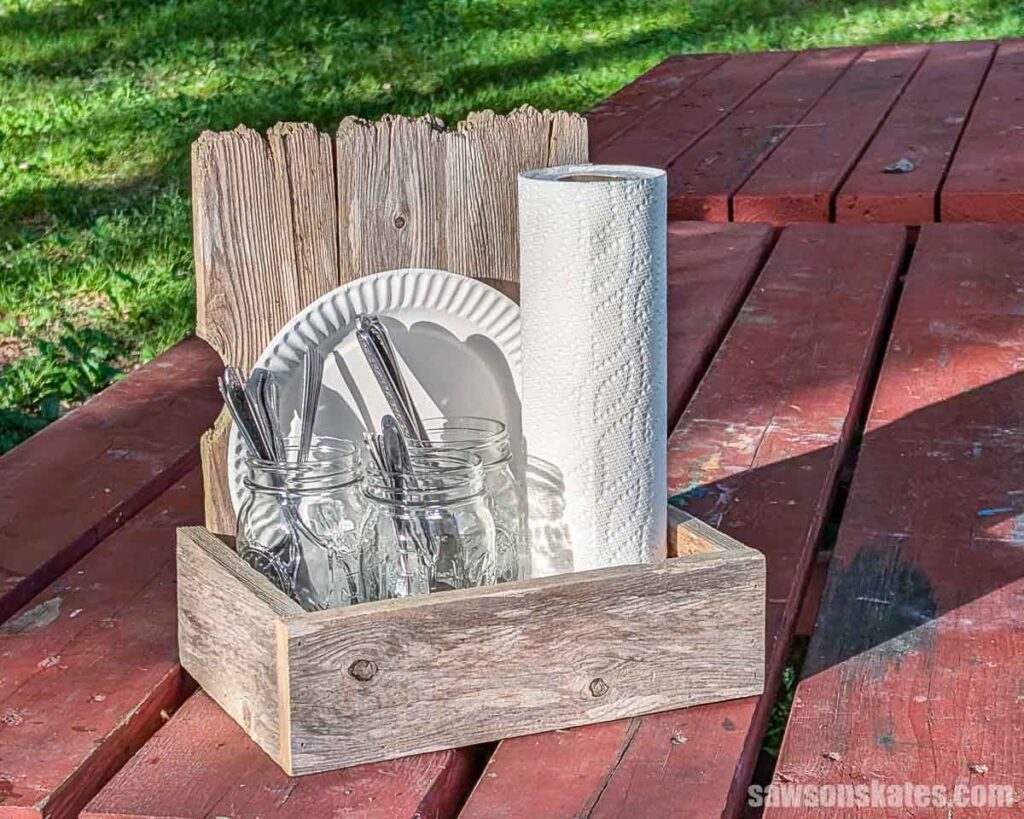
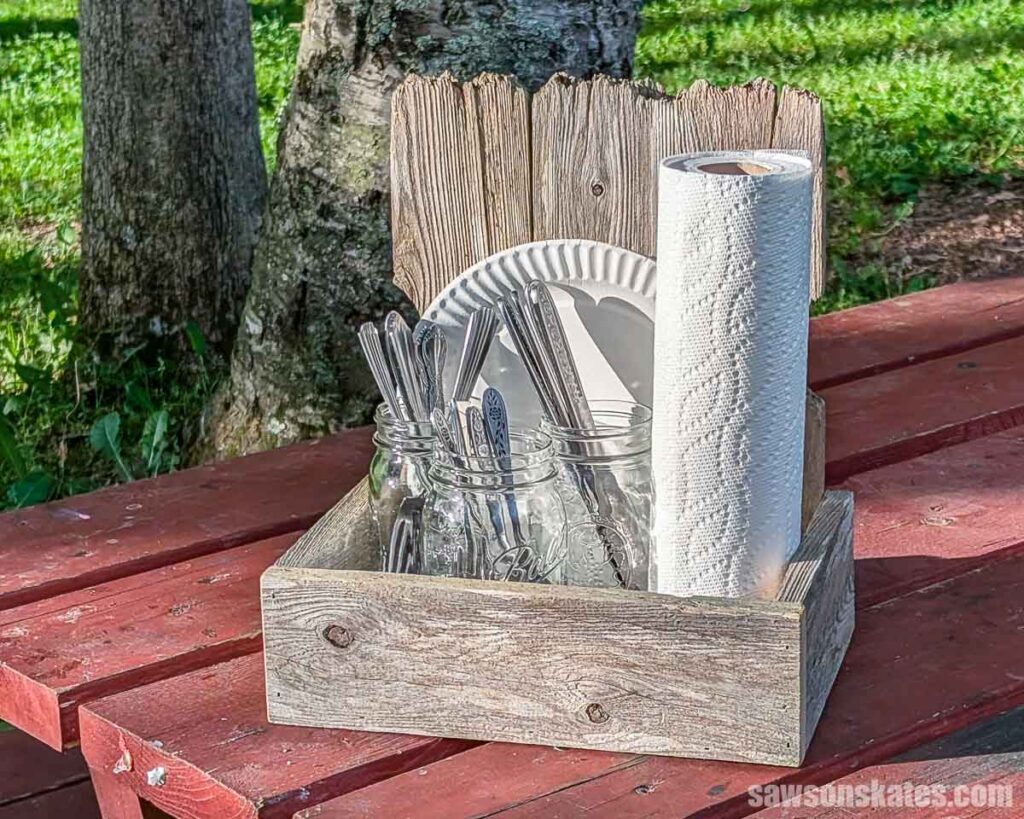
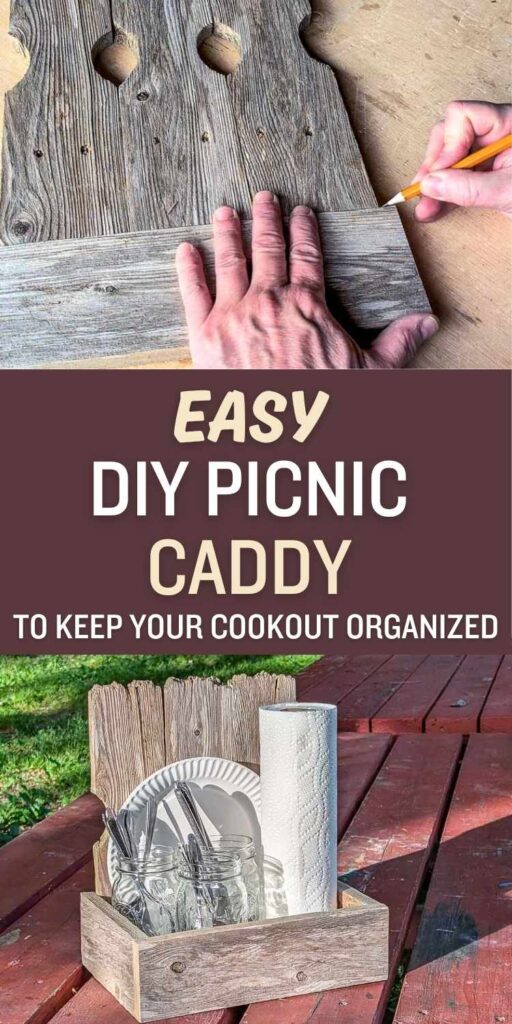
DIY Picnic Caddy to Keep Your Cookout Organized
Old fence pickets get a second life as a rustic picnic caddy, perfect for organizing plates, napkins, and utensils at summer gatherings and BBQs.
What Should I Build Next?
That's the question I help answer.
Every week, I send woodworking ideas to 17,000 DIYers who love building things.
You'd fit right in.
For about a week, I drove by two sections of broken-down fence. And one morning, my inner voice said, “Stop and get them!”
So I did. Then my inner voice said, “What are you gonna do with these?!”
I loved the rustic, worn, silvery look, but I had no idea what to do with a handful of busted fence pickets.
I’m not even sure what made me think of it, but I thought, what about one of those organizers for your picnic table? You know the ones, they hold your plates, napkins, utensils, and condiments; all of your cookout gear.
Well, I made a quick SketchUp model, and in one easy afternoon, I had this handy, rustic picnic caddy, perfect for summer gatherings and backyard BBQs.
Pickets or Boards
I made my caddy with old cedar fence pickets, but you could use store-bought boards instead.
Make It Portable
I didn’t have any stashed away, but adding some rustic handles to each side would make this project easier to carry.
Finish It Your Way
I planned to whitewash my caddy, but really liked the look of the silvery cedar, so I decided to leave it natural.
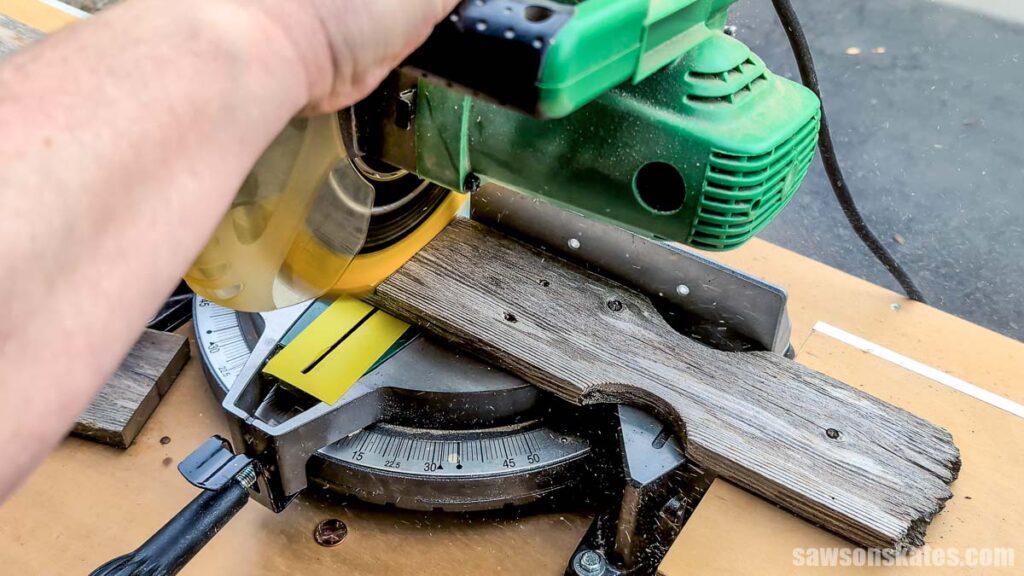
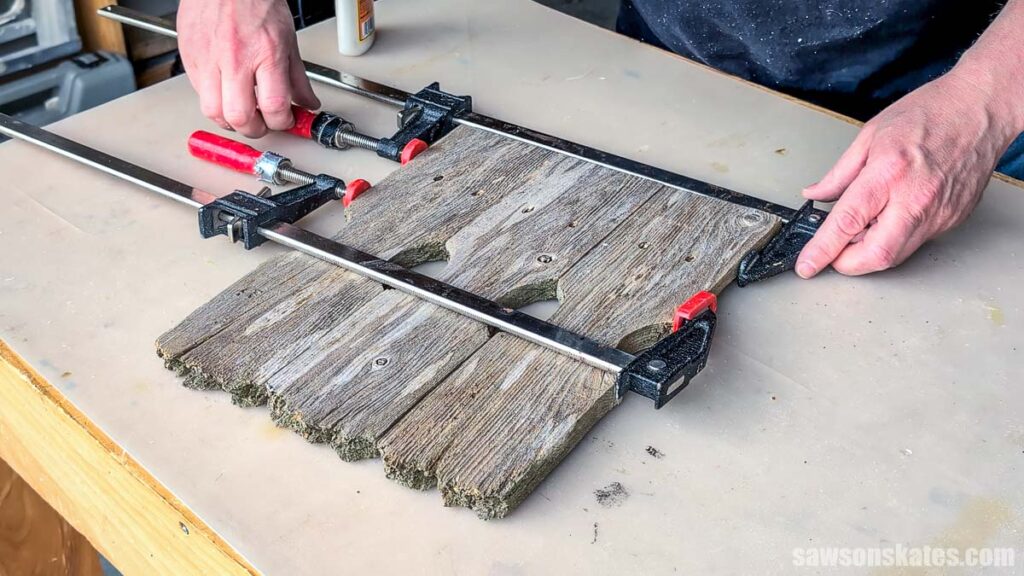
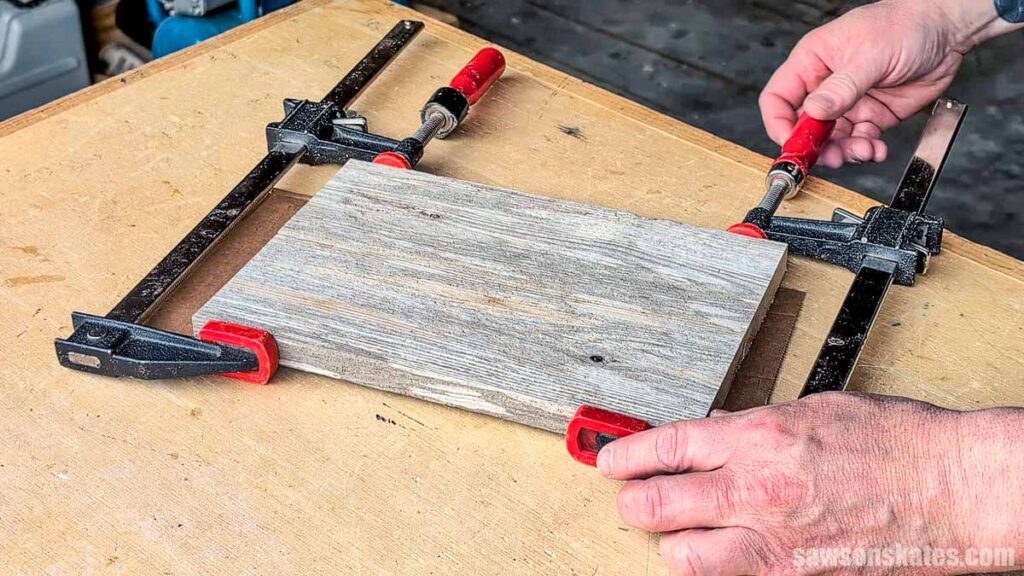
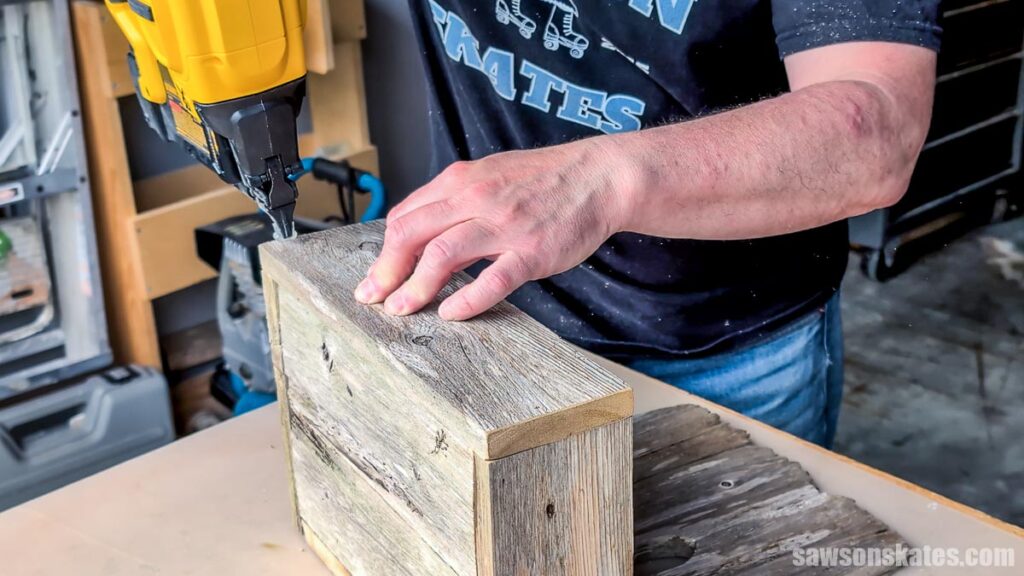
Step 1. Make the Back
I cut three pickets to 13″ for the back.
I applied glue to the edges, clamped them, and let them dry for about an hour.
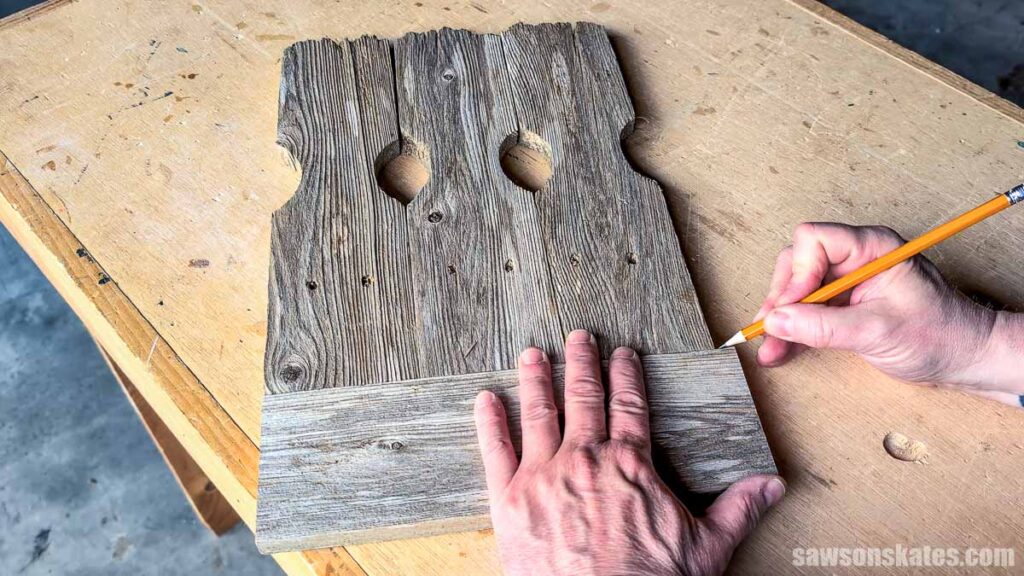
Step 2. Attach the Bottom
I placed a piece of picket on the back and marked it for length. Then, I cut two pieces to this length.
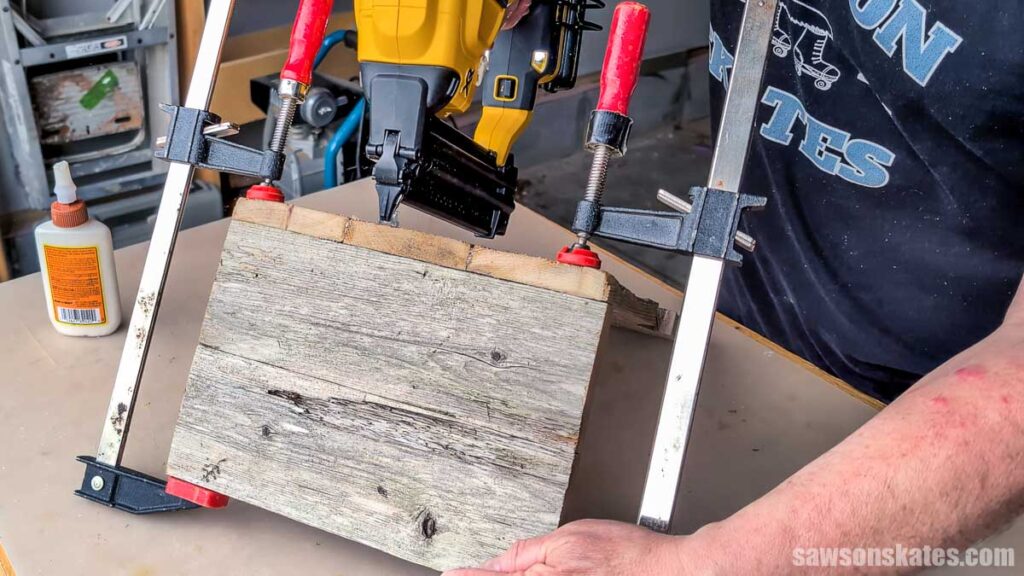
I applied glue to the edges, clamped them, and let them dry for about an hour.
Then, I applied glue, positioned it on the back, and clamped it in place. I attached it using 1-¼” brad nails.
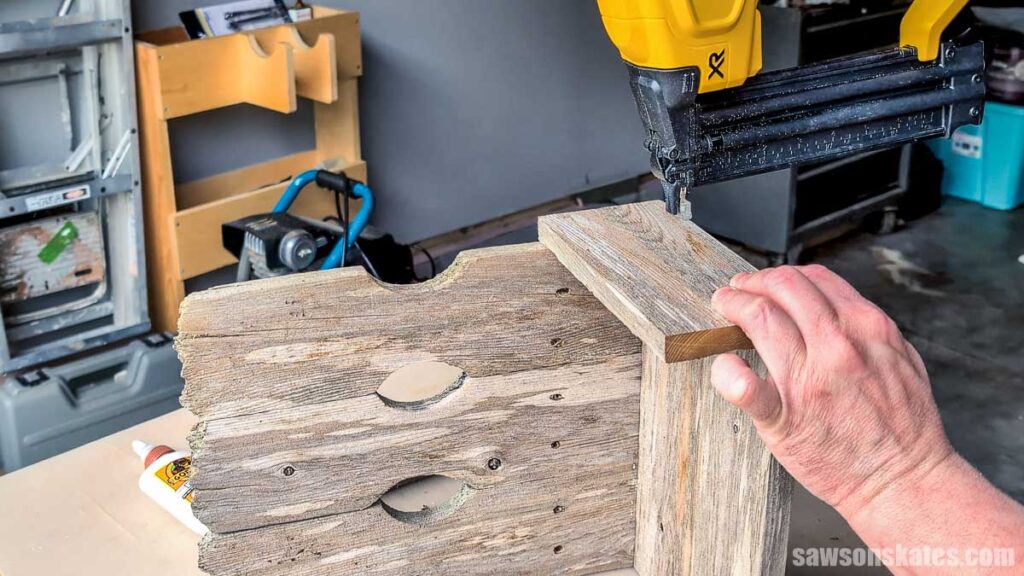
Step 3. Attach the Sides
Following the same method I used to mark the bottom to length, I marked the sides and cut two pieces.
I applied glue and attached them using 1-¼” brad nails.
Step 4. Attach the Front
I cut a piece of picket to length for the front and attached it using 1-¼” brad nails.
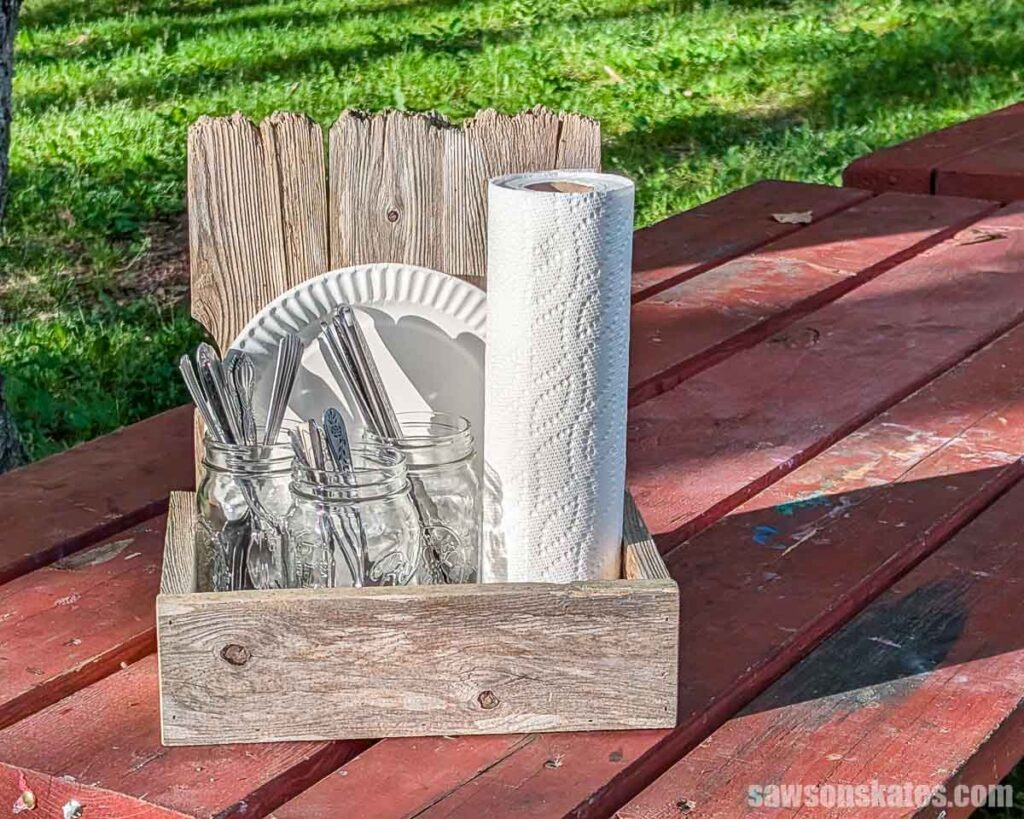
Step 5. Ready for the Table
Now it’s ready for plates, mason jars for the utensils, napkins, salt and pepper, condiments, cups, and all the little things that end up on a picnic table.
Final Thoughts
So that’s how a couple of broken-down fence sections became a picnic caddy. If you’ve got some weathered pickets kicking around, this is an easy way to put them to use, and you can check out my 21+ Scrap Wood Summer Decor Projects for more.

Pin This For Later

Hi there – I’m Scott, a woodworking enthusiast and creator of Saws on Skates, a site I started in 2015 to share easy-to-follow tutorials, space-saving shop tips, and project inspiration for DIYers at any skill level. Learn more about my woodworking journey here.