Robot Emoji DIY Piggy Bank
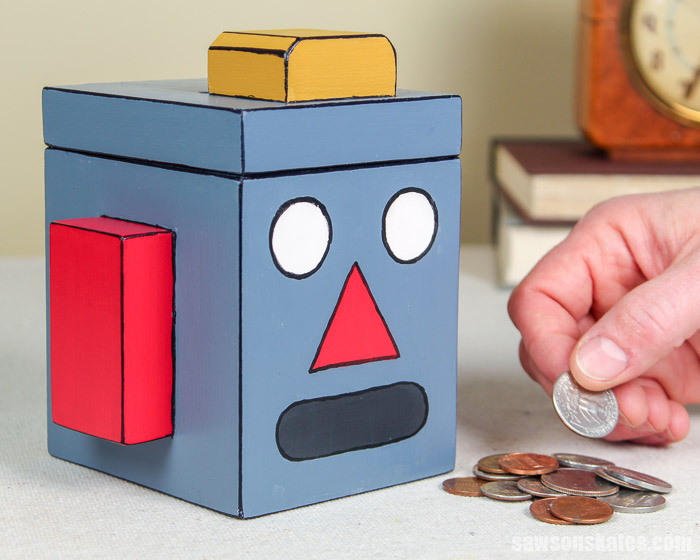
This DIY piggy bank is shaped like a cute robot emoji! It’s an easy do it yourself project made with simple supplies like scrap wood and craft paints.
What Should I Build Next?
That's the question I help answer.
Every week, I send woodworking ideas to 17,000 DIYers who love building things.
You'd fit right in.
DIY Piggy Bank
This do it yourself piggy bank is made out of wood and shaped like a cute robot emoji. It’s a simple project that can be made entirely with scrap wood.
Make it as a gift for your kids or grandchildren. Or get the kids involved. Ask them to help with gluing, sanding, and painting.
This project is also a great opportunity to teach kids about saving money.
This tutorial contains affiliate links to supplies and tools. Purchases made using these links help support the Saws on Skates website and allows me to share more projects and tips with you. There is no cost to you for using these links. Visit my site policies for more information.
Before we get into how to make a DIY piggy bank, be sure to click the subscribe button at the bottom of this page to sign up for my FREE weekly newsletter loaded with helpful pocket hole tricks, space-saving workshop ideas, clever DIY tips and more!
Table of Contents
- Can Kids Help to Make This DIY Piggy Bank?
- What Kind of Wood Do You Need to Make This DIY Piggy Bank?
- How Do You Finish the DIY Piggy Bank?
- Customize this DIY Piggy Bank
- Where to Buy a Piggy Bank
- How to Make a DIY Piggy Bank
- Get the Free Printed Plan
Can Kids Help to Make This DIY Piggy Bank?
Yes, kids can help to make this wooden piggy bank. This is an easy do it yourself project that can be made in an afternoon. It’s a great project for DIYers of any skill level.
The parts can be cut with a miter saw or a miter box. The miter saw should be used by an adult, but age-appropriate kids could use a miter box to cut the parts.
Related: 7 Miter Saw Tricks Every DIYer Should Know
The parts are joined with glue and nails. I used a brad nailer to join the parts of my piggy bank, but age-appropriate kids could use a hammer and nails instead.
Kids can get involved with finishing the piggy bank too. They can help with smoothing the parts with sandpaper. Then, they can decorate the bank with craft paints.
Related: How to Make a DIY Craft Paint Organizer
Back to Table of ContentsWhat Kind of Wood Do You Need to Make This Piggy Bank?
This handmade piggy bank is an easy and affordable project. It doesn’t require much wood. I made my bank entirely with scrap wood that I had in my workshop.
Related: How to Decide What Scrap Wood to Keep
I used 1×2, 1×3, and 1×4 pine to build this DIY piggy bank. Pine is inexpensive and easy to work with. Pine can be purchased at your local home improvement store.
Related: Beginner’s Guide to Wood Sizes
Back to Table of ContentsHow Do You Finish the DIY Piggy Bank?
First, the parts of the bank were sanded smooth. Then I applied a primer. I used this water-based primer that I had leftover from another project. When the primer was dry, I lightly sanded the bank with 220 grit sandpaper.
Related: 11 Secrets for Sanding Wood Projects Like a Pro
Then I painted the piggy bank with craft paints that I had leftover from other projects.
Customize This DIY Piggy Bank
There are several ways to customize this wooden piggy bank. Instead of painting the eyes, nose, and mouth, you could attach hardware like screws, washers, etc.
Back to Table of ContentsWhere to Buy a Piggy Bank
Store-bought piggy banks are available if you don’t have the tools or time to make one. Here are a few options you can buy online and have sent to your home.
Back to Table of ContentsRobot Emoji DIY Piggy Bank
Printed Plan
- Get the FREE plan here (includes detailed instructions, measurements, and bonus tips).
Supplies
- Wood (per printed plan)
- 1-¼” Finish Nails or Brad Nails
- 1-¼” Wood Screws
- Wood Glue (I used this one)
- Ready Patch
- Craft Paints
- Artist Brushes
- Sharpie Marker (I used this one)
- Minwax Polycrylic (Matte-Finish)
Tools
- Tape Measure
- Drill
- Kreg Multi-Mark
- Miter Saw or Miter Box
- Jig Saw
- Hammer or Brad Nailer
- ¼” Drill Bit
- Compass
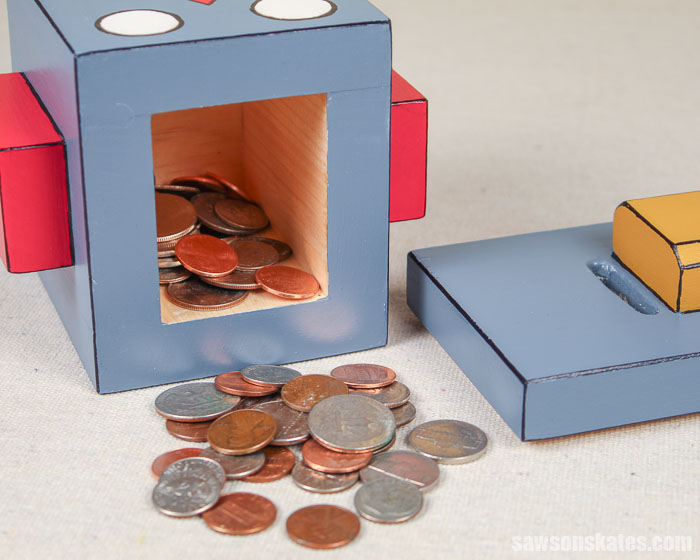
Step 1. Make the Box
Cut the wood to length for the front, back, sides and bottom. Apply glue to parts, clamp, and attach using nails.
Cut 2 pieces of wood to length for the ears.
Apply glue to the ears, position on the box, and clamp. Attach using nails.
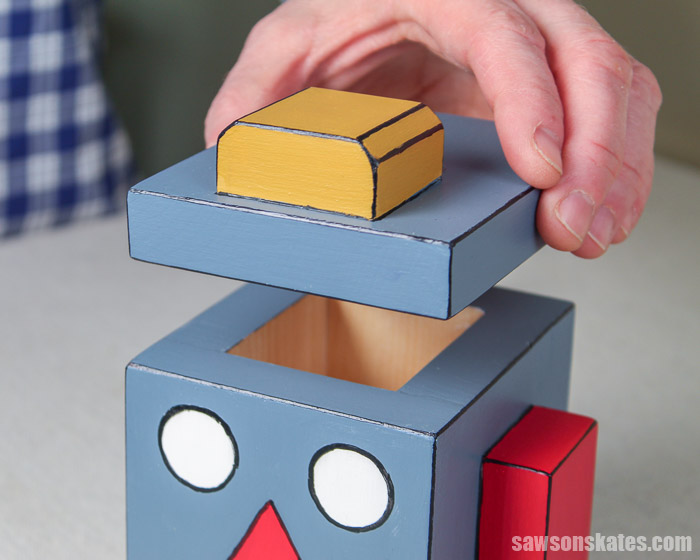
Step 2. Make the Lid
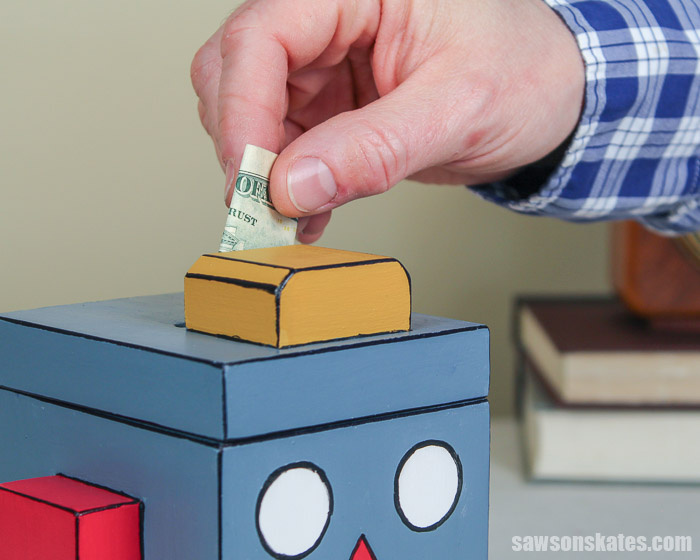
Cut 1 piece of wood to length for the lid and cut a hole for the coin slot.
Cut 1 piece of wood to length for the handle. I used a sanding block to sand a 45-degree bevel on each end.
Apply glue to the handle, position on the lid, and clamp. Attach using nails.
Step 3. Finish the DIY Piggy Bank
I sanded all of the parts and applied a coat of primer. When the primer was dry I lightly sanded with 220 grit sandpaper.
I used the measurements from the printed plan to layout the locations for the eyes, nose, and mouth.
I used small artist brushes and craft paints to paint the piggy bank.
Next, I used a small artist brush and black paint to outline the edges of the eyes, nose, mouth, and ears. Then, I used a sharpie marker like this one on the edges of the bank.
The last thing I did was to protect the project with a few coats of matte-finish Minwax Polycrylic.
Related: Polycrylic vs Polyurethane: Are They The Same?
Final Thoughts
This robot emoji-shaped piggy bank is a simple project that can be made entirely with scrap wood.
Make one as a gift for your kids or grandchildren. Or get the kids involved. Ask them to help with gluing, sanding, and painting.
Get the free plan (including the detailed instructions and measurements) now!
Thank you for stopping by. If you enjoyed this tutorial, would you please take a moment and pin it to Pinterest? I’d really appreciate it!
Pin This For Later

Hi there – I’m Scott, a woodworking enthusiast and creator of Saws on Skates, a site I started in 2015 to share easy-to-follow tutorials, space-saving shop tips, and project inspiration for DIYers at any skill level. Learn more about my woodworking journey here.