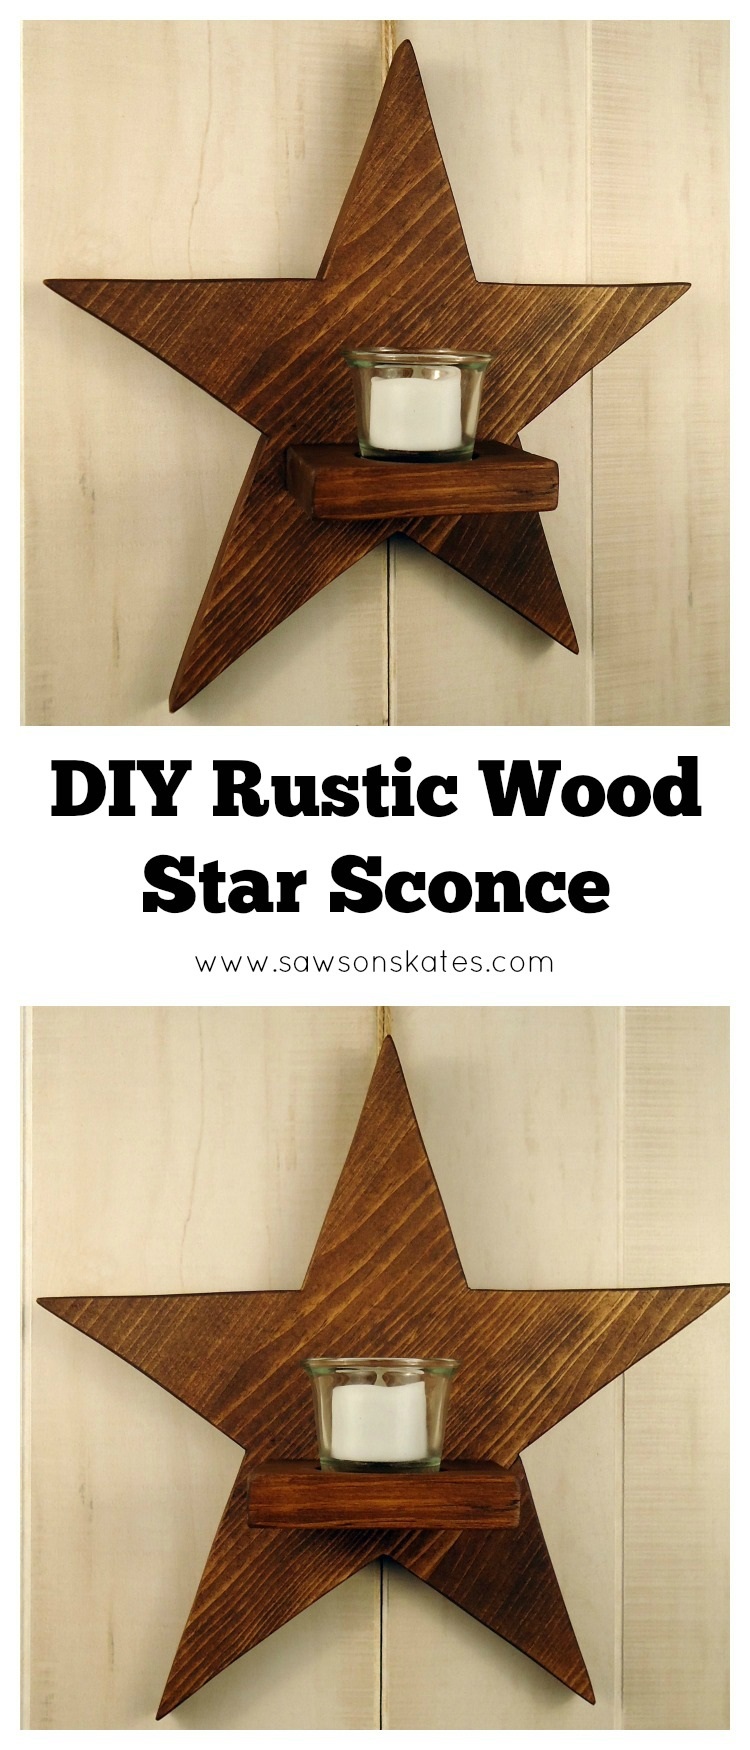
DIY Rustic Wood Star Sconce
Who doesn’t like stars, wood and candles? All three come together for this easy to make DIY rustic wood star sconce!
For your convenience this post contains affiliate links to products or tools I used to complete this project. Click here to visit my site policies.
This rustic wood star sconce was one of the last projects I shared as a member of the Domestically Speaking 2016 Creative Team. I had a blast being part of the creative team! I learned some new tricks and got to share some cool projects like the DIY dog bed, the schoolhouse chalkboard and the chippy paint candle holder.
The idea for the rustic wood star sconce was inspired by a gift I received at the closing for my house. My friend Sue’s dad was the attorney for my closing. I closed on the house right around Christmastime and Sue’s dad gave me one of his handmade Christmas star sconces as a housewarming gift. What a thoughtful gesture!
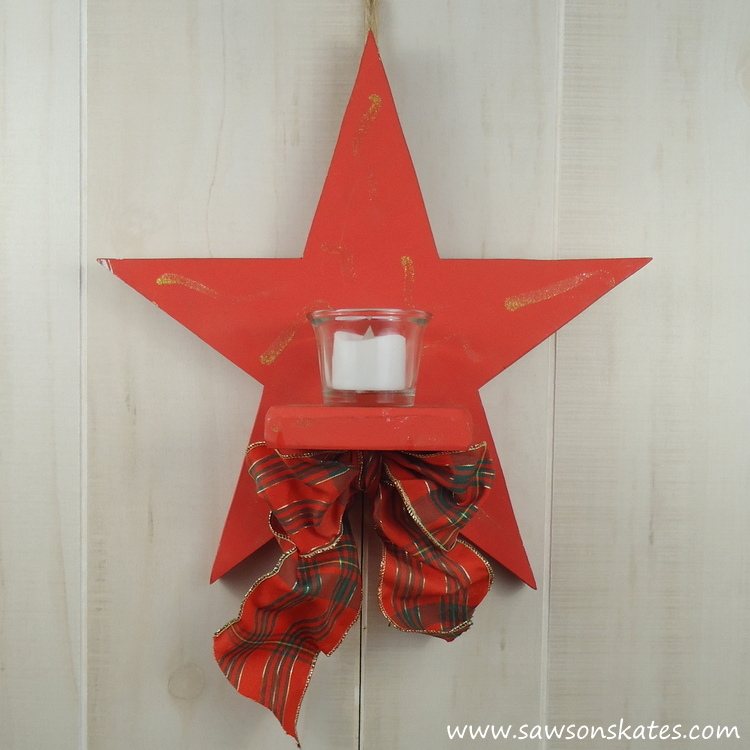
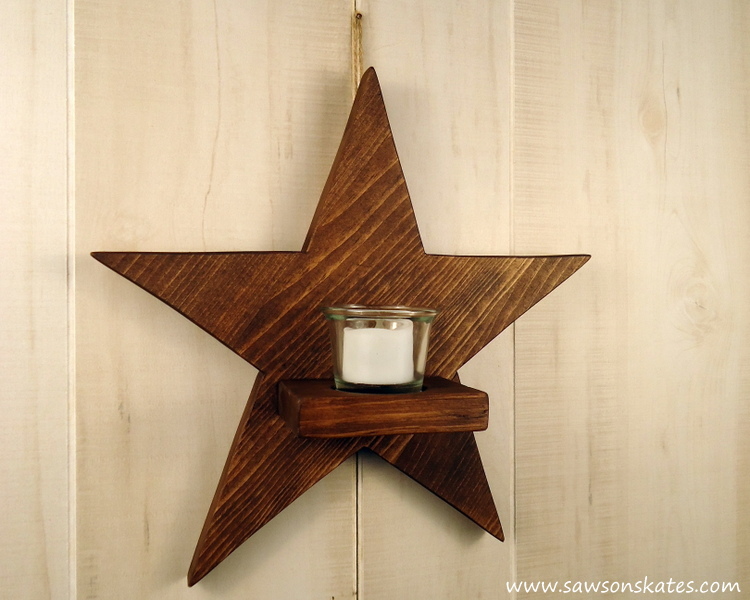
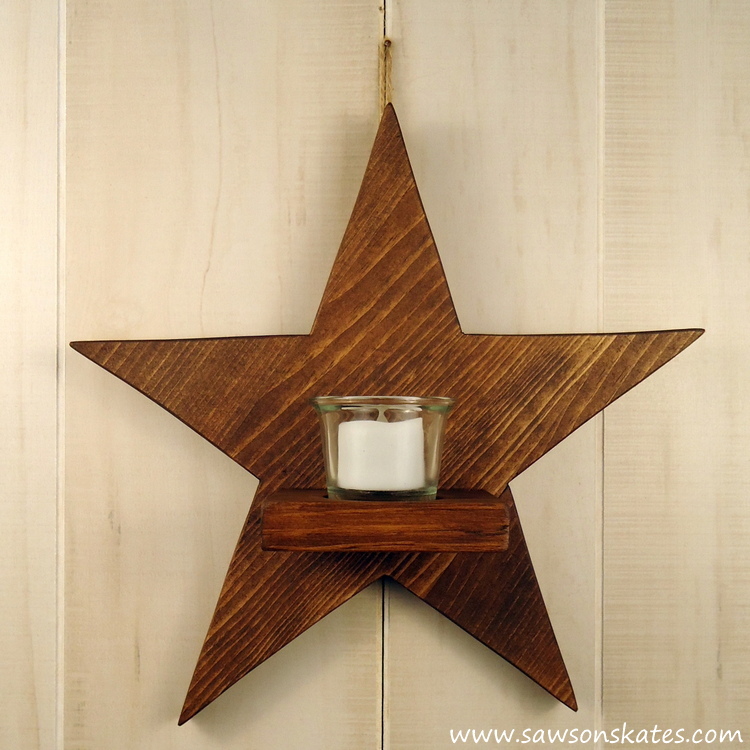
I always liked this star, but wished I could keep it up year round. The star screamed “Christmas”, so it wasn’t really an option for year round use. But… I could make my own using the Christmas star as a template. And that’s what I did! I used some scrap wood, opted for stain rather than red paint and I left off the plaid bow. Now this rustic wood star sconce is ready for year round use. You can make it like I did, add a bow or even paint it like the original. So many options!
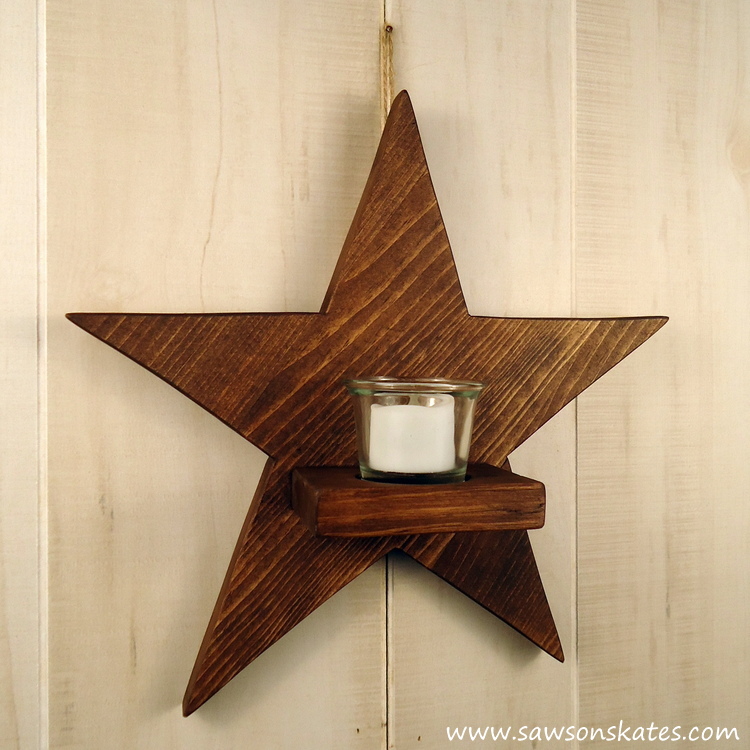
I did make one upgrade to the original. I drilled a hole in the holder, so the glass votive holder would stay in place. Before you build the rustic wood star sconce, you have to make me a promise. Please promise you’ll only use a flameless candle. Candles next to wood and candles on the wall make me nervous! You promise, only flameless candles, right?
DIY Rustic Wood Star Sconce Plan
Printed Plan
Click here to download a PDF of the DIY Rustic Wood Star Sconce Plan
Supplies
1×3 about 4″
1×4 about 24″
1×5 about 12″
1-1/4″ wood screws
votive holder
flameless candle
twine
Rust-Oleum Ultimate Wood Stain Dark Walnut
Tools
Miter saw
Jig saw
DEWALT Drill
staple gun
1-7/8″ Forstner bit
Countersink drill bit
Step 1. Trace and Cut the Star. Trace the star on a piece of 11-1/2″ x 11-1/2″ wood. I used two pieces of 1×4 and one piece of 1×5 cut to 11-1/2″ and glued together. You could also use a piece of 3/4″ plywood or any combination of 1x wood to form a piece 11-1/2″ x 11-1/2″.
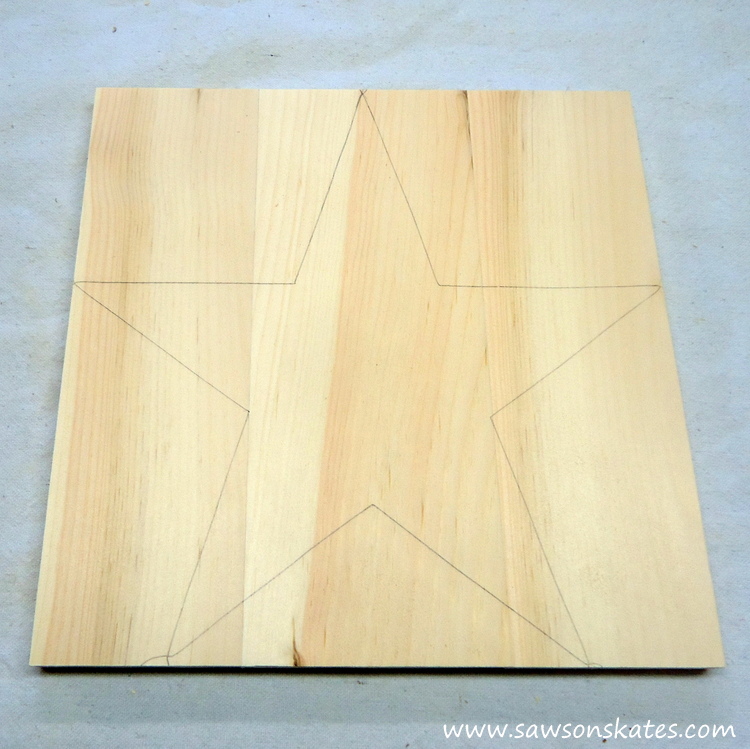
Trace a star on the wood. I used the star I had, but you can also find a clipart star on the web. Once the star was traced, I cut the star with my bandsaw. You can also use a jig saw to cut the star.
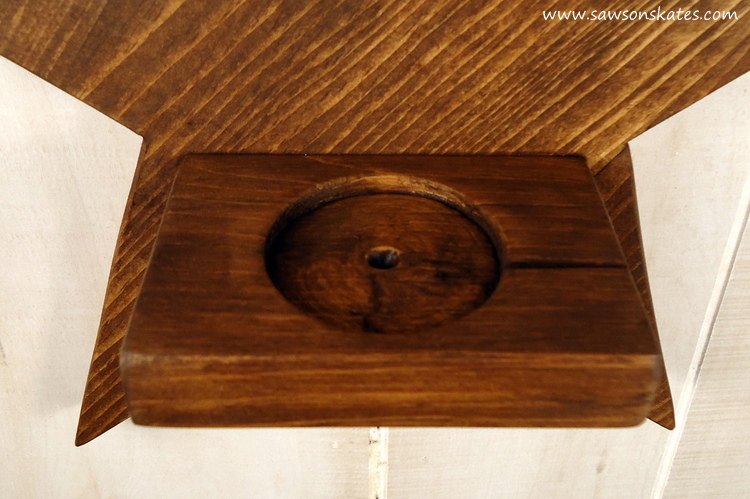
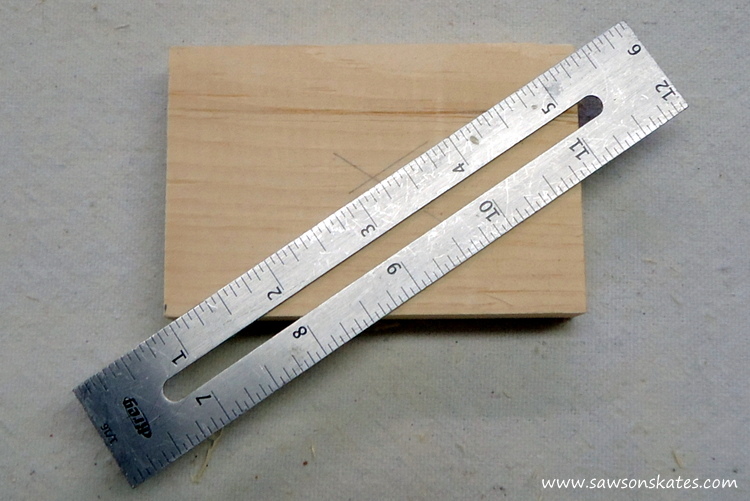
Step 2. Make the Holder. Cut a piece of 1×3 to 3-3/4″. Locate the center of the holder by placing a straightedge diagonally.
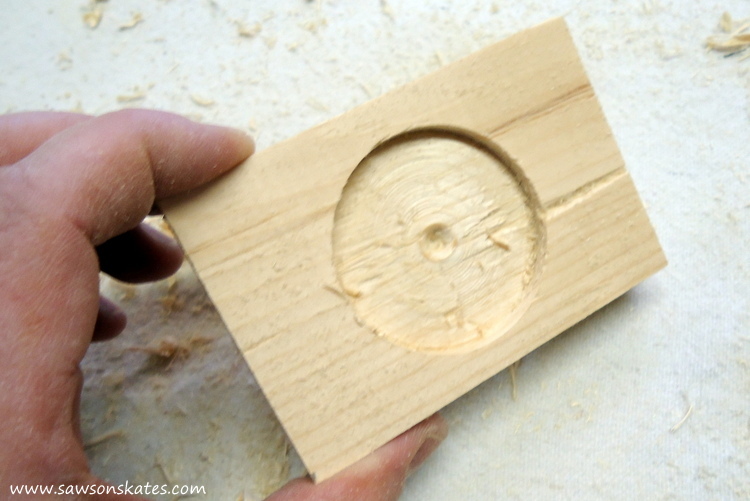
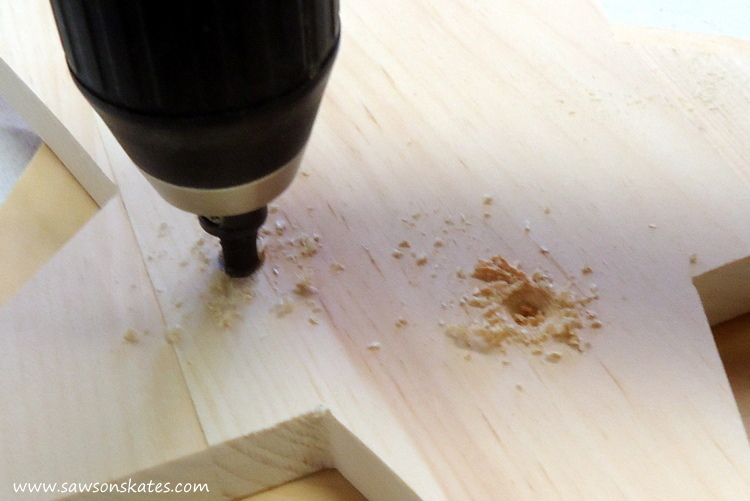
Use 1-7/8″ forstner bit to drill a slight hole in the holder.
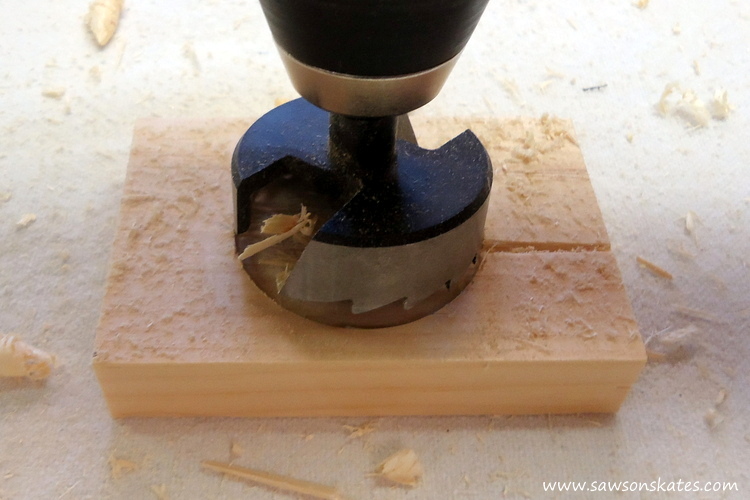
This hole will keep the votive holder in place.
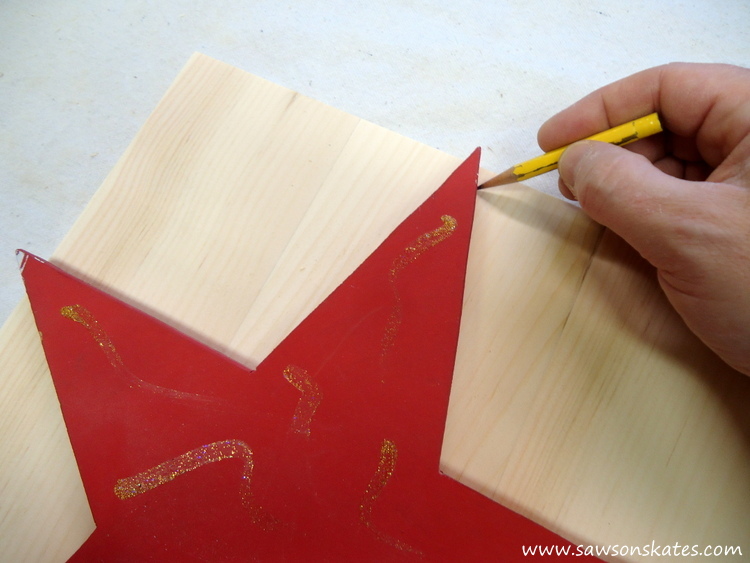
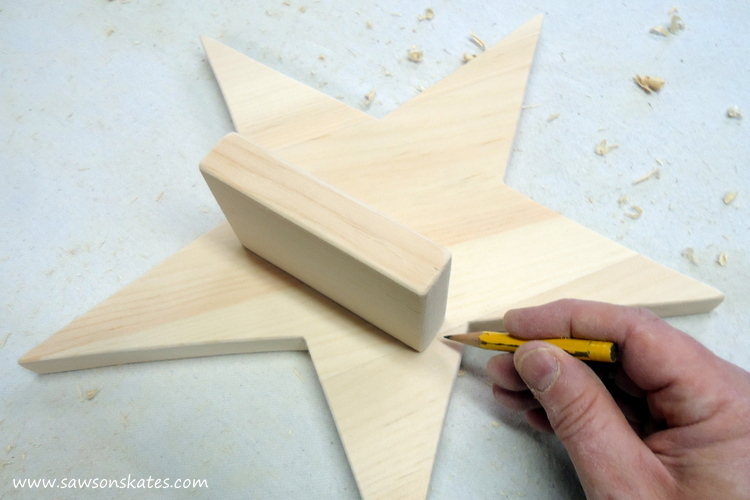
Step 3. Attach the Holder. Place the holder on the star, so it’s level and trace around the holder.
Drill two holes in the front, just until the drill bit protrudes from the back.
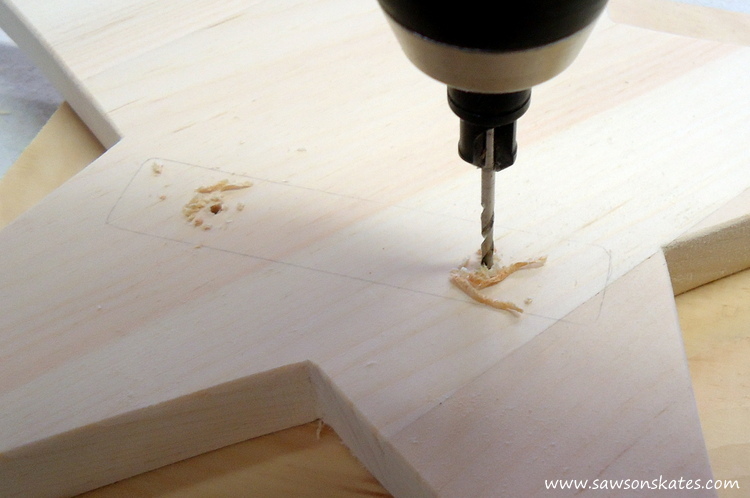
Then using the two holes on the back, drill two countersink holes.
Clamp the holder to the star and drill into the holder.

Attach the holder using 1-1/4″ wood screws.

Step 4. Sand and Stain. Sand the star and holder. Apply a coat of dark walnut stain.

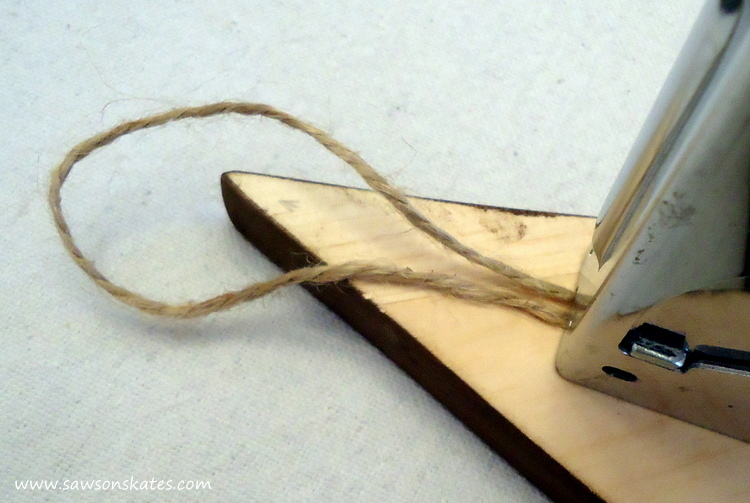
Step 5. Attach Hanger. Cut a piece of twine and attach to back using a staple gun.
Add a votive holder, a flameless candle, hang on the wall and enjoy!
PIN THIS!

Hi there – I’m Scott, a woodworking enthusiast and creator of Saws on Skates, a site I started in 2015 to share easy-to-follow tutorials, space-saving shop tips, and project inspiration for DIYers at any skill level. Learn more about my woodworking journey here.