How to Drill Pilot Holes (Why, When & Correct Size)
Wondering how to drill pilot holes? I’m breaking down why, when, how, and correct sizing. Up your DIY game with these step-by-step instructions!
Drilling pilot holes is an important step for many woodworking and home improvement projects, but what are they, and why should you drill them? I’ll answer those questions, plus explain when to drill them, what size they should be, and how to drill pilot holes so you can get your project done right the first time.
Table of Contents
- What are Pilot Holes?
- Why Drill Pilot Holes?
- When Should You Drill Pilot Holes?
- How Big Should Pilot Holes Be?
- What Size Drill Bit Should You Use to Make Pilot Holes?
- How Deep Should You Drill Pilot Holes?
- How to Drill Pilot Holes in Wood for Screws
- Frequently Asked Questions
This article contains affiliate links. If you purchase from these links, I may earn a small commission at no additional cost to you. Visit my site policies for more information.
What are Pilot Holes?
A pilot hole, sometimes called predrilling, uses a drill bit to make a small-diameter hole into materials such as wood to create an entry point for fasteners or larger drill bits.
Pilot holes are an essential step for:
- Ensuring fasteners and holes are drilled at the correct location
- Provide clearance for fasteners like screws or nails and larger drill bits
- Guide fasteners and larger drill bits to go in at the proper angle
Why Drill Pilot Holes?
Drilling pilot holes improves accuracy and precision by allowing you to drive a fastener or drill a larger hole in the exact spot you want it and at the correct angle. They also provide clearance for fasteners and larger bits.
Pilot Holes for Screws
When you drive a screw without creating a pilot hole, it requires more twisting force or torque that could result in the screw breaking. Additionally, the outward pressure created by the screw may cause the wood to split.
By drilling a pilot hole first, you remove material creating a pathway for the screw, which reduces the outward pressure on the wood and decreases the risk of splitting it or breaking the screw.
Pilot holes are frequently used when joining two pieces of wood with screws but may also be used for other fasteners, such as driving nails with a hammer.
Pilot Holes for Larger Drill Bits
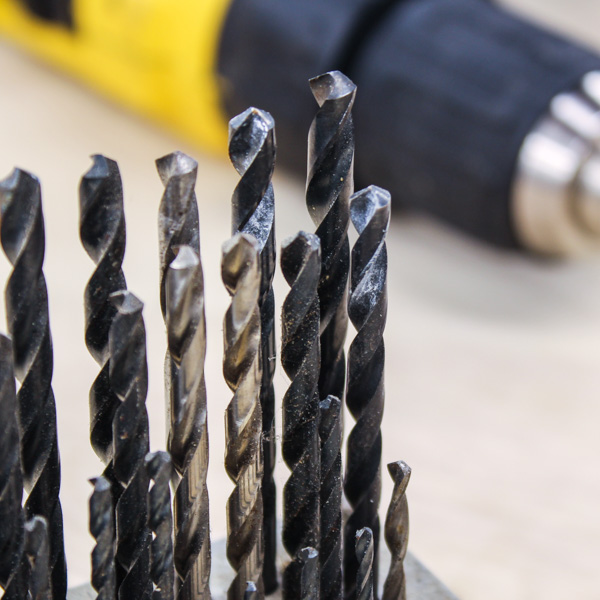
It’s recommended to drill a pilot hole when making a large hole using a twist drill bit, the most common bit used for creating holes in wood.
Related: 14 Types of Wood Drill Bits (Which to Use & Why)
Large twist bits are prone to walking or wandering off course, potentially damaging your project’s surface and creating a hole where it wasn’t intended.
Drilling a pilot hole creates an entry point for the larger drill bit, preventing it from walking and ensuring the hole is made at the correct location.
The smaller drill bit also creates a space for the larger one, which reduces the:
- Amount of power needed to turn a large drill bit
- Chances of the large bit binding and breaking
- Chances of tearing the wood’s surface
If you don’t predrill a hole, the larger bit needs to bore through a wall of hard material which may cause it to bind or break. A small starter hole creates an entry point for the larger drill bit, allowing it to penetrate the material more easily and without breaking.
When Should You Drill Pilot Holes?
Now that we covered what pilot holes are and why you should drill them let’s look at when they should be used.
When You Need to Drive a Screw at an Exact Location
Pilot holes are helpful when you need to drive a screw at an exact location because they provide an entry point for the screw to go in and prevent it from wandering off course.
When You Need to Drive a Screw at the End or Edge of a Workpiece
Driving a screw near the end or edge of a workpiece without first drilling a pilot hole can cause the wood to split.
Think about it this way. If you were to drive a screw into the middle of a workpiece without predrilling a hole, the screw essentially pushes material out in all directions, and the surrounding wood absorbs the outward force.
However, when you drive a screw near the ends or edges of a workpiece, there isn’t enough material for that pressure to be absorbed, which can cause the wood to split.
Drilling a pilot hole first when you need to drive a screw near the end or edge of a workpiece creates a pathway for the screw, reducing the outward force and the likelihood of splitting the wood.
When You Need to Drive a Screw Through Dense Material
Driving screws into dense materials such as hardwood requires a lot of twisting force.
Density measures how much mass (weight) is contained in a given volume. Hardwoods such as oak, maple, and walnut tend to have higher densities than softwoods like pine, meaning they contain more mass per unit volume. This means driving screws into hardwood takes more effort and torque, increasing the risk of breaking your screws or splitting the wood.
By drilling pilot holes first, you reduce the force required to drive the screws into the dense material minimizing the risk of breaking the screw or splitting the wood.
When You Need to Drill a Large Hole With a Twist Bit
As I mentioned earlier, large twist drill bits tend to wander off course, potentially damaging the surface of your project and making holes where they are not intended.
Drilling a pilot hole prevents the bit from walking and ensures the hole is drilled precisely where you want it. It also reduces the amount of power needed to turn a large bit and the chances of it binding in the material.
How Big Should Pilot Holes Be?
Before I discuss the correct sizing for pilot holes, it’s important to understand the parts of a screw.
- Head
The head of a screw is commonly larger than its body, and it’s the part you use to drive it into your workpiece using a tool such as a drill or a screwdriver. - Shank
The shank of a screw is the smooth part between the head and threads of the screw. - Threads
The threads are the corkscrew-shaped portion on the shank that allows it to grip and pull material together when driven in. - Tip
The tip of the screw is the sharp point at the end of the shank.
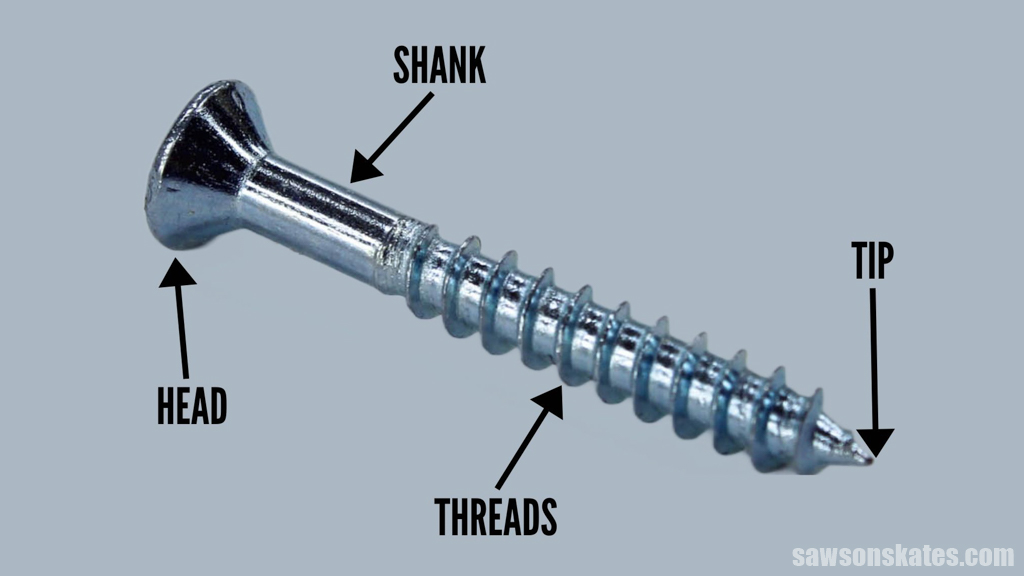
With an understanding of a screw’s parts, let’s look at pilot hole sizing.
A mistake DIYers often make, which I’ve made in the past, is drilling a smaller pilot hole, thinking it will create a better grip. However, if the hole is too small, it can cause the wood to crack or split.
Generally speaking, pilot holes should be about the same size as the screw’s shank, but this guideline varies based on the type of wood you’re using.
Softwood:
For softwoods, such as pine, pilot holes should be slightly smaller than the screw’s shank.
Hardwood:
For hardwoods like oak, pilot holes should be slightly larger than the screw’s shank.
If you’re not sure what type of wood your project is made from, make the pilot hole about 1/64″ larger than the diameter of the screw’s shank.
Next, we’ll discuss what size drill bit you should use to make a pilot hole.
What Size Drill Bit Should You Use to Make Pilot Holes?
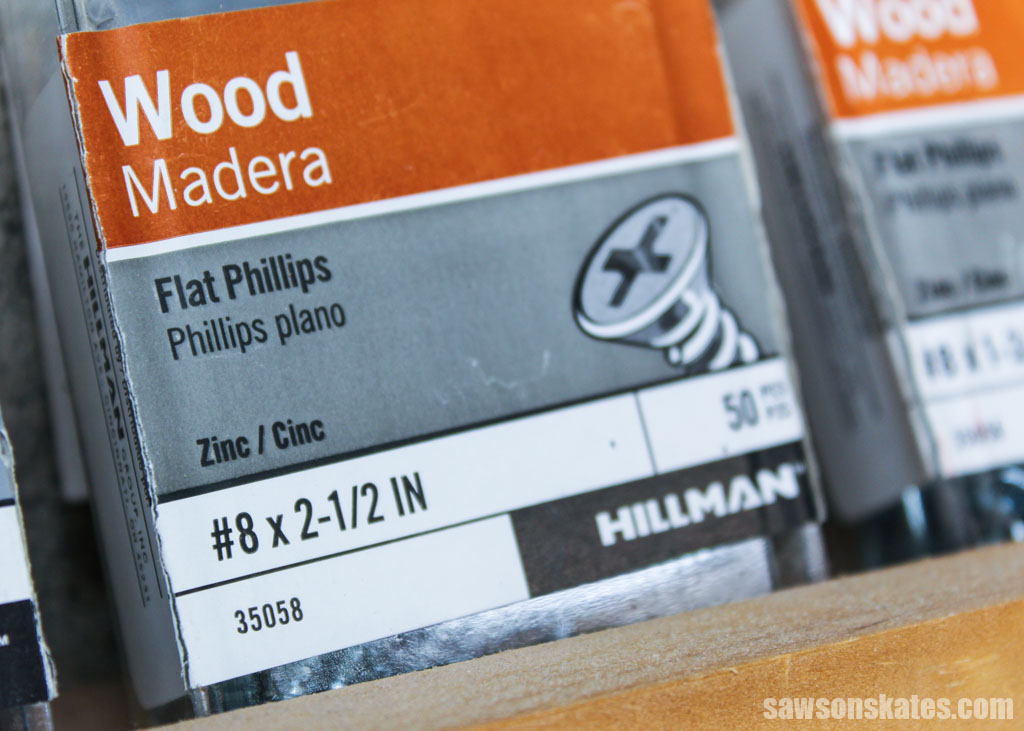
Drill bits are sized according to their diameter, which you may find engraved on their body or printed on their container or packaging.
If you’re following directions or using a woodworking plan, it might say, “make an 1/8″ pilot hole,” which means you’ll need a 1/8″ drill bit.
Another way to determine what size bit you need is by the screw’s gauge. Screws are numbered using a gauge system where the higher the number, the bigger they are. For example, #10 screws are larger than #8 screws.
Pilot Hole Size Chart
Here’s a handy chart to help you find the correct bit size to make a pilot hole for your screw.
| Screw Size for Hardwood | Screw Size for Softwood | Drill Bit Size |
|---|---|---|
| #4 | – | ⁵/₆₄” |
| – | #6 | ³/₃₂” |
| #6 | #8 | ⁷/₆₄” |
| #8 | #10 | ⅛” |
| #10 | #12 | ⁹/₆₄” |
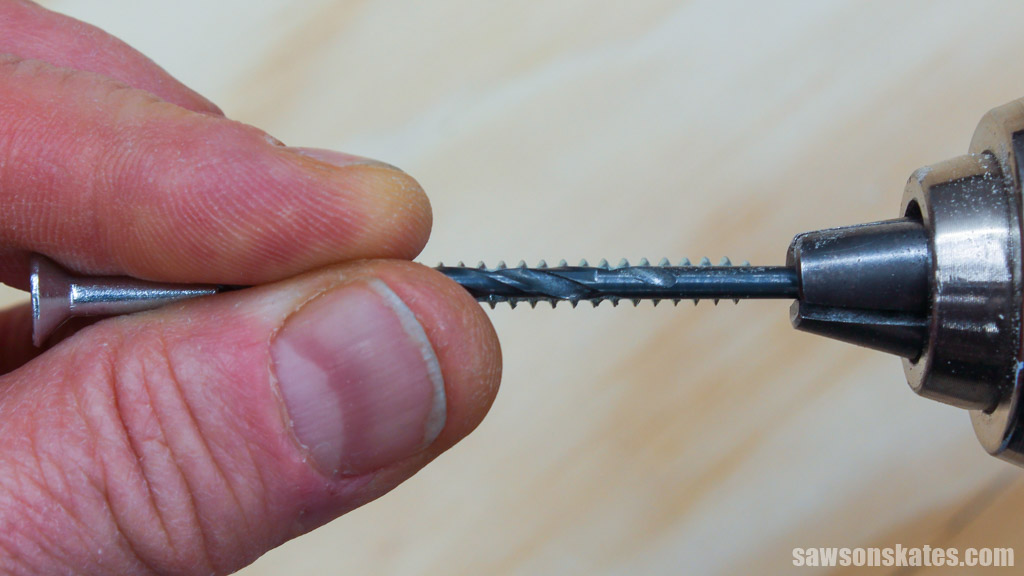
On the other hand, if you’re working without a plan, or don’t know the size of the screw you’re using, place the drill bit over the screw with its end facing toward the screw’s head and make sure the threads are visible on both sides.
Remember, for softwoods, the pilot hole should be slightly smaller than the screw’s shank, while hardwoods should be slightly larger, so select the drill bit accordingly. If you’re unsure of the wood, make the pilot hole about 1/64″ larger than the screw’s shank.
How Deep Should You Drill Pilot Holes?
Pilot holes should be drilled to a depth equal to your screw’s length, from its tip to the top of its head.
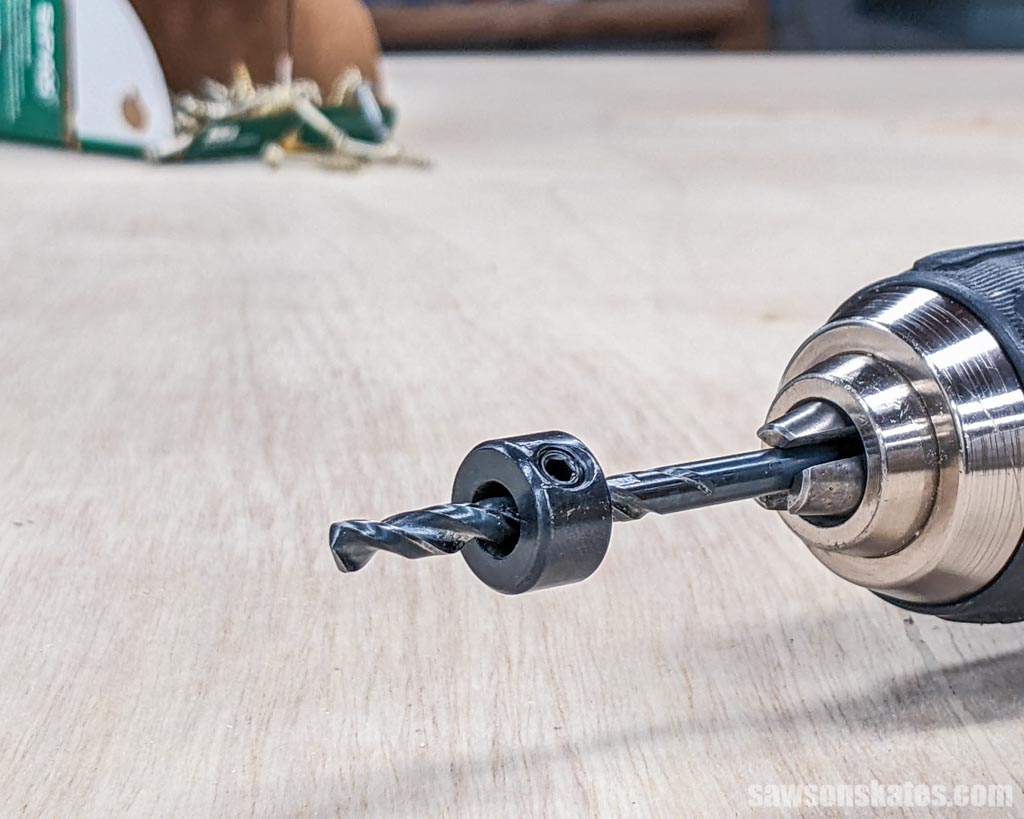
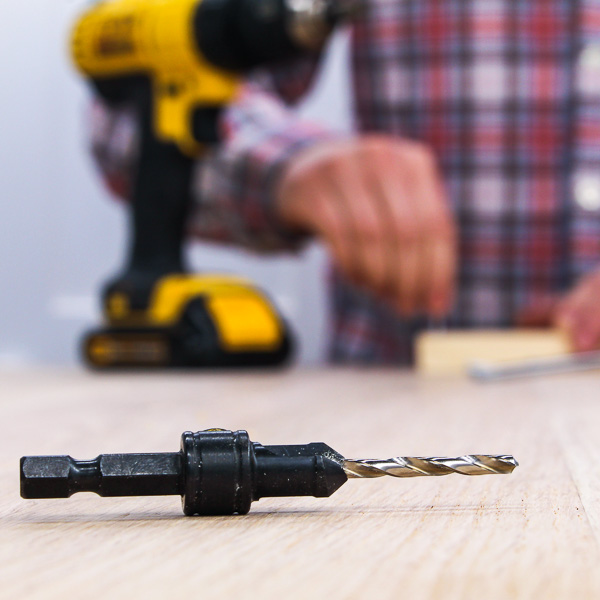
One way to control the depth of a pilot hole is using a stop collar, a device that fits on the drill bit and limits how deep it can penetrate your workpiece. Stop collars are often used for repetitive drilling jobs requiring multiple pilot holes of identical depths.
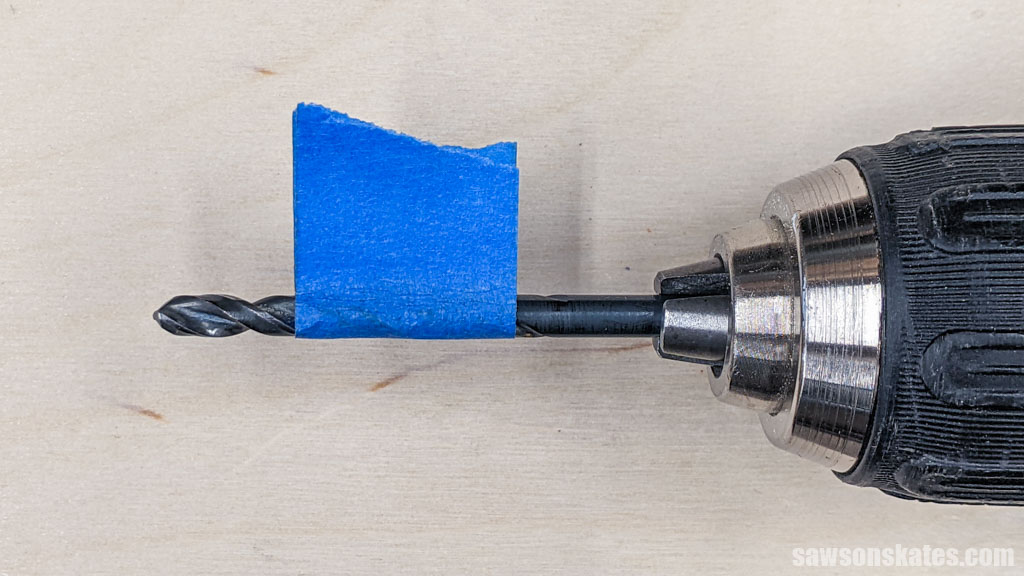
You can also use painter’s tape to mark the depth of the pilot hole you need. Painter’s tape works well when you only need to predrill a few holes. One drawback I’ve found is that with repeated use, the tape creeps up the drill bit, resulting in the hole being deeper than necessary.
How to Drill Pilot Holes in Wood for Screws
Step 1. Safety First
Safety should always be your top priority, no matter what project you’re working on. So, before you begin, make sure to wear a pair of safety glasses to protect your eyes from debris and flying wood chips.
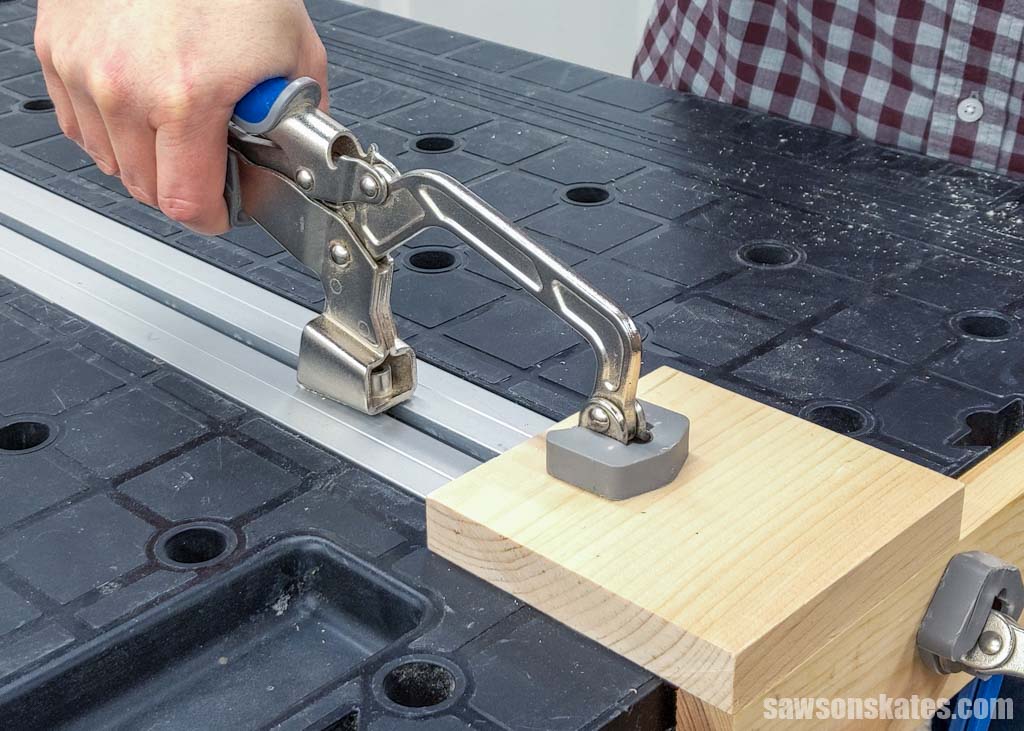
You’ll want to keep your hands away from the drill bit while it’s spinning to avoid any potential injuries. If you’re drilling pilot holes on small workpieces, consider clamping them before drilling. This will ensure better control and accuracy while keeping your hands from the drill bit.
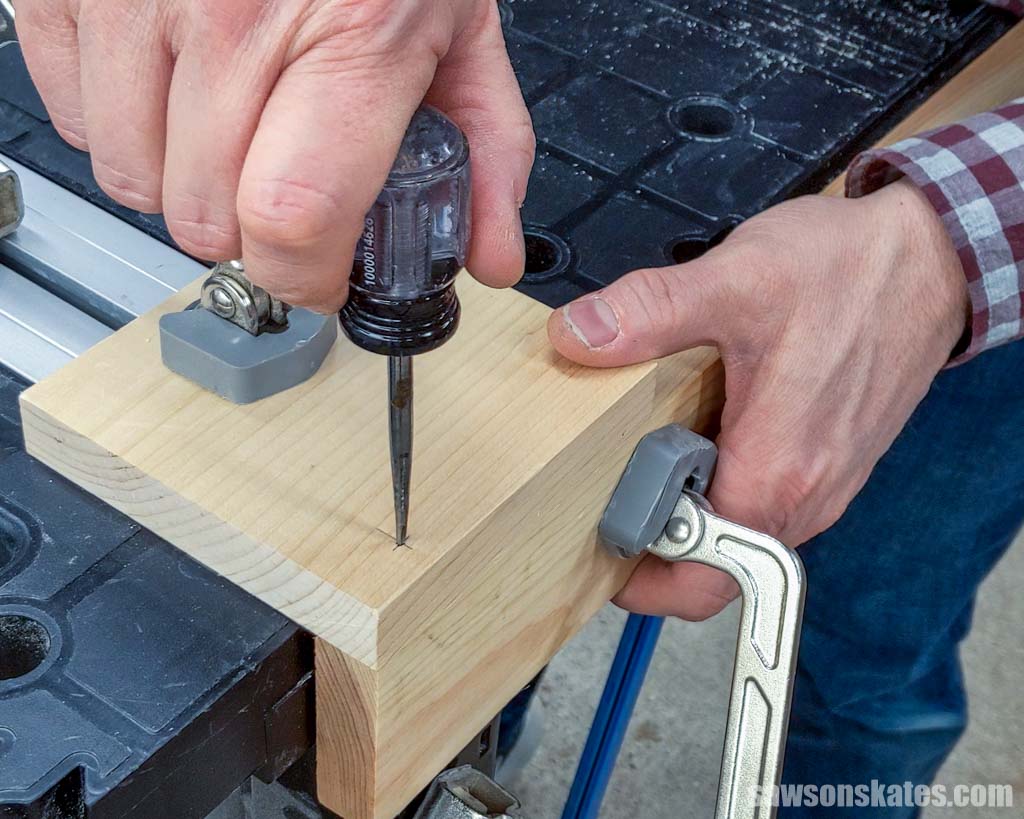
Step 2. Mark the Location
Using a pencil, mark the pilot hole location on your workpiece.
If you’re predrilling multiple holes, consider using a Kreg Multi-Mark to keep them in a straight line which will give your project a more professional look.

Once you’ve marked the location mark, I recommend using an awl to make a small hole which will ensure your bit begins drilling exactly where you want and prevent it from walking or wandering across the surface of your project.
Related: What is an Awl? (+ How to Use It)
Step 3. Choose the Correct Size Drill Bit
If you’re following directions or a woodworking plan, it may tell you what size drill bit to use.
If you don’t have that information but you know what size screw you’re using, you can use this chart to select the correct drill bit.
If you’re still unsure, you can use the method I describe above, placing the drill bit over the screw with its end facing toward the screw’s head and ensuring the threads are visible on both sides.
As I mentioned earlier, pilot holes should be slightly smaller than the screw’s shank for softwoods, slightly larger for hardwoods, and about 1/64″ larger than the screw’s shank if you’re unsure of the wood.
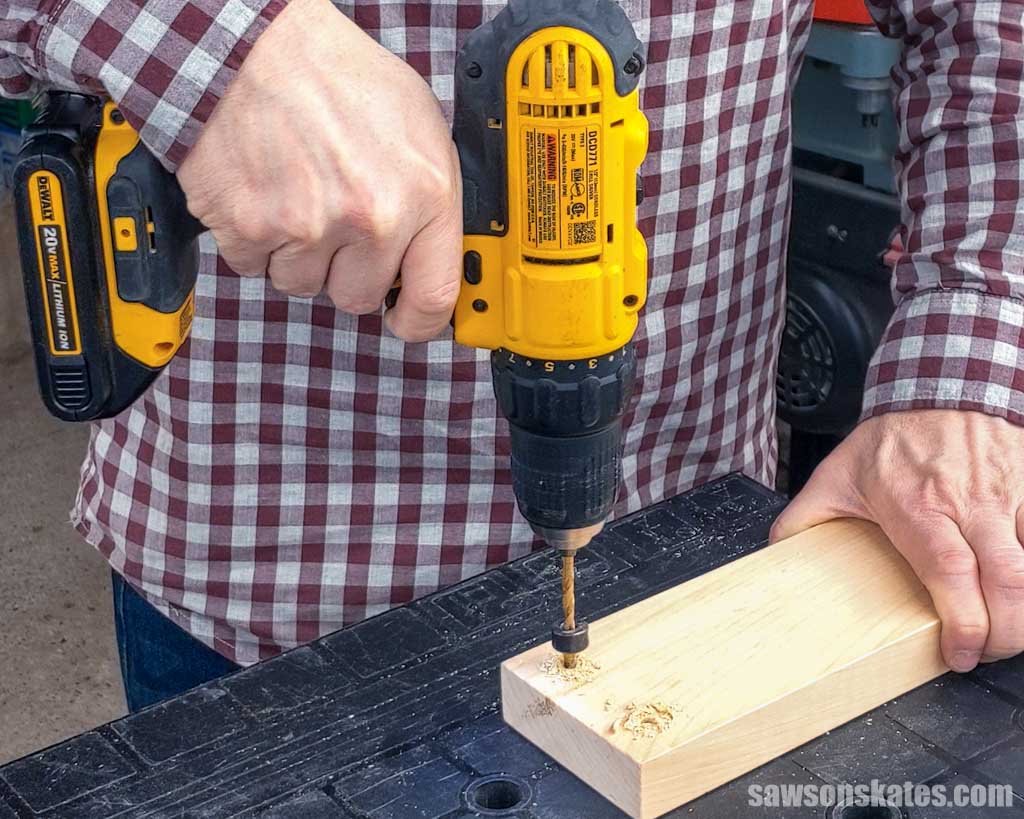
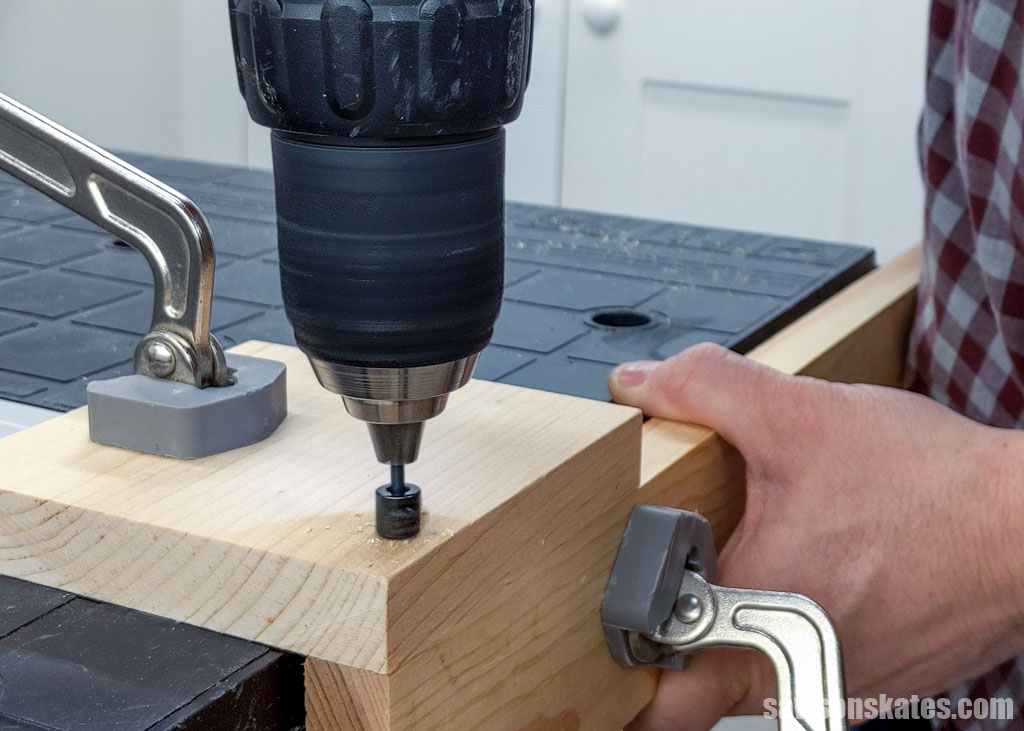
Step 4. Drill the Pilot Hole
Once you’ve selected the correct size drill bit, set the depth using a stop collar or a piece of painter’s tape, and insert it into your drill’s chuck (the clamp that holds the drill bit in place,) making sure it’s centered and firmly secured.

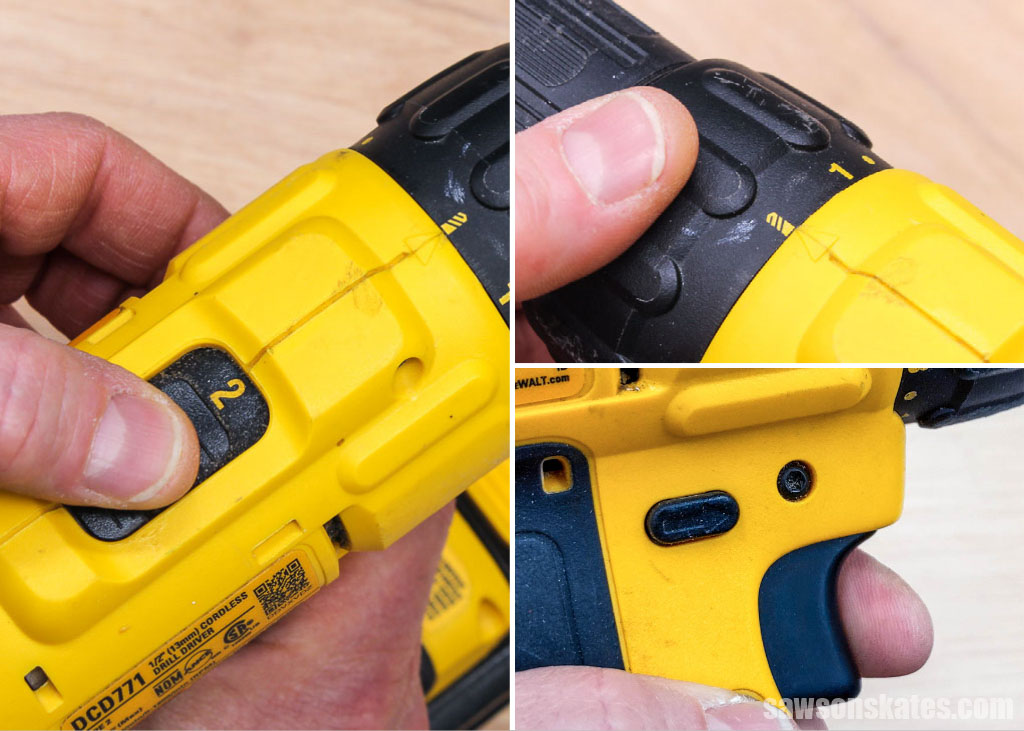
Adjust your drill’s settings to “drill,” which usually resembles an image of a drill bit, set the speed to high, and switch the direction to forward.
Using the divot you made with the awl as a guide, slowly and carefully begin drilling. Once the bit is at the correct location and angle, you can increase the speed, keeping a firm grip on your drill and using even pressure.
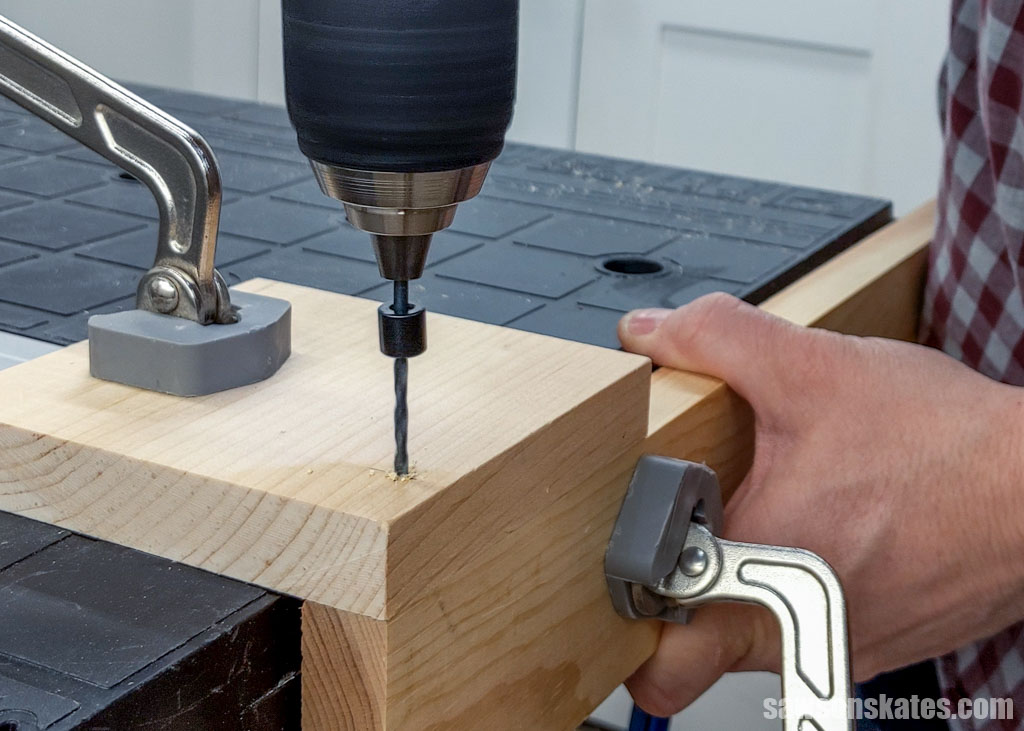
If the bit is having trouble penetrating the wood, you may need to pull the bit out several times to clear the wood chips that have accumulated in the hole.
Once you’ve reached the desired depth, switch the direction to reverse and pull the drill bit out of the hole.
NOTE: The drill bit will be hot after use, so do not touch it! Please wait until it has cooled before removing it from the drill.
Step 5. Drive the Screw
Begin by inserting the screw into the predrilled hole. Then use a screwdriver or drill to drive the screw.
Related: Electric Screwdriver vs Drill (Differences + Which to Buy)

If you’re using a drill, change your speed back from high to low and adjust the clutch, which determines how much torque is applied to the screw.
The clutch will help prevent you from over-tightening the screw, which could crack the wood or result in the screw becoming stripped, meaning it won’t tighten any further.
Start slowly, and once you’ve established it’s going in straight, you can increase the speed.

Countersink Holes
While pilot holes help prevent the wood from splitting and make it easier to drive screws, the screw’s head is usually proud or raised above the surface of the wood.
A countersink hole is a pilot hole with a recessed area at the top of the hole so the screw’s head can sit flush or slightly below the surface of your project.
Countersinking allows the screw to make better contact with the wood and they’re ideal where the screw will be visible on the finished project.
Related: How to Use a Countersink Drill Bit
Frequently Asked Questions
Are pilot holes necessary?
While pilot holes aren’t necessary, they’re highly recommended as they improve accuracy, ensure the screw is located at the precise spot you want, help prevent the wood from splitting, and make it easier to drive screws.
What happens if a pilot hole is too small?
The screw may cause the wood to split if a pilot hole is too small. As a general guideline, pilot holes should be slightly smaller than the screw’s shank for softwoods, slightly larger for hardwoods, and about 1/64″ larger than the screw’s shank if you’re unsure of the wood.
Final Thoughts
Drilling pilot holes is an essential part of most DIY projects. Predrilling ensures your fasteners are driven at the correct location, provides clearance to prevent the wood from splitting, and guides fasteners and bits to go in at the proper angle.
Thank you for stopping by. If you enjoyed this tutorial, would you please take a moment and pin it to Pinterest? I’d really appreciate it!
Recommended For You

Pin This For Later

Hi there – I’m Scott, a woodworking enthusiast and creator of Saws on Skates, a site I started in 2015 to share easy-to-follow tutorials, space-saving shop tips, and project inspiration for DIYers at any skill level. Learn more about my woodworking journey here.
Simple but important to know. I’ve predrilled and not predrilled in the past. Finally I know what to do when and how to do it properly. Thanks!
You’re welcome. I’m glad this was helpful for you.