How to Use a Countersink Bit
Learn how to use a countersink bit with this step-by-step tutorial. We’ll look at what it does, why you need one, and what size countersink bit you need.

How to Use a Countersink Bit
Using a countersink drill bit prevents tearout, reduces the chances of splitting the wood, and allows screws to make better contact. Plus, it makes DIY projects look more professional.
In this easy-to-follow tutorial, we’ll look at how to use a countersink bit, what size bit you need, and how to drive countersink screws in wood.
This tutorial contains affiliate links to supplies and tools. Purchases made using these links help support the Saws on Skates website and allows me to share more projects and tips with you. There is no cost to you for using these links. Visit my site policies for more information.
Before we get into how to use a countersink bit, be sure to click the subscribe button at the bottom of this page to sign up for my FREE weekly newsletter loaded with helpful pocket hole tricks, space-saving workshop ideas, clever DIY tips and more!
Table of Contents
What is a Countersink Drill Bit?
A countersink drill bit does two things. First, a pilot hole is drilled into the workpiece. A pilot hole is a small hole drilled into a workpiece that creates space for a fastener like a screw. Drilling a pilot hole helps to prevent splitting or cracking the wood.
Second, a countersink drill bit creates a “V” or countersink in the face of a workpiece.
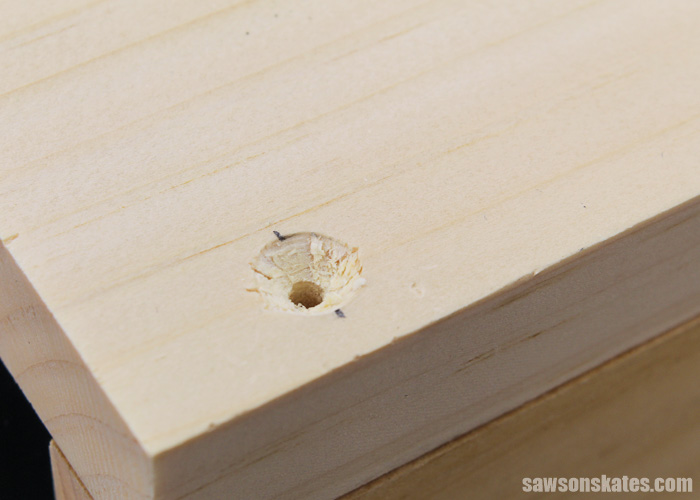
This “V” or recessed area allows a screw with a countersunk head to be driven flush with the face of the workpiece.
Do I Need a Countersink Bit?
You may not need a countersink drill bit, but there are a few reasons why you may want to use one.
Prevents Tearout
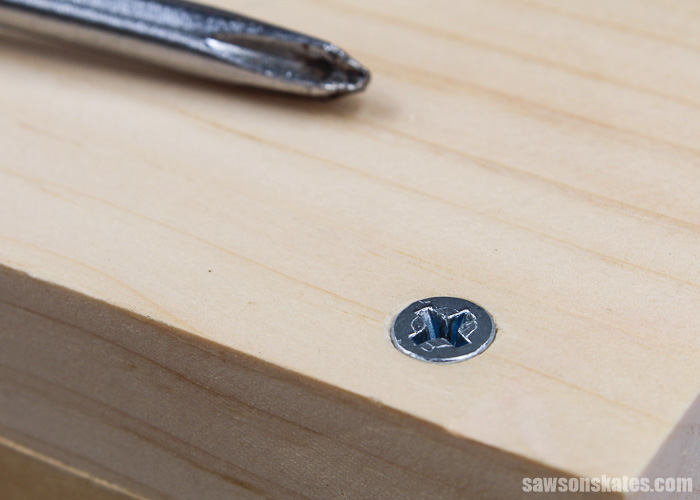
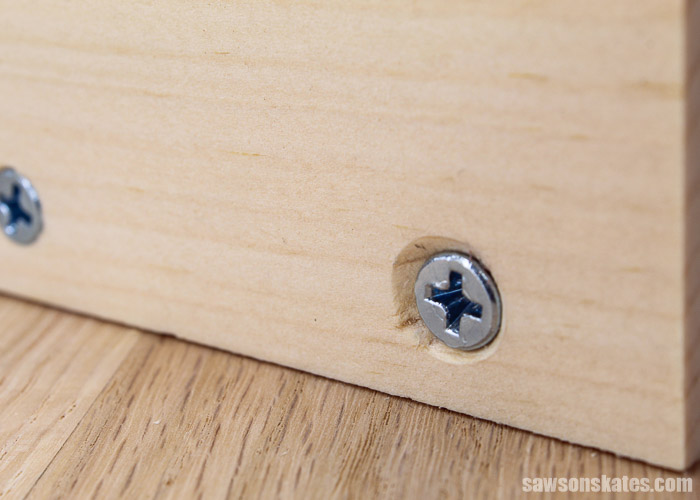
The “V” shape created by the countersink bit allows the screw to be driven flush with the face of the wood.
Driving a screw flush without using a countersink bit crushes the wood fibers. Crushing the wood fibers causes the surface of the wood to tearout which makes our projects look unprofessional.
Another consideration is the hardness of the wood. We might be able to drive a screw flush without using a countersink bit on softwoods (keep in mind this would cause tearout). But driving a screw flush without using a countersink bit would be difficult on hardwoods like oak.
Related: 7 Tips for Using a Pocket Hole Jig with Hardwoods
Reduces Splitting
Driving a screw creates an outward force on the wood. This outward force can cause the wood to split.
Drilling a pilot hole creates a space for the screw. This space reduces the outward force. The screw can more easily be driven through the hole which reduces the chances of splitting the wood.
Related: 7 Ways to Prevent Pocket Screws from Splitting Wood
Makes Better Contact
A countersink bit creates an area in the wood that matches the countersunk shape of the screw head. This shape allows the screw to contact the wood with an equal amount of force. This creates a strong joint between the screw and the wood.
Hide the Screws
A countersink bit allows the screws to seat flush with the surrounding wood, but there are also several ways to hide the head of the screw.
The countersink bit can be drilled deeper into the wood so the screw seats below the face of the wood. Then the screw head can be covered with a filler. Or the bit can be drilled even deeper to create an area for a plug. Then, a wood plug can be inserted into the hole to hide the screw and give the project a finished look.
Related: How to Make Pocket Hole Plugs
Back to Table of ContentsTypes of Countersink Drill Bits
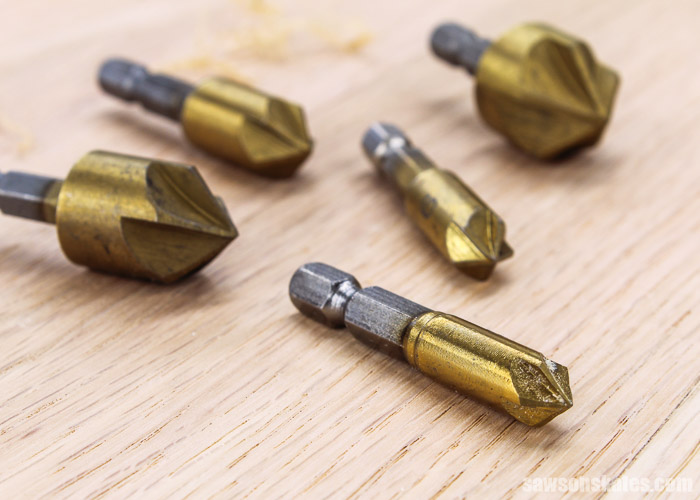
Fluted Bits
- A pilot hole needs to be drilled first
- Fluted bits are available in several sizes
- Two steps and two bits are needed
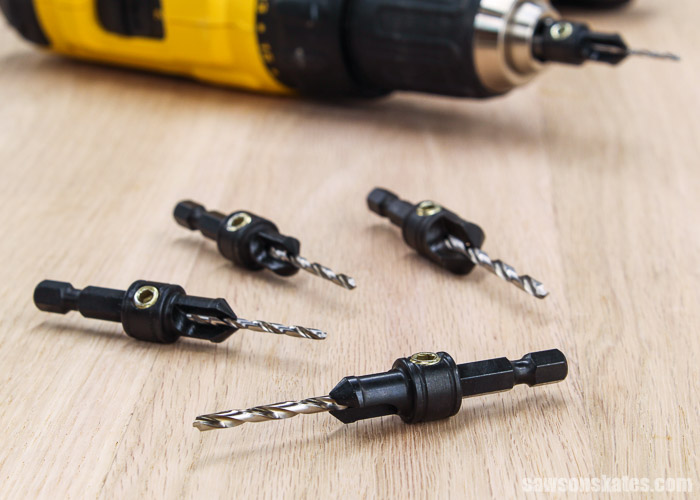
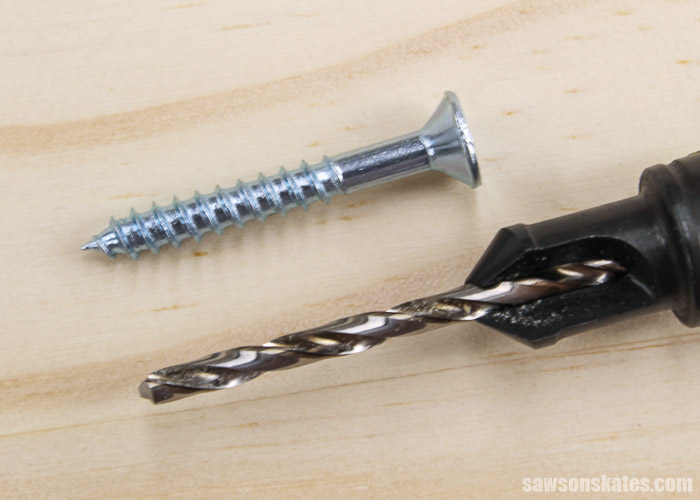
Combination Bits
- A combination countersink bit drills a pilot hole and a countersink hole at the same time (it’s a drill bit inside of a fluted bit)
- Available in several sizes
- Works in one step
What Size Countersink Bit Do I Need?
The most important thing to remember when using a countersink bit is to match the size of the bit to the size of the screw.
Fluted Bits
Fluted bits come in a variety of sizes. Choose one that matches the size of the screw head. The screw won’t be flush with the surrounding wood if the countersink hole is too small. There will be space between the screw head and the edge of the hole if the countersink is too big.
Combination Bits
Combination bits are usually sold in sets. The sets are designed to drill countersink holes for common screw sizes. Screw sizes are printed on the screw containers. Choose a combination bit that matches the size of the screw.
Countersink Size Chart
This handy chart was printed on the back of my combination countersink drill bit set:
| Drill Bit Size | Screw Size for Hardwood | Screw Size for Softwood |
|---|---|---|
| ⁵/₆₄” | #4 | – |
| ³/₃₂” | – | #6 |
| ⁷/₆₄” | #6 | #8 |
| ⅛” | #8 | #10 |
| ⁹/₆₄” | #10 | #12 |
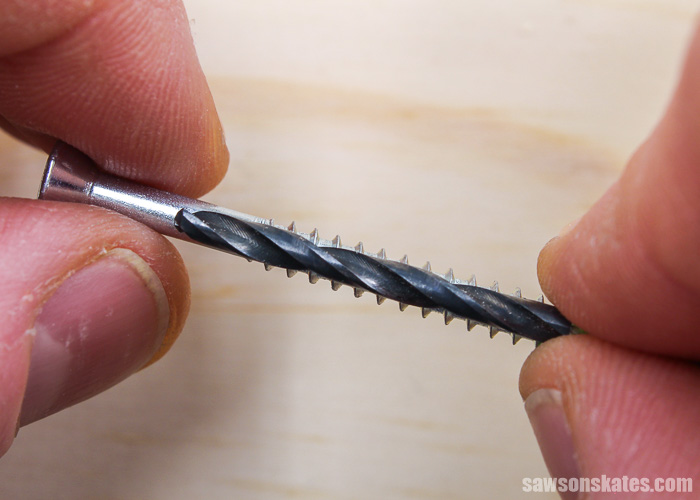
Don’t Know the Size of the Screw?
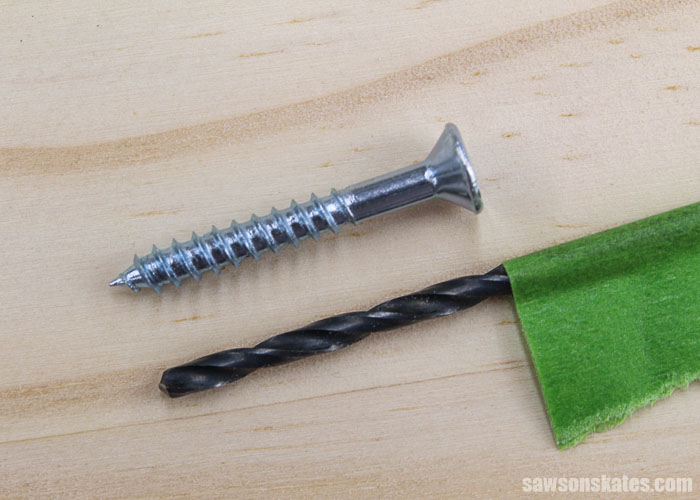
If you don’t know the size of the screw, hold the bit over the screw with the bit end towards the head of the screw. The right size bit is one where you can just see the threads of the screw on either side of the bit.
Tips for Drilling Countersink Holes
- It takes a little practice to drill the hole deep enough so the screw head will be flush with the surrounding surface
- Try drilling countersink holes on a few test pieces before drilling holes on your project
- Drilling countersink holes isn’t a race
- Drill the holes slowly
- Drilling too fast can make the countersink holes too deep
- Drilling at a high speed can cause “chatter”
- Chatter is where the edges of the hole tearout and the inside of the hole is jagged
How to Use a Countersink Bit: Fluted Bit
Tools
- Kreg Multi-Mark
- Awl
- Drill
- Drill Bit
- Fluted Countersink Bit Set
- Painter’s Tape
Step 1. Mark the Location
Use a pencil and Kreg Multi-Mark to mark the location for the hole.
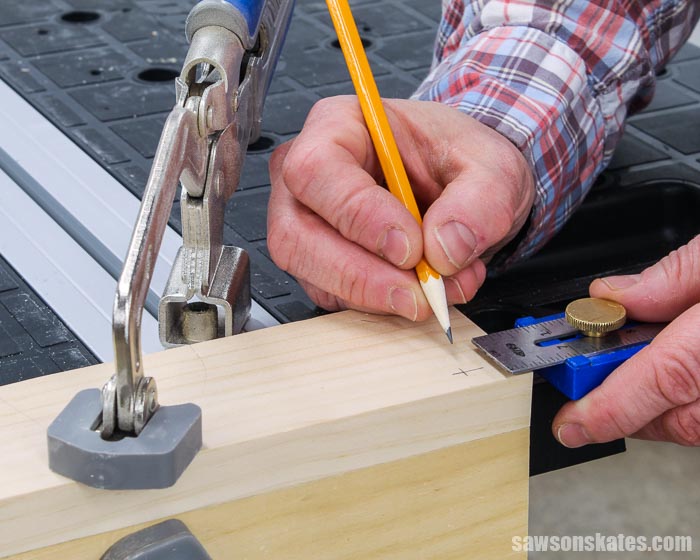
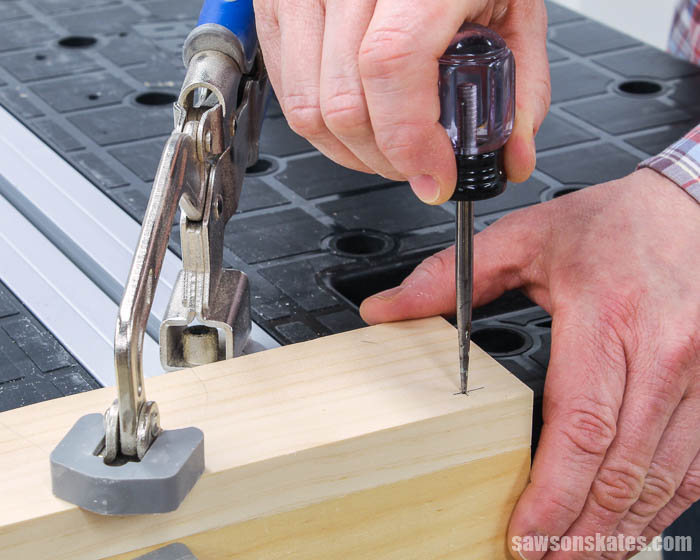
Then, use an awl to create a starting point for the drill bit. The starting point will prevent the drill bit from wandering on the surface of the wood.
Related: What is an Awl? (+ How to Use It)
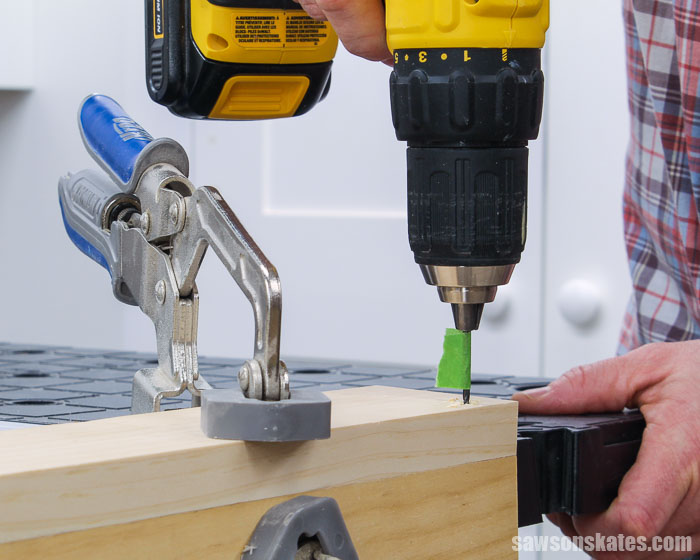
Step 2. Drill a Pilot Hole
Choose a drill bit that corresponds to the size of the screw.
Use painter’s tape to mark the depth of the pilot hole. The depth of the pilot hole doesn’t need to be drilled to the exact length of the screw. It just needs to be close to the length of the screw.
Chuck the bit in the drill and drill the hole until the painter’s tape contacts the face of the workpiece.
Related: How to Put a Drill Bit in a Drill
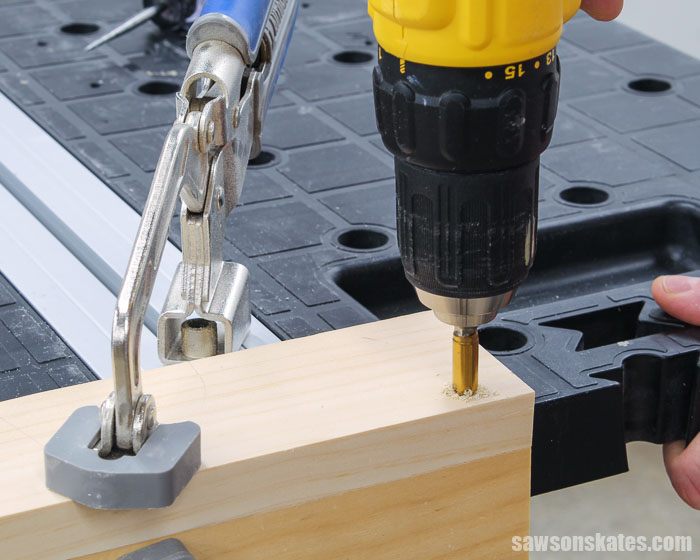
Step 3. Drill The Countersink Hole
Choose a fluted bit that corresponds to the size of the screw head. Chuck the bit in the drill.
Then, drill the hole deep enough to make the screw head flush with the surface of the wood. Or drill the hole deep enough to hide the screw head with a filler or a wood plug.
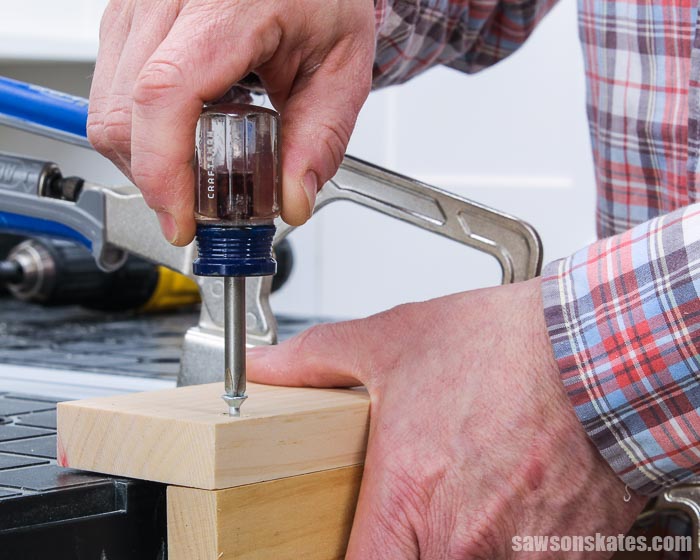
Step 4. Drive the Screw
Use a screwdriver or drill to drive the screw into the countersink hole.
How to Use a Countersink Bit: Combination Bit
Tools
Step 1. Mark the Location
Use a pencil and Kreg Multi-Mark to mark the location for the hole.

Then, use an awl to create a starting point for the drill bit. The starting point will prevent the drill bit from wandering on the surface of the wood.
Related: What is an Awl? (+ How to Use It)

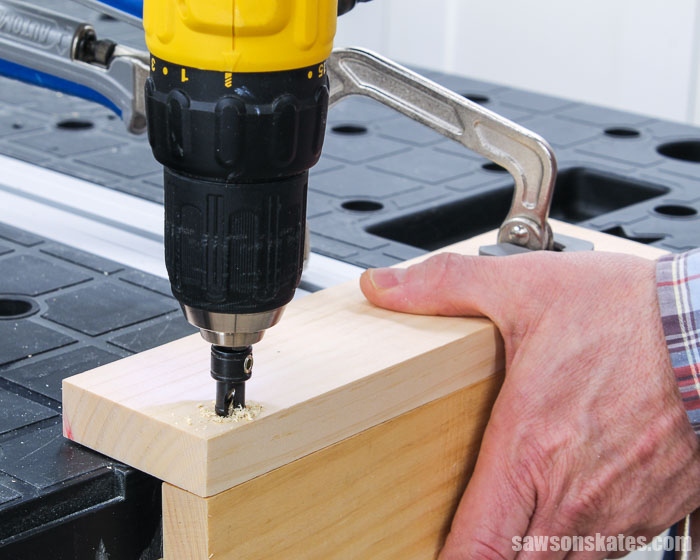
Step 2. Drill the Countersink Hole
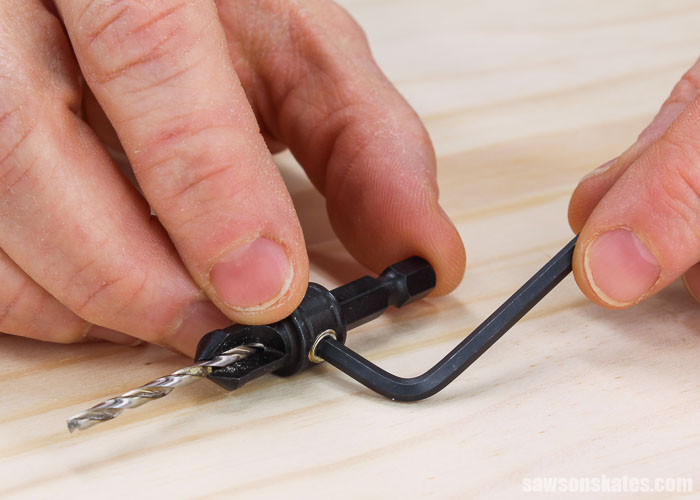
Choose a combination bit that corresponds to the size of the screw. Next, adjust the bit to match the length of the screw.
Then, tighten the screw with the hex wrench and chuck the bit in the drill.
Related: How to Put a Drill Bit in a Drill
Drill the hole deep enough to make the screw head flush with the surface of the wood. Or drill the hole deep enough to hide the screw head with a filler or a wood plug.
Step 3. Drive the Screw
Use a screwdriver or drill to drive the screw into the countersink hole.

How Do You Drive Countersink Screws?
- Use a screwdriver or cordless drill
- Set the torque to avoid over tightening
- Drive the screw slowly
How Do You Hide Countersink Screws?
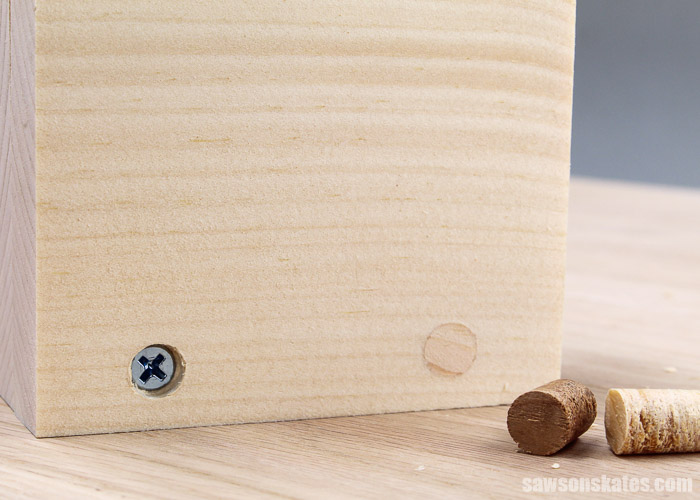
We can drill a countersink hole so that the head of the screw seats flush with the surrounding wood. Or we can drill the countersink hole deeper so that we can hide the head of the screw.
First, we could drill the hole so that the head of the screw sits just below the surface of the wood. This way we can apply a filler like Ready Patch to the head of the screw. This method works well if the project will be painted, but not so much if the project will be stained.

The second way is to drill the hole even deeper so that a wooden plug can be inserted into the hole. Store-bought button plugs are available or we can use a plug cutter to cut our own plugs.
Glue is applied to the plug and the plug is inserted into the hole. When the glue is dry, a flush cut saw is used to trim the plug and then the plug is sanded flush.
Final Thoughts
Using a countersink drill bit prevents tearout, reduces the chances of splitting the wood, and allows screws to make better contact. Plus, it makes DIY projects look more professional.
Thank you for stopping by. If you enjoyed this tutorial, would you please take a moment and pin it to Pinterest? I’d really appreciate it!
Recommended For You
Shop Now
Pin This For Later

Hi there – I’m Scott, a woodworking enthusiast and creator of Saws on Skates, a site I started in 2015 to share easy-to-follow tutorials, space-saving shop tips, and project inspiration for DIYers at any skill level. Learn more about my woodworking journey here.
Thanks for this article. Great review!
Is there a trick for insuring the proper depth of the countersink: not too deep vs deep enough for regularity ?
Regards
Hi Pierre – Thank you for the compliments. I think this takes a little practice and depends on your countersink bits. I have countersink bits from a few different brands. I have to stop drilling at different points for each brand. I try to stick to one brand so I don’t have to think about where to stop 🙂
Thank you! Such a great tutorial, well written and to the point bravo brother! 🇺🇦✌🏻☮️
You’re welcome. Thank you for the compliments. I’m glad it was helpful for you.
Thank you for the tutorial. Certainly cleared up some grayed areas for sizes.
You’re welcome, Ray. I’m glad this was helpful for you.