A Router Lift is the No-Nonsense Way to Set Up a Router Table
A router lift makes changing router bits a breeze and is the best way to precisely set the router bit depth when using a router table.
A router lift raises and lowers a router so the router bit depth can be fine-tuned to the exact measurement needed for your project. Plus, the router lift raises the router so router bits can be changed above the router table.
For your convenience, this post contains affiliate links to supplies or tools I used to complete this project. Purchases made using these links help support the Saws on Skates website and allow me to share more DIY projects. and DIY tips with you. There is no cost to you for using these links. Click here to visit my site policies.
I received the Kreg Precision Router Lift in exchange for my honest review. All thoughts and opinions are my own.
A Fixed Router Table Plate Can Make Set Up Difficult
If you’ve ever used a router table with a fixed router table plate you know sometimes the setup can be tricky. How does a fixed router table plate work? A router mounts to the router table plate and the plate is permanently attached to the router table top. This means the router “lives” under the router table top but this configuration has a few drawbacks.
Router Bits Can Be Difficult to Change
The first drawback of a fixed router table plate is installing and changing the router bits. Because the router “lives” below the table changing the router bits must be done from underside.
Changing the router bits from beneath the router table top can be a real knuckle buster. Two wrenches are needed to change the bits on my router. One wrench holds the router shaft and one loosens the collet. Turning those wrenches in opposite directions in a confined space can end with a bruised hand or sliced knuckle.
I have tried removing the router and bracing it on the floor to change the router bits but then I was chasing the router around my workshop floor!
Router Bit Depth Can Be Difficult to Set
The second drawback of a router table with a fixed router table plate is adjusting the router bit depth. The router bit depth refers to the amount of the router bit that will be exposed or the amount of the router bit that is actually cutting (routing) the workpiece.
Adjusting the router bit depth is also done from beneath the router table top when using a fixed router table plate. For me, adjusting the router bit depth can sometimes be maddening.
Squat down to look under the router table, adjust the router bit depth, run a test piece and the router bit is too low. Adjust the router bit depth, run a test piece and now the router bit is too high. Squat down to look under the router table again, adjust the router bit depth again, run a test piece again, and now the router bit is too low again. ARRRRGGGHH!!! Talk about frustrating.
There has to be an easier way to change router bits without busting our knuckles and a simpler way to adjust the router bit depth. There is a better way and it’s called a router lift.
What is a Router Lift?
A router lift, unlike a fixed router table plate, has the ability to move the router up and down. Think of a router lift as an elevator for our routers.
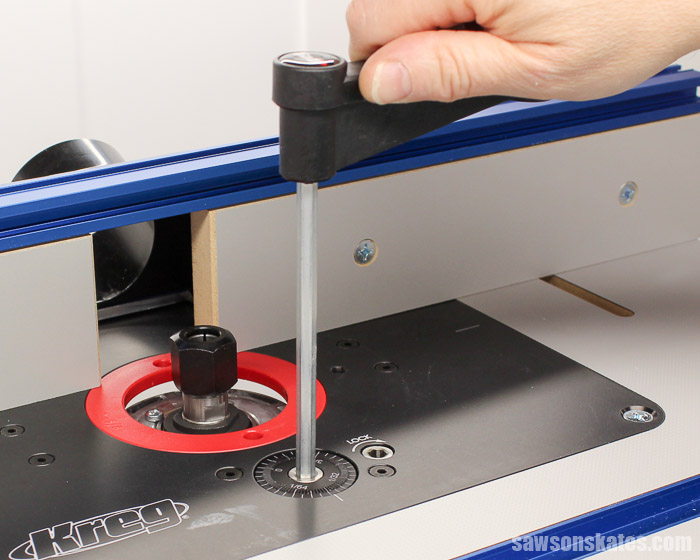
A router mounts to the router lift and the lift attaches to the router table top. A crank inserts into the micro-adjustment dial on the router lift and the crank can be turned right or left to raise or lower the router.
This up and down movement allows us to raise the router lift so changing router bits can easily be done topside rather than busting our knuckles below the router table top. This also means adjusting the router bit depth can be done topside which makes adjustments a breeze.
Kreg Precision Router Lift
Recently I was sent the Kreg Precision Router Lift and I’m in LOVE! I’ll admit I was a bit confused when I first opened the box. I thought “What is this thing? It looks like a flux capacitor!” Movie fans will remember the flux capacitor is what powered the DeLorean in Back to the Future. The Precision Router Lift won’t allow you to travel through time, but it will definitely save you some time when setting up your router table and it will definitely make your routing projects more precise.
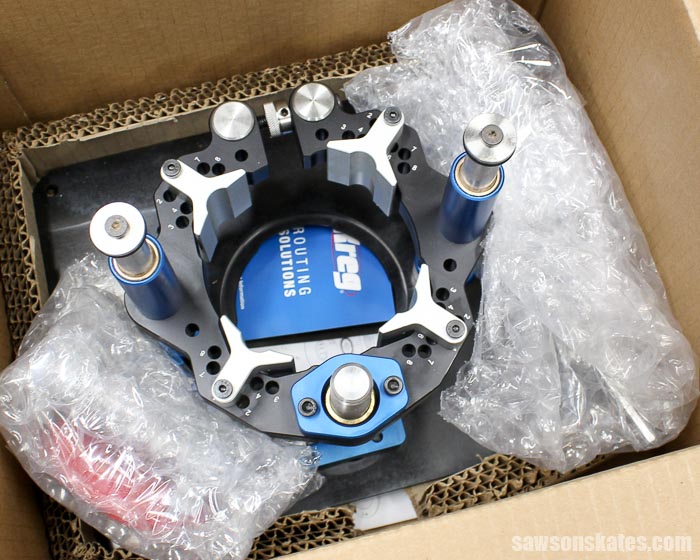
Don’t be intimidated when you open the box. You won’t need to know anything about “flux dispersal” or “gigawatts”. What you do need to know is that it’s sooo easy to install your router into the Kreg Precision Router Lift. There are no holes to drill or customizations that need to be made. Even better than that the router can be raised so router bits can be changed from the top. No more busted knuckles!
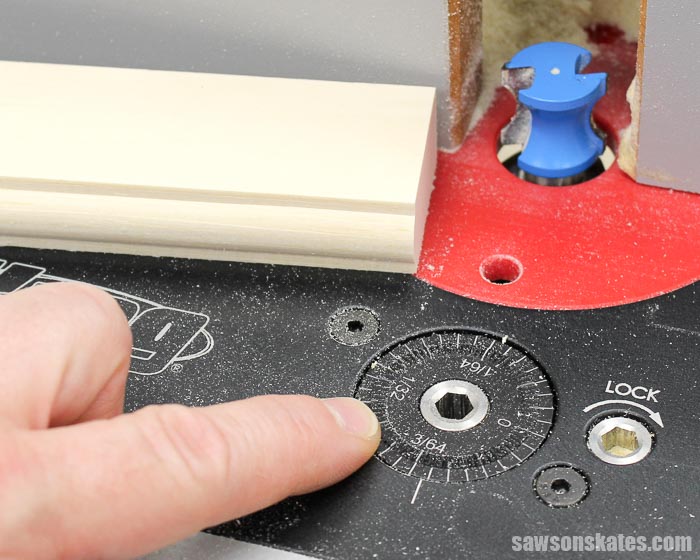
And precisely adjusting the router bit depth is a snap thanks to the crank and the micro-adjustment dial. The micro-adjustment dial on the router lift can make tiny (and I mean tiny) micro adjustments so the router bit depth can be fine-tuned to the exact measurement needed for a project. So easy!
No more busted knuckles and no more making adjustments from underneath the router table top? Like I said, I’m in love!
Precision Router Lift Fits Nearly Every Router
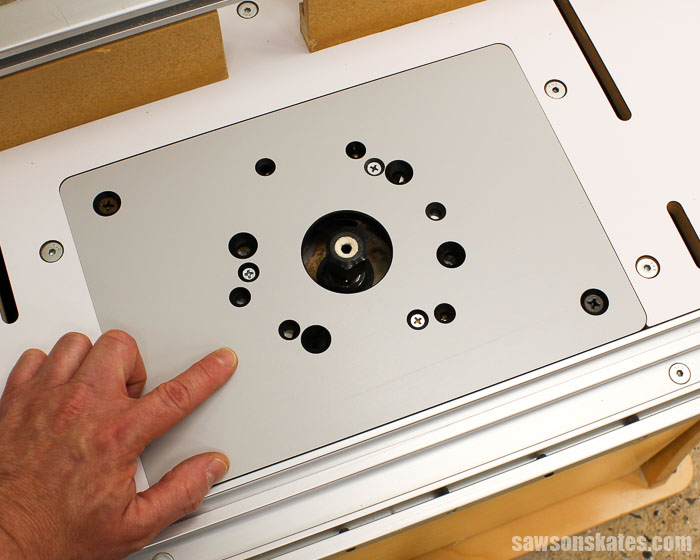
Why I’m in love with the Kreg Precision Router Lift? Let me count the ways. First, there are no holes to drill or customizations to make in order to install your router in the lift. Just find your router on the table included in the owner’s manual.
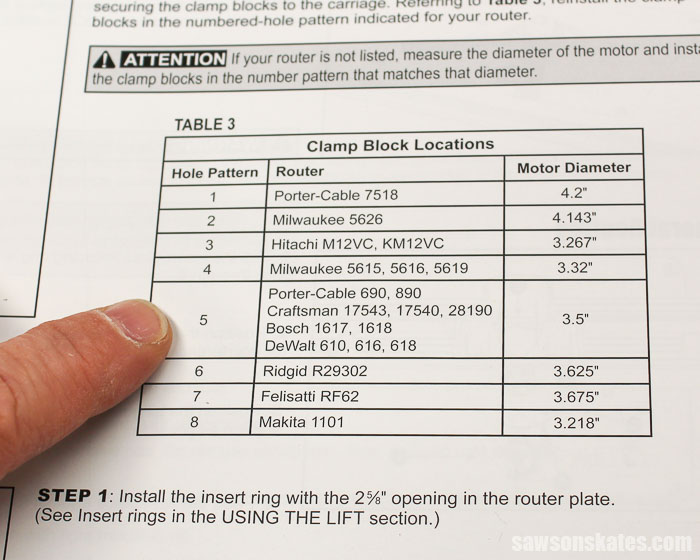
After you find your router simply install the clamp blocks in the pattern indicated in the table. Don’t see your router listed in the table? No worries, you can still use the Kreg Precision Router Lift. Just measure the diameter of your router motor and install the clamp blocks in the pattern that matches that diameter. That’s it. No holes to drill. No customizations to make. Just a nearly effortless way to install your router.

Precision Router Lift Fits All Kreg Router Tables
The Kreg Precision Router Lift fits all Kreg Router Tables and many other popular router table brands too. It’s also a great choice for a DIY router table. I installed my router table lift in My Kreg Precision Benchtop Router Table. The benchtop router table is the perfect size for a small workshop.
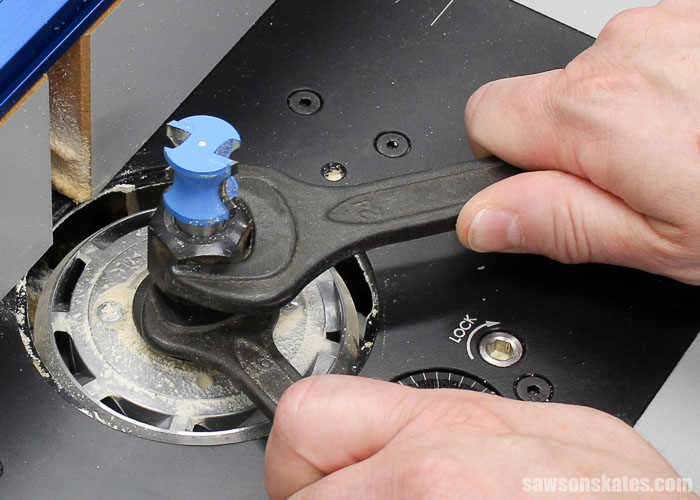
Simple Router Bit Installation
Installing a router bit is just as easy as mounting the router in the router lift. Use the crank to unlock the lift, then insert the crank in the micro-adjustment dial and raise the router. Now the router bit can be changed easily without busting our knuckles.
Precise Router Bit Depth Adjustments
The micro-adjustment dial can also be used to precisely set the router bit depth. Each full turn of the crank changes the height of the bit 1/16″. If one full turn of the micro-adjustment dial adjusts the router bit 1/16” just imagine turning the crank a half of a turn or a quarter of a turn. Now we’re talking about adjusting the depth a 1/32” or a 1/64”. That’s precision! That means the router bit depth can be fine-tuned to the exact measurement needed for your project. And that fine-tuning allowed me to perfectly center this bit on the edge of my workpiece.
Router Lift Maintenance Tips
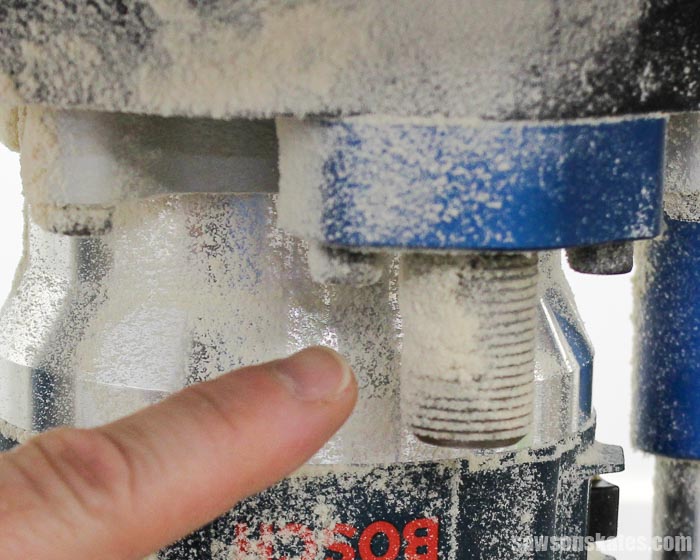
There’s just a little maintenance that we have to do from time to time with the Kreg Precision Router Lift. Sawdust falls from the top of the router table and can land on the posts and adjustment screw. It’s a good habit to check these areas often and especially before cranking the router lift up. Trust me. I know. If the posts are loaded with sawdust the lift will be hesitant to crank or won’t crank at all.
The fix is easy. Wipe the posts with a clean rag or paper towel. I’ve even used my ShopVac to vacuum the area below the router lift.
Router Tips
- Feed Direction: Always feed the workpiece so the router bit rotates against the feed direction. When a router is mounted in a router table the bit rotates left to right so the workpiece needs to be fed from right to left.
- Feed Rate: Allow the router bit to dictate the feed rate. Don’t force the workpiece through the cut.
- Start with the End Grain: End grain tends to tear out when routing. It’s best to rout the ends first and then rout the edges. This way any tear out is removed when the edges are routed.
- Clean Bits: Wood pitch can build up on router bits just like it builds up on saw blades. Keeping bits clean will ensure crisp clean cuts. Skate over to Clean Saw Blades for Peak Performance and Quality Cuts to see which cleaner I like to use for my blades and bits.
Conclusion
A router table outfitted with a Kreg Precision Router Lift makes changing router bits a breeze and is the best way to precisely set the router bit depth.
Thank you for stopping by. If you found this information helpful, would you please pin it to Pinterest? Other DIYers would appreciate it and I would too! Thank you – Scott

Hi there – I’m Scott, a woodworking enthusiast and creator of Saws on Skates, a site I started in 2015 to share easy-to-follow tutorials, space-saving shop tips, and project inspiration for DIYers at any skill level. Learn more about my woodworking journey here.