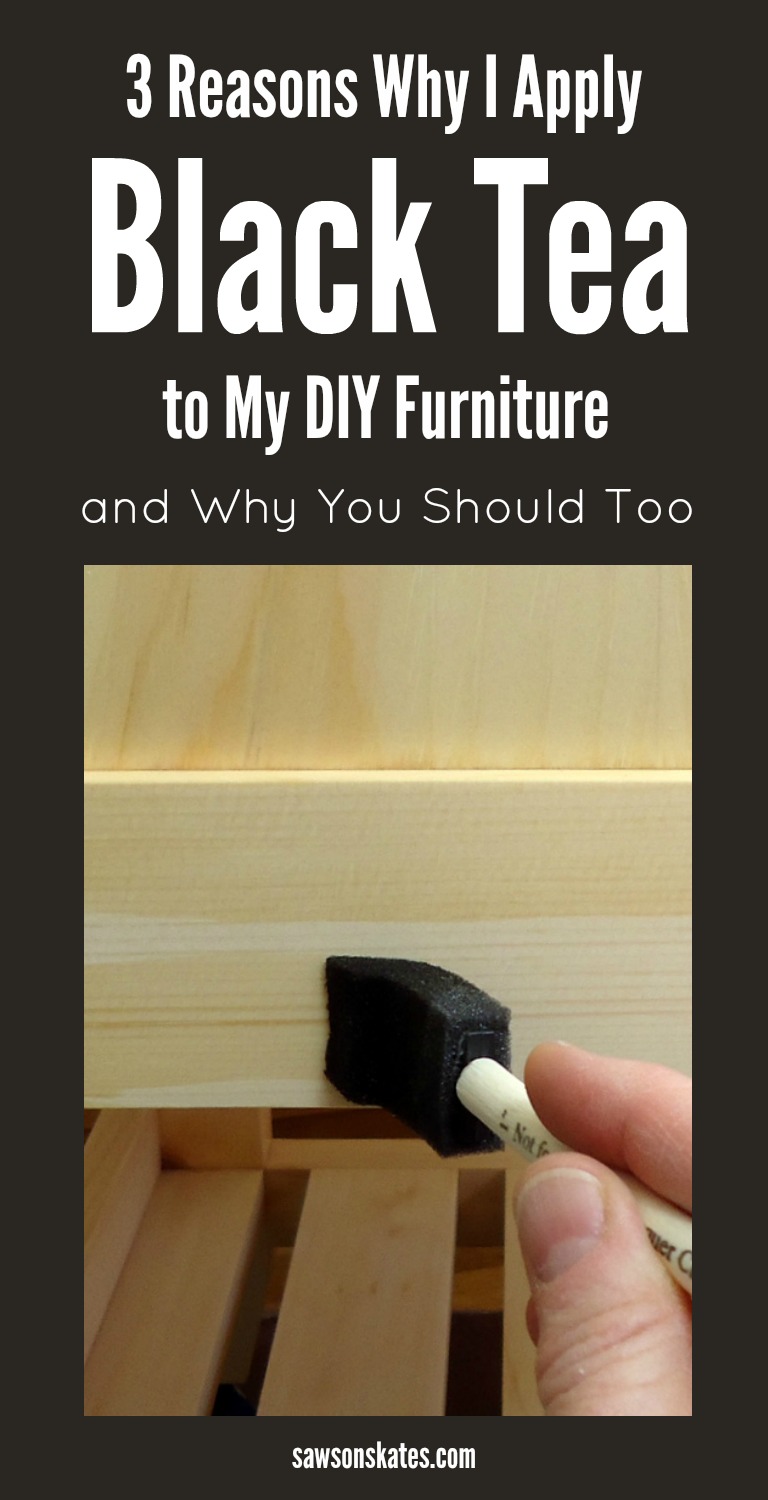
3 Reasons Why I Always Apply a Tea Stain to my DIY Furniture
Why in the world would I ever apply tea to my DIY furniture? Yes, tea! You know, the kind of tea you drink, like Earl Grey? What benefit could applying tea possibly have for DIY furniture? I always apply a tea stain before I apply wood stain to my DIY furniture and today I’m sharing three reasons why you should too.
For your convenience, this post contains affiliate links to supplies or tools I used to complete this project. Purchases made using these links help support the Saws on Skates website and allow me to share more DIY projects. and DIY tips with you. There is no cost to you for using these links. Click here to visit my site policies.
What is a Tea Stain?
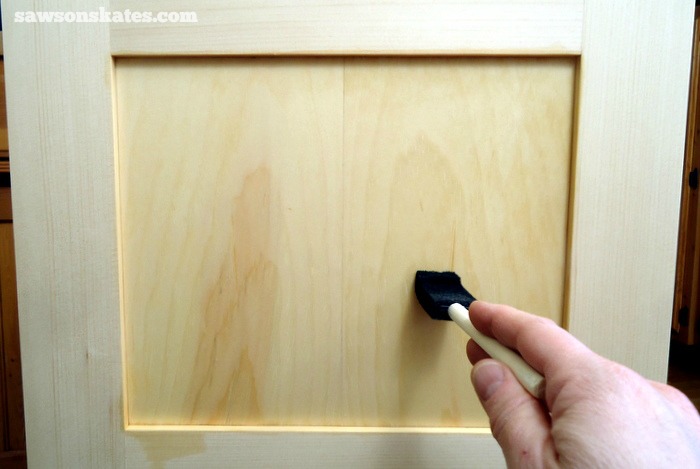
A tea stain is essentially a strongly brewed batch of tea. After the tea is brewed it’s applied to my DIY furniture with a foam paint brush. I should point out anytime a water-based product is applied to wood, like a tea stain, it raises the grain of the wood. This means the surface is no longer smooth. Once the tea stain is dry, the surface of the wood should be lightly sanded with 220 grit sandpaper.
You may also enjoy: How to Stain Wood With Coffee and How to Make a DIY Black Walnut Stain
That’s a tea stain in a nutshell, but why do we want to apply it to our DIY furniture? There are three benefits of applying a tea stain to our projects. It prevents blotchiness, evens out the wood tone and wood treated with a tea stain will actually stain darker than wood that hasn’t been treated with tea.
Prevents Blotchiness
If you have ever stained a piece of pine furniture you know it often gets a patchy, blotchy look. You just spent a ton of time and money building a beautiful piece of DIY furniture and now it looks like a Rorschach inkblot test – arrrrgggghhhh!!! I don’t know about you, but that’s definitely not the professional look I want for my DIY furniture. But you can prevent that blotchiness by applying a tea stain.
Evens Out Wood Tone
Not only does the tea stain prevent the wood from becoming blotchy, another benefit is it evens out the wood tone. If you have ever stained a piece of pine furniture you know some parts of the wood stain really dark and other parts hardly absorbs the stain at all. Wood treated with a tea stain absorbs wood stains more evenly and uniformly. This produces a more professional look for our furniture.
Dark, Rich Stain
Hey, wait a minute… isn’t there a product you can buy that prevents blotchiness and makes the wood absorb the stain more evenly? Yes, you can buy a wood conditioner that achieves a similar result to a tea stain, but for me, I prefer a tea stain. Both the wood conditioner and tea stain prevent blotchiness and evens out the wood tone, but the real difference comes in the way they accept stain.
Related: What I Use Instead of Wood Conditioner
It appears to me store bought wood conditioner prevents blotchiness by preventing the wood stain from soaking too deeply into the wood. In my experience furniture pieces treated with a wood conditioner produces a lighter stain color than I anticipated. Wood treated with a tea stain practically sucks the stain into the fibers of the wood and produces a darker, richer color which is exactly the look I want.
Tea Stain Revealed
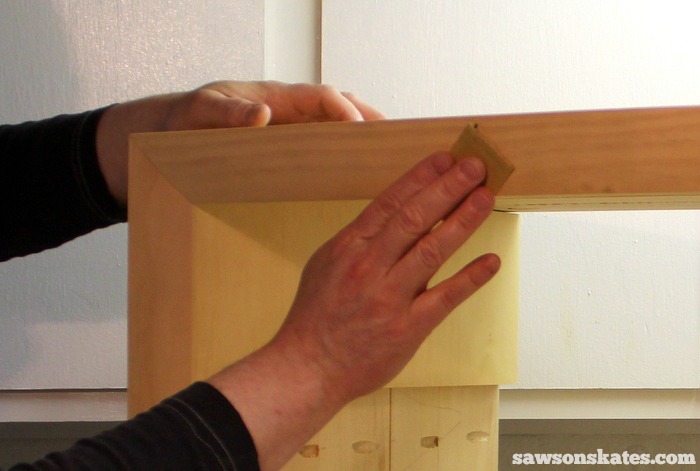
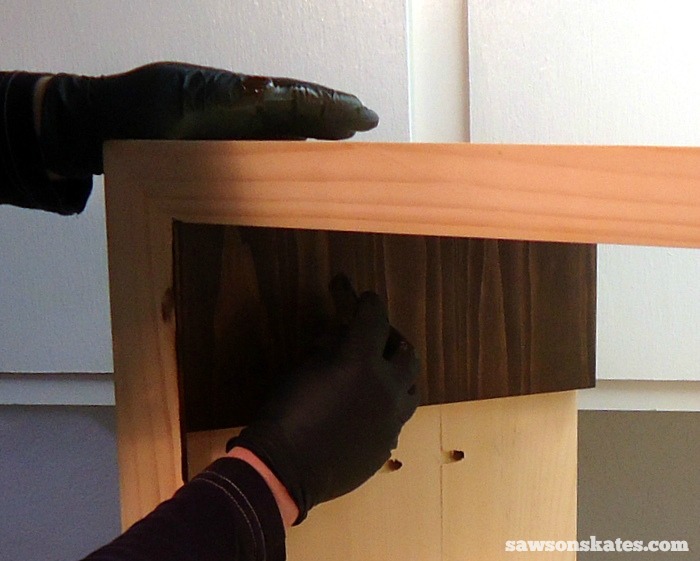
OK, so I told you about all of the benefits of a tea stain, now you want to see it in action, right? Take a look at the book-matched panels I made for the DIY bathroom vanity. The entire vanity, including the panels, were first tea stained and then stained with a coat of my favorite wood stain, Rust-Oleum Dark Walnut wood stain. The piece I’m holding was just stained with a coat of Rust-Oleum Dark Walnut wood stain. It’s a dramatic difference, right?!
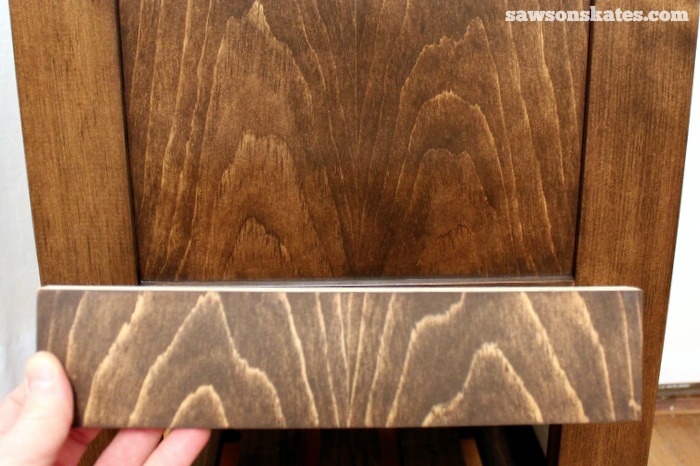
The bathroom vanity panels are not blotchy and have a dark, rich uniform color while the test piece is really dark in spots and really light in other spots. Man, I’m sooo glad I did a test piece on a leftover piece of the panel before I stained the whole vanity and I’m sooo glad I applied a tea stain. The color of the vanity turned out exactly how I envisioned it.
Why Tea Stain Works
Now we know what a tea stain does and all of the amazing benefits, but why does it work? Wood contains tannic acid. Tannic acid contributes to the color of wood. Typically lighter woods have less tannic acid and darker woods have more tannic acid. For instance, I build most of my DIY furniture projects with white pine. White pine is, well, it’s pretty white and would contain less tannic acid than a wood like red oak.
When you apply a tea stain, the tea reacts with the tannic acid in the wood. The tea stain itself doesn’t really change the color of the wood very much, but when a wood stain is applied, the color change is dramatic.
How to Make a Tea Stain
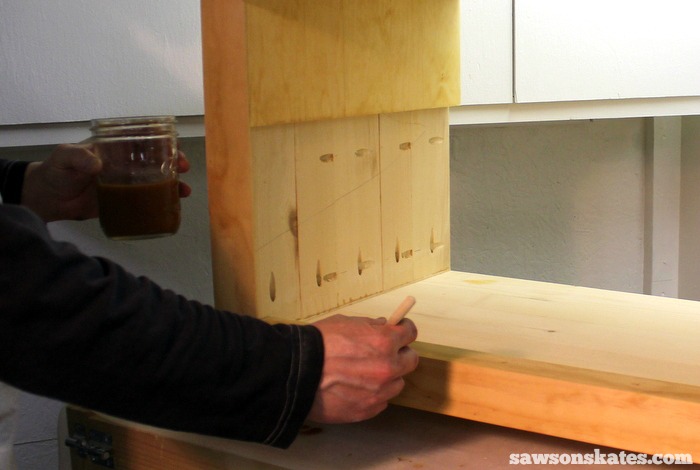
Boil about 1-1/2 cups of water and add 10 Bigelow English Teatime Black Tea bags. I usually make my tea stain in a mason jar, so I can seal it and store in the refrigerator if I need to. Steep the tea bags for 30 minutes to an hour and then remove the tea bags.
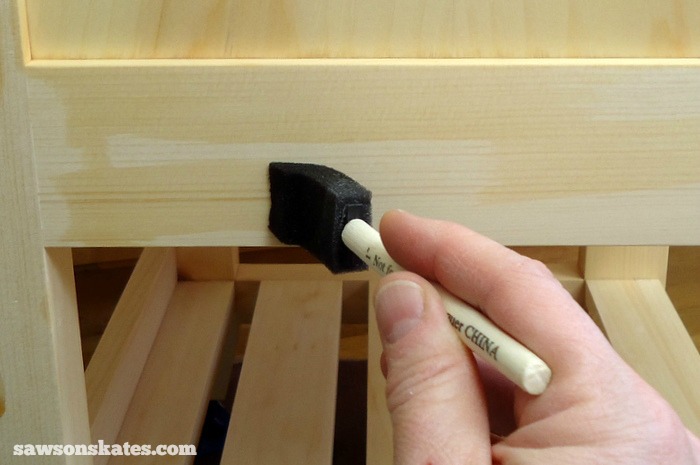
How to Apply a Tea Stain
Once you have your tea brewed, the application is easy. Take a foam paint brush, dip it in your tea and apply it to your furniture project. That’s it! Well, there is one more thing we need to do.
Anytime a water-based product is applied to wood, like a tea stain, it raises the grain of the wood, so the surface is no longer smooth. Once the tea stain is dry, the surface of the wood needs to be lightly sanded with 220 grit sandpaper. And when I say lightly, I mean sand very lightly. We only want to knock off the wood fibers that raised up. Just a few, light passes should do it.
Apply Wood Stain
Now that you’ve applied the tea stain and sanded the raised wood fibers, you’re ready to apply your wood stain. I’m a BIG fan of Rust-Oleum Ultimate Wood Stains. I love the one coat coverage, the quick drying time and Rust-Oleum stains always produce dark, rich stain colors.
Just a note about working wood stain when using a tea stain. Wood treated with a tea stain absorbs wood stain much more quickly than untreated wood. Because of this, you won’t need to leave the stain on as long as recommended by the instructions for your wood stain. You’ll want to start removing it just before it looks like it’s starting to dry. If you leave it on too long, the wood stain will dry and will be difficult to remove.
Take it a Step Further
Want your furniture project even darker? You can apply a tea stain and then oxidize the wood with a solution of vinegar and steel wool. Check out my Dark Chocolate stain post for details.
Conclusion
I recommend before you use a tea stain on your project that you try it out on a test piece and be sure it produces the color you were hoping for. I think you’ll be impressed with the results! A tea stain prevents blotchiness, evens the wood tone and tea stained wood stains darker than wood that hasn’t been treated with a tea stain.
Have you ever used a tea stain? What did you think of the results? Share your thoughts in the comments. Oh, and if you found this information helpful, would you please pin it to Pinterest?
PIN THIS!

Hi there – I’m Scott, a woodworking enthusiast and creator of Saws on Skates, a site I started in 2015 to share easy-to-follow tutorials, space-saving shop tips, and project inspiration for DIYers at any skill level. Learn more about my woodworking journey here.
Great site .. having 40 years experience in woodworking and remodeling, I find that learning new methods from other wood work enthusiasts, is a life long experience. Anyone who thinks they know everything is a complete nut.
Thank you Scott for your generous and very informative sharing of ideas and methods
Joe
Hi Joe – Thank you for stopping by and for the compliments!
I have a 3′ by 7′ bookcase I’ve built. Now too cold to finish, even with a propane heater in the shop. I’ll try the Tea stain pre-finish. Thanks.
So glad found your site. I’m finishing some new pine stair treads and risers. I tried your tea stain trick and what a dramatic difference. So much warmer and richer after applying stain. Highly recommended.
Thank you Terri – I’m glad this worked well for you!
Have you ever tea stained and then just put clear polyurethane on top?
Hi Lorie – I have not tried that. The tea stain by itself does not add all that much color to the wood. If you’re wanting a more natural look applying a tea stain and then top coating with poly might be a good option for you. I would test it on some scrap wood first to be sure it will give you the look you’re hoping for.
I’ve seen someone applying a water-based stain with steel wool. Apparently that takes care of the raising grain and thus sanding again is not needed. Have you tried that?
I have not seen this technique, but I think I’m going to have to give it a try! Thank you for the suggestion.
Scott how long do you suggest letting it dry after applying the tea stain, before sanding?
I usually wait 12-24 hours. More than likely it’s dry before that, but I like to make sure the wood is totally dry before I sand.
Thank you Scott.
I’ve been looking for a frugal way to prevent the “blotchy” effect when stripping a piece for refinishing. as i use
Methylene Chloride (yes very hazardous stuff,only use with experience) to strip followed with a lacquer thinner wash,use thick neoprene gloves lacquer thinner goes straight through your skin. I tried applying the tea after lacquer wash then 600 sand,air or tac clean. then i applied another tea coat and 1200 sand,apply stain and have not had the uneven blotchy appearance. thanks for a great tip this has saved me so much headache and work.
Hi John – Thank you for stopping by and for the compliment. I’m glad this worked out for you!
Interesting idea. I’m getting ready to finish an oak cabinet I made for my neighbours and will try tea stain on some scraps. I showed them some test pieces with stain only and they said they would like it to be a little darker and a little warmer. Hopefully the tea stain will help achieve the desired results.
Hi Andy – Thank you for stopping by. I hope the tea stain works for you. Please let me know how it goes.
Thankfully I remembered this article of yours from last year. I’ve just ordered an unfinished, unassembled pine barn door which will need to be stained once it arrives. Blotchy will not do! I need a light stain to blend in with the existing light oak flooring. Tea stain, sand and hopefully I will find a light-colored stain that’s just right. Any suggestions will be gladly be considered.
Hi Kathy – Thank you for stopping by. Staining and getting just the right color can be tricky. I hope your door turned out just the way you wanted it!
I look forward to trying this method, it makes sense with soft woods like pine, but wonder how this will work with hardwood like QS White Oak? I am re-doing my entire entryway, living room and dining room in Arts & Crafts/Craftsman style, and will be installing high wainscot paneling and built-in media cabinets/bookcases all out of Quarter sawn White Oak per that period/style. I have been looking at all these various ways to achieve that fumed Oak look of that period without the caustic fuming, since that not even an option inside a home, and I’ll be applying the wainscoting over plywood panels with 1/2 inch stock using a reversible wainscot router bit (Done this on a number of jobs years ago, prior to spending 20 years in the USAF). Have you tried this on White Oak, or do you have any good suggestions on getting the rich warm brown finish of craftsman style furniture on paneling and woodwork?
Hi Kurt – Thank you for stopping by. That sounds like an amazing project! I’m not sure if I will be much help to you. I typically use pine for my projects and rarely use white oak. I’m also far from an expert on getting “just the right stain color”. The tips I’ve shared are things I’ve discovered by accident and then tested to see if I can achieve a repeatable result on my pine projects. I apologize I couldn’t be more help. Good luck with your project.