How to Make Homemade Black Walnut Wood Stain Without Harsh Chemicals
Learn how to make natural homemade black walnut wood stain. Add rich color to your projects using simple, easy-to-find ingredients.
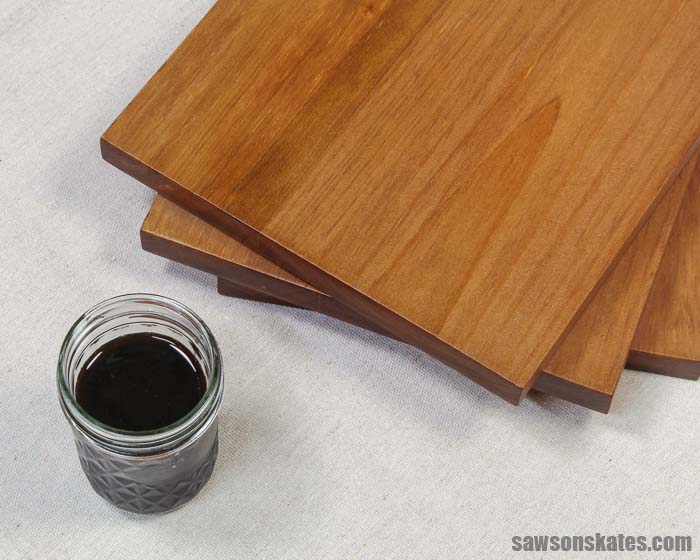
DIY Black Walnut Stain
Have you ever wondered if you could make your own wood stain without harsh chemicals? This simple DIY method uses just black walnuts and a little water.
It’s an easy way to add color to your projects without using stinky oil-based stains, and you can control how light or dark the finish looks by adding more coats. I’ve used it on pine, and it creates a soft, natural brown tone that builds with each layer.
In this tutorial, I’ll show you how to make black walnut stain, how to apply it, and what kind of results you can expect.
You may also enjoy How to Stain Wood with Coffee and How to Stain Wood with Tea
This article contains affiliate links. If you purchase from these links, I may earn a small commission at no additional cost to you. Visit my site policies for more information.
Why Use Black Walnuts to Stain Wood?
There are a few reasons I use black walnuts to make my own wood stain instead of buying one from the store.
ALLERGY WARNING: This homemade stain contains tree nuts.
1. Natural
This stain is made with just two simple ingredients: black walnuts and water.
2. Safer
Traditional oil-based stains are flammable and need to be used in a well-ventilated area.
This DIY stain is water-based, so it’s not combustible and doesn’t have strong fumes.
That means you can use it indoors without worrying about ventilation or fire risk.
3. More Control
If you’ve ever used a store-bought stain, you know the color doesn’t always turn out how you expected.
This DIY black walnut stain gives you more control over the final color.
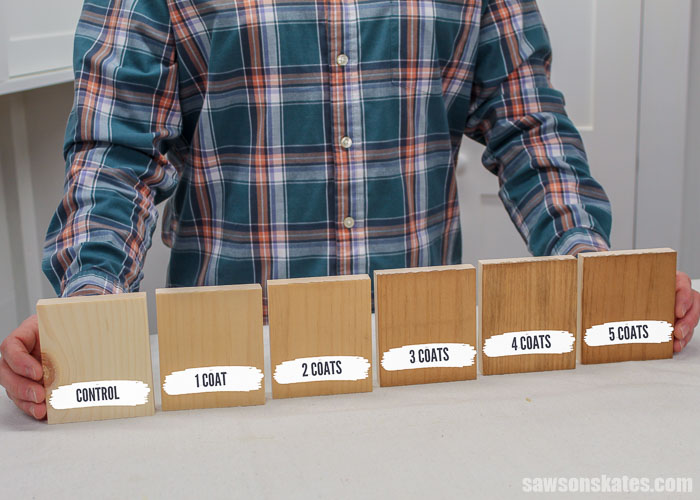
Each coat adds a little more depth, so you can build up the color instead of guessing.
4. Use as a Pre-Stain Wood Conditioner
You can also use this black walnut stain to pre-condition wood before applying an oil-based stain. This works well on woods that tend to blotch, such as pine.
Store-bought wood conditioners help prevent blotchiness, but in my experience, they often produce a lighter stain color than I expected.
Related: What I Use Instead of Wood Conditioner
Using a coat of homemade black walnut stain as a pre-conditioner, on the other hand, appears to even out absorption, resulting in a darker, richer color.
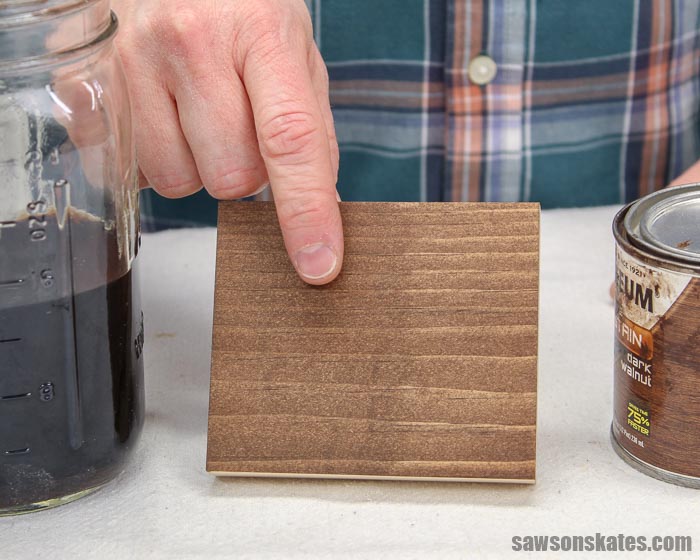
Left: This side was treated with one coat of black walnut stain followed by one coat of Rust-Oleum Dark Walnut oil-based stain. The color is darker, richer and more even.
Right: This side has one coat of Rust-Oleum Dark Walnut oil-based stain.
What Do You Need to Make Black Walnut Stain?
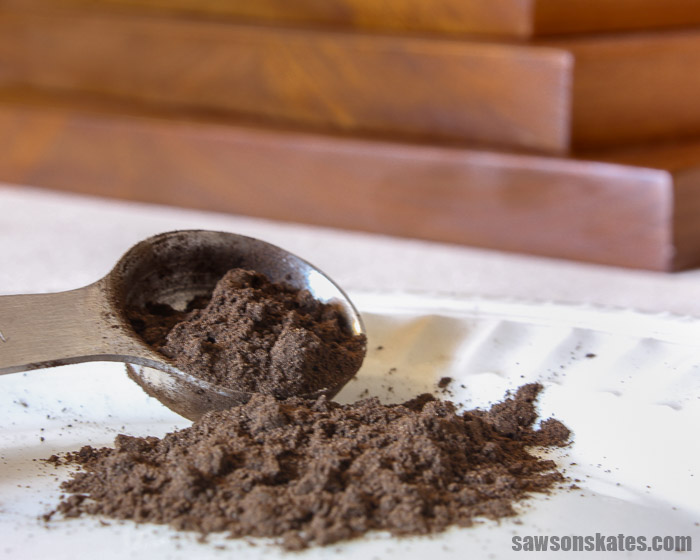
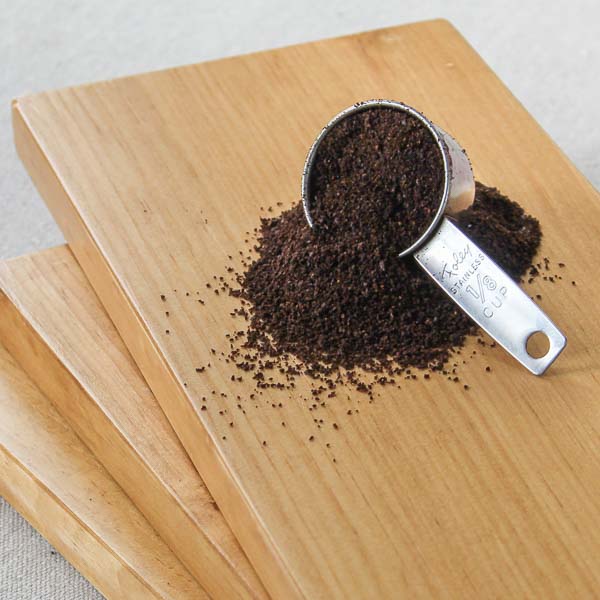
You only need a few simple things to make black walnut stain. First, as you might have guessed, you’ll need black walnuts. You can use walnuts from your yard if you have a black walnut tree or store-bought walnut hull powder.
I don’t have a black walnut tree in my yard, but a friend does. He told me I could collect as many as I wanted, but warned me how messy they are and how badly they stain your hands. He also mentioned they make a heck of a noise when they hit the blades of his riding mower, lol.
So instead of dealing with all that, I used this walnut hull powder.
💡 TIP: Be sure to use gloves when working with a black walnut stain. Black walnuts will stain hands and the stain can be difficult to remove.
You’ll also need some water and a container (like a mason jar) to keep it in.
How Do You Preserve Black Walnut Stain?
Black walnuts are food-based, so this stain could spoil and become moldy.
There are a few things you can do to help it last longer.
- First, I added white vinegar to the black walnut stain.
- Second, I refrigerated the stain mixture to help it last longer.
💡 TIP: When you’re ready to stain a project, pour the amount of stain you think you’ll need into a small container. Then work from that small container. This will reduce the chances of contaminating the jar where you keep your stain.
What Kind of Wood Can You Stain With Black Walnuts?
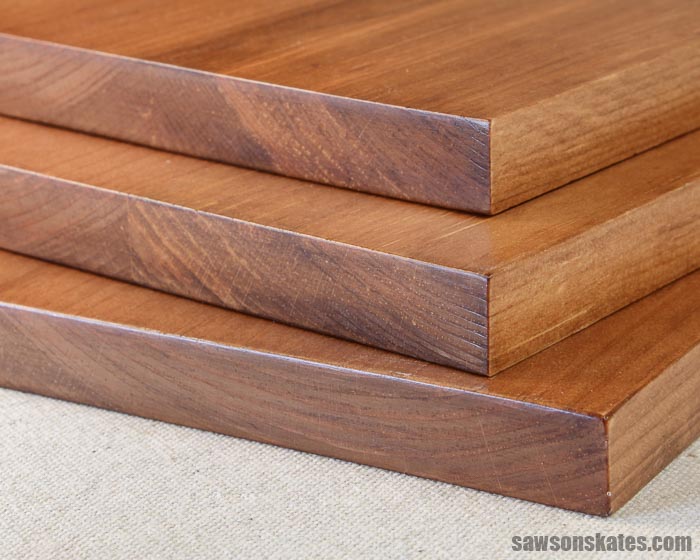
You can use this black walnut stain on just about any wood like pine, poplar, oak, or maple. I used it on pine for all of the samples in this tutorial.
💡 TIP: All woods take stain differently. As with any stain, it’s a good idea to test it on some sample boards before using it on your project. This way, you can be sure it will produce the color you’re looking for.
How Do You Prepare the Wood?
You should sand the wood to prepare it for the stain. I sanded the samples in this tutorial with 100 grit, 120 grit, and 150 grit sandpaper.
Water-based products, like this black walnut stain, raise the grain of the wood. This means the surface of the wood is no longer smooth. There are two ways to deal with this.
One way is to apply water to the wood before applying the water-based stain. Dip a rag in water and wipe it on the surface of the wood. When the wood is dry, lightly sand with 220 grit sandpaper. Then remove the sanding dust with a ShopVac and apply the walnut stain.
The other way is to sand the wood after applying the water-based stain. This is what I chose to do for my project. Once the final coat of walnut stain was dry, I lightly sanded the wood with 220 grit sandpaper to smooth the surface. Then I removed the sanding dust with a ShopVac.
Related: 11 Secrets for Sanding Wood Projects Like a Pro
The end grain of the wood tends to pull in more stain than the rest of the board. This is especially true when using a water-based stain like this.
One way to help prevent this from happening is to sand the end grain to a higher grit than the rest of the board. For my project, I used a sandpaper assortment (similar to this one) to sand the end grain with 180 grit, 220 grit, 240 grit, 280 grit, and finished sanding with 320 grit sandpaper.
How Do You Apply the Black Walnut Stain?
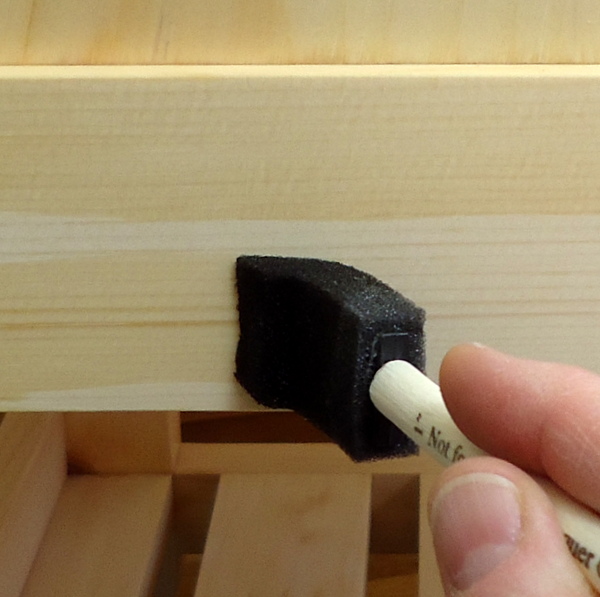
I used an inexpensive 1″ foam craft brush to apply the walnut stain on some sample pieces of pine. But after the second coat, I noticed this brush was leaving lap marks on the wood.
Lap marks are darker streaks that happen when one area starts to dry before you brush over it again, causing uneven color.
I switched to this paint brush (my favorite brush) for the remaining coats of stain and it didn’t leave lap marks. I would recommend using a quality brush to apply the stain.
How Long Does the Stain Need to Dry Before Applying Another Coat?
I allowed the stain to dry for about two hours before applying another coat.
How Many Coats of Black Walnut Stain Can You Apply?
For this tutorial, I applied five coats of stain to some sample pieces of pine.
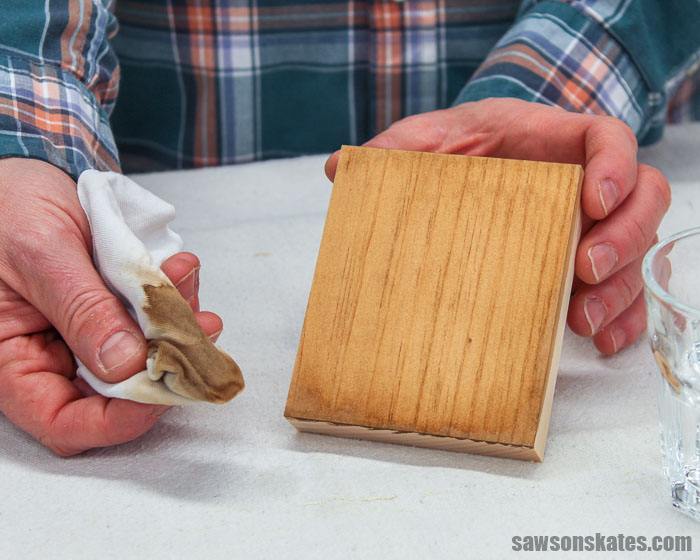
I mentioned earlier that this is a water-based stain. I should also mention that water will remove the stain.
This is important to remember for two reasons:
- First, projects stained with walnuts need to be sealed.
- Second, you’ll want to avoid using a water-based sealer as this may remove the stain as it’s being applied.
How Do You Seal the Wood?
For this tutorial, I tested the walnut stain with five different top coats. These top coats included beeswax polish, furniture wax, oil-based polyurethane, Bob’s Miracle Finish, and shellac.
I’ve been using this water-based Polycrylic on many of my recent projects. I didn’t test Polcrylic on the walnut stain because, as I mentioned earlier, water removed some of the walnut color from the test piece. So I presumed a water-based product like Polycrylic would remove the stain.
Related: Polycrylic vs Polyurethane: Are They The Same?
This DIY beeswax polish removed some of the stain color and left the wood looking a little dull.
This furniture wax also removed some of the stain color and left the wood looking dull.
This semi-gloss oil-based polyurethane removed some of the stain color but added depth to the wood and added a little shine.
Bob’s Miracle Finish removed some of the stain color but added depth to the wood and added a little shine.
This shellac was the only top coat that didn’t remove the stain color. It also added depth to the wood and added a little shine.
I should mention that wax-free shellac can be used under any other top coat. In other words, you can first apply a wax-free shellac and then apply any other top coat like Polycrylic, polyurethane, etc.
Related: What You Need to Know About a Shellac Wood Finish
How to Make Black Walnut Stain
There are two ways you can make a stain with black walnuts. You can either use whole walnuts or walnut hull powder.
I used powder to make my stain so I will focus on that method for this tutorial. Click here for how to make stain with whole walnuts.
How to Make Black Walnut Wood Stain with Walnut Hull Powder
Materials
- Walnut Hull Powder (I used this one)
- Water
- White Vinegar
- Mason Jar
- Bamboo Skewer
Tools
- Measuring Spoons
- Measuring Cups
- Disposable Gloves
- Paint Brush (I used this one)
Step 1. Make the Stain
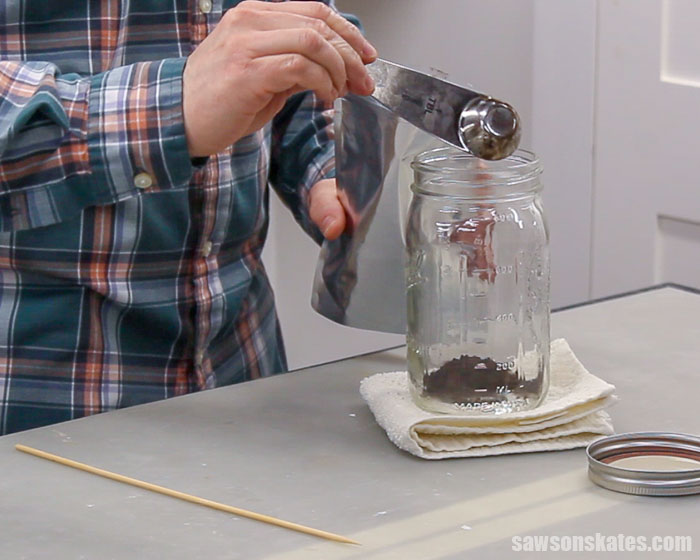
Add one tablespoon of walnut hull powder to a mason jar.
Boil 1-½ cups of water and carefully add it to the mason jar. I stirred the mixture with a bamboo skewer.
You can use something else to stir like a spoon, etc. but keep in mind that it may become stained.
When the mixture was cooled, I added a ½ cup of white vinegar to help preserve it.
Step 2. Prepare the Wood
See How to Prepare the Wood for more details.
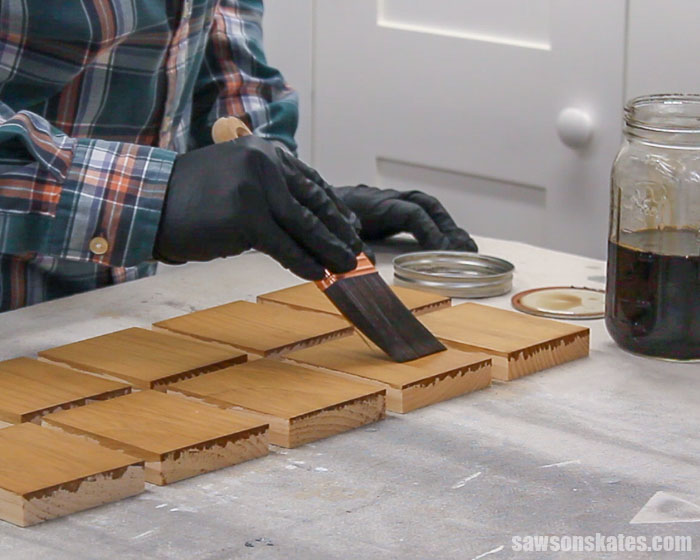
Step 3. Apply the Black Walnut Stain
I applied the stain to the wood with this paint brush.
I allowed the first coat of stain to dry for two hours. Then I applied four more coats of stain. Each coat was allowed to dry two hours before applying the next.
Step 4. Seal the Stain
For my project, I chose to first apply a coat of wax-free shellac and then three coats of this matte-finish water-based Polycrylic. I sanded with 220 grit sandpaper between each coat and removed the sanding dust with a ShopVac.
See How Do You Seal the Wood? for more information.
How to Make Black Walnut Wood Stain with Whole Walnuts
There are two ways to make black walnut stain with whole walnuts. You can either boil them or just let them steep in the water for a few days.
With either method, you’ll need about 15-20 walnuts. The husks of the nuts need to be removed. Be sure to wear gloves to remove the husks because your hands will become stained and the stain will be difficult to remove. When the husks are removed, put the walnuts in a cheesecloth bag.
Next, you’ll need a large stockpot. Be sure to use one you don’t care about because the walnuts may stain the stockpot.
Place the cheesecloth bag in the stockpot and add about a gallon of water.
Boil Method
For the boil method, allow the walnuts to soak for about 24 hours. After 24 hours, boil for 1-2 hours. Carefully remove the cheesecloth bag and allow the pot to cool.
When the pot is cool, strain any debris, and pour the stain into a mason jar.
Add about ½ cup of white vinegar and store the stain in the refrigerator.
Steep Method
For the steeping method, allow the walnuts to soak for about two days. After two days remove the cheesecloth bag. Strain any debris and pour the stain into a mason jar.
Add about ½ cup of white vinegar and store the stain in the refrigerator.
Final Thoughts
Enhance the beauty of your wood projects with this DIY black walnut stain. It’s made with simple ingredients like black walnuts and water. It’s easy to make, easy to apply, and doesn’t have any stinky fumes like oil-based stains.
Thank you for stopping by. If you enjoyed this tutorial, would you please take a moment and pin it to Pinterest? I’d really appreciate it!
Recommended For You
Pin This For Later

Hi there – I’m Scott, a woodworking enthusiast and creator of Saws on Skates, a site I started in 2015 to share easy-to-follow tutorials, space-saving shop tips, and project inspiration for DIYers at any skill level. Learn more about my woodworking journey here.