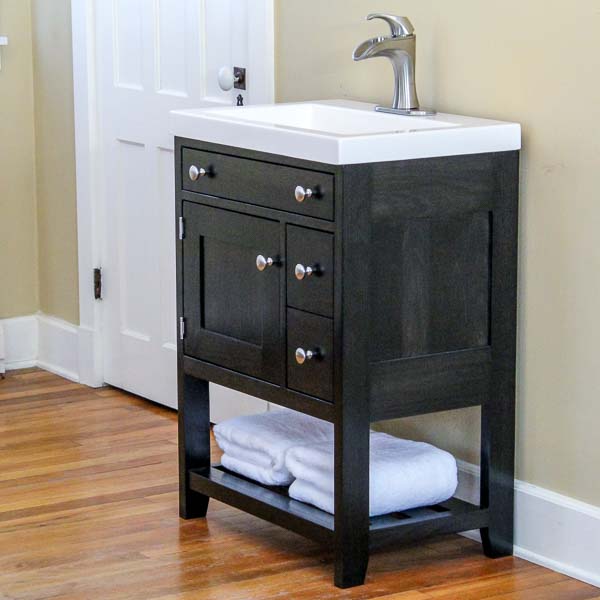
DIY Small Bathroom Vanity with Towel Storage
Is your small bathroom feeling the squeeze? Transform it with this compact DIY vanity featuring a towel rack. Add style without sacrificing storage.
What Should I Build Next?
That's the question I help answer.
Every week, I send woodworking ideas to 17,000 DIYers who love building things.
You'd fit right in.
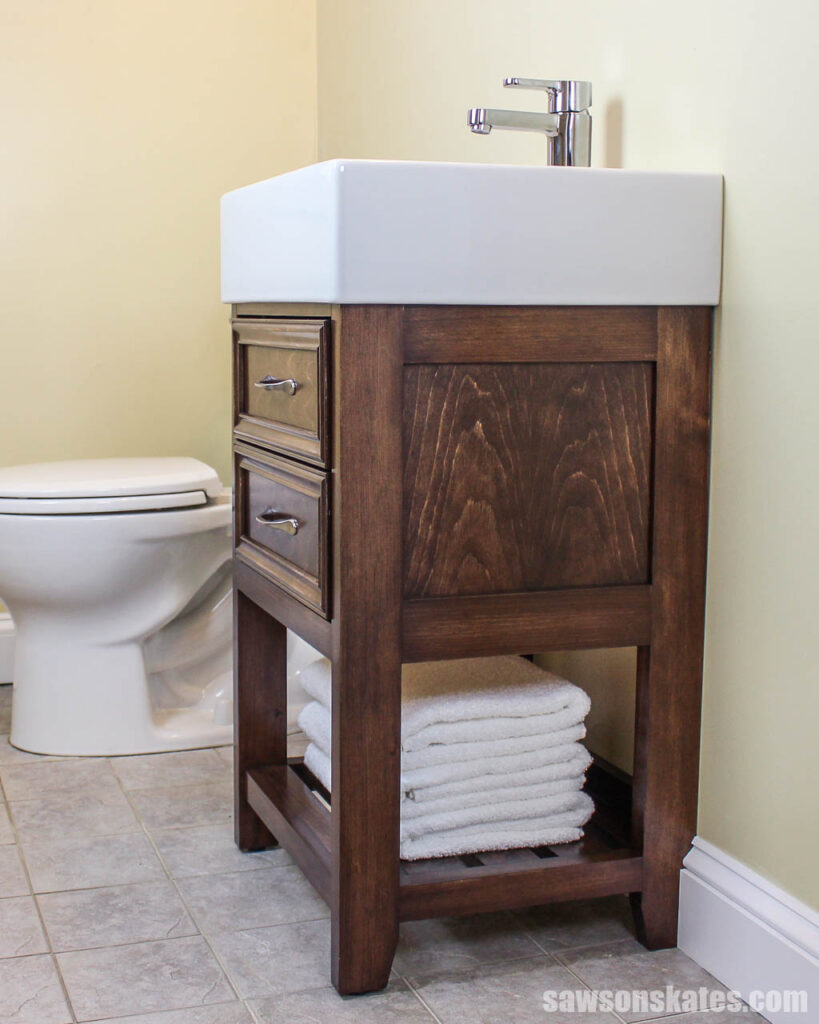
My friend’s tiny bathroom was begging for a makeover. A bulky, boring vanity was hogging precious floor space. Determined to rescue her restroom from blandness, I created a space-saving masterpiece featuring towel storage that packs a stylish punch. I’ll show you how to make it in this step-by-step tutorial.
Originally published June 10, 2017, republished August 12, 2024.
Table of Contents
This article contains affiliate links. If you purchase from these links, I may earn a small commission at no additional cost to you. Visit my site policies for more information.
Inspiration for This Project
My friend Linda has a small bathroom with a big problem. And I do mean small. Her house is about 750 square feet, and her bathroom is tiny. The previous owners did some renovations, like adding new floor tile, but when it came to the vanity, the one they selected was just too big.
She wanted to ditch the oversized, boring home improvement store vanity and replace it with a smaller, stylish one and asked if I could do anything. Of course, I accepted the challenge.
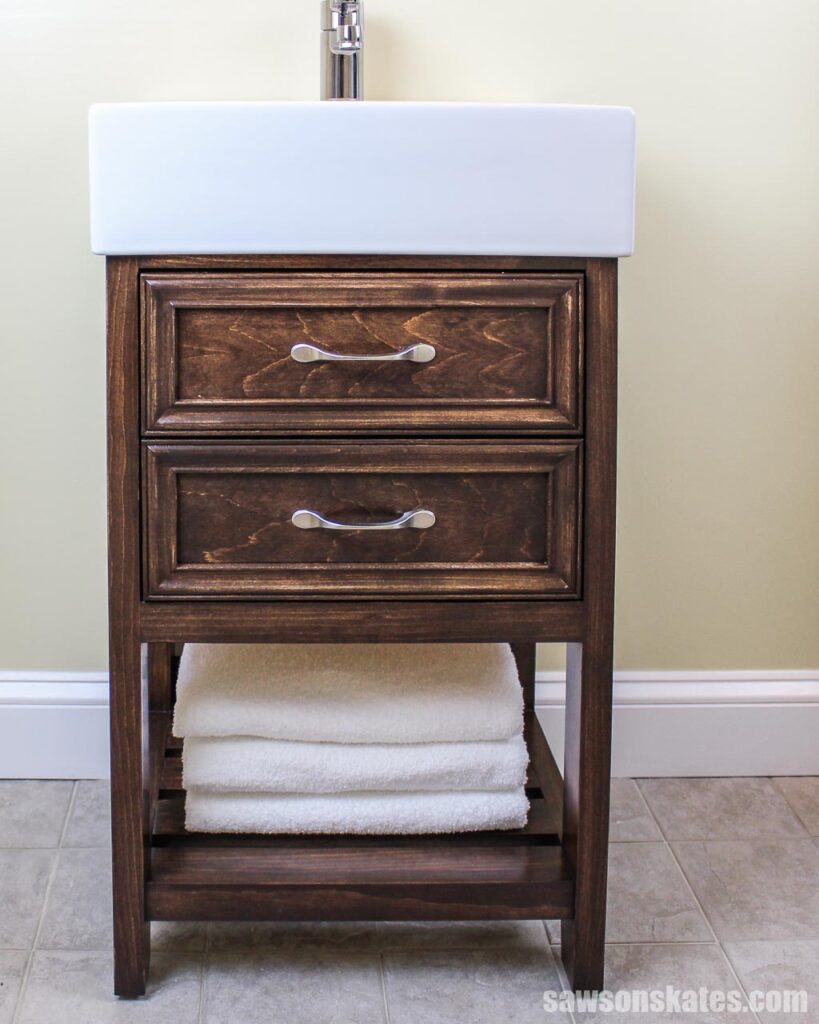
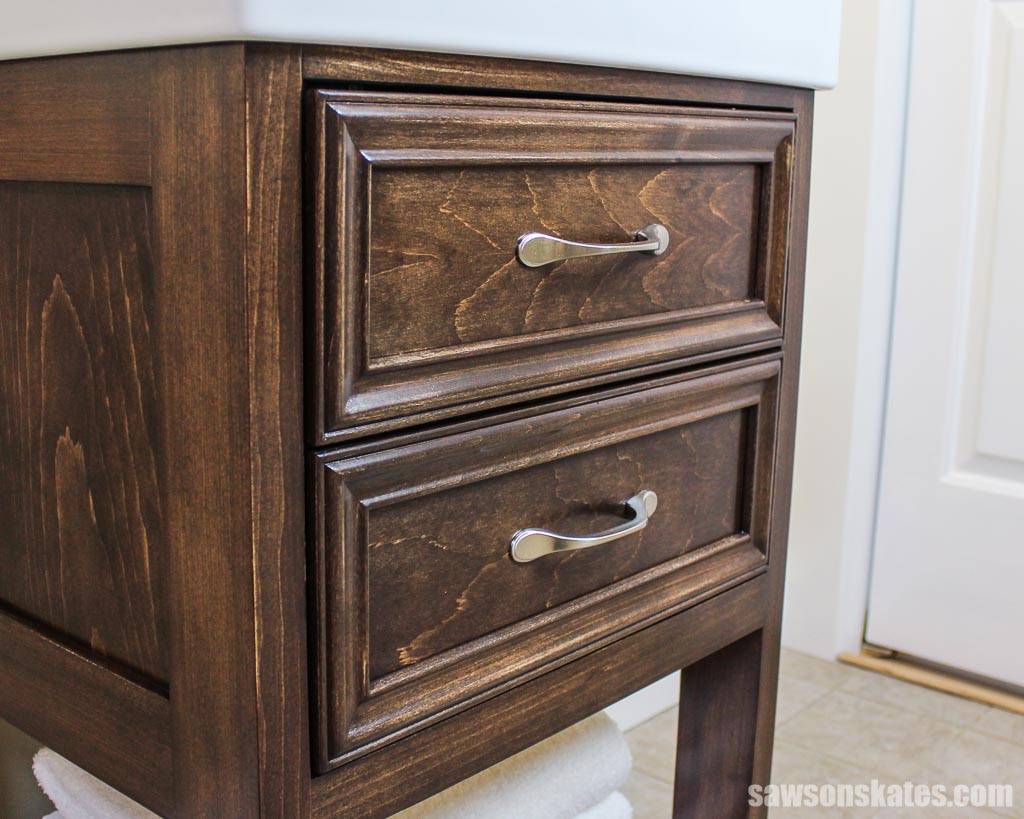
Inspired by one I found on Wayfair, I put my own spin on it. Aiming for a more furniture-like appearance, I skipped the single door and went with faux drawers for a touch of texture and style. That’s right, those aren’t drawers at all. I also included a rack at the bottom for plenty of towel storage.
What Wood Should You Use?
I chose 5/4 pine (spoken as five-quarter) for this project because its 1-⅛” thickness closely matched the inspiration piece. However, I always hesitate to publish plans using it for several reasons.
First, past experiences have shown that this wood dimension can confuse DIYers.
Related: Beginner’s Guide to Wood Sizes
Also, I’ve received comments from readers expressing difficulty finding 5/4 in their local stores. While I can easily find it in the pine board section at my local Lowe’s and lumber yard, its availability may be limited in other areas.
Related: How to Buy Wood (Top Tips for Choosing Woodworking Lumber)
For even more style, I book-matched the side panels and drawer fronts, a technique where two pieces of wood are mirrored to create a symmetrical, visually striking pattern, giving it the look of an opened book.
I created book-matched panels from pine boards using a bandsaw and thickness planer. If you don’t have these tools, you can use plywood instead.
Related: Jointer vs Planer (Differences & Which to Buy First)
What Sink Do You Need?
I originally designed this vanity around the IKEA Yddingen sink, which is no longer available. Here are a few alternatives to consider:
- Explore IKEA Options: IKEA often carries small bathroom sinks, so you might find a suitable replacement there.
- Repurposed Sink: I discovered a sink, cabinet, and mirror set on sale at a local home improvement store. I salvaged the sink for this modern bathroom vanity project. Checking Facebook Marketplace, and second hand stores like Habitat for Humanity’s ReStore are also options.
- Vanity Adjustment: You can adjust the vanity’s dimensions to fit a different sink if necessary.
What Finish Should You Use?
To protect this project from the high humidity levels typically found in bathrooms, I sealed it with three coats of oil-based polyurethane, known for its water-resistant properties.
How to Make a Small Bathroom Vanity with Towel Storage
Printed Plan
Get the PDF plan here (includes detailed instructions, measurements, and bonus tips)
Materials
- Wood (per the printed plan)
- Wood Glue
- ½” Pin Nails
- 1-¼” Wood Screws
- 1-¼” Pocket Hole Screws
- 1-½” Pocket Hole Screws
- (2) Cabinet hinges
Tools
- Tape Measure
- Drill
- Pocket Hole Jig
- Miter Saw
- Table Saw
- Circular Saw
- DIY Crosscut Jig
- Pin and Brad Nailer or Hammer
Step 1. Make the Legs
Cut four pieces of wood to length for the legs.
Following the diagram in the printed plan, lay out the angle at the bottom of each leg. Using a circular saw and crosscut jig, cut the marked angles. You could also use a jigsaw instead; however, it won’t be as precise.
Related: How to Make a DIY Circular Saw Crosscut Jig
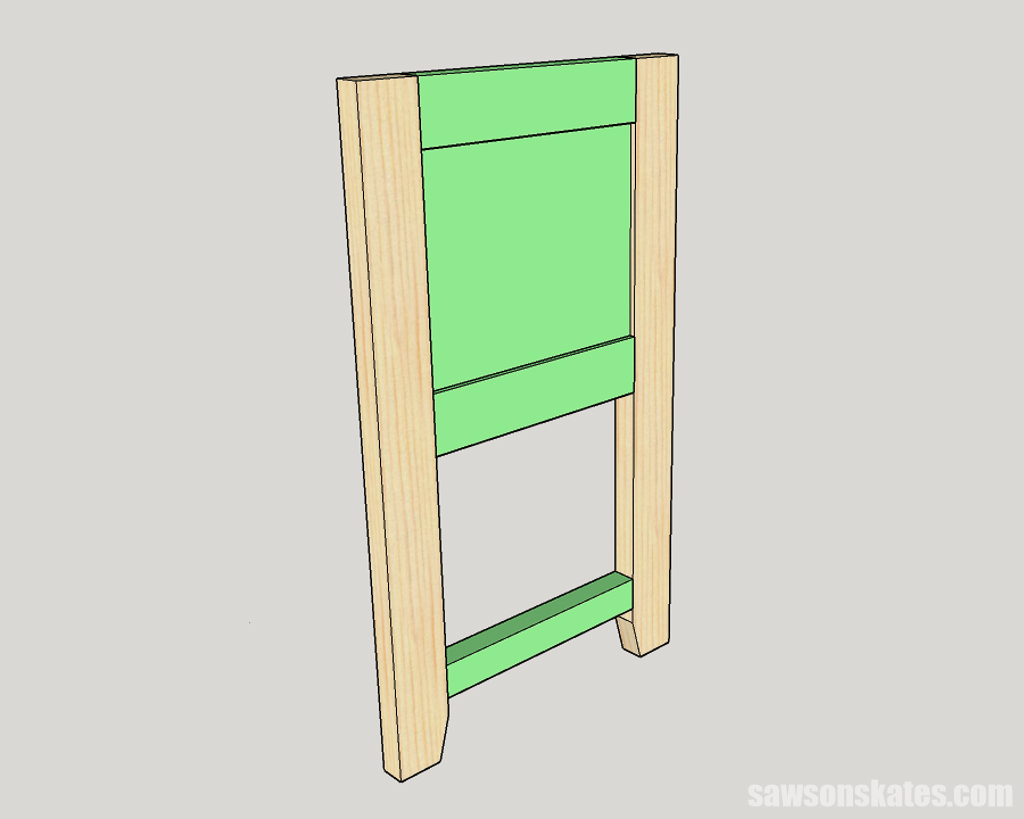
Step 2. Assemble the Sides
Using my miter saw, I cut four pieces of wood to length for the top and middle rails. I set my pocket hole jig for the material’s thickness and drilled two pocket holes in each end.
Related: How to Use a Pocket Hole Jig (& Beginner Pitfalls to Avoid)
With my miter saw, I cut two pieces of wood to length for the bottom rails and drilled one pocket hole in each end.
Using my table saw, I cut two pieces of plywood to size for the side panels. You could also use a circular saw and Kreg Rip-Cut instead.
Related: 21 Table Saw Safety Rules (& Mistakes to Avoid)
Following the diagram in the printed plan, I marked the location for pocket holes. I set my pocket hole jig for the material’s thickness and drilled one at each mark.
NOTE: For my project, I made ¼” thick book-matched panels and attached them to ½” plywood pieces, resulting in a final thickness of ¾”.
Following the diagram in the printed plan, I placed the parts on my workbench.
The side panel sets in from the legs’ faces. To help position it, I placed scrap pieces of MDF on my workbench, then placed the panel on top.
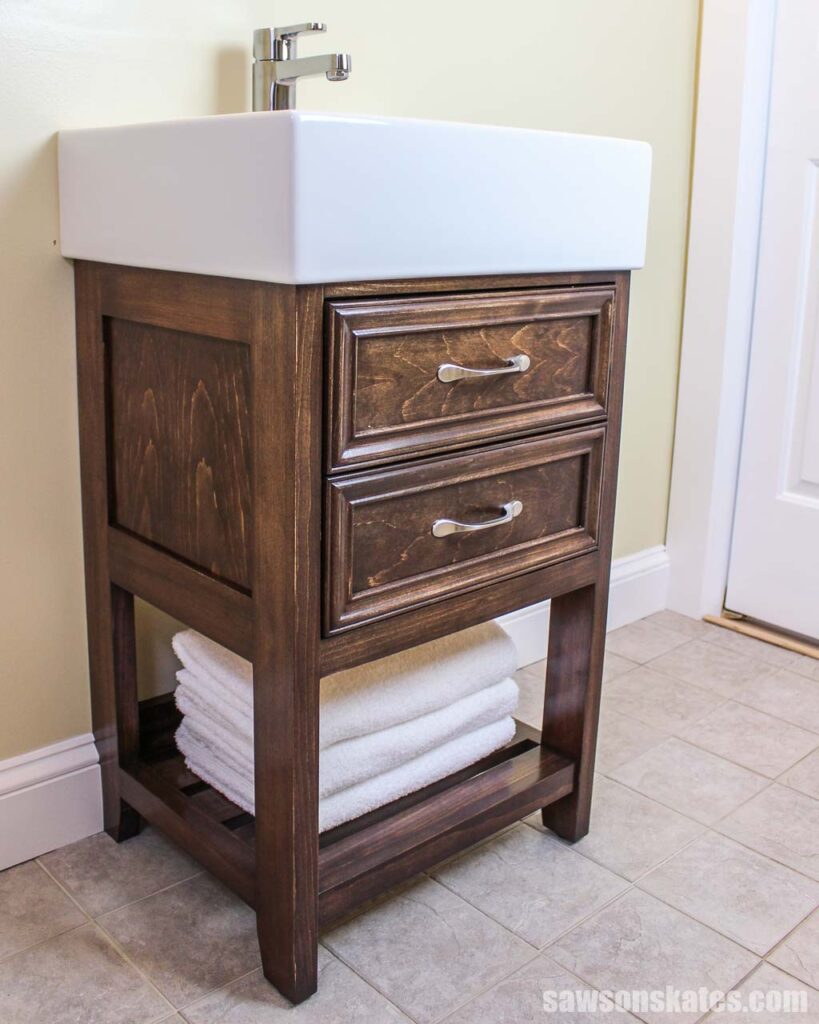
TIP: My book-matched panels featured cathedral grain, a mountain-like pattern. To enhance the visual appeal, I positioned the grain’s peak toward the top of the vanity.
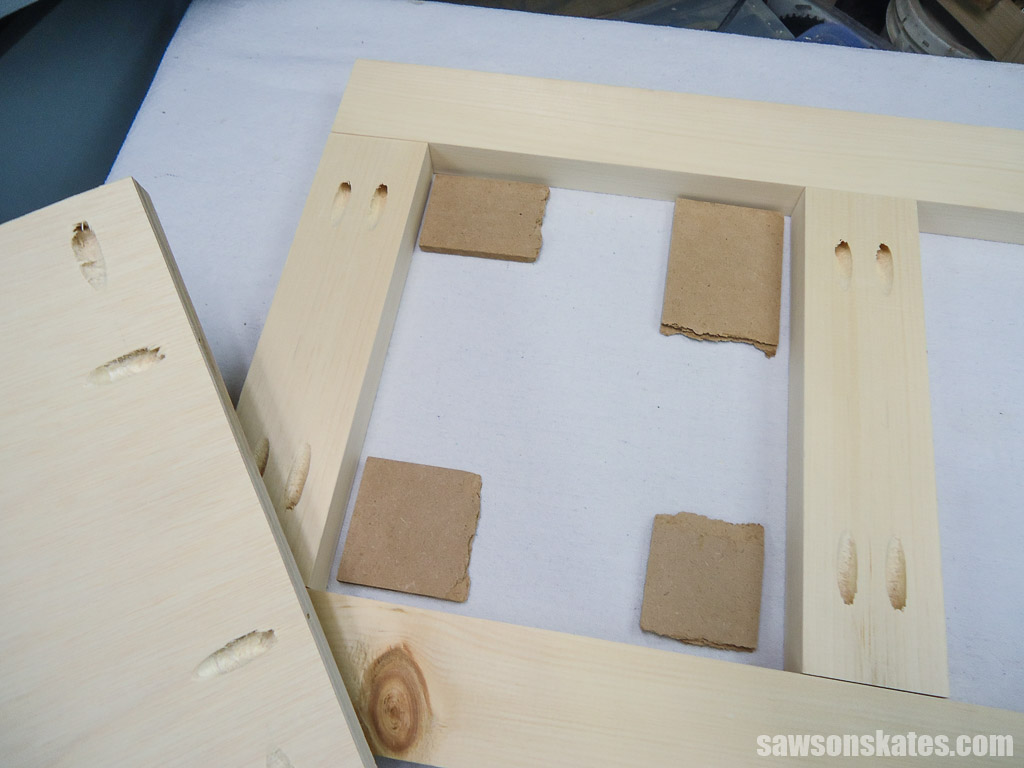
To ensure proper spacing, I placed two pieces of scrap wood between the middle and bottom rails.
After laying out the parts, I applied glue to the ends of the rails, clamped them in position, and attached them using pocket hole screws. Don’t attach the panel yet.
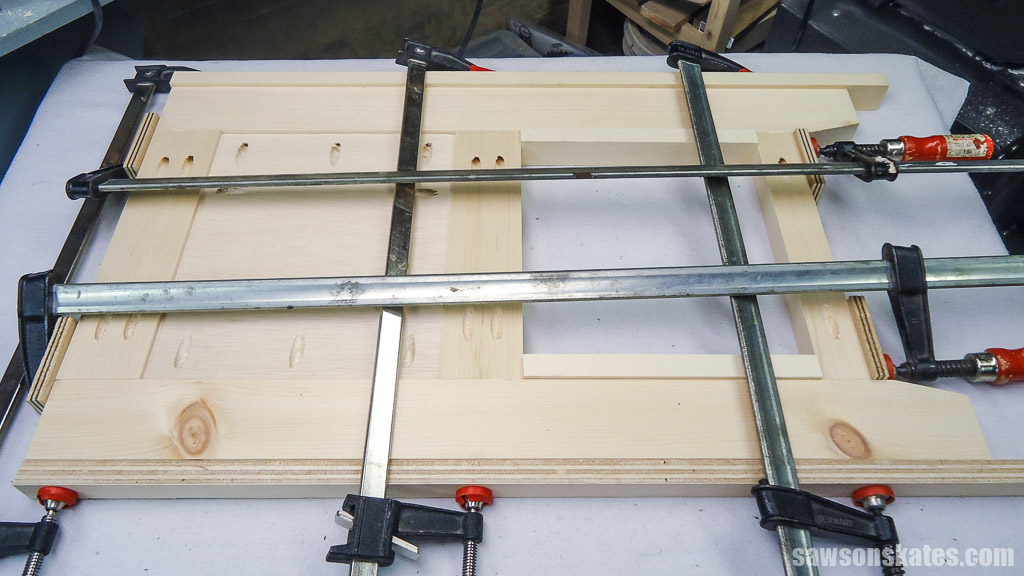
I flipped the assembly over and ensured the panel was set in from the legs’ faces. Adjust the panel if necessary.
I clamped the panel in position and attached it with pocket hole screws. Repeat for the other side assembly.
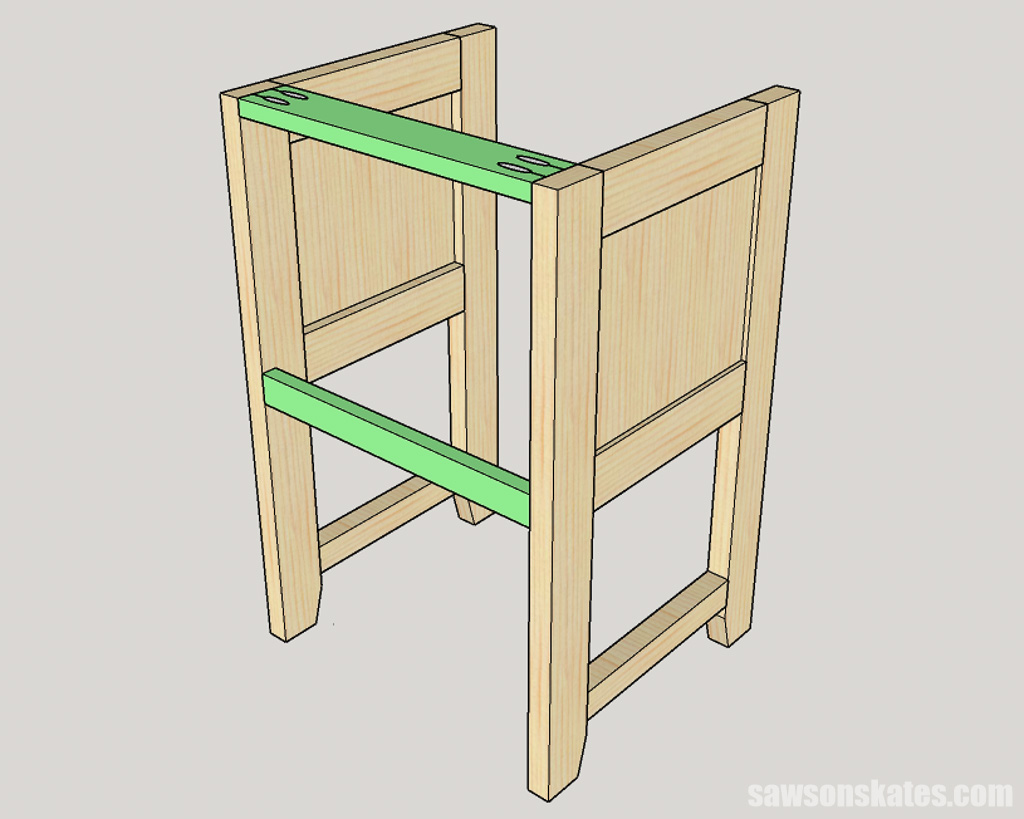
Step 3. Join the Side Assemblies
Using my miter saw, I cut one piece of wood to length for the middle rail and drilled one pocket hole in each end.
With my miter saw, I cut one piece of wood to length for the upper rail and drilled pocket holes in each end.
I applied glue to the upper rail and clamped it between the two side assemblies.
To ensure proper spacing, I placed two pieces of scrap wood below the upper rail, applied glue to the middle rail, and clamped it in position.
I attached the rails using pocket hole screws.
Using my table saw, I cut one piece of plywood to size Following the diagram in the printed plan, I marked the locations for pocket holes and drilled one at each mark.
I positioned the bottom in the cabinet, ensuring its underside was flush with the underside of the side rails and front rail. I clamped it in placed and attached using pocket hole screws.

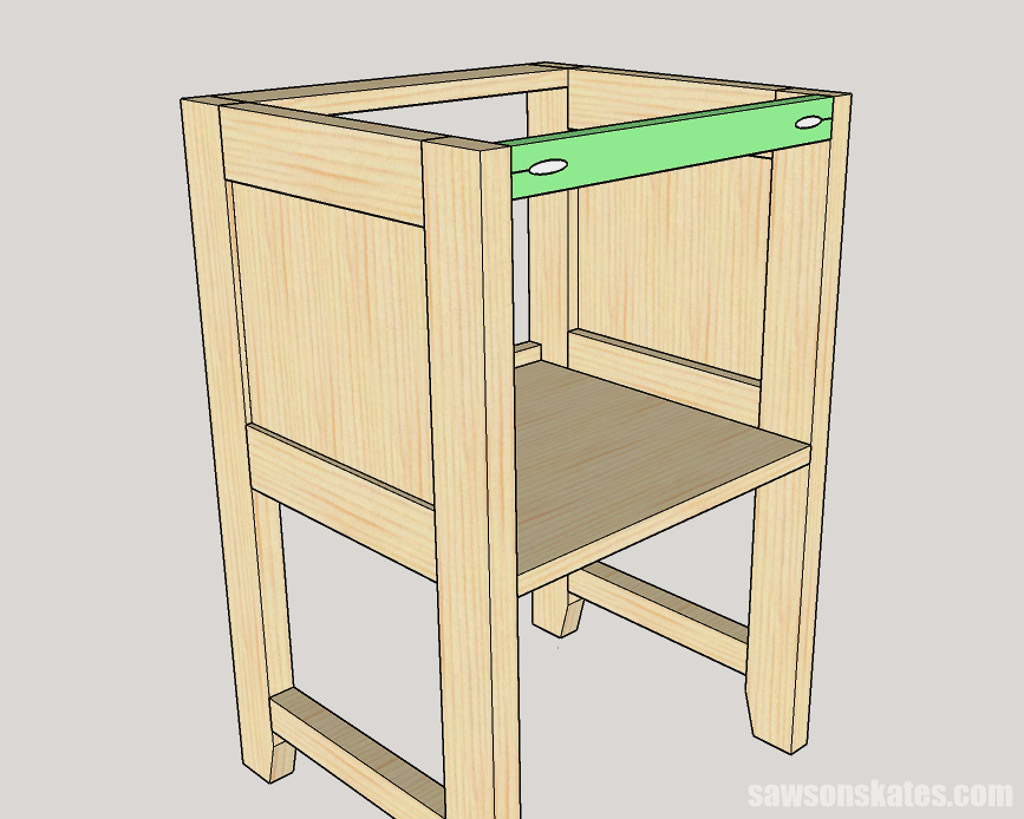
Using my miter saw, I cut one piece of wood to length for the upper rail and drilled one pocket hole in each end.
I applied glue, clamped it in position, and attached it using pocket hole screws.
Step 4. Install the Towel Shelf
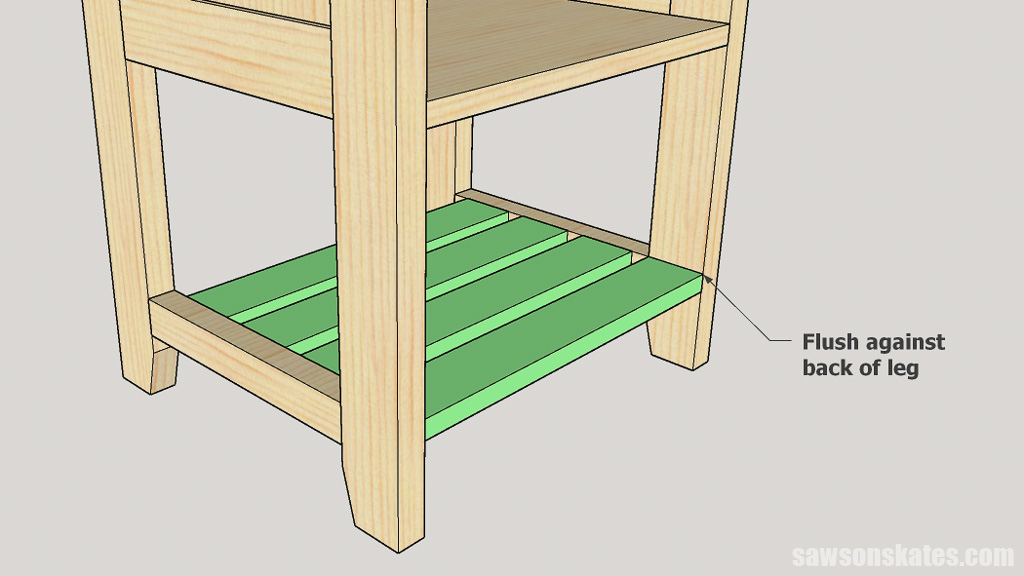
Using my miter saw, I cut four pieces of wood to length for the towel shelf slats and drilled pocket holes in each end.
To help install the back slat, I cut two pieces of scrap wood and placed them beneath the bottom. The back slat is flush against the back legs. I clamped it in position and attached it using pocket hole screws.
The remaining slats are positioned so their tops are flush with the top of the lower rails.
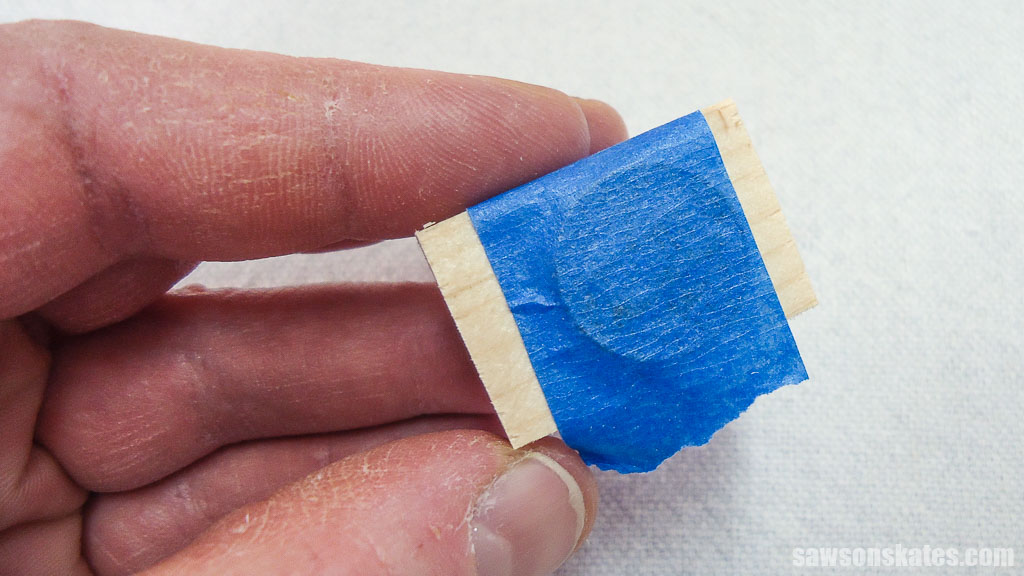
To help with the spacing, I cut a few pieces of scrap wood and attached pennies to them with painter’s tape, which equaled the spacing between the slats.
I attached the slats using pocket hole screws.
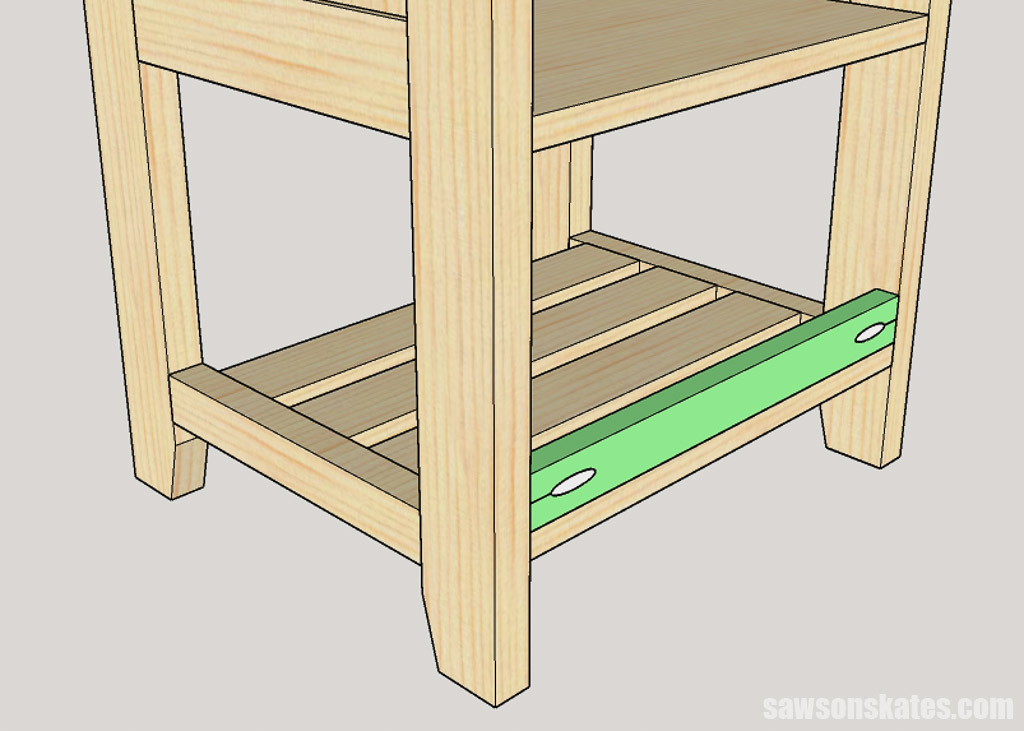
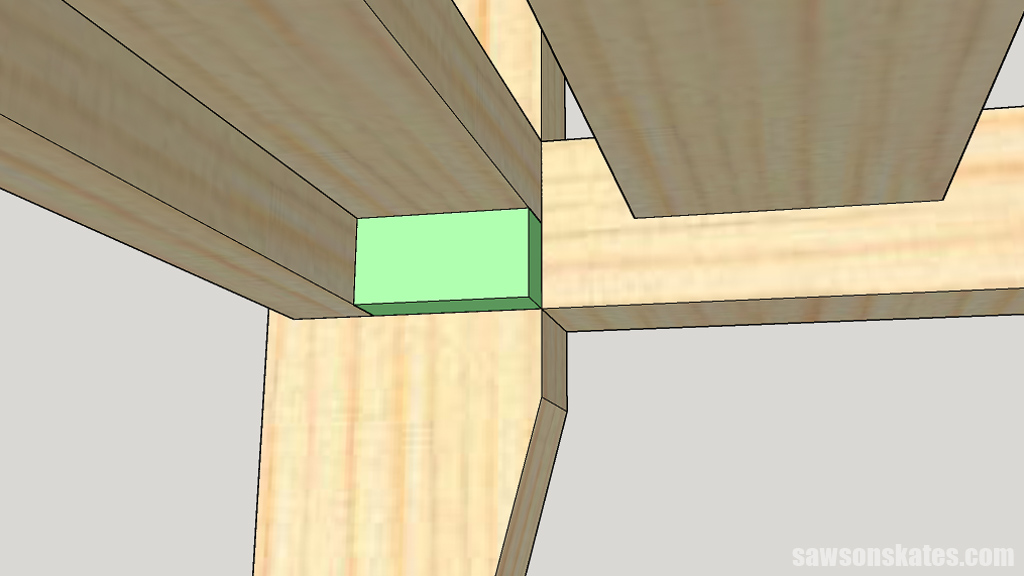
Using my miter saw, I cut one piece of wood to length and drilled one pocket hole in each end. I positioned it on the back slat and attached it using pocket hole screws.
With my miter saw, I cut two pieces of wood to length. In one piece, I drilled one pocket hole in each end. Then, I applied glue to the edge of this piece, positioned the second one, and clamped them until the glue dried.
To help position the front slat assembly, I cut two pieces of scrap wood and placed them below the front rail. I clamped the slat assembly in place and attached it using pocket hole screws.
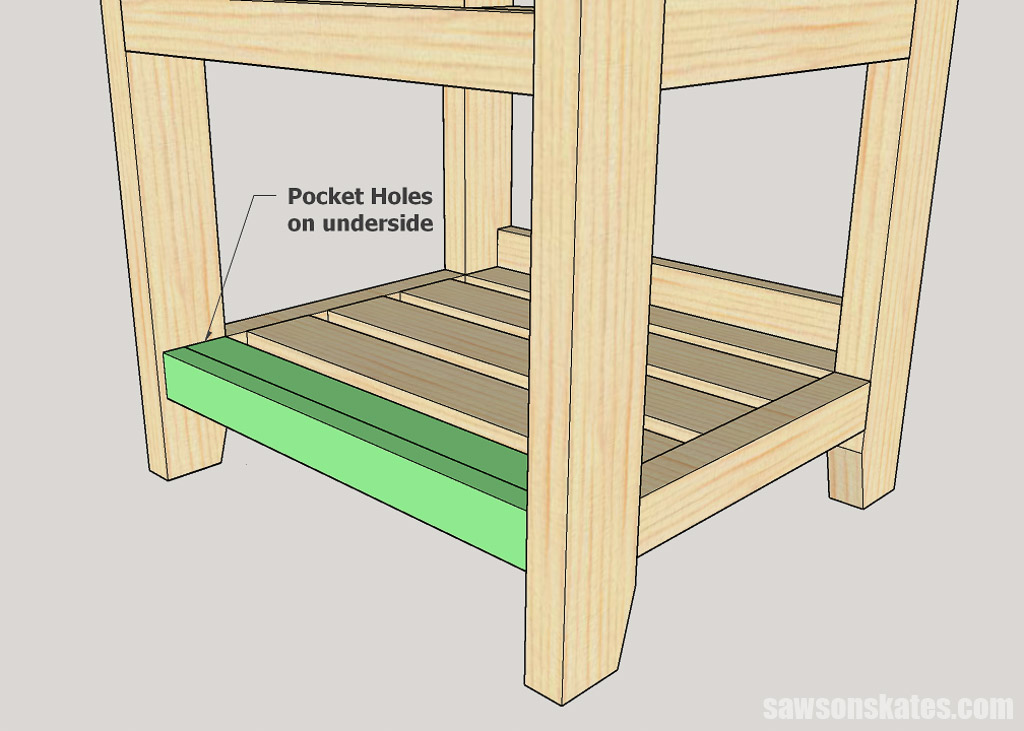
Since the front slat assembly is only attached with a single pocket hole screw on each side, it’s prone to twisting. To stabilize it, using my table saw, I cut two pieces of plywood to size.
I applied glue to the plywood, positioned it beneath the front slat assembly, and tacked it in place using brad nails.
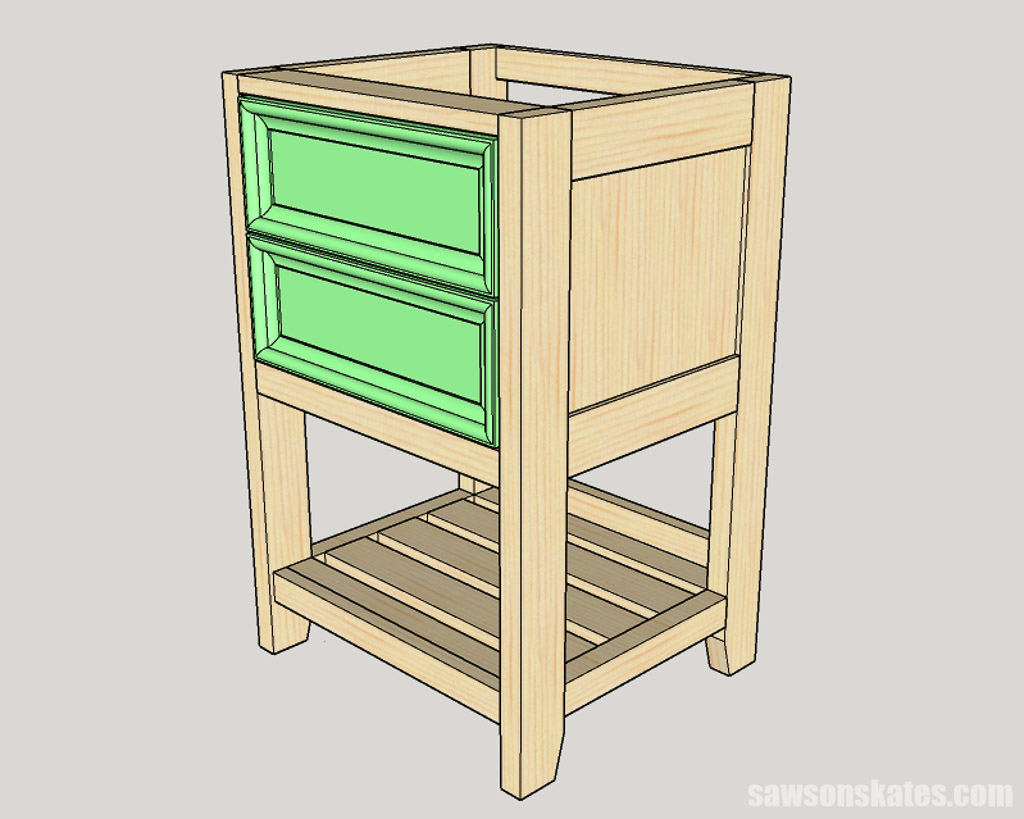
Step 5. Make the Faux Drawers
The faux drawers are mounted to a plywood door, which requires clearance to open and close properly.
To ensure a proper fit, I recommend measuring the door opening and allowing for ⅛” clearance on all sides; in other words, subtract a total of ¼” from the top-to-bottom and side-to-side measurements.
Using my table saw, I cut one piece of plywood to this dimension.
Next, with my table saw, I cut two pieces of plywood to size for the faux drawer fronts.
NOTE: I used leftover pieces of the book-matched side panels to make my drawer fronts.
I applied glue to the drawer fronts, placed them on the door panel leaving a gap between them and clamped until dry.
To complete the look, I attached decorative molding to the outside edge of each drawer using glue and pin nails. You can skip this step for a simpler look.
TIP: If you’re planning to use molding, I recommend marking and drilling for your door knobs or pulls before attaching the molding, as measuring precisely for them could be tricky afterward.

Using playing cards as spacers, I centered the door in the opening and marked the location for the hinges. Following the manufacturer’s instructions, I installed the hinges.
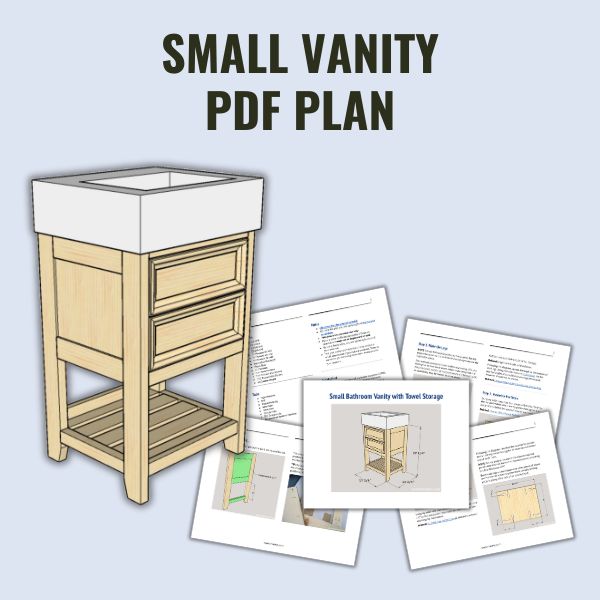
Includes:
- List of tools and materials
- Complete measurements (in inches)
- Easy-to-follow instructions
- Step-by-step photos
- Detailed diagrams
Final Thoughts
This space-saving vanity that packs a stylish punch, proves that big style doesn’t always require a big footprint.
Don’t wait. Get your PDF plan (including the detailed instructions and measurements) now!
Thank you for stopping by. If you enjoyed this tutorial, would you please take a moment and pin it to Pinterest? I’d really appreciate it!
Recommended For You
Pin This For Later

Hi there – I’m Scott, a woodworking enthusiast and creator of Saws on Skates, a site I started in 2015 to share easy-to-follow tutorials, space-saving shop tips, and project inspiration for DIYers at any skill level. Learn more about my woodworking journey here.