DIY Beeswax Wood Finish
This DIY beeswax finish is a natural way to give wood a warm glow. Beeswax polish is easy to apply, makes wood feel silky smooth, and smells good too!
Beeswax Wood Finish
This natural beeswax finish for wood is made with only two simple ingredients. Beeswax polish can be used on new topcoats, but I use it the most to give dull wood projects a warm glow. It’s easy to apply and makes wood feel silky smooth. The hint of honey makes it smell good too!
This tutorial contains affiliate links to supplies and tools. Purchases made using these links help support the Saws on Skates website and allows me to share more projects and tips with you. There is no cost to you for using these links. Visit my site policies for more information.
Before we get into how to make a beeswax wood finish, be sure to click the subscribe button at the bottom of this page to sign up for my FREE weekly newsletter loaded with helpful pocket hole tricks, space-saving workshop ideas, clever DIY tips and more!
Table of Contents
- Is Beeswax Good For Wood?
- Can You Use Beeswax to Seal Wood?
- What is a Beeswax Wood Finish?
- Why Use Beeswax to Finish Wood?
- What are the Pros and Cons of Using Beeswax for Wood?
- What Do You Need to Make Beeswax Wood Finish?
- Is Beeswax Safe for Food?
- How Do You Store the Beeswax Wood Finish?
- Where Can You Use a Beeswax Wood Finish?
- How Do You Apply the Beeswax?
- Where to Buy Beeswax Polish
- How to Make a Beeswax Wood Finish
Is Beeswax Good For Wood?
Yes, applying beeswax is a natural way to protect wood. It also gives wood a warm glow.
Back to Table of ContentsCan You Use Beeswax to Seal Wood?
Yes, we can use beeswax to seal wood. But there are a few things to keep in mind. Beeswax polish will make water bead up, so it’s resistant to spills. But it’s soft, so it doesn’t provide a lot of protection against scratches. The wax can be melted, so it’s not a heat resistant finish.
If you’re going to use the polish over an existing finish, test it in an inconspicuous area first. You’ll want to be sure it doesn’t interact with any topcoats and that it gives you the look you want.
Don’t use beeswax polish if you plan to do another finish over the top. The wax will repel other finishes and they won’t stick to your project.
I use beeswax polish the most to refresh an old, dull finish. It works best if the finish is intact (not flaking or peeling) and it just needs a little TLC.
We can also use beeswax wood polish on a new finish. In this case, we need to wait for the finish to cure before applying the wax. How long should we wait? I’ve heard everything from 2-3 days for oil-based finishes to 1-2 weeks for water-based finishes.
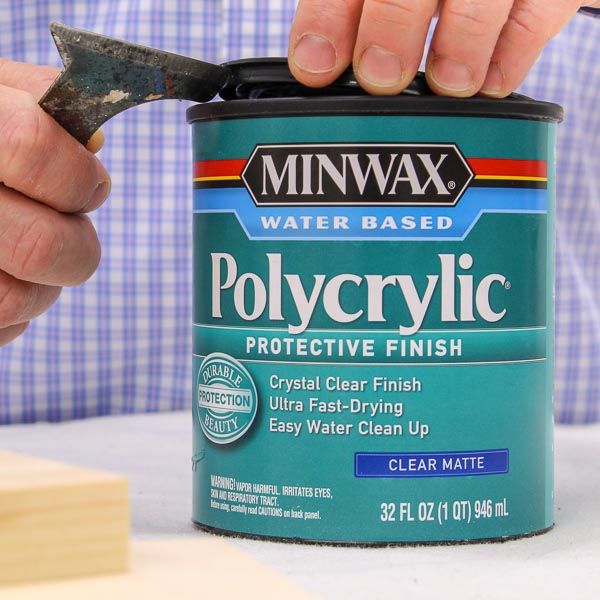
Related: Polycrylic vs Polyurethane: Are They The Same?
I would follow the instructions for your finish. If it says to wait 24 hours before “normal use”, then I would wait at least that long (if not longer) before applying wax. Then test the beeswax in an inconspicuous area first to be sure it doesn’t interact with your topcoat.
Back to Table of ContentsWhat is a Beeswax Wood Finish?
A beeswax wood finish or wood polish is a combination of beeswax and oil. An oil like coconut oil, olive oil, jojoba oil, walnut oil, etc. The wax and oil mixture is applied to the wood with a clean rag.
Back to Table of ContentsWhy Use Beeswax to Finish Wood?
There are several reasons to use beeswax wood polish. First, it’s a natural way to protect and polish wood. Second, it repels water and dust. Third, it enhances wood tones. Fourth, it smells good!
Related: Why I Switched to This Natural Polyurethane Alternative
Back to Table of ContentsWhat are the Pros and Cons of Using Beeswax for Wood?
Treating wood with beeswax has several benefits, but there are also some downsides. It’s important to understand both the pros and cons before deciding whether or not it’s right for your project.
Advantages of Beeswax Finish
- Natural
Natural substance that has been used for thousands of years to protect and enhance wood. It’s an excellent choice for sealing handmade wooden toys for kids.
- Earth-Friendly
More environmentally friendly than many other types of wood finishes. It’s biodegradable and doesn’t contain toxic chemicals.
- Easy to Apply (and Reapply)
You can simply wipe it on with a clean cloth or rag. Unlike many finishes that need to be sanded between coats, you don’t need to do any prep work before reapplying.
- Nourishes Wood
Great for conditioning and nourishing wood, preventing it from drying out and cracking.
- Adds Shine
Adds a beautiful natural shine to wood that other finishes simply can’t match. It gives wood a warm, rich luster that will improve the appearance of any furniture or wooden objects in your home.
- Some are Food-Safe
It’s good to know that some types are considered food-safe that may be used on wooden utensils, cutting boards, or other wooden items meant for preparing food. Be sure to look for beeswax specifically labeled as food-grade or food-safe.
Disadvantages of Beeswax Finish
- Not Durable
The main downside is that it’s not very durable, and it won’t stand up to heavy wear and tear. Other finishes, such as polyurethane, will last longer and provide more protection against scratches, moisture, and high temperatures.
- Requires Regular Maintenance
Unlike other finishes that can last for years before needing to be redone, it will need to be reapplied regularly to maintain its protective coating. This can make it less appealing for some projects.
- Reapplying Causes Build-Up
It can build up over time if you apply it frequently, leaving the wood looking dull. It may be removed, but it’s a bit of a hassle.
- Can’t Apply a Different Finish Over It
If you apply it and then later decide you want to put a different finish on top of it, you will have to remove the wax first because other finishes won’t stick to it.
- Difficult to Remove
It can be difficult to remove if you decide to go with a different top coat. One way is to use heat to melt the wax and then wipe it away with a clean cloth. You can also use a chemical solvent such as mineral spirits or paint thinners.
- Not Heat Resistant
It’s not a good choice for finishing objects that will be near a heat source or will come into contact with high heat since it melts around 145 degrees Fahrenheit.
What Do You Need to Make Beeswax Wood Finish?
It’s easy to make beeswax wood polish. We only need a few things like beeswax, oil, something to melt the wax in, and a container to store it in.
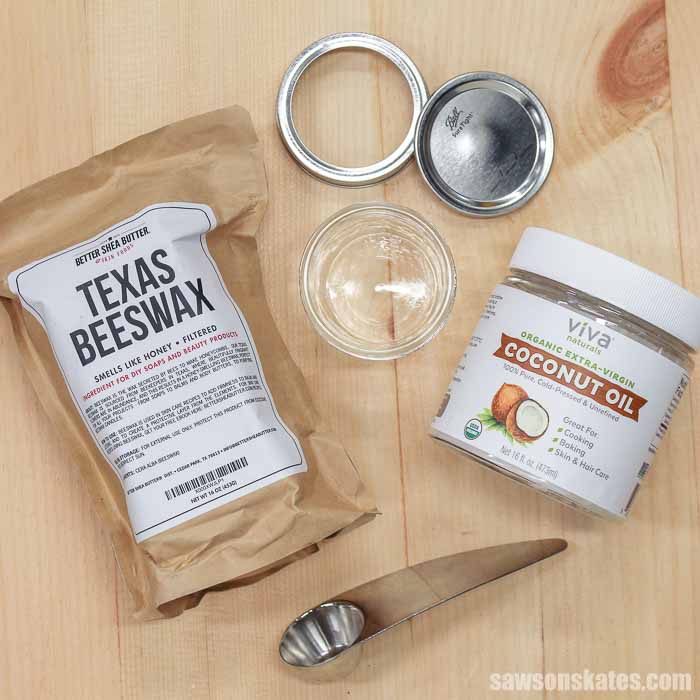
Beeswax
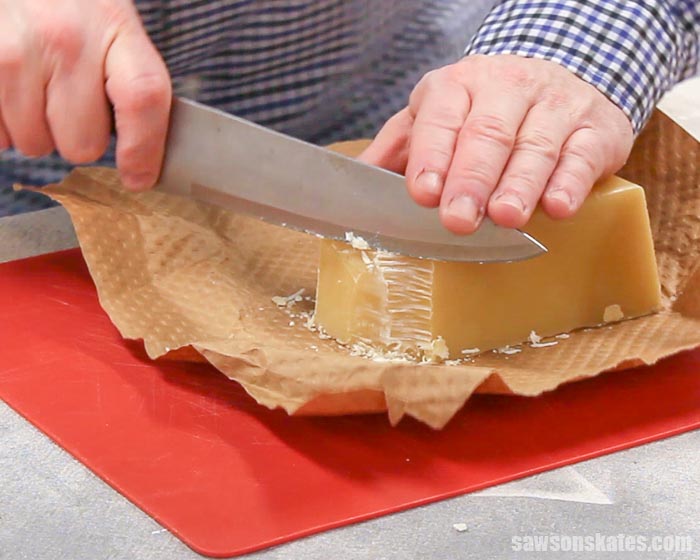
The first thing we’ll need is beeswax. I bought a beeswax block to make my wood polish. The one drawback with the block is that it needs to be cut. Beeswax is deceivingly hard. You could also use beeswax pellets like these instead.
I bought this beeswax block online and had it sent to my home. You can also look for beeswax locally at farmer’s markets.
I should also mention a block of beeswax is a lot of wax, so you’ll have extra. You could make some containers of beeswax for your DIY friends or make some candles.
Oil
The second thing we’ll need is oil like olive oil, coconut oil, jojoba oil, walnut oil, etc. I had coconut oil on hand so that’s what I used to make my batch of polish.
The color of the oil will affect the color of the polish. Coconut oil will make the wax color appear lighter. Olive oil will give the polish a greenish color.
It’s important to mention that oils like coconut oil, olive oil, walnut oil, etc. can go rancid over time.
We can also use mineral oil. Mineral oil is petroleum-based and won’t go rancid. This mineral oil is food safe. It’s designed to be used on wood cutting boards and wood utensils.
Melt the Wax
We’ll need a way to melt the wax. We can either melt the wax in a double boiler or microwave. I don’t have a double boiler so I melted my wax in the microwave inside a microwave-safe container.
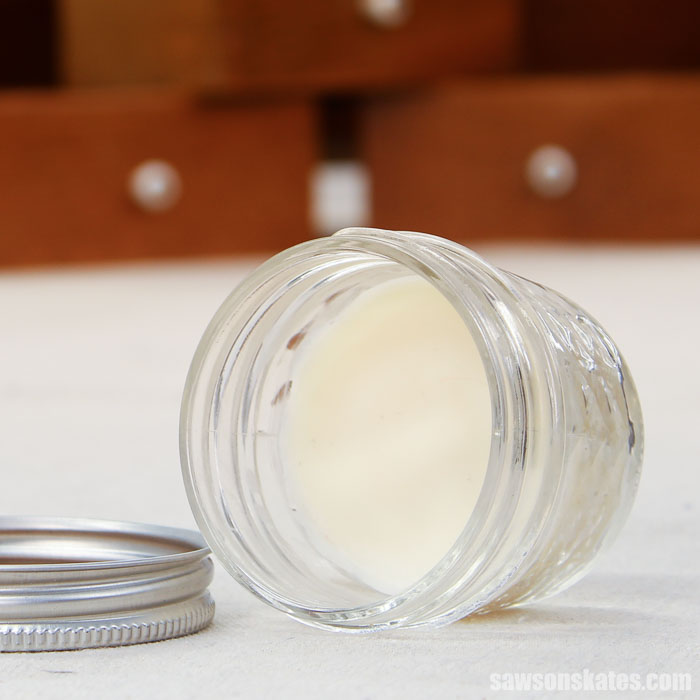
Container to Store the Wood Polish
We’ll need a way to store the wood polish. These little 4 oz mason jars work perfectly for storing the wax. They have a wide mouth and are shallow, so it makes it easy to access the polish.
Back to Table of ContentsIs Beeswax Safe for Food?
A beeswax wood finish can be safe for food if you use food-safe beeswax.
Many beeswax blocks I found online were for cosmetic use only. This means they are safe for external use but not safe to be ingested. Check your local farmer’s market for food-safe beeswax.
Another thing to keep in mind is allergies. People can be allergic to beeswax and the oils used to mix with the wax.
How Do You Store the Beeswax Wood Finish?
We should store our wood polish in an airtight container. I stored mine in a little mason jar like this.
The shelf life of the polish is 1-2 years. This time will depend on what type of oil used to make the polish.
We should keep it away from direct sunlight and in a cool spot. Storing the polish in the refrigerator will help make it last longer.
Back to Table of ContentsWhere Can You Use a Beeswax Wood Finish?
- Apply over other finishes
- Refresh an old, dull finish
- Picture frames and home decor pieces
- Wood toys (be sure to use food-safe beeswax)
- Butcher Blocks (be sure to use food-safe beeswax)
A word of caution when using wax on open grain woods like oak. The wax could get trapped in these deep grain patterns. The wax in the grain could be difficult or nearly impossible to remove. Over time the wax in the grain could develop a whitish color and give the piece an odd look.
Beeswax polish would be best for closed-grain woods like pine, maple, cherry, hickory, etc.
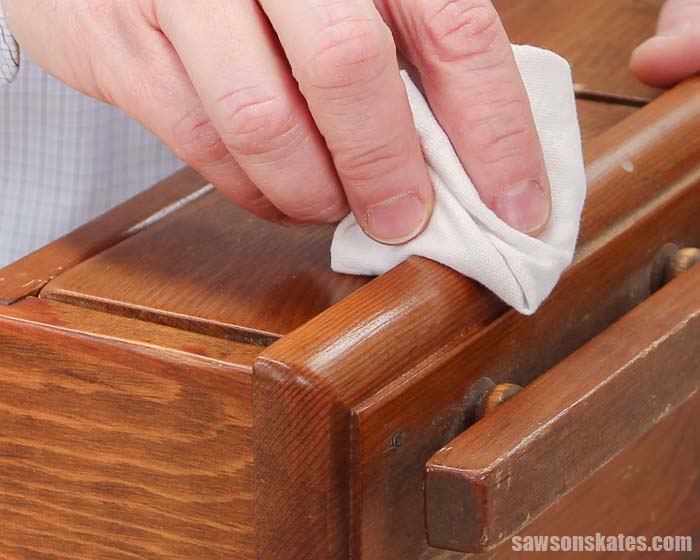
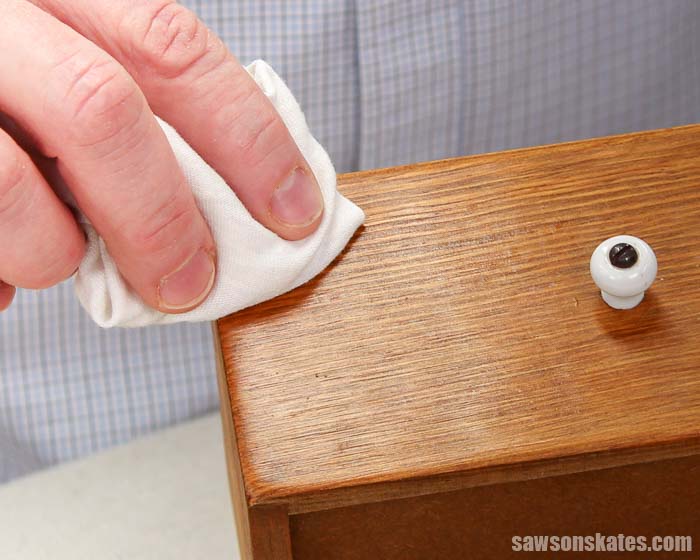
How Do You Apply the Beeswax?
The wood polish is easy to apply with a clean rag (I applied mine with an old t-shirt). Here’s a tip. Do not apply the wax in a circular motion.
Can I rant for a minute? Have you ever waxed your car? The instructions say “apply in a circular motion”. Then when you see the car in the sunlight you can see swirl marks.
Then that same wax company sells you a “swirl mark remover” to remove the marks you made by applying the wax in a circular motion. Don’t do it!
Apply the wax to your car and your wood projects in a back and forth motion NOT in a circular motion. You know what happens when you apply the wax in a back and forth motion? You won’t get swirl marks! Rant over.
After we apply the wax in a back and forth motion, we’ll allow it to dry for a few seconds and buff it off with a clean rag.
The great thing is we don’t have to worry about it getting on our hands because this beeswax is cosmetic safe.
Where to Buy a Beeswax Wood Polish
Store-bought beeswax polishes are available if you don’t have the ingredients or time to make your own. Here are a few options you can buy online and have sent to your home.
Back to Table of ContentsHow to Make a Beeswax Wood Finish
Supplies
- Beeswax (I used this one)
- Olive Oil, Coconut Oil, Jojoba Oil, Walnut Oil, Mineral Oil, etc. (I used this oil
- Measuring Spoons
- Bamboo Skewer
- 4 oz mason jars
Tools
- Knife
- Cutting Board
- Double Boiler or Microwave
- Microwave Safe Container
I used a ratio of 3 parts oil to 1 part beeswax. To make a softer wax, use 4 parts oil to 1 part beeswax. To make a harder wax, use 2 parts oil to 1 part beeswax. Also, if you have a food scale, you can weigh the wax and oil then melt them at the same time.
Step 1. Cut the Wax
I used this beeswax block to make my wood polish. I started by cutting some wax off the block. You can skip this step if you use these beeswax pellets.
Step 2. Melt the Oil
We’ll need to melt (or warm) the oil depending on which one we use. In the next step, we’re going to melt the wax. The oil and wax need to be about the same temperature so they mix easily.
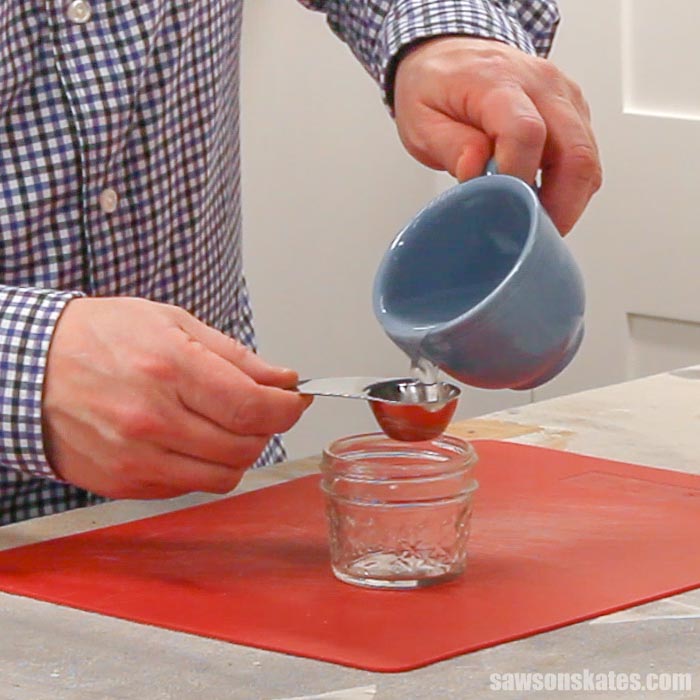
I used this coconut oil to make my wood polish. I scooped out about 3-4 tablespoons of oil into a microwave-safe container. I melted the oil in the microwave at 50% power for about 1 minute. This time will vary for each microwave.
When the oil was melted I measured 3 tablespoons and poured it into a mason jar .
Step 3. Melt the Wax
The wax needs to be melted so it can be mixed with the oil. Please be careful. Beeswax is flammable.
The wax can be melted in a double boiler or a microwave. I melted my wax in the microwave. I placed about 1-2 tablespoons of wax in the same microwave-safe container I used to melt the oil.
I melted the wax in the microwave at 50% power for about 2-3 minutes. I used a skewer to stir the wax and melted for another minute at 50% power. Times will vary for each microwave.
Please be careful. The container and wax will be very hot.
Step 4. Mix the Oil and Wax
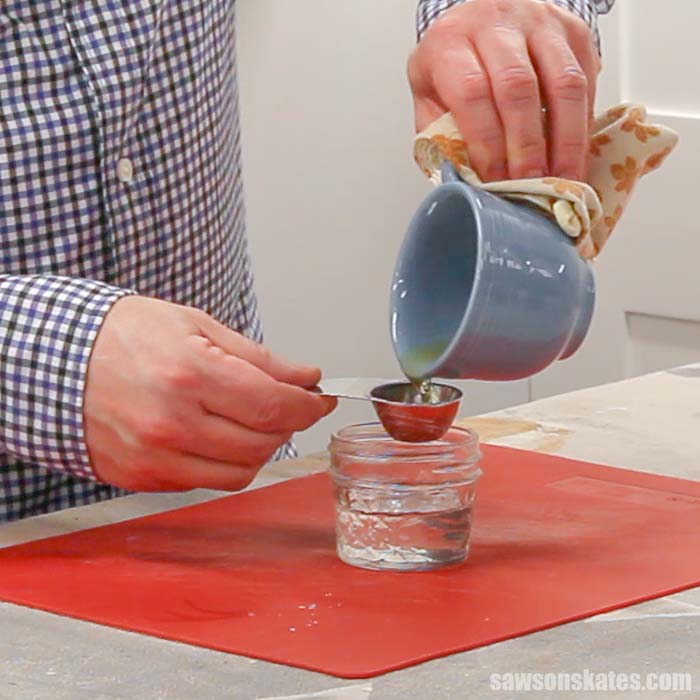
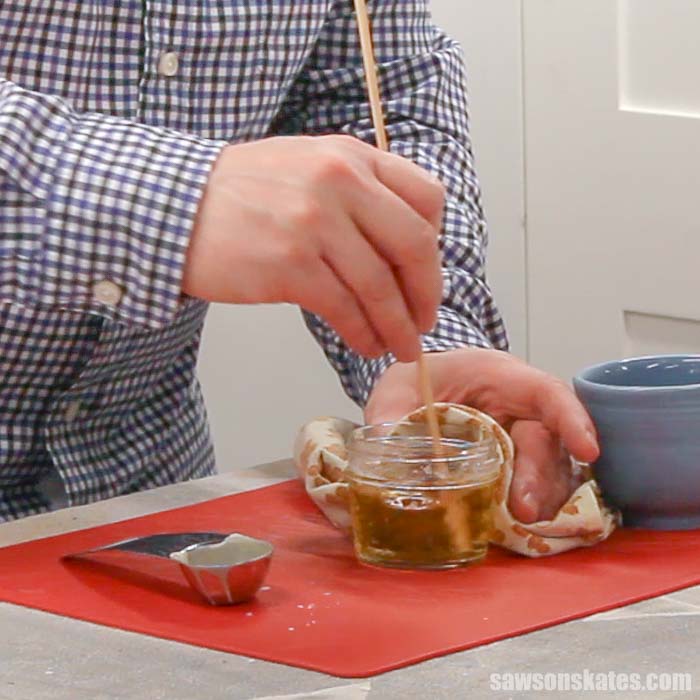
When the wax was melted I carefully measured 1 tablespoon and poured it into the oil. I used a skewer to mix wax into the oil.
The oil was cooler than the wax so the mixture got a little chunky. I microwaved the mixture at 50% power for 30 seconds to a 1 minute. I removed the container from the microwave and used the skewer to fully combine the oil and wax.
Step 5. Apply the Beeswax Wood Polish
Apply the wax with a clean rag using back and forth motion. Allow the wax to dry for a few seconds and buff it off with a clean rag.
Final Thoughts
Make your own natural beeswax finish for wood with only two simple ingredients. Beeswax polish can be used on new topcoats, but I use it the most to give dull wood projects a warm glow. It’s easy to apply and makes wood feel silky smooth. The hint of honey makes it smell good too!
Thank you for stopping by. If you enjoyed this tutorial, would you please take a moment and pin it to Pinterest? I’d really appreciate it!
Recommended For You

Pin This For Later

Hi there – I’m Scott, a woodworking enthusiast and creator of Saws on Skates, a site I started in 2015 to share easy-to-follow tutorials, space-saving shop tips, and project inspiration for DIYers at any skill level. Learn more about my woodworking journey here.
Hello, I have been making this type of wood finish for many years now and I have a suggestion, first get good beeswax preferably local they are usually the best and you know everything that’s in there, I also use mineral instead of plant based oils. It does cost a little more but both beeswax and mineral oil never dry out and also never go rancid. Look up homemade food grade board butter or board wax there will be many recipes, it’s approximately 1 part beeswax 2 parts mineral oil you can always remelt and adjust ingredients to get the consistency you want, the recipe may alter slightly based on the dryness of your beeswax often store bought is a little softer than local but often does not, as you stated, have that awesome honey smell!
thanks for the great posts!
Hi Darrin – Thank you so much for all of this info and the reminder. Yes, you’re right. You can use mineral oil instead of coconut oil, olive oil, etc. I forgot to include mineral oil on the list. I’ll add it now.
Bees wax is awesome stuff. Food oils do go rancid after time. Have you tried Mineral oil instead of the nut or olive oils? Mineral oil is also food grade. It is edible (safe as a laxative). It is also food-safe and won’t go rancid or support microorganisms, often used on cutting boards and wooden utensils. It is not intended as a cooking oil. Just a thought.
Hi Lexie – Thank you for your note and the reminder. Yes, you’re right. You can use mineral oil instead of coconut oil, olive oil, etc. I forgot to include mineral oil on the list. I’ll update it now.
A few drops of an essential such as lemongrass oil gives the polish a wonderful smell
Hi Peter – That’s a great idea. Thank you for the tip!
Scott, I use salsa jars after using the salsa. They are an ideal size and you don’t have to buy them especially for the job.
That’s a great suggestion, Peter!