DIY Wall-Mounted Spice Cabinet (Easy & Rustic)
Tired of messy spice jars? Get organized while adding rustic charm to your kitchen with this easy-to-make DIY wall-mounted spice cabinet.
What Should I Build Next?
That's the question I help answer.
Every week, I send woodworking ideas to 17,000 DIYers who love building things.
You'd fit right in.
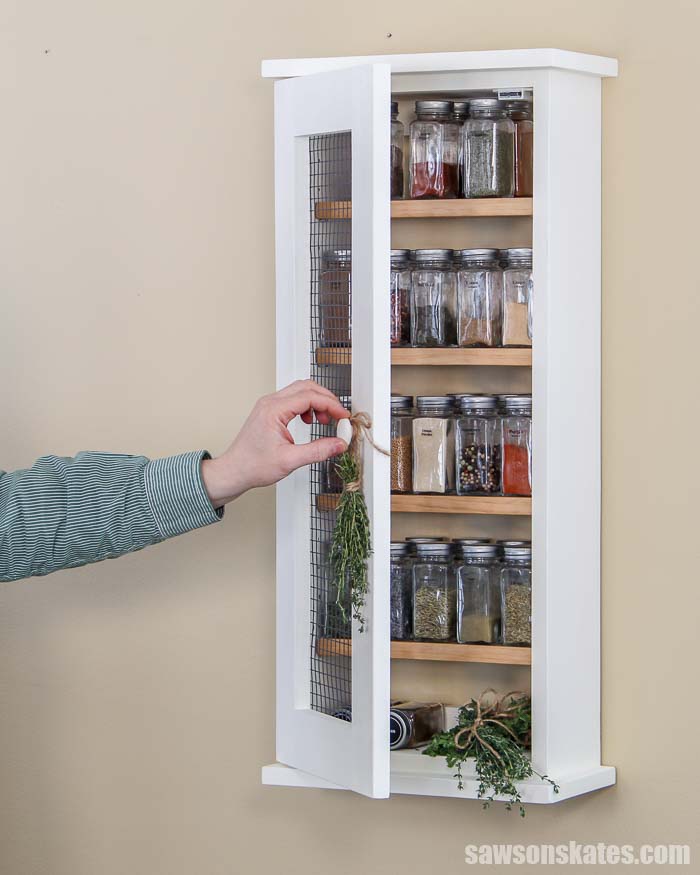
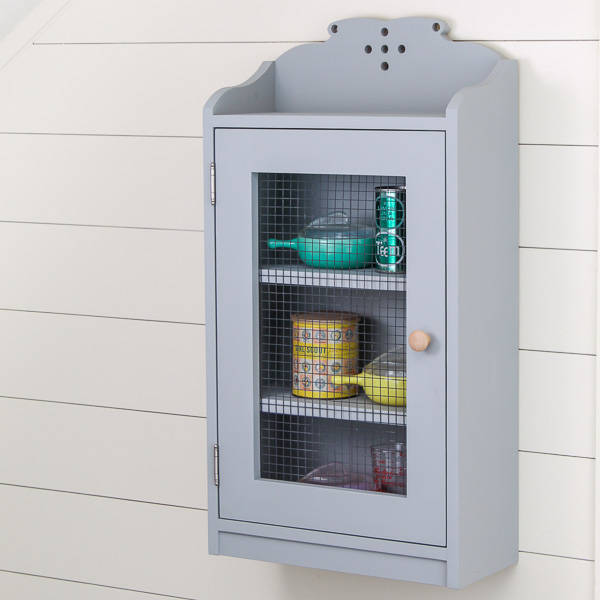
Get your spices organized and add style to your kitchen with this easy to make wood spice rack. This rustic wall-mounted cabinet has a chicken wire door, chalky paint exterior, and adjustable stained wood shelves. The printable plans make this a simple project for do it yourselfers of any skill level.
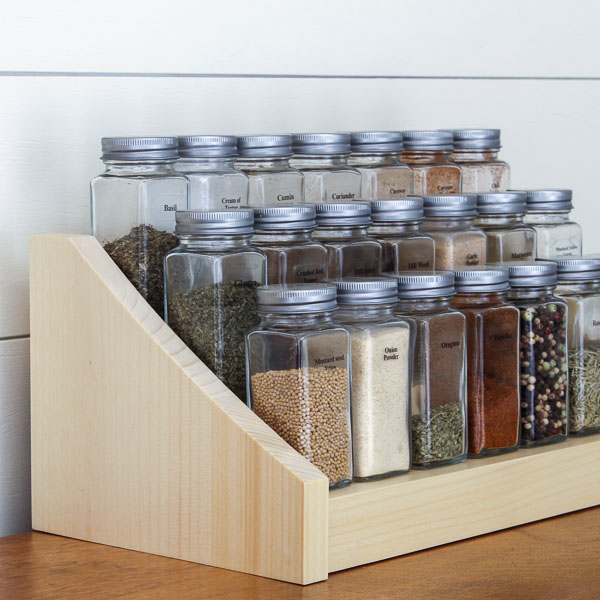
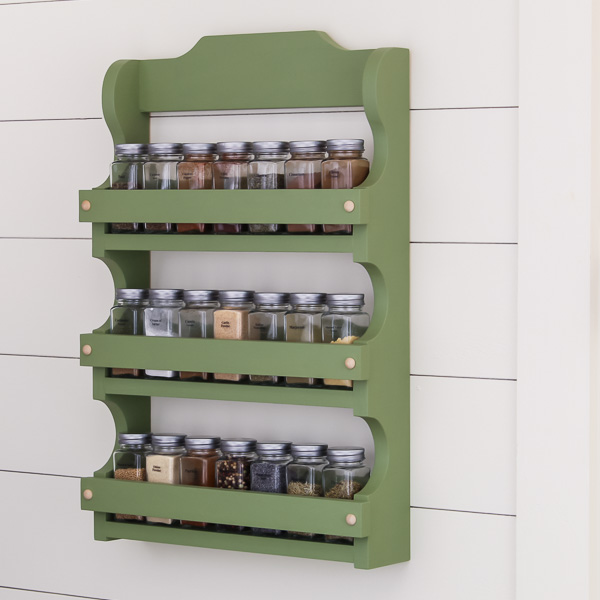
You may also enjoy this DIY Wood Spice Shelf and this DIY Tiered Spice Rack.
Table of Contents
- How Many Spice Jars Can the Cabinet Hold?
- What Tools Do You Need?
- What Wood Should You Use?
- How Do You Finish the Spice Cabinet?
- Customize Your Spice Cabinet
- How to Make a DIY Wall-Mounted Spice Cabinet
- Get the PDF Plan
This article contains affiliate links. If you purchase from these links, I may earn a small commission at no additional cost to you. Visit my site policies for more information.
How Many Spice Jars Can the Cabinet Hold?
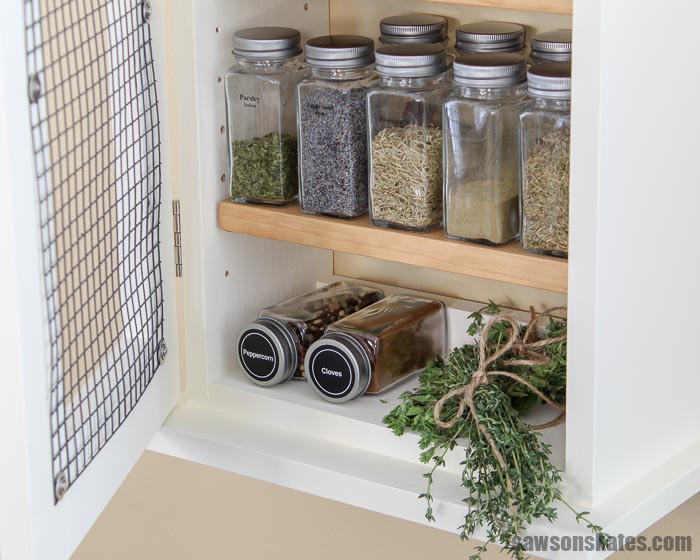
This rustic spice cabinet was designed with four shelves and holds about 36 of these jars. The cabinet can easily be customized to add more shelves to organize more spices of different shapes and sizes
What Spice Jars Did You Use for This Wall-Mounted Spice Cabinet?
I bought this pack of 36 glass jars for this project. The spice jars come with spice labels, shaker lids, metal caps, and a collapsible funnel.
What Skills Do You Need to Build This Spice Organizer?
This is an easy do it yourself project for DIYers of any skill level. It’s made with just a few basic tools which makes this a great project for beginners.
Related: 10 Must-Have Woodworking Tools for Beginners
What Tools Do You Need to Build a Spice Cabinet?
You only need a few basic tools to build this wood spice cabinet. Tools like a miter saw, pocket hole and a drill. It’s handy to have an orbital sander, but you could use a sanding block to smooth the parts instead. It’s also helpful to have an assortment of bar clamps.
You may enjoy these helpful tool tutorials:
- How to Use a Kreg Jig
- Beginner’s Guide to Using a Power Drill
- 7 Miter Saw Tricks Every DIYer Should Know
What Wood Should You Use to Make a Wall-Mounted Spice Cabinet?
This easy to build spice cabinet can be made with just about any type of wood. I used common pine to build the cabinet and shelves. Pine is inexpensive and easy to work with. I purchased the pine at my local home improvement store.
Related: Beginner’s Guide to Wood Sizes
I painted the cabinet and stained the shelves. One way to customize this project is to use a different type of wood for the shelves. Woods like cherry, oak or mahogany would look great with the painted cabinet.
How Do You Finish This DIY Spice Cabinet?
I wanted to keep this project simple so I painted the cabinet with this chalk-type paint. Unlike other types of paint, you don’t need to apply a primer to the wood before applying a chalk-type paint.
Related: How to Stop Knots From Bleeding Through Paint
I sanded the wood smooth and applied the paint with this paintbrush. Chalk-type paint dries quickly so I was able to apply two coats in just a few hours.
Related: Beginner’s Guide to Spraying Chalk-Style Paint
For the shelves, I applied a coffee stain and one coat of wax-free shellac. I followed the shellac with a couple of coats of this matte-finish water-based Polycrylic. I think the matte-finish of the shelves pairs well with the chalky paint and gives the cabinet a rustic feel.
Related: How to Stain Wood With Coffee
Where to Use This Cabinet
- Kitchen to organize spices
- Bathroom to organize toiletries
- Craft room to organize craft supplies
Customize Your Wall-Mounted Spice Cabinet
I designed this project without a back so beginners could build it without using a table saw. If you have a table saw (or circular saw) you could cut a back panel for this project. A piece of ¼” plywood or beadboard would complement the style of this cabinet.
Related: Beginner’s Guide to Table Saw Safety
If you have a router you could add a cove or ogee detail to the top and bottom. You could also add a round over detail to the front edge of the shelves.
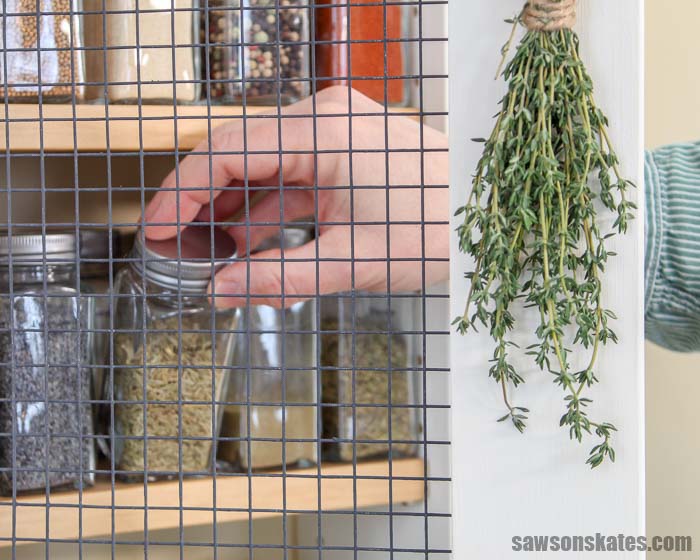
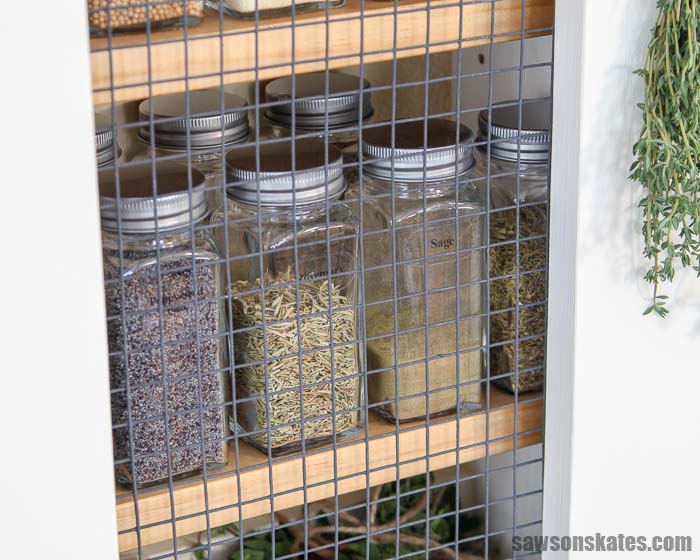
I was planning to use chicken wire for the door. I used hardware cloth instead because I had some on hand from another project. Using chicken wire instead of hardware cloth would give this project an even more rustic look. You could also make a raised panel door or glass panel door instead.
I used a small foam roller to roll a coat of this black chalk-type paint on the front and back of the hardware cloth. When I built this outdoor plant stand a few readers suggested that I paint the chicken wire black. They said it would be easier to see inside.
I tested both the bare wire and painted wire on this project. I have to agree. I think it’s easier to see inside with the black wire.
This cabinet has four shelves. You could make more shelves depending on what you need to store.
How Do You Install the Shelves?
I drilled shelf pin holes in the cabinet’s sides to allow for adjustable shelving. Shelf pins are then inserted into these holes to support the shelves.
I used shelf pins I had on hand from another project for my spice cabinet; however, wood isn’t always perfectly flat, which can cause the shelves to rock a bit on the pins. Unfortunately, this happened with my cabinet.
I recommend this type of shelf pin to prevent the shelves from wobbling. It has a hole so you can attach it to the shelf with a small screw, creating a secure fit and eliminating any rocking motion.
How Do You Hang the Spice Cabinet on the Wall?
This spice cabinet will be heavy when it’s loaded with spices. My cabinet and spice jars weighed nearly 30 pounds. So it must be securely attached to the wall.
There is a cleat at the top and bottom of the cabinet. The best way to attach the cabinet to the wall is to drive a 2-½” or 3” screw through each cleat into a wall stud.
You could also use wall anchors if there isn’t a stud where you want to hang your cabinet. If you’re going to use wall anchors you may want to consider using two at the top and two at the bottom.
An easy way to attach the spice cabinet to the wall is to use one of these heavy-duty french cleats.
Related: How to Make a French Cleat
Video: How to Make a DIY Spice Cabinet
Watch the quick video to see how to make this spice cabinet!
How to Make a DIY Wall-Mounted Spice Cabinet
Printed Plan
Get the PDF plan here (includes detailed instructions, measurements, and bonus tips)
Materials
- Wood (per the printed plan)
- 1-¼” Pocket Screws
- 1-¼” Wood Screws
- (8) #6 ¾” Wood Screws
- (8) M5 Washers (from this assortment)
- (8) M8 Washers (from this assortment)
- Wood Glue
- Hardware Cloth or Chicken Wire
- Shelf Pins
- Knob
- Decorative Hinges
- Magnetic Catch
- Spice Jars (I used these)
Tools
- Tape Measure
- Drill
- Pocket Hole Jig
- Miter Saw
- Shelf Pin Jig
- Tin Snips
- ¼” Drill Bit
- Countersink Drill Bit Set
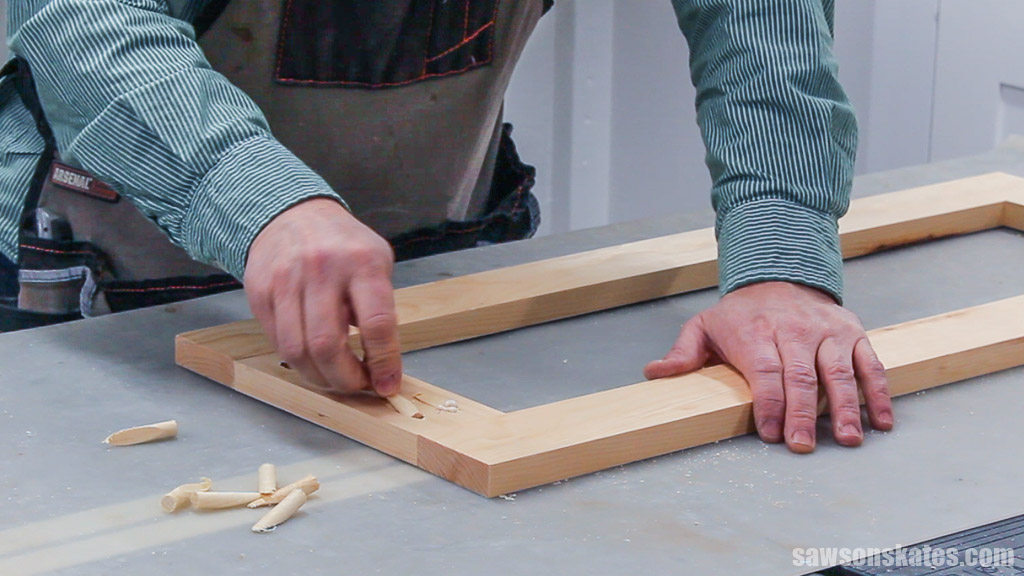
Step 1. Make the Cabinet Box
Cut two pieces of wood to length for the sides.
I used a shelf pin jig to make holes for the adjustable shelves, setting it to drill them 1″ from the board’s edge.
TIP: To ensure your shelf pin holes are level front to back and side to side, mark one end of each board as “Bottom” and begin drilling the holes at this end.
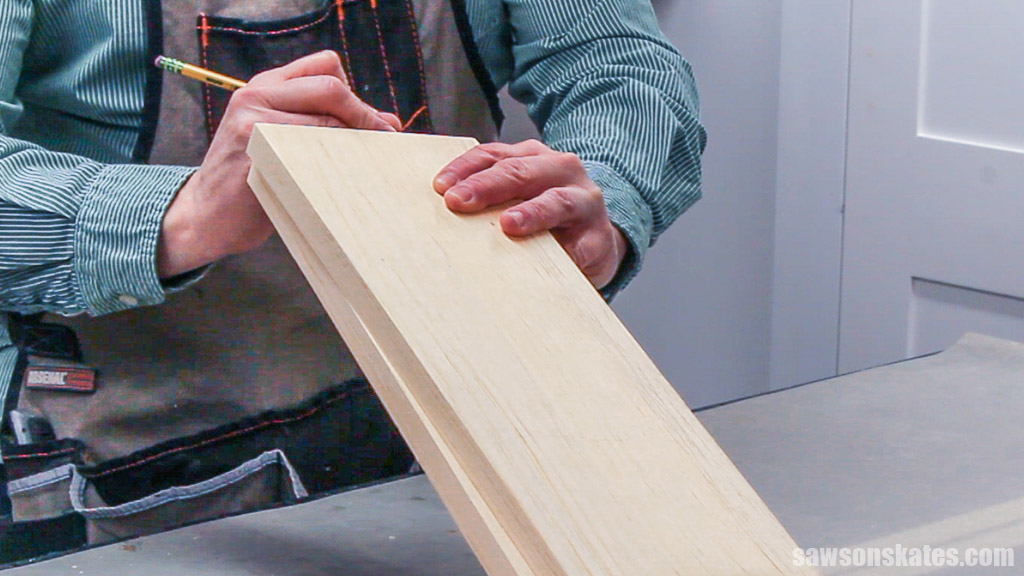
To position the shelf pin jig, clamp a scrap piece of scrap wood to the workpiece’s top and bottom, then clamp the jig to the end marked “Bottom.”
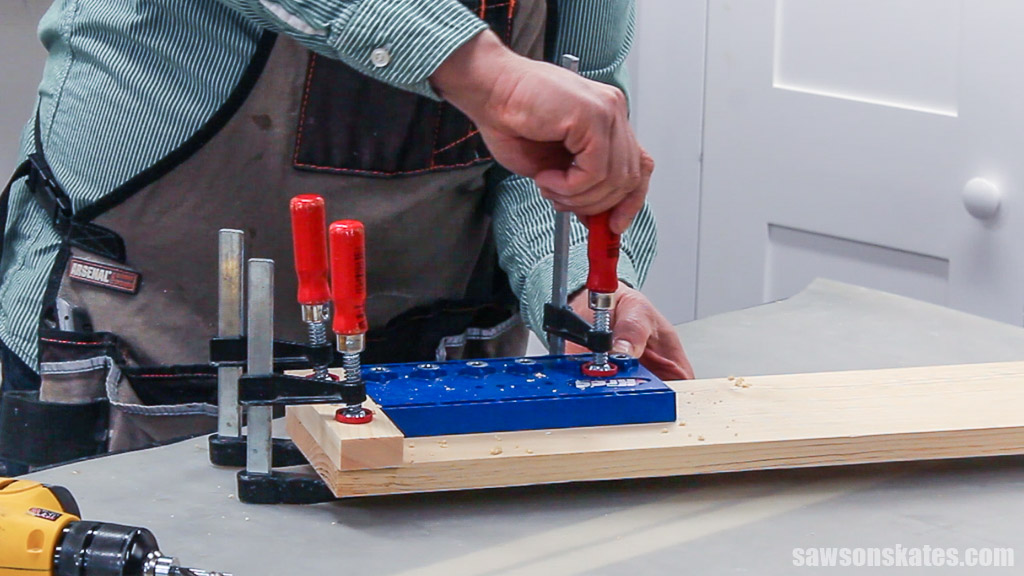
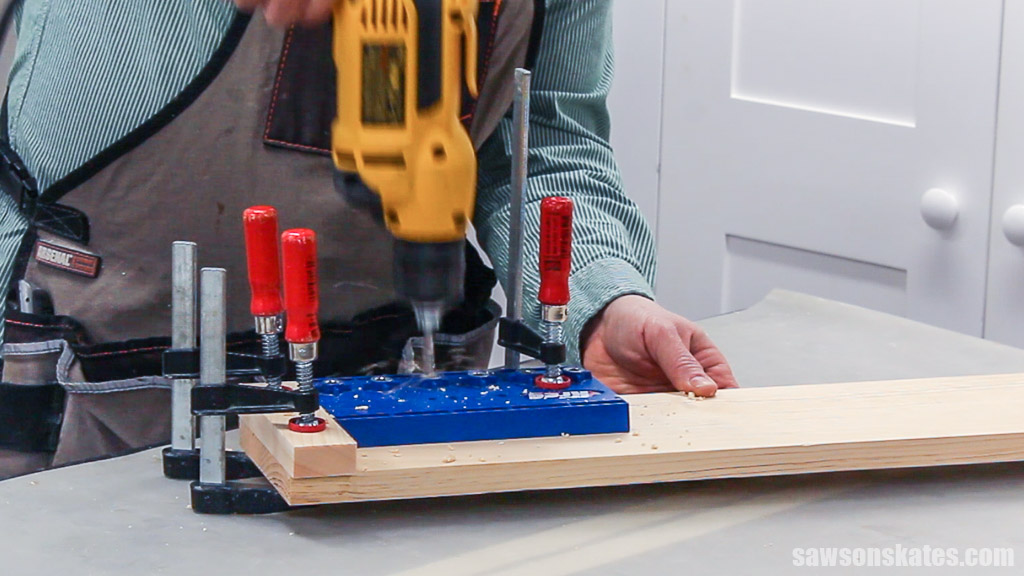
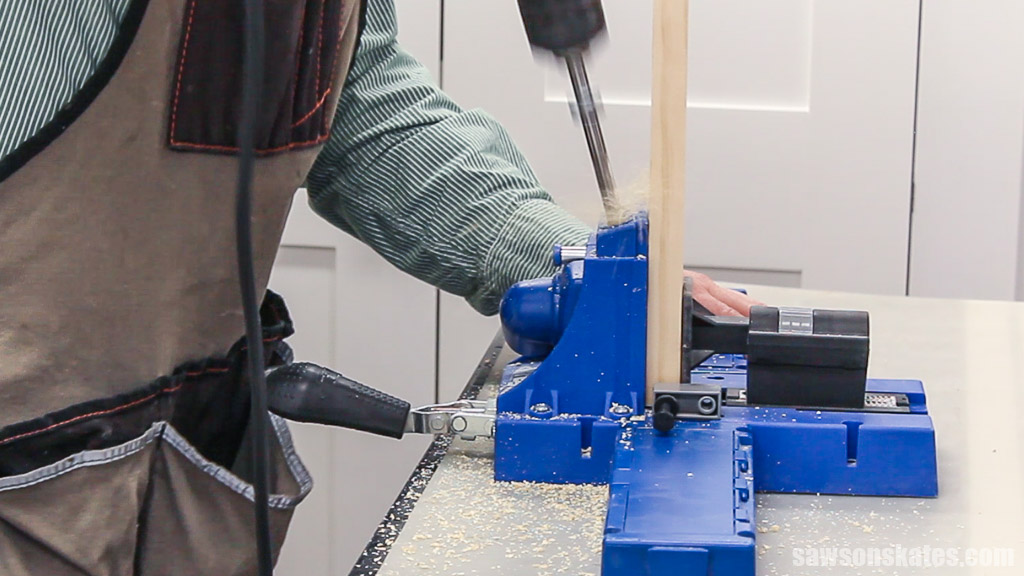
Then, drill shelf pin holes along each edge. Repeat these steps for the second side.
Related: How to Make Adjustable Shelves with a Shelf Pin Jig
Cut two pieces of wood to length for the box’s top and bottom. Set your pocket hole jig and drill pocket holes in each end.
Related: How to Use Pocket Hole Jig (Beginner Pitfalls to Avoid)
Next, label one piece “Top.”
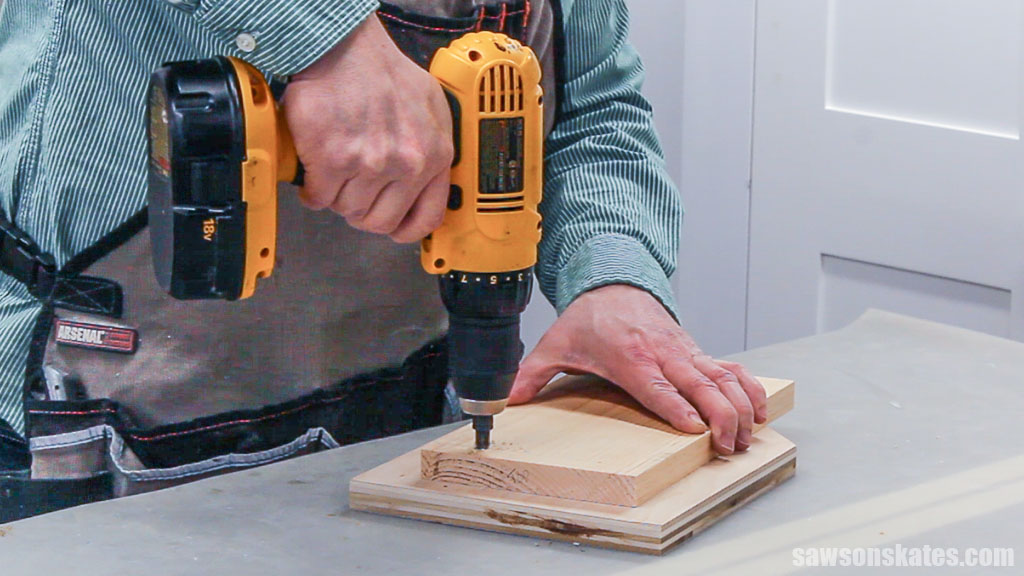
On the top piece only, use the diagram in the printed plan to lay out the locations for countersink holes on the opposite side of the pocket holes.
Use an awl to make a starting point for the drill bit.
Related: What is an Awl? (& How to Use It)
Next, drill countersink countersink holes at each mark.
Related: How to Use a Countersink Bit
Arrange the parts with the “Bottom” labels facing the same direction and the “Top” opposite them.
Apply glue to the ends of the top and bottom and clamp to the sides. Attach using pocket hole screws.
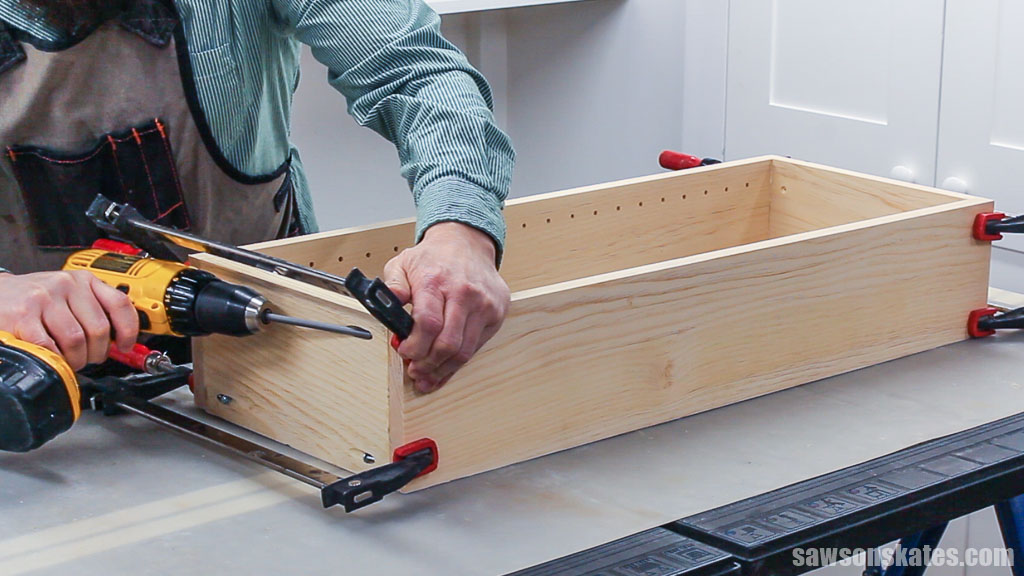
Cut two pieces of wood to length for the cleats and drill pocket holes in each end.
Apply glue to the ends of the cleats, position them in the box, and clamp to the sides. Attach using pocket hole screws.
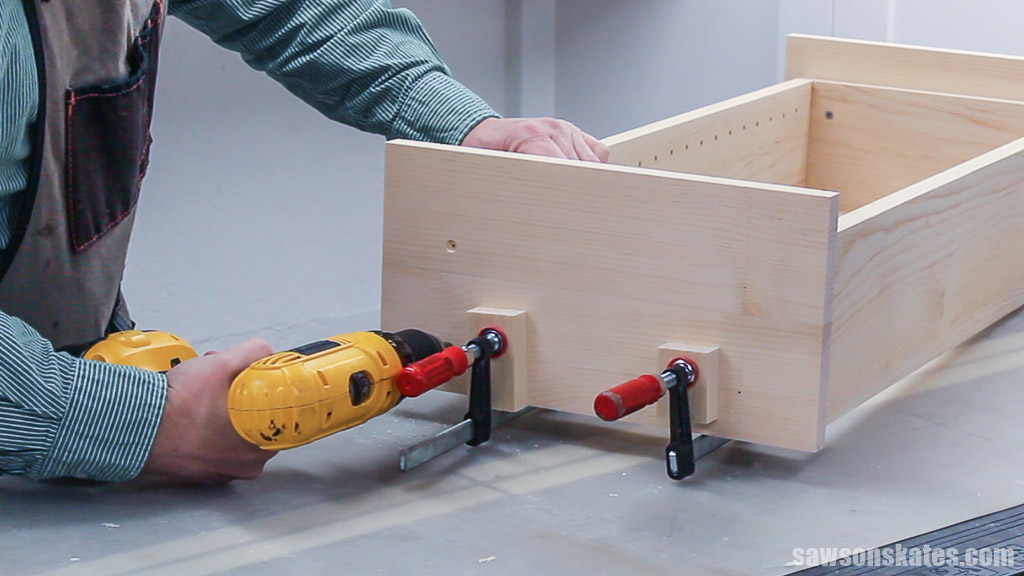
Step 2. Attach the Top and Bottom
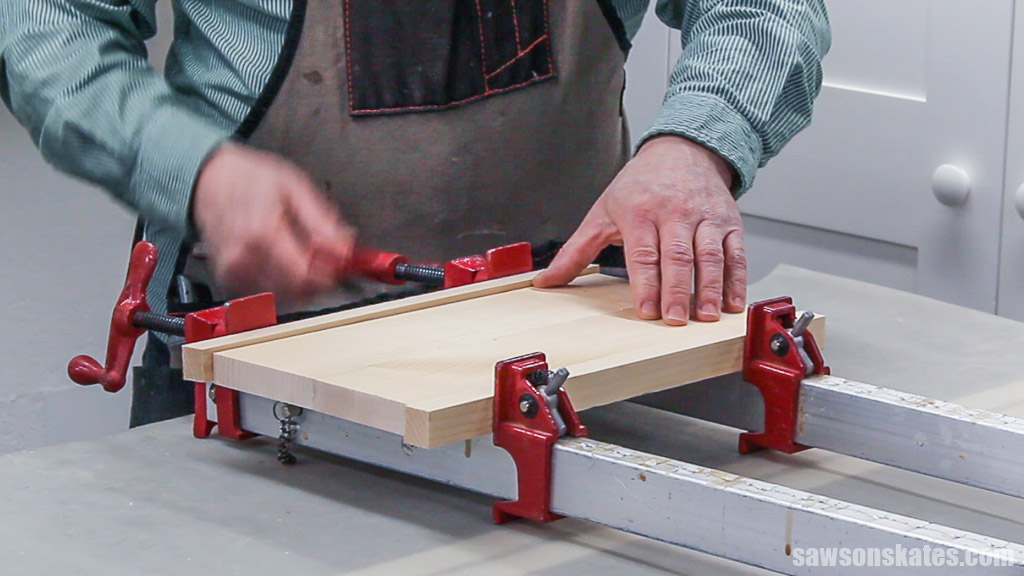
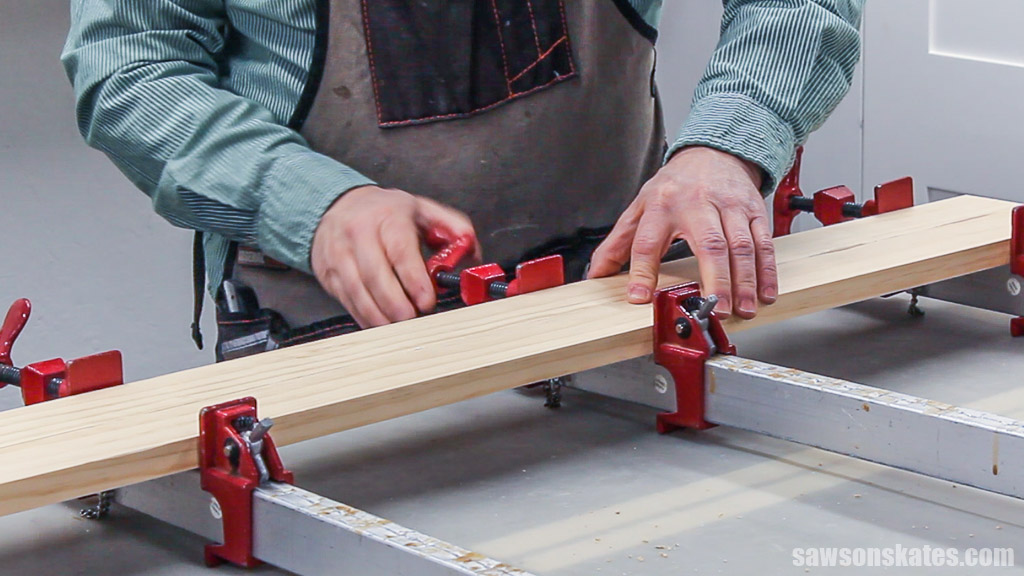
Cut four pieces of wood to length. Apply to the edge and clamp to form a panel. Repeat for the second panel.
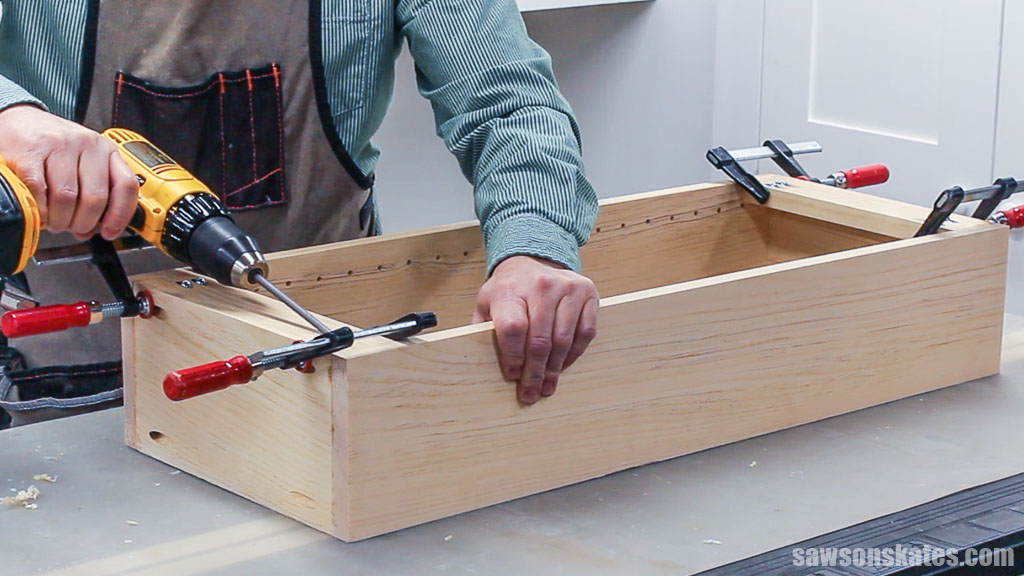
Place one piece on the top of the cabinet, flush with the back, and center it from side to side.
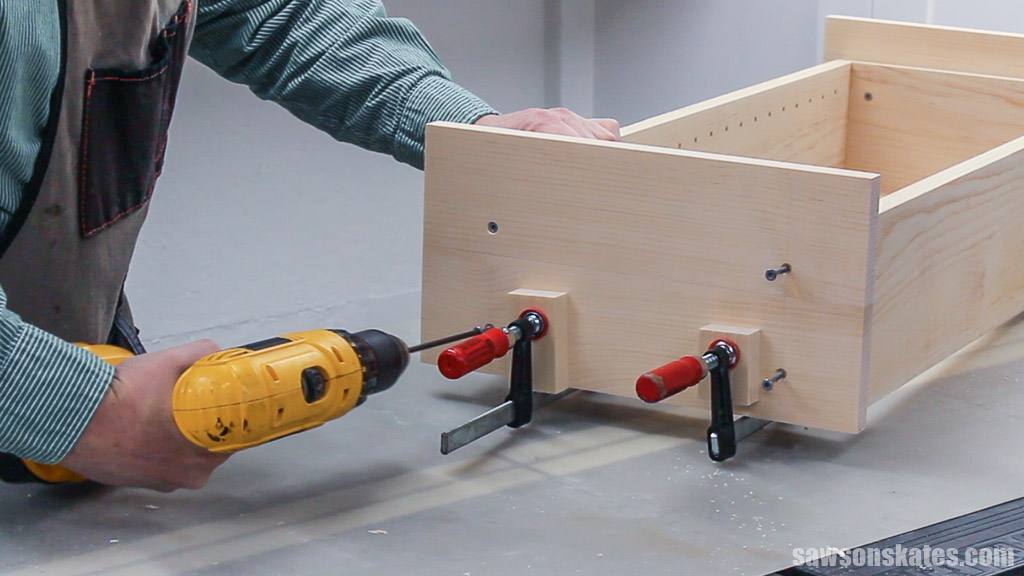
Clamp and attach using wood screws through the countersink holes you drilled in Step 1.

Place the second piece on the cabinet’s bottom, flush with the back, and center it from side to side. Clamp in position and use the diagram in the printed plan to mark the location for countersink holes.
Use an awl to make a starting point for the bit and drill a countersink hole at each mark.
Then attach the bottom using wood screws.
Step 3. Make the Shelves
Cut two pieces of wood to length. Apply glue to the edge and clamp to form a panel.
You’ll need a small amount of clearance to ensure the shelves slide in easily. Aim for about ¹/₁₆” on each side ⅛” total). Here’s how to get the perfect shelf size:
- Measure your cabinet’s inside width.
- Subtract ⅛” from that measurement, accounting for your desired total clearance.
- Cut your four shelves to this length.
Step 4. Make the Door
The door needs clearance to operate smoothly. You’ll want an ⅛” on the top and bottom for a total of a ¼”. Here’s how to determine your cabinet’s door height:
- Measure your cabinet’s inside height.
- Subtract ¼” from that measurement, accounting for the total clearance you want at the top and bottom.
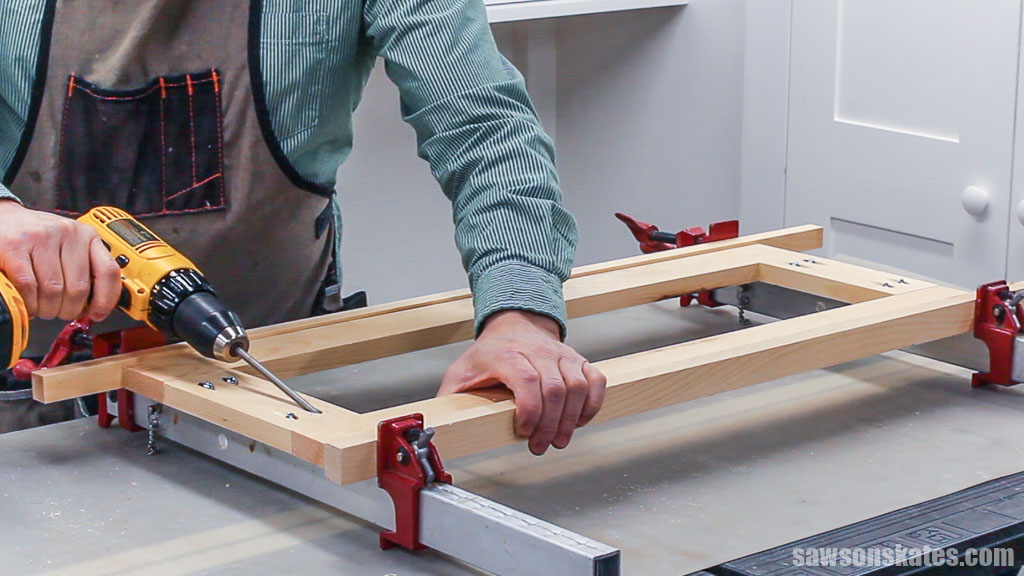
Cut two pieces of wood to length for the stiles (vertical side pieces). Cut two pieces of wood to length for the rails and drill pocket holes in each end.
Apply glue to the rails, clamp to the stiles, and attach using pocket screws.
For a professional-looking finish, I filled the pocket holes with pocket hole plugs. I applied glue to the pocket holes and pressed a plug into each one. After the glue dried, I used an orbital sander to smooth them.
Related: How to Make Pocket Hole Plugs (Step-by-Step Guide)
I chose to center the knob horizontally and vertically on the door’s stile. I marked the center point with a pencil and used an awl to make a starting point for the drill bit. Then, I drilled a pilot hole using a ¼ inch drill bit at that mark.
Related: How to Drill Pilot Holes (Why, When & Correct Size)
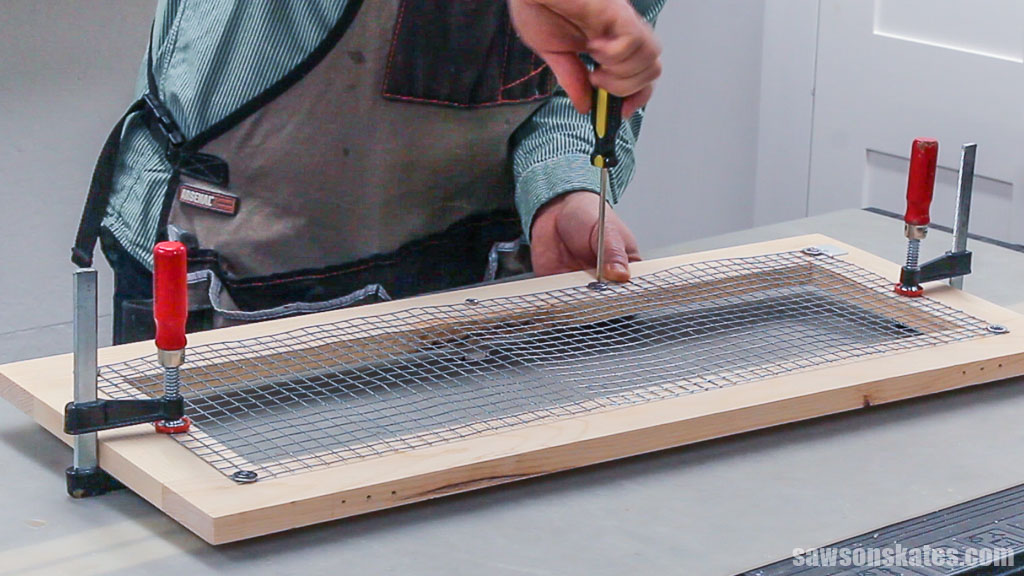
I used tin snips to cut a piece of hardware cloth allowing it to overlap the door’s opening 1” on each side.
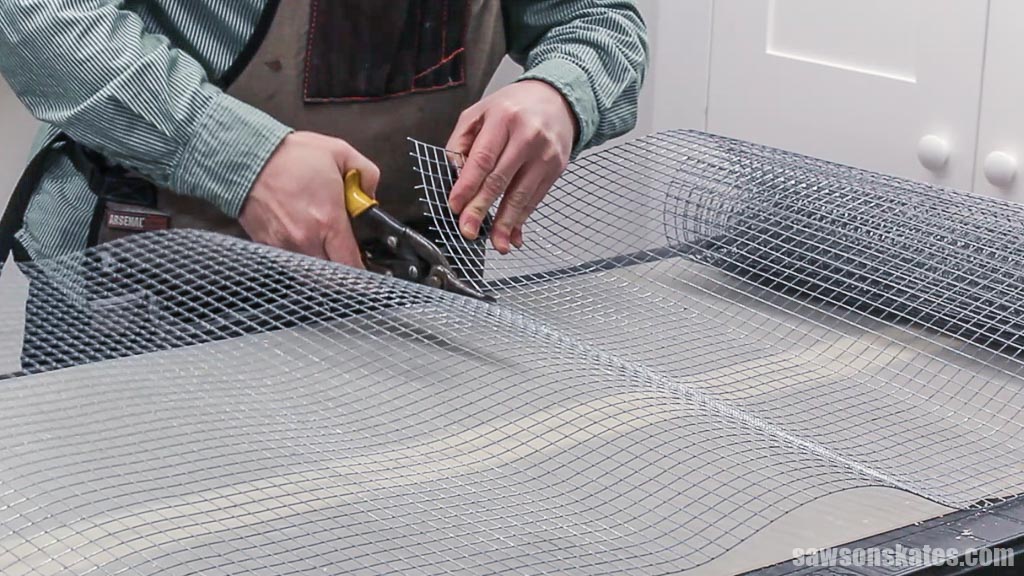
I centered the hardware cloth on the back of the door and attached it with (8) #6 ¾” wood screws, (8) M5 washers and (8) M8 washers, using one screw in each corner and two screws on each side.
To ensure the door was positioned evenly within the cabinet’s opening, I used playing cards as spacers at the top and bottom to achieve a consistent gap. With the door positioned, I attached the hinges using the screws that came with them.
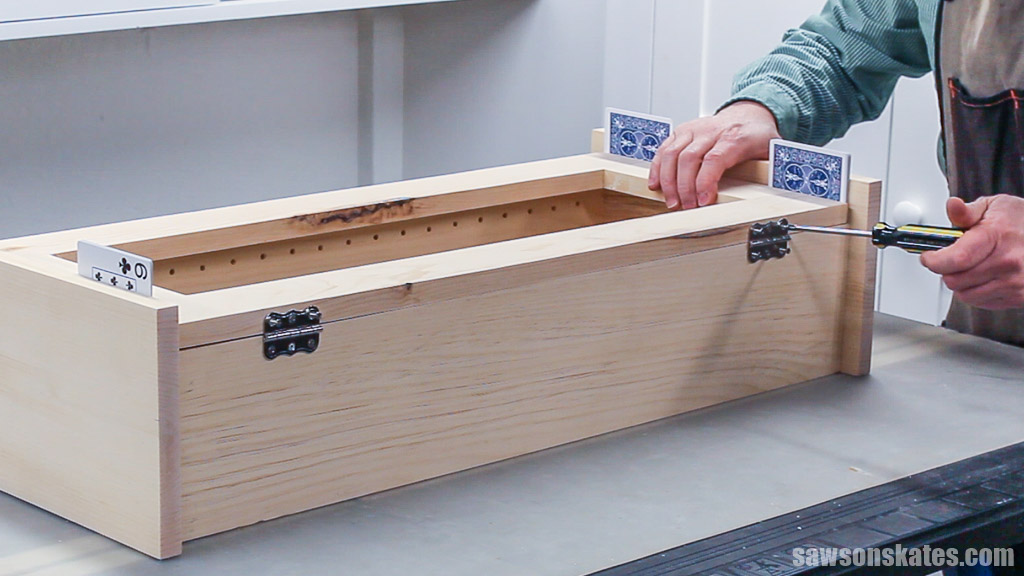
I installed a magnetic catch at the top of the cabinet’s interior to keep the door closed; however, the magnet’s strength made the door a bit too stubborn to open.
To address this, I adjusted the magnet’s position, tilting it slightly at an angle, reducing the surface area making contact with the metal catch on the door. This clever trick maintained a secure closure while making the door easier to open and close.
Step 5. Finish the Spice Cabinet
I painted the cabinet with two coats of this chalk-type paint.
Next, I sanded the shelves smooth. Then, using a rag, I applied three coats of this coffee stain and allowed them to dry for two hours between each coat.
After the third coat of stain was dry, I lightly sanded the shelves with 220-grit sandpaper. I removed the sanding dust with a tack rag and a ShopVac and applied one coat of wax-free shellac with an inexpensive chip brush.
Related: How to Sand DIY Wood Furniture (Faster, Easier & Better Results)
I lightly sanded the shelves with 220-grit sandpaper when the shellac was dry. I removed the sanding dust with a ShopVac and applied three coats of matte-finish Minwax Polycrylic. I allowed each coat to dry for about two hours. I sanded with 220 grit sandpaper between each coat and removed the sanding dust with a ShopVac.
Related: How to Apply Polycrylic

Includes:
- List of tools and materials
- Complete measurements (in inches)
- Easy-to-follow instructions
- Step-by-step photos
- Detailed diagrams
Final Thoughts
Get your seasonings organized and add style to your kitchen with this easy-to-make wall-mounted spice cabinet featuring a chicken wire door, chalky paint exterior, and adjustable stained wood shelves. The printable plans make this a simple project for do it yourselfers of any skill level.
Click here to get the PDF plan (including the detailed instructions and measurements) now!
Thank you for stopping by. If you enjoyed this tutorial, would you please take a moment and pin it to Pinterest? I’d really appreciate it!
Recommended For You
Pin This For Later

Hi there – I’m Scott, a woodworking enthusiast and creator of Saws on Skates, a site I started in 2015 to share easy-to-follow tutorials, space-saving shop tips, and project inspiration for DIYers at any skill level. Learn more about my woodworking journey here.