How to Apply Polycrylic
New to Polycrylic? Here’s how to avoid streaks, bubbles, and brush marks for a smooth finish on your painted or stained wood projects.

Apply Polycrylic Without Streaks or Brush Strokes
Polycrylic is a popular protective finish for DIY projects, but it can get streaky if you’re not careful.
Let me show you a few simple tricks to help you avoid brush marks and get a smooth, glass-like finish every time.
This article contains affiliate links. If you purchase from these links, I may earn a small commission at no additional cost to you. Visit my site policies for more information.
What is Polycrylic?
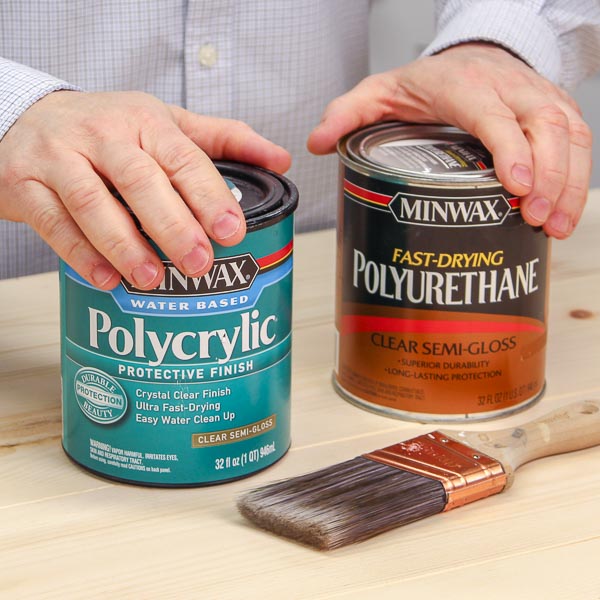
Polycrylic is a water-based protective top coat made by Minwax. It adds a clear layer over your wood project, helping to keep out water and dust. It also protects against wear and tear, while adding a bit of shine.
Unlike oil-based polyurethane, it doesn’t produce strong fumes, dries quickly, and won’t yellow over time. And since it’s water-based, cleanup is easy with just soap and warm water.
A Common Polycrylic Mix-Up
In Facebook woodworking groups, I often see people say they applied “polyurethane” to their project, but in the background of their photo, I can clearly see a can of Polycrylic. And that’s when my woodworking brain starts twitching. Here’s why.
Polyurethane is a category of protective finishes. It can be oil-based or water-based. Polycrylic, on the other hand, is a specific product made by Minwax, and it’s always water-based. It’s not formulated the same way as many products labeled “water-based polyurethane,” in fact, Minwax describes it as a water-based protective finish on their product page.
According to This Old House, Polycrylic’s formula uses acrylic resins as the base, with polyurethane added for adhesion and durability, which makes it behave differently from classic water-based polys designed for heavier-duty use.
I’m not claiming to know what happened in the Minwax naming meeting, but “Polycrylic” does sound like a blend of polyurethane and acrylic, lol.
So yes, Polycrylic is water-based and might fall under the broad umbrella of “water-based polyurethane” in some listings, but chemically and performance-wise, it’s its own thing.
If you want to dig into how Polycrylic stacks up against polyurethane, I break it all down here: Polycrylic vs. Polyurethane (Are They the Same?)
Where to Use Polycrylic
| Use | Notes |
|---|---|
| Indoors or Outdoors | Can be used for indoor projects. Not recommended for outdoor projects. |
| Light Woods or Dark Woods | Works well on light woods. Can look milky on dark woods. Apply thin, even coats for a clear finish. |
| Painted Projects | Works well on light colors. Can appear milky on dark colors. Apply thin, even coats for a clear finish. |
| Small or Large Projects | Works well on small projects like small side tables, decorative trays, home decor projects, and more. Can be difficult to apply on large projects because it dries quickly. |
| Vertical or Horizontal Surfaces | Can be difficult to apply on vertical surfaces because of its runny consistency. Can be difficult to apply on large horizontal surfaces like table tops because it dries quickly. |
| Instead of Polyurethane | Not as durable, heat resistant, or water resistant as polyurethane. |
Types of Polycrylic
Polycrylic is available in liquid and spray aerosol cans.
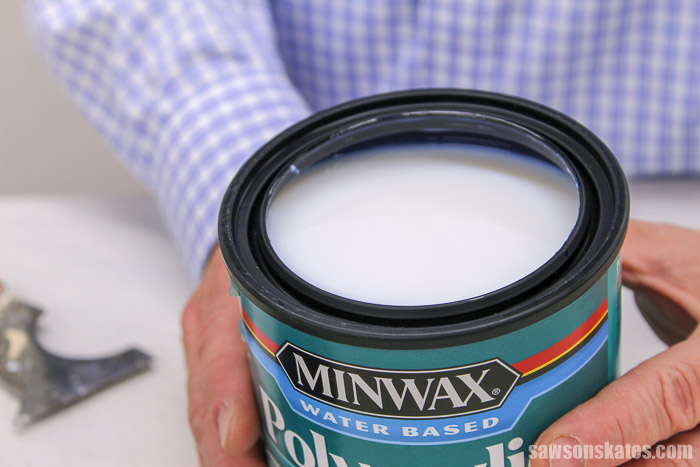
When you open a can of Polycrylic, you might be surprised that it looks milky white. That’s completely normal. It dries crystal clear.
You’ll also notice it’s pretty runny. That thinner consistency can make it tricky to apply on vertical surfaces, so you’ll need to keep an eye out for drips on projects like the sides of bookcases or doors.
How to Choose the Right Sheen
Sheen refers to the level of gloss. The higher the gloss, the more shine you’ll see, but it will also highlight imperfections, like dents in the wood or spots you might have missed while sanding.
Lower sheens tend to hide minor flaws better. That’s one reason I usually reach for satin or matte. The other reason? I’m just not a fan of overly glossy projects.
| Ultra Flat | Matte | Satin | Gloss | High Gloss | |
|---|---|---|---|---|---|
| Amount of Gloss (Shine) | ✔ | ✔✔ | ✔✔✔ | ✔✔✔✔ | ✔✔✔✔✔ |
What’s the Best Tool to Apply Polycrylic?
You can apply Polycrylic with brush or sprayer.
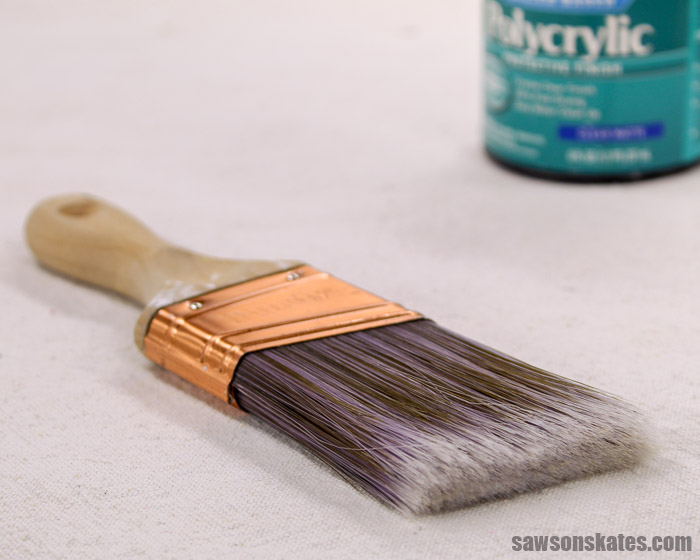
I’ve found the best way to apply it is with a synthetic bristle brush. It’s also the method Minwax recommends.
I use this paint brush. It’s my favorite, from painting to applying finishes, its stubby handle makes it unique.
That shorter handle gives me better control when applying paint, stain, or finishes. And because it’s lighter, there’s less stress on my wrist.
Can I Use a Foam Brush to Apply Polycrylic?
I’ve tried applying Polycrylic with a foam brush, but I wouldn’t recommend it.
In my experience, foam brushes hold too much product. If you press a bit too hard, you can end up with a puddle before you even realize it.
Can You Apply Polycrylic With a Roller?
I don’t recommend applying Polycrylic with a roller. Rollers can introduce air bubbles into the finish, which can leave the surface bumpy.
If that happens, you’ll need to sand those bumps smooth and apply another coat.
How to Apply Polycrylic
- Minwax Polycrylic
- Quality Paint Brush (I used this one)
- Sandpaper (80, 100, 120, 150, and 220 grits)
- ShopVac
- Tack Cloth
Set Up Your Work Area
Polycrylic has a slight odor, but it doesn’t have strong fumes like oil-based polyurethane. That said, it still irritates my throat, so when the weather permits, I try to apply it outdoors. Otherwise, I recommend working in a well-ventilated area and wearing a respirator.
Your work area should also be relatively dust-free. Dust particles that land in the finish while it’s drying will need to be sanded out. Fortunately, Polycrylic dries quickly, so I haven’t experienced that problem yet.
Humidity can slow down dry time. If possible, apply the finish when the humidity is low or in a space where you can control it.
Prepare the Surface
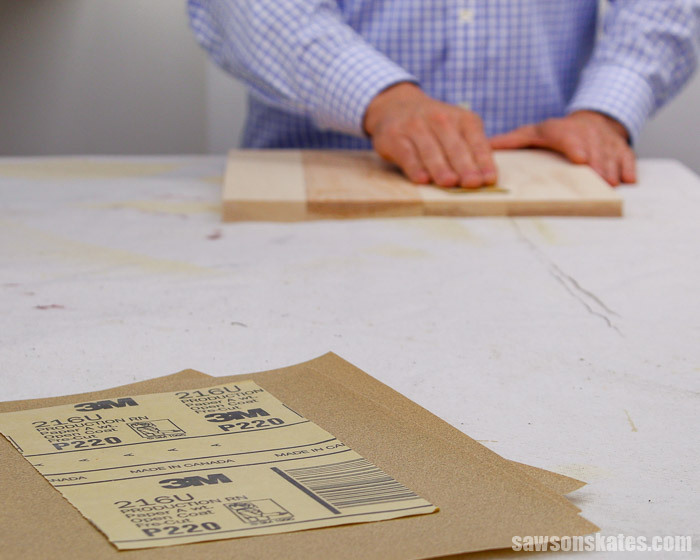
Any finish begins with properly preparing the surface of the wood. That means smoothing the surface of the wood with sandpaper.
Related: What’s the Best Sander for Furniture? (Here’s the Answer)
I typically start with 80 grit or 100 grit sandpaper and finish with either 120 grit or 150 grit sandpaper.
Related: 11 Secrets for Sanding Wood Projects Like a Pro
Next, I fill any gaps or nail holes. I like to use this DIY wood filler. It’s easy to make with just two ingredients and it absorbs stain well.
Related: Does Stainable Wood Filler Work?
Polycrylic on Raw Wood
Water-based products like Polycrylic can raise the grain on raw wood (that has not been stained or painted). In other words, the wood is no longer smooth after the finish is applied.
One way to prevent this is to prep the wood first. Dip a rag in water, wring it out so it’s damp but not dripping, and wipe down the surface. When the wood is completely dry, lightly sand it with 220-grit sandpaper. Then remove the sanding dust. I like to vacuum up most of it with a ShopVac and follow up with a tack cloth.
Related: What is a Tack Cloth? (+ What I Used Instead)
Polycrylic on Stained Wood
I usually build my projects with pine, which can get blotchy when it’s stained. To help the wood accept stain more evenly, I apply a pre-stain conditioner first. You can buy conditioners at the store, but I prefer natural, DIY versions instead.
Related: What I Use Instead of Wood Conditioner
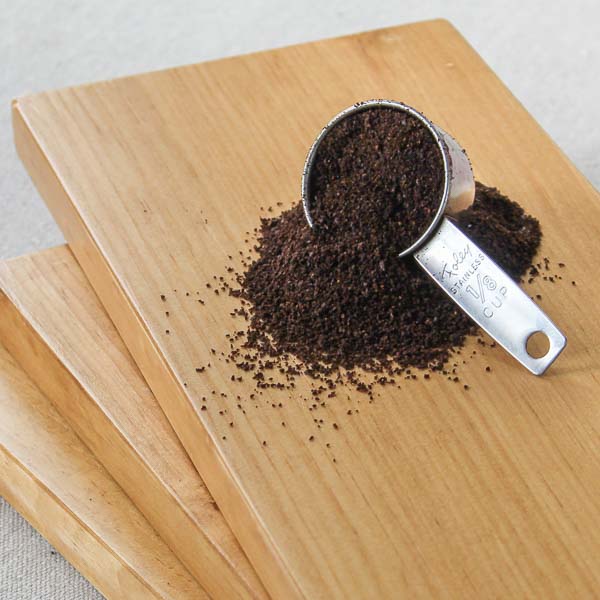
Then I apply the stain. I’ve used Rust-Oleum and Varathane oil-based stains for years. They work well, but they do have strong fumes. Lately, I’ve been experimenting with homemade stains like this coffee stain and this DIY black walnut stain.
An important thing to know is that water-based finishes can sometimes react with stains. For example, water-based top coats can sometimes lift or smear water-based stains like coffee or black walnut if you’re not careful.
To prevent that, you can apply a coat of wax-free shellac first
Related: What You Need to Know About a Shellac Wood Finish
Wax-free shellac acts as a barrier between the stain and the Polycrylic. It rarely reacts with oil-based or water-based stains and can be used under almost any top coat.
If you’re working with pine, I share more about stain problems and why I’ve started approaching it differently here: Why You Should Stop Staining Pine
How to Prepare Polycrylic
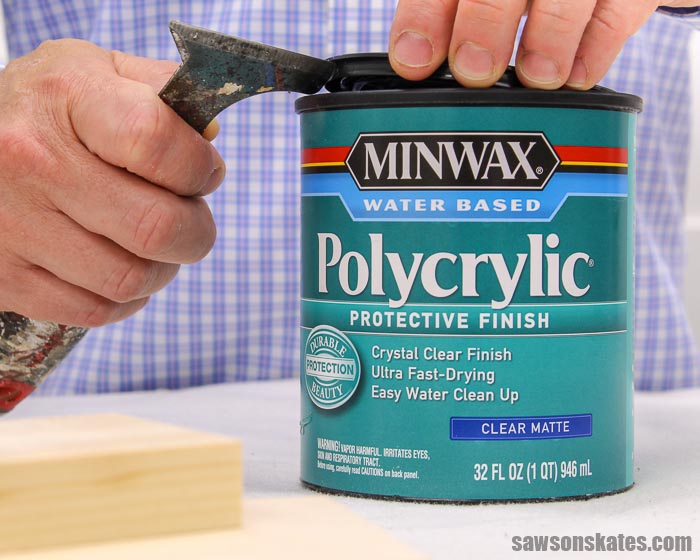
Stir the Polycrylic. Don’t shake it. Shaking can introduce air bubbles, which can leave the finish bumpy.
If that happens, you’ll need to sand the surface smooth and apply another coat.

Apply Polycrylic Without Streaks
- Use a quality synthetic bristle brush
- Apply with the grain of the wood
- Use long strokes in one direction. Short, back and forth strokes can leave streaks or brush strokes
- Apply thin, even coats and brush out any drips
- Keep a wet edge. Work from wet areas towards dry areas.
How Long Does it Take to Dry?
Polycrylic dries quickly, usually in about two hours. It’s ready for light handling after about three hours.
Give it at least 24 hours before putting it into “normal use.” During that time, be careful, since the finish can still scratch or dent before it’s fully cured.
How Many Coats of Polycrylic Should I Use?
Minwax recommends three coats of Polycrylic. That’s what I usually do, and I’ve been happy with the results.
Do You Have to Sand Between Coats of Polycrylic?
Yes. Apply a coat and let it dry for about two hours.
Then lightly sand with 220-grit sandpaper before applying the next coat. After sanding, remove the dust. I usually vacuum up most of it with a ShopVac and then follow up with a tack cloth.
Do not sand the last coat.
TIP: Don’t use steel wool between coats when working with water-based products like Polycrylic. Moisture can cause tiny steel wool fibers to rust. If any of those fibers are left behind, they can create rust stains in the finish.
How Do You Fix Streaks or Brush Strokes?
You can fix streaks and brush marks by sanding and applying another coat.
Let the problem coat dry completely. Then lightly sand with 220-grit sandpaper until the surface feels smooth again.
Remove the sanding dust. I vacuum up most of it with a ShopVac and follow up with a tack cloth.
Finally, apply another coat of Polycrylic.
Can You Apply Polycrylic Over Paint?
Yes, Polycrylic can be applied over paint.
You need to prepare the painted surface just like a wood surface. Paint is smooth. Polycrylic needs something to bite into so that it will stick to the surface
That means you need to lightly sand the painted surface with 220 grit sandpaper. Then, remove the sanding dust. First, remove the majority of the dust with a ShopVac and then follow up with a tack cloth.
I should also mention if your painted project has visible streaks or brush strokes, you will see those after the Polycrylic is applied. The painted surface will need to be completely smooth for the Polycrylic to be completely smooth.
Can You Apply Polycrylic Over Chalk-Type Paint?
Yes, Polycrylic can be applied over chalk-type paints.
Related: How to Spray Chalk-Type Paint
I’ve heard matte-finish paints like chalk-type paints have an additive that gives them a chalky appearance. This additive supposedly can prevent Polycrylic from drying (it will remain tacky) or dry very slowly.
I have applied Polycrylic to projects painted with chalk-type paints. In my experience, the Polycrylic dried as it normally would on any other project.
I would recommend that you try it on some test pieces before applying to your project to be sure the Polycrylic will dry properly with your chalk-type paint.
I should also mention if your chalky paint project has visible streaks or brush strokes, you will see those after the Polycrylic is applied. The painted surface will need to be completely smooth for the Polycrylic to be completely smooth.
You need to prepare the chalky painted surface just like a wood surface. That means you need to lightly sand the painted surface with 220 grit sandpaper. Then, remove the sanding dust. First, remove the majority of the dust with a ShopVac and then follow up with a tack cloth.
Can You Apply Polycrylic Over Vinyl Decals?
Yes, Polycrylic can be applied over vinyl decals.
Final Thoughts
Polycrylic is an easy-to-apply protective finish for DIY projects. But this top coat can become streaky or have noticeable brush strokes if it’s applied the wrong way.
Get a smooth as glass finish by using a quality brush, applying with the grain, using long strokes in one direction, applying thin, even coats, and keeping a wet edge.
Thank you for stopping by. If you enjoyed this tutorial, would you please take a moment and pin it to Pinterest? I’d really appreciate it!
Recommended For You

Pin This For Later

Hi there – I’m Scott, a woodworking enthusiast and creator of Saws on Skates, a site I started in 2015 to share easy-to-follow tutorials, space-saving shop tips, and project inspiration for DIYers at any skill level. Learn more about my woodworking journey here.
I wondered if you have tried to use Polycrylic and used a HVLP type sprayer and what the results were and why you do not use a sprayer.
Hi Frank – I haven’t used Polycrylic with my paint sprayer. I typically use Polycrylic for small projects that are easy to tackle with a brush. But as far as I know, you can use it in a sprayer. Now that you brought it up, I’m going to try spraying it!
Did you ever try spraying?
Hi Bill, I haven’t tried spraying it yet, but it’s on my list of things to try.
I think one of the important elements of poly acrylic, is that it won’t yellow. Anything with -thane in the name will. That’s why I stick with poly acrylic or even paint base for dark colors. (You know, the can of stuff before the pigment is added.)
This was great info, thanks!! I’m just starting out with DIY stuff so i needed some basics with this material. I wasnt about to waste resin for a custom desk i am making for myself! This seems like a proper solution 🙂
I use my HVLP sprayer all time with both polyurethane and polycrylic. I get great results with it. No need to thin even when using 1.0 or 1.5 tip. Water base poly makes clean up a breeze. Highly recommend the sprayer.
Thanks for posting this. I’m finishing a pine bookcase with polycyclic that I’ve already painted. After the first coat, I’m noticing streaks and brushstrokes. I gave it a light sand and it helped a little, but they’re still noticeable. You mentioned that you use polyacrylic for small items. I can understand why you would use a brush for small items, but maybe a foam brush would be better for a large bookcase. I’m going to apply the next coat using a foam brush. The fact that a foam brush holds more poly will possibly help, considering the bookcase is 7 feet tall. This should help achieve longer strokes, and minus the bristle marks. Will try.
I typically always use steel wool between coats. The instructions specifically say not to, but I’ve done it a number of times without causing a problem. I like the results that steel wool provides over using sandpaper. After using the steel wool I vacuum the surface and wipe it down with a damp rag to remove any residue.
I called Minwax and asked them why they say not to use steel wool between coats, and they responded with the exact reason you said (i.e., small particles of steel wool can rust).
And note that I do not use steel wool on the bare wood.