Best Sanders for Furniture: Which One to Buy & Why
A sander is one of the essential tools in finishing furniture. Choosing the right one isn’t always easy. Learn which type is best for your project here.
How to Choose the Best Sander for Furniture
What sander do you need for your furniture project? There are several types of sanders, and they do similar things, but a few significant differences set them apart.
Which is better for sanding through multiple layers of paint? Which one can leave swirl marks on the surface of the wood? Which one can get into hard-to-reach places? Which one should you buy first? It’s important to know the differences, so you can choose the best one for sanding your furniture projects.
This tutorial contains affiliate links to supplies and tools. Purchases made using these links help support the Saws on Skates website and allows me to share more projects and tips with you. There is no cost to you for using these links. Visit my site policies for more information.
Table of Contents
- Why Use a Sander?
- What is a Sander Used For?
- What Type of Sander is Good for Sanding Furniture?
- Power Sources for Sanders
- What Kind of Sandpaper Do You Need?
- Which is Easier to Use?
- Tips for Using Sanders
- Which Sander Should You Buy First?
- Comparison Chart: Which Sander Do You Need?
Why Use a Sander?
Sanding is my least favorite chore when it comes to building DIY furniture. Sanding is dirty, messy, and it can be a lot of work.
But sanding is a necessary step that we can’t skip. Sanding is important because it smooths and prepares wood for paint, stain, or finish.
Hand Sanding for Small Jobs
Sanding by hand is a must for some small projects where an electric sander could cause damage. But sanding a large project by hand is time-consuming and a lot of work. Plus, sanding by hand takes a lot of effort, which, for an extended time, can cause muscle fatigue.
I usually sand by hand for touch-ups, getting into areas where an electric sander can’t reach, and easing the edges of boards.
💡 TIP: Boards like 1×4s,1×6s, etc., usually come from the factory with sharp, 90-degree edges. Easing or breaking the edge smooths these sharp edges. Easing the edges helps the piece look finished and helps the edges resist denting and chipping.
Electric Sander for Big Jobs
For sanding big projects, an electric sander is the way to go. An power sander makes sanding large projects quick and easy. Plus, the sander does most of the work, so it’s less effort than sanding by hand.
Back to Table of ContentsWhat is a Sander Used For?
Before applying paint, stain, or finish, you can use a sander to prepare furniture like tables, chairs, dressers, desks, cabinets, shelves, etc.
Preparing a piece of furniture can mean different things depending on the project. If you want to refinish a piece of furniture, it could mean removing layers of old paint or removing a worn-out finish. If you build a new furniture project, it means smoothing and sanding away imperfections in the wood.
Furniture Refinishing
Are you thinking of upcycling an old chair? Want to flip furniture to make a little extra money? Looking to restore a table from grandma’s house?
Chances are the piece of furniture you’re looking at is covered with layers of old paint or has an old finish that has seen better days. You’ll need to remove that old finish before you upcycle, flip, or restore.
An electric sander will help you quickly remove layers of old paint and prepare the piece for a new look.
Be Careful With Old Paint
It’s important to mention that according to the Environmental Protection Agency (EPA), many homes built before 1978 have lead-based paint, and “lead from paint, chips, and dust can pose serious health hazards.”
You may have seen this warning on containers of paint and stain: “WARNING: If you scrape, sand, or remove old paint, you may release lead dust. LEAD IS TOXIC.”
That means we need to be careful when sanding old furniture because it may contain lead-based paint. Visit the EPA for more information about lead-based paint.
Strip or Sand?
When it comes to furniture restoration, there are two common ways to remove an old finish. You could use a chemical stripper, or you could use a sander.
The advantage of a chemical stripper is that it doesn’t damage the wood like a sander. But furniture strippers can be messy, the chemicals are harmful, and it could require several applications to dissolve the old finish completely.
The advantage of a sander is that it works quickly to remove layers of old paint. The downside is that they work fast, sometimes too fast. You really have to pay attention. Otherwise, you could damage the wood by sanding grooves or ridges into the surface.
I prefer to build new furniture rather than refinish existing furniture pieces. That said, I have refinished several furniture projects in the past. I have a few recommendations if this is the first time you’re using a sander to refinish a piece of furniture.
My first recommendation is don’t start with a family heirloom or a valuable piece of furniture. For a beginner, it’s easy to sand too much, which can damage the wood. Some furniture pieces are not solid wood, but instead, plywood covered with thin pieces of wood veneer. An electric sander can sand through a thin veneer in seconds. It’s difficult to repair these mistakes once the damage is done.
I suggest that you first practice on a piece of furniture that you find for free on the side of the road or purchase an inexpensive piece at a thrift store.
My second recommendation is to start with the least aggressive approach first.
Starting with the most aggressive method can cause irreversible damage. I think it’s better to start with the least aggressive tool and work up to more aggressive tools if necessary.
In other words, if you think you might need a belt sander, try a random orbital sander first. If you feel you need 60 grit sandpaper, try 100 grit first. If the least aggressive approach doesn’t work, you can always move on to a more aggressive method.
Preparing New Wood
I use a sander most often to prepare new wood projects for paint, stain, or finish.
A professional-looking finish begins with sanding the wood. Sanders work to quickly smooth uneven joints between boards and smooth rough surfaces. Smoothing prepares the wood for painting or staining.
Wood that hasn’t been properly sanded could mean that you see scratches or imperfections on the surface of your finished project. These imperfections will make your project look unprofessional.
Related: 11 Secrets for Sanding Wood Projects Like a Pro
Back to Table of ContentsWhat Type of Sander is Good for Sanding Furniture?
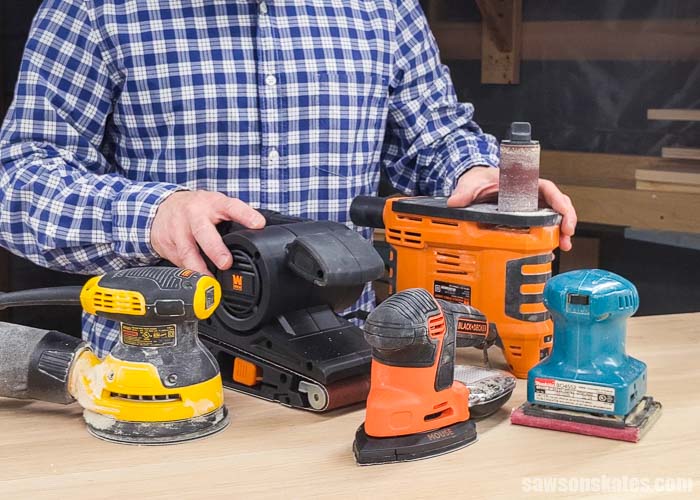
Five types of sanders are commonly used to refinish furniture or prepare new wood projects. Those sanders include a belt sander, random orbital sander, palm sander, detail sander, and a spindle sander.
Each type of sander serves a specific purpose. These purposes range from sanding large, flat surfaces to sanding in tight corners, and more.
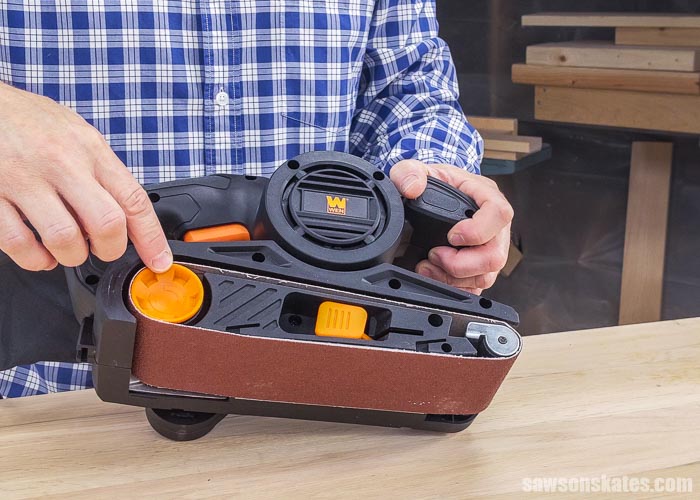
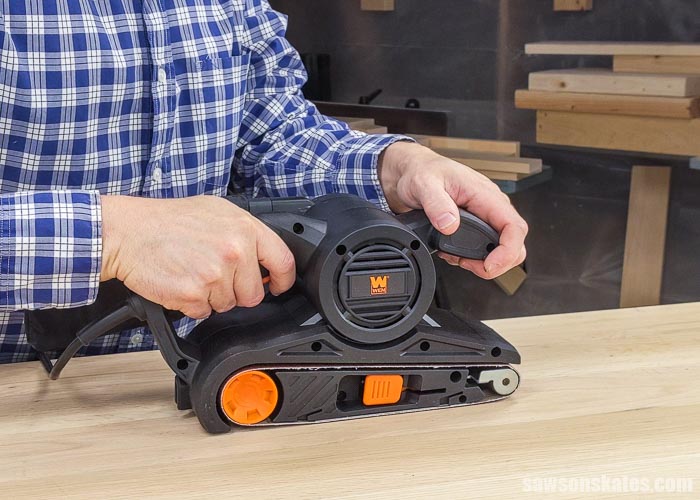
Belt Sander
A portable belt sander, also called a handheld belt sander, has two drums and uses a sandpaper belt. It might remind you of a conveyor belt at a store check out.
Pros
Belt sanders remove a lot of material very quickly. You can use a belt sander to remove layers of old paint. Or use it on wood to grind out gouges or effortlessly smooth uneven boards.
For example, a friend of mine replaced some old doors at his house. The new doors were a snug fit in the old door openings. He used a belt sander to remove material from the edges of the new doors to custom fit them to the openings.
Belt sanders work well on large furniture projects with a large, flat surface area. Furniture like tables, desks, shelves, etc.
For heavily painted projects, you may need a belt sander.
Cons
Belt sanders have less control than smaller sanders and are too powerful for delicate projects. They are not recommended for fine sanding.
A belt sander is difficult to use on small projects and is too big to fit into small corners.
Belt sanders are powerful. They can get away from you quickly and easily gouge the wood. It’s a good idea to practice on some scrap wood before using a belt sander on your project.
What I Use
I use this WEN Belt Sander.
Best Belt Sanders
Best Value
WEN 6321 3″ × 21″ Belt Sander
Runner Up
SKIL 3″ × 18″ Belt Sander
Runner Up
CRAFTSMAN 3″ × 21″ Belt Sander
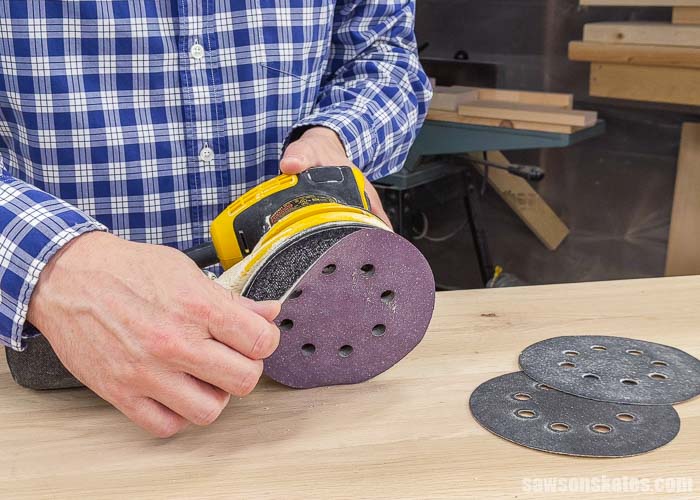
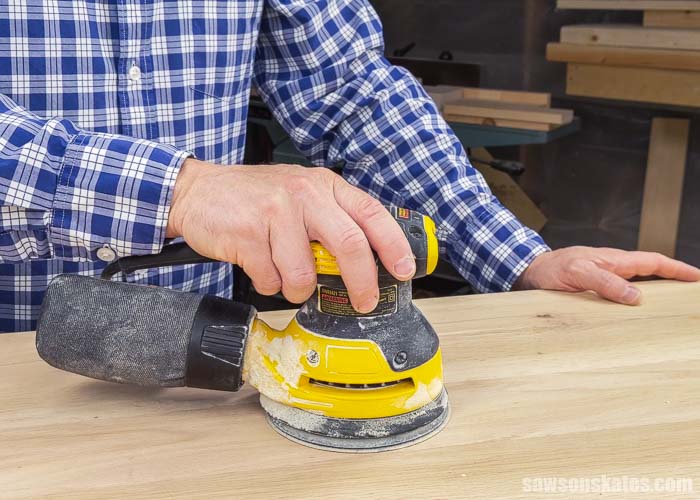
Random Orbital Sander
A random orbital sander, also called a random orbit sander, or disc sander, has a round base that rotates in a random pattern. It uses round sandpaper pads or discs that fit the size of the base. The base of a disc sander usually measures 5 inches in diameter. Random orbital sanders are available in single speed or variable speed.
In my opinion, a random orbital sander is the most versatile sander on this list. It’s the sander I use the most for my furniture projects.
Pros
A random orbital sander works quickly to remove paint from lightly painted furniture or to smooth wood. It works best for medium to large furniture projects.
Because it rotates in a random pattern, you can use it with the grain or across the grain of the wood.
It doesn’t leave swirl marks or what I call a “figure 8” pattern on the wood like a palm sander. A disc sander does a decent job at dust collection and doesn’t vibrate as much as a palm sander.
For lightly painted projects or preparing new wood for a finish, you’ll likely want to start with a random orbital sander.
Cons
Because of the shape of the base, a random orbital sander isn’t the best choice for sanding angles or getting into corners.
One of the biggest pros of an orbital sander is also one of its biggest cons. That is, it removes material quickly. Which means it’s easy to sand off too much material.
It’s important to keep a random orbital sander moving. Don’t hold it in one place; otherwise, you can sand grooves into the wood. Also, be careful near the corners of table tops, etc. Keep the sander level, and don’t push too hard on the edge; otherwise, you’ll sand a bevel onto the edge.
I have one last word of caution when using a random orbital sander. Keep your opposite hand away from the rotating disc. The sanding discs can slice like a knife. Trust me, I know from experience!
What I Use
I use this DEWALT Random Orbital Sander.
Best Random Orbital Sanders
Top Pick
DEWALT 5″ Random Orbit Sander (DWE6421K)
Best Value
BLACK+DECKER 5″ Random Orbit Sander (BDERO100)
Runner Up
Makita 5″ Random Orbit Sander (BO5041)
Orbital Sander
An orbital sander, also called a palm sander, finishing sander, or quarter-sheet sander, has a square base. It uses quarter sheets of sandpaper and moves in a small, circular pattern.

Pros
An orbital sander removes a smaller amount of material than a random orbital sander. You can use it to remove paint from lightly painted furniture or to smooth wood. It works best for medium to large furniture projects.
Because of the shape of the pad, it can get into right-angle corners.

Cons
An orbital sander doesn’t do as good a job at dust collection as a random orbital sander. It also vibrates more than a random orbital sander which with extended use can cause muscle fatigue.
I know many DIYers like an orbital sander, but for me, this is my least favorite type of sander. Because it moves in a circular motion, it can sand swirl marks or what I call a “figure 8” pattern into the surface. And, yes, I understand that you can sand out the swirl marks. But I have found that sanding out the swirl marks means extra steps, time, and effort compared to using a random orbital sander.
Your project can look awful if you don’t sand out these swirl marks before applying a finish to your project. Sometimes the marks stain darker than the surrounding wood. Or a shiny finish can reflect light on the marks, which further emphasizes the problem.
Best Orbital Sanders
Top Pick
DEWALT Palm Sander (DWE6411K)
Best Value
BLACK+DECKER Palm Sander (BDEQS300)
Runner Up
Makita Finishing Sander (BO4556)
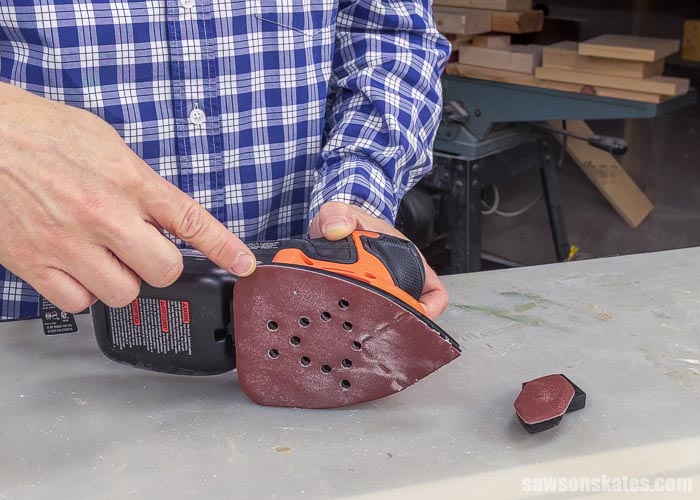
Detail Sander/Mouse Sander
A detail sander, also called a mouse-style sander, is one of the smallest options on this list. It’s a compact tool that has a triangular sanding pad. It looks similar to an iron that you might use to press your clothes.
Pros
A detail sander is a precise and accurate way to remove paint from lightly painted furniture or to smooth wood. It works best for small furniture projects or in hard-to-reach places where larger sanders can’t go.
Some detail sanders have attachments that make it even easier to reach difficult spots.
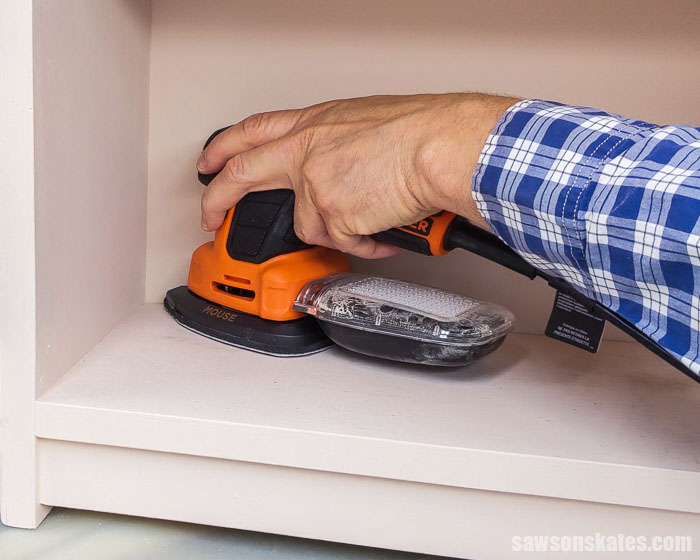
The compact size of a mouse-style sander makes it the perfect choice for sanding details, intricate areas, tight spaces, and contoured edges.
You can also use it in flat open spaces or in corners like the shelf of a bookcase.
Related: How to Make a Simple Bookshelf
Cons
One of the biggest cons about a detail sander is that it might be too small for some projects.
What I Use
I use this BLACK+DECKER Mouse Detail Sander.
Best Detail Sanders
Top Pick
BLACK+DECKER Mouse Detail Sander (BDEMS600)
Best Value
WEN Detail Sander (6301)
Runner Up
SKIL Detail Sander (SR250801)
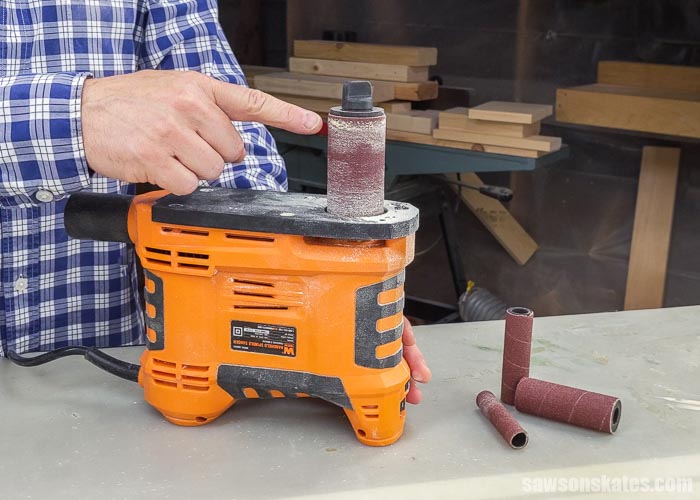
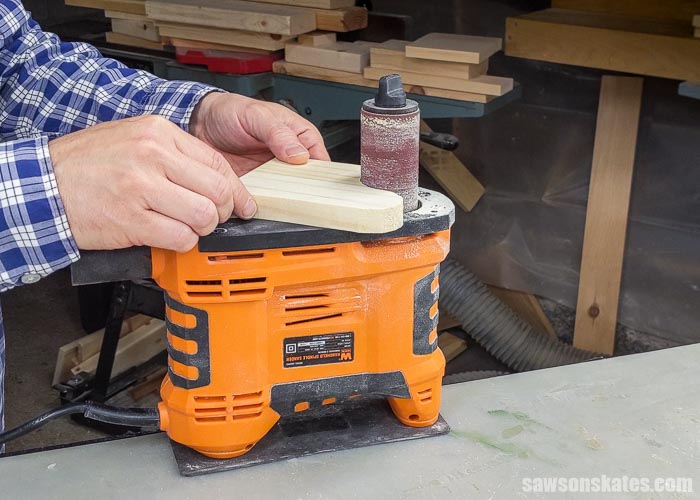
Spindle Sander
I recently added this portable spindle sander to my workshop.
Related: My 12×13 Small Woodshop Layout
A portable spindle sander uses sanding sleeves that fit over a rubber drum. It rotates in a circular motion and oscillates up and down. The model I have includes four spindle sizes ½ inch, ¾ inch, 1 inch, and 1-½ inch diameter.
Pros
A spindle sander is a great way to sand hard-to-reach places that you would usually have to sand by hand. The spindle sander made quick work of smoothing saw marks on inside curves. I used a spindle sander on this paper towel holder, step stool, and spice shelf.
You can use the spindle sander as a handheld unit or clamp it to your workbench.
Cons
A spindle sander isn’t a great fit for all projects. Where I think it really shines is sanding inside curves that would normally take a lot of effort to sand by hand.
Back to Table of ContentsPower Sources for Sanders
There are three common power sources for sanders. Those power sources include corded, cordless (batteries), and pneumatic (air).
Corded
Corded sanders are connected to an electrical outlet. They are limited by the length of the cord but can run indefinitely.
Cordless
Cordless sanders use rechargeable batteries. They have greater mobility compared to a corded sander because they are not limited by a cord.
Battery-powered sanders are a good option when you don’t have an outlet nearby. Cordless sanders are limited by the battery’s charge and can’t run indefinitely like a corded sander. When the battery runs out, you have to stop working and recharge the battery before continuing.
Pneumatic
Pneumatic sanders are powered by air pressure. Using a pneumatic sander means you will need an air compressor, air hose, and an electrical outlet to plug in the compressor.
Compressors are noisy. Compressors and air hoses can be heavy. Small air compressors may not be able to keep up with the demands of a pneumatic sander. This means the sander might not spin fast enough and could leave marks in the wood.
Back to Table of ContentsWhat Kind of Sandpaper Do You Need?
Each type of sander uses a different kind of sandpaper.
Belt sanders use sandpaper belts that correspond to the size of the sanding drums.
Random orbit sanders use round discs that attach with hook and loop Velcro. The size of the disc needs to match the size of your random orbit sander. Another consideration are the holes in the discs. These holes need to match so the dust can collect in the dust collection bag.
Palm sanders use quarter sheets of sandpaper.
Detail sanders use triangular sandpaper that is usually specific to each manufacturer.
Spindle sanders use sandpaper sleeves.
Back to Table of ContentsWhich is Easier to Use?
There are a few considerations when determining which sander is easier to use. Considerations like how much the sander weighs, how much it vibrates, and how easy it is to control.
A typical sander can weigh one to eight pounds. The weight can depend on if the sander is corded, cordless, or pneumatic.
Sanders, especially palm sanders vibrate. This vibration can cause muscle fatigue.
Belt sanders are powerful and can be difficult to control.
Out of the five sanders on this list, I think a random orbital sander is the easiest to use. A random orbital sander doesn’t vibrate as much as a palm sander and is relatively easy to control.
Back to Table of ContentsTips for Using Sanders
- Always wear personal protective equipment: eye protection, dust mask, and hearing protection
- Follow all of the directions included with your sander
- Let the machine do the work. Pressing too hard can cause grooves in the wood.
- Don’t hold it in one spot for too long. This can also cause grooves in the wood.
- For difficult spots, use a sweeping motion to feather out the area that you’re sanding.
- Use a tack cloth to remove the sanding dust before applying paint, stain, or finish.
Related: What is a Tack Cloth? (+ What I Use Instead)
Back to Table of ContentsWhich Sander Should You Buy First?
Which sander you should buy first will depend on what type of project that you want to sand. Below is a comparison chart to help you figure out what type of sander you may need. And you may find that you need several sanders for a project.
That said, I would say that you might want to start with a random orbital sander. I think a random orbital sander is good choice because it’s one of the most versatile sanders and is relatively easy to control. A random orbital sander is the sander I use the most for building my furniture projects.
Once you have determined which sander you need, you can then look at the different features available for that type of sander. Features like different speeds, dust collection, pressure detection, and how well it fits in your hand.
Back to Table of ContentsComparison Chart: Which Sander Do You Need?
| Belt Sander | Random Orbital Sander | Orbital Sander | Detail Sander | Spindle Sander | |
|---|---|---|---|---|---|
| Remove Paint | Heavily Painted Furniture | Lightly Painted Furniture | Lightly Painted Furniture | Lightly Painted Furniture | Lightly Painted Furniture |
| Smooth Wood | Yes | Yes | Yes | Yes | Yes |
| Project Size | Large | Medium to Large | Medium to Large | Small | Small |
| Right Angles | Yes | No | Yes | Yes | No |
| Hard-to-Reach Places | No | No | No | Yes | Yes |
| Ease of Use | Difficult | Easiest | Easy | Easy | Easy |
| Type of Sandpaper | Belts | Discs | Sheets | Pads | Sleeves |
Final Thoughts
There are several types of sanders, and they do similar things, but a few significant differences set them apart.
It’s important to know the differences, so you can choose the best one for sanding your furniture projects.
Thank you for stopping by. If you enjoyed this tutorial, would you please take a moment and pin it to Pinterest? I’d really appreciate it!
Pin This For Later

Hi there – I’m Scott, a woodworking enthusiast and creator of Saws on Skates, a site I started in 2015 to share easy-to-follow tutorials, space-saving shop tips, and project inspiration for DIYers at any skill level. Learn more about my woodworking journey here.