Does Stainable Wood Filler Work?
Stainable wood filler is supposed to absorb stain just like wood. Does it work, or does it look awful? I tested 7 fillers, and I’m sharing the results here.
What’s the Best Stainable Wood Filler?
Don’t waste your money on a stainable wood filler that doesn’t work. In this comparison, I’m trying five store-bought fillers and two homemade fillers with three types of wood stain and sharing the results with you.
This tutorial contains affiliate links to supplies and tools. Purchases made using these links help support the Saws on Skates website and allows me to share more projects and tips with you. There is no cost to you for using these links. Visit my site policies for more information.
Table of Contents
- Inspiration for This Project
- What Is Wood Filler?
- Can You Stain Wood Filler?
- What is Stainable Wood Filler?
- Method I Will Use for This Comparison
- How Do You Prepare the Wood?
- How Do You Apply Stainable Wood Filler?
- How Many Coats of Filler Can You Apply?
- How Long Does it Take for Stainable Wood Filler to Dry?
- How Long Should You Wait to Apply Stain?
- Stainable Wood Filler
- Does Wood Filler Stain the Same as Wood?
- Is Colored Stainable Wood Filler Available?
- Can You Color Wood Filler?
- Which One Should You Buy?
Inspiration for This Project
In a recent survey, I asked readers to rate the best and worst stainable wood fillers.
There wasn’t a clear winner, so I decided to try them out for you, so you don’t waste your money on something that doesn’t work.
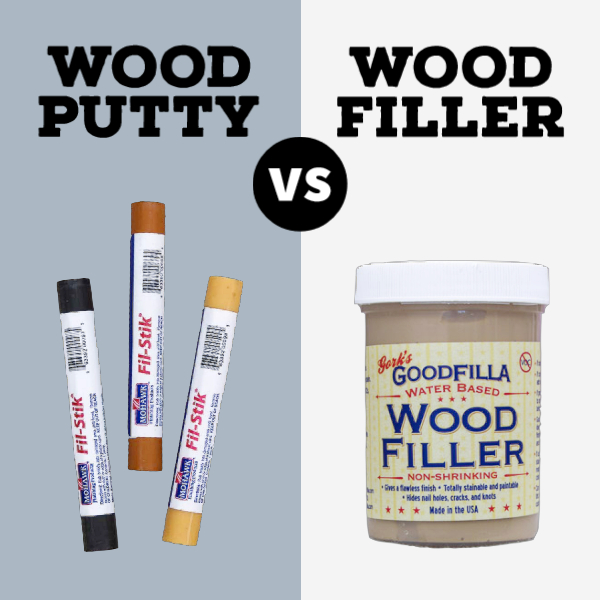
What is Wood Filler?
Wood filler is a water-based material used to hide or conceal flaws in wood. I use it the most to patch small holes, gaps, or cracks in my DIY furniture projects. It can also be used to repair small scrapes and scratches.
Back to Table of ContentsCan You Stain Wood Filler?
Nearly every wood filler can be primed and painted, but not every wood filler can be stained. Unless the label on the container of the wood filler specifically says “stainable”, then it most likely won’t absorb the stain.
Back to Table of ContentsWhat is Stainable Wood Filler?
Stainable wood fillers patch small holes and gaps but are designed to absorb stain and blend into the surrounding wood.
In a recent poll, readers told me some of these fillers work better than others, so I decided to do a side-by-side comparison to find the best stainable wood filler.
Back to Table of ContentsMethod I Will Use for This Comparison
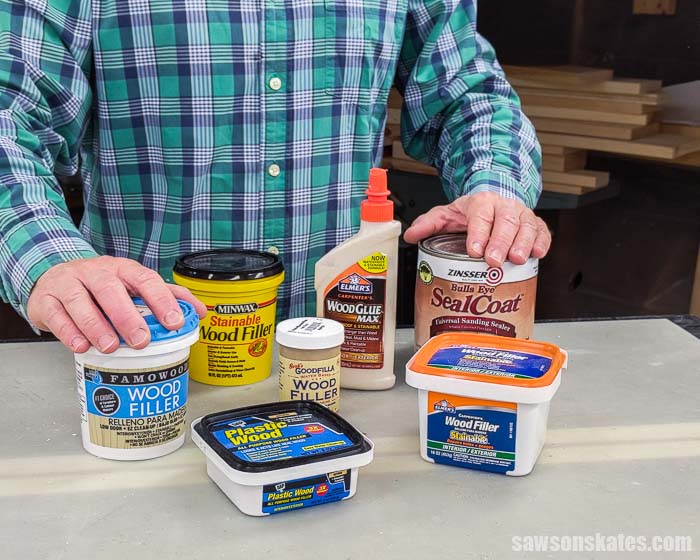
For this comparison, I’m going to test seven types of wood filler. All tests will be done on pine.
Stainable Wood Fillers
I will test seven types of wood filler. Five of the stainable wood fillers will be store-bought:
- Minwax Stainable Wood Filler
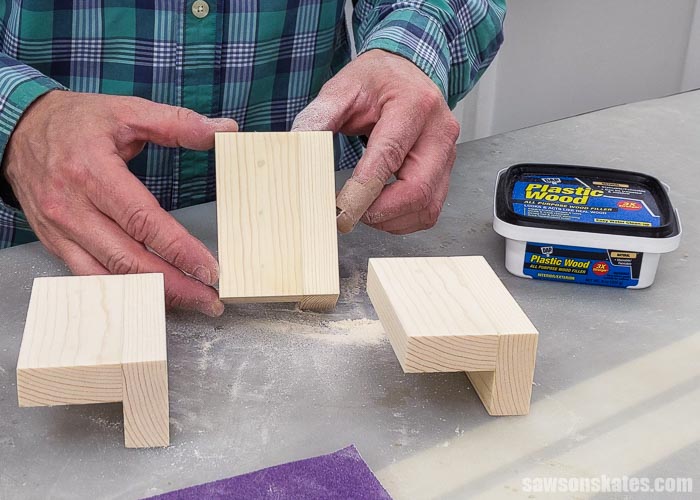
- DAP Plastic Wood
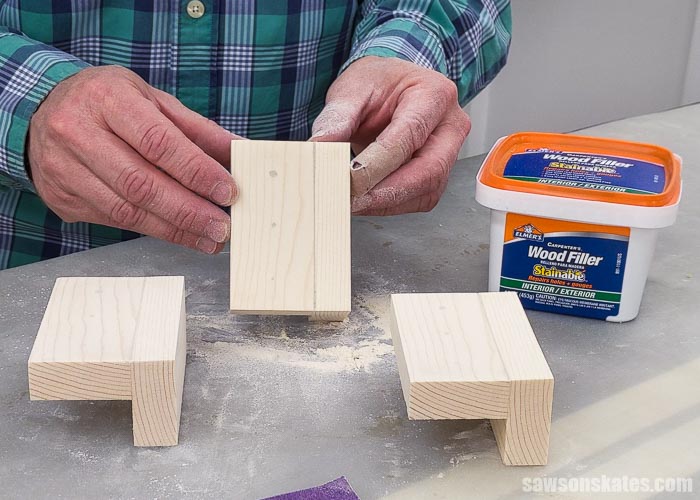
- Elmer’s Carpenter’s Stainable Wood Filler
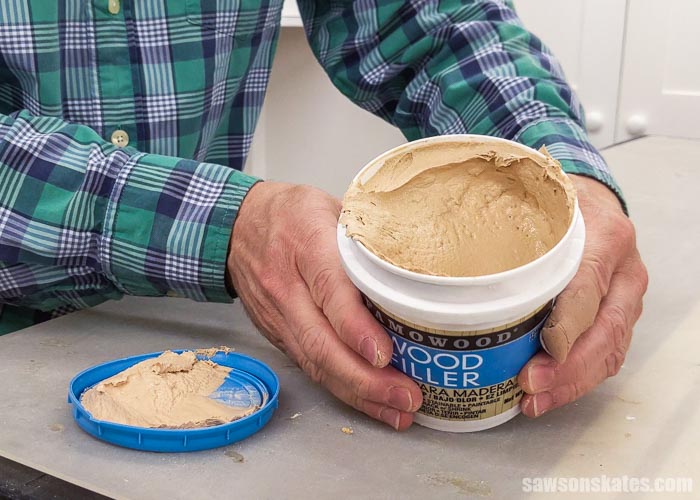
- FamoWood Latex Wood Filler
- Goodfilla Wood Filler
Two of the wood fillers will be homemade:
Related: How to Make DIY Wood Filler
Stains
I will test three types of stain. Two of the stains are store-bought. One stain is light, and one stain is dark:
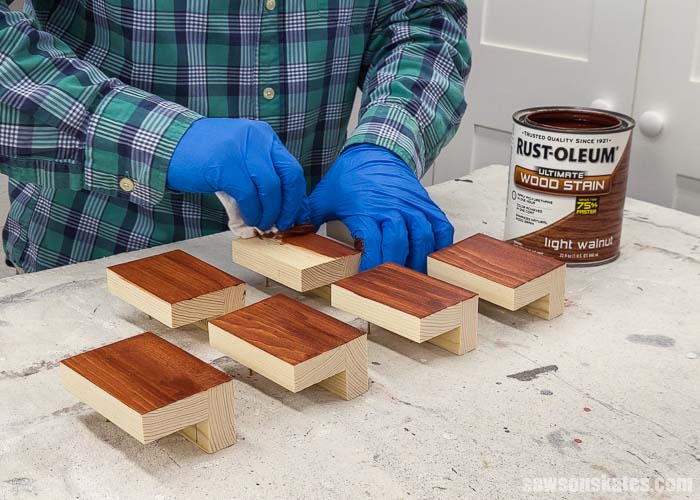
- Rust-Oleum Ultimate Wood Stain “Light Walnut”
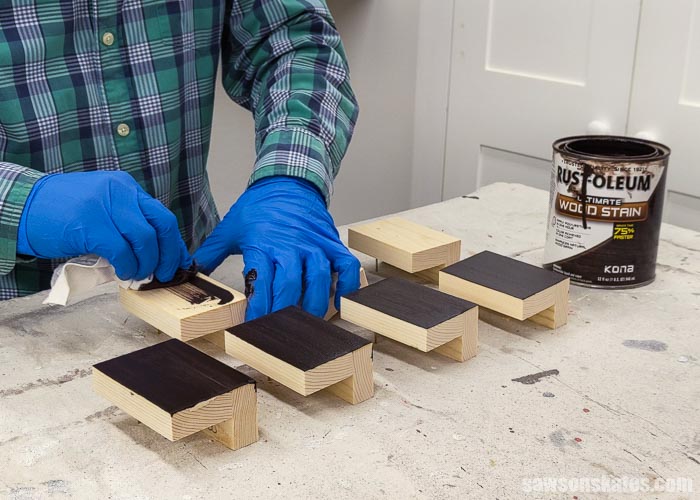
- Rust-Oleum Ultimate Wood Stain “Kona”
One of the stains is homemade:
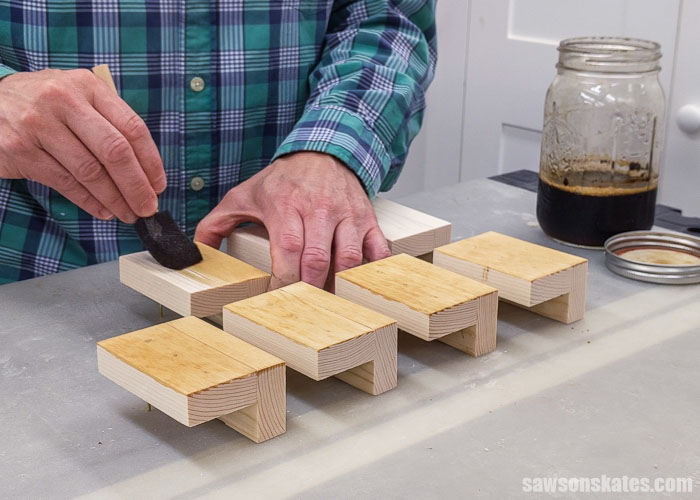
- DIY Coffee Stain
Related: How to Make a DIY Coffee Stain
Common Repairs
I will test the stainable wood fillers on two common repairs:
- Small gap between boards
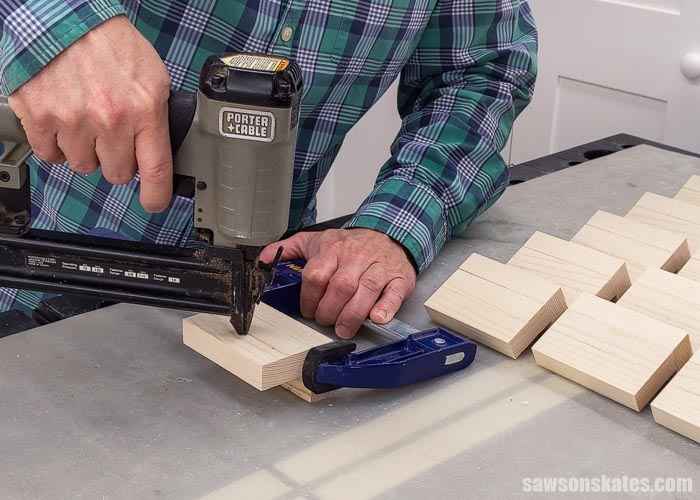
- Nail Holes (pin nails, 18-gauge brad nails, and 16-gauge finish nails)
Related: Brad Nailer vs Finish Nailer: Are They the Same?
How Do You Prepare the Wood?
Step 1. Sand the Wood
All of the pieces of wood in this comparison were sanded using a random orbital sander with 120 grit sandpaper. The sanding dust was removed with a ShopVac and a synthetic tack cloth.
Related: 11 Tips for Sanding Wood Projects Like a Pro
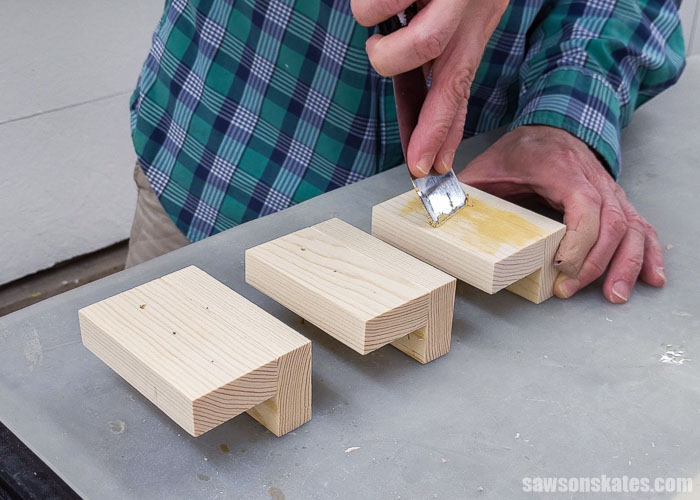
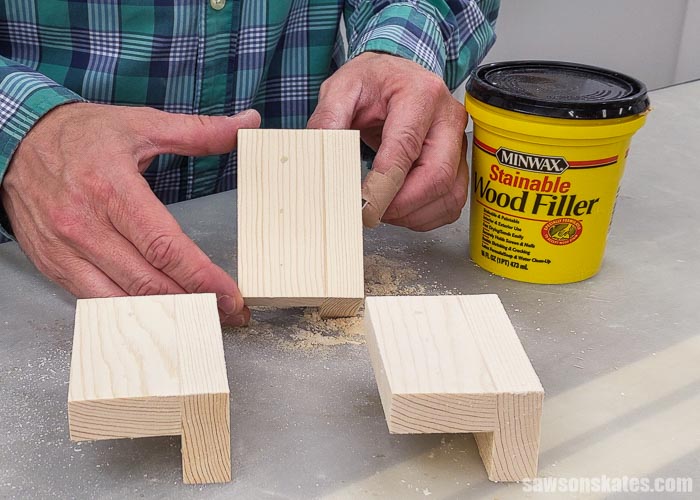
Step 2. Apply the Filler
All of the fillers were applied with a metal putty knife.
Step 3. Sand the Filler
All of the samples were sanded with 150 grit sandpaper when the fillers were dry.
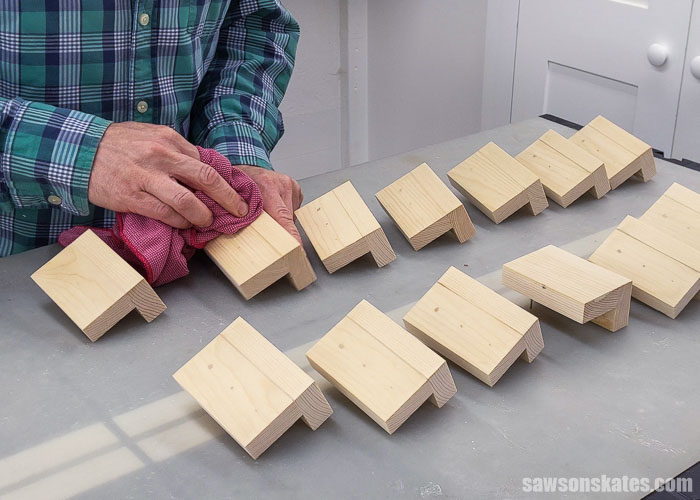
Step 4. Remove the Sanding Dust
The sanding dust was removed with a ShopVac and a synthetic tack cloth.
Related: What is a Tack Cloth? (and What I Use Instead)
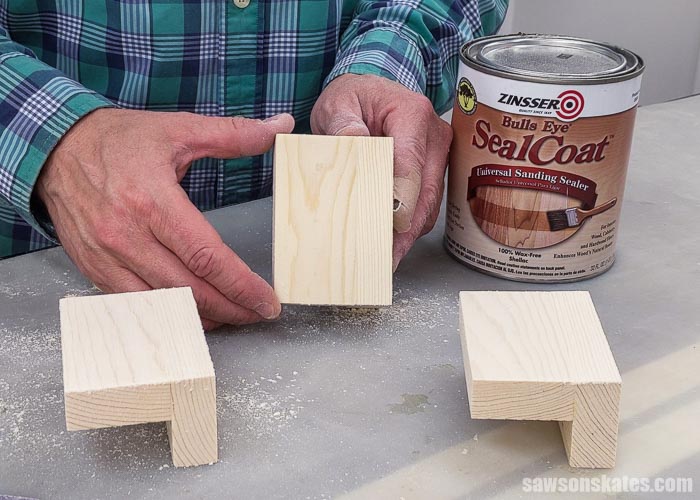
Step 6. Apply the Wood Conditioner
A homemade wood conditioner was applied to help the wood to absorb the stain more evenly.
Related: What I Use Instead of Wood Conditioner
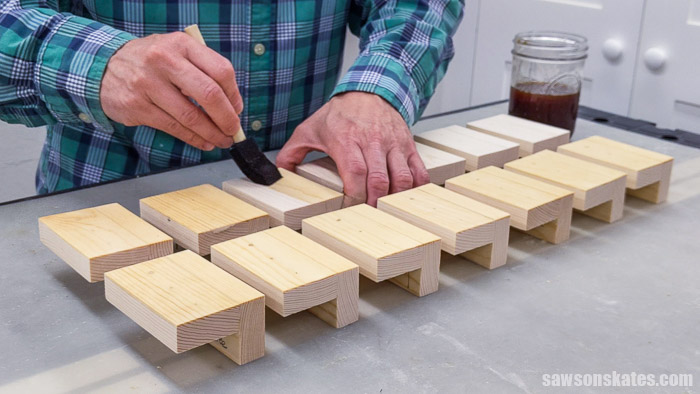
Step 6. Apply the Stain
The light and dark stains were applied with a clean rag.
The coffee stain was applied with a foam brush.
How Do You Apply Stainable Wood Filler?
I usually apply wood filler with a metal putty knife. I have used a plastic putty knife, but I find plastic putty knives are too flexible. I feel a metal putty knife is more rigid and does a better job of forcing the filler into the gaps or holes.
- Use the putty knife to firmly press the filler into the hole.
- Fill the hole slightly above the surface to allow for shrinking and sanding.
- Deeper holes should be filled in layers. Allow each layer to dry before applying another layer.
How Many Coats of Filler Can You Apply?
You can fill most small repairs with one application of stainable wood filler. Larger holes or deep gouges should be filled in several layers. Each layer should be allowed to dry completely before applying the next layer.
Back to Table of ContentsHow Long Does it Take for Stainable Wood Filler to Dry?
The time it takes stainable wood filler to dry will vary for each product. Drying times will also vary depending on the depth of the repair.
The drying times for the fillers in this comparison ranged from 15 minutes to 2 hours. Deeper holes may take 2-6 hours to dry.
Back to Table of ContentsHow Long Should You Wait to Apply Stain?
The time you have to wait to apply stain will vary for each product. The wait time will also depend if the stain that you’re applying is water-based or oil-based.
The wait times before applying water-based finishes to the fillers in this comparison ranged from applying immediately to 2 hours after the product was dry. The wait times before applying oil-based finishes ranged from 12 to 24 hours.
I waited 24 hours to apply the stain for this comparison.
Stainable Wood Filler Comparison Results
For each of the seven wood fillers, I will be sharing:
- My first impressions of the product
- How easy it was to apply
- How easy it was to sand (all samples were sanded with 150 grit sandpaper)
- How it absorbed the three types of stain
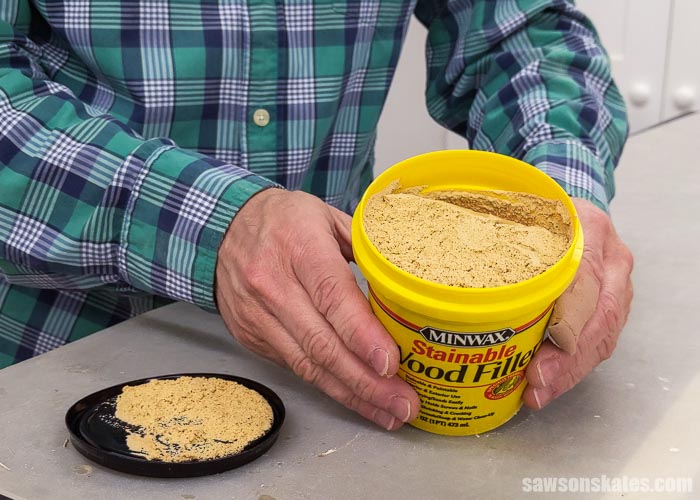
Minwax Stainable Wood Filler
First Impression
My first impression when opening the container of Minwax Stainable Wood Filler was that it looked like foam, and the color reminded me of circus peanuts candy.
Application
The Minwax filler was gritty to apply. It almost felt like I was applying beach sand to the wood.
After the Minwax had dried, I noticed that it had shrunk. It shrunk the most out of all the fillers in this comparison. I applied a second coat to make sure the holes were properly filled.
Sandability
Before I began sanding, I noticed the Minwax filler had changed color when it was dry. It dried to an orange color and I thought it looked the worst out of all of the fillers in this comparison.
The Minwax filler was one of the most difficult to sand out of all the fillers in this comparison. I started sanding by hand, but it was taking so much effort that I ended up using my random orbital sander.
When the Minwax filler was sanded, the color blended much better with the surrounding wood.
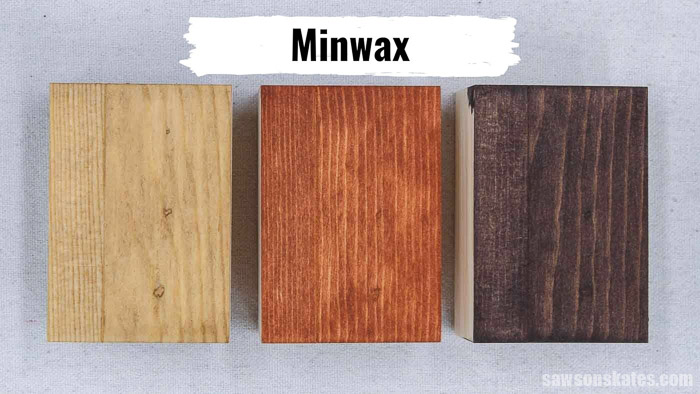
Stainability
The Minwax filler was a decent match for the coffee, but I think several of the fillers outshined Minwax on the coffee stain. Minwax was a very close match with the light stain and a close match for the dark stain.
There are two important things to mention when using the Minwax filler. The Minwax filler shrinks as it dries. Be sure to slightly overfill the hole so you will be able to sand it flush with the surrounding wood.
Also, be sure to avoid overspreading. I was not careful about this, and I overspread the filler onto the surrounding wood. The result was the area where the filler was overspread stained lighter than the surrounding wood. This was most noticeable on the the lighter stain sample.
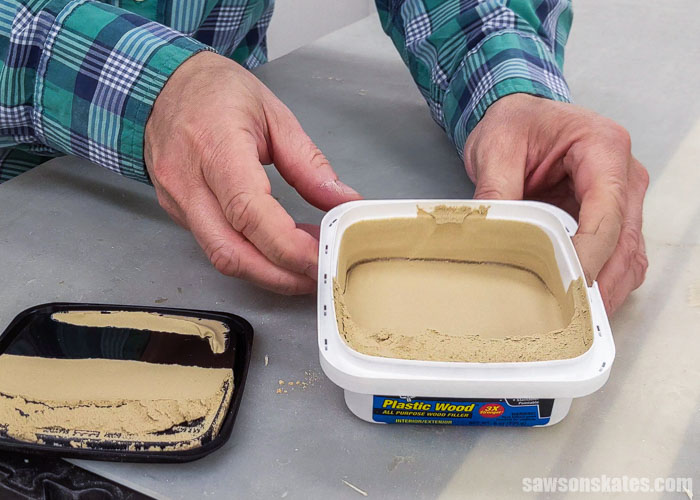
DAP Plastic Wood
First Impression
My first impression when opening the container of DAP Plastic Wood was that it looked dry and it had a strong odor.
Application
The DAP filler had a dry texture which made it difficult to spread.
Sandability
Before I began sanding, I noticed the DAP filler felt smooth to the touch, had a slight powdery feel, and the color was slightly darker than the wood.
The DAP filler was fairly easy to sand by hand.
Stainability
The DAP filler on the coffee stain was a close match for the nail holes, but the joint between the boards looked more like filler than wood.
On the light stain, DAP was a very close match. On the dark stain, DAP virtually disappeared on the nail holes and the joint between the boards.

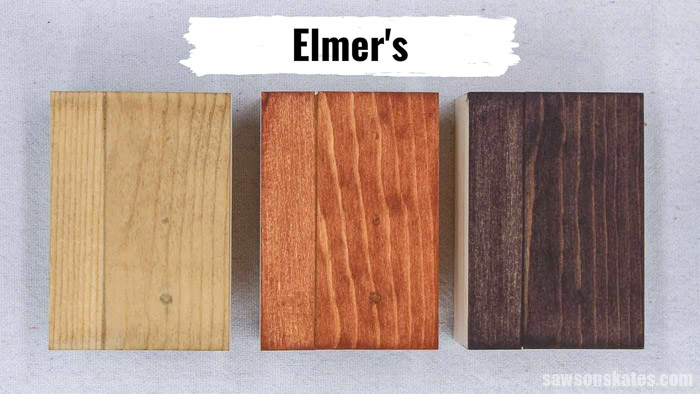
Elmer’s Carpenter’s Stainable Wood Filler
First Impression
My first impression when opening the container of Elmer’s Carpenter’s Stainable Wood Filler was that it looked wet. When I titled the container, I noticed it had a runny consistency.
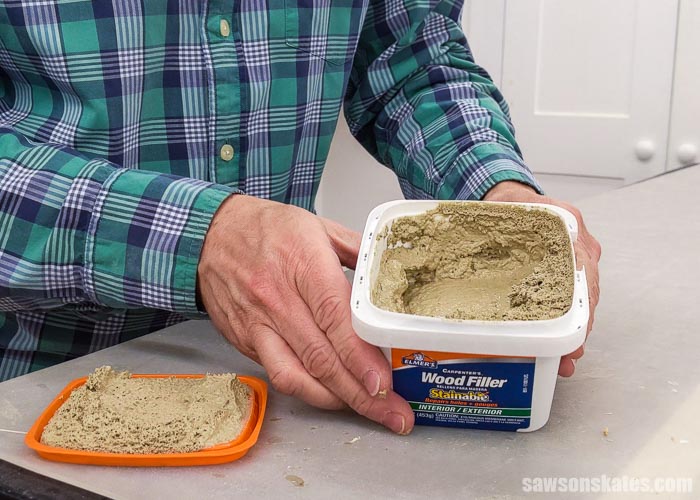
Application
Despite the runny consistency, it applied more like a dry product, and it had a slightly gritty texture. As I spread the Elmer’s wood filler, it kept popping out of the nail holes. I had to spread it slowly so that it would stay where I wanted it.
Sandability
Before I began sanding, I noticed the Elmer’s filler felt fairly smooth to the touch, and it had a greenish color compared to the surrounding wood.
The Elmer’s filler was fairly easy to sand by hand.
Stainability
The Elmer’s filler was noticeable on the coffee stain, and it looked more like filler rather than wood.
On the light stain, Elmer’s was a good match on the nail holes but was slightly noticeable on the joints between the boards.
On the dark stain, Elmer’s was a very close match. The filler was most noticeable on the largest hole, but the joint between the boards was nearly undetectable.
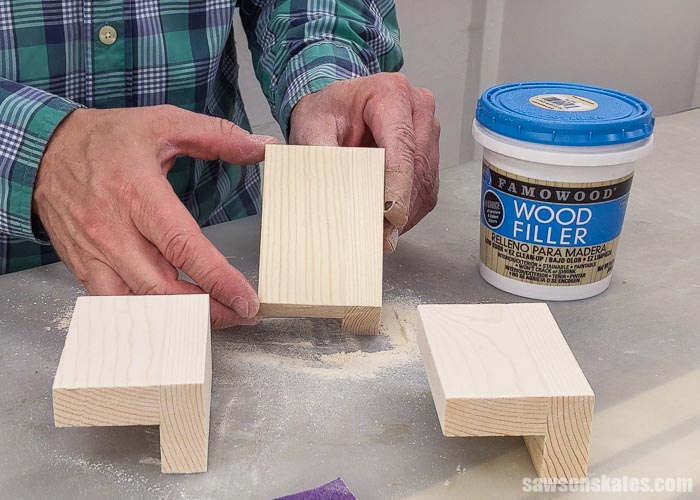
FamoWood Latex Wood Filler
First Impression
My first impression when opening the container of FamoWood Wood Filler was that it had a smooth, mashed potato-like texture.
Application
The smooth texture of the FamoWood made it easy to spread.
Sandability
Before I began sanding, I noticed the FamaWood felt fairly smooth to the touch, and it had a pinkish color compared to the surrounding wood.
The FamoWood filler was fairly easy to sand by hand.
Stainability
I had high hopes for the FamoWood filler. Out of all of the fillers, it looked the best on raw pine, so I figured it would be a great match when it was stained.
Of the three stain samples, it looked the best with the coffee stain.
On the light stain, FamoWood was noticeable and stained much lighter than the surrounding wood.
On the dark stain, FamoWood was a pretty close match with the dark stain, but I thought several of the other fillers did a better job.

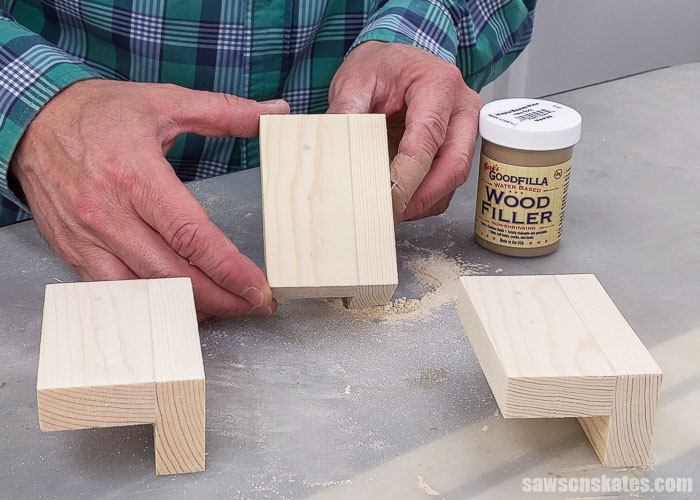
Goodfilla Wood Filler
First Impression
My first impression when opening the container of Goodfilla Wood Filler was that it looked smooth and was slightly shiny. The look of it reminded me of Silly Putty.

Application
Goodfilla was the easiest to spread of all the fillers in this comparison.
Sandability
Before I began sanding, I noticed the Goodfilla felt fairly smooth to the touch, and it had a darker, almost khaki color compared to the surrounding wood.
The Goodfilla filler was fairly easy to sand by hand.
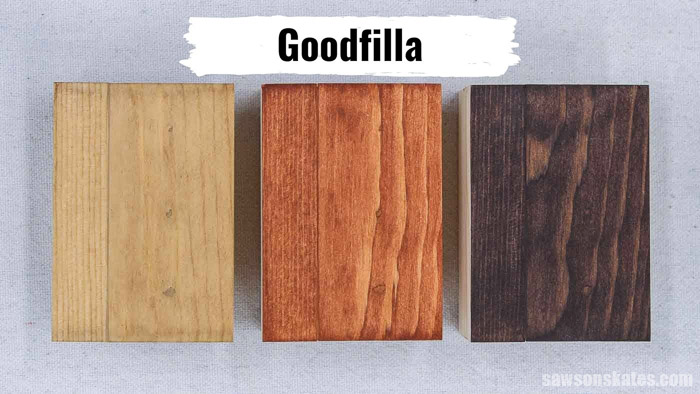
Stainability
The Goodfilla was a pretty close match for the coffee stain.
On the light stain, Goodfilla was a decent match but stained lighter than the surrounding wood.
On the dark stain, Goodfilla stained lighter. Several of the other fillers did a better job on the dark stain.
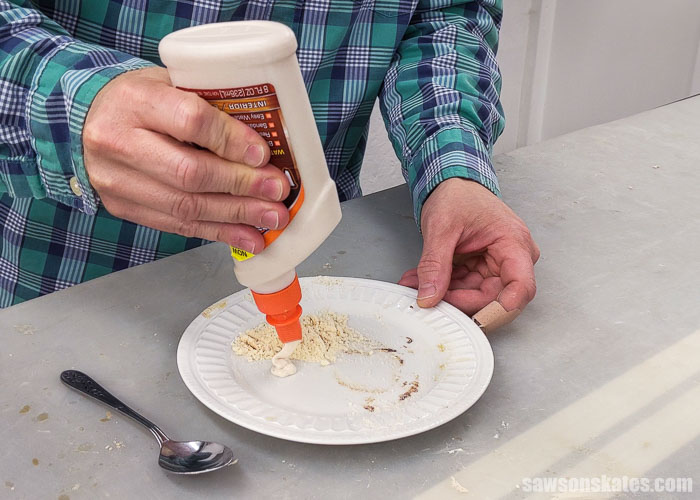
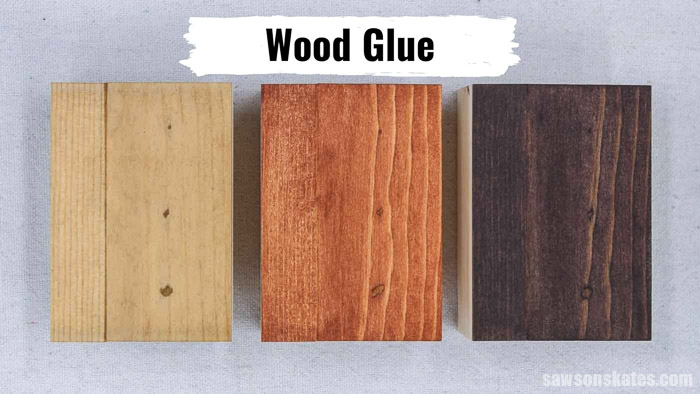
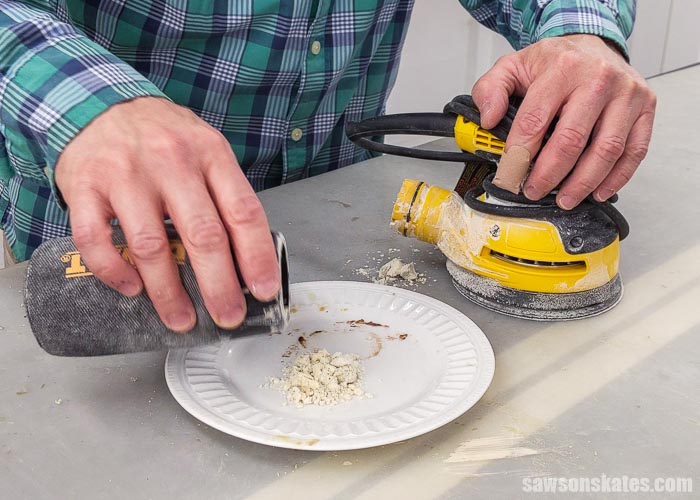
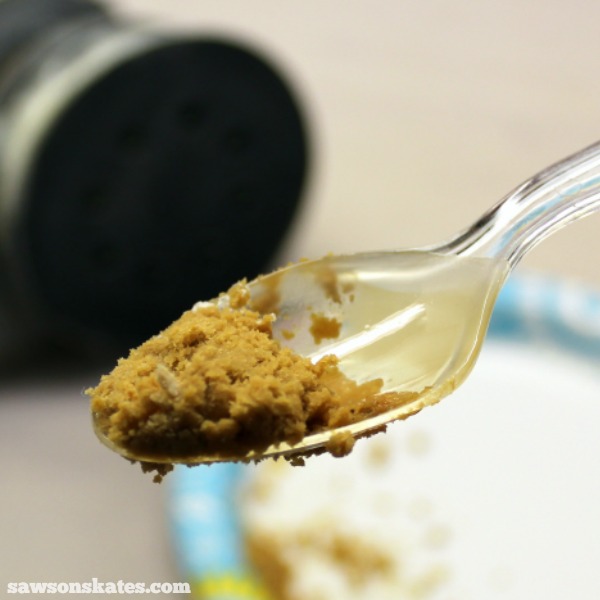
Sawdust and Wood Glue
To make this wood filler, I mixed sanding dust from my random orbital sander. The sanding dust was from sanding the pieces of pine for this comparison, so it should be a good color match. Then I mixed the dust with enough stainable wood glue to make a putty-like consistency.
Related: Clever Uses for Sawdust: 11 Ideas That Will Inspire You
First Impression
My first impression of sanding dust/glue mixture was that it had a gummy, rubber-like texture.
Application
The rubber-like texture made this mixture feel like I was trying to spread chewing gum into the holes.
Sandability
Before I began sanding, I noticed the glue mixture was slightly flaky to the touch and was a darker color compared to the surrounding wood.
Just like the Minwax wood filler, the glue mixture was one of the most difficult to sand. I started sanding by hand, but it was taking so much effort that I ended up using my random orbital sander.

Stainability
For me, glue mixed with sanding dust missed the mark on every sample.
On the coffee stain, light stain and dark stain, the glue mixture was noticeable, and not a good match.
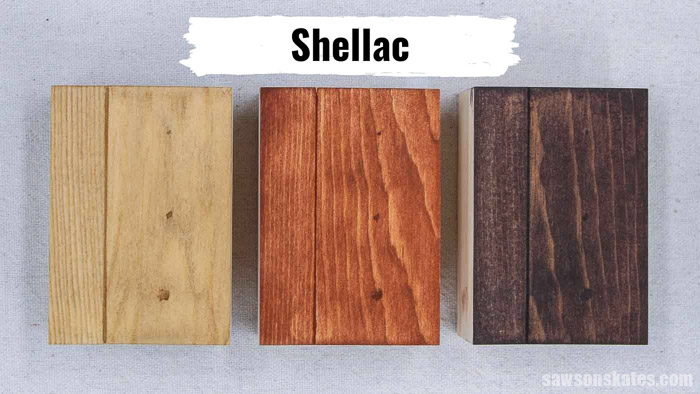
Sawdust and Shellac
To make this wood filler, I mixed sanding dust from my random orbital sander. The sanding dust was from sanding the pieces of pine for this comparison, so it should be a good color match. Then I mixed the dust with enough dewaxed shellac to make a putty-like consistency.
First Impression
Related: How to Make a DIY Wood Filler
My first impression of sanding dust/shellac mixture was that it had a dry, powder-like texture.
Application
The dry texture made this mixture difficult to spread. As I spread the shellac mixture, it would pop out of the nail holes. I had to spread it slowly so that it would stay where I wanted it.
Sandability
Before I began sanding, I noticed the shellac mixture was slightly flaky to the touch, and the color was a close match to the surrounding wood.
The shellac mixture was the easiest to sand of all the fillers in this comparison.
Stainability
On all three samples, the shellac mixture stained a darker, complementary color.
My Stainable Wood Filler Review
These are my observations based on this comparison. You’ll want to test for yourself to be sure the filler will produce the results you’re looking for.
Light Stain
- First Choice:
The winner was Minwax. I would call this a very close match between the wood and the filler. The filler almost disappeared on the largest hole. The joint between the boards was nearly undetectable. Be careful to avoid overspreading. I was not careful about this, and I overspread the filler onto the surrounding wood. The result was the area where the filler was overspread stained lighter than the surrounding wood. - Second Choice:
This was a tie between Elmer’s and DAP, but I would give the advantage to Elmer’s. The Elmer’s was a very close match between the wood and the filler. The filler was most noticeable on the largest hole, but the joint between the boards was nearly undetectable. DAP lost points on the joint between the boards. My issue with the joint was that it looked more like filler than wood. - Third Choice:
Shellac mixed with sanding dust came in third. The mixture stained a darker, complementary color.
Dark Stain
- First Choice:
DAP was the clear winner for me on the dark stain. The DAP filler virtually disappeared on the nail holes and the joint between the boards. - Second Choice:
This was a tie between Elmer’s and Minwax. I think either would be a good choice. I think Elmer’s looked better in the nail holes, where I think Minwax stained slightly lighter. The Minwax virtually disappeared in the joint between the boards where the Elmer’s was slightly noticeable. - Third Choice:
Shellac mixed with sanding dust came in third. The mixture stained a darker, complementary color.
Coffee Stain
- First Choice:
FamoWood was the clear winner for me on the pine stained with coffee. The FamaWood filler virtually disappeared on the nail holes and the joint between the boards. - Second Choice:
This was a tie between Goodfilla and DAP. I think Goodfilla slightly outshined DAP. Again, DAP lost points on the joint between the boards because it looked more like filler than wood. - Third Choice:
Shellac mixed with sanding dust came in third. The mixture stained a darker, complementary color.
Missed the Mark
- For me, glue mixed with sanding dust missed the mark on every sample.
- On the coffee stain, light stain, and dark stain, the glue mixture was noticeable and not a good match.
- I know some people swear by it, but I have tried this glue filler several times, and I have never been happy with the results.
Stainable Wood Filler Comparison Chart
| Filler | Coffee Stain | Light Stain | Dark Stain |
|---|---|---|---|
| Minwax | Noticeable | Best | Better |
| DAP | Better | Better | Best |
| Elmer’s | Noticeable | Better | Better |
| FamoWood | Best | Noticeable | Good |
| Goodfilla | Better | Good | Good |
| Glue/Sanding Dust | Poor | Poor | Poor |
| Shellac/Sanding Dust | Good | Good | Good |
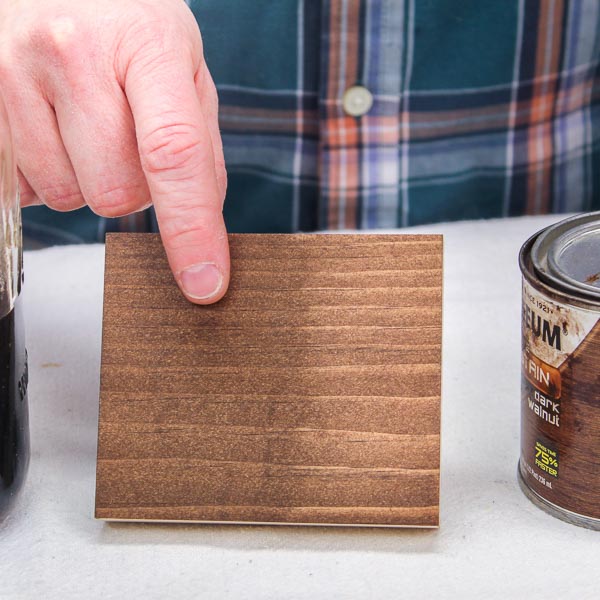
Does Wood Filler Stain the Same as Wood?
As you can see from this comparison, stainable wood filler does not absorb stain like wood. The filler may stain darker or lighter. When choosing between darker or lighter, I recommend a filler that stains a darker, complementary color.
The reason I would choose darker is because of a friend who makes quilts. She says the best way to match thread to fabric is to use a thread color that is darker than the fabric. She says a darker color will blend or almost disappear, while a lighter color will stand out and bring attention to the difference in color.
I should mention again that the darker color should complement the color of the stain. A few of the fillers on this list stained darker, but the darker color did not complement the stain color.
💡 TIP: When staining any wood project, it’s a good idea to test a few sample pieces to be sure the filler will give you the results that you’re looking for.
Back to Table of ContentsIs Colored Stainable Wood Filler Available?
Colored stainable wood fillers are available. Goodfilla is just one brand that is available in colors. As I mentioned earlier, you might want to choose a colored wood filler that is a darker, complementary color to the stain color that you are using for your project.
Back to Table of ContentsCan You Color Wood Filler?
You can color wood filler to help it match better with your project. Keep in mind that most stainable wood fillers are water-based, so you’ll want to use a water-based colorant to be sure the products blend properly.
Back to Table of ContentsWhich One Should You Buy?
Minwax, DAP, and Elmer’s consistently placed at the top of this comparison. One of these would be a good choice to get started with a stainable wood filler.
Best for Light Stain

Photo Credit: Amazon
Minwax Stainable Wood Filler
Best for Dark Stain

Photo Credit: Amazon
DAP Plastic Wood
Best for Coffee Stain

Photo Credit: Amazon
FamoWood Latex Wood Filler
Final Thoughts
Stainable wood fillers patch small holes and gaps but are designed to absorb stain and blend into the surrounding wood. Based on this comparison, there wasn’t one filler that was a perfect match for the light, dark, and coffee stains. In other words, there isn’t a one-size-fits-all stainable wood filler. To get the best match, you may need two or even three wood fillers based on the type of wood and stain color you are using for your project.
Thank you for stopping by. If you enjoyed this tutorial, would you please take a moment and pin it to Pinterest? I’d really appreciate it!
Recommended For You
Pin This For Later

Hi there – I’m Scott, a woodworking enthusiast and creator of Saws on Skates, a site I started in 2015 to share easy-to-follow tutorials, space-saving shop tips, and project inspiration for DIYers at any skill level. Learn more about my woodworking journey here.
Excellent research. Thank you for doing this.
You’re welcome. I’m glad this was useful to you.
I use glue to fill the hole ,Then I sand the area with a finish sander to create sawdust, Keep sanding until the hole is least noticeable. Be sure to get ALL the glue sanded off the project, or it will stick out like a sore thumb when the stain is applied!
I have been using wood dye instead of stain on soft woods such as pine and alder, as I think it is absorbed into the wood better, just my opinion!
Thank you for the tip, Robert. I will have to give that a try!
Famowood is the best hands down. Been using it for years.
Thanks for posting this Scott. I’m in the process of staining (Light Color) our deck starting this afternoon when its in the shade. I was going to go with Min-Wax after I heard it works good on the lighter stain and it looks as though those people agree with your top choice for lighter stains. Thanks for reaffirming my choice!
Just wanted to say thanks for this awesome review!