5 Essential Cabinet Making Tools
Master your next project with these cabinet making tools! DIY experts reveal the 5 tools they trust to take the guesswork out of their cabinet builds.
Essential Cabinet Making Tools
Do you feel overwhelmed when you begin to think about building DIY furniture or building DIY kitchen cabinets? I understand how you feel because there are so many things to consider.
How do you make adjustable shelves? How do you install the drawers? What about installing doors? How do you do that? And what about the knobs or pulls? How do you drill the holes for those things?!
Today I’m chatting with four expert DIYers about the cabinet making tools they use to take the guesswork out of building furniture and cabinets.
I’m excited to partner with Kreg Tool and to have them as a sponsor of this post!
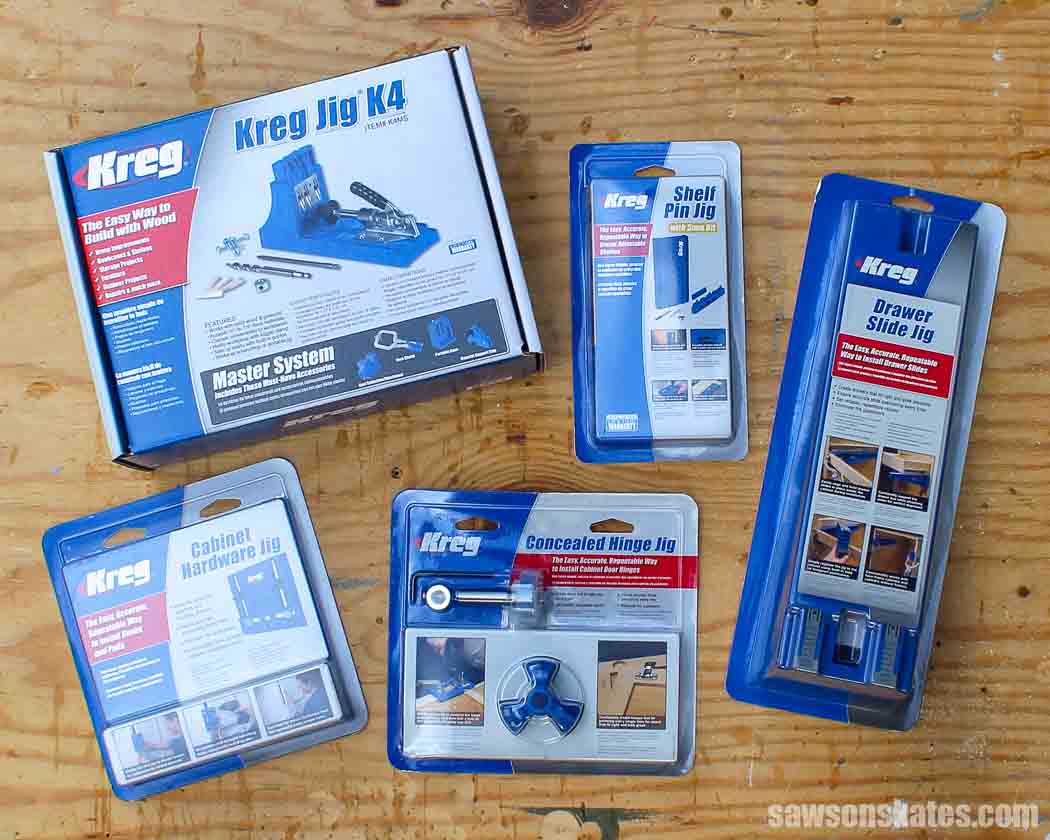
Charlee from Build and Create Home, Anika from Anika’s DIY Life, Vineta from The Handyman’s Daughter, and Sarah from The Created Home are here to help. They’ll answer all of these questions, give us helpful tips, and share the cabinet making tools they use to make building DIY projects easier.
This tutorial contains affiliate links to supplies and tools. Purchases made using these links help support the Saws on Skates website and allows me to share more projects and tips with you. There is no cost to you for using these links. Visit my site policies for more information.
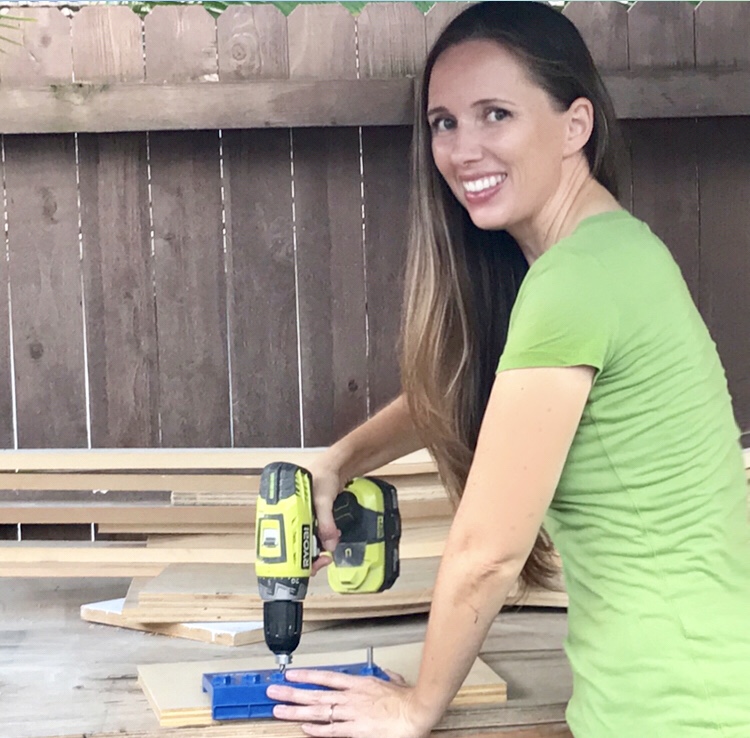
1. Pocket Hole Jig
There are a few ways to assemble furniture and cabinets. You could use wood screws, biscuit joints or pocket holes. For me, pocket holes are my go-to joinery method for my DIY projects.
In a recent post, a reader asked me to compare pocket holes vs biscuit joints. My comparison showed biscuits align joints well and are invisible, but pocket holes are faster, easier to use and my preferred joinery method.
Related: Kreg Jig vs Biscuit Joiner: Differences of Pocket Holes and Biscuit Joints
How does a Kreg Jig work? It uses a guide block with preset holes to drill angled pocket holes into a workpiece. A pocket screw, specifically designed to be used with pocket holes draws the two workpieces together to form a strong joint.
With a Kreg Jig, you can drill the pocket holes, apply glue, clamp the joint, drive the pocket screws and you’re DONE! The screw securely attaches the joint so you don’t have to wait for the glue to dry. Now you’re ready to move on to the next step of your project.
2. Shelf Pin Jig
For many DIY furniture projects and DIY cabinet projects, you’ll want to add some shelves for storage. In my opinion, adjustable shelves are the way to go. Adjustable shelves or shelves that can be moved offer greater flexibility for storing items of different shapes and sizes than fixed shelves.
Adjustable shelves are great for bookcases, kitchen cabinets, sideboards, closets and more. But how do you add adjustable shelves to your DIY project? In the past, I’ve used pegboard as a makeshift jig to drill holes for the shelf pins.
I would lay the pegboard on my project and use a drill bit to drill the holes for the shelf pins. The problem is over time the drill bit would make the holes in the pegboard larger and the shelf pin holes in my project would get a little sloppy.
Related: 4 Reasons Why I Don’t Use Pegboard in My Small Workshop
Charlee at Build and Create Home tells me there’s a much easier way to drill holes for adjustable shelves. Charlee is an avid home remodeler (you should see her kitchen!), builds furniture for clients, and you may even see her doing a woodworking presentation at a conference.
In other words, Charlee doesn’t have time to mess around drilling holes for shelf pins with a pegboard. Instead, she uses the Kreg Shelf Pin Jig. She says “it really has made such a big difference in how I build my shelves.”
The Kreg Shelf Pin Jig is so simple to use. First, the jig is clamped to your project. The kit includes a drill bit and depth collar. The depth collar is set on the drill bit to prevent drilling through the other side of your project.
Next, the shelf pin holes are drilled. Remove the jig, place the included “locating pin” in one of the holes and slide the jig over the pin. Now you’re ready to drill your next set of holes. The locating pin aligns the jig to the first set of holes. This means you’ll have perfectly spaced holes every time.
Charlee says “I love inexpensive things that make my life easier!” I’m with you Charlee. The shelf pin jig is way easier than using pegboard!
Related: How to Make Adjustable Shelves with a Shelf Pin Jig
3. Drawer Slide Jig
Now that we added some adjustable storage shelves to our DIY project, let’s add more storage with some drawers. Have you ever seen those metal drawer slides? They look intimidating, right? Or if you’ve ever worked with drawer slides you know it can be frustrating to install them.
Anika from Anika’s DIY Life understands how you feel. Anika says “To me, installing drawers has always been the most stressful part when building furniture involving drawers.”
When Anika first started building she would “measure and mark three locations three times, clamp a straight edge, clamp a level, mark locations for the drawer slide and attach to the cabinet.” All of that work was for just one side of the cabinet. Then she had to do all of these same steps on the other side of the cabinet.
But she was only halfway done with installing the drawer. Next, she had to “repeat a lot of those steps to attach the slide to the drawer itself.” This seems like so much work just to install a drawer. Not only was it a lot of work but Anika says “The margin for error is almost zero if you want perfectly working drawers.”
Then Anika discovered the Kreg Drawer Slide Jig and she says her “drawer installing world completely changed with the drawer slide jig!”
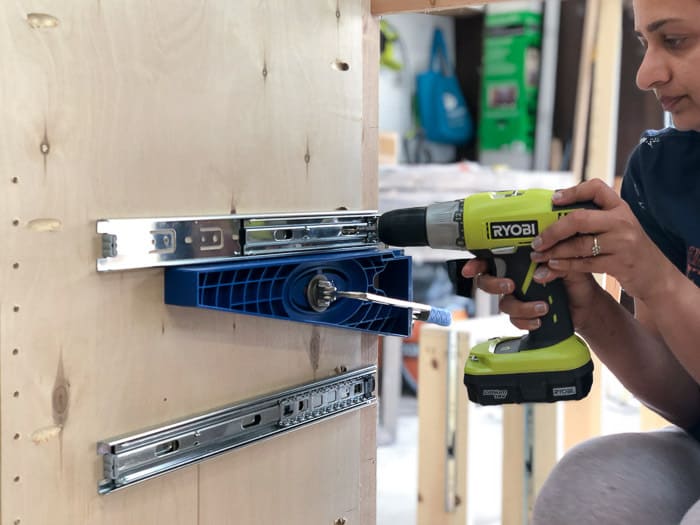
The Kreg Drawer Slide Jig eliminates all of those complicated steps. With the jig, Anika tells me all she had to do was measure the “exact height where I want to attach the drawer slide to the cabinet and clamp the drawer slide jig at that location.” Next, she would “rest the drawer slide on the jig and attach!” So simple!
Since learning about the Kreg Drawer Slide Jig Anika has used it to install drawers in several of her DIY projects like her Sliding Barn Door Cabinet and her Entryway Bench.
Oh, and if you need help building the drawer itself Anika has got you covered. Skate over to her complete guide on How to Build a Drawer.
4. Concealed Hinge Jig
Installing hinges on doors, just like installing drawer slides can be a little tricky. Vineta from The Handyman’s Daughter is here to share the simple way she installs door hinges on her DIY projects.
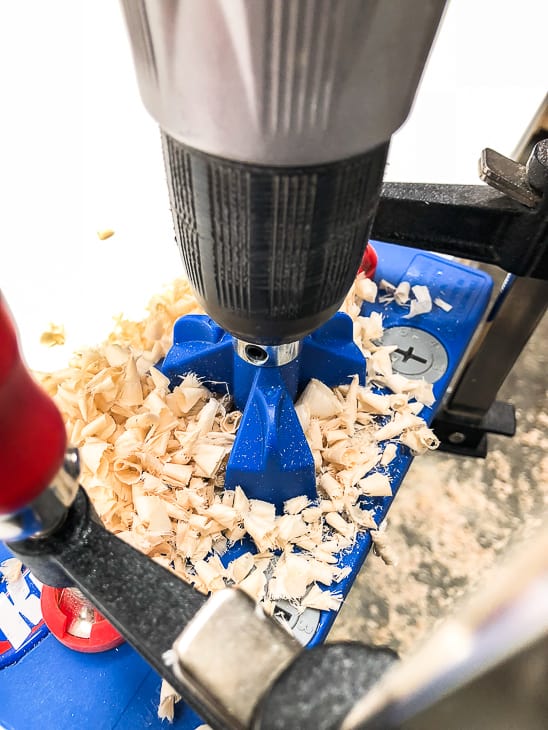
Vineta’s go-to tool for installing hinges is the Kreg Concealed Hinge Jig. She’s used the jig to attach hinges for new furniture projects like her DIY Pantry Cabinet. She says “The jig takes all the guesswork out of boring concealed hinge holes in your brand new cabinet doors.”
First, Vineta clamped the Kreg Concealed Hinge Jig to her door, inserted the included drill bit guide into the jig, locked it in place and drilled the hole. She says “Make sure to bore all the way down to the stop collar for the perfect depth.”
For more of Vineta’s tips and tricks on using the jig skate over to How to Use a Concealed Hinge Jig on New Cabinet Doors. Oh, be sure to check out her concealed hinge video too!
Vineta also used the Kreg Concealed Hinge Jig on existing cabinets. She shares the details of this project in her Update Your Bathroom Vanity with New Cabinet Doors post. She replaced her old vanity doors with new vanity doors but wanted to reuse the hinges. Vineta says “The jig made it simple to replicate the placement and spacing, so I didn’t have to adjust the old hinges at all!”
5. Cabinet Hardware Jig
Ok, let’s recap. We’ve built a cabinet, added some adjustable shelves, installed the drawers and attached the doors. What are we missing? Oh, yeah! We need to add some drawer pulls and knobs!
The major problem with installing drawer pulls and door knobs is positioning them in the same location for each drawer and door. That’s the issue Sarah from The Created Home ran into.
Sarah has taken on some major renovations. She recently completed a DIY Kitchen Renovation, updated a Small Walk in Pantry and Laundry, and created a DIY Mudroom with Dog Bath (Yes, a mudroom with a dog bath! Be sure to skate over and check it out!) Sarah said, “I had more than 40 pulls to install, and there is no way I was tackling that task without a jig.”
Sarah went on to say “You can make your own jig, but you will have to make a new one for each drawer or door dimension.” With these major renovations and more than 40 pulls to install she didn’t have time to create a custom jig for each installation. That’s when she learned Kreg made a Cabinet Hardware Jig.

Sarah said the jig allows you to “position a pull or knob at the same precise measurement on the face of a drawer or door.” But how do you change the jig to fit different doors and drawers? Sarah says “With the Cabinet Hardware Jig a simple adjustment is all you need to change the drill position.”
Sarah tells me “When it comes to consistency, ease of use, and time spent on projects, this little jig is an absolute game changer.”
Cabinet Making Tools Make Building Easier
- Assembling furniture and cabinets with a Kreg Jig is fast, easy and you don’t have to wait for the glue to dry.
- The Kreg Shelf Pin Jig easily allows you to add adjustable shelves to nearly any DIY project.
- The Kreg Drawer Slide Jig eliminates complicated steps when installing drawers.
- The Kreg Concealed Hinge Jig takes away the guesswork when installing door hinges.
- The Kreg Cabinet Hardware Jig allows you to precisely position holes for pulls and knobs on the faces of drawers and doors.
Final Thoughts
Building furniture and cabinets can seem intimidating. Today we chatted with four DIY experts about the cabinet making tools they use to make building DIY projects easier. Take it from Charlee, Anika, Vineta and Sarah these Kreg tools make your life easier, change your world, take away the guesswork and are game changers for your DIY projects.
Thank you for stopping by. If you found this information helpful, would you please pin it to Pinterest? Other DIYers would appreciate it and I would too! Thank you – Scott
More Like This

Hi there – I’m Scott, a woodworking enthusiast and creator of Saws on Skates, a site I started in 2015 to share easy-to-follow tutorials, space-saving shop tips, and project inspiration for DIYers at any skill level. Learn more about my woodworking journey here.