9 Beginner Woodworking Tools (That Won’t Break the Bank)
As a beginner, woodworking can be intimidating, but it doesn’t have to be. Learn what tools you need, why you need them, and what to buy first.
Must-Have Woodworking Tools for Beginners
If you’ve been thinking about taking up woodworking, you’re probably confused about where to get started. Beginners often ask, “what tools should I buy for woodworking?” or “what tools should every woodworker have?” I’ll break down what tools are necessary, what they can do, and why they’re important so you can get the job done right the first time.
You may also enjoy 11 Places to Take Beginner Woodworking Classes
Published August 20, 2019, updated November 22, 2021
This tutorial contains affiliate links to supplies and tools. Purchases made using these links help support the Saws on Skates website and allows me to share more projects and tips with you. There is no cost to you for using these links. Visit my site policies for more information.
Before we get into the basic tools that beginners need, be sure to click the subscribe button at the bottom of this page to sign up for my FREE weekly newsletter loaded with helpful pocket hole tricks, space-saving workshop ideas, clever DIY tips and more!
Table of Contents
- My Advice on Buying Woodworking Tools
- Safety First: Personal Protective Equipment
- Basic Woodworking Hand Tools for Beginners
- Basic Woodworking Power Tools for Beginners
- Beyond the Basics
- Where to Buy Woodworking Tools
- My Complete List of Woodworking Tools
- How to Organize Tools
- More Like This
My Advice About Buying Tools
Before we look at the basic tools you’ll need for woodworking, I’d like to share my thoughts about which tools to buy first and my philosophy about buying tools.
Which Woodworking Tools Should I Buy First?
One of the questions beginners often ask is “which tools should I buy first?” or “what order should I buy woodworking tools?”
First, you don’t need to buy everything on this list all at once. My advice is, buy tools as you need them based on the project that you’re building.
Think about it this way. Let’s say you decide that you want to start hiking as a hobby. The only footwear you own is a pair of flip flops and a pair of slippers. It would be helpful (and safer) if you invested in a pair of hiking boots to get started with your new hobby.
As the seasons change, you may need to invest in a jacket, hat, or gloves.
You can use this same approach when buying tools for woodworking.
The tools on this list are the ones I use most often. Many of them I use on every project that I build.
My Philosophy About Buying Tools
I shared my thoughts about buying tools on the Start Here page, but I wanted to share them again with you here.
I believe tools are an investment, just like buying a house or investing in a 401k plan. We should invest in the best tools our budget will allow. But I’m not suggesting that you max out your credit card.
I am suggesting that sometimes it’s best to save until you have the money to get the best tool that your budget will allow. Do research, read reviews, ask fellow DIYers for their recommendations and then weigh your options.
Think about it this way:
- Tool “A”
Tool “A” is cheap, but the reviewers say it isn’t durable and won’t last very long. - Tool “B”
Tool “B” is a little more expensive but will last forever.
For me, tool “A” is a waste of money, so I’m going to save and buy tool “B.”
I’ve been disappointed every time that I focused on the budget over quality. When my research told me I needed a more expensive tool, but I skimped, saying to myself, “this will do,” hands down, I always regretted not going with the quality tool.
The bottom line is to buy the best tool your budget will allow.
Safety First: Personal Protective Equipment
Wikipedia describes personal protective equipment or PPE as “protective clothing, helmets, goggles, or other garments or equipment designed to protect the wearer’s body from injury or infection.”
I’ve included personal protective equipment on my list of essential woodworking tools because we need to use it EVERY TIME we use a tool. No exceptions. No excuses.
Here’s the analogy I think about when it comes to personal protective equipment. When I took a training course to get my motorcycle license the instructor said: “If it’s too hot to wear safety gear then it’s too hot to ride!”
This statement has stuck with me for years. Here’s my advice to you. If you can’t be bothered to wear PPE then don’t bother DIYing!”
Using tools without PPE can be dangerous to our eyes, ears, and lungs. This means we need to protect our eyes with safety glasses, our ears with hearing protection and our lungs with a quality respirator.
Basic Woodworking Hand Tools for Beginners
There are a few basic hand tools that I’m guessing most people already own, like a hammer and a set of screwdrivers.
Instead, let’s look at other hand tools essential to woodworking, like a tape measure, Kreg Multi-Mark, and bar clamps.
Hand tools like a block plane or a set of chisels are also helpful but not necessarily essential. I would add these types of tools as you need them or as your skills increase.
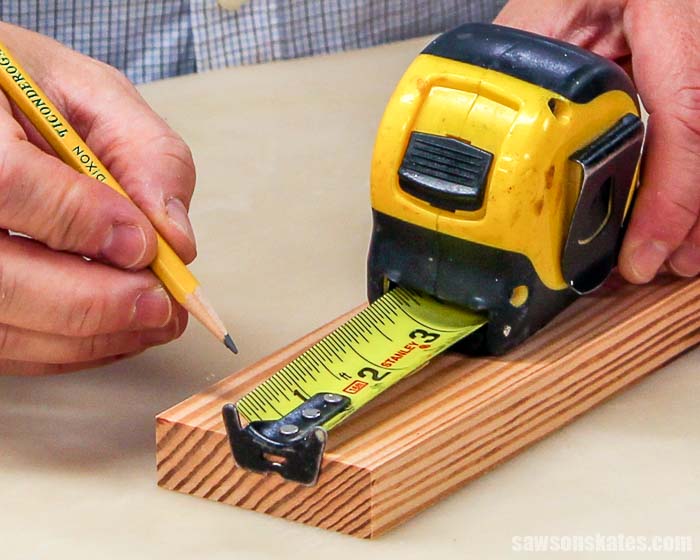
Tape Measure
One of the essential tools you will need for every woodworking project is a tape measure.
You will use a tape measure for everything from measuring the width and thickness of a board to marking the length for a cut.
Related: How to Use a Tape Measure Correctly (Tips for Success)
There are few things you’ll want to consider when buying a measuring tape. Look for one that is:
- Accurate and easy to read
- Sturdy and doesn’t twist or bend easily
The Stanely FatMax is my go-to tape measure. It’s accurate, sturdy, and I like the way the rounded case fits in my hand.
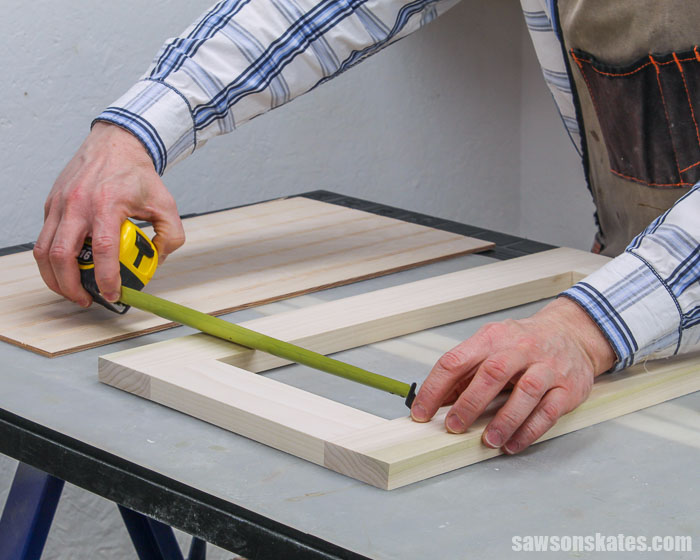
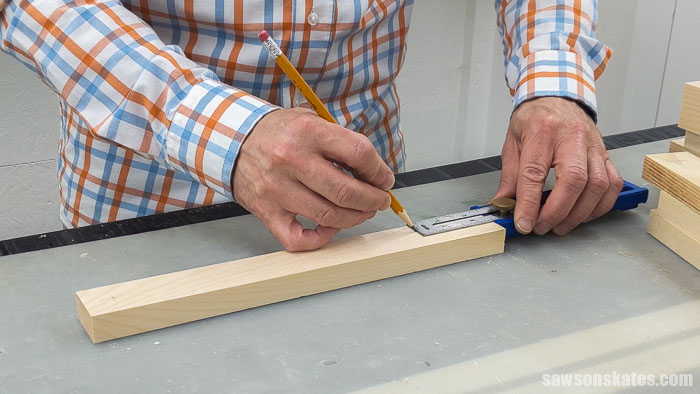
Kreg Multi-Mark
The Kreg Multi-Mark is a handy must-have tool for beginners. I have two of them in my tiny workshop. That’s how handy it is!
Related: My 12×13 Small Workshop Layout
I use the Multi-Mark on nearly every project I build. It’s excellent for:
- Making repetitive measurements
- Setting the depth of a saw blade or router bit
- Marking the locations for cuts
- Marking the locations for pilot holes and countersink holes
- Plus much more
Just look at the build photos from any of my furniture plans, and chances are you’ll see me using the Multi-Mark.
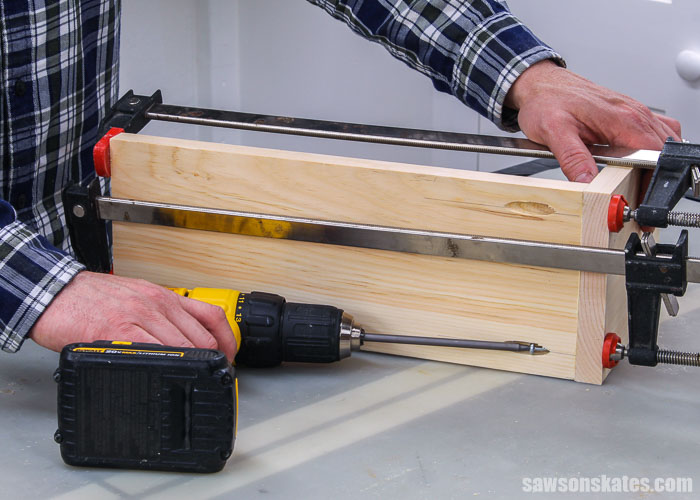
Bar Clamps
Bar clamps are another essential tool that you’ll need for nearly every woodworking project.
- Gluing Table Tops and Panels
Bar clamps hold boards in place when gluing up table tops and panels. I used bar clamps to glue up the side panels for this nightstand and the sides for this step stool. - Assembly
Clamps also keep parts aligned properly and prevent assemblies from moving while you’re drilling pilot holes, driving nails, or driving pocket hole screws.
Related: How to Prevent Pieces from Moving When Assembling Pocket Hole Joints
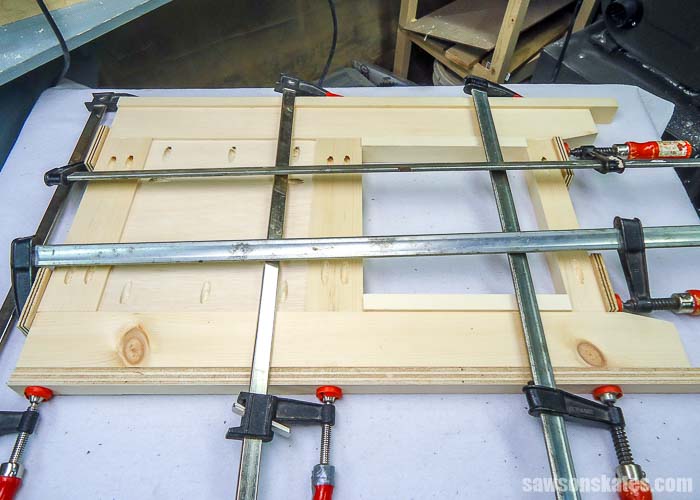
There are a variety of clamps available like spring clamps, corner clamps, and bar clamps. I use bar clamps the most for assembling DIY furniture. My favorite bar clamps are Bessey Bar Clamps.
It’s helpful to have an assortment of clamps in various lengths. I typically use clamps in pairs, so I usually buy two clamps at a time. The sizes I use the most are 6”, 16”, 24” and 36”.
Related: 6 Tips to Clamp Your DIY Project Like a Pro
Basic Woodworking Power Tools for Beginners
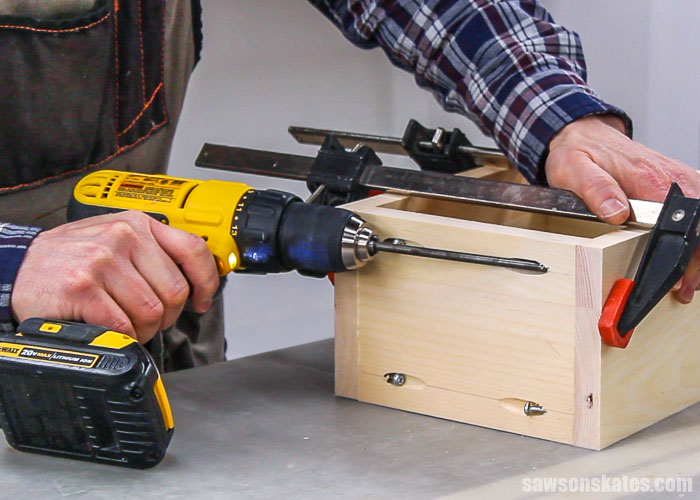
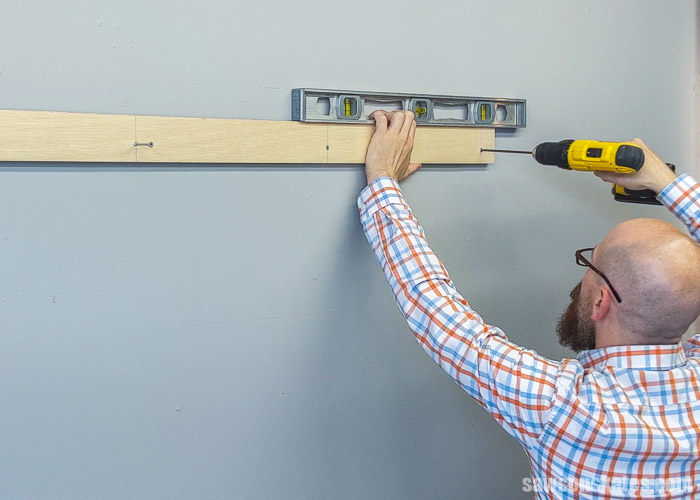
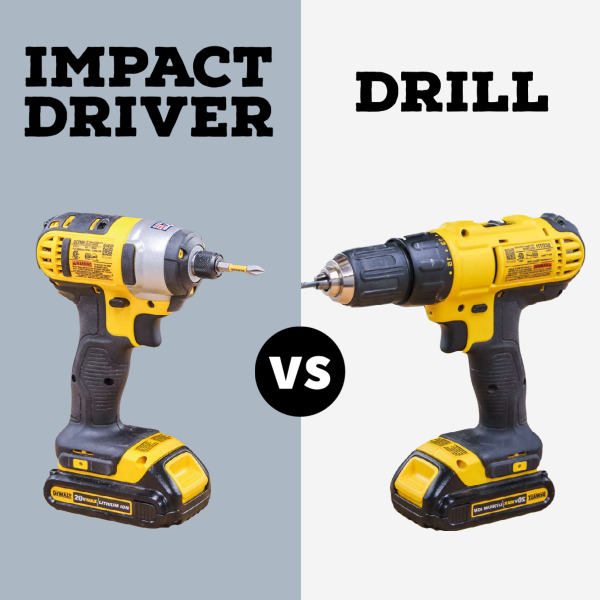
Power Drill
A drill is the first power tool I recommend adding to your collection because it’s one of the most versatile tools you can buy.
Home Repairs
You can use a drill for many home improvement projects like drilling holes in wood, metal, and plastic or drilling holes in drywall to hang a picture.
Drills are also helpful for driving and removing screws. A drill won’t replace your screwdriver set. You’ll still need a screwdriver for delicate jobs like attaching hardware like small hinges, knobs, handles, and more.
Related: How to Make a DIY Screwdriver Holder
DIY Furniture Projects
A drill is essential for building DIY furniture projects. You’ll use a drill with a Kreg Jig to make pocket holes and for driving pocket holes screws.
Drill Bit Sets
A drill is only one part of the equation. You’ll also need drill drivers and drill bits.
- Drill drivers are bits used to drive and remove screws like phillips, square, star, etc. These bits can be purchased separately or as a combo set.
- Drill bits like countersink bits, Forstner bits, and hole saws are used to drill holes.
Related: How to Use a Countersink Bit
Corded vs Cordless
- Corded
Corded drills are connected to an electrical outlet. They are limited by the length of the cord but can run indefinitely.
- Cordless
Cordless drills use rechargeable batteries. They have greater mobility compared to a corded sander because they are not limited by a cord.
Battery-powered drills are a good option when you don’t have an outlet nearby. Cordless drills are limited by the battery’s charge and can’t run indefinitely like a corded drill. When the battery runs out, you have to stop working and recharge the battery before continuing.
I have two drills in my workshop: a cordless drill and a corded drill. First, I bought a cordless drill. Later on, I was working on a project where I needed to drill a lot of holes into thick pieces of wood.
The battery on my cordless drill was wearing down too quickly, so I bought a corded drill to finish the project.
Drill batteries are not interchangeable between brands. In other words, a DeWalt battery won’t fit in a Makita drill. So for that reason, as you build your cordless tool collection, you may want to stick with one brand.
Be sure to carefully read the fine print because some tools don’t include a battery. You may see a box marked “Tool Only” which means a battery is not included. You can buy batteries and a charger separately, but buying this way can often be more expensive than buying a tool that includes a battery.
An affordable way to buy several tools at once is with a combo kit. Combo kits include several cordless tools, a battery, and a charger.
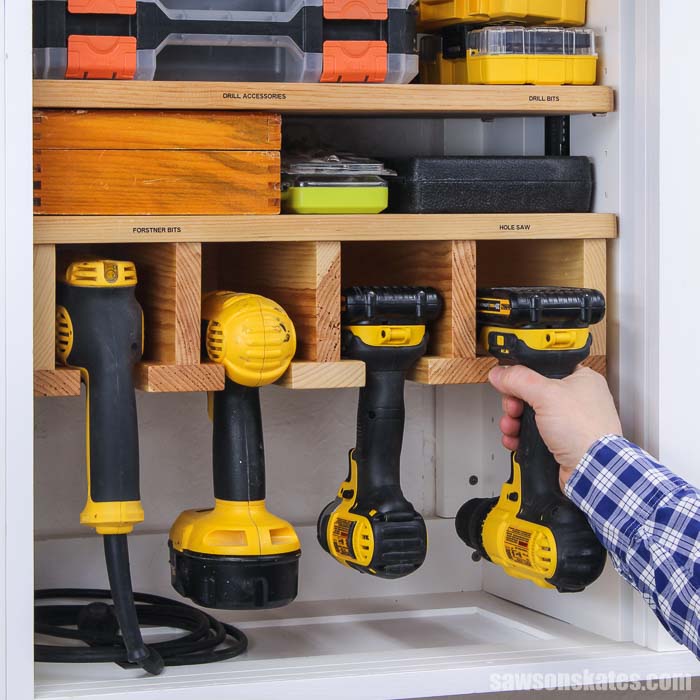
Organize Your Drills
This DIY drill storage rack is a quick afternoon project and an excellent way to keep your drill collection organized.
Related: How to Make a DIY Drill Holder
Miter Saw
I use my miter saw for nearly every project that I build. Using a miter saw is a quick, easy, and accurate way to cut wood to length.
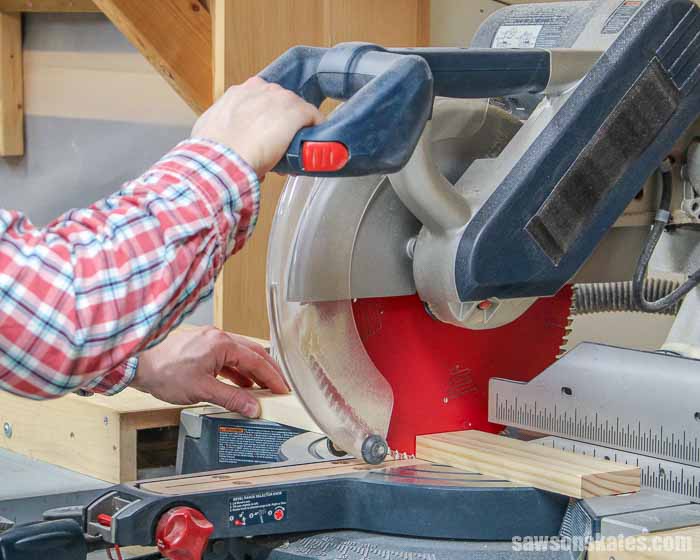
Many beginners are scared to use a miter saw. I understand. It can be intimidating to have a blade spinning at a high rate of speed towards your body. But after reading the owner’s manual and following the safety instructions for your saw, you’ll see that a miter saw is one of the more straightforward tools to use.
Related: 7 Miter Saw Tricks Every DIYer Needs to Know
There are several things you’ll want to consider when choosing a miter saw, like the type of cuts you want to make, the width of the material you want to cut, and the power source.
Miter Saw Cuts
You can use a miter saw to make different types of cuts like straight cuts, miter cuts, and bevel cuts.
- Crosscut
A crosscut, or a straight cut, is made at a 90-degree angle across the grain of the wood or across the width of a board. - Miter Cut
A miter cut is made at an angle across the grain of the wood or across the width of a board. - Bevel Cut
A bevel cut is an angled cut made on the edge of a board. A bevel cut changes the profile of the wood. - Compound Miter Cut
A compound miter cut combines a miter cut and a bevel cut. Compound miter cuts are needed to install crown molding.
Related: How to Adjust a Miter Saw for Accurate Cuts
Types of Miter Saws
There are two types of miter saws. A compound miter saw and a sliding miter saw.
Miter saws usually come with a 10-inch or 12-inch blade. The length a miter saw can cut will depend on the size of the blade and if it’s a compound miter saw, or a sliding miter saw.
Related: How to Change a Miter Saw Blade
- Compound Miter Saw
- A compound miter saw can make crosscuts, miter cuts, bevel cuts, and compound cuts.
- Some compound miter saws are single compound. In other words, it only cuts a bevel in one direction. Other miter saws are dual compound and can cut bevels in both directions.
- Many compound miter saws with a 10-inch blade can make crosscuts on lumber up to about 5-½ inches wide by 3-½ inches thick.
- Many compound miter saws with a 12-inch blade can make crosscuts on lumber up to about 7-½ inches wide by 3-½ inches thick.
- Sliding Miter Saw
- A sliding miter saw can make the same cuts as a compound miter saw.
- The difference between a compound miter saw and a sliding miter saw is the saw blade of a sliding miter saw is on rails which allows it to cut much wider widths of wood. A sliding miter saw is excellent for cutting large-width boards like 1×12s.
Corded vs Cordless
Just like drills, miter saws are available, either corded or cordless.
- Corded
Corded miter saws are connected to an electrical outlet. They are limited by the length of the cord but can run indefinitely.
- Cordless
Cordless miter saw use rechargeable batteries. They have greater mobility compared to a corded sander because they are not limited by a cord.
Battery-powered miter saws are a good option when you don’t have an outlet nearby. Cordless miter saws are limited by the battery’s charge and can’t run indefinitely like a corded drill. When the battery runs out, you have to stop working and recharge the battery before continuing.
If you’re planning to work primarily in your workshop, I recommend choosing a corded miter saw.
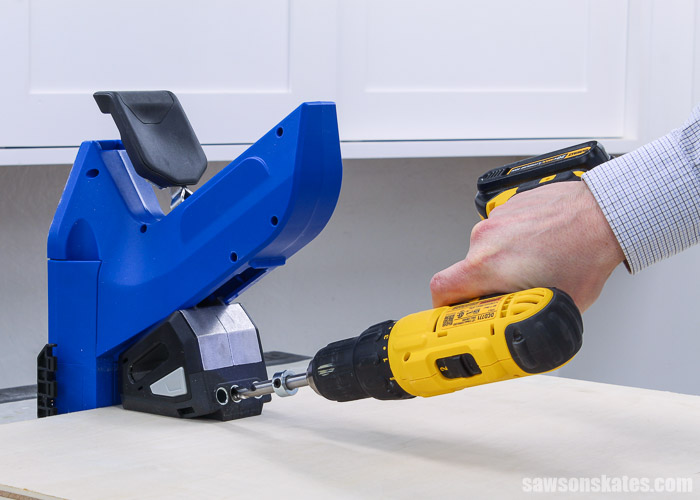
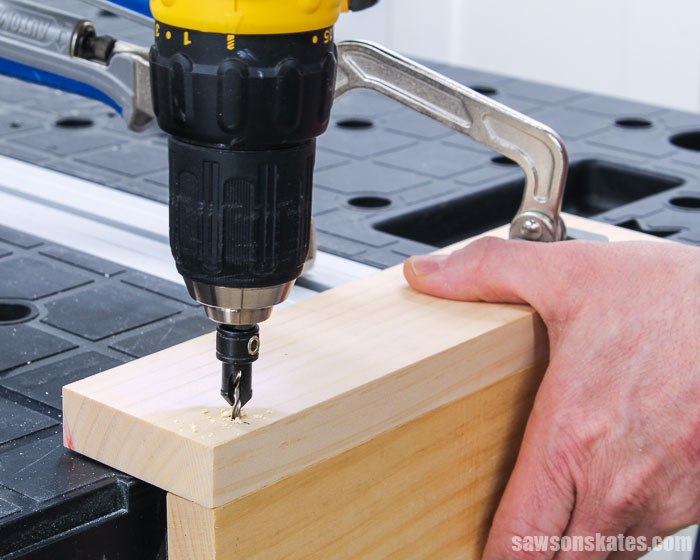
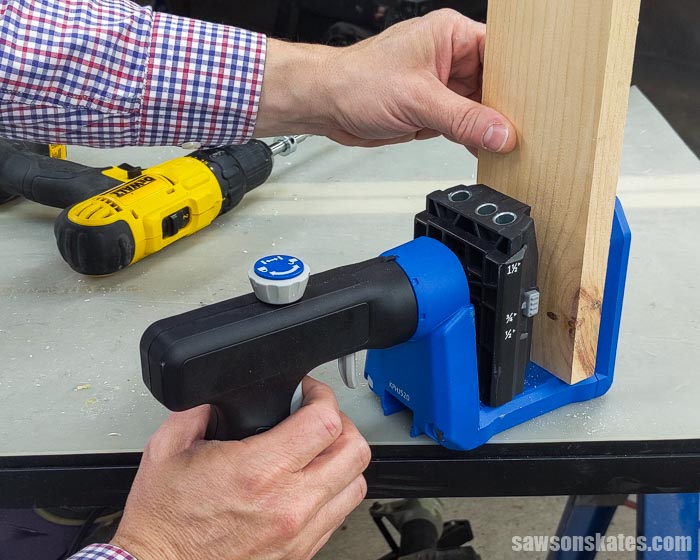
Kreg Jig
A pocket hole jig or Kreg Jig is a quick and easy way for beginners or DIYers of any skill level to join pieces of wood.
A Kreg Jig uses a guide block with preset holes to drill angled pocket holes into a workpiece.
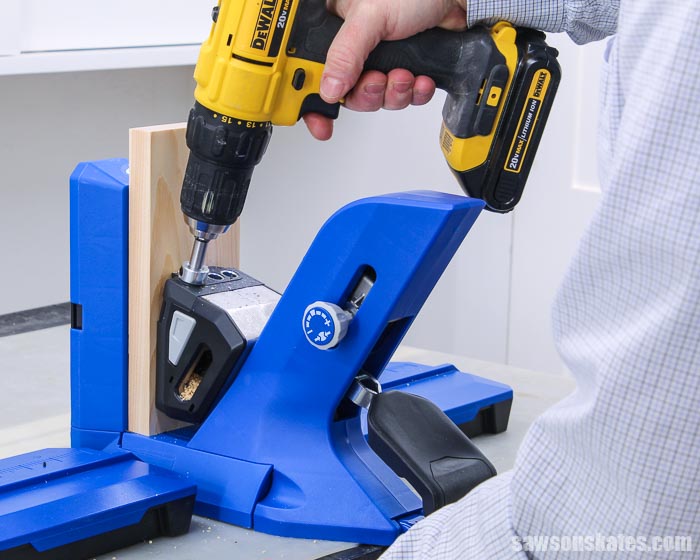
A pocket hole screw, specifically designed to be used with pocket holes, draws the two workpieces together to form a strong joint.
Related: How to Use a Kreg Pocket Hole Jig
I use my Kreg Jig for nearly every project I build. In fact, I created an entire resource center dedicated to pocket hole joinery. It’s loaded with helpful tutorials about pocket hole jigs, pocket hole joints, and tips for troubleshooting pocket holes.
Related: 9 Pocket Hole Mistakes You Don’t Want to Make
Which Kreg Jig Should You Buy?
There are so many types of Kreg Jigs that it can be confusing to know which one to buy. Most of Kreg’s pocket hole jigs include fool-proof settings, making their tools an excellent choice for beginners or first-timers.
There are several considerations when deciding which Kreg Jig you should buy. Things like:
- How you will use a pocket hole jig
- How many pocket holes you need to drill
- How often you will use it
- What materials you plan to join
- Where you build
This side-by-side comparison will help you decide which Kreg Jig is right for you.
Related: Which Kreg Jig Should You Buy?
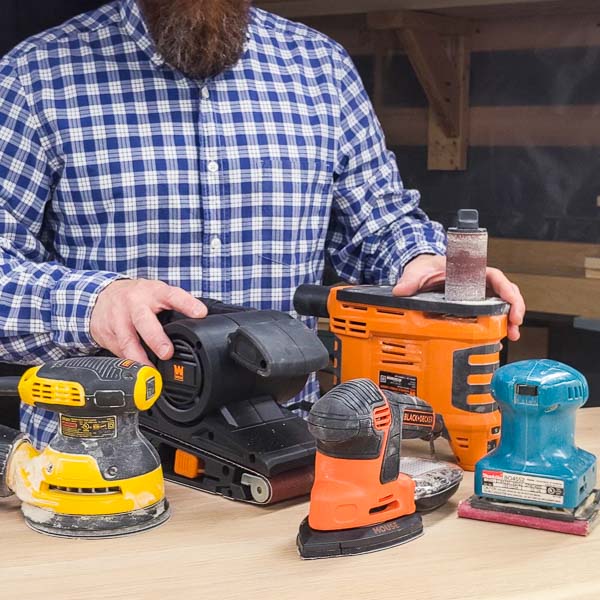
Random Orbital Sander
Sanding is an important step in woodworking because it smooths and prepares wood for paint, stain, or finish.
Even though it’s important, sanding is my least favorite part of woodworking. Sanding by hand is dirty, messy, and time-consuming. Plus, sanding by hand takes a lot of effort, which can cause muscle fatigue.
An electric sander makes a tedious chore a little less tedious. There are a variety of power sanders like belt sanders or detail sanders, but my go-to is a random orbital sander.
Related: The Best Sanders for Furniture: Which One to Buy & Why
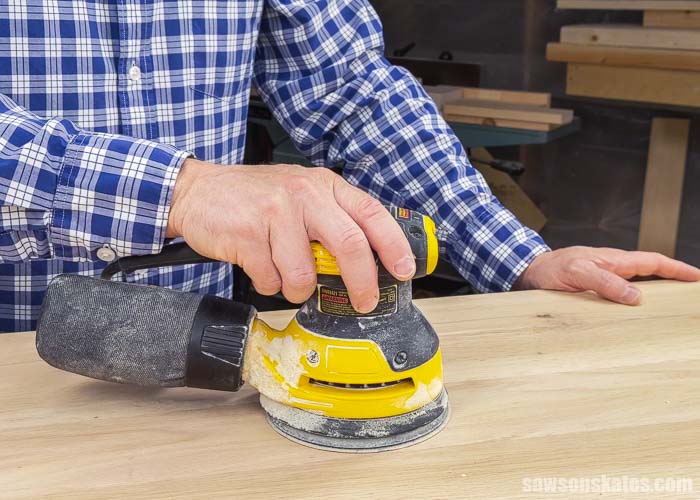
A random orbital sander sometimes called ROS or disc sander, is a quick, easy way to smooth wood. It’s one of the most versatile sanders you can buy.
Random orbital sanders rotate in a random pattern which means you can use them with the grain or across the grain of the wood.
Related: 11 Secrets for Sanding Wood Projects Like a Pro
Plus, it doesn’t leave swirl marks or what I call a “figure 8” pattern on the wood, does a decent job at dust collection and doesn’t vibrate as much as other sanders.
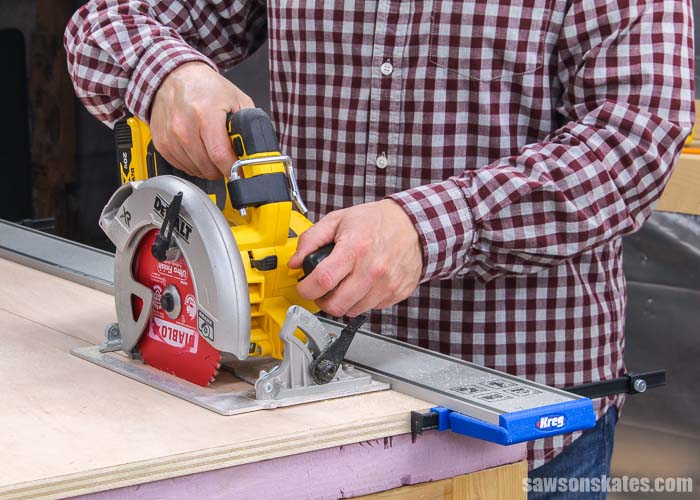
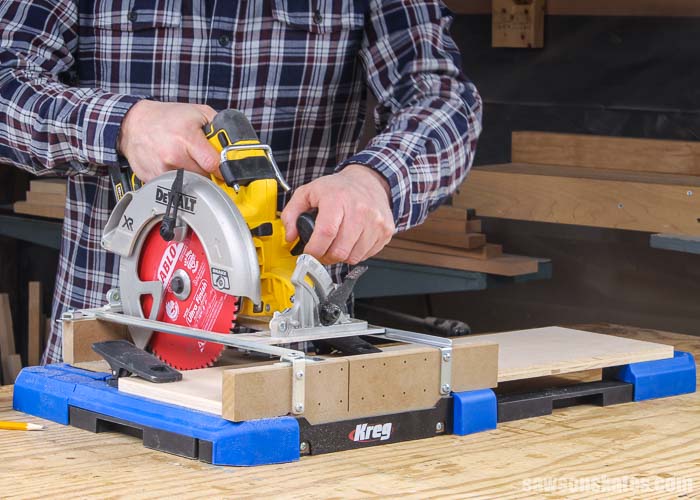
Back to Table of ContentsCircular Saw
A circular saw is a portable tool that you can use in your shop, backyard, or driveway. And you’re going to want one if you’re planning to build projects with plywood.
A circular saw is the perfect tool to cut large, heavy pieces of wood down to size like sheets of plywood or MDF.
You could cut small pieces of plywood on a table saw if you have one, but sometimes large pieces are too heavy to lift and could be dangerous to cut with a table saw.
I don’t often build projects with plywood, but I have used a circular saw for other projects like making french cleats and cutting the panels for cabinet doors.
Related: How to Make DIY Cabinet Doors (Without Complicated Tools)
Circular Saw Cuts
You can use a circular saw to make different types of cuts like ripping wood to width, crosscuts, miter cuts, bevel cuts, and more
- Rip Cut
A rip cut is made with the grain of the wood or along the length of the board. - Crosscut
A crosscut, or a straight cut, is made at a 90-degree angle across the grain of the wood or across the width of a board. - Miter Cut
A miter cut is made at an angle across the grain of the wood or across the width of a board. - Bevel Cut
A bevel cut is an angled cut made on the edge of a board. A bevel cut changes the profile of the wood. - Compound Miter Cut
A compound miter cut combines a miter cut and a bevel cut. Compound miter cuts are needed to install crown molding.
Circular saws generally don’t include a fence. Without using a fence, the accuracy of the cut will depend on your ability to keep your hand steady and follow the pencil line.
There are several ways to improve the accuracy of a circular saw. One way is to make a DIY crosscut guide.
Related: How to Make a DIY Circular Saw Crosscut Guide
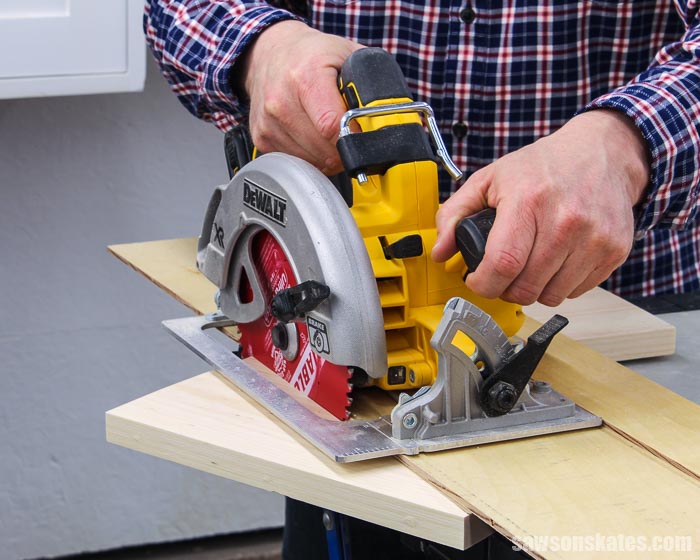
Other ways to improve the accuracy include store-bought options like the Kreg Straight Edge Guide and Kreg Crosscut Station.
Related: 4 Ways to Make Straight Cuts with a Circular Saw
Jigsaw
A jig saw is a handheld power tool that you can use to cut curves, shapes, circles, and holes. The compact size allows you to get into tight spots where other saws, like a miter saw or circular saw, can’t go.
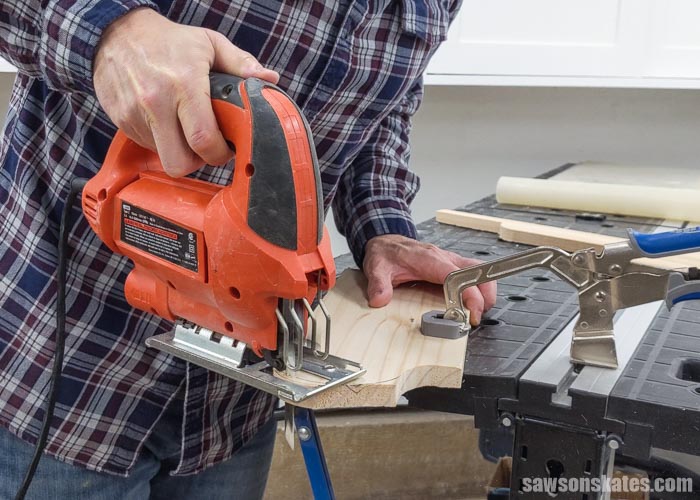
I included the jig saw towards the end of the list because it’s not a tool that I use often. I usually use a scroll saw instead of a jig saw if I need to make these types of cuts. But I did use a jig saw to make this DIY lap desk.
Related: How to Make a DIY lap Desk
A jigsaw isn’t the best at making straight cuts, but you can use one in a pinch. Just like making straight cuts with a circular saw, you can improve the accuracy of a jigsaw by using a straightedge like speed square or Kreg Straight Edge Guide.
Related: How to Use a Kreg Straight Edge Guide (and Review)
You can also adjust the shoe of the jigsaw to make bevel cuts.
And just like other tools on this list, jigsaws are available, either corded or cordless.
Back to Table of ContentsBeyond the Basics
A few tools are not essential but can take your woodworking projects to the next level. As your skills increase or your budget allows, you can add tools like a brad nailer and a router.
Brad Nailer
A brad nailer is not an essential tool for beginners, but it’s quicker, easier, and less frustrating than using a hammer and nails.
If you’ve ever used a hammer, you’ve probably experienced the frustration of workpieces moving out of alignment. You get the workpiece precisely where you want it, then start tapping the nail, and the vibration causes the workpiece to move.
The advantage of using a brad nailer is that it drives the nail without any vibration. That means workpieces stay exactly where you want them.
Related: Brad Nailer vs Finish Nailer: Which to Choose & Why
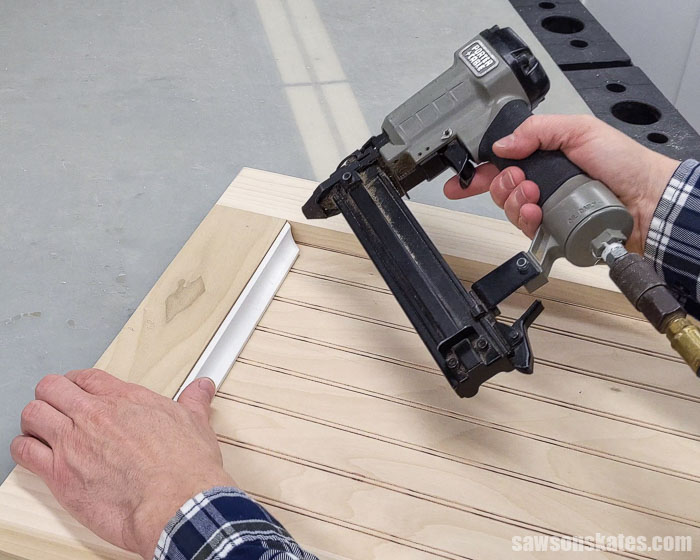
A brad nailer is an excellent tool to put the finishing touches on home improvement projects and DIY furniture projects.
Brad nailers are available either pneumatic or cordless.
Pneumatic brad nailers use compressed air from an air compressor. This means in addition to the nailer, you’ll also need an air compressor and an air compressor hose.
Cordless brad nailers use rechargeable batteries and can go anywhere. There’s no compressor or hose to hold you back. But this convenience comes at a price. Cordless nailers are usually more expensive than pneumatic nailers.
Back to Table of ContentsRouter
With a router, you can add decorative edges to furniture projects, make grooves and slots in workpieces, and more.
Related: How to Use a Router Table for Beginners
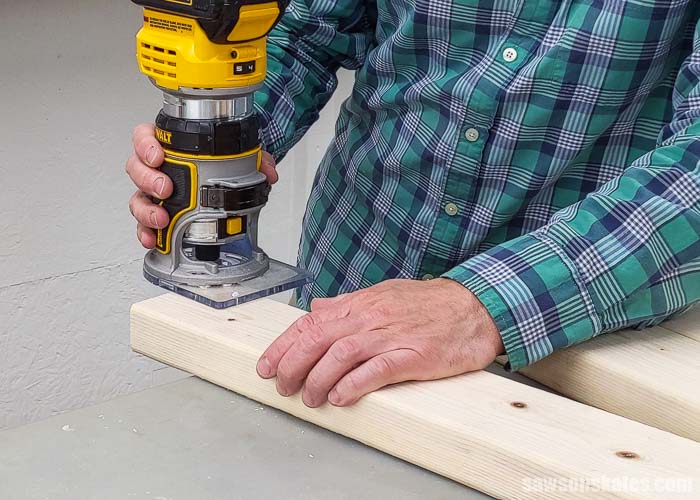
I often use my router when building with 2×4s. The edges of 2×4s are rounded. Cut edges butted up to rounded edges doesn’t look right to me.
I use my router with a roundover bit to match these cut edges to the rounded edges. Sure, you could leave the cut edges as they are or even use a sander to round them, but a router is a quick and easy way to give these edges a finished look.
Back to Table of ContentsWhere to Buy Woodworking Tools
We can buy tools at our local big box home improvement store. We can also buy them online and have them shipped to our home. Used tools can be purchased from places like craigslist.
Related: Beginner’s Guide to Buying Used Woodworking Tools
My Complete List of Woodworking Tools
I’m often asked what tools and products I use so I put together a list of things I use regularly in my workshop.
Most of the tools and products listed on the page are affiliate links, which means I receive a small commission if you purchase an item using one of these links. There is no cost to you for using these links. Thank you so much for your support!
Skate over to the Tools I Use page here.
How to Organize Tools
OK, we have our tools. Now what? Now it’s time to get our tools organized!
In the How to Organize Tools in a Small Workshop post, I’m sharing 5 simple steps to get your tools organized. We’ll look at ways to store hand and power tools and how to keep them organized once and for all.
Skate over to How to Organize Tools in a Small Workshop or watch this quick video!
Final Thoughts
I hope this overview of beginner woodworking tools has given you some clarity. Understanding what tools are necessary, what they do, and which tools to buy first will make your experience as a beginner more enjoyable.
Thank you for stopping by. If you found this info useful, would you please take a moment and pin it to Pinterest? I’d really appreciate it!
Recommended For You

Pin This For Later

Hi there – I’m Scott, a woodworking enthusiast and creator of Saws on Skates, a site I started in 2015 to share easy-to-follow tutorials, space-saving shop tips, and project inspiration for DIYers at any skill level. Learn more about my woodworking journey here.