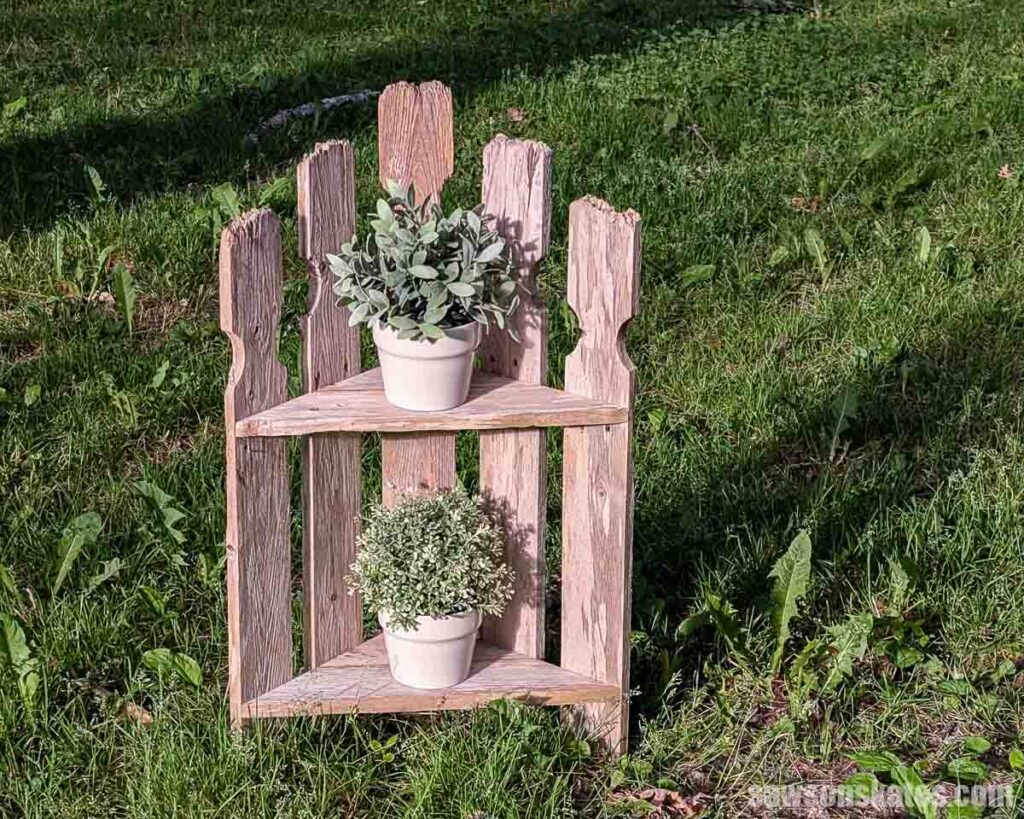
DIY Two-Tier Fence Picket Plant Stand for Showing Off Your Blooms
I turned old fence pickets into a simple two-tier plant stand that’s perfect near an entryway, porch, or patio. A free, easy weekend build.
What Should I Build Next?
That's the question I help answer.
Every week, I send woodworking ideas to 17,000 DIYers who love building things.
You'd fit right in.
I recently picked up a few broken-down sections of fence from the side of the road. I had no idea what I was going to build with them, but I started with a rustic picnic caddy, you know, the kind that holds plates, utensils, and napkins.
Then I thought, hey, these pickets lived outside for years, so what about an outdoor project? A plant stand!
Well, you know me. I made a quick SketchUp model, and one morning on my day off from my part-time job, I whipped up this super simple plant stand. It’s perfect tucked near an entryway, on a porch, or out on the patio.
It looks great all summer, but how awesome would this rustic, silvery wood look filled with fall mums and a couple of pumpkins? Those are still a couple of months out, otherwise I totally would’ve staged it that way.
Pickets or Boards
I made my plant stand with old cedar fence pickets, but you could use store-bought 1×4 boards instead.
Before You Begin
My pickets measured ¾” x 3-½”. You may have to adjust the measurements if your pickets are a different width.
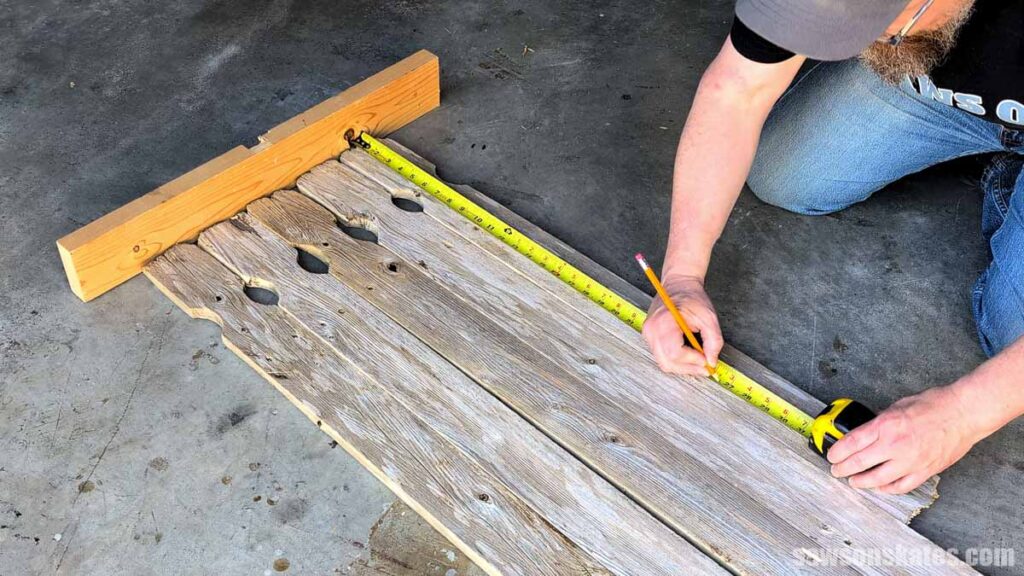
Step 1. Make the Back Slats
This probably wasn’t necessary, but the tops of my pickets were pretty worn, so I placed a board across the top to give me a straight line to measure from. I made the middle picket about 30″ and the outer pickets on either side a little shorter.
I cut them to length using my miter saw.
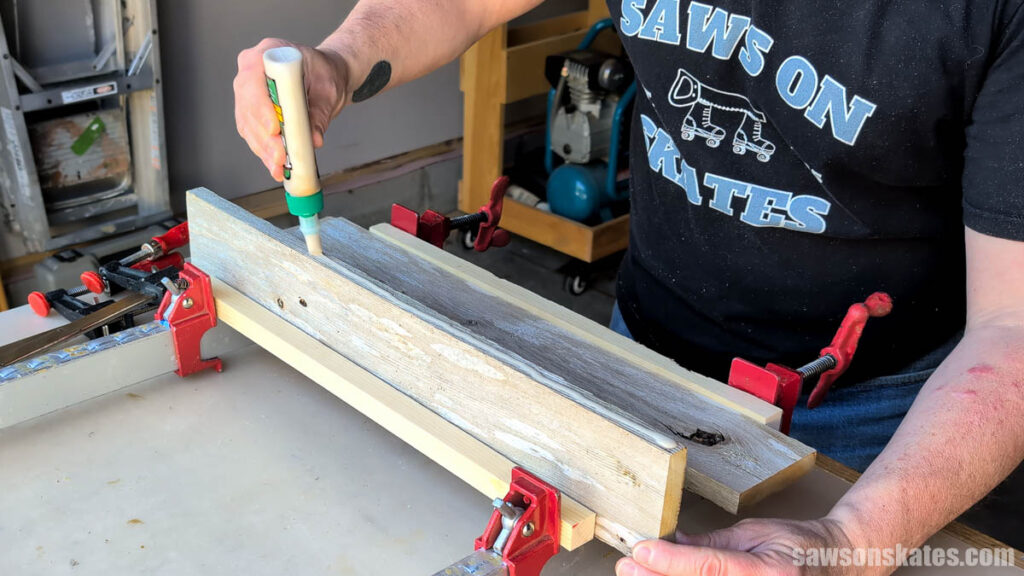
Step 2. Make the Shelves
I cut four pickets to about 20″.
I applied glue to the edge of one board and clamped it to a second board for about an hour until the glue dried. I repeated this step for the second shelf.
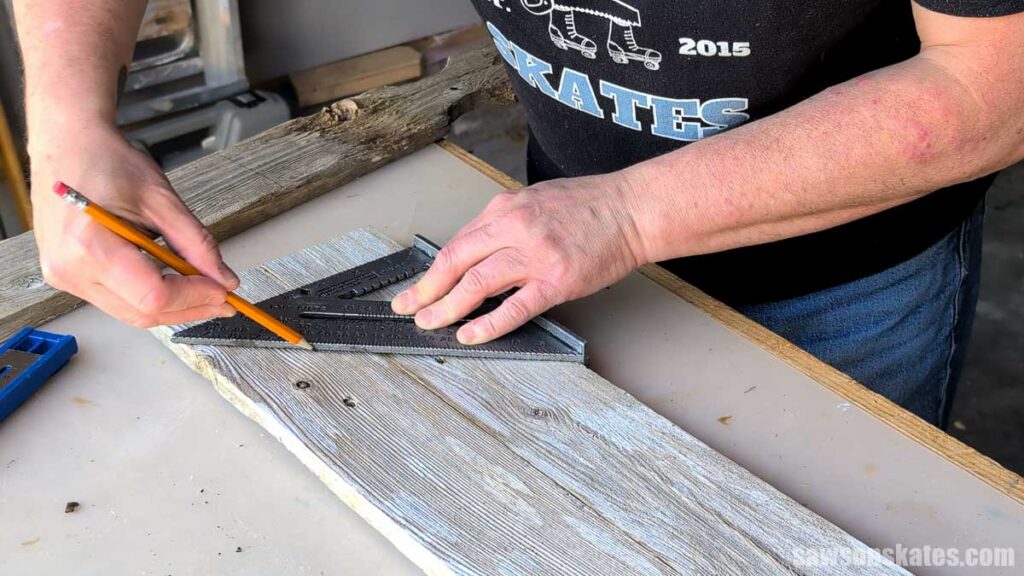
When the glue was dry, I centered a picket on the shelf and marked either side.
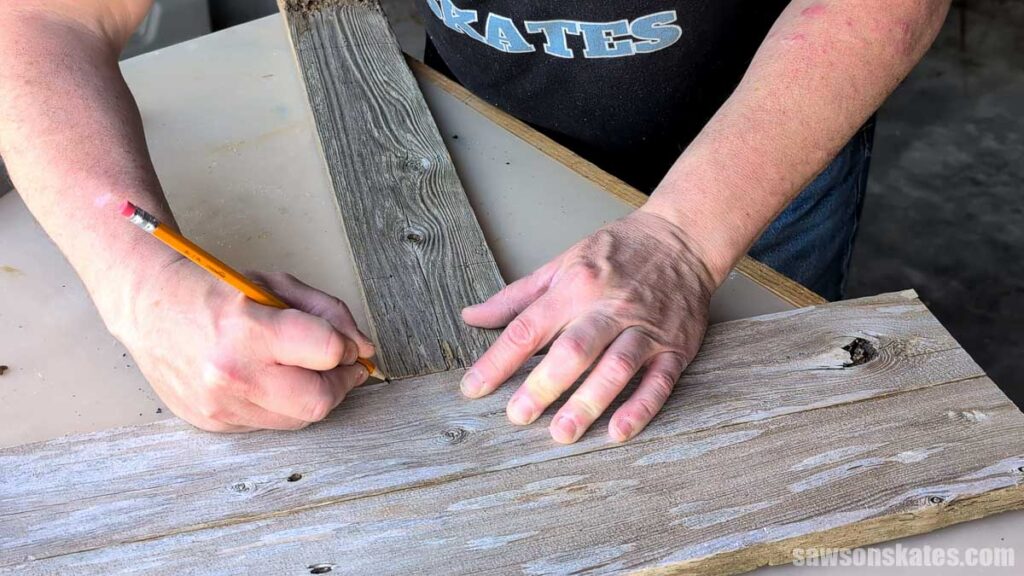
Using a speed square, I drew a 45-degree line from each mark.
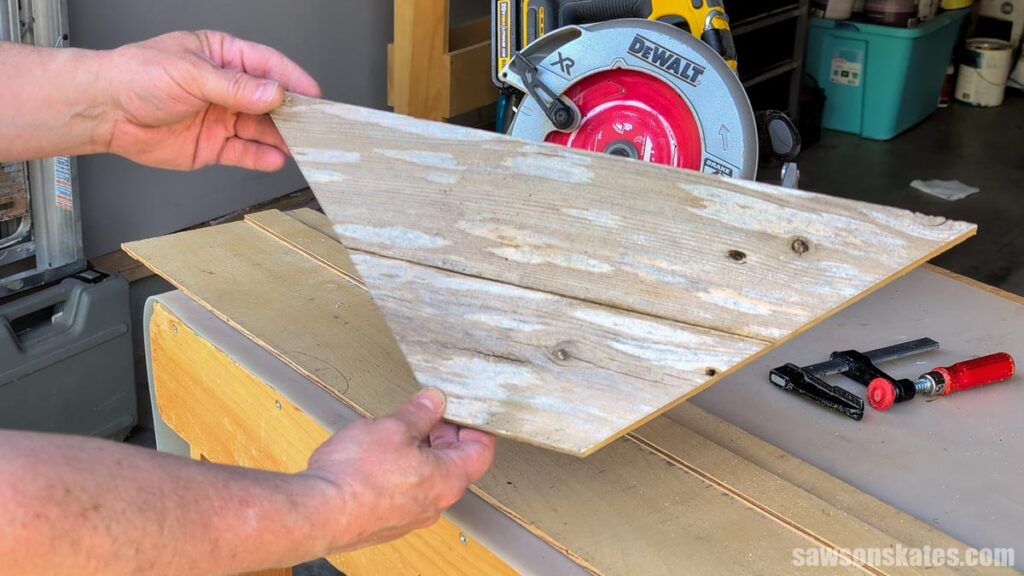
Next, I placed my circular saw crosscut guide on the pencil line and clamped it in place.
Then, I cut it out using my circular saw.

I repeated these steps for the second edge and the second shelf.
Step 3. Attach the Slats
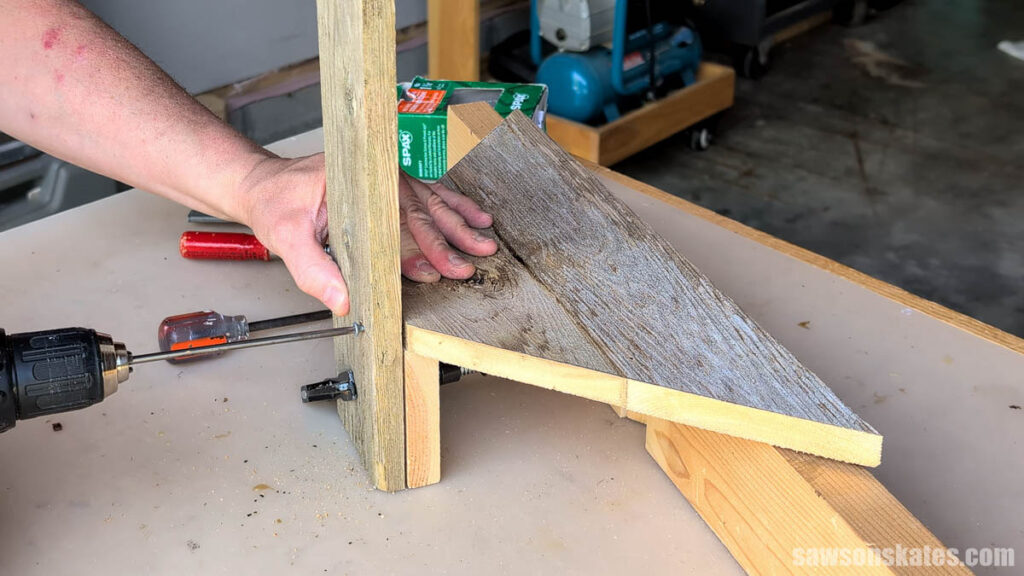
I wanted the lower shelf to set up 3-½” from the bottom, so I clamped a scrap piece of wood 3-½” wide to the back slat.
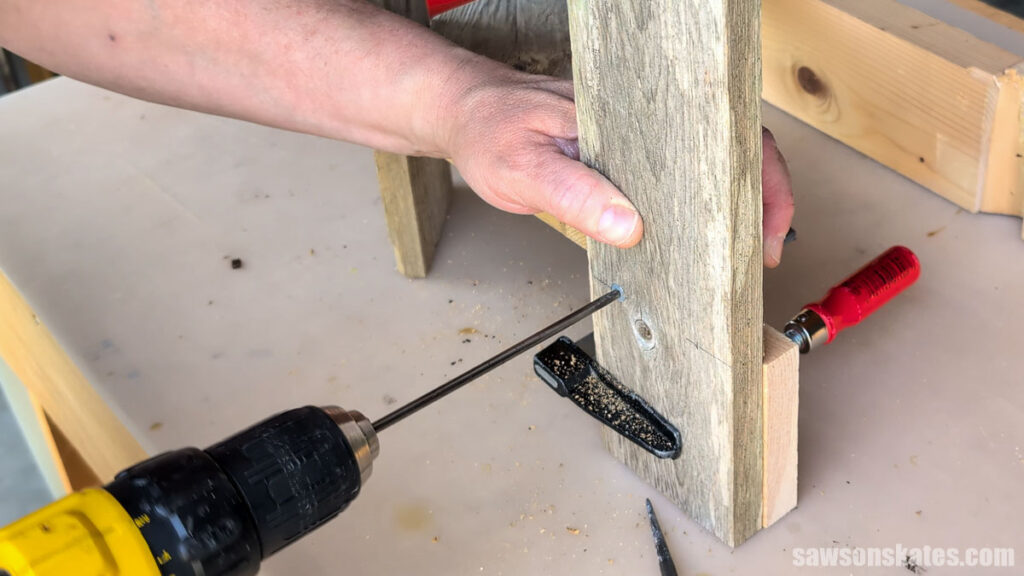
I placed the shelf on top of the scrap wood and drilled two countersink holes on either side of the slat. I attached it using 1-¼” exterior screws.
I repeated this for the two outer slats.
TIP: I waited to install the two middle slats until after the upper shelf was installed.
I cut pieces of scrap wood to 12-¾”, placed them on top of the lower shelf, and clamped them to the slats.
Then, I placed the upper shelf in position and followed the same steps I used to attach the lower shelf.
Finally, I attached the two middle slats.

Final Thoughts
And there you have it. A simple plant stand made from a few broken-down fence sections that were headed for the landfill. Not bad for a morning’s work on my day off.
Recommended For You
Pin This For Later

Hi there – I’m Scott, a woodworking enthusiast and creator of Saws on Skates, a site I started in 2015 to share easy-to-follow tutorials, space-saving shop tips, and project inspiration for DIYers at any skill level. Learn more about my woodworking journey here.