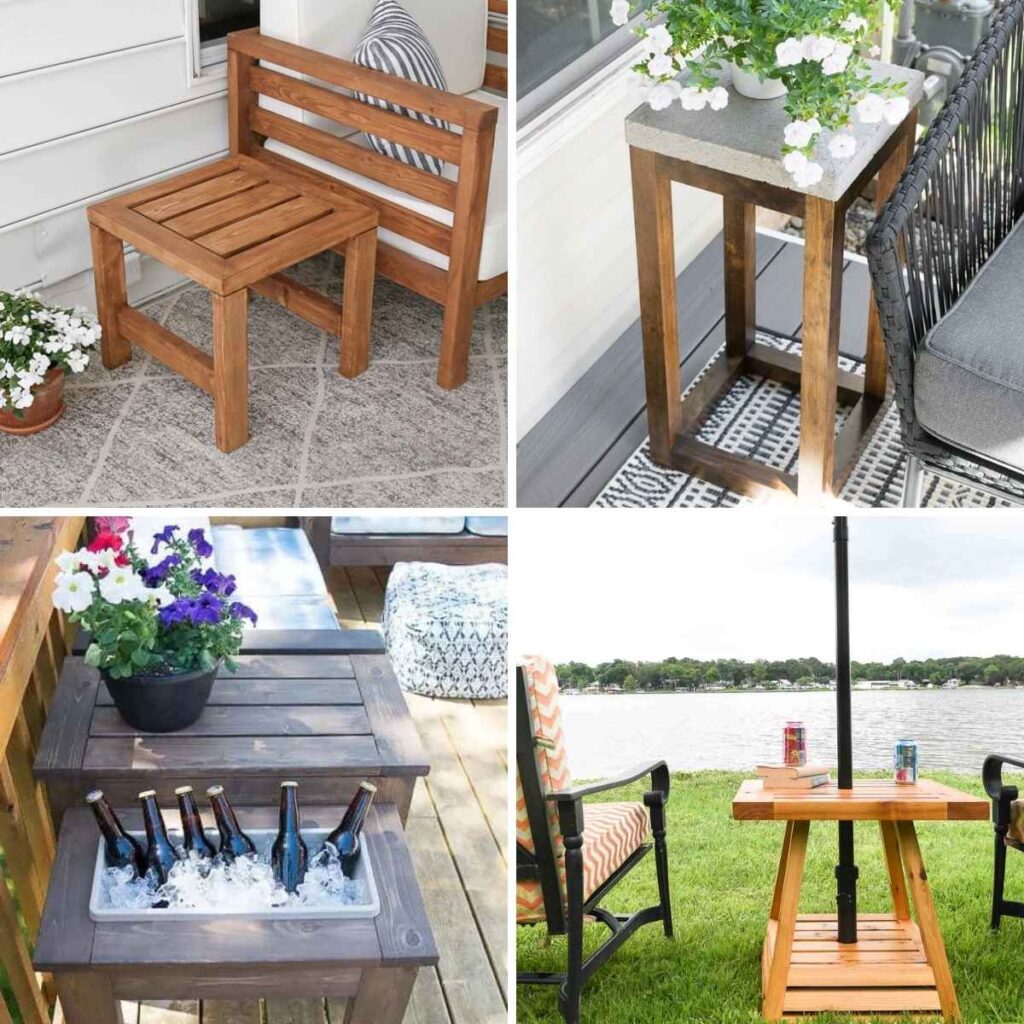
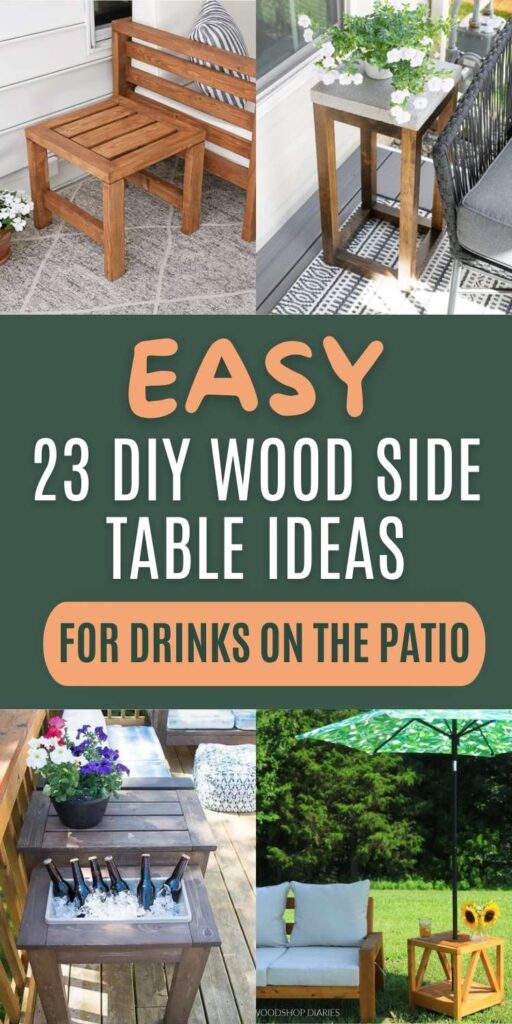
Give your patio a place for cold drinks with these 23 DIY outdoor side table ideas, from small builds to hidden coolers and umbrella stands.
What Should I Build Next?
That's the question I help answer. Every week, I send woodworking ideas to 17,000 DIYers who love building things.
You'd fit right in.
Nothing says summer like sipping a cold drink in the sunshine on your patio. But where do you set your drink? On the ground? On the arm of your chair, where it’s one bump away from spilling? There’s a better way: make yourself an outdoor side table.
From small builds you can tuck next to a chair to ones with built-in coolers, hidden storage, and umbrella stands, these 23 DIY outdoor side table ideas come in just about every style. Many use affordable materials like cedar fence pickets, 2x4s, scrap wood, or even leftover concrete pavers or stepping stones from the garden aisle.
Whether you want a quick weekend build or a piece with a few clever extras, these projects will give your patio a place for cold drinks, summer reads, and everything in between.
Small Side Tables
Short on space? These small side tables are easy to tuck between two chairs, next to a lounger, or wherever you need a place to set a drink or a book.
1
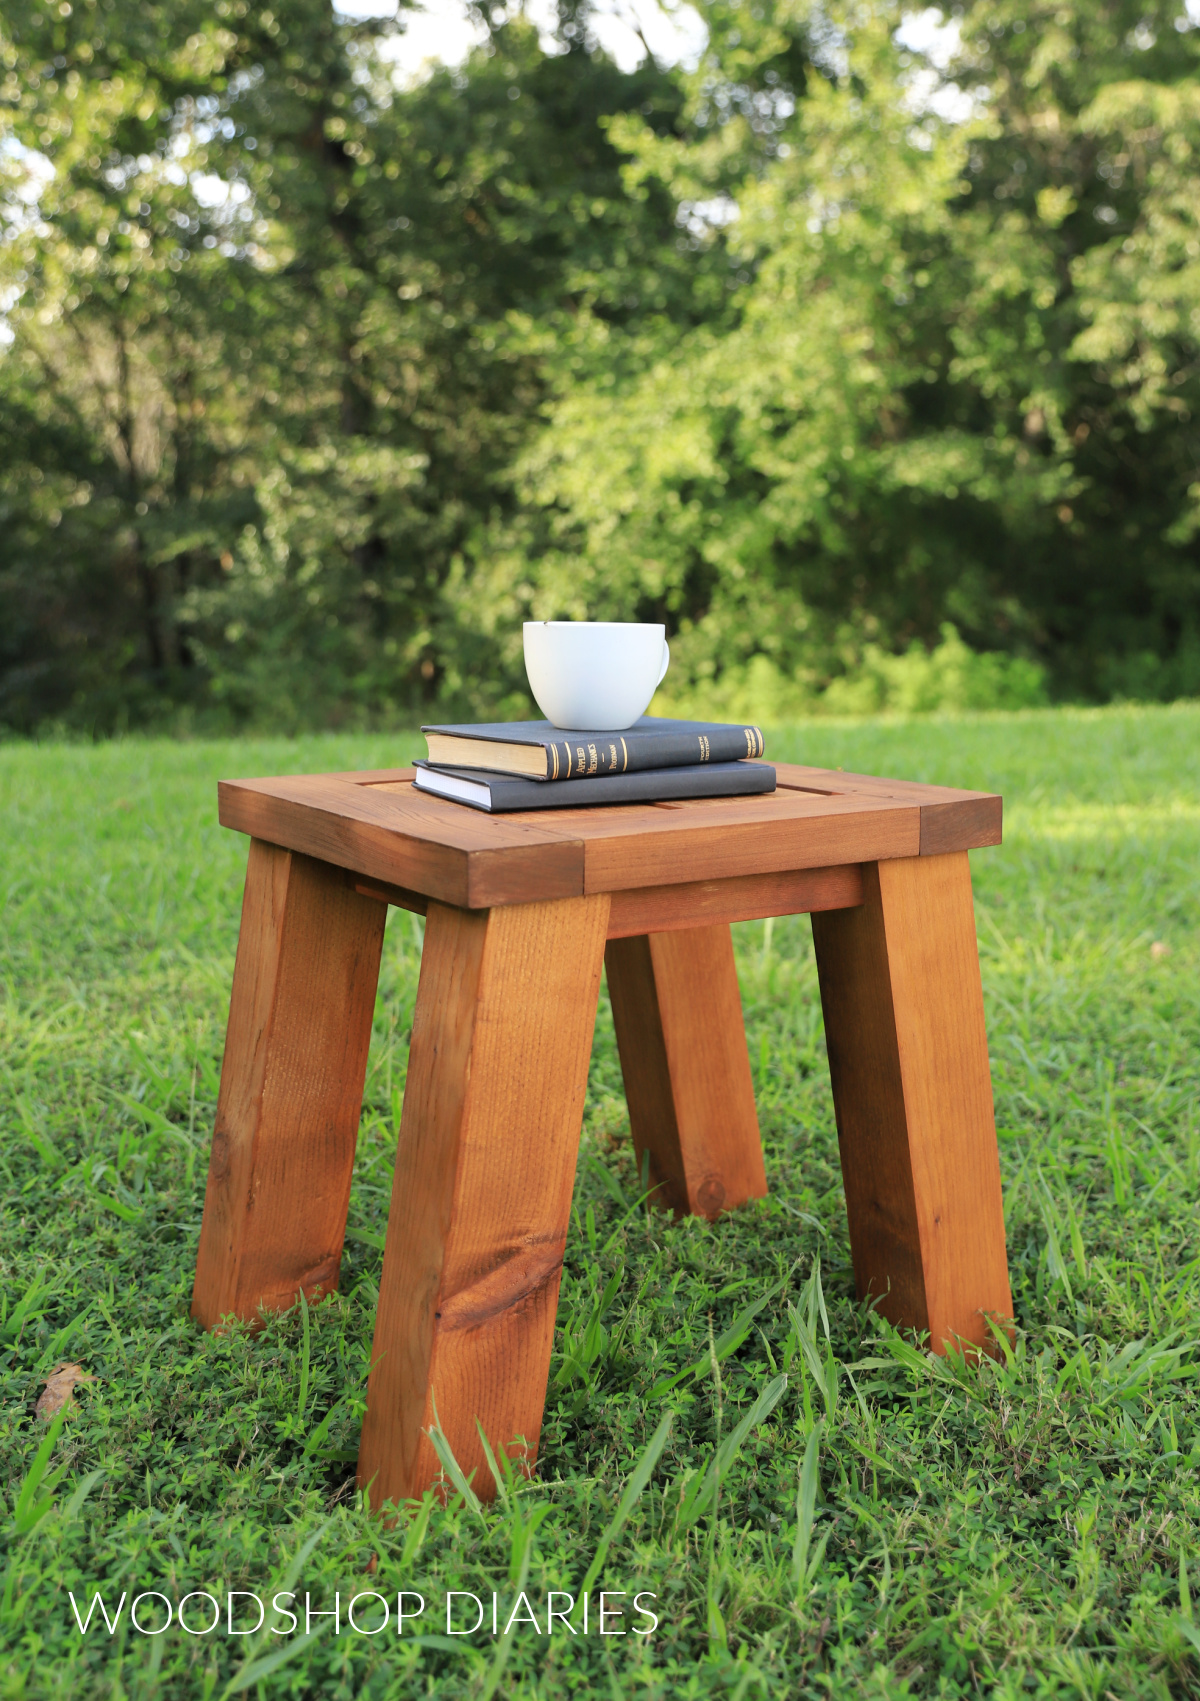
woodshopdiaries.com
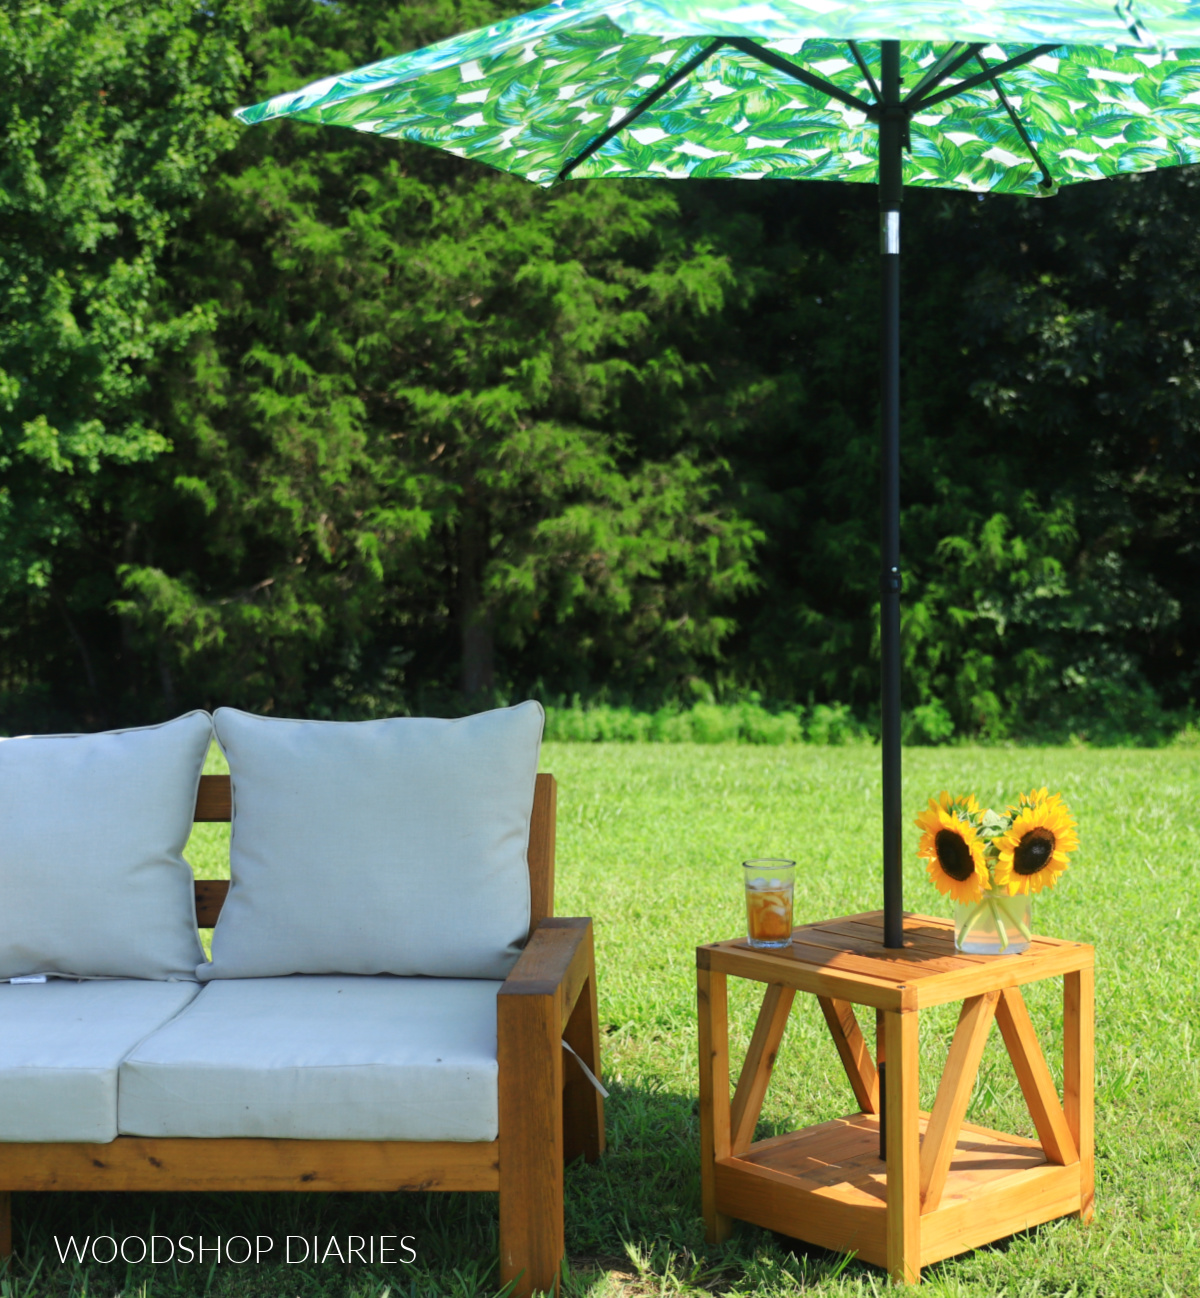
Chunky Cedar Side Table
Shara designed this sturdy little end table as the finishing piece to her five-piece outdoor furniture collection, so it pairs beautifully with a matching loveseat and coffee table. The slanted legs give it a modern-rustic feel, and she keeps the cost down by using inexpensive cedar fence pickets for the top slats instead of pricey boards. It goes together with pocket holes in an afternoon.
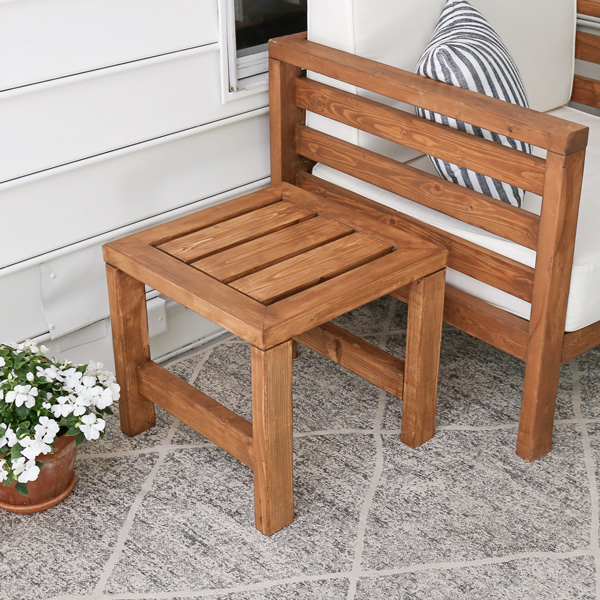
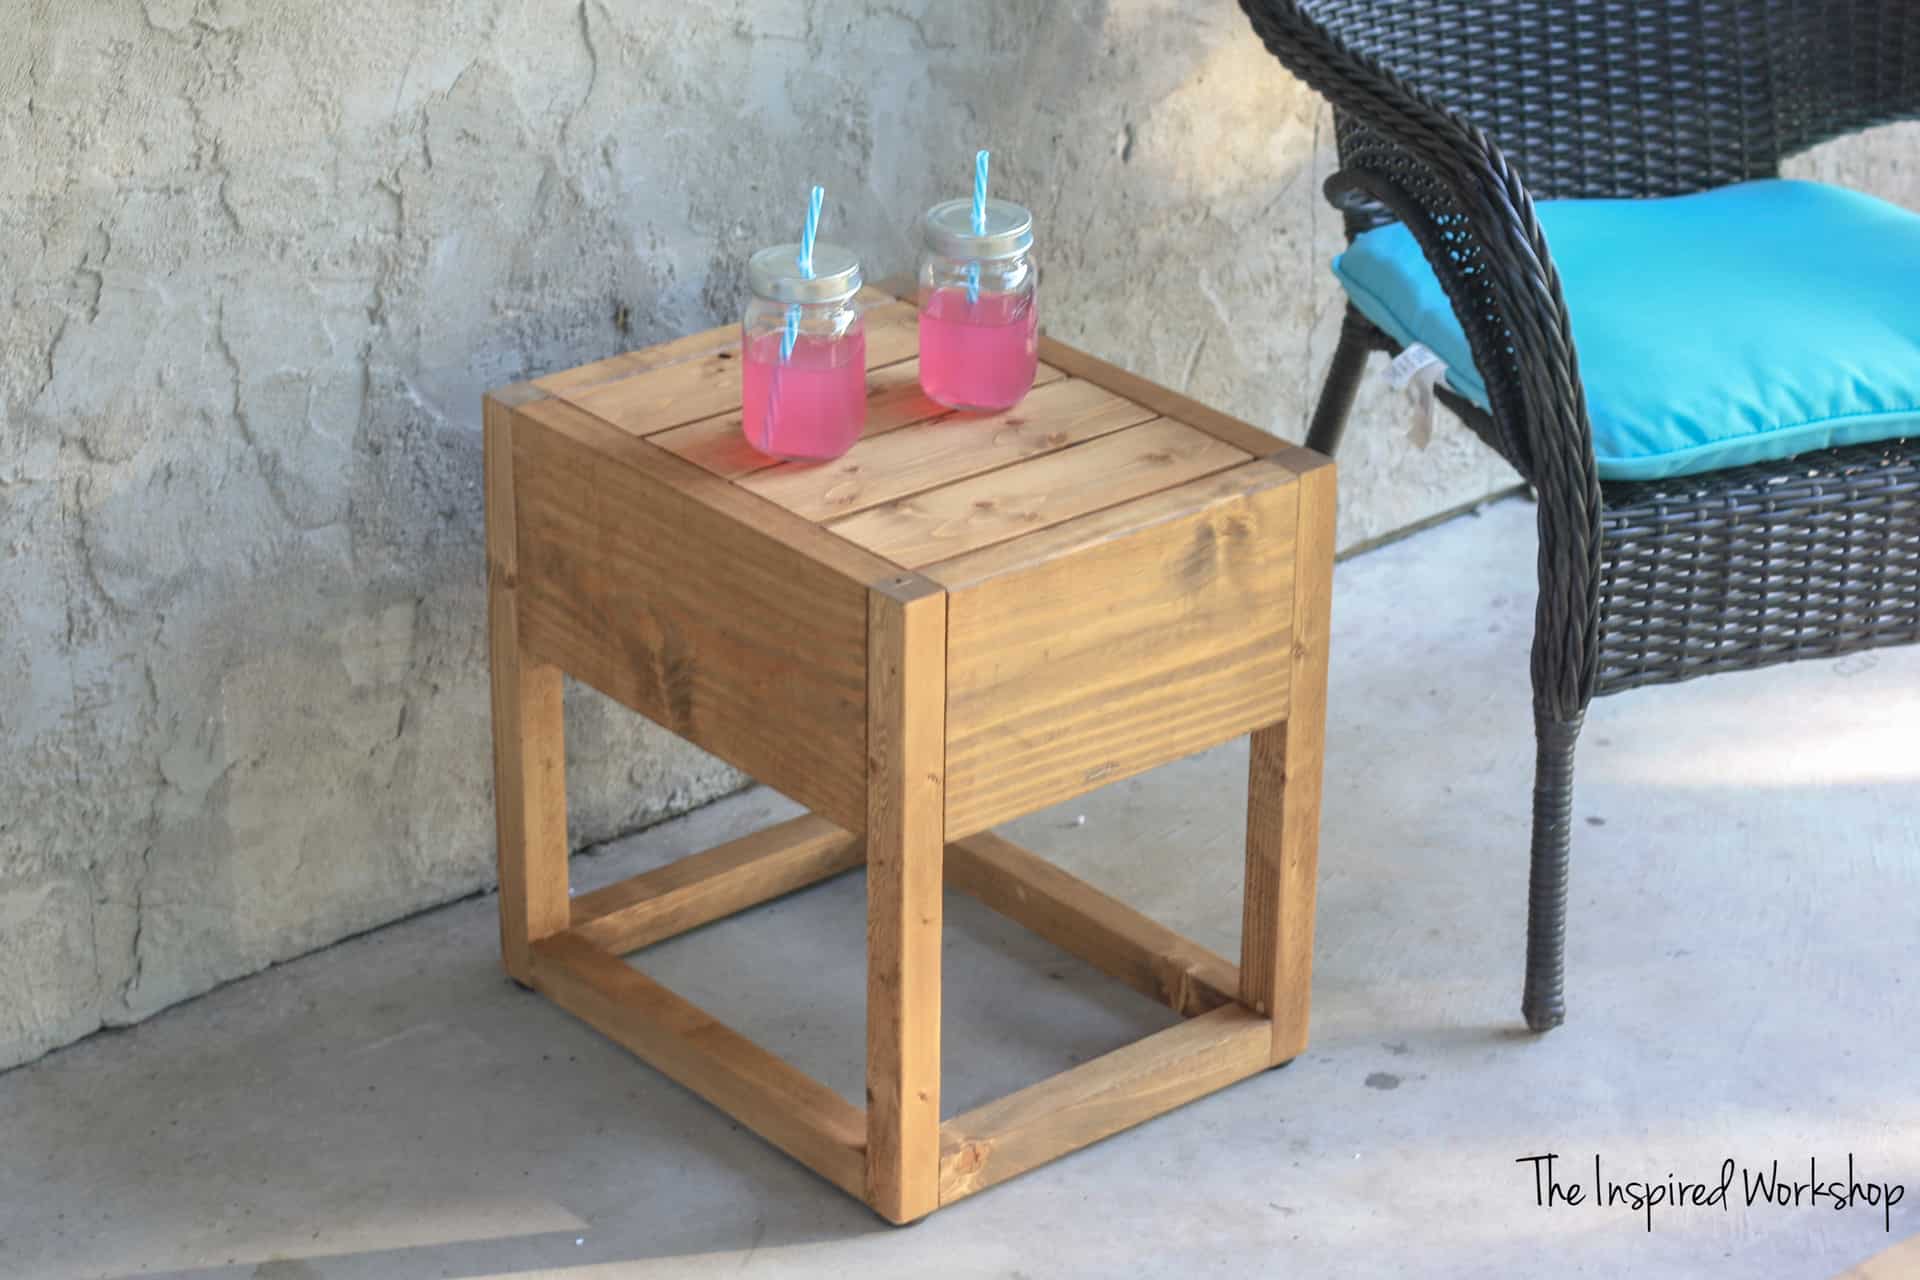
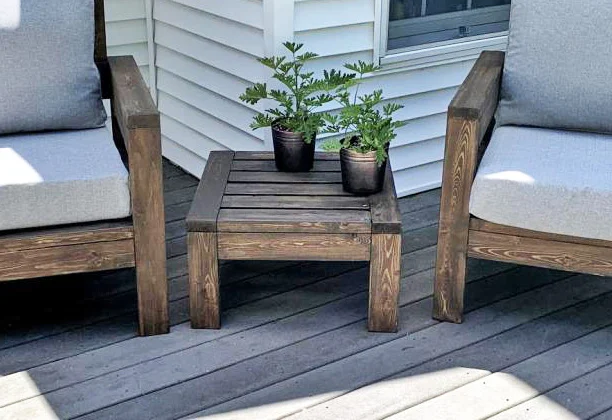
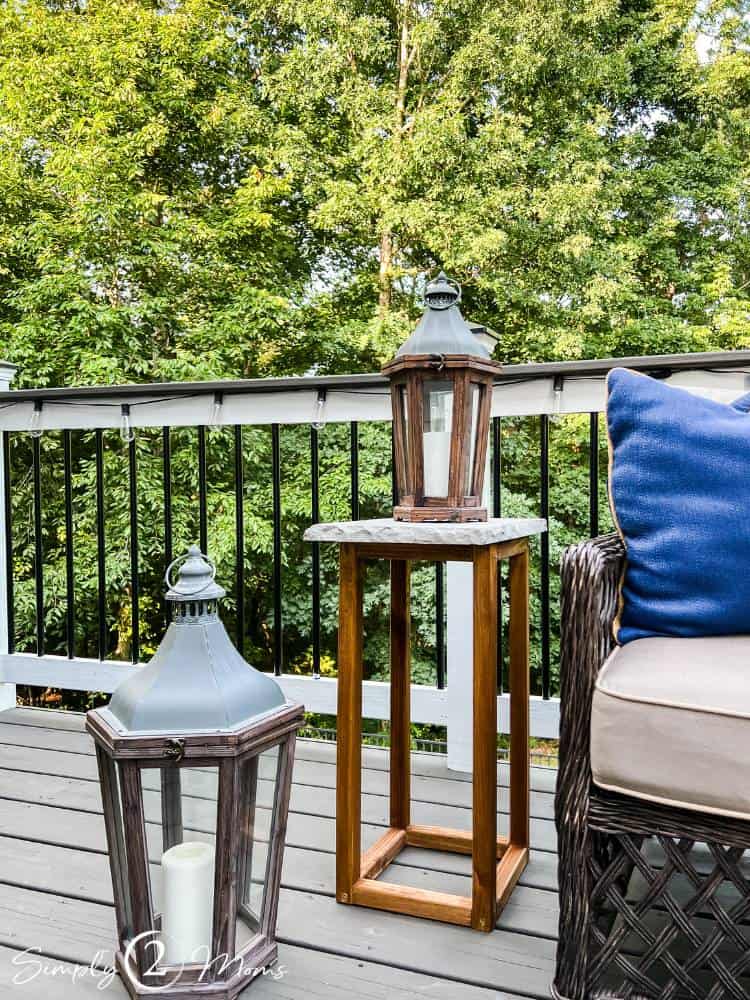
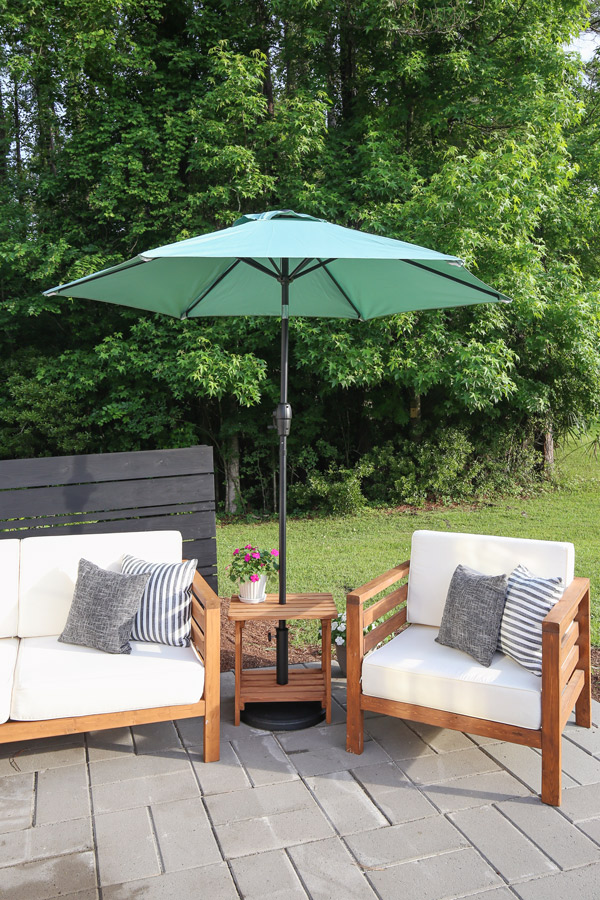
Angela built this matching side table for her outdoor furniture set using just a few pieces of lumber, which kept her total cost to about $16. The whole thing assembles with pocket holes and a little wood glue, then gets a coat of exterior stain. Best of all, she shows how to tweak the same design into an umbrella stand side table, so it works right in the middle of your seating too.
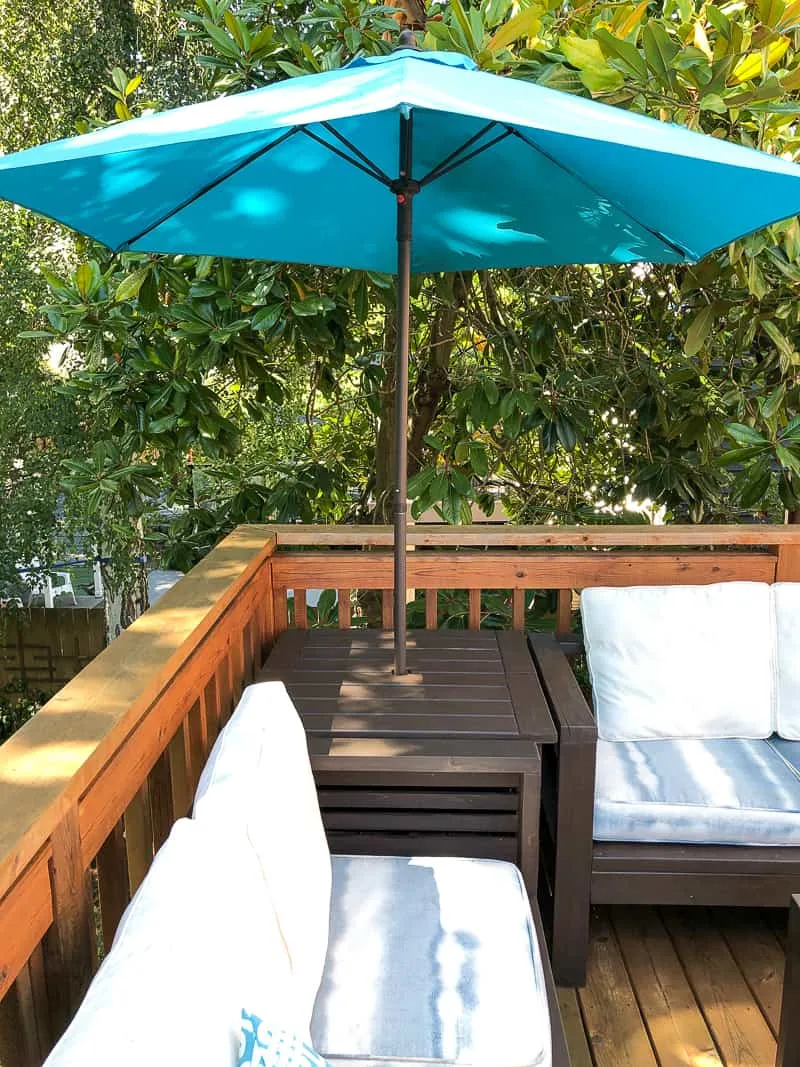
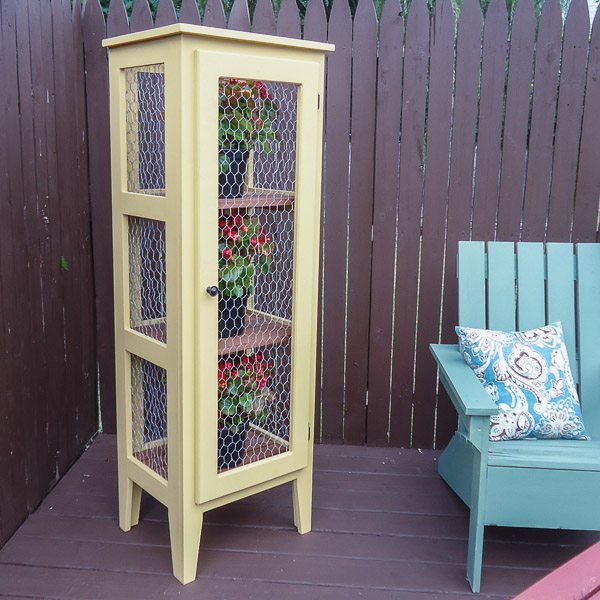
This was actually the first piece of furniture Toni built entirely on her own, which makes it a great confidence booster if you're new to woodworking. The whole table comes from a few inexpensive 2x4s, joined with pocket holes and glue, with bevel and miter cuts on the legs for a little extra style. She painted hers a cheerful teal and points out that the sturdy top is solid enough to double as an extra seat when guests show up.
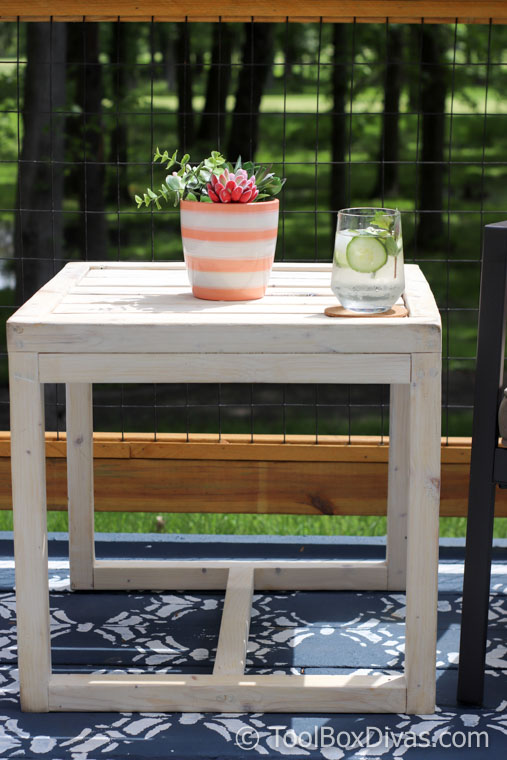
Timisha designed this modern side table to look like something off a showroom floor, but it's built entirely from narrow boards that keep it light and airy. The standout trick is a recessed tabletop, giving it a built-in, high-end feel.
Cara built this little table mostly from scraps left over from a coffee table project. It's small enough to tuck almost anywhere, but still holds a drink and a book. She hid the pocket holes on the underside so there's nothing to fill, glued the top slats down overnight, and finished it in teak. She also points out that it works inside as a nightstand.
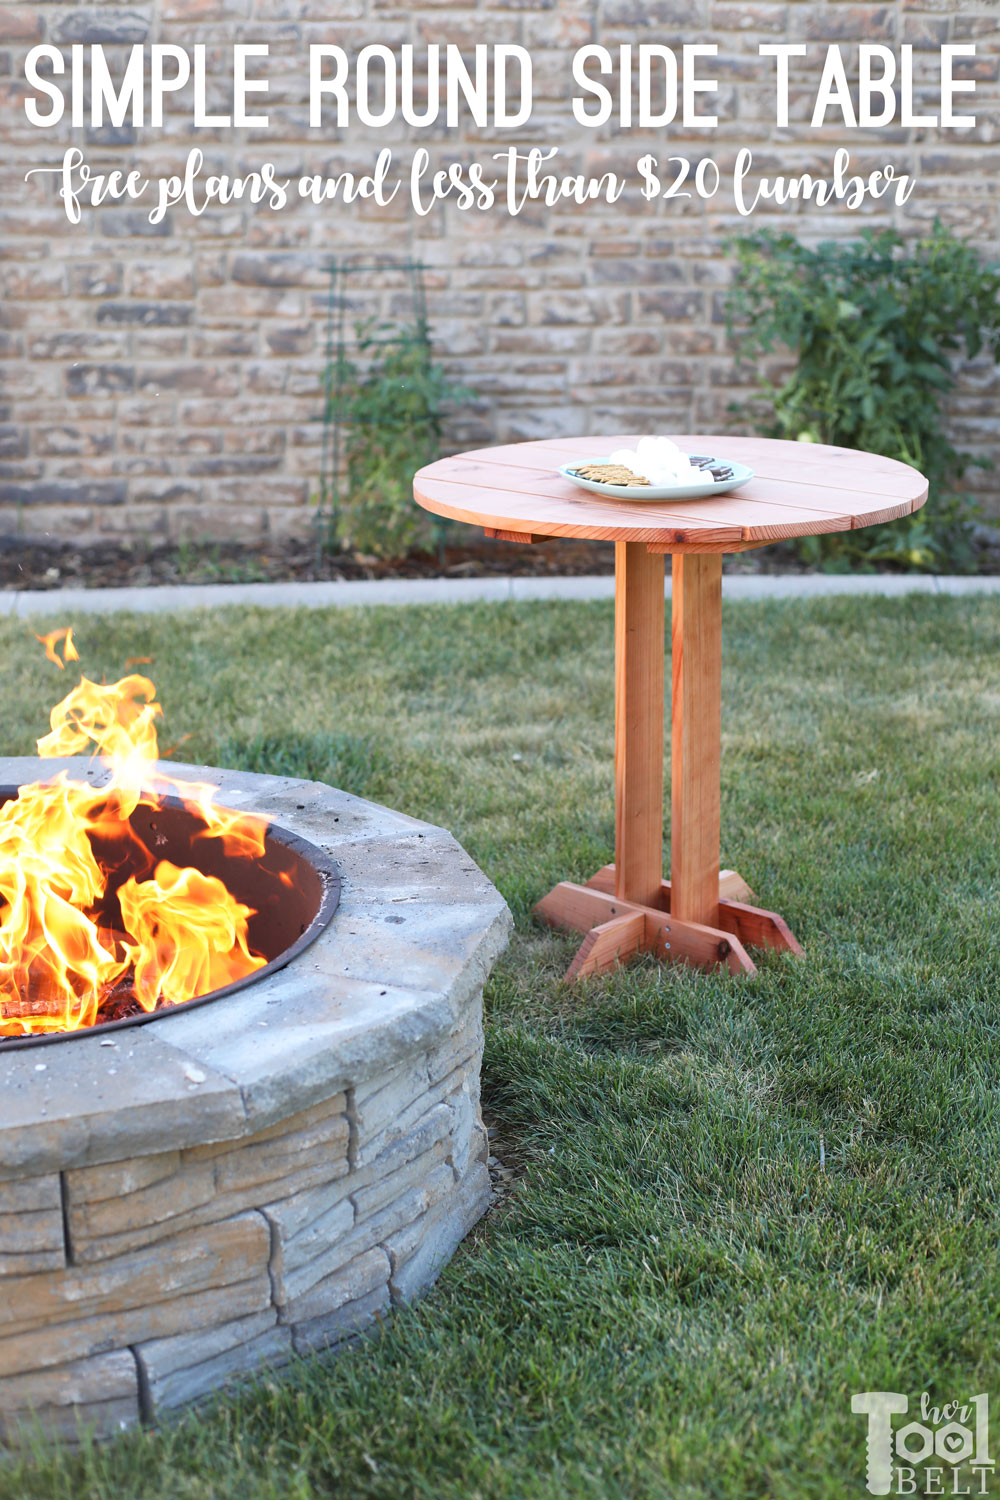
Amy's round-top design is easier to pull off than it looks. She lays out the boards, draws a perfect circle with a pencil tied to a string and a screw, like a giant compass, then cuts it out with a jigsaw. The whole thing comes together with just two power tools, no miter saw needed. She built hers from redwood left over from a pergola and finished it in a natural stain.
Shauna built this one from salvaged wood left over from a farmhouse dining table, then painted it a soft aqua that plays off the gray Adirondack chairs beside it. There aren't any instructions for this one, but I wanted to include it because I love the simple, rustic design.
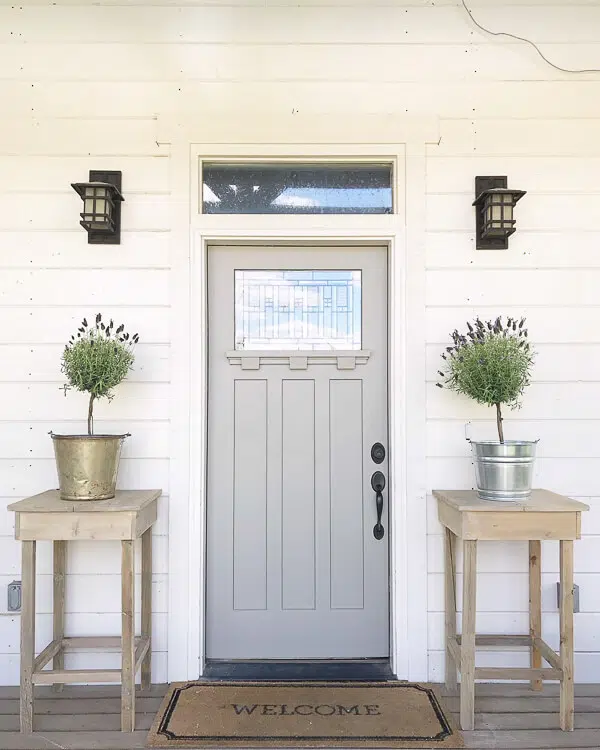
Sara built a pair of these tall, skinny tables to flank her front door, which is a different look from the low tables you'd park beside a chair. She made hers entirely from scrap pulled from her trash pile, and screwing everything together. Her finishing tip is worth stealing if you build with scrap: a homemade weathered stain that blends mismatched wood species into one uniform, rustic gray.
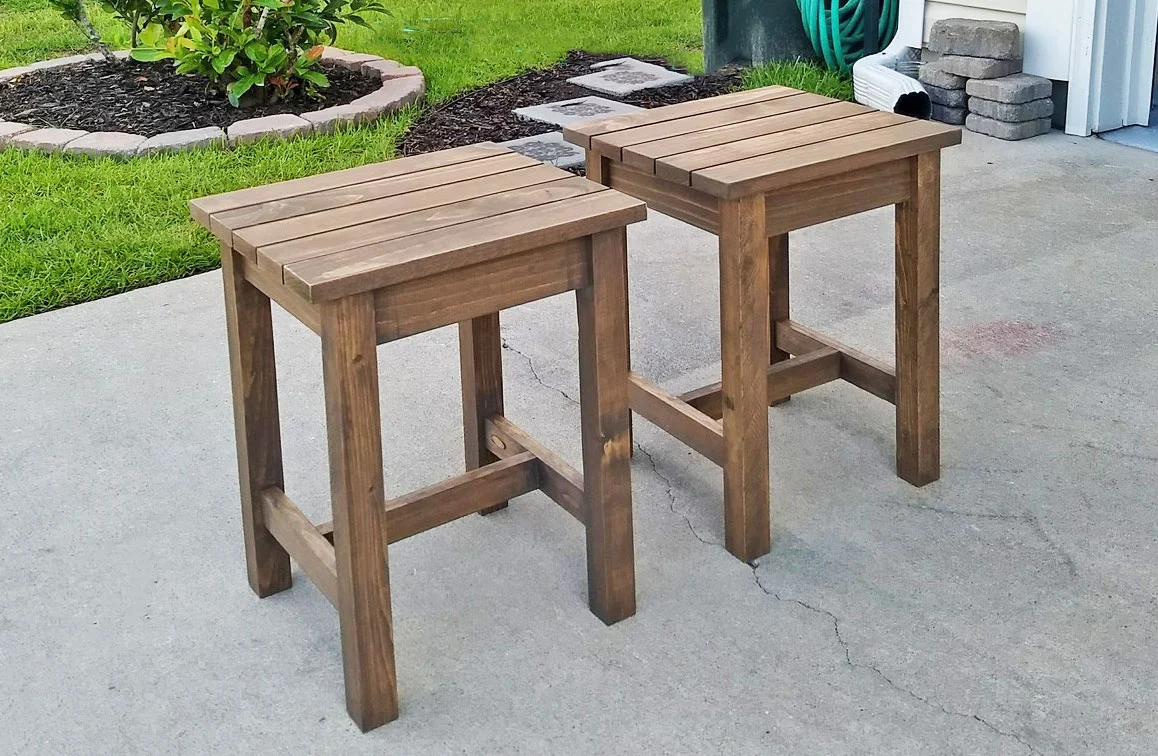
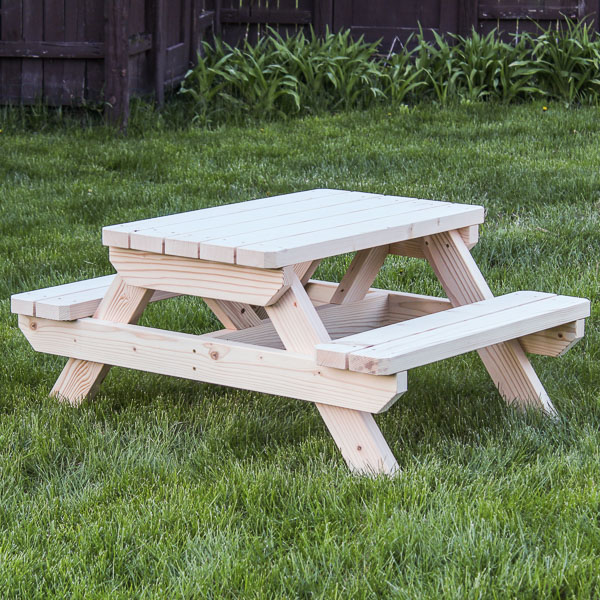
This little Adirondack-style piece from Ana White sits low enough to use as a stool and sturdy enough to hold a drink, so it pulls double duty. It's a beginner-friendly build using pocket holes, and the plans include a cut list and step-by-step diagrams. Stain it for a rustic look or paint it a bold color to brighten up a porch.
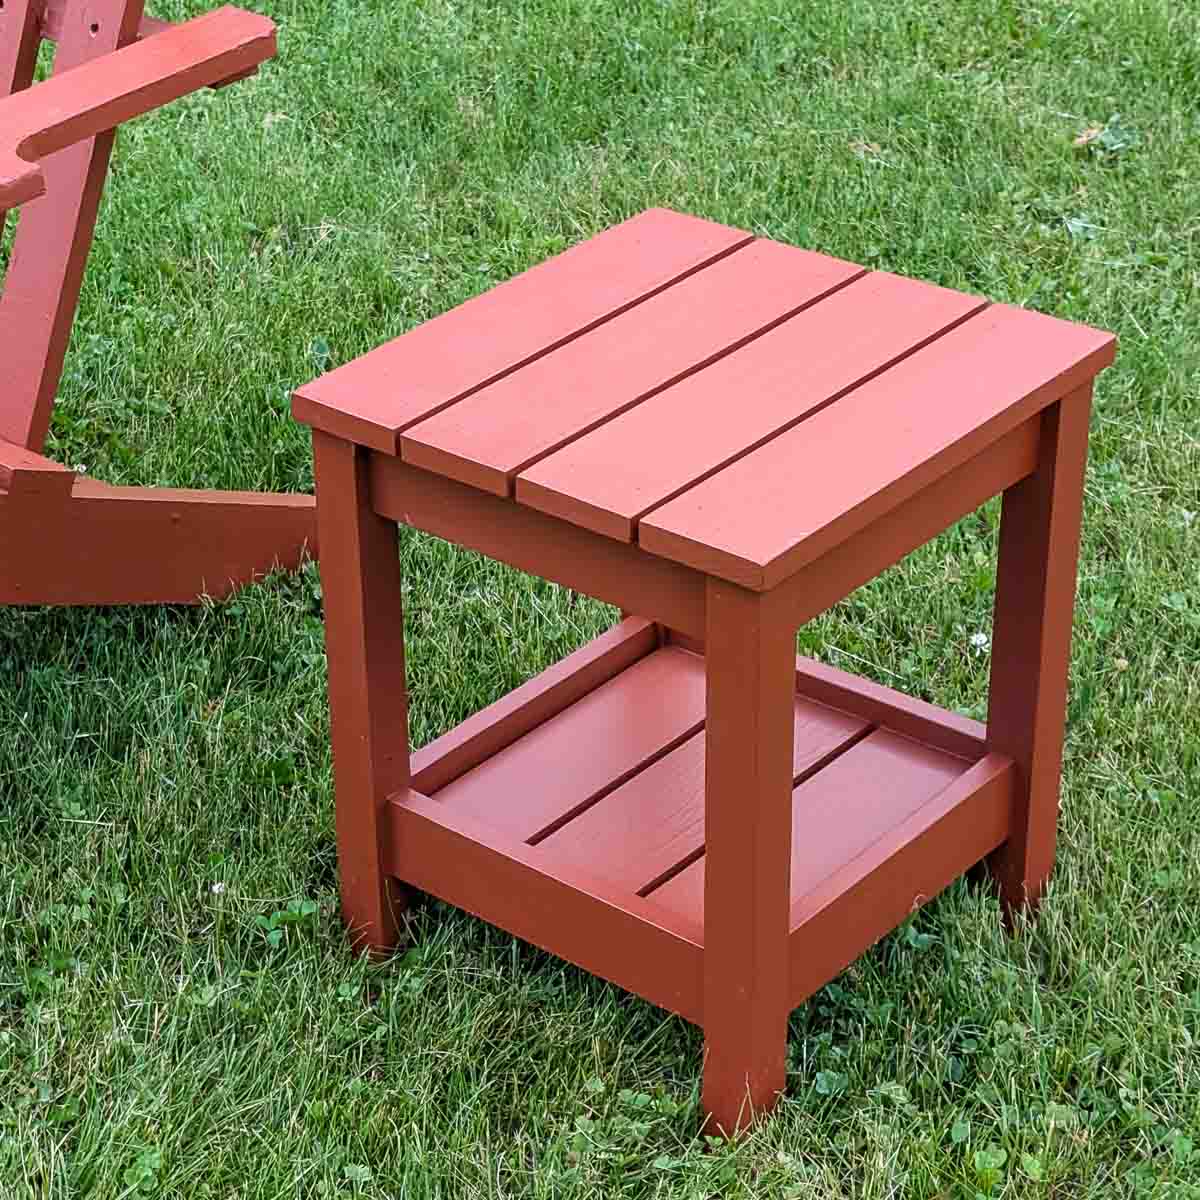
I found a pair of Adirondack chairs by the dumpster in surprisingly good shape and dragged them home. I wanted a side table to go with them, so I designed this one. I really like the lower shelf. It's perfect for a plant, a book, sunscreen, or whatever else you need on the patio. I built the whole thing from scrap wood, so it cost me nothing.
Built entirely from 2x4s, this is one of Ana White's simplest outdoor projects, coming together with just a circular saw and a drill, no angled cuts or fancy joinery needed. The square, sturdy design is part of her popular 2×4 outdoor collection, so you can build a matching sofa and sectional to go with it. The plans even show how to resize it taller or wider.
Looking for a side table with a little extra style? These designs pair a wood base with a concrete or stone top for a modern, high-end finish.
12
fixthisbuildthat.com
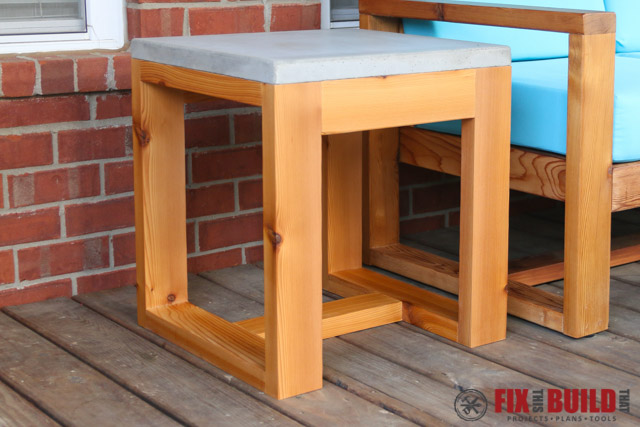
Modern Concrete-Top Side Table
Brad's design pairs a cedar base with a poured concrete top for a sleek, industrial look. He walks through building a simple form and casting the slab, then joins the base with pocket holes. The whole thing comes together with just two power tools and no miter saw required.
Brittany gets the look of a concrete-top table without mixing or pouring a thing. She builds a simple frame using pocket hole joinery and drops a store-bought concrete paver in as the top, so there are no forms to build and no drying time to wait on.
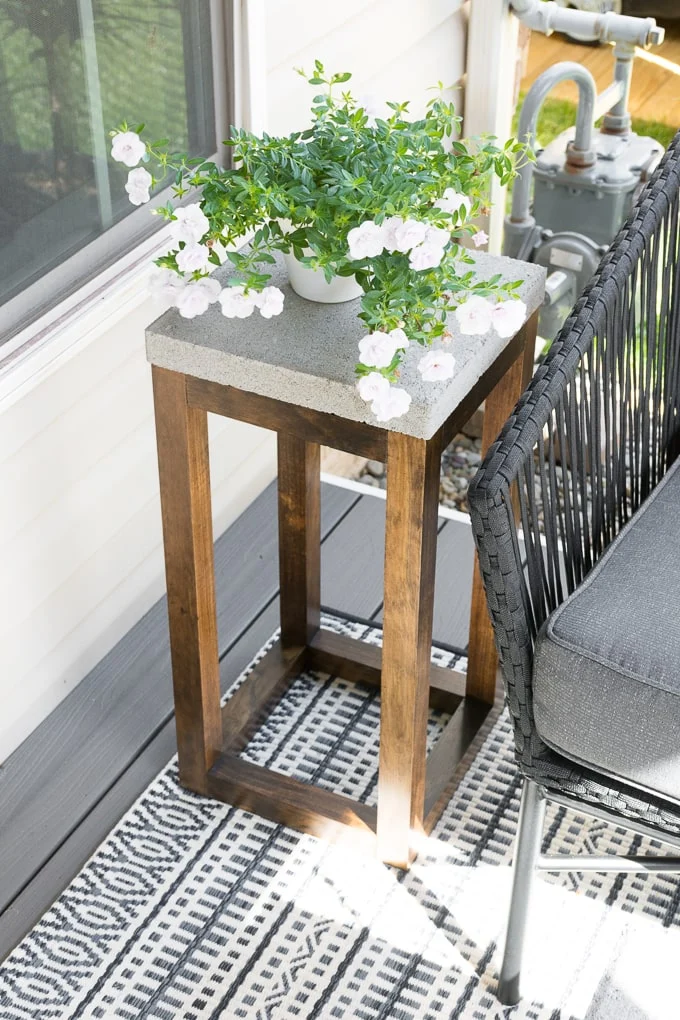
AnnMarie built a slim frame joined with deck screws, then topped it with a stepping stone she picked up from the garden aisle. She didn't own clamps, so she came up with a clever trick to hold the stone down while the adhesive set. She made a pair to flank her outdoor sofa, all for under $10.
Why get up for another drink when your side table can hold them right next to you? These designs have built-in coolers or hidden storage, so everything you need is within arm's reach.
15
thehandymansdaughter.com
Side Table With a Built-In Drink Cooler
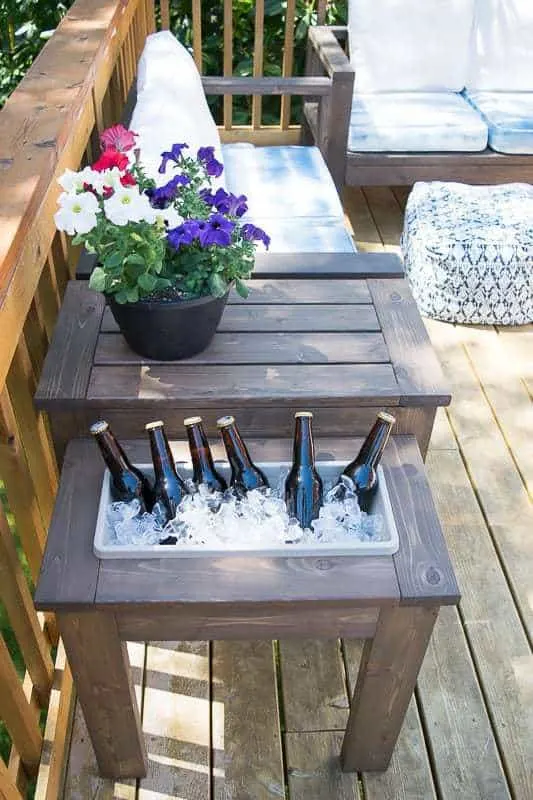
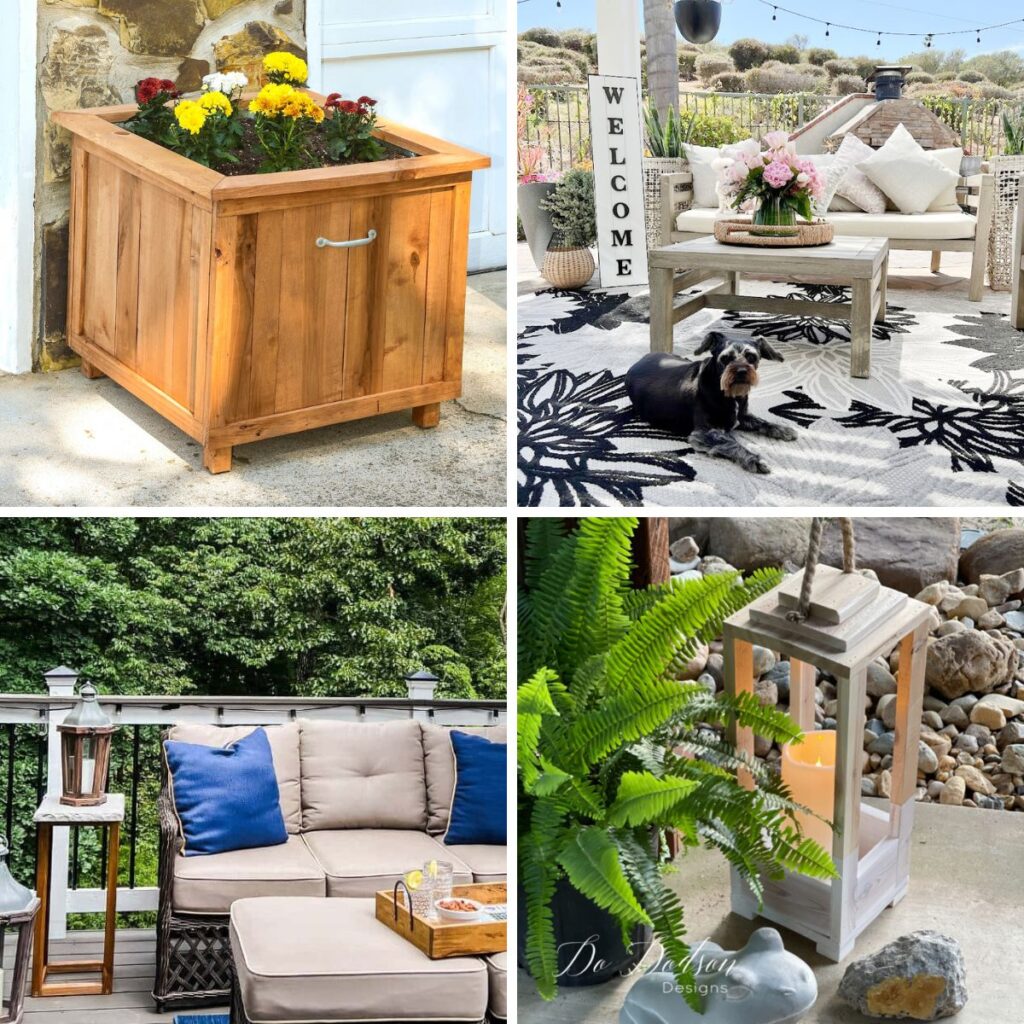
Vineta's two-tier design has a drop-in box on the lower shelf that you can use in two ways. Fill it with ice to keep a six-pack cold right next to your chair, or swap in a planter of flowers when you'd rather have something pretty to look at. It's built from cedar and joined with pocket holes.
Tarah built a set of three of these from pressure-treated boards to sit between her outdoor loungers, each with a plastic insert dropped into the center. Fill it with ice, and it's a built-in drink cooler, or add soil, and it's a planter.
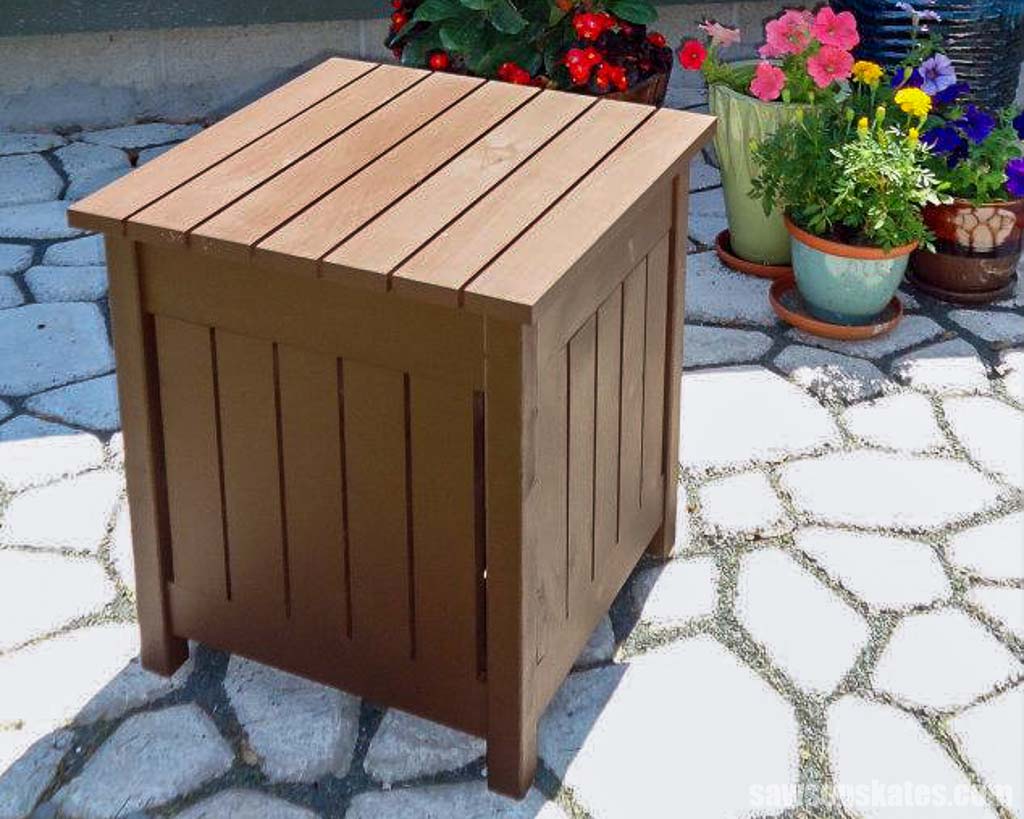
Years ago, I designed this side table as a housewarming gift. The removable top hides a square plastic planter that pulls triple duty: fill it with ice for a built-in cooler, drop in soil for flowers or herbs, or use it for storage. One reader even uses his to hide his propane tank!
Looking for a little shade on the patio? These side tables double as umbrella stands, so you get a spot for your drink and a way to keep the sun off your face, all in one build.
18
woodshopdiaries.com
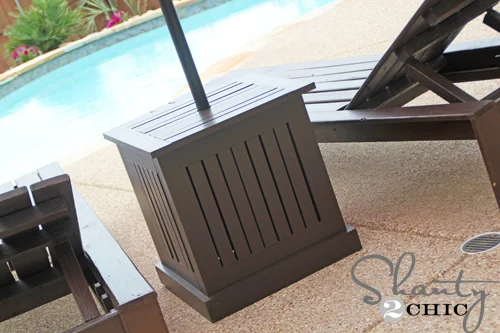
Cedar Umbrella Stand Side Table
Shara built this one entirely from cedar scraps, so it's a perfect use-up-the-pile project. The slatted top sits on legs with cedar fence pickets forming the bottom shelf, and you can dress up the two open sides with optional diagonal trim for a little extra character. Rather than wrestling with a weighted base, the table slips over a standard umbrella stand, so you can swap things out later.
Looking for shade without the sawdust? Angela skipped the woodworking entirely for this one. Instead, she started with an unfinished side table from the home improvement store. Then, she drilled a hole through the top for the umbrella pole and another through the bottom shelf for the weighted base. The whole project only required a drill, and she shares a clever jig trick for keeping the hole saw steady across the gap between slats.
Vineta's design hides the weighted umbrella base inside the table, with a slatted cedar body and a top that splits in half on hinges so you can lift it open around the pole. Inside, there's room for storing outdoor pillows or anything else cluttering the patio, and the hinges make taking the umbrella down for winter painless. Her scrap-board spacing trick is worth stealing, too.
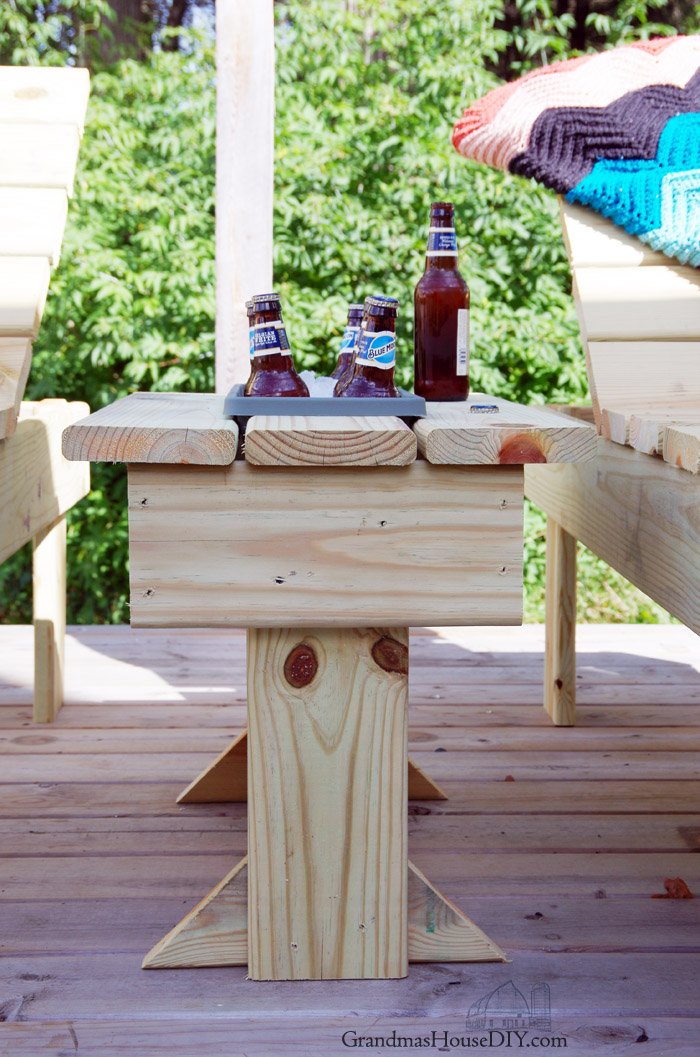
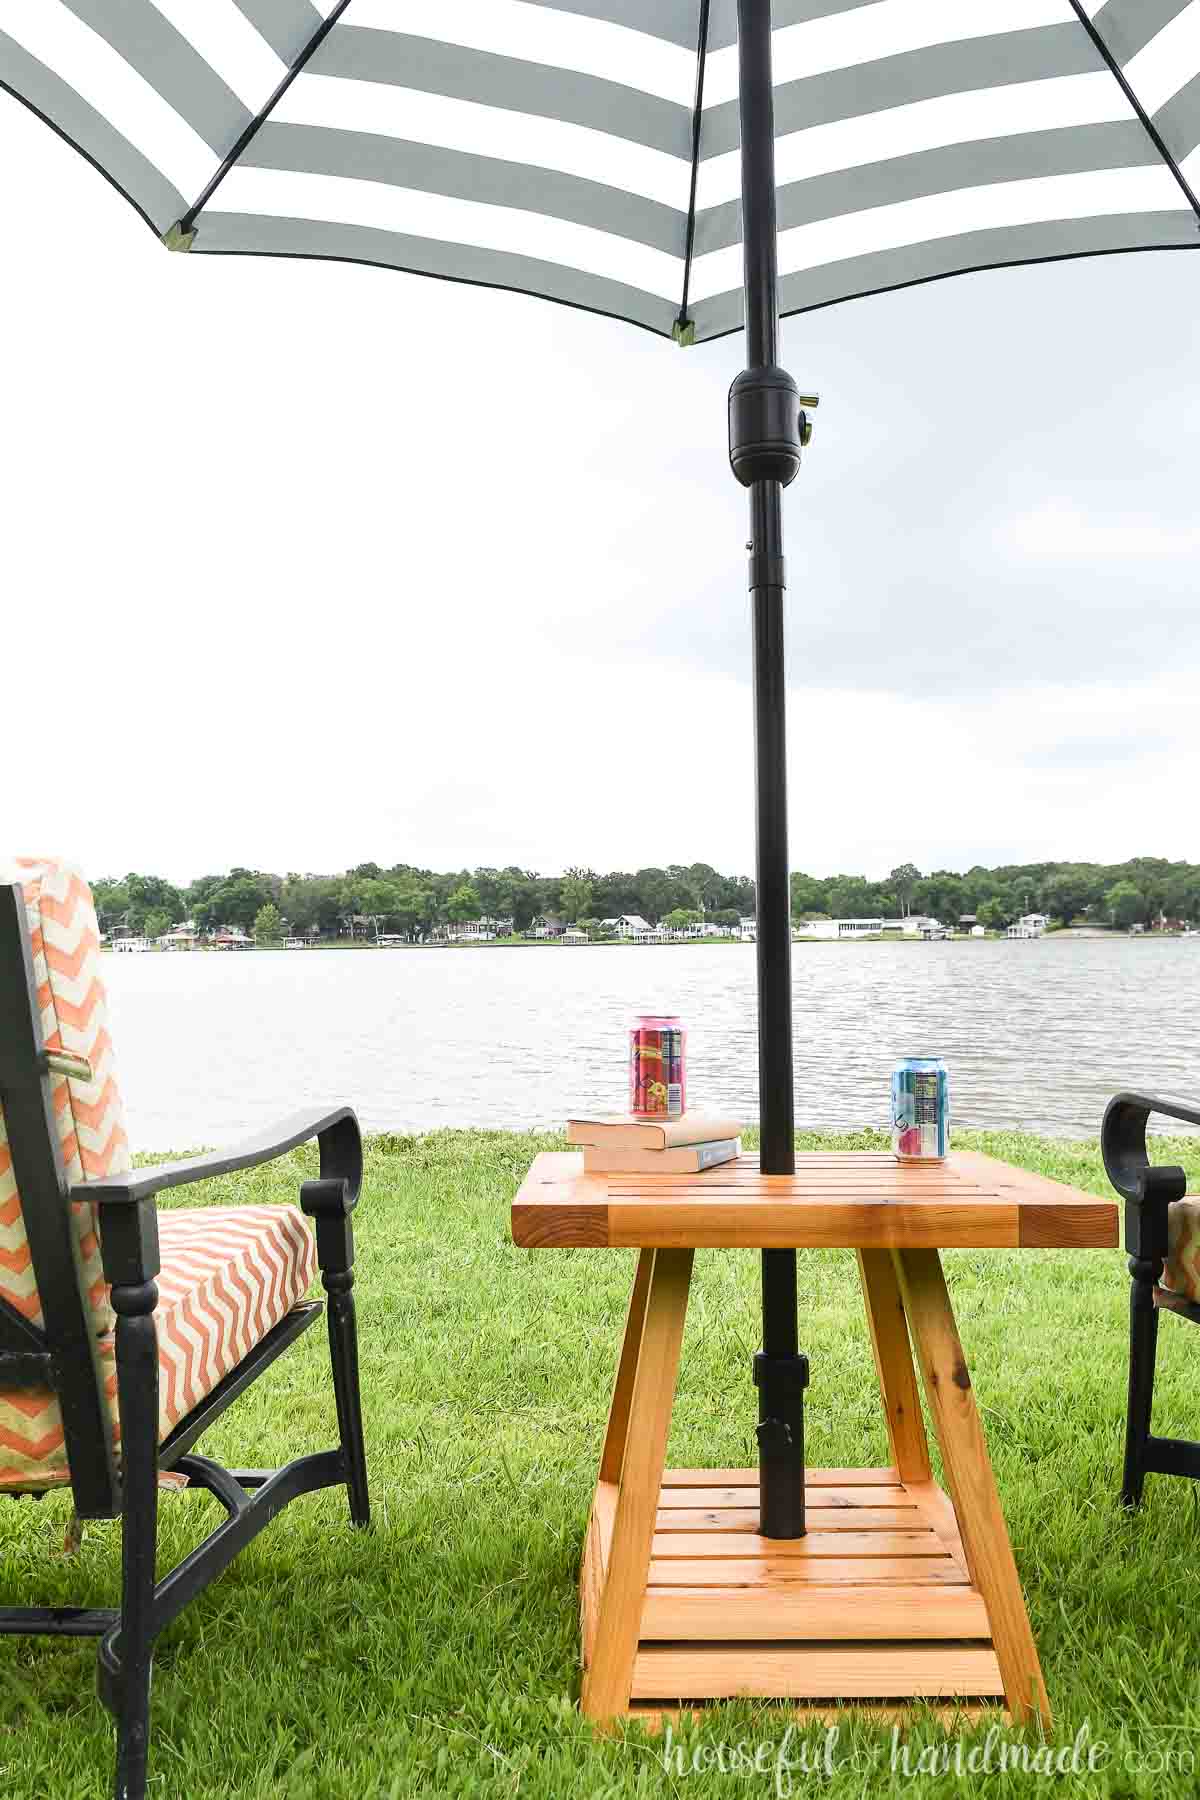
Kati's design stands out for its pyramid-shaped base. The legs splay wider at the bottom and taper toward the top, hiding the weighted umbrella stand inside while giving the table a sculptural shape. The secret is a single compound angle cut on the miter saw, which sounds advanced, but her video walks you through exactly how to dial it in. There's also a lower shelf inside the pyramid for storage.
Ana White's plans deliver a beginner-friendly version of a $300 designer umbrella side table at a fraction of the cost. The slatted body hides a weighted base inside, and the top notches around the umbrella pole. In her comments, builders have shared two budget hacks for the weighted base: one using a flower pot filled with Quikrete, and another using a 5-gallon bucket with concrete and a short length of PVC to hold the umbrella shaft straight.
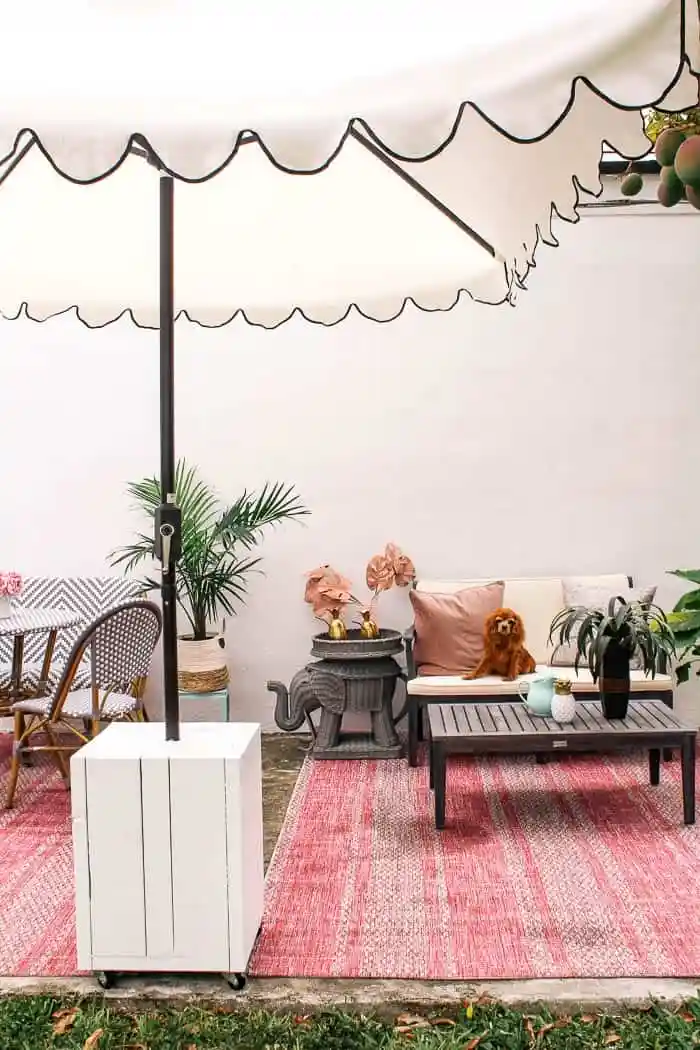
Ashley put her umbrella stand on wheels so it could roll around the deck to chase the shade. She built a box and poured concrete inside with a steel pipe in the center, which turned the table into its own weighted base. A coat of bright white exterior paint finishes it off.
There you have it: 23 DIY outdoor side table ideas to help your patio feel a little more put-together this summer. Whether you build one to tuck next to a chair, go all in with a built-in cooler, or finally solve the wobbly umbrella problem, you’ll have the perfect place to set your drink.
Hi there – I’m Scott, a woodworking enthusiast and creator of Saws on Skates, a site I started in 2015 to share easy-to-follow tutorials, space-saving shop tips, and project inspiration for DIYers at any skill level. Learn more about my woodworking journey here.