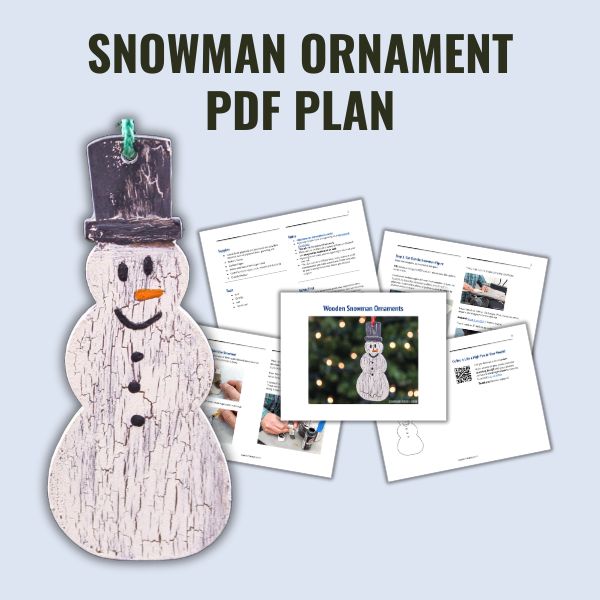
DIY Wooden Snowman Ornaments
Add a touch of winter whimsy to your tree with these adorable, DIY wooden snowman ornaments. Easy-to-follow instructions and pattern included.
What Should I Build Next?
That's the question I help answer.
Every week, I send woodworking ideas to 17,000 DIYers who love building things.
You'd fit right in.
If you’re looking for a fun and easy way to add a bit of winter cheer to your Christmas tree, I’ve got the perfect project for you: DIY wooden snowman ornaments!
These adorable ornaments are quick and simple to make with this easy-to-follow plan, including a template.
Table of Contents
- Inspiration for These DIY Wooden Snowman Ornaments
- What Tools Do You Need?
- What Wood Should You Use?
- How Do You Draw the Snowman?
- How Do You Finish the DIY Snowman Ornaments?
- How to Make a DIY Wooden Snowman Ornament
- Get the PDF Plan
This article contains affiliate links. If you purchase from these links, I may earn a small commission at no additional cost to you. Visit my site policies for more information.
Inspiration for These DIY Wooden Snowman Ornaments
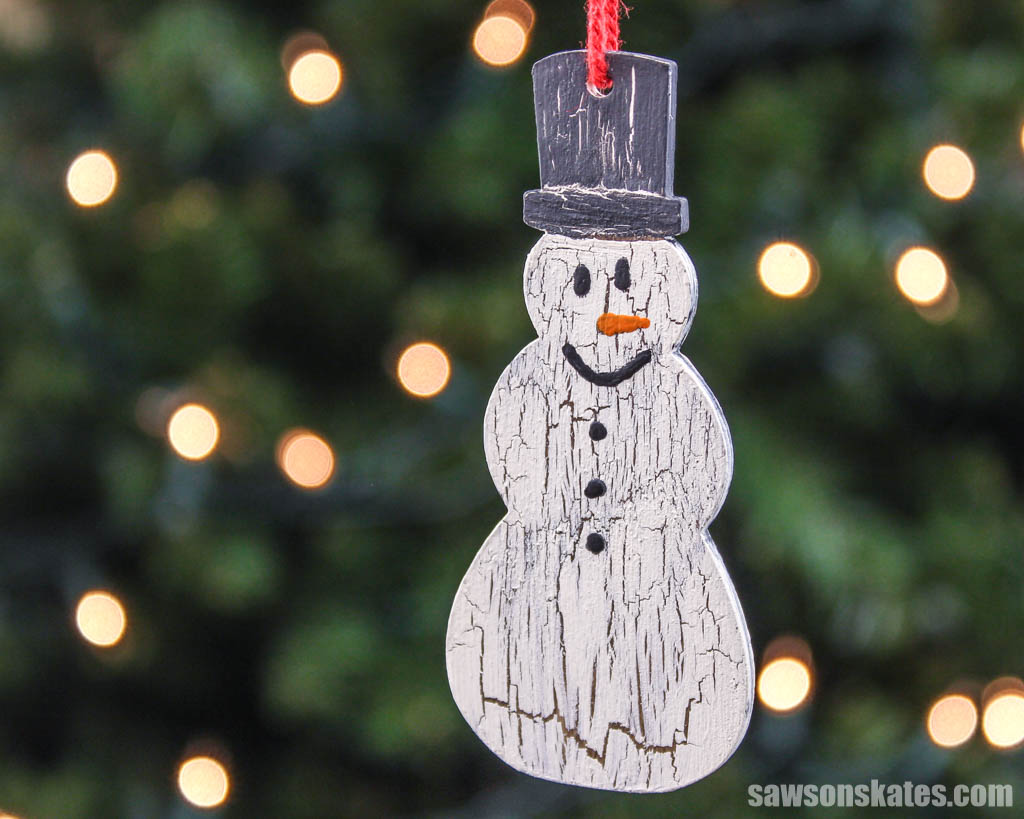
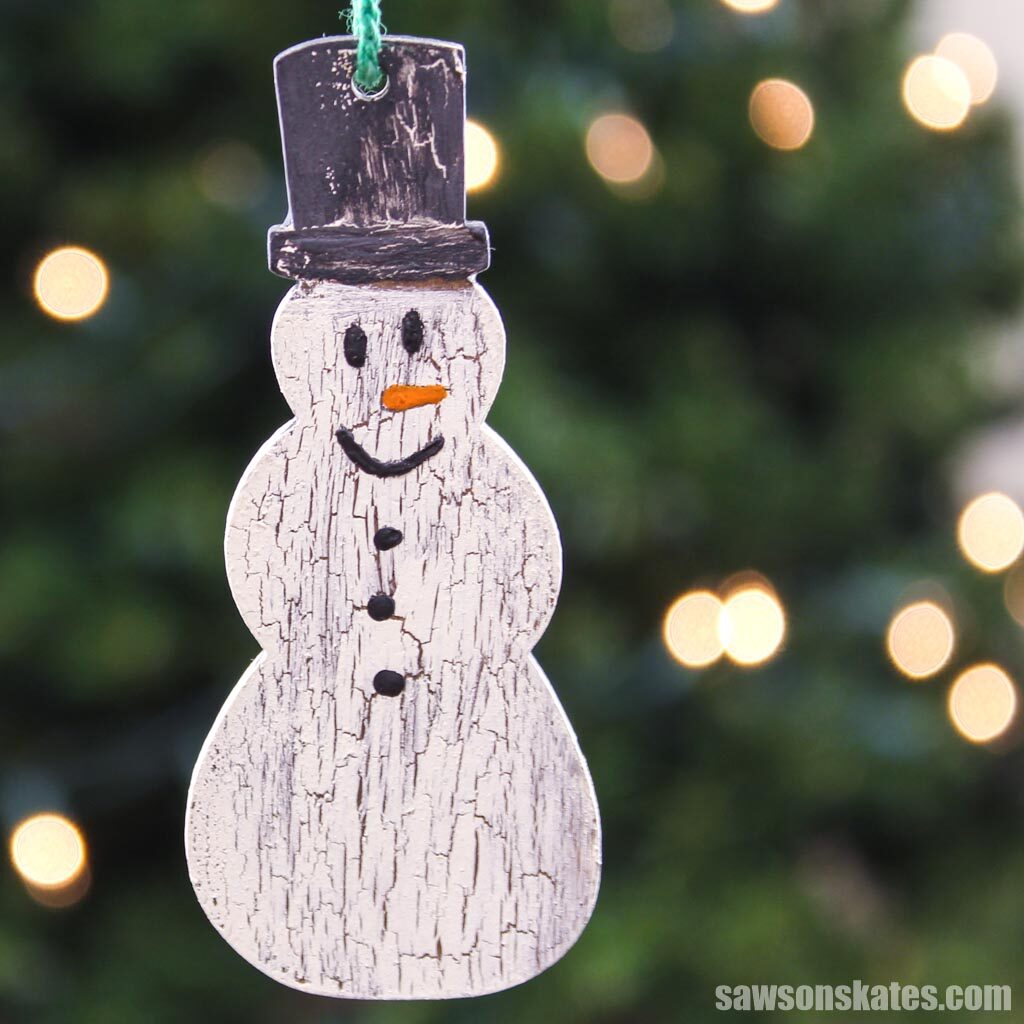
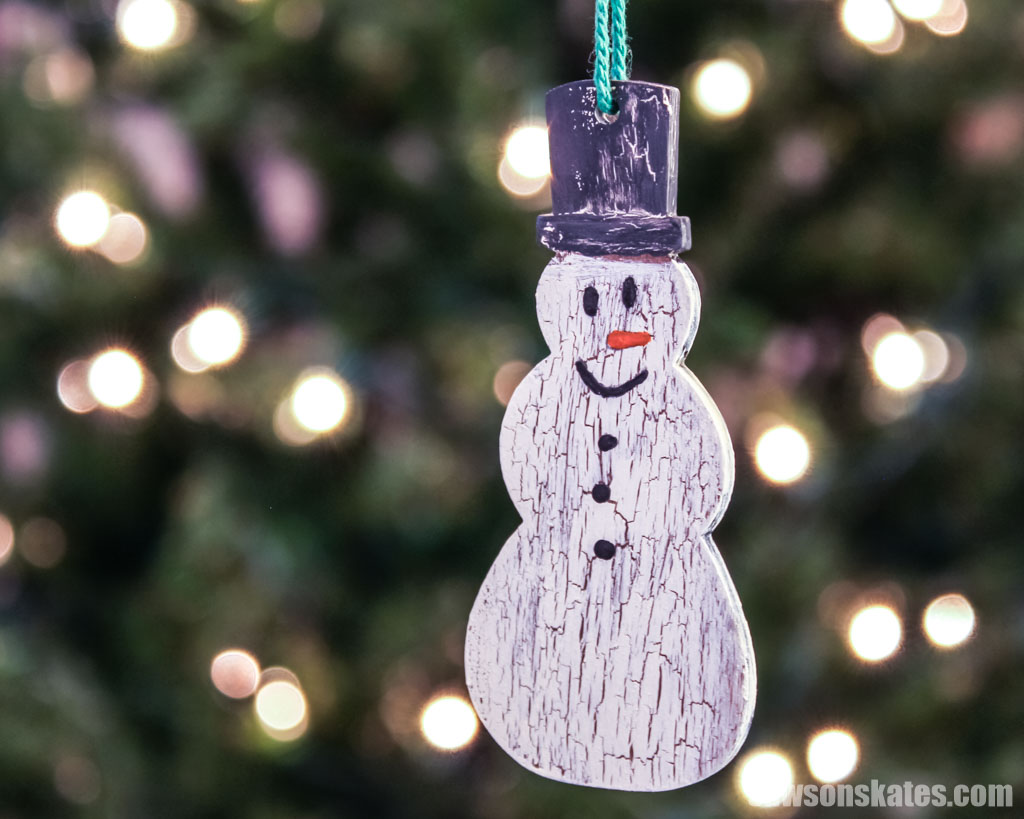
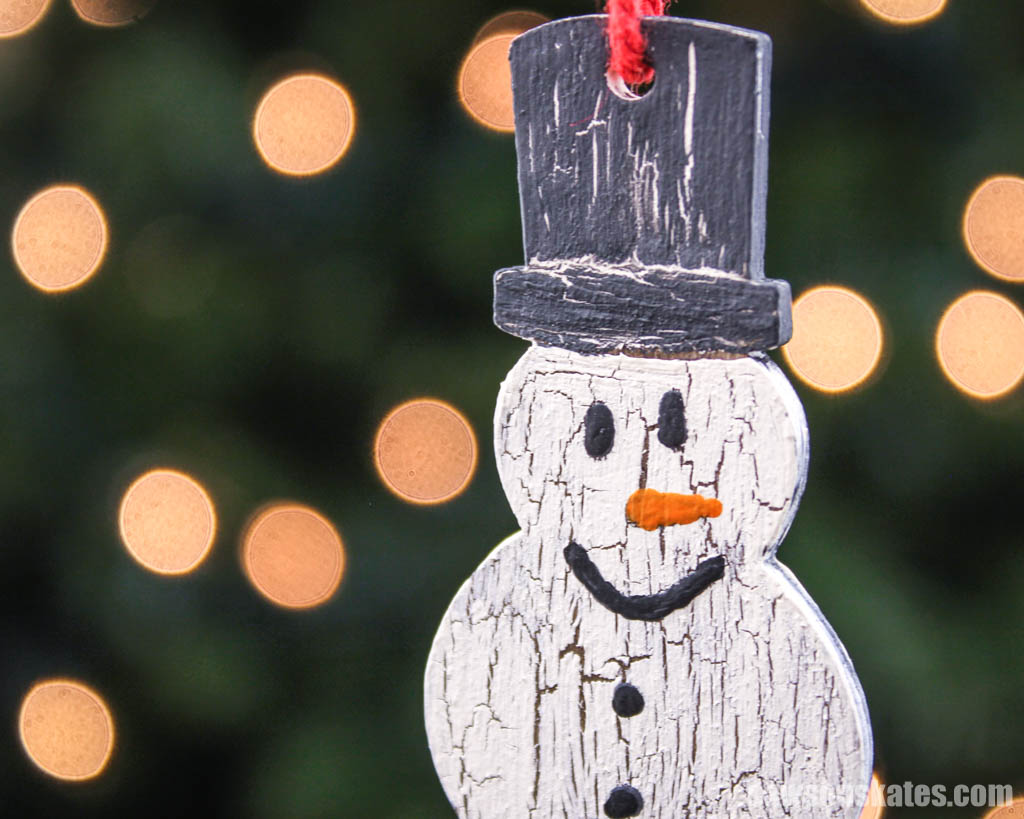
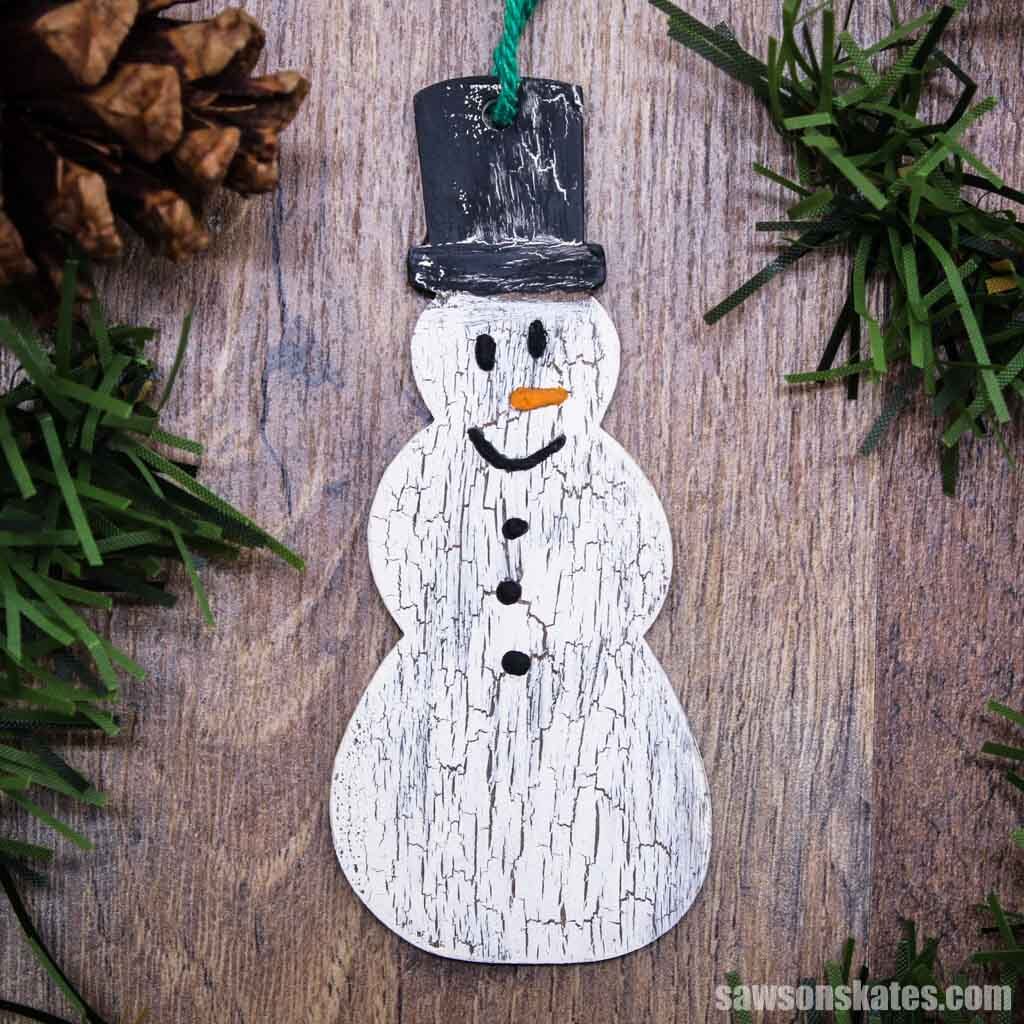
I’ve had an antique-style wooden snowman in my ornament collection ever since I can remember. I’m not sure where the snowman came from, but he’s been around so long that he’s practically a family heirloom.
I’ve always loved his rustic charm and crackle paint finish and wanted to create something similar. After trying a few variations, I came up with these festive snowmen ornaments.
My DIY version is nearly identical to the snowman in my collection, but you can customize them to fit your style.
What Tools Do You Need?
Making these DIY ornaments is as easy as it gets. All you need are two common woodworking tools, a scroll saw, and a drill, and in no time, your cute snowman ornament will be ready to hang on your tree!
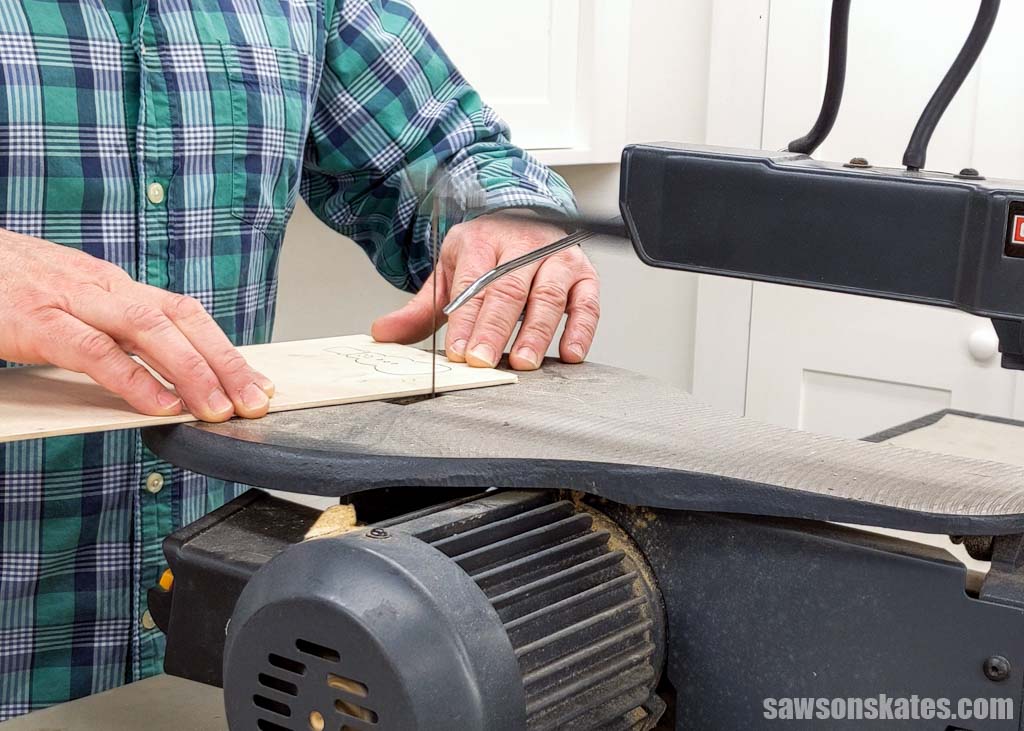
Scroll Saw
I used a scroll saw to cut out the snowman figure. If you don’t have one, you might be able to use a bandsaw instead.
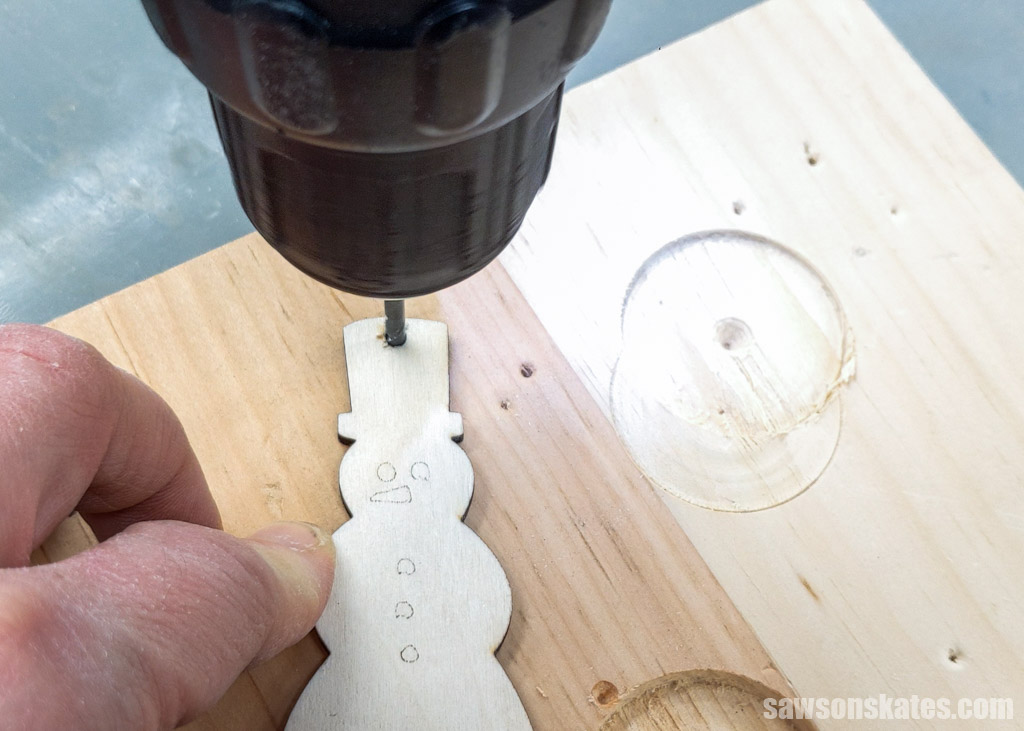
Drill
I used a drill to make the hole in the snowman’s hat for the hanger.
What Wood Should You Use?
To make my snowman ornaments, I tapped into my reserve of 3mm plywood, which I had leftover from previous projects.
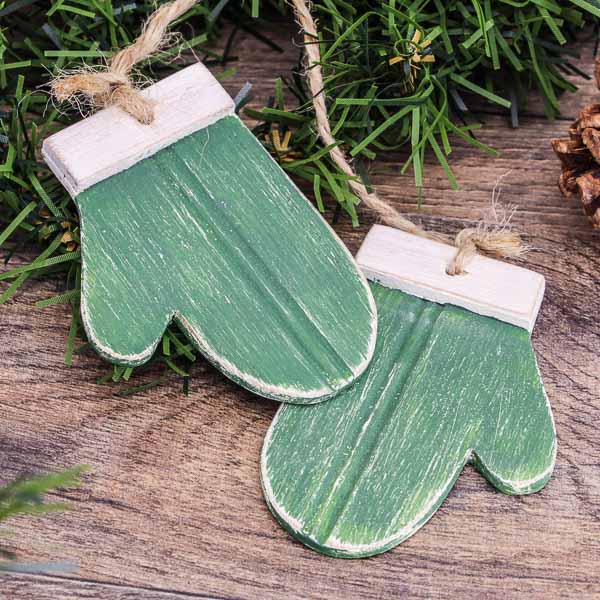
The best part is you don’t need to buy wood. Grab whatever thin plywood material you have. Just about anything from lauan to hardboard will work just as well. I even used scrap pieces of beadboard paneling to make these mitten ornaments.
How Do You Draw the Snowman?
Don’t worry if you can’t draw. I can’t either! But I’ve got you covered. The printable plan includes a pattern that’ll take care of everything!
Just get the plan, print the template, and trace it. That’s it!
How Do You Finish the DIY Snowman Ornaments?
I finished my snowman ornaments with a crackle paint finish and painted their features with inexpensive craft paints.
How to Make DIY Wooden Snowman Ornaments
Printed Plan
Get the PDF plan here (includes detailed instructions, measurements, and bonus tips)
Supplies
- Wood (per the printed plan)
- Baker’s Twine
- Carbon Paper
- White and Black Chalk-Type Paint
- Craft Paints (for eyes, nose, mouth and buttons)
- Crackle Medium
Tools
- Drill
- Drill Bit
- Awl
- Scroll Saw
Step 1. Cut Out the Snowman Figure
Print the template at the end of the plan.
💡 TIP: When printing the PDF pattern, make sure the scale is set to 100%.
I had some carbon paper left over from another project, so I used it to trace the snowman pattern onto the 3mm plywood. I used a few pieces of painter’s tape to keep it in position while I traced.

Then, I cut out the shape using my scroll saw.
Next, I made a hole for the hanger. First, I used an awl to make a starting point for the drill bit.
Related: What is an Awl? (+ How to Use It)
Then I used a drill bit to make the hole.
Related: How to Use a Drill (Tips & Techniques)
Step 2. Paint the Snowman
First, I applied a coat of Behr water-based wood stain in dark walnut to the snowman’s body.

Then I applied white chalk-type paint similar to this one to his hat.
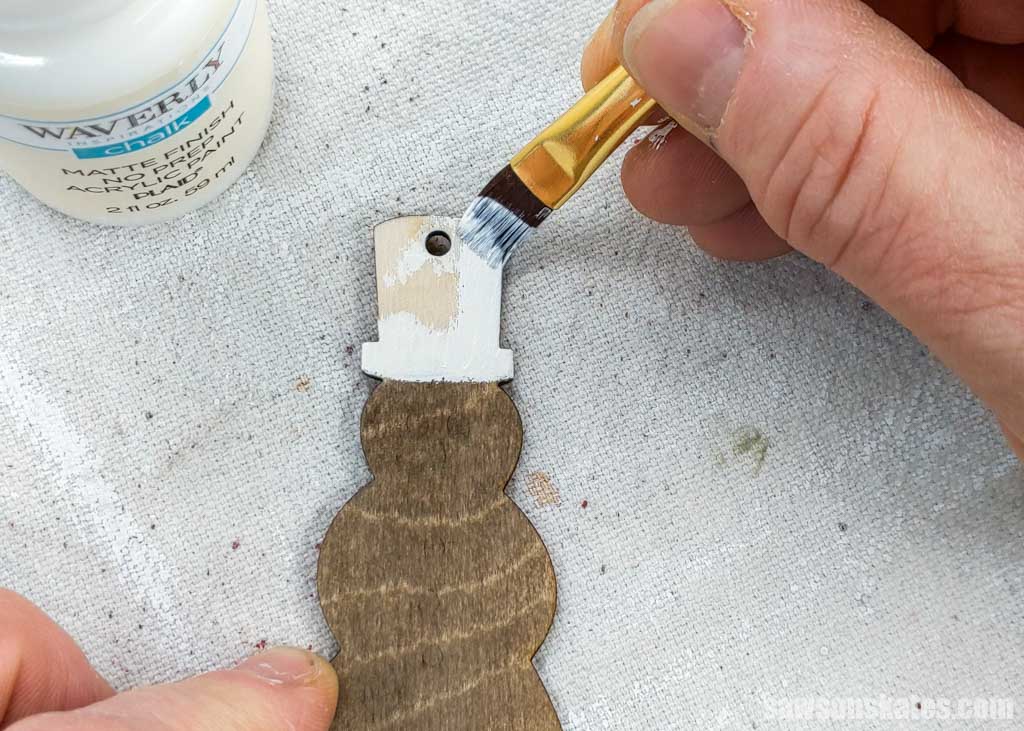
When the stain and paint were dry, I applied the crackle medium. I used school glue, but you can also use a store-bought crackle medium.
Over the crackle medium, I applied white chalk-type paint to his body and black to his hat.
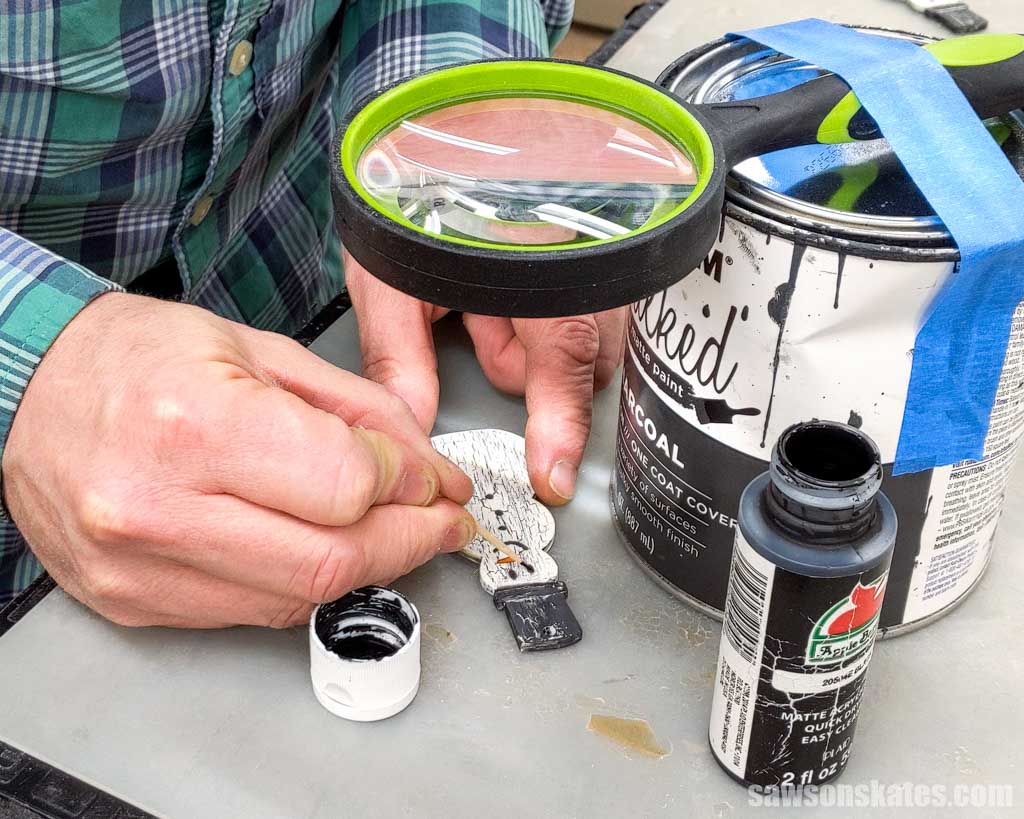
I painted his face and buttons when the paint was dry. These were tricky to paint with a paintbrush, so I ended up using a magnifying glass and toothpick!
Step 3. Attach the Hanger
I cut a piece of baker’s twine, fed it through the hole, and tied a knot.
Includes:
- List of tools and materials
- Complete measurements (in inches)
- Easy-to-follow instructions
- Step-by-step photos
- Snowman template
- BONUS: SVG file
or get the best value:
Final Thoughts
These wooden snowman ornaments are a great way to add some rustic flair to your holiday decor. They’re perfect for decorating your Christmas tree and make great gifts too.
Get your plan (including the detailed instructions and measurements) now!
Thank you for stopping by. If you enjoyed this tutorial, would you please take a moment and pin it to Pinterest? I’d really appreciate it!
Recommended For You

Pin This For Later

Hi there – I’m Scott, a woodworking enthusiast and creator of Saws on Skates, a site I started in 2015 to share easy-to-follow tutorials, space-saving shop tips, and project inspiration for DIYers at any skill level. Learn more about my woodworking journey here.