How to Use a Drill (Tips & Techniques)
Not sure how to use a drill? I’ll walk you through the basics, understanding its settings and how to use it for foolproof results every time!
A drill is essential for many home improvement projects, but where do you start if you don’t know how to use one? I’ve got you covered! With this easy-to-follow guide, you’ll learn everything you need to know, from understanding the parts of a drill to adjusting its settings. I’ll also walk you through how to drill holes and drive screws so that your next project will be a success!
Originally published July 9, 2019, updated February 25, 2023.
Table of Contents
- What is a Drill?
- What are the Parts of a Drill?
- How to Buy a Drill
- What are Drill Bits?
- How to Use a Drill to Make a Hole
- How to Use a Drill to Drive a Screw
- How to Use a Drill to Remove a Screw
This article contains affiliate links. If you purchase from these links, I may earn a small commission at no additional cost to you. Visit my site policies for more information.
What is a Drill?
A power drill sometimes called a drill driver or simply a drill, is a versatile handheld power tool. You can use it for countless projects like making repairs, hanging pictures, assembling furniture, attaching hardware, or even building a bookshelf.
A drill has a motor that turns the chuck. The chuck is a clamp that holds the drill bit in place. The motor turns the chuck, which spins the bit.
You can use a drill to make holes in materials like metal, plastic, or wood.
You can use a drill to drive screws and other fasteners.
Drills may be used with accessories beyond drivers and drill bits, such as right-angle attachments, wire-wheel brushes, and more.
Different types of drills are available, including corded and cordless. Corded drills plug into an electrical outlet and run on electricity. Cordless drills run on batteries and can be used just about anywhere.
What are the Parts of a Drill?
Before you start using a drill, there are several parts you’ll want to be familiar with.
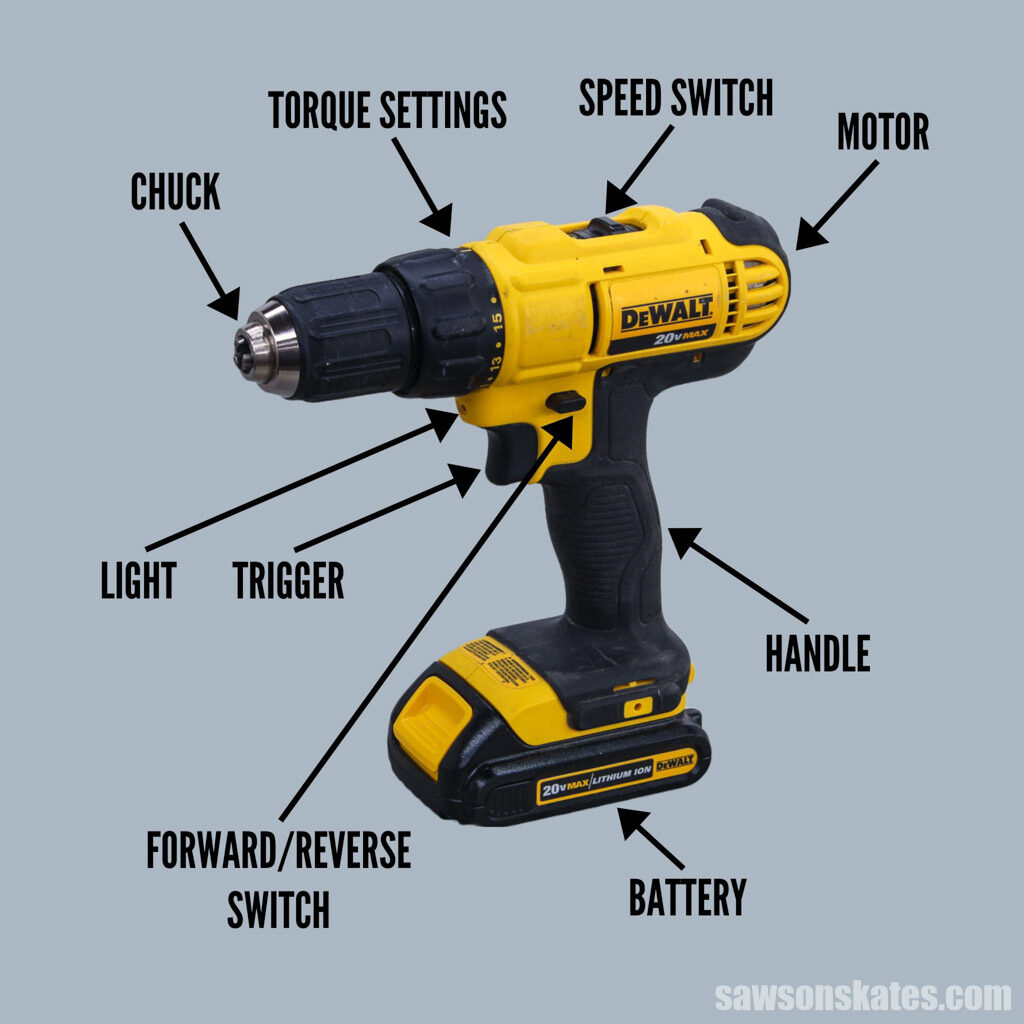
Handle or Grip
The handle or grip is the part of the drill you hold onto while drilling. It’s usually made from hard plastic or rubber and has grooves or indentations to help provide a good grip.
Motor
The motor is what powers the drill. It’s located above the handle and is responsible for turning the chuck, which spins the bit.
The size of the motor will vary depending on the type of drill you have. A corded drill will typically have a higher-powered motor than a cordless one.
Chuck
The chuck is a clamp that holds bits in place. A drill’s chuck has adjustable jaws, making it easy to change between bits of different shapes and sizes, such as round shank bits and hex shank bits.
Chucks come in two styles: one with a key and one without. The first is a keyed chuck, which needs a chuck key to tighten and loosen.
The second is a keyless chuck that does not need a key. All you need to do is turn the chuck clockwise to tighten it and counterclockwise to loosen it.
A keyed chuck has more gripping strength than a keyless one, and it’s commonly found on bigger, more powerful drills.
Forward/Reverse Switch
The forward/reverse switch or button is used to change the direction of the bit.
The forward direction rotates the bit clockwise, which is used for drilling holes and driving fasteners.
The reverse direction rotates the bit counterclockwise, which is used for removing screws and drill bits.
Trigger
The trigger is the part you press to start the motor and turn the drill bit.
Some drills have a variable speed trigger. A variable speed trigger controls the speed of the drill by allowing you to start at low speeds and gradually increase the speed.
For example, if you were drilling a hole in a piece of wood, and you started the drill too quickly, it might tear the wood fibers causing damage to your workpiece. The variable speed trigger allows you to gradually increase the speed rather than suddenly starting at full speed.
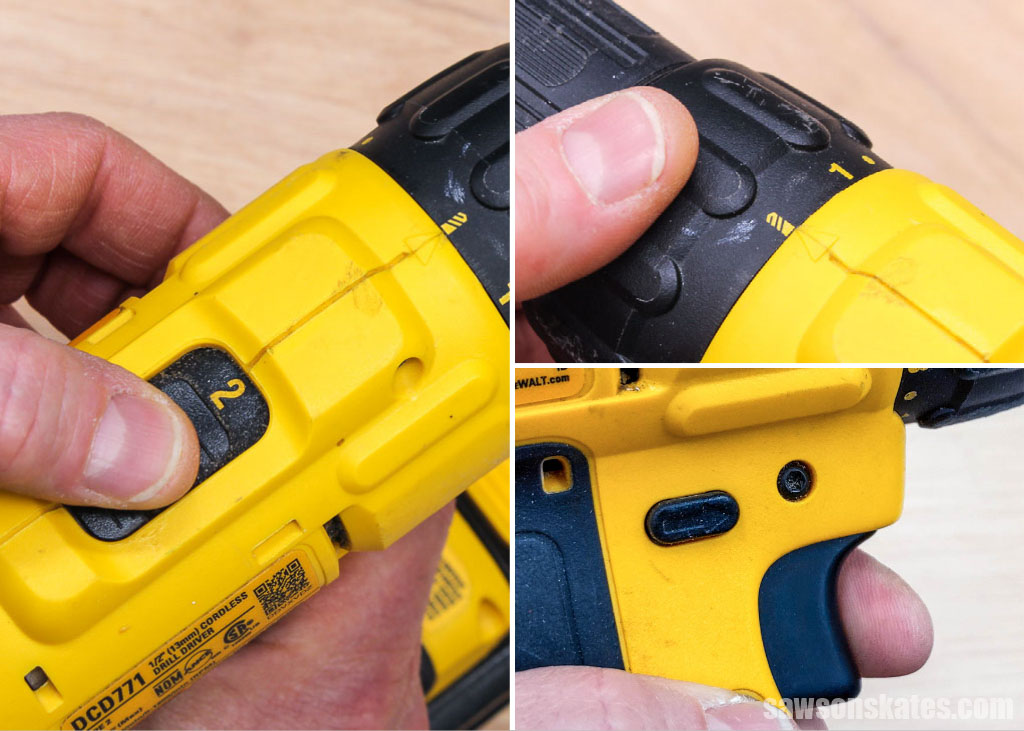
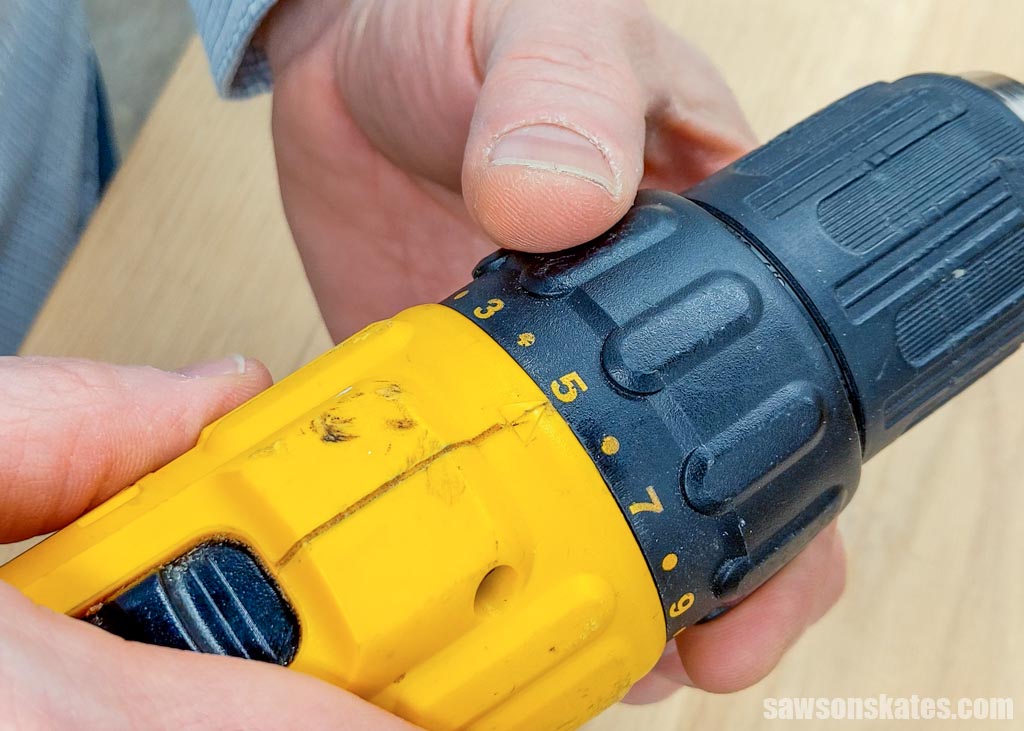
Clutch/Torque Settings
A slip clutch with torque settings is a common feature on many drills. Torque is the amount of twisting force the drill can apply to a bit.
The clutch allows you to adjust the torque, so you don’t over-tighten screws or drive them too deeply into the workpiece.
When the drill meets a specific amount of resistance, the clutch slips or disengages, stops turning, and makes a clicking sound.
High/Low Speed Switch
A drill typically has two speeds, high and low.
The higher the speed, the lower the torque, which is best suited for drilling holes.
The lower the speed, the higher the torque, which is used for more delicate tasks such as driving screws and other fasteners.
Rechargeable Battery or Corded
The majority of drills today are powered by a rechargeable battery. There are also some drills that can be plugged into an electrical outlet and used with a power cord.
LED Light
Many drills have an LED light, which is helpful when drilling in dark or confined spaces. The light illuminates the surface you are drilling, allowing you to see clearly, and enabling more accurate drilling.
How to Buy a Drill
There are several things you’ll want to consider when buying a drill. First, decide what type of drill you need. There are corded drills and cordless drills.
Corded vs Cordless
Corded drills require an outlet to plug in, while cordless drills use batteries.
The advantage of corded drills is that they are usually more powerful than cordless drills and will never run out of power. The drawback is you can only use it near an outlet or with an extension cord.
The advantage of having a rechargeable battery is that it allows you to use the drill without being connected to an electrical outlet. This is especially handy if you need to work in a location where there is no power outlet available, like in your yard or driveway.
The disadvantage of having a battery-powered drill is that the battery will eventually run out of power and need to be recharged.
What will you use the drill for?
When choosing between a corded or cordless drill, think about what you will be using the drill for. If you are only using the drill for light-duty tasks around the house, a cordless drill will be fine. But if you need a drill that is more powerful or will be using it for heavier-duty tasks, a corded drill might be better.
Features
When choosing a drill, also think about the features that are important to you.
- Does it have a variable speed trigger for more control?
- Does it have a high/low setting?
- Does it have clutch/torque settings to prevent stripping screws or driving fasteners too deep?
- Does it come with an LED light so you can see what you are doing in dark or confined spaces?
- Do you want extra batteries so one can charge while another is in use?
You’ll also want to ask yourself:
- How does the grip feel?
- Can you comfortably reach the trigger?
- Is it lightweight for easy handling?
Once you’ve answered these questions, you’ll be able to better determine which drill is best for you.
The price is the last thing to consider. The cost of a drill will depend on your budget and the features you want. Drills are available at every price point, so take your time and shop around.
You can purchase a drill at most home improvement stores or online.
When purchasing a drill, I recommend reading the reviews before buying one to get an idea of what people thought about it and if there were any problems.
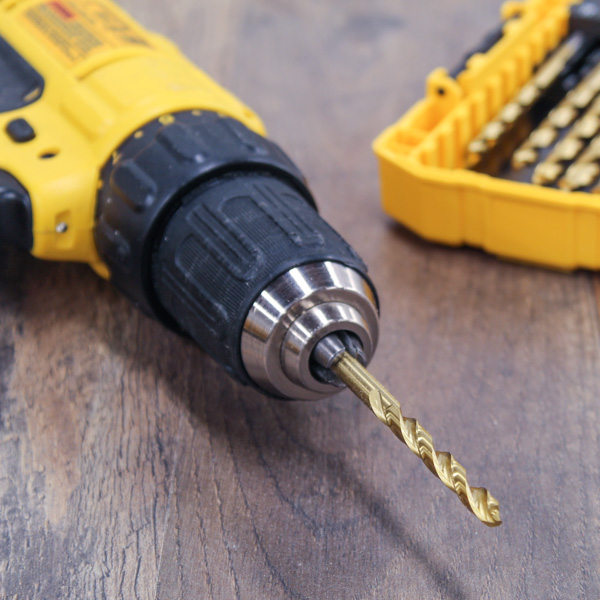
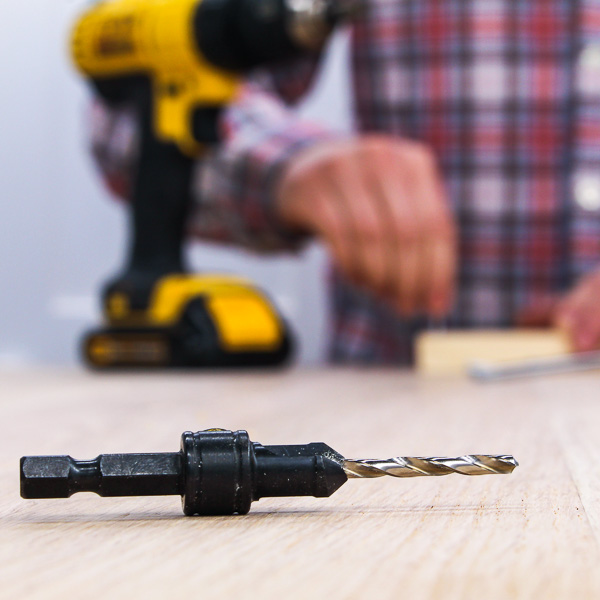
What are Drill Bits?
Bits are the metal tips that fit into your drill’s chuck and are available in various shapes and sizes, depending on what you will be using them for.
Bits either have a round shank or a hex shank. The shank is the part of a bit that goes into the drill’s chuck.
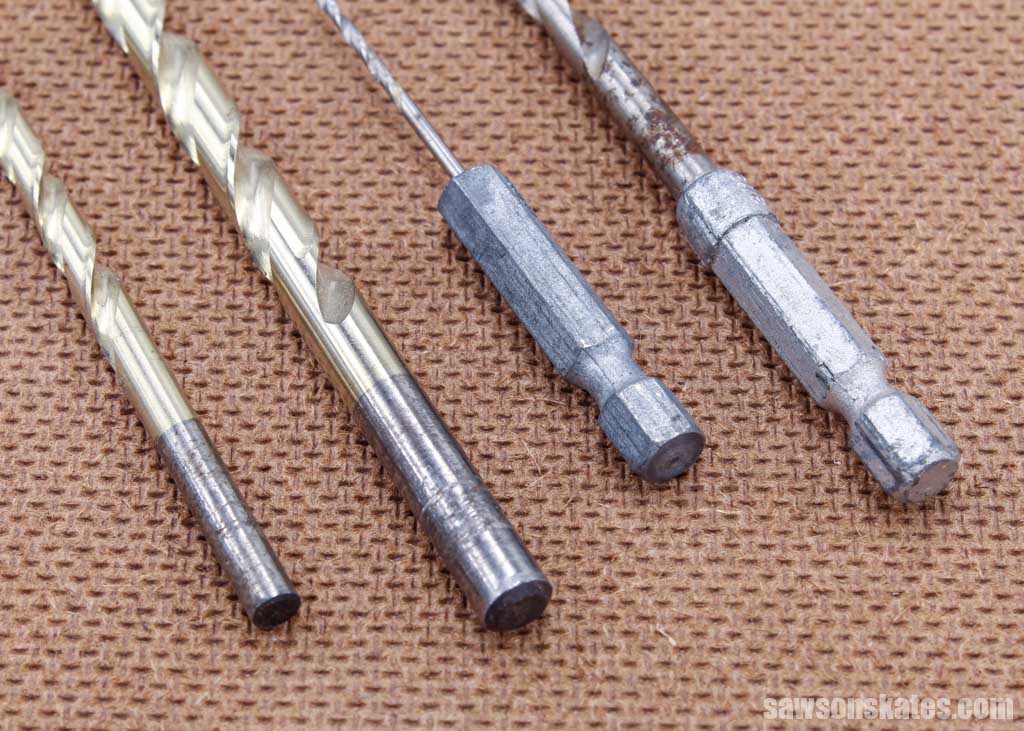
The common bits used with a drill are driver bits and drill bits.
Driver Bits
Driver bits are used to drive screws and are available in a variety of shapes and sizes. The common driver bits you’ll see are:
- Phillips head, which has a cross shape.
- Slotted, which is flat and has straight edges.
- Star, which is star-shaped.
- Square, which is square-shaped.
Drill Bits
Drill bits make holes in materials like wood, plastic, and metal and come in various styles and sizes to fit your project’s requirements.
Common drill bits include:
- Twist Bit: used for drilling into wood and plastic.
- Spade Bit: used for drilling large holes in wood quickly.
- Forstner Bit: used for drilling holes with smooth sides and a flat bottom.
- Countersink Bit: used for drilling holes that allow screws to sit flush with the surface.
Related: How to Use a Countersink Bit
You may also use a drill with accessories like flexible drive shafts, rotary sanders, right-angle attachments, wire-wheel brushes, and right-angle attachments.
If you need driver bits or drill bits, I recommend buying them in sets that include almost any size you’ll need for your projects. You can buy drill bits at most home improvement stores and online.
Related: 14 Types of Wood Drill Bits (Which to Use & Why)
Now that we covered what drill bits are, let’s learn how to use them!
How to Use a Drill to Make a Hole
Here are the basics on how to make a hole with a drill:
1. Safety First
Your safety should always be the first step with any project, so put on a pair of safety glasses before you begin to keep debris and flying wood chips out of your eyes.
To reduce the risk of injury to your hands, keep them away from the drill bit while it’s in use. If you are working with small parts, I recommend clamping them before you start drilling. Using a clamp will give you more control and keep your hands at a safe distance from the rotating bit.
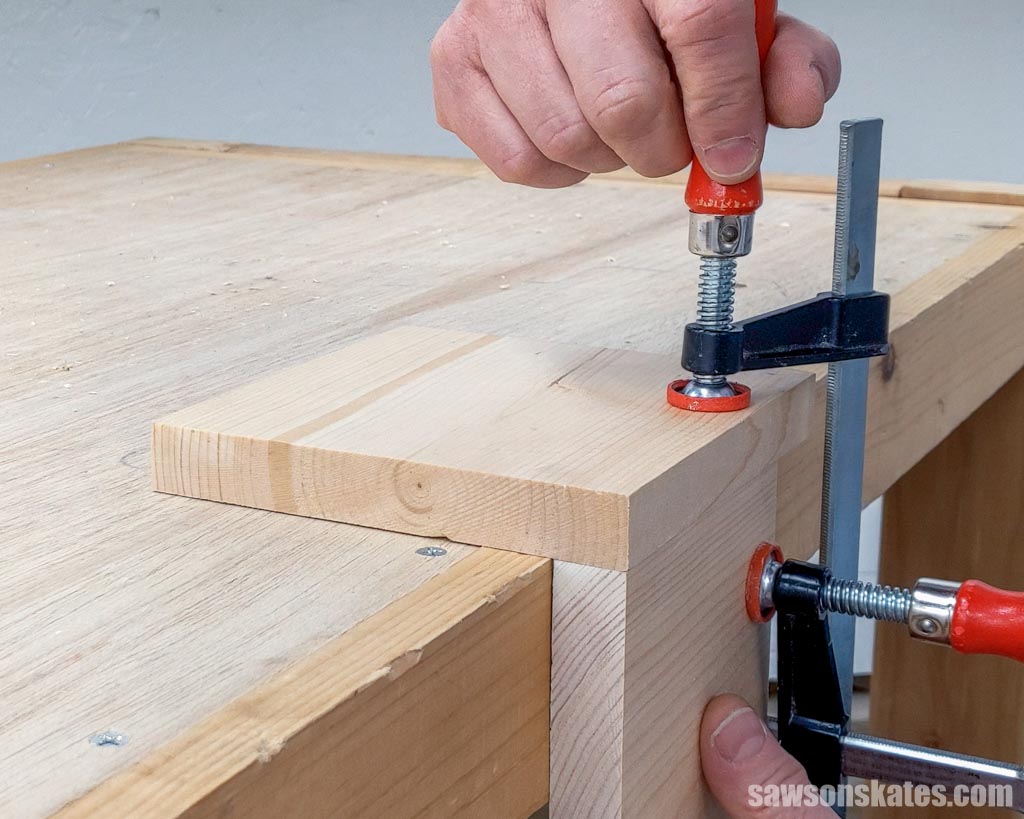
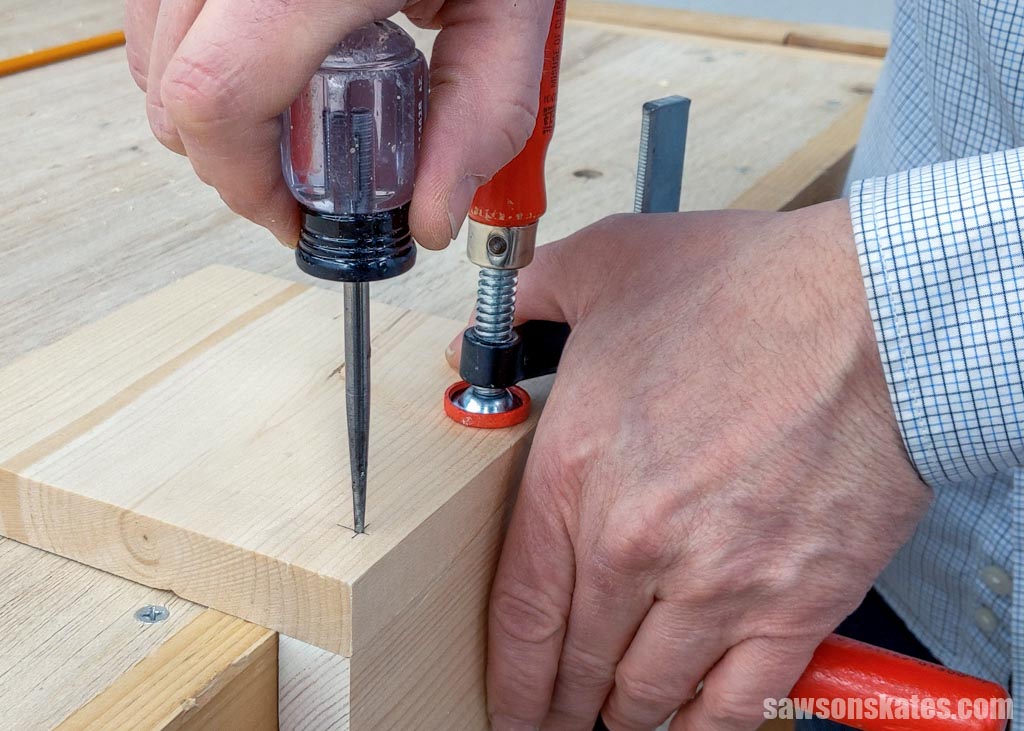
2. Mark the Location
Use a pencil to mark where you would like the hole on your workpiece.
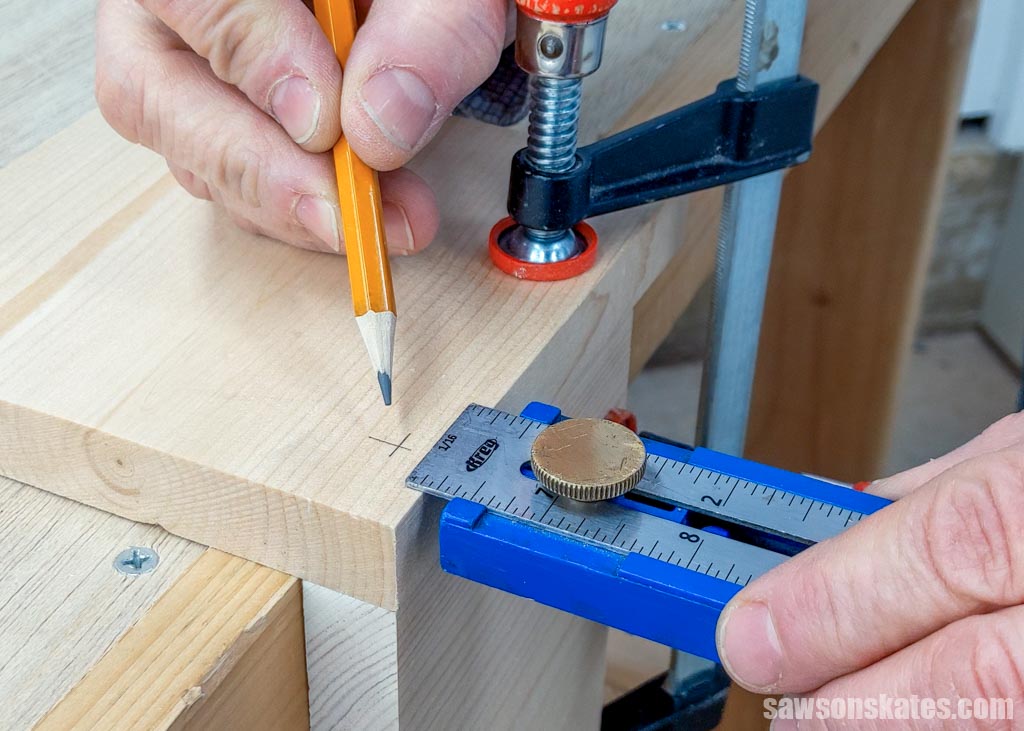
After marking your desired spot, I recommend using an awl to make a divot on the surface. This tiny hole allows the bit to start drilling precisely where you want it, preventing it from wandering off course.
Related: What is an Awl? (+ How to Use It)
3. Select the Drill Bit
Now you’re ready to select a drill bit that’s the right size and type for your project. As I mentioned before, different bits are used for different applications.
For example, twist bits are often used to make pilot holes, while spade bits make quick work of drilling larger holes in wood.
Remove the battery or unplug the drill from the outlet.
Once you’ve selected the right bit, insert it in your drill’s chuck. Make sure the bit is centered in the jaws, and tighten the chuck.
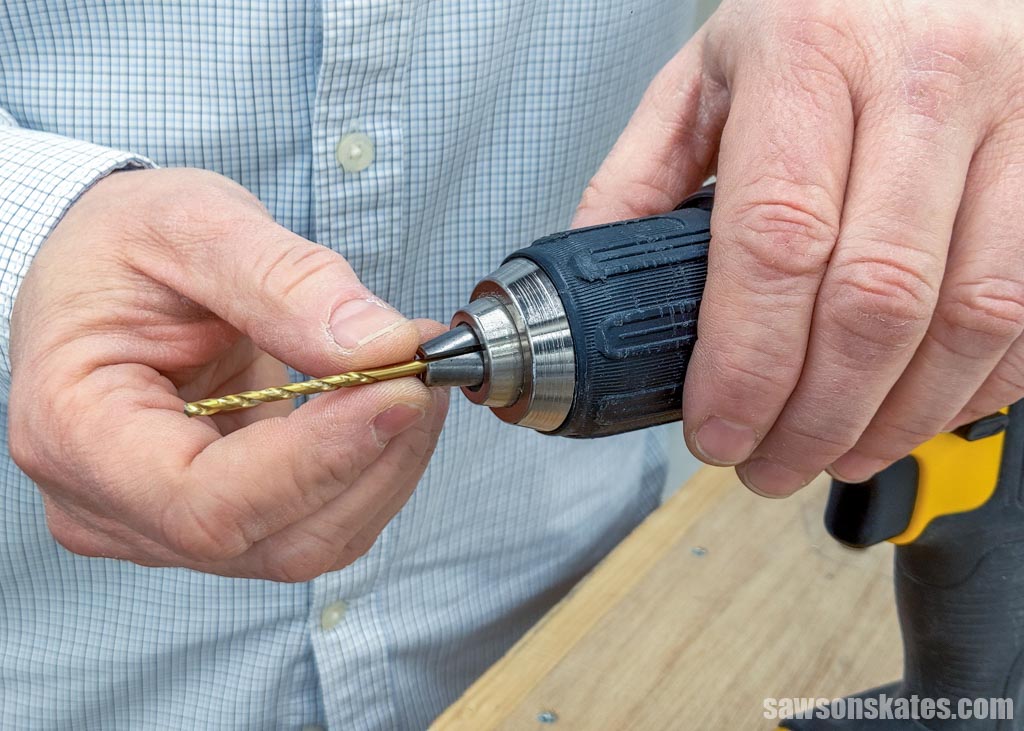
If it’s a keyless chuck, tighten it by turning it clockwise with your hand, or if it’s keyed chuck, use the chuck key to tighten it. Make sure the bit is secured in the chuck before you start drilling.
Occasionally you may read instructions that say, “chuck the bit in your drill,” which means to insert the bit in your drill.
Related: How to Change a Drill Bit (Step-by-Step)
4. Adjust the Settings
Switch your drill’s direction to forward, usually indicated by an arrow pointing toward the front of the drill.
If your drill has a high/low-speed setting, set it to the highest speed.
Adjust the clutch/torque to the drill setting, usually resembling an image of a drill bit.
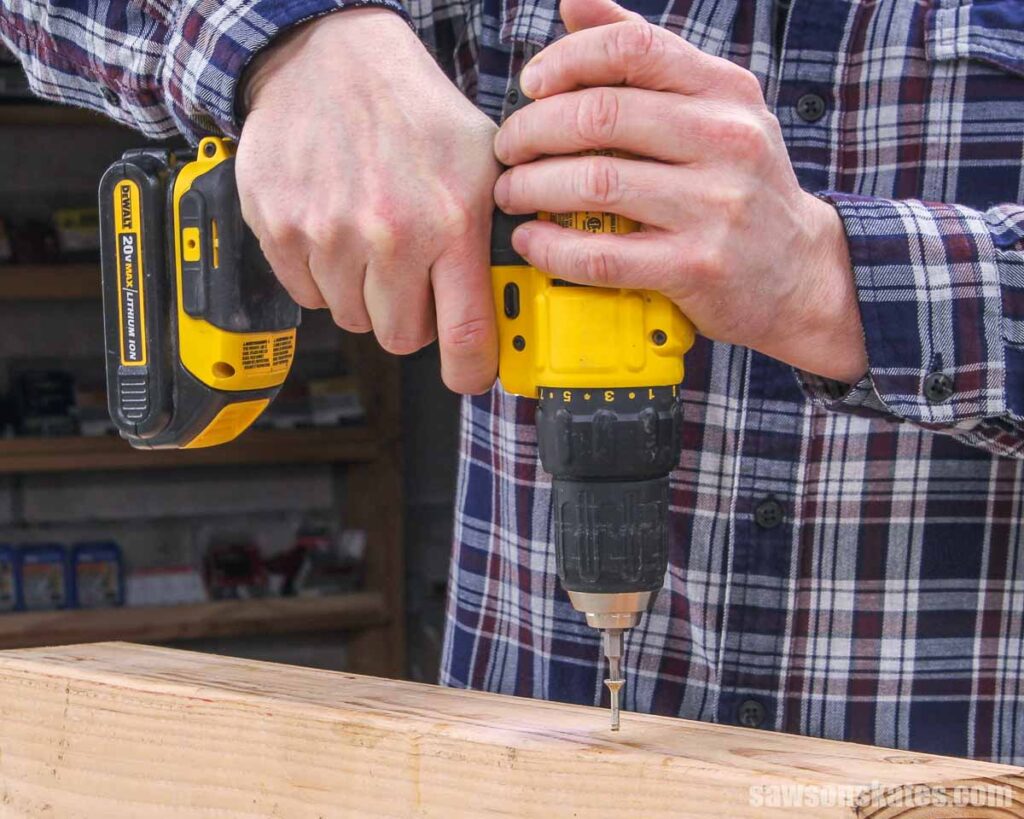
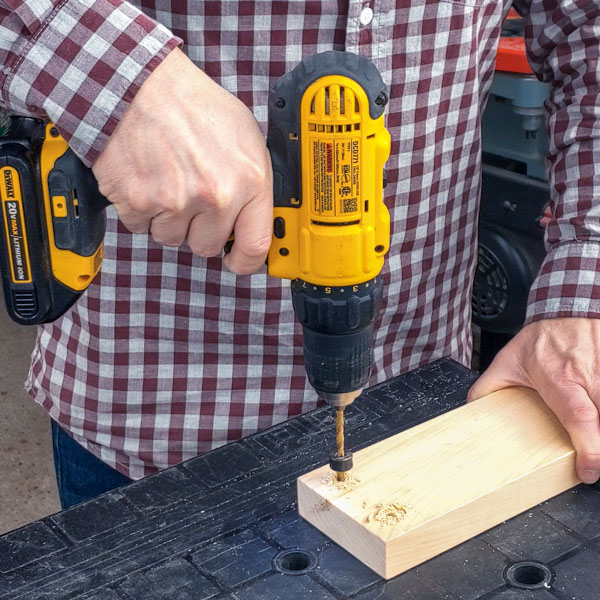
5. Drill the Hole
Position the drill bit’s tip into the indentation you made with the awl, and slowly squeeze your drill’s switch to begin drilling.

When you’re sure the bit is in the right spot and at the correct angle, steadily increase the speed while maintaining a firm grip and applying consistent pressure.
If you notice the bit is having difficulty advancing through the wood, try removing it to clear any wood chips that have collected in the hole.
When you’ve reached the necessary depth, switch your drill to reverse, squeeze the switch, and remove the drill bit from the hole.
Try to keep the bit as straight as possible because pulling it at an angle can cause small bits to snap.
WARNING: The drill bit will become hot during use! Allow it to cool before removing it from the drill.
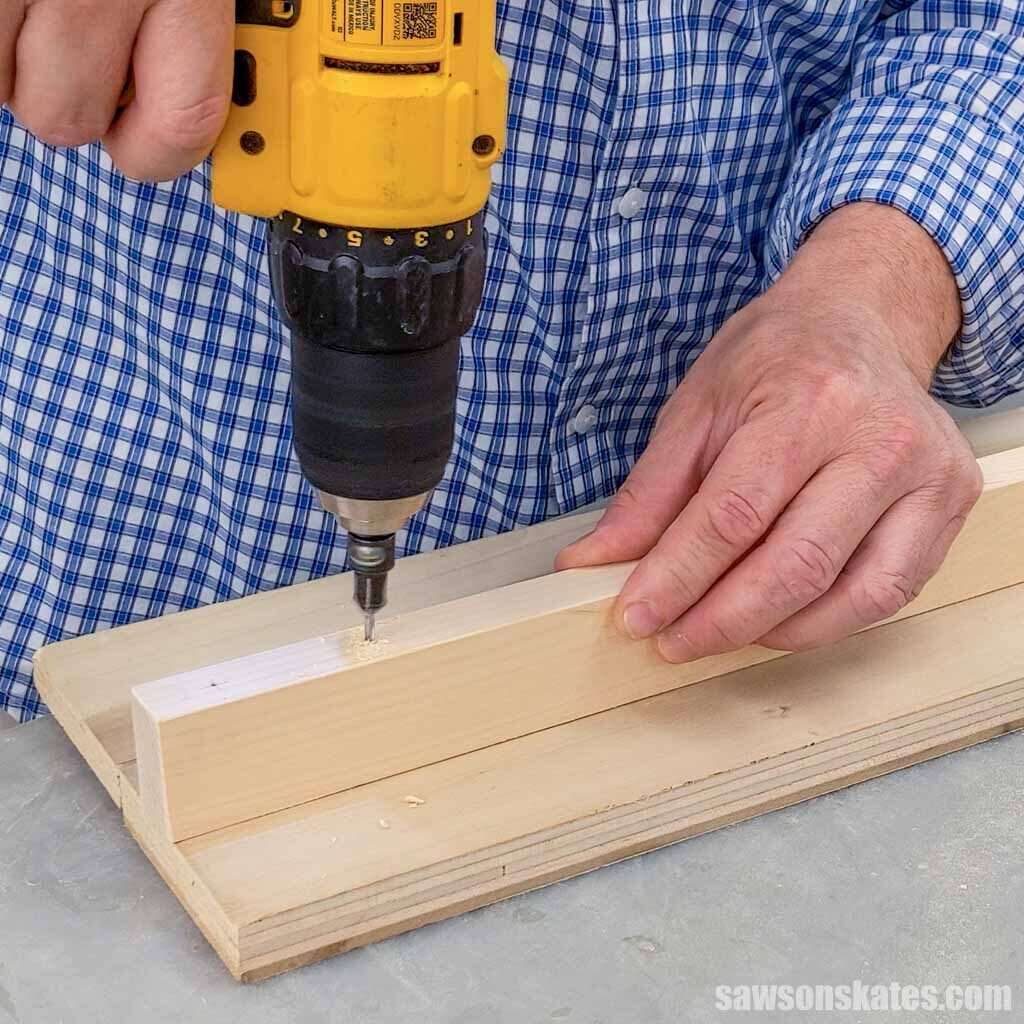
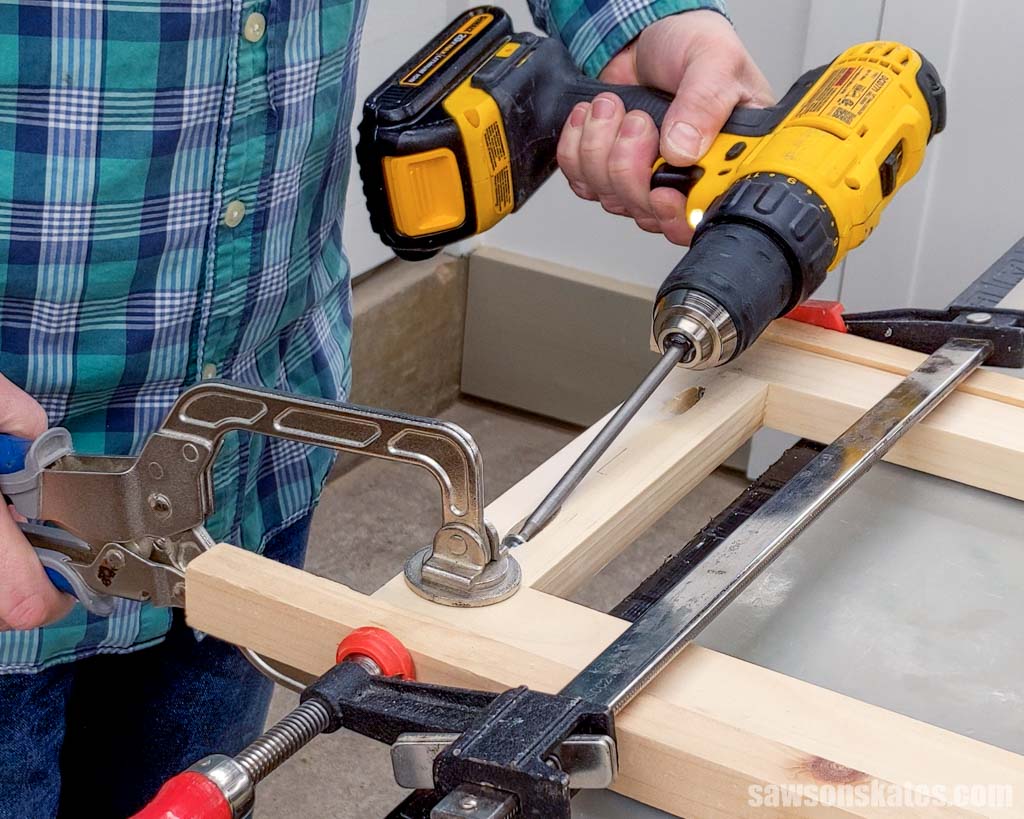
How to Use a Drill to Drive a Screw
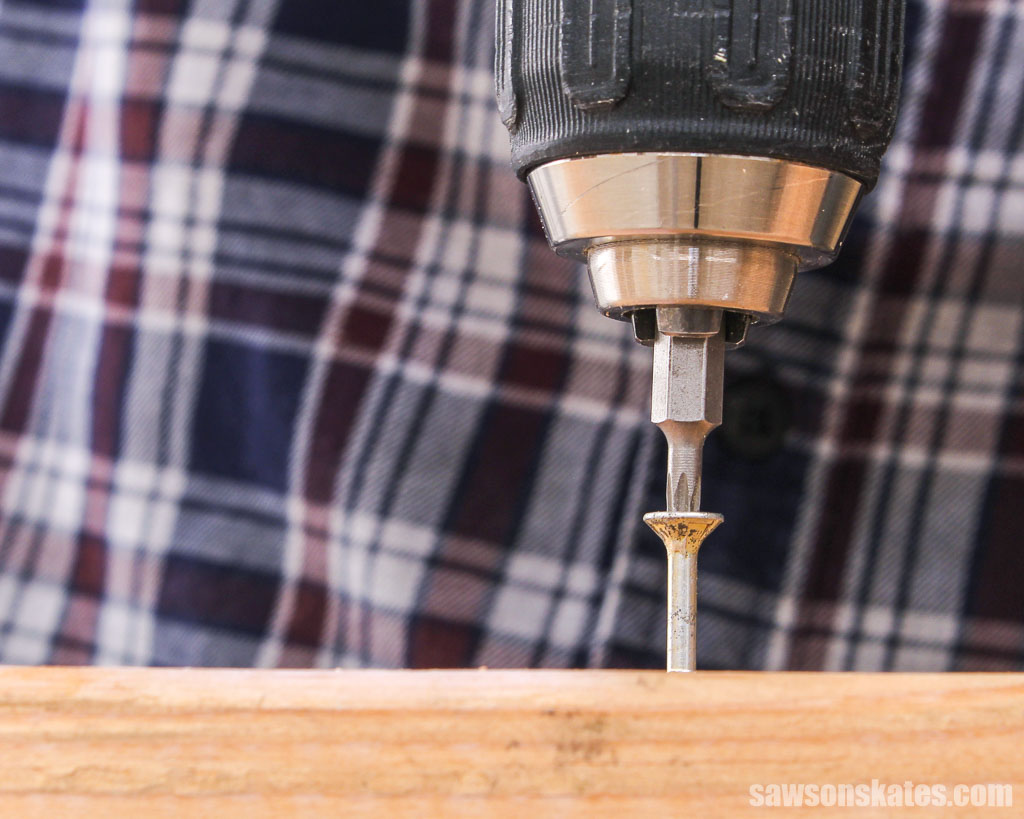
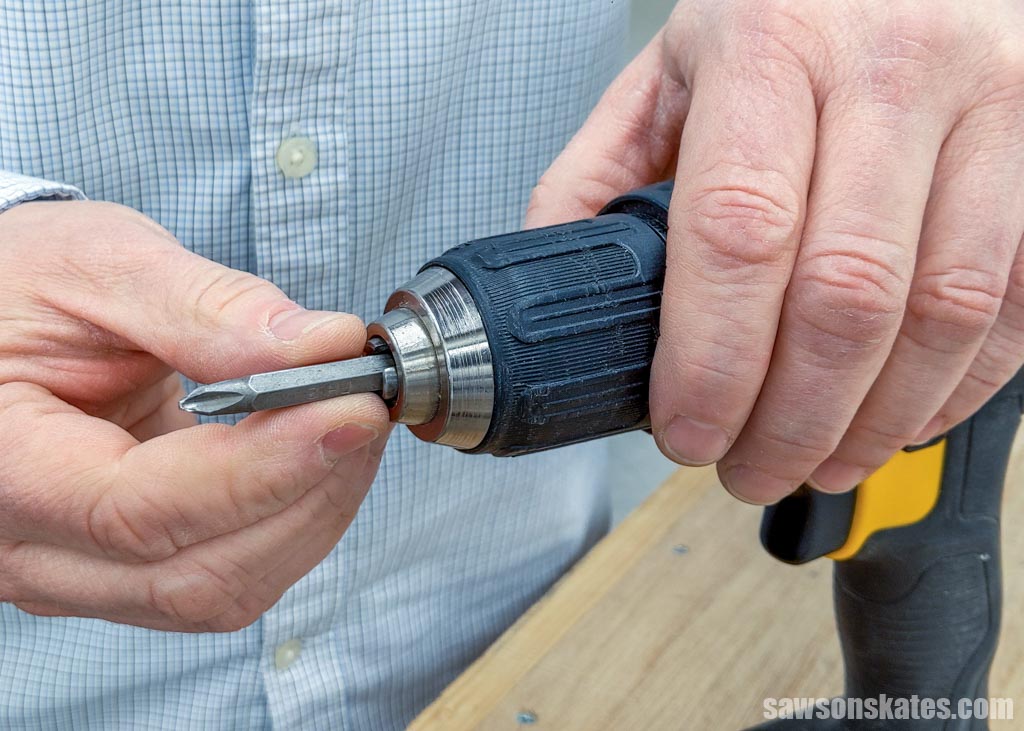
1. Select the Correct Driver Bit
To find the right bit for your screw, compare its head pattern and match it with a driver bit of the corresponding shape.
Driver bits you’ll frequently see include Phillips, slotted, star, and square drive. Once you’ve selected the right bit, insert it into your drill’s chuck and securely tighten it.
2. Adjust the Settings
Switch your drill’s direction to forward, usually indicated by an arrow pointing toward the front of the drill.
If your drill has a high/low-speed setting, set it to the lowest speed.
Adjusting the clutch/torque will prevent you from driving the screws too deeply or over-tightening them. Selecting the correct setting depends on the type of material and the size of the screw, so don’t get discouraged if you have to do a bit of experimenting. For the best results, I recommend testing the torque setting on scrap wood before you begin your project.
For many projects, you’ll want the head of the screw flush with the surrounding surface, so adjust the torque accordingly. When you’ve adjusted it correctly, the drill will stop spinning, and you’ll hear a clicking noise when the screw’s head is flush with the surface. You’ll need to increase the torque if the screw’s head is above the surface. If the screw’s head is driven below the surface, reduce the torque.
Generally, for softwoods like pine, I adjust my drill to low torque, usually 5 or 6. Driving screws in denser materials may require more twisting force, so you’ll need to adjust your drill’s torque to a higher setting.
Once your drill settings are adjusted correctly, it’s time to drive in the screw.
3. Drive the Screw
Insert the screw into the hole in your workpiece.
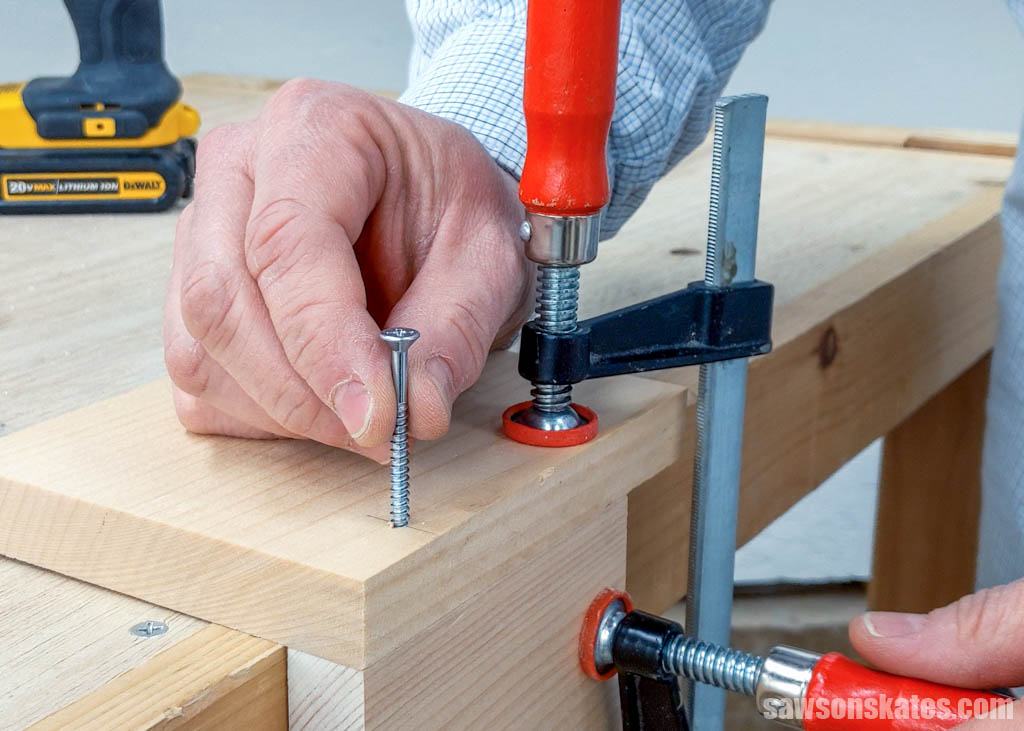
Next, position the driver bit’s tip into the indentation on top of the screw and gradually squeeze your drill’s switch to begin driving.
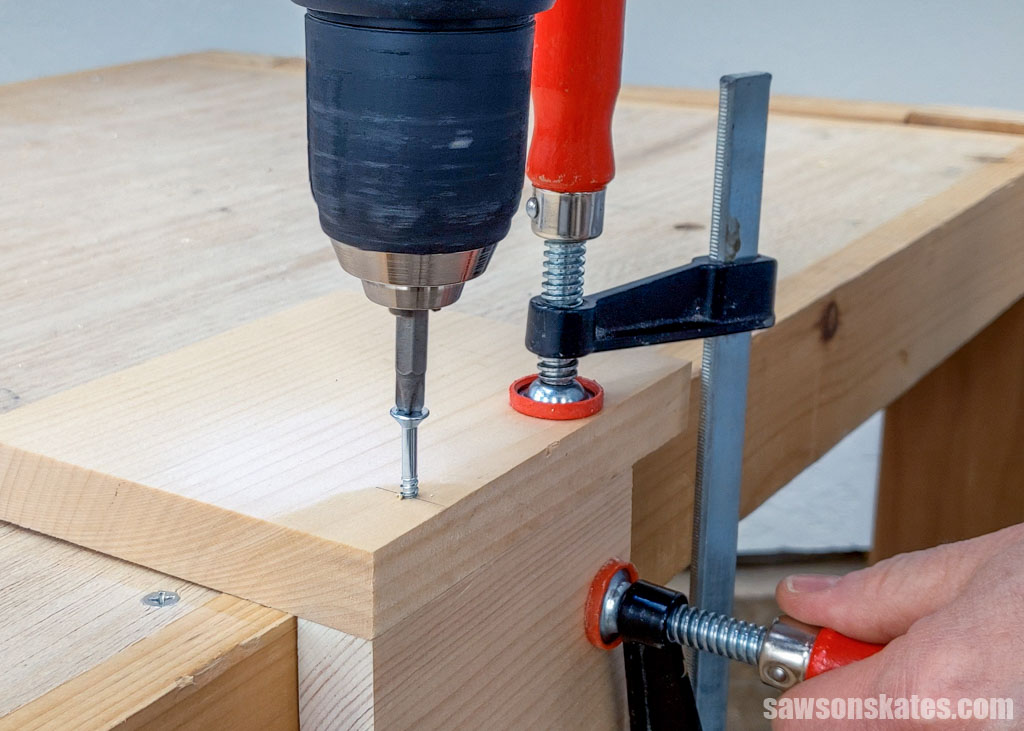
When you’re sure the screw is driving into the hole at the correct angle, steadily increase the speed while applying consistent forward pressure.
If the bit slips out of the head, don’t panic. Position the bit back into the indentation in the head of your screw. Then, slowly increase speed and apply consistent pressure until it’s securely fastened in place.
If the bit continues to slip out of the screw’s head, it might indicate that you might need a different size driver for that particular screw.
If the clutch doesn’t disengage, stop driving once the screw is flush with the surface and adjust the torque to a lower setting before driving the next screw. Or if the screw is raised above the surface, increase the torque setting.
Another way to prevent over-tightening is to stop driving the screw before it’s flush with the surface and finish tightening with a screwdriver.
Related: Electric Screwdriver vs Drill (Differences + Which to Buy)
How to Use a Drill to Remove a Screw
Removing a screw is essentially the reverse of driving a screw.
First, select the correct driver bit and insert it into your drill’s chuck. Next, switch your drill to reverse and set the torque/clutch to the drill setting. Avoid using one of the numbered settings because if the drill meets that amount of resistance, it will stop turning, preventing you from removing the screw.
Position the tip of the driver bit in the top of the screw’s head, apply light pressure, and squeeze the switch until the screw is out.
CAUTION: The screw will be hot!
Final Thoughts
No matter if you need to drill holes or drive screws, mastering the basics of your drill will help you tackle your projects with ease, speed, and confidence!
Thank you for stopping by. If you enjoyed this tutorial, would you please take a moment and pin it to Pinterest? I’d really appreciate it!
Recommended For You
Pin This For Later

Hi there – I’m Scott, a woodworking enthusiast and creator of Saws on Skates, a site I started in 2015 to share easy-to-follow tutorials, space-saving shop tips, and project inspiration for DIYers at any skill level. Learn more about my woodworking journey here.
Thanks for those clear instructions. I’ve seen people insert a bit, then pull the trigger to tighten the chuck. Guess that would be using the one-part keyless chuck.
Hi Eileen – Thank you for stopping by. Yes, you can tighten a one-part keyless chuck by holding the chuck and pulling the trigger.