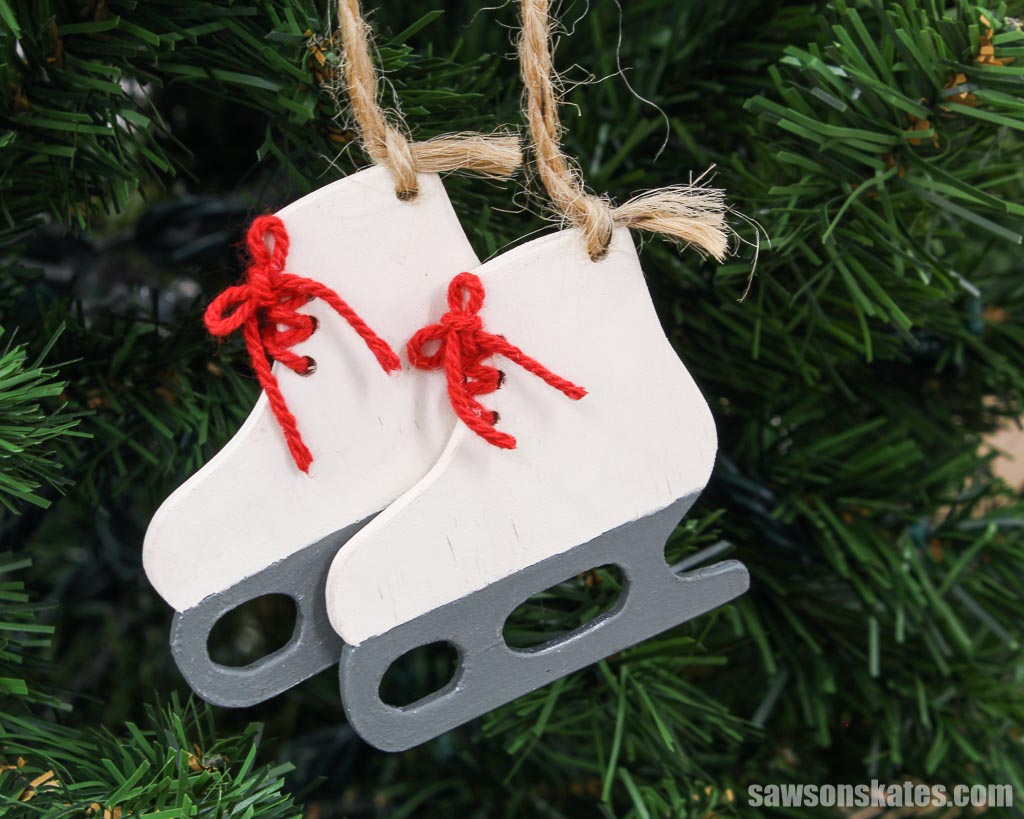
DIY Ice Skate Christmas Ornaments
Looking for a Christmas craft that’s fun and simple? Look no further than these easy-to-make DIY ice skate ornaments!
What Should I Build Next?
That's the question I help answer.
Every week, I send woodworking ideas to 17,000 DIYers who love building things.
You'd fit right in.
These wooden ornaments are the perfect project for beginners, and they’re an excellent activity adults and children can have fun doing together. Adults can cut out the skates, while kiddos can sand, paint and decorate them as they like.
The step-by-step tutorial includes a ice skate pattern and easy-to-follow instructions.
Table of Contents
- Inspiration for These DIY Ice Skate Ornaments
- What Tools Do You Need?
- What Wood Should You Use?
- How Do You Draw the Ice Skate Shape?
- How Do You Finish the DIY Ice Skate Ornaments?
- How to Make DIY Ice Skate Ornaments
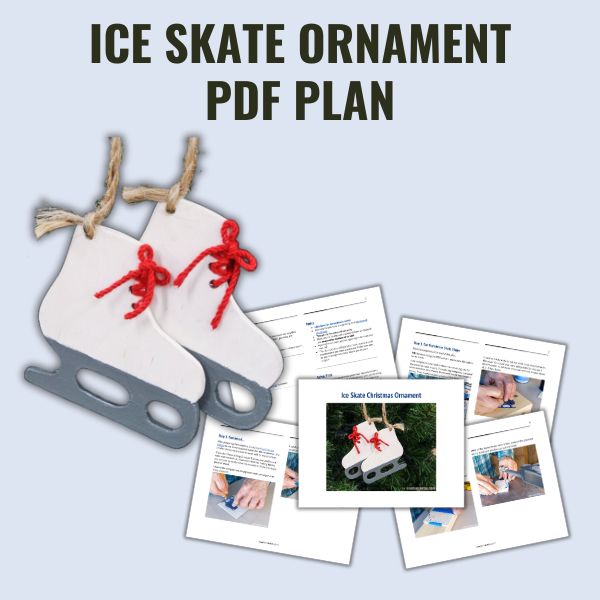
- Get the PDF Plan
This article contains affiliate links. If you purchase from these links, I may earn a small commission at no additional cost to you. Visit my site policies for more information.
Inspiration for These DIY Ice Skate Ornaments
My grandmother was always crafty; she did everything from crocheting afghans and doilies to making handcrafted ornaments. One of my favorite traditions is decorating the family Christmas tree with her handmade creations.
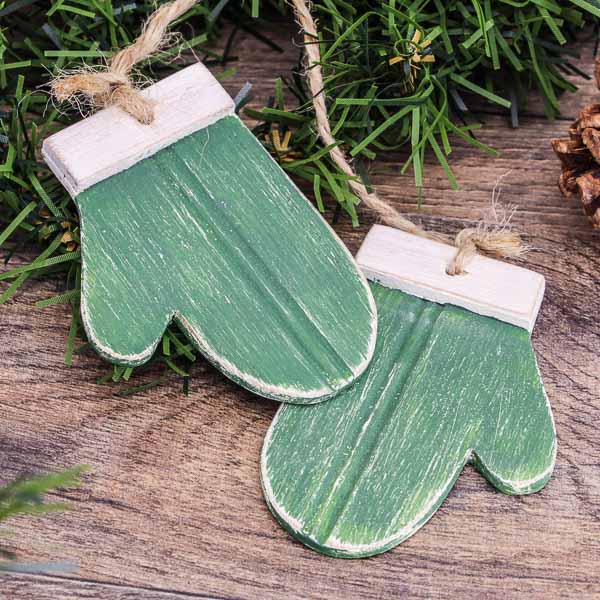
A while back, her felt mittens inspired me to make these wooden mitten ornaments. I even traced the pattern for them from her original design.
I was once again inspired by one of her creations. This time it was her fabric ice skate ornaments. She made the boot out of felt and used a paper clip to create the metal blade. Next, she sewed three tiny beads onto the boot where the laces would go. Finally, the two skates were connected by a crocheted chain of yarn.
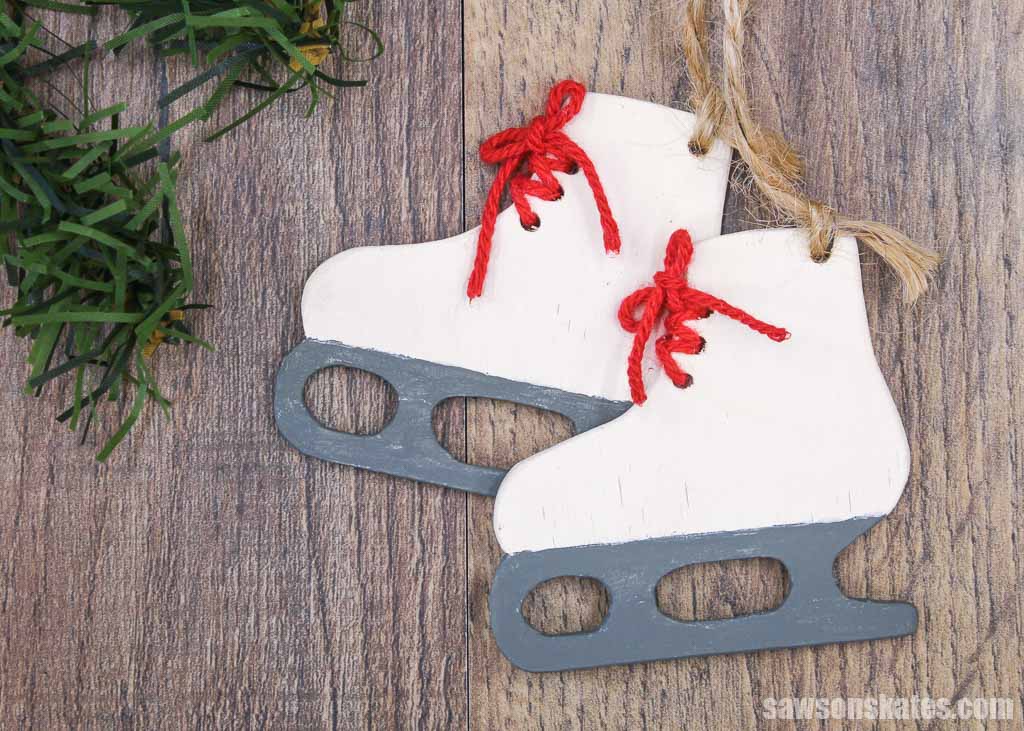
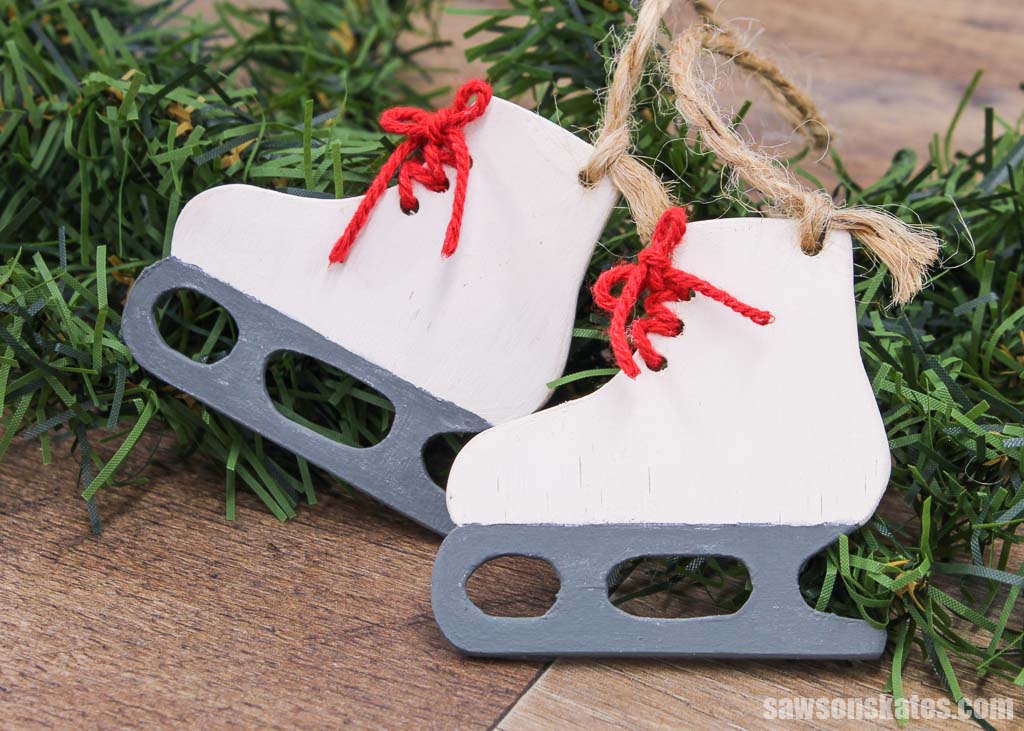
For my wooden version, I painted the skates in a similar style to my grandmother’s, and instead of yarn, I connected them with twine. They look a little different than my grandma’s, but I think she would have loved them just the same.
What Tools Do You Need?
These ice skate ornaments are a quick DIY project that needs only basic woodworking skills and two common woodworking tools: a scroll saw and a drill. I also used one more tool, but it’s totally optional.
Kreg Crosscut Station (optional)
I used the Kreg Crosscut Station to make some blanks for the ornaments. A blank is simply a piece of wood that has been cut to a rough shape but hasn’t been cut to its finished size.
I found the smaller blanks were easier to work with when cutting them with my scroll saw.
Related: Kreg Crosscut Station (How to Use and Review)
If you don’t have a Kreg Crosscut Station, you could use a table saw instead. Or if you don’t feel like making blanks, that’s totally fine! You can just as easily make the ornaments from one larger piece of wood.
Related: Table Saw vs Miter Saw (Differences + Which to Use)
Scroll Saw
I used a scroll saw to cut out the ice skate shape. If you don’t have a scroll saw, you might be able to use a bandsaw instead.
Drill
I used a drill to create the holes for the laces and to drill out the holes for the hanger.
Related: Drill vs Impact Driver (Which to Use & Why)
What Wood Should You Use?
I used some of this 3mm plywood to make my ice skate ornaments which I had leftover from making these picture frame ornaments.
The good news is you don’t need to buy wood. You could use almost any type of thin plywood you have on hand. I used scrap pieces of ⅛” beadboard paneling to make my mitten ornaments, but just about any thin material like lauan, paneling, etc., could work.
Related: 71 Scrap Wood Projects (Clever Ways to Reuse Old Wood)
How Do You Draw the Ice Skate Shape?
Don’t worry if you think these ice skates would be tricky to draw by hand. The pattern included with the printable plan takes care of that for you!
Just get the plan, print the template, and trace it on the wood. That’s all there is to it!
How Do You Finish the DIY Ice Skate Ornaments?
I finished the skates with chalk-type paint and inexpensive craft paints.
Related: DIY Craft Paint Storage Caddy
DIY Ice Skate Ornaments
Printed Plan
Get the PDF plan here (includes detailed instructions, measurements, and bonus tips)
Supplies
- Thin material such as plywood, lauan, paneling, etc. (I used this one)
- Baker’s Twine
- Jute Twine
- Chalk-Type Paint (I used this one)
- Craft Paints
Tools
- Drill
- Drill Bits
- Scroll Saw
- Kreg Crosscut Station (optional)
Step 1. Cut Out the Ice Skate Shape
Print the template at the end of the plan.
💡 TIP: When printing PDF pattern, make sure the scale is set to 100%.
I like templates to be rigid so that it serves as a guide for the pencil to trace around. To make my template, I sprayed some adhesive on a manila folder and placed the template on top. Then I used scissors to cut out the design.
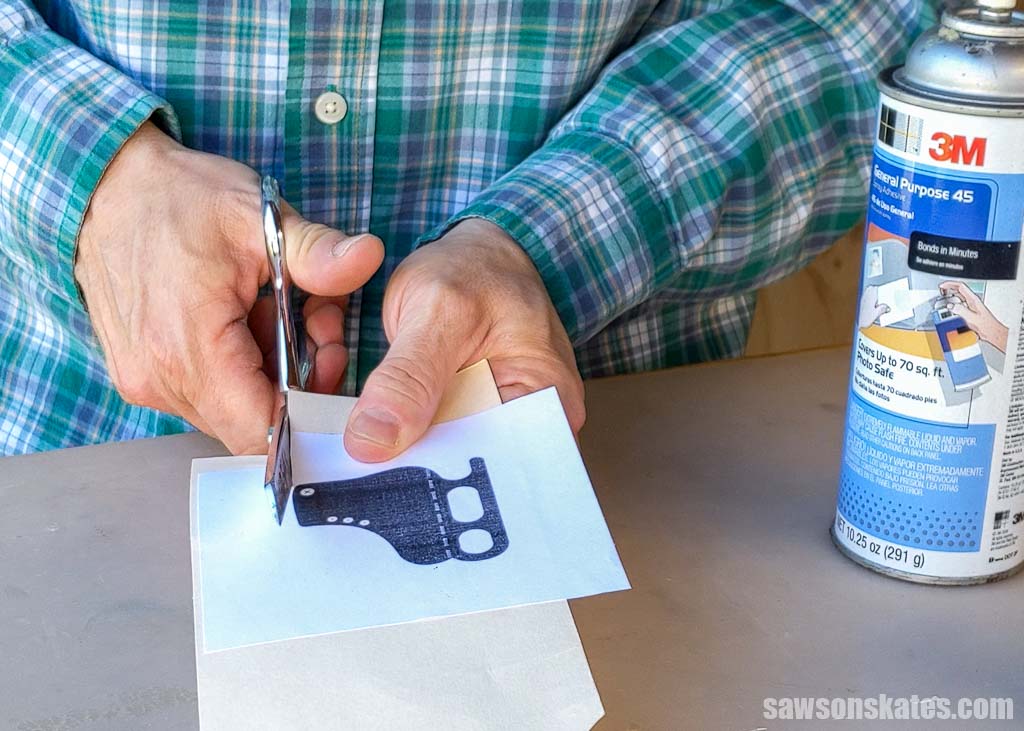
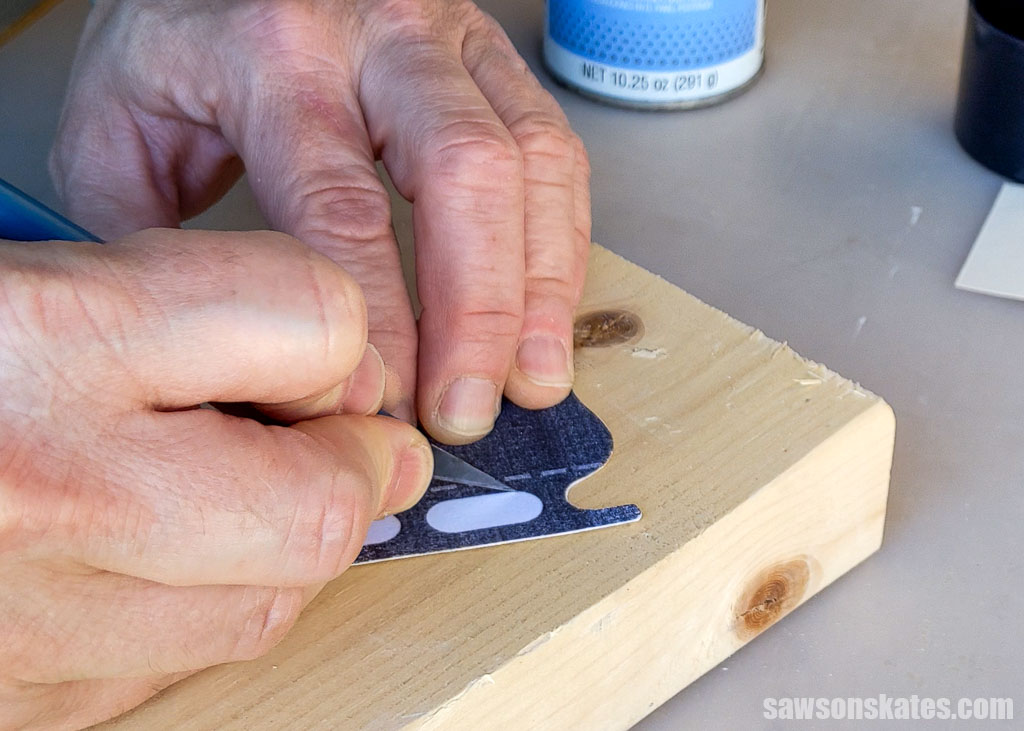
I used an X-Acto knife to cut the small inner areas between the posts. You could also use a utility knife for this, but I find it’s easier to cut these tiny areas with the smaller blade of an X-Acto knife.
After preparing the template, I used my Kreg Crosscut Station to cut some plywood blanks for the ornaments. The smaller blanks were easier to work with on my scroll saw.
If you don’t have a Kreg Crosscut Station, you could use a table saw instead. Or, if you don’t feel like making blanks, you can just as easily make the ornaments from one larger piece of wood.
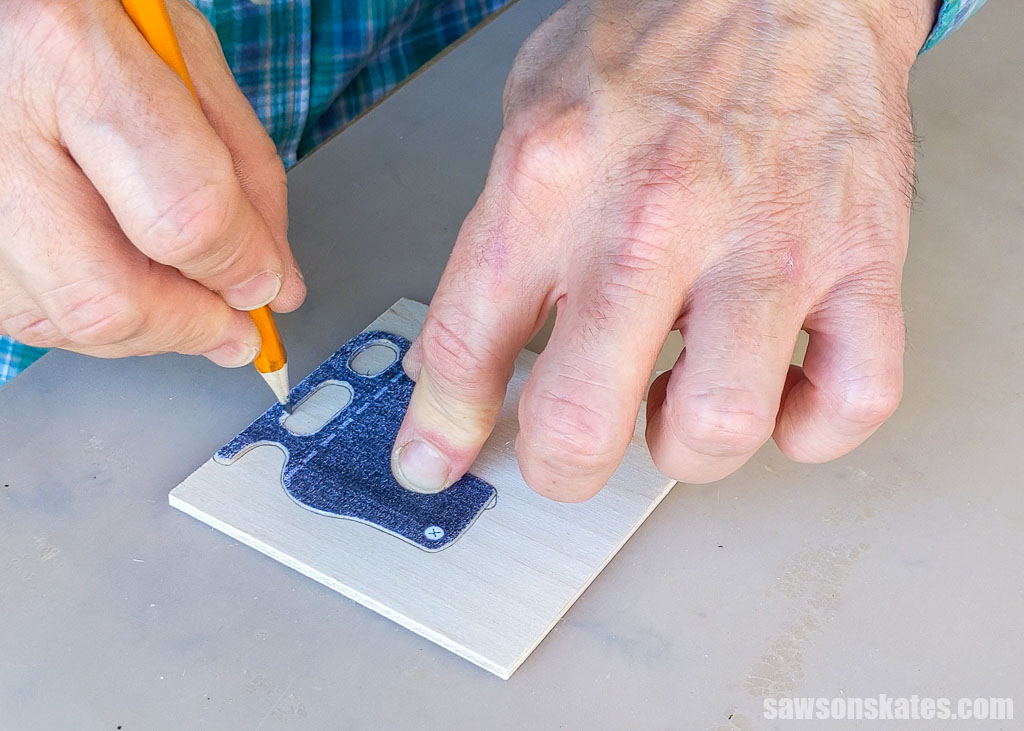
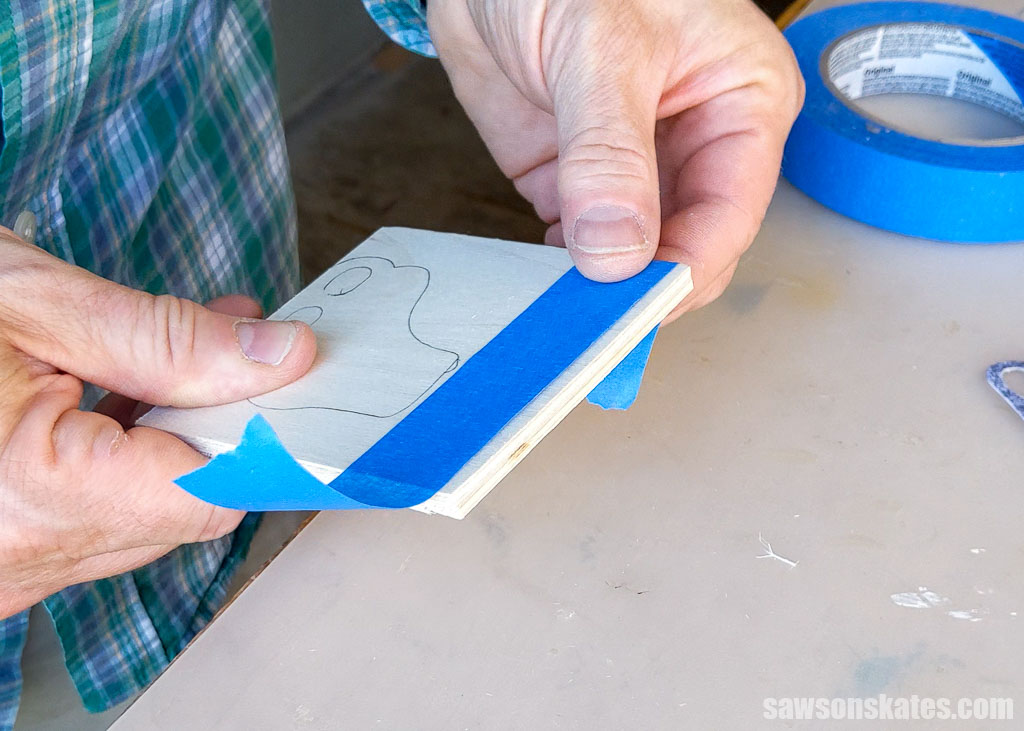
I placed the template on the plywood and used a pencil to trace around it.
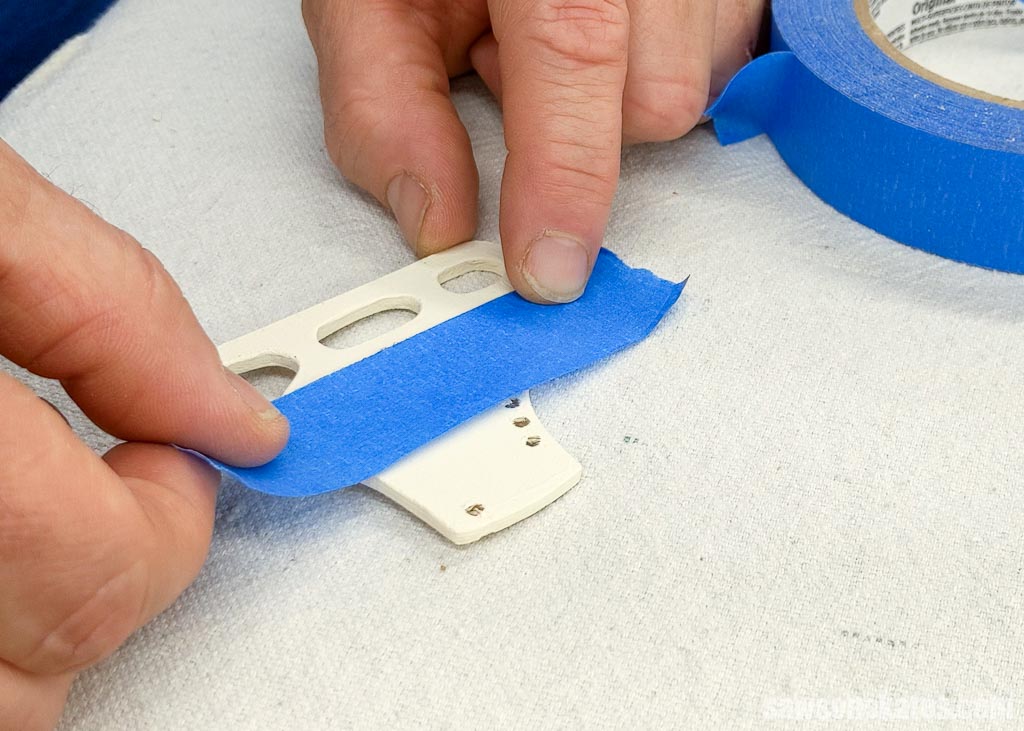
I used painter’s tape to join two blanks together so that I could cut two ornaments at the same time.
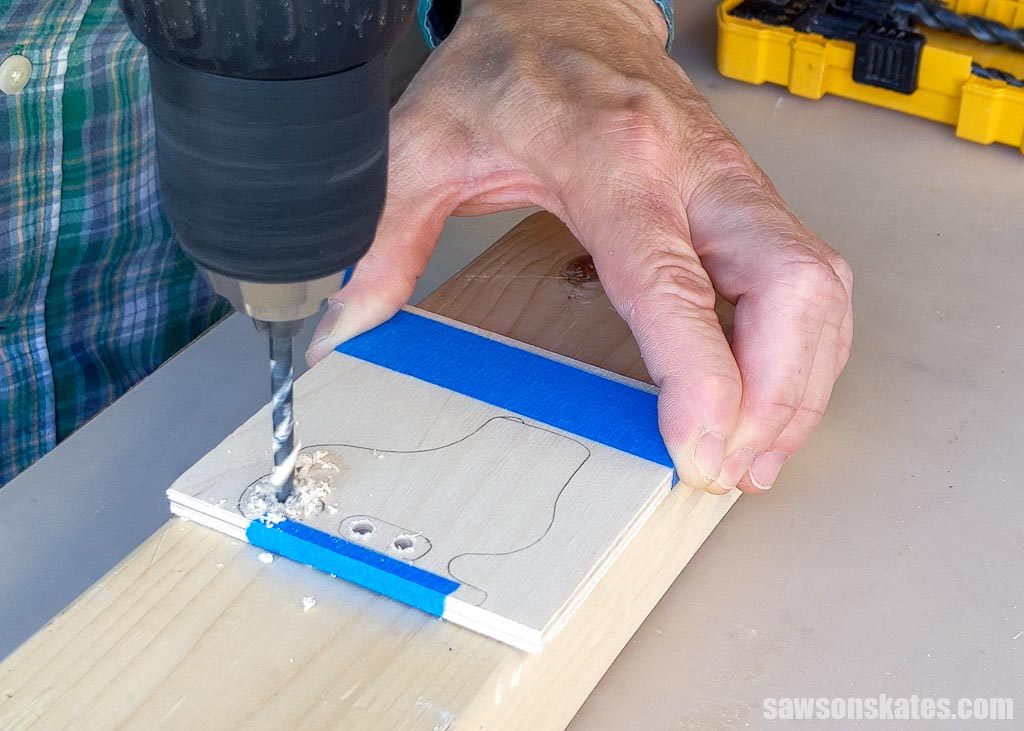
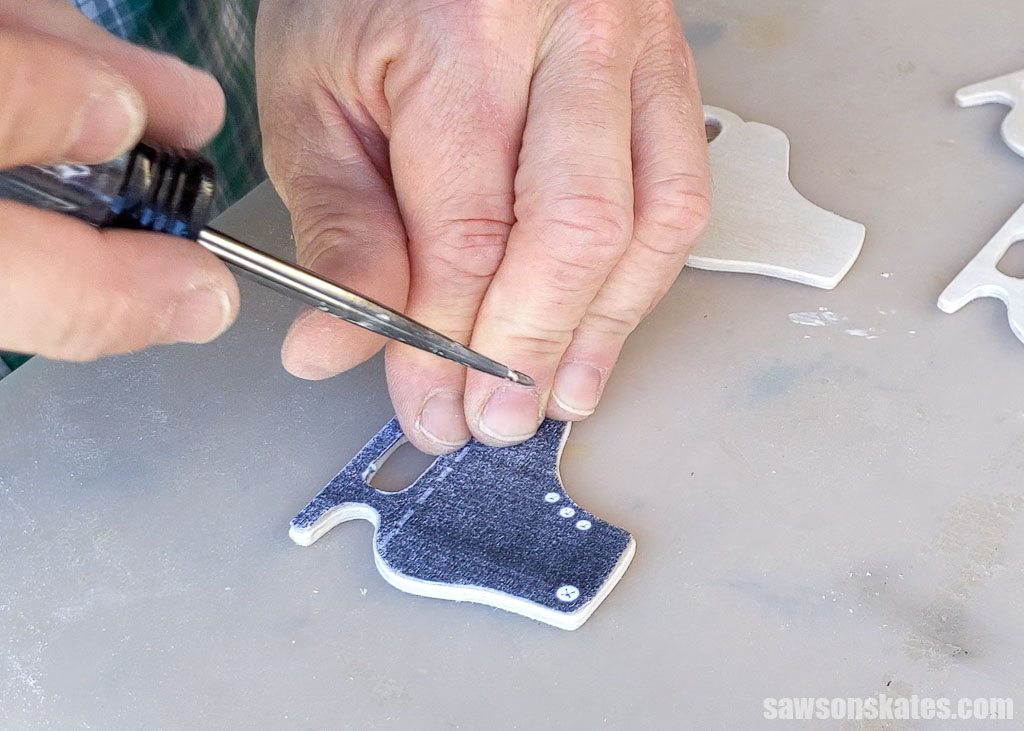
Next, I used an awl to make a starting point for a drill bit in the inner areas of the blade.
Related: What is an Awl? (+ How to Use It)
I used a drill bit to create small starter holes for the scroll saw blade.
💡 TIP: Make sure the hole is big enough to fit your scroll saw blade.
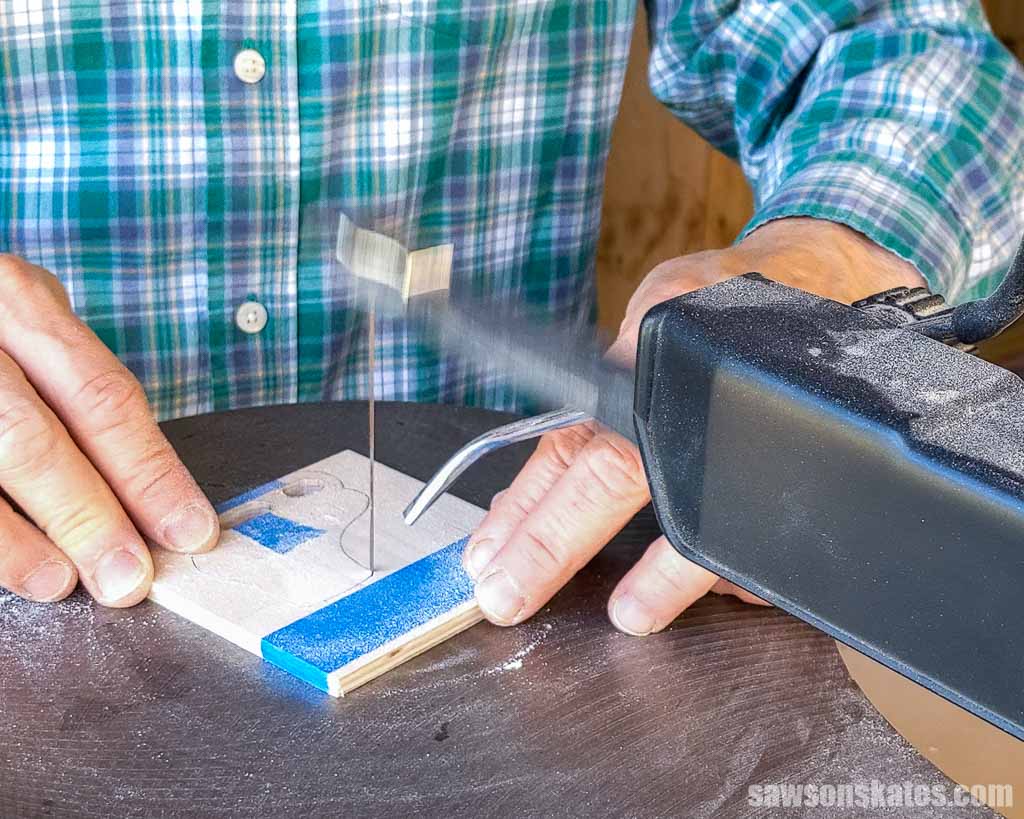
After all the starter holes were drilled, I placed the plywood on my scroll saw and first cut out the holes.
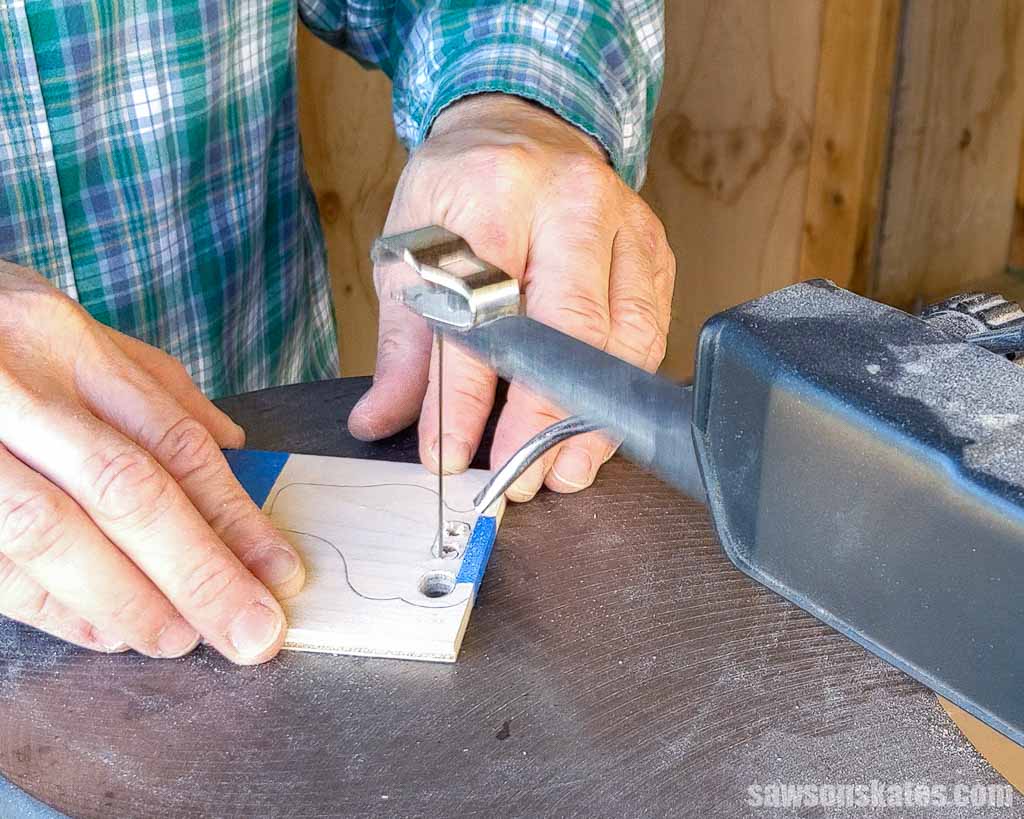
Then, I cut out the ice skate shape.
If you don’t have a scroll saw, you might be able to use a bandsaw instead. Just be aware that the interior curves might be more difficult to cut with a bandsaw.
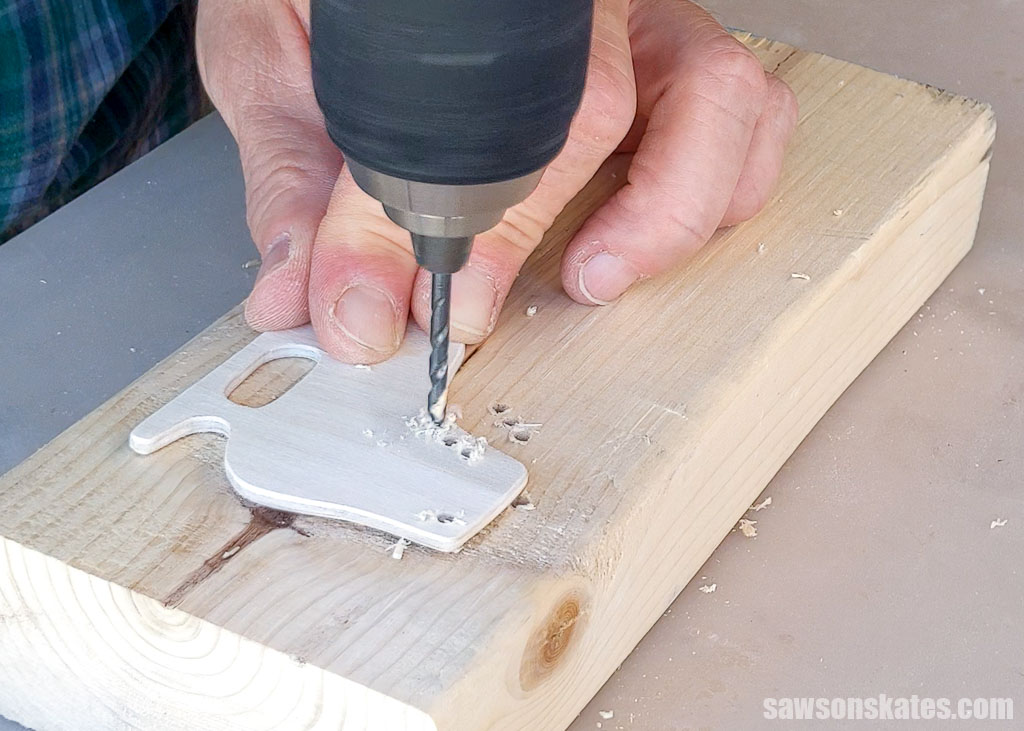
Step 2. Drill the Holes
I placed the template on the skate and used an awl to mark the holes for the laces and the hole for the hanger.
Related: What is an Awl? (& How to Use it)
Then, I used a drill bit to drill a hole at each mark.
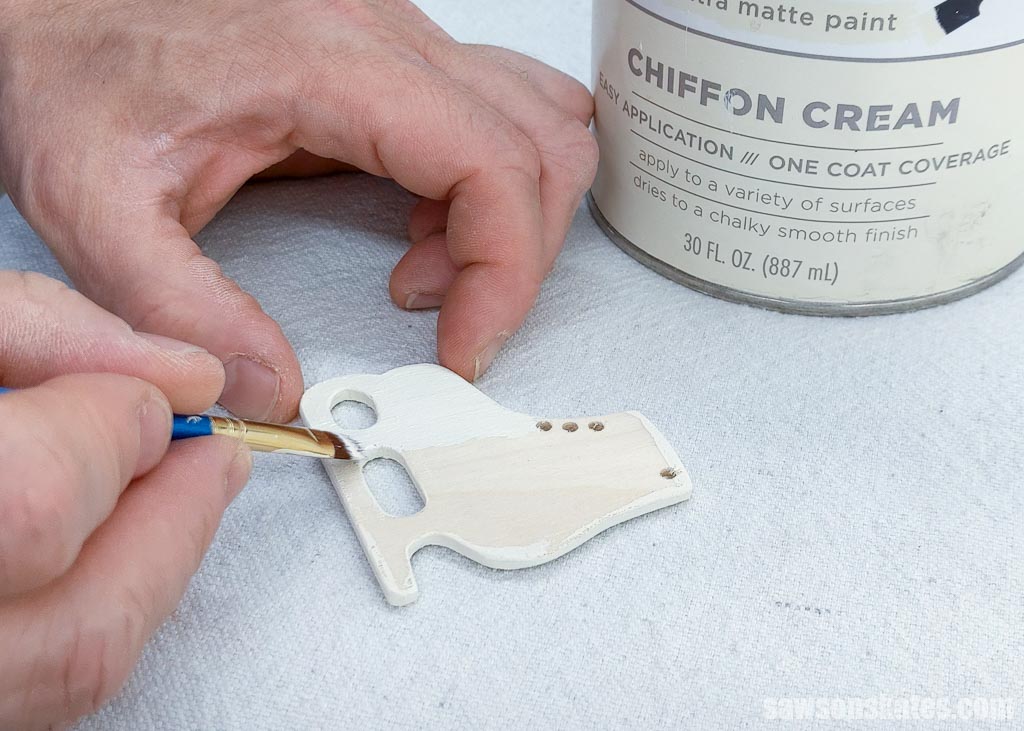
Step 3. Paint the Ice Skate
I used some 120 grit sandpaper to smooth the edges of the wood.
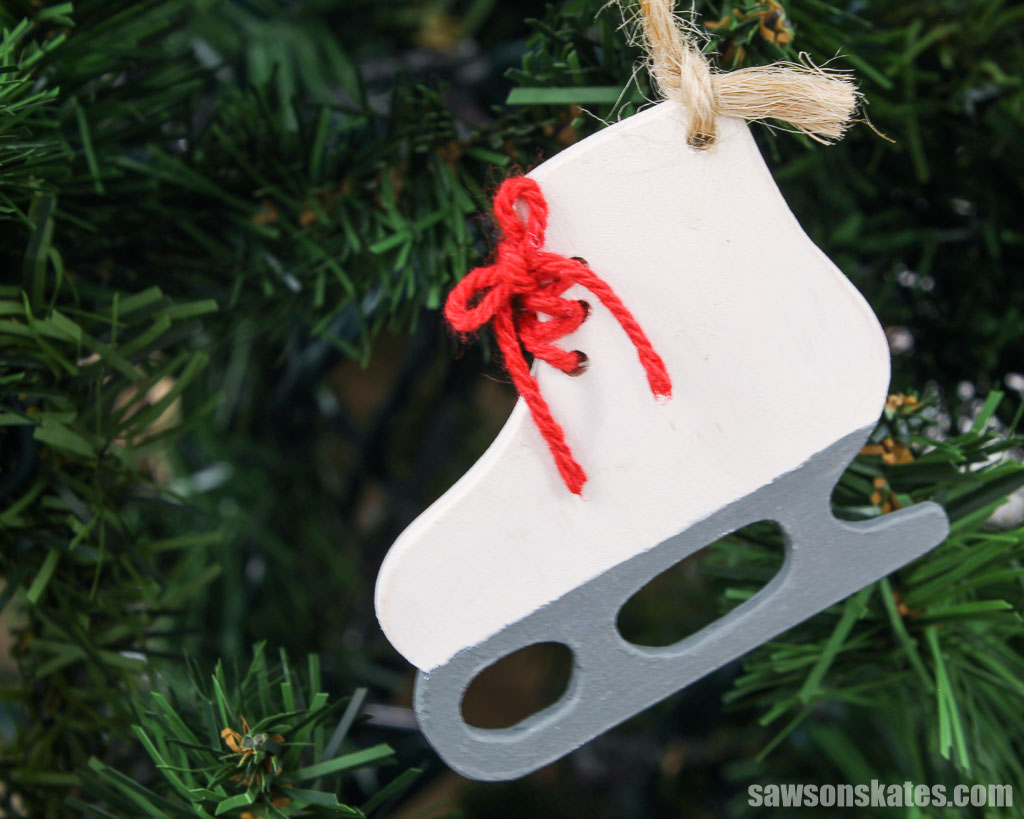
I painted the entire skate with this chalk-type paint in a color called “Chiffon Cream.”
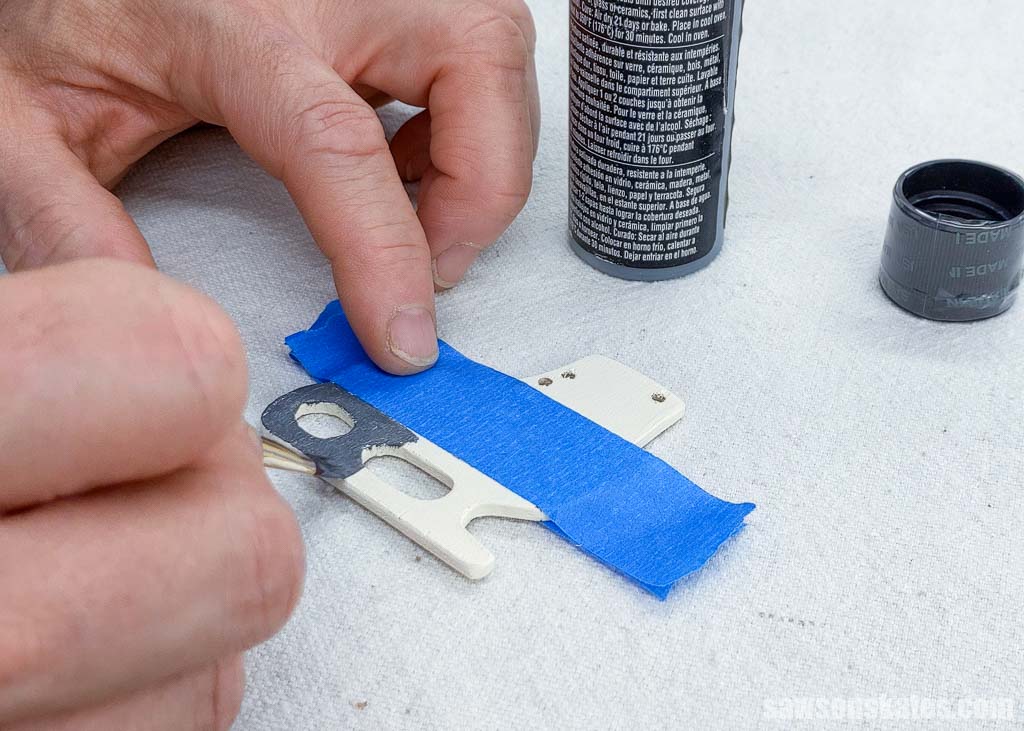
When the chalk-type paint was dry, I placed the template on the skate and used a pencil to mark the bottom of the dotted line at the back of the boot.
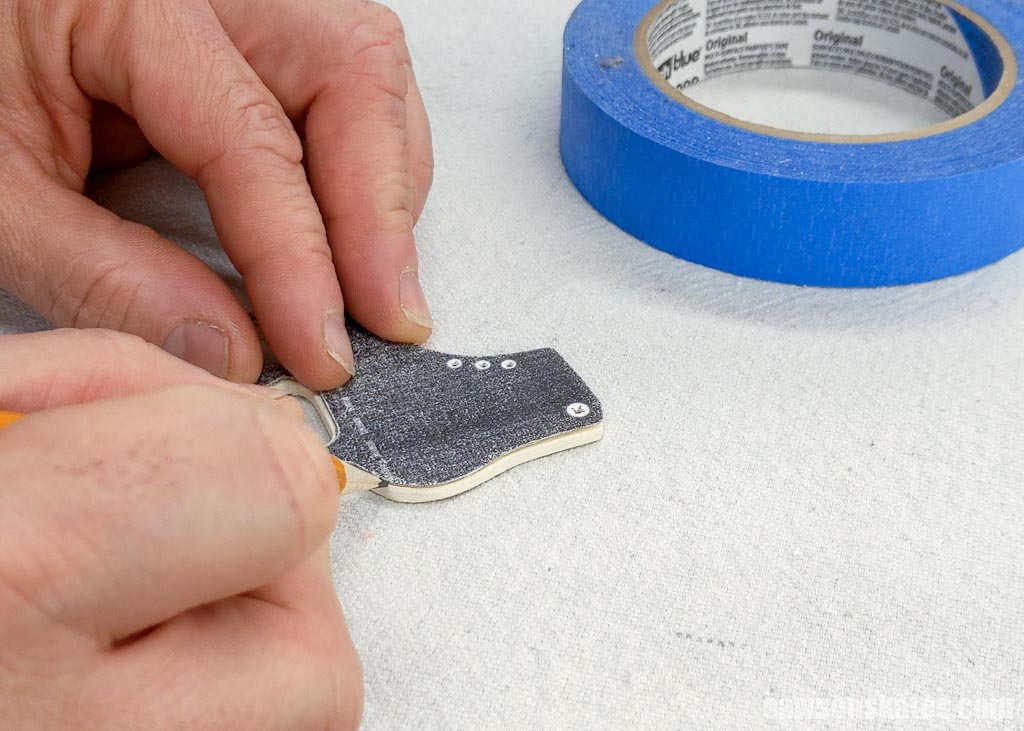
I placed a piece of painter’s tape between the front of the boot and the pencil line. The tape created a nice, clean line between the blade and boot.
I painted the blade area with a dark gray craft paint.
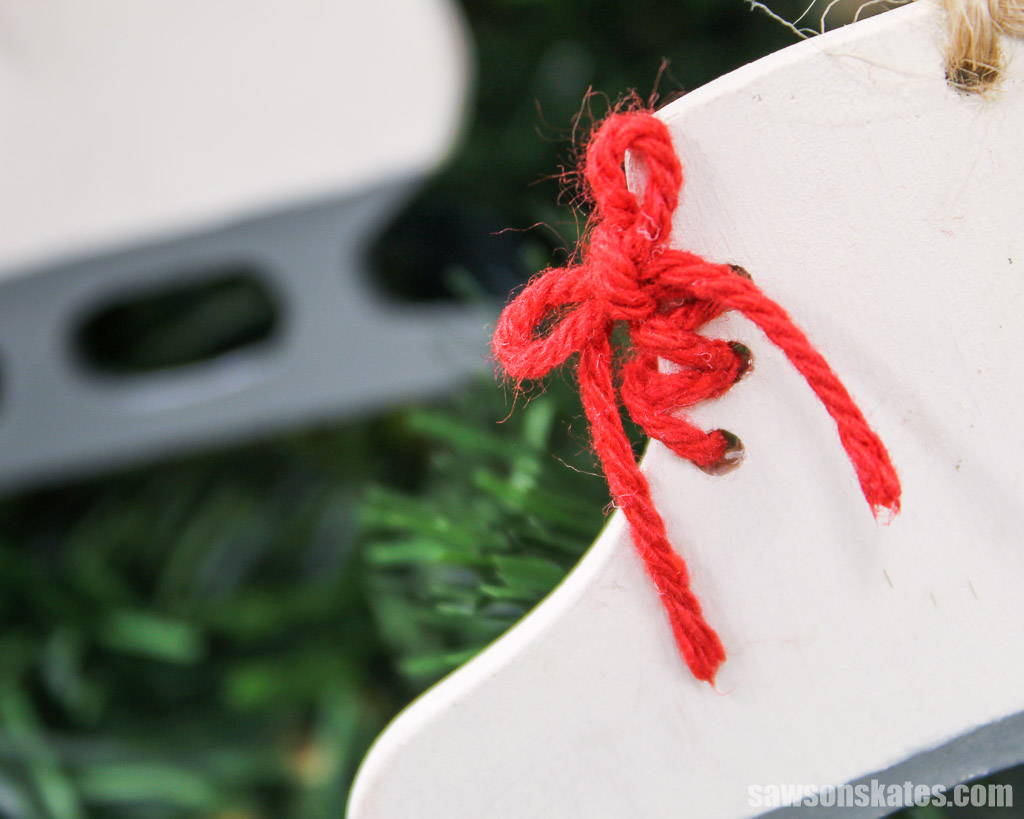
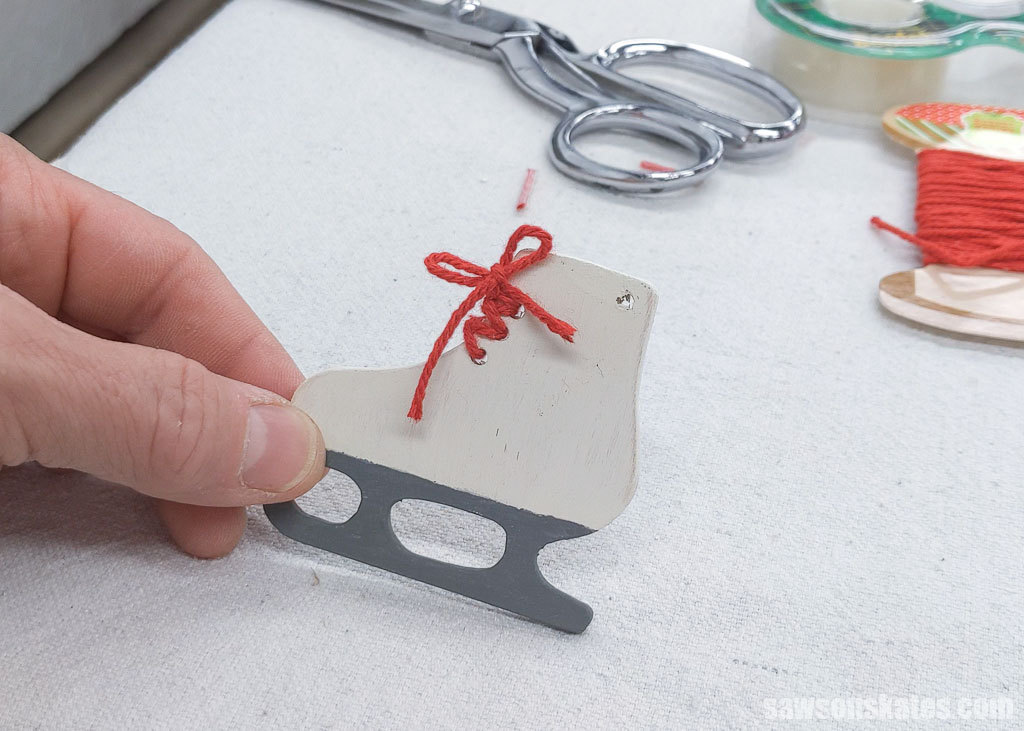
Step 4. Add the Laces
I used some baker’s twine to create laces for the skates. I had the twine in my stash that I bought years ago, but you can buy something similar here.
To make the laces, I cut a piece of twine and wrapped scotch tape around each end of the twine. The tape makes it easier to thread the twine through the holes.
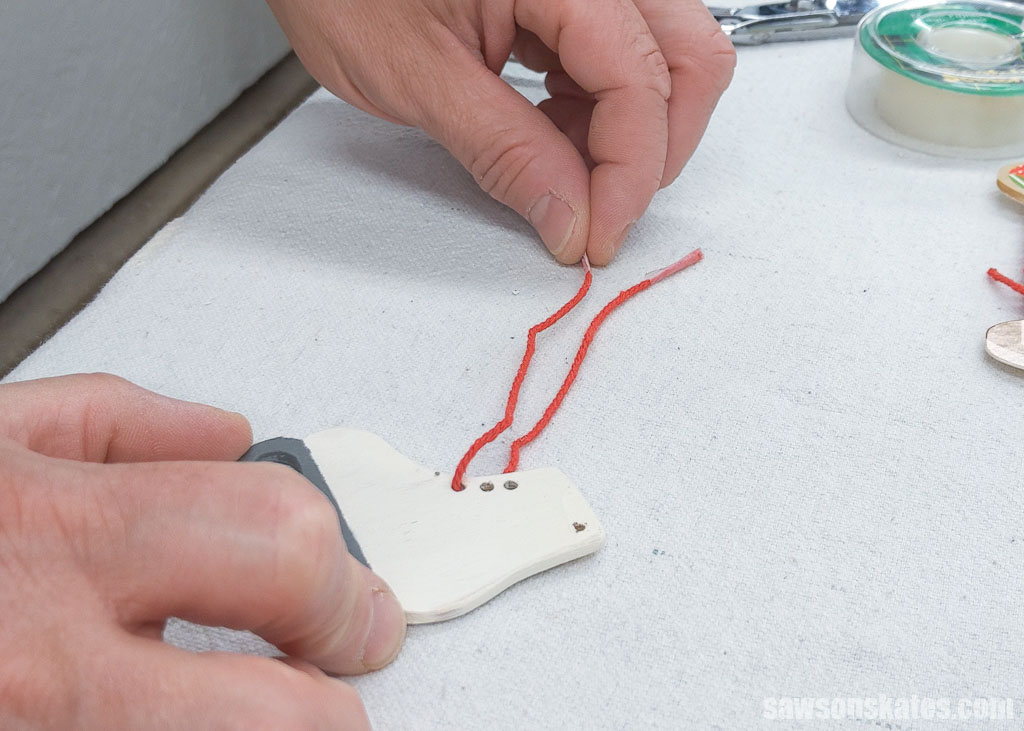
I started at the bottom of the skate and threaded the twine through each hole until I reached the top.
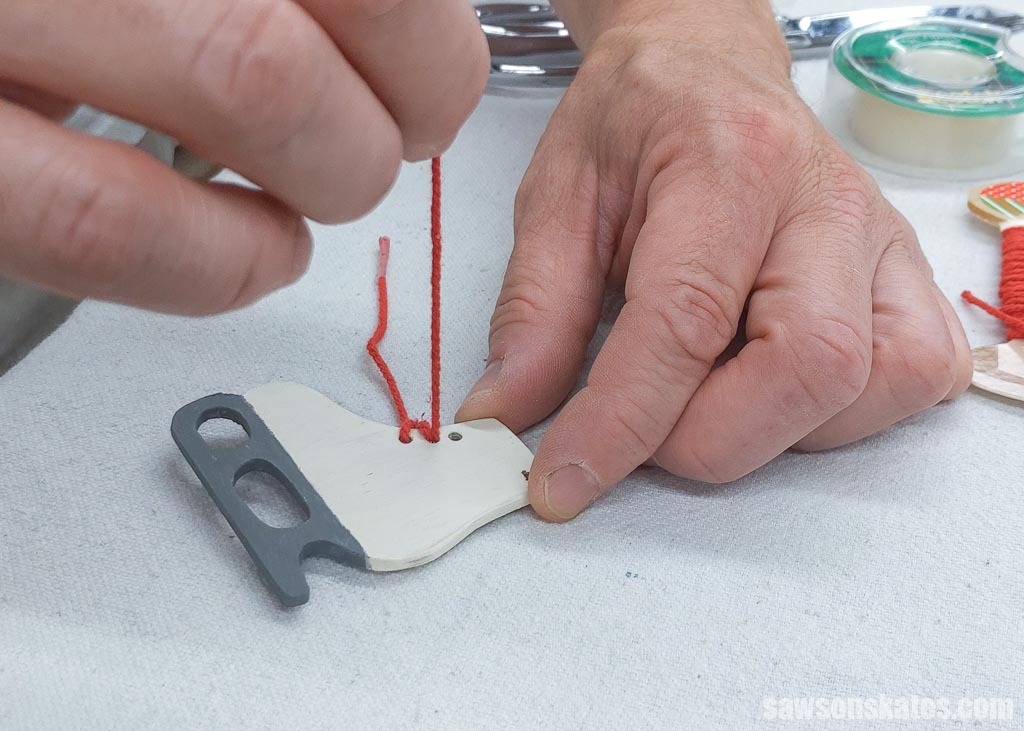
Then, I tied a bow and trimmed off any excess. I dipped the ends of the laces in white craft glue to keep them from fraying.
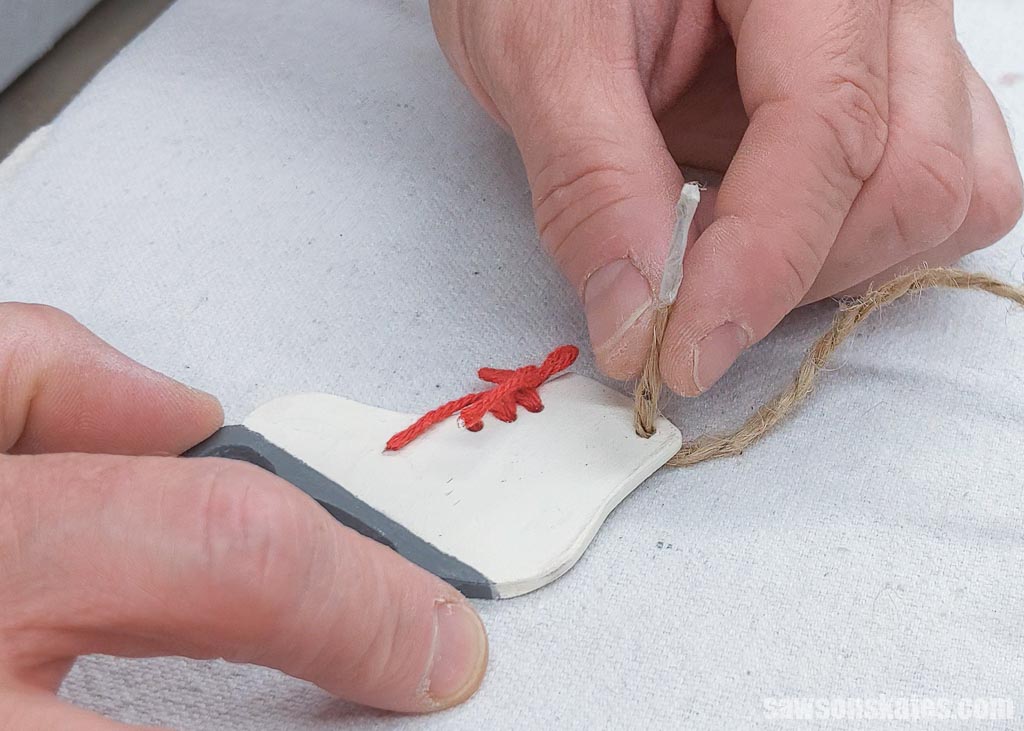
Step 5. Attach the Hanger
I cut a piece of jute twine, wrapped scotch tape around one end and fed it through the hole in the skate.
After threading about 2″ of twine through the hole, I tied a double knot and cut off any excess. Then, I repeated this step for the other end of the twine.
Includes:
- List of tools and materials
- Complete measurements (in inches)
- Easy-to-follow instructions
- Step-by-step photos
- Ice skate template
or get the best value:
Final Thoughts
These DIY ice skate ornaments are simple to make and only require a few supplies. They’re perfect for adding a little bit of whimsy to your holiday decor!
Get your plan (including the skate pattern) now!
Thank you for stopping by. If you enjoyed this tutorial, would you please take a moment and pin it to Pinterest? I’d really appreciate it!
Recommended For You

Pin This For Later

Hi there – I’m Scott, a woodworking enthusiast and creator of Saws on Skates, a site I started in 2015 to share easy-to-follow tutorials, space-saving shop tips, and project inspiration for DIYers at any skill level. Learn more about my woodworking journey here.