How to Apply All-in-One
All-in-One Stain & Finish is a stain and poly in one. I’m sharing what you need to know before you use it, how to apply it, and if I would use it again.

How to Apply All-in-One Stain & Finish
Applying stain and polyurethane is usually a two-step process. First, the stain is applied to add color to the wood, then polyurethane is applied to protect the wood. But with a stain and poly in one, like All-in-One Stain & Finish made by Vermont Natural Coatings, you can skip a step.
All-in-One Stain & Finish adds color and a layer of protection at the same time. All-in-One allows you to save time and get professional results for your projects in one step.
But there are a few things you should know before you use it. I’m sharing helpful tips and tricks so you can tackle your next stain and poly project with confidence. Plus, in my review, I’ll let you know if I would ever use All-in-One again.
This tutorial is not sponsored. I bought the All-in-One Stain & Finish at a hardware store.
Table of Contents
- What is Stain and Polyurethane in One?
- What are the Pros and Cons of Using Stain and Poly in One?
- Where Can You Use All-in-One Stain & Finish?
- What Colors are Available?
- Do You Need to Use a Wood Conditioner?
- Can You Apply All-in-One Stain & Finish Over an Old Finish?
- What is the Best Way to Apply All-in-One Stain & Finish?
- How Long Does it Take to Dry?
- How Many Coats of All-in-One Stain & Finish Should You Apply?
- Do You Have to Apply a Top Coat?
- How to Apply Apply All-in-One Stain & Finish Tutorial
- Would I Use All-in-One Again?
- Where Can You Buy All-in-One Stain & Finish?
What is Stain and Polyurethane in One?
Applying a stain and a protective top coat like polyurethane is usually a two-step process. First, a stain is applied to the wood. The pigment in the stain soaks in and adds color to the wood. Then a finish, like polyurethane, is applied to seal and protect the wood.
Related: How to Spray Polyurethane
It’s important to note the difference between stain and polyurethane. Stain soaks into the wood. Polyurethane sits on the surface of the wood.
As the name suggests, stain and polyurethane in one works in one step. Stain and poly in one adds color and protection in one coat. Because the pigment is suspended in the polyurethane, the color doesn’t really soak into the wood. Instead, it sits on the surface of the wood.
There are several stain and poly in one options like Minwax PolyShades, Behr Stain & Poly in One, and Varathane One Step Stain & Polyurethane.
For this tutorial, we’re going to focus on the Vermont Natural Coatings All-in-One Stain & Finish. All-in-One is easy to apply and easy to clean up with soap and warm water.
Back to Table of ContentsWhat are the Pros and Cons of Using Stain and Poly in One?
There are pros and cons of using a stain and poly in one.
One advantage is that it saves time. Each coat of a stain and poly in one adds color and a layer of protection to the wood.
But that time savings comes at a price. If you look closely, sometimes it can appear that the color is floating on the surface of the wood. This is especially true when a stain and poly in one is applied over an existing finish. It looks like it’s floating on the surface because it is. Remember if we use a stain and poly separately, the stain soaks into the wood and the poly sits on top to protect the wood.
But a stain and poly in one sits on the surface of the wood. This isn’t necessarily a bad thing. But to the trained eye, having the color sit on the surface can make the piece look a bit off. It’s just something to be aware of when choosing a finish for your project.
That said, I was thoroughly impressed with the look of the All-in-One. To me, it didn’t look like the color was floating on the surface of the wood. Instead, I thought it had the look of stain and poly that was applied separately.
Where Can You Use All-in-One Stain & Finish?
- Furniture Projects
- Cabinets
- Doors
- Trim
- Molding
What Colors are Available?
All-in-One Stain & Finish is available in eight wood tones: Fireside Ebony, Westfield Walnut, Mad River Mahogany, Backroad Brown, Craftsbury Cherry, Creek Road Oak, Harvest Amber, and Snowfall White.
Back to Table of Contents
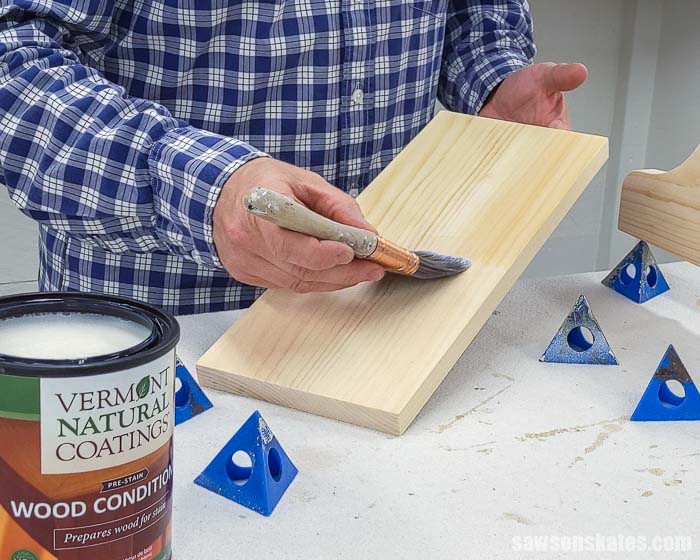
Do You Need to Use a Wood Conditioner?
To ensure a uniform color, Vermont Natural Coatings recommends pretreating porous woods with Vermont Natural Coatings Pre-Stain Wood Conditioner.
All of these samples were done on pine. The samples were sanded with 120 grit sandpaper. On a large project, I would use this brush, but for these small pieces, I used a small artist brush.
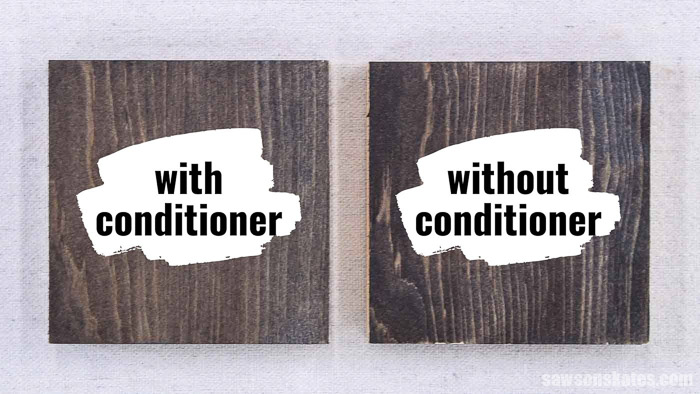
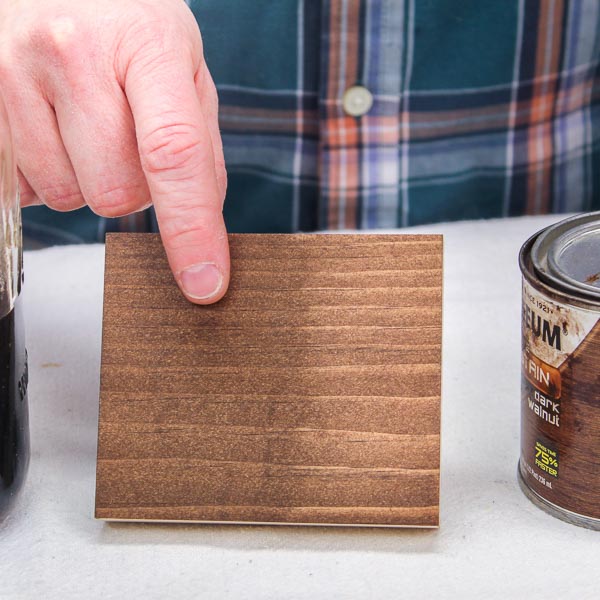
In this test, I compared a sample where I applied the Vermont Natural Coatings Pre-Stain Wood Conditioner to a sample without conditioner. I used All-in-One in the color Fireside Ebony for these samples.
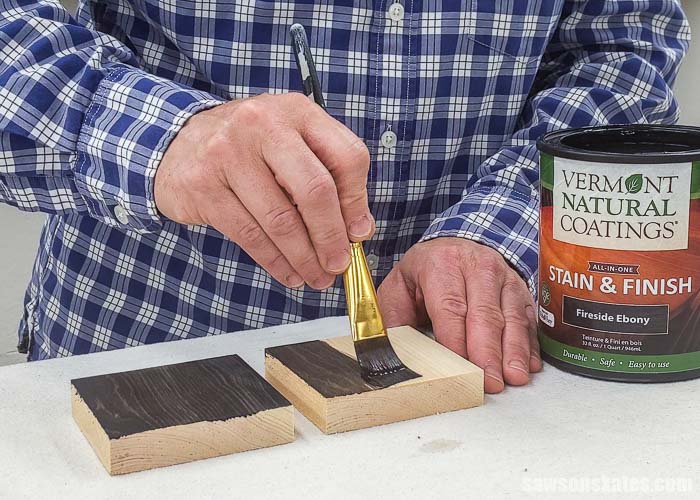
The color on the sample with the wood conditioner is more even and uniform than the sample without.
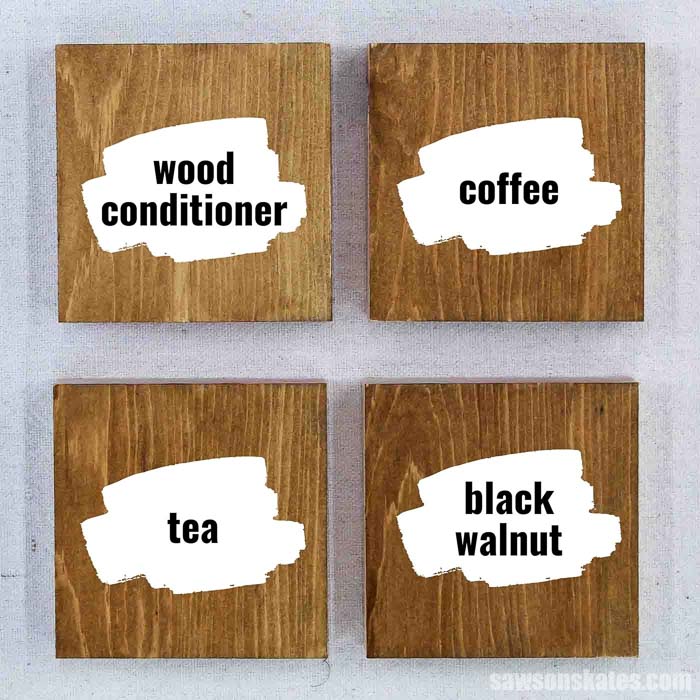
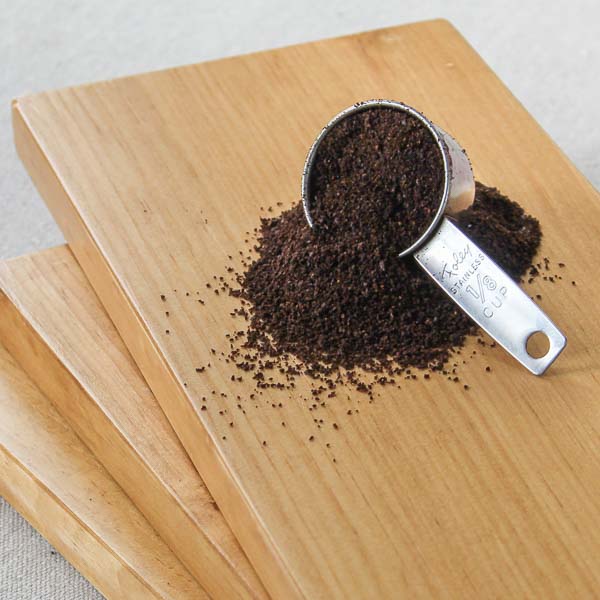
I also compared the Vermont Natural Coatings Pre-Stain Wood Conditioner to the three DIY wood conditioners that I often use for my projects.
Related: What I Use Instead of Wood Conditioner
I used All-in-One in the color Westfield Walnut for these samples. The All-in-One was also applied with an artist brush.
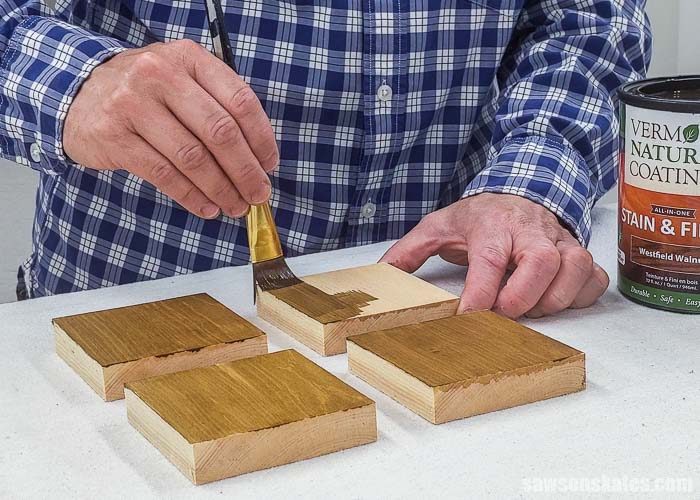
The wood conditioners all appeared to work well on these small pieces. The tea stain appeared to be the most similar to the Vermont Natural Coatings Pre-Stain Wood Conditioner. The coffee stain and black walnut stain looked similar to each other and stained slightly darker than the Vermont Natural Coatings Pre-Stain Wood Conditioner and tea stain.
📝 NOTE: These pieces are small. It would be best to test a sample on a larger piece to be sure it will produce the color you want. Also, different types of wood may react differently. So it would be best to test a sample on the type of wood you will be using for your project to be sure it will produce the color you want.
Can You Apply All-in-One Stain & Finish Over an Old Finish?
Yes, All-in-One can be used over previously finished wood. First, the surface should be lightly sanded with 220 grit sandpaper. Sanding improves the adhesion between the old finish and the All-in-One.
Next, use a ShopVac to remove the majority of the sanding dust. Follow up with a clean damp cloth to remove any remaining sanding dust. Then, begin with Step 2 of the How to Apply All-in-One Stain & Finish Tutorial.
Back to Table of ContentsWhat is the Best Way to Apply All-in-One Stain & Finish?
All-in-One Stain & Finish can be applied with a brush, pad, or clean cloth.
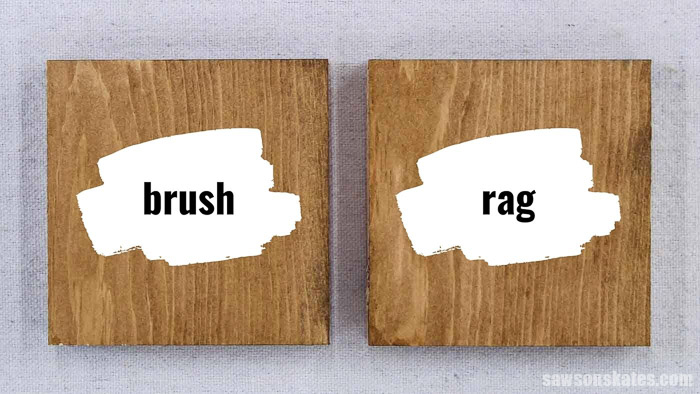
These samples were done on pine. The samples were sanded with 120 grit sandpaper. The samples were treated with Vermont Natural Coatings Pre-Stain Wood Conditioner.
On a large project, I would use this brush, but for this small piece, I applied the All-in-One with a small artist brush. The All-in-One on the second sample was applied with a clean piece of an old t-shirt. I used All-in-One in the color Westfield Walnut for these samples.
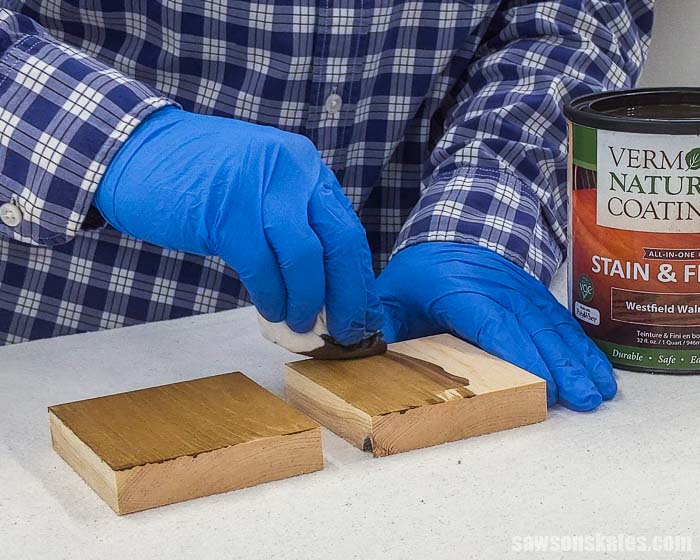
I didn’t see any noticeable difference between applying the All-in-One with a brush or a cloth.
How Long Does it Take to Dry?
All-in-One dries in about two hours, but temperature and humidity may affect the time it takes to dry.
Back to Table of ContentsHow Many Coats of All-in-One Stain & Finish Should You Apply?
The instructions say to apply one coat but for a deeper tone, you can apply a second coat. The manager of the hardware store’s paint department where I bought the All-in-One suggested that I may only want to apply one coat because sometimes two coats can be too dark.
These samples were done on pine. The samples were sanded with 120 grit sandpaper. The samples were treated with Vermont Natural Coatings Pre-Stain Wood Conditioner.
On a large project, I would use this brush, but for this small piece, I applied the All-in-One with a small artist brush. I used All-in-One in the color Backroad Brown for these samples.
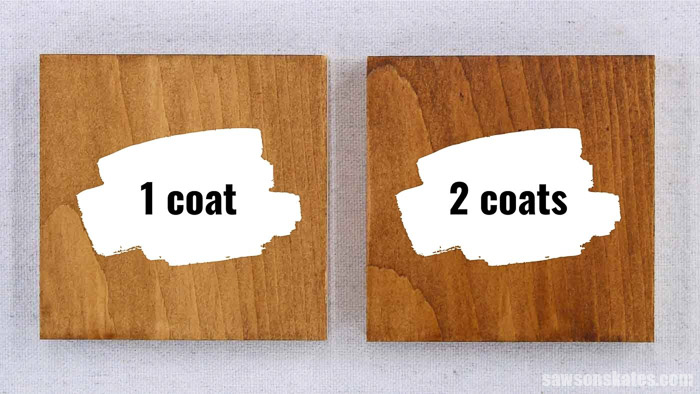
📝 NOTE: After I made these samples, I tried a sample with this Purdy brush that I normally use for my projects. The Purdy brush applied more product than the artist brush.
One coat with the Purdy brush looked like two coats applied with the artist brush. Two coats applied with the Purdy brush began to obscure the wood grain and the sample almost looked like it had been painted.
This proves that it’s important to do sample pieces. And depending on what brush is used, I would agree with the paint department manager, that one coat is usually enough to get the color you want.
Based on these tests I decided to only apply one coat of All-in-One to this DIY paper towel holder.

Do You Have to Sand Between Coats?
The instructions didn’t say whether you need to sand between coats, but I sanded with 220 grit sandpaper before applying a second coat.
I will mention again, as I did above, that depending on the brush that you use, you will likely only want to apply one coat of All-in-One.
Back to Table of ContentsDo You Have to Apply a Top Coat?
For maximum protection, you’ll want to apply a top coat to the All-in-One. See Step 5 of the How to Apply All-in-One Stain & Finish Tutorial for more information.
Back to Table of ContentsHow to Apply All-in-One Stain & Finish
Supplies
- All-in-One Stain & Finish
- PolyWhey
- Sandpaper
- Paint BrushI used this one
- Painter’s Pyramids
- Clean Cloth/Rags
- Drop Cloth
Step 1. Prepare the Wood
The first step to preparing any project for a finish is to smooth the wood with sandpaper. I like to sand my projects as I build them, but I always give them a quick once over when I’m done assembling. The final grit I used on this project was 120 grit sandpaper.
Related: 11 Secrets for Sanding Wood Projects Like a Pro
Next, I removed the majority of the sanding dust with my ShopVac.
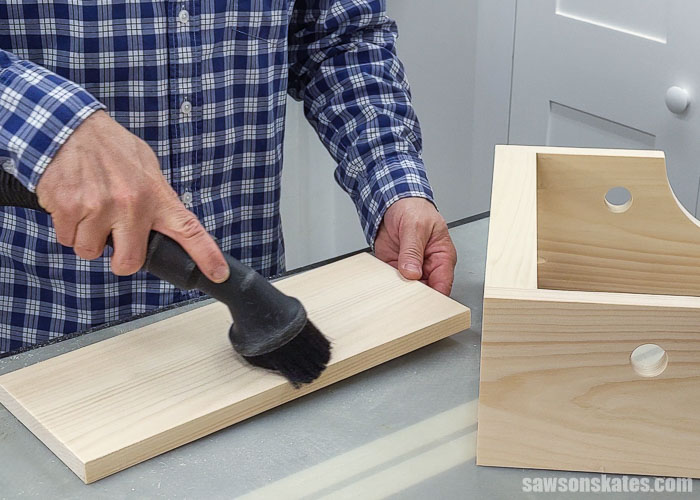
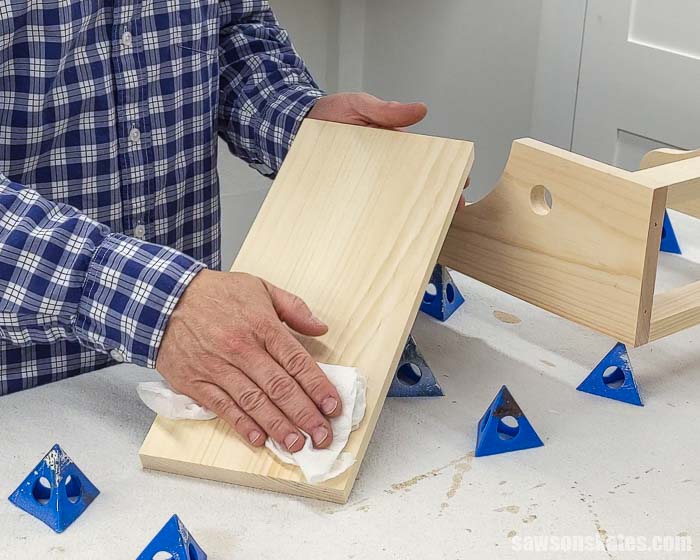
I used a clean, damp rag to remove any remaining sanding dust.
💡 TIP: Don’t use paper towels. I used a paper towel and it left fibers behind on the surface of the wood. Later on, I used a piece of a t-shirt and that worked well.
Then, I applied the Vermont Natural Coatings Pre-Stain Wood Conditioner with the grain of the wood using this brush. First, I applied it to the backside.
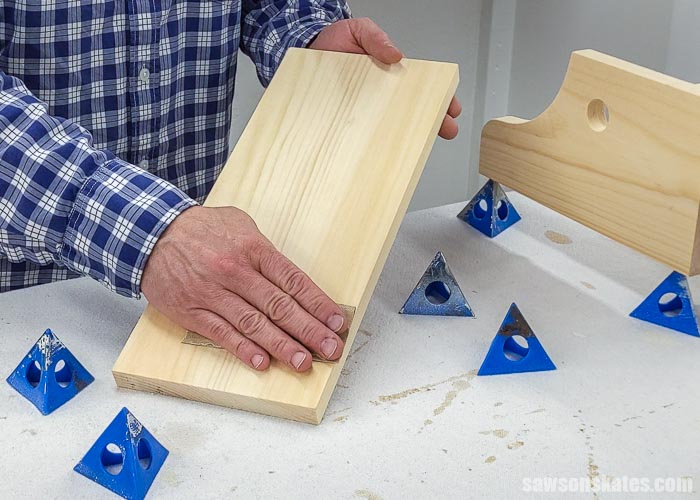
Next, I flipped the piece over and placed it on the painter’s pyramids. Then, I applied it to the front side.

I allowed the conditioner to dry for about two hours.
I ran my hand over the piece when it was dry. It didn’t feel as smooth as it did before I applied the conditioner. Even though the directions didn’t mention it, I lightly sanded the piece with 220 grit sandpaper.
Again, I removed the majority of the sanding dust with my ShopVac and used a clean, damp rag to remove any remaining sanding dust.
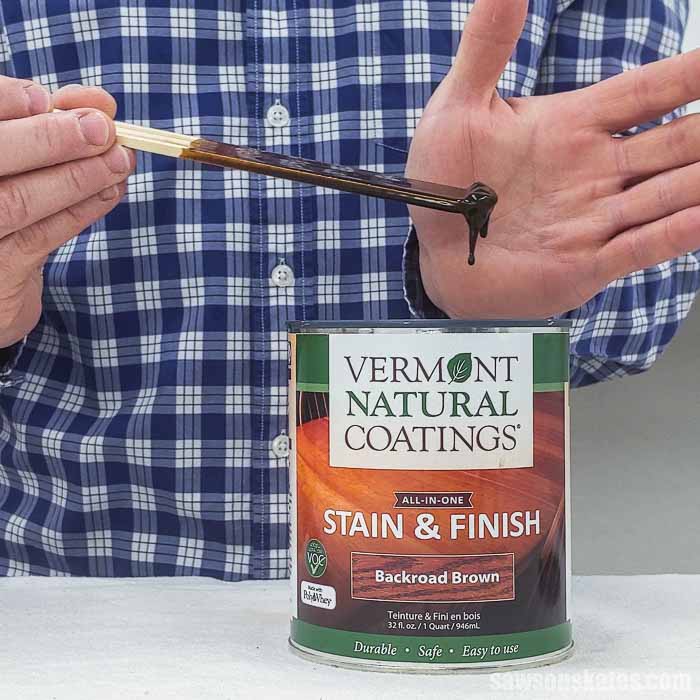
Step 2. Prepare the All-in-One Stain & Finish
This product collects at the bottom of the can so it’s important to stir it really well.
Be patient with this step. It took some time for the product that was collected on the end of the paint stick to blend into the rest of the product.
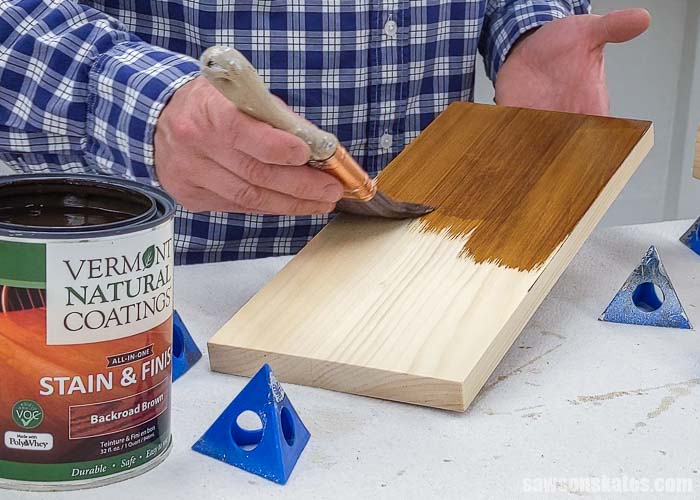
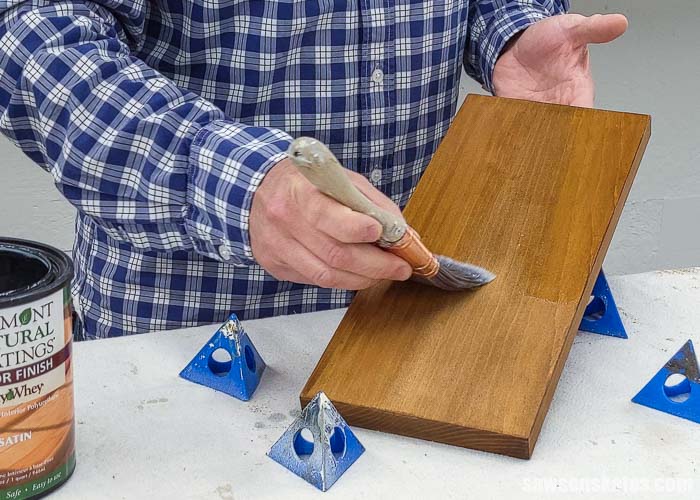
Step 3. Apply the All-in-One
All-in-One is as easy to apply as latex paint. Apply thin, even coats with the direction of the wood grain. Overlap the strokes, keep a wet edge, and brush out any areas that puddle.
Just like I did with the conditioner, First, I applied the All-in-One to the backside.
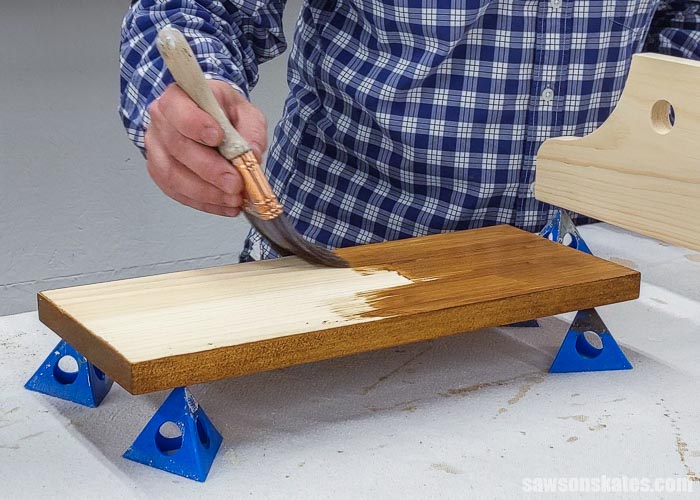
Next, I flipped the piece over and placed it on the painter’s pyramids. Then, I applied the All-in-One to the front side.
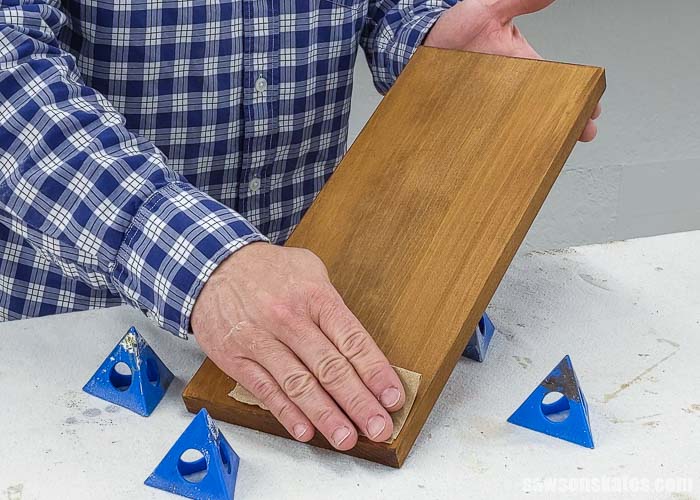
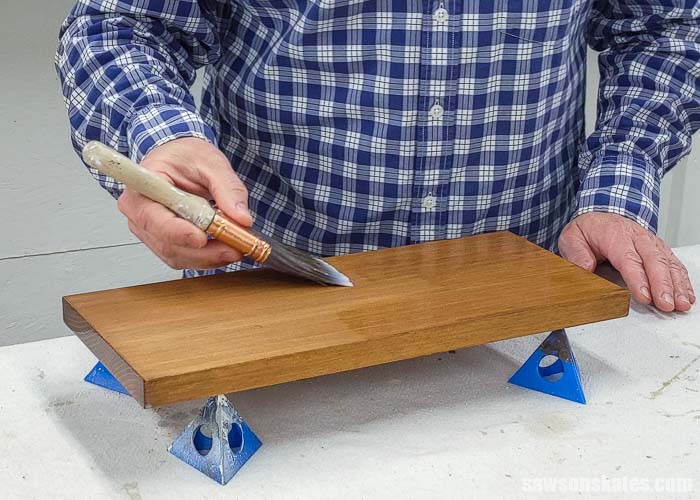
I ran my hand over the piece when it was dry. It didn’t feel as smooth as it did before I applied the All-in-One. Even though the directions didn’t mention it, I lightly sanded the piece with 220 grit sandpaper.
💡 TIP: Don’t use steel wool to sand between coats when using water-based finishes. Water can cause steel wool to rust. If any of the steel wool is left behind it could cause a stain in the finish.
Again, I removed the majority of the sanding dust with my ShopVac and I used a clean, damp rag to remove any remaining sanding dust. Do not use a tack cloth for this step. The substance in the tack cloth can contaminate the surface and prevent additional coats from adhering properly.
Related: What is a Tack Cloth? (+ What I Used Instead)
Step 4. Apply a Second Coat of All-in-One (optional)
For a deeper tone, you can apply a second coat of All-in-One. I was pleased with the color of my project so I skipped this step.
If you want to apply a second coat, allow the first coat to dry for 2 hours. Next, lightly sand with 220 grit sandpaper. Remove the sanding dust with ShopVac and wipe the surface using a cloth dampened with water. Then, repeat Step 3 to apply a second coat.
Step 5. Apply the PolyWhey
For maximum protection, I applied a top coat of Vermont Natural Coatings PolyWhey. PolyWhey is a natural polyurethane derived from whey. Whey is a byproduct of cheesemaking.
Related: Why I Switched to This Polyurethane Alternative
I only applied one coat of All-in-One, so I applied two coats of PolyWhey to provide for three layers of protection for my project. If I had applied two coats of All-in-One, I would have only applied one coat of PolyWhey.
I’m using the PolyWhey Floor Finish. I wanted to use satin sheen on this DIY desk. The hardware store didn’t have the satin furniture version on hand, but they did have the satin floor coating.
The manager of the hardware store’s paint department told me the only difference between the furniture version and the floor version is that the floor coating is more durable. I had some of the Floor Finish leftover after using it on the desk so I used it on this project.
I applied the PolyWhey just like I applied the All-in-One. First, I applied the PolyWhey to the backside.
Next, I flipped the piece over and placed it on the painter’s pyramids. Then, I applied the PolyWhey to the front side.
I allowed the PolyWhey to dry for two hours. Next, I lightly sanded the piece with 220 grit sandpaper, removed the sanding dust with a ShopVac, and removed any remaining sanding dust with a damp rag. Then, I applied the second (final) coat of PolyWhey.
Would I Use All-in-One Again?
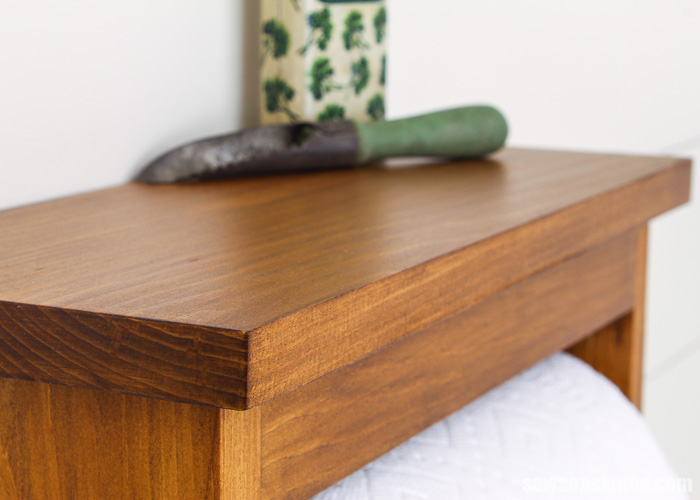
Yes, I would use All-in-One again on my projects. I was impressed with the results of the Vermont Natural Coatings PolyWhey (natural polyurethane). And I’m equally impressed with their All-in-One Stain & Finish.
I liked that this product is easy to apply and is easy to clean up. The color was uniform and even, and my finished project looked amazing.
I will mention again that the brush makes a difference. The Purdy brush applied more product than the artist brush. It’s important to try a few samples before using any product on your finished project.
Where Can I Buy All-in-One Stain & Finish?
I bought my Vermont Natural Coatings All-in-One Stain & Finish from a hardware store. If All-in-One isn’t available in your area, you can buy it online here and have it shipped to your home.
I have some great news if you want to try All-in-One for yourself. I reached out to Vermont Natural Coatings. I told them how much I enjoyed using their products and asked if they would offer a discount to Saws on Skates® readers. They agreed!
You can save 10% when you buy All-in-One Stain & Finish (or any of their products) directly from the Vermont Natural Coatings website! Enter the code SAWSONSKATES10 at check out to save. I may earn a small commission if you make a purchase.
Final Thoughts
Applying stain and polyurethane is usually a two-step process. But with a stain and poly in one, like All-in-One Stain & Finish made by Vermont Natural Coatings, you can skip a step.
All-in-One Stain & Finish adds color and a layer of protection at the same time. All-in-One allows you to save time and get professional results for your projects in one step.
Thank you for stopping by. If you enjoyed this tutorial, would you please take a moment and pin it to Pinterest? I’d really appreciate it!
Recommended For You
Pin This For Later

Hi there – I’m Scott, a woodworking enthusiast and creator of Saws on Skates, a site I started in 2015 to share easy-to-follow tutorials, space-saving shop tips, and project inspiration for DIYers at any skill level. Learn more about my woodworking journey here.
Thank you for this very thorough tutorial. The Vermont Poly vs the Bob’s Miracle DIY finish, which would you recommend for a wine/liquor/storage cabinet?
This really depends on the level of protection and the look that you want for your project. The PolyWhey will provide more protection than Bob’s. Bob’s will look more like a hand-rubbed finish that you might find on an heirloom piece. A compromise might be the Vermont Natural Coatings “Heirloom Fine Finish” which provides durability with the look of a hand-rubbed finish.