How to Make a Zero Clearance Insert for a Miter Saw
A zero clearance insert reduces tear-out and helps us make cleaner miter saw cuts. We can buy an insert but it’s easy to make a DIY insert with scrap wood.
Brian recently left a comment on the 7 Miter Saw Tricks Every DIYer Should Know post. Brian said:
Great article, one thing I would add is to make a zero clearance insert for your miter saw. This helps reduce tear-out and if you are like me and mainly use your saw primarily with no angle the insert will last a while. However, they are easy to make so if you need an angled cut and the gap gets larger it is easy to replace.”
That’s a great idea! Thank you for the suggestion, Brian. Let’s talk tear-out and how our miter saw cuts can be cleaner with a zero clearance insert.
Before we get into zero clearance inserts, be sure to click the subscribe button at the bottom of this page to sign up for my FREE weekly newsletter loaded with helpful pocket hole tricks, space-saving workshop ideas, clever DIY tips and more!
This post contains affiliate links to supplies or tools I used to complete this project. Purchases made using these links help support the Saws on Skates website and allow me to share more DIY projects. and DIY tips with you. There is no cost to you for using these links. Click here to visit my site policies.
What is Tear-Out?
Let’s make a cut on a board with our miter saw and then flip the board over. What do we see? The bottom side of our cut looks chipped or jagged. That’s called tear-out.
Don’t worry we’re not doing anything wrong. Tear-out can happen no matter if we’re using a DeWALT, Bosch, Rigid, Makita, Hitachi or any other brand of miter saw. Tear-out happens because the fibers of the wood are not supported.
Can You Reduce Tear-Out?
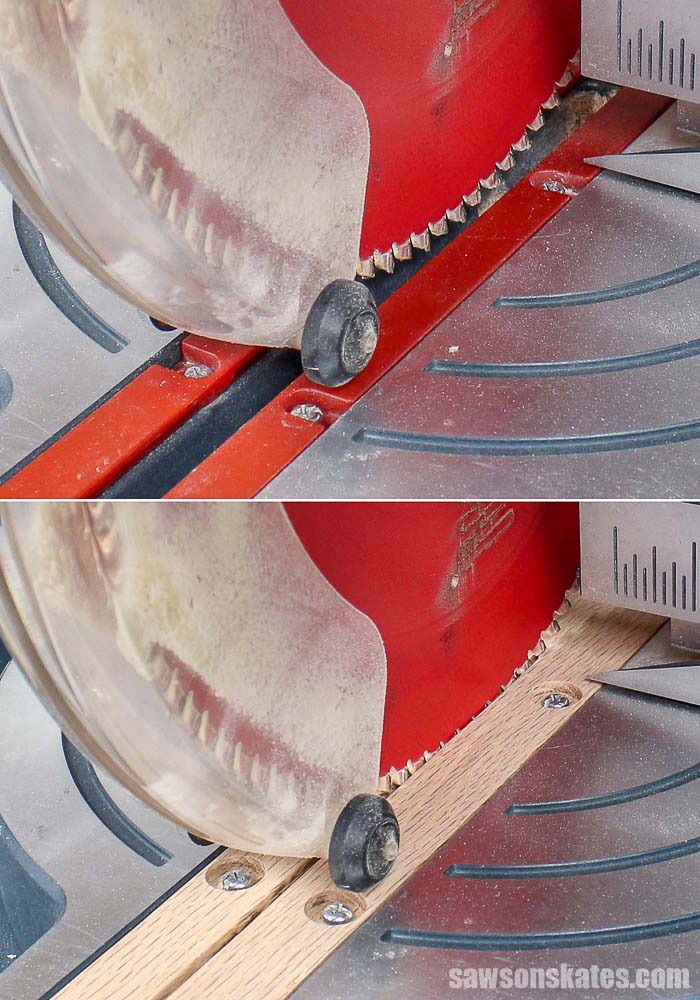
Let’s take a look at the throat plate or insert in the table of our miter saw. We’ll disconnect the power to the saw and lower the saw blade towards the table. What do we see? We’ll notice there is a gap between the insert and the blade. This means our board is not supported over this gap.
If we could make this gap smaller our board would be better supported and the chances of tear-out would be reduced. We can make this gap smaller and support the wood with a zero clearance insert.
Notice the gap between the blade and the stock insert (top) and the minimal gap between the blade and the zero clearance insert (bottom).
What is a Zero Clearance Insert?
A zero clearance insert replaces our stock miter saw throat plate. The insert reduces the gap between the edges of the insert and the blade. This provides support for our board and reduces the chances for tear-out.
We can buy a store-bought zero clearance insert![]() or we can make a DIY zero clearance insert with scrap wood.
or we can make a DIY zero clearance insert with scrap wood.
How to Make a Zero Clearance Insert for a Miter Saw
Making a zero clearance insert for our miter saw is an easy DIY project. I made this insert for my miter saw with a piece of oak scrap wood.
Supplies
- Scrap Wood
Tools
- Tape Measure
- Drill
- Miter Saw
- Table Saw
- Jigsaw
- Thickness Planer
- Forstner Bits
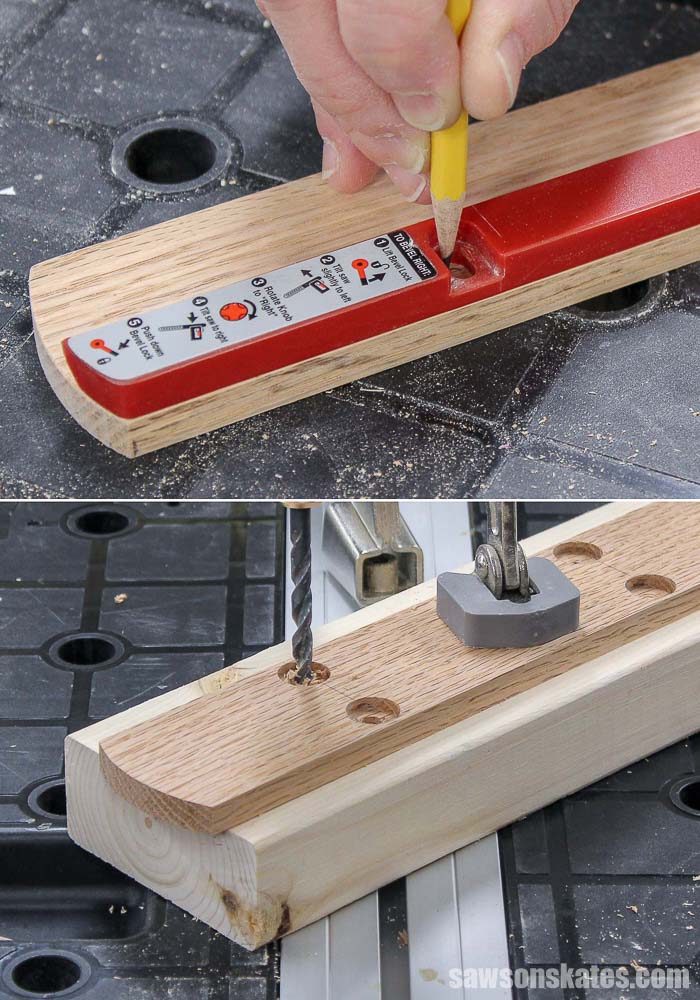
Step 1. Measure the Throat Plate
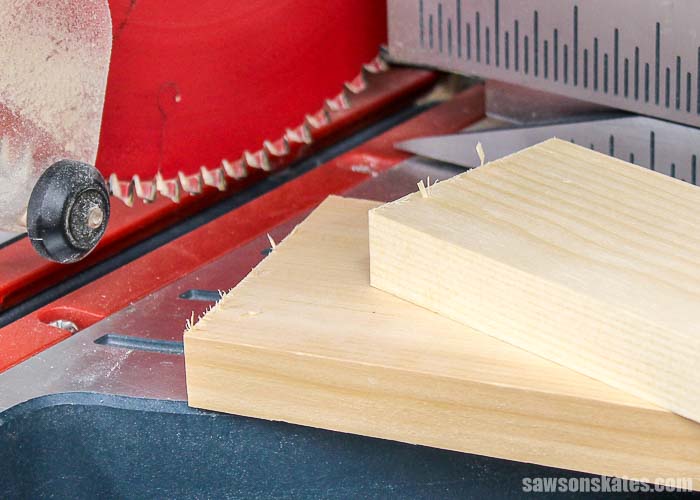
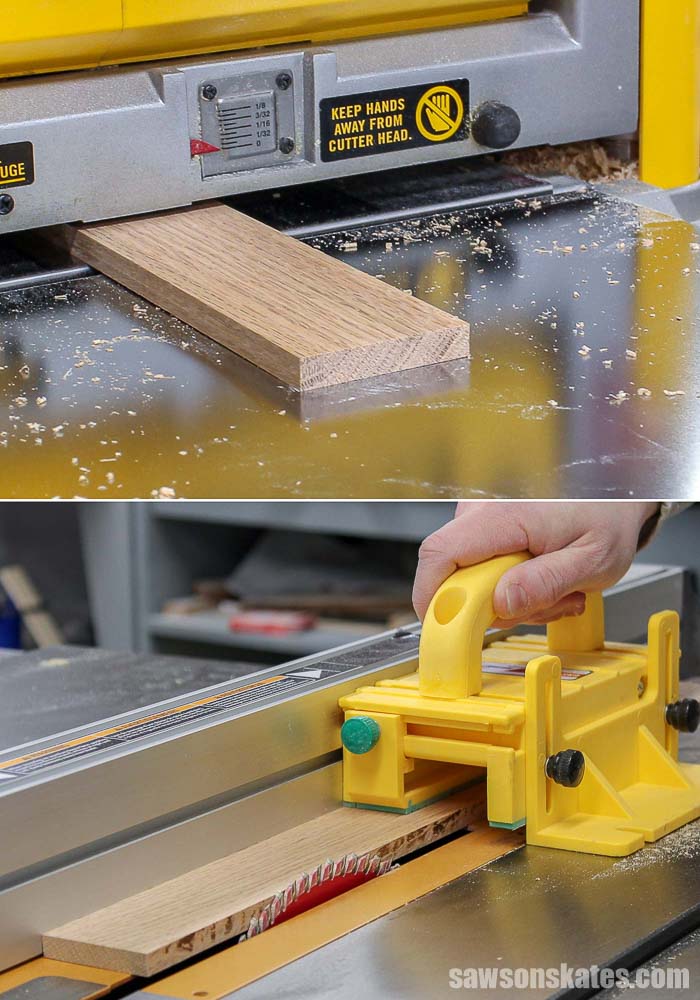
First, I measured the width and height of the stock throat plate in my miter saw. My stock insert measured 2” wide by 3/8” high. I used my thickness planer to plane the oak to 3/8” an then ripped to width on my table saw.
Related: Jointer vs Planer: Differences and Which to Buy First
I understand everyone might not have a thickness planer. What you might be able to do in that case is glue up pieces of different thicknesses to get the height you need for your insert.
In other words, for my zero clearance insert, I could have glued a piece of 1/8” plywood to a piece of 1/4” plywood to get the ⅜” thickness I needed.
Step 2. Cut the Insert to Length
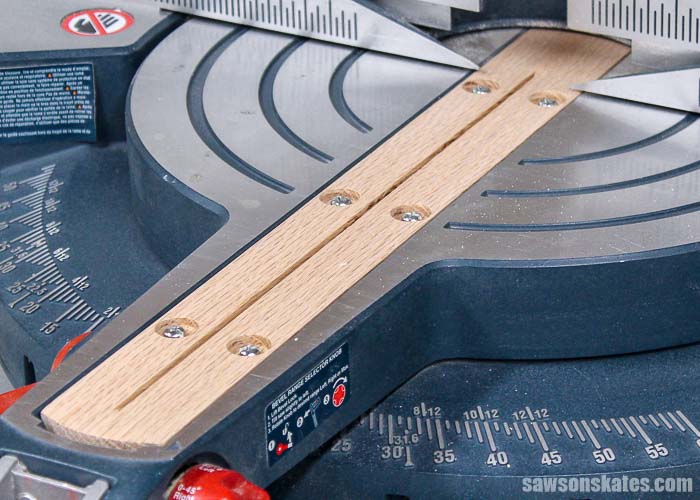
I used my stock insert to determine the length of my zero clearance insert by tracing the stock insert onto the oak. Then I cut the oak to length with a jig saw and sanded it smooth.
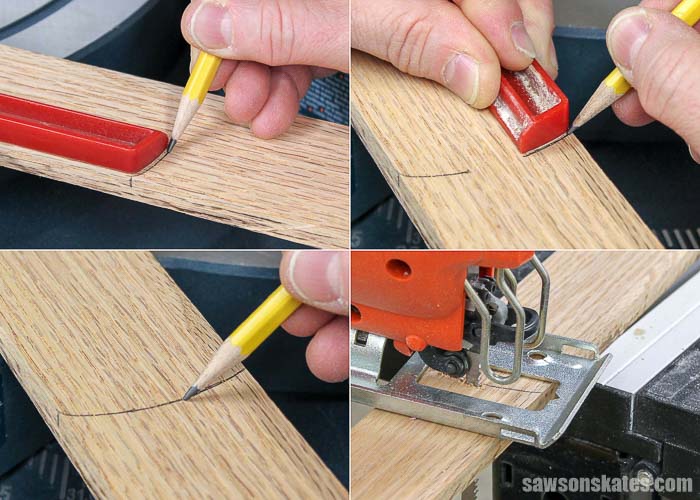
Step 3. Drill the Mounting Holes
I used my stock insert to determine the location of the screw holes on my zero clearance insert. First I used a 5/8″ Forstner bit to make a recessed area for the screws. Then, I used a drill bit to make a hole for each screw.
Step 4. Install the Zero Clearance Insert
First, I installed the zero clearance insert upside down in my miter saw and made a cut in the insert. Next, I removed the insert, flipped it from front to back, and reinstalled in my miter saw. Then I made another cut in the insert. Now we’re ready to make crispy clean cuts!

Final Thoughts
A zero clearance insert reduces tear-out and helps us make cleaner miter saw cuts. We can buy an insert but it’s also easy to make a DIY insert with scrap wood.
Thank you for stopping by. If you found this information helpful, would you please pin it to Pinterest? Other DIYers would appreciate it and I would too! Thank you – Scott
More Like This:

Hi there – I’m Scott, a woodworking enthusiast and creator of Saws on Skates, a site I started in 2015 to share easy-to-follow tutorials, space-saving shop tips, and project inspiration for DIYers at any skill level. Learn more about my woodworking journey here.
Thanks for this weeks tip?? Extremely well done!!!✌?️
Great tips. Thank you.
Have you made one that will work with a compound miter saw?
Thank you for stopping by. I very rarely make compound miter cuts, so I haven’t tried making an insert for compound cuts yet.
Will it work on aluminum cast tops?
Hi Doug – Thank you for stopping by. It’s hard for me to say for certain without seeing a pic of your saw, but I would saw if you have removable insert this should work. If you have any doubts or if installing this type of insert would cause a safety concern then I wouldn’t install it.
Too bad I got this helpful information 1 week, and 6 stitches too late, luckily I still have my index finger. Keep in mind it takes less than a couple of seconds of inattention to do some serious harm to yourself, always maintain the respect these tools deserve. Take the time to learn how to operate all of your tools in a safe manner. There is no job that is so important that you risk doing serious damage to yourself or others. Remember that most safety procedures were written in blood.
Tim Morrow
Hi Tim – Thank you for stopping by and for sharing this important advice. I’m sorry to hear about your injury, but I’m glad you’re on the mend and that it wasn’t more serious. Stay safe – Scott
Hurt my pride more than anything, I know better. I grew up around power tools, my Dad, and Uncles were all carpenters, & I worked on F-14 Tomcats for 10 years. Just takes one moment.