Why Most Woodworkers Need a Planer First (and Why a Jointer Can Wait)
Discover the difference between a jointer and a planer, and why I recommend most woodworkers start with a planer before buying a jointer.
When I first published this article, it was a straightforward jointer vs planer comparison, but after years of working in a small shop and on a budget, I’ve learned something: for most woodworkers, the better first investment is a planer.
And if you’re not totally sure what each tool actually does, you’re in good company — lots of DIYers mix them up.
So in this guide, I’ll walk you through what each machine does and when you’d use one over the other. Knowing the difference between them will help you understand which tool you actually need.
But if you’re short on time, you can jump down to the section, Why a Planer Is the Better First Tool for Most Woodworkers.
This article contains affiliate links. If you purchase from these links, I may earn a small commission at no additional cost to you. Visit my site policies for more information.
What is a Jointer?
A jointer is basically a powered version of a hand plane (AMAZON LINK). It smooths and flattens the surface of a board, just like a plane does, but the big difference is that a hand plane is a manual tool, while a jointer runs on electricity and does the work a lot faster.
A jointer has an infeed table, an outfeed table, and a rotating cutter head in between. You slide the board over the spinning blades, and it shaves off a little material with each pass. With a hand plane, it’s the opposite — you do the moving as you push the tool across the board.
And while a hand plane takes some practice (and time) to master, a jointer is fast, easy to use, and does most of the work for you.
Jointers can handle more than just squaring edges, too. You can use them for rabbets, bevels, and chamfers.
What Does a Jointer Do?
A jointer is used to flatten one face of a board and square an adjacent edge.
Before we get into how it works, it helps to quickly look at the three surfaces of a board: face, edge, and end.
- Face
The face is the widest side of a board and usually the surface that is seen when the board is finished. - End
The end is where the wood’s pores are exposed. These pores act like little drinking straws that once carried water up the tree. - Edge
The edge is the long, narrow side that runs perpendicular to the end.
When you’re working with rough-cut lumber, a jointer is one of the first tools you’ll reach for. Rough boards haven’t been milled to a consistent thickness or flattened yet. They often have saw marks, and the surface feels, well, rough.
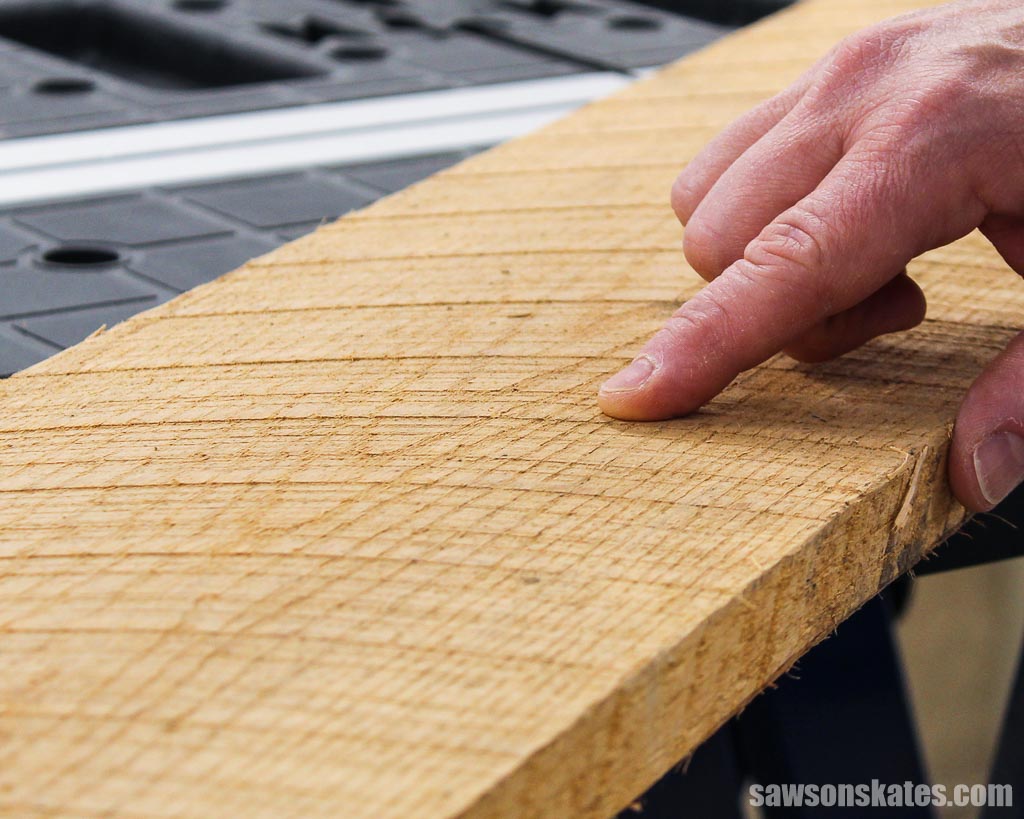
Jointers are also used to correct defects in boards, such as cupping, bowing, warping, or twisting.
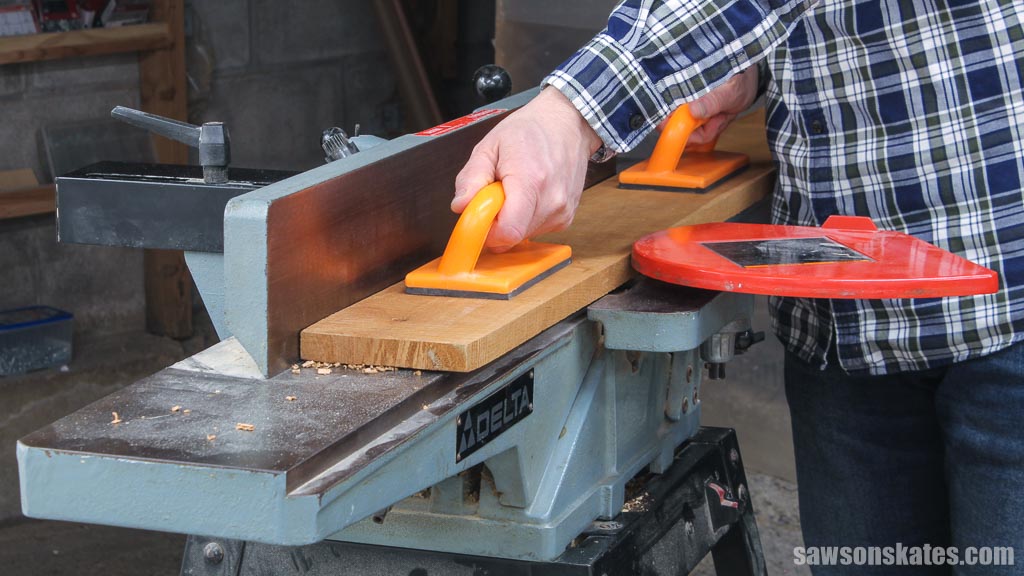
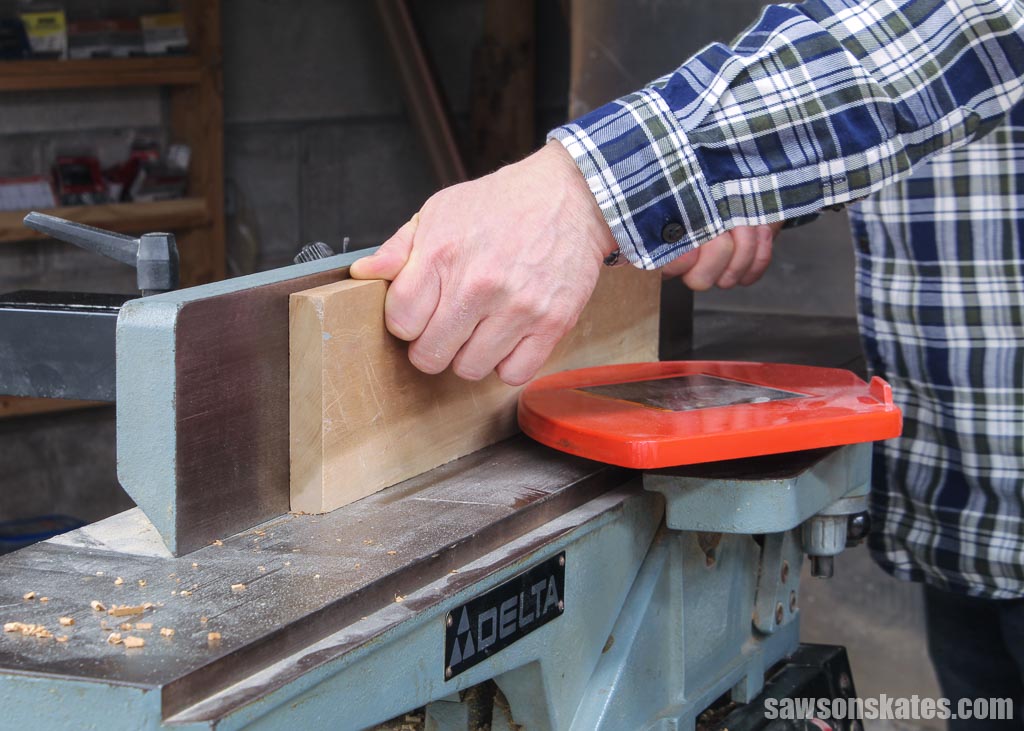
When you run a board over the cutter head (the sharp, straight blades under the table), the jointer shaves off a thin layer at a time. This is what creates those smooth, flat surfaces and makes the edge perfectly perpendicular to the face, but only on one side of the board.
The process is simple: the board starts on the infeed table, passes over the cutter head, and lands on the outfeed table, which is set just slightly higher to match the amount of material being removed.
Once the face is flattened, you can square an adjacent edge. To get a straight edge that’s perfectly perpendicular to the face, place the newly flattened side against the jointer’s fence. The fence keeps the board aligned as you guide it past the cutter head.
You can flatten the opposite face and square the second edge on a jointer, but this is where the tool starts to show its limits. A jointer can’t control the finished thickness of a board, so there’s no way to make several boards match. And it can’t guarantee that your second face or second edge will be perfectly parallel to the first one.
That’s where other tools come in. To get a second face that’s flat and parallel, you’ll want a planer. And to get the opposite edge straight and parallel, you’ll use a table saw.
Related: 21 Table Saw Safety Rules (& Mistakes to Avoid)
For the opposite face, place the flattened face down on the planer bed and run it through the cutter head. This gives you two faces that are both flat and parallel.
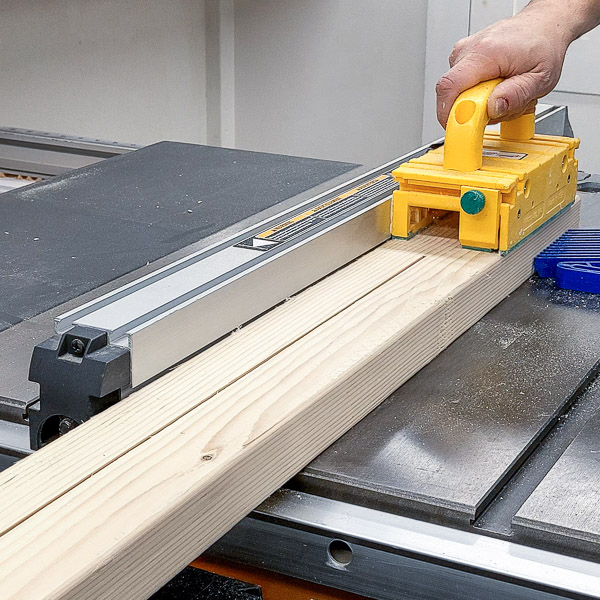
For the opposite edge, put the board on the table saw with the flat face against the table and the squared edge against the fence. Sending it through the blade gives you two edges that are straight and parallel.
Why is it Important to Flatten Faces and Square Edges?
If you want tight-fitting joints and projects that look clean and professional, you need boards with flat faces and square edges.
Flat, square lumber is just easier to work with. Whether you’re making a simple butt joint or gluing up boards into a bigger panel, everything goes together more smoothly. And when you’re building panels, tabletops, desks, or shelves, having straight, square edges ensures there are no gaps between the boards.
Parts of a Jointer
The five main parts of a jointer are the infeed table, outfeed table, blade guard, cutter head, and fence.
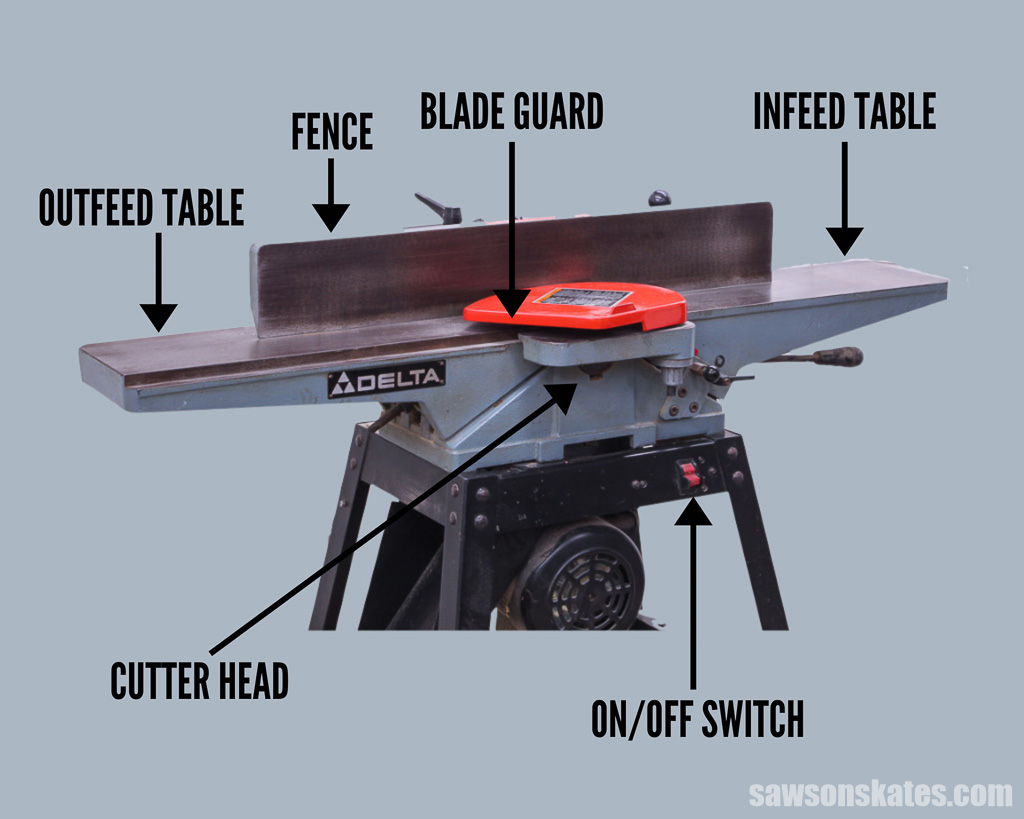
Infeed Table
A jointer has two adjustable tables — the infeed table and the outfeed table. Together, they make up the jointer’s bed. The infeed table is where you place the board before pushing it across the cutter head and onto the outfeed table. You can raise or lower the infeed table to control how much material gets removed.
Raising the infeed table exposes less of the cutter head, so the jointer takes a lighter cut. Lowering it exposes more of the blades, which increases how much material is removed with each pass.
How you set the infeed table depends on how aggressive you want the cut to be. As a general guideline, remove no more than 1/8″ per pass when working with softwood, and no more than 1/16″ per pass when jointing hardwood.
Outfeed Table
The outfeed table is the second half of a jointer’s bed. When it’s set correctly, the surface of the outfeed table is perfectly flush with the tips of the jointer’s knives at their highest point of rotation, known as top dead center (TDC).
Once the board passes over the cutter head, the outfeed table supports it at the exact height it was just cut.
It’s important that the infeed and outfeed tables stay perfectly parallel to each other across their full length and width. If they’re out of alignment, the jointer won’t produce flat surfaces.
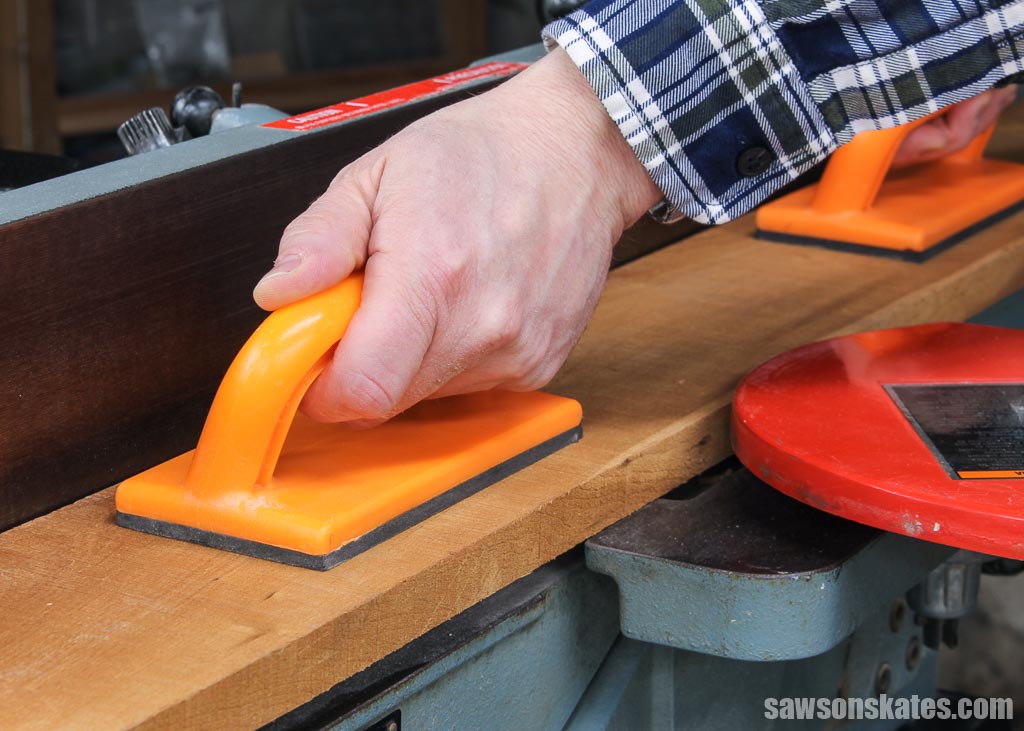
Blade Guard
The blade guard is a spring-loaded, pivoting cover that sits over the cutter head, keeping your hands away from the spinning knives.
As you push a board across the jointer, the guard swings out of the way, then automatically snaps back into place once the board passes the cutter.
Cutter Head
The cutter head is a rotating drum located right under the blade guard. It usually holds two or three sharp knives and spins at around 5,000 to 6,000 RPM.
This is the heart of the jointer — it’s the part that actually does the cutting and removes the material from the board.
Adjustable Fence
A jointer’s fence tilts and is usually set at 90° to the tables for squaring an edge to a flattened face. But you can also tilt it to other angles to cut a bevel or chamfer along a board’s edge.
Fence Tilt Handle
The tilt handle lets you adjust the angle of the fence and lock it in place.
On/Off Switch
This one’s pretty straightforward. The switch turns the jointer on and off.
Dust Port
The dust port is where the wood chips exit the jointer. And jointers make a lot of chips — it can get messy fast. To keep things under control, the port is usually hooked up to a ShopVac or a dust collection system that pulls the waste away.
Some jointers don’t come with a dust port, so you may need to buy one separately if yours doesn’t.
Types of Jointers
The two common types of jointers are benchtop and cabinet-style.
Benchtop Jointer
If you’re a DIYer, a benchtop jointer is usually the go-to. It fits on a workbench, doesn’t weigh a ton, and you can actually move it around without throwing out your back. It’s a good option if you don’t need the power, capacity, or price tag of a bigger cabinet-style machine.
Cabinet-Style Jointer
A cabinet-style jointer — sometimes called a floor-standing jointer — is the choice for serious or high-volume woodworkers. These machines are bigger, heavier, and more powerful, and they can handle wider boards than a benchtop model.
Jointer Pros and Cons
Pros
- Quickly flattens faces and squares edges
- Much faster and easier than doing the same work with a hand plane
- Fixes common defects like cupping, bowing, warping, or twisting
- The fence can be tilted to create square edges, bevels, or chamfers
Cons
- Can’t control or set the final thickness of a board
- Can’t make the second face or edge parallel to the first
- You’ll still need other tools (like a planer or table saw) to finish milling a board and square the opposite edge
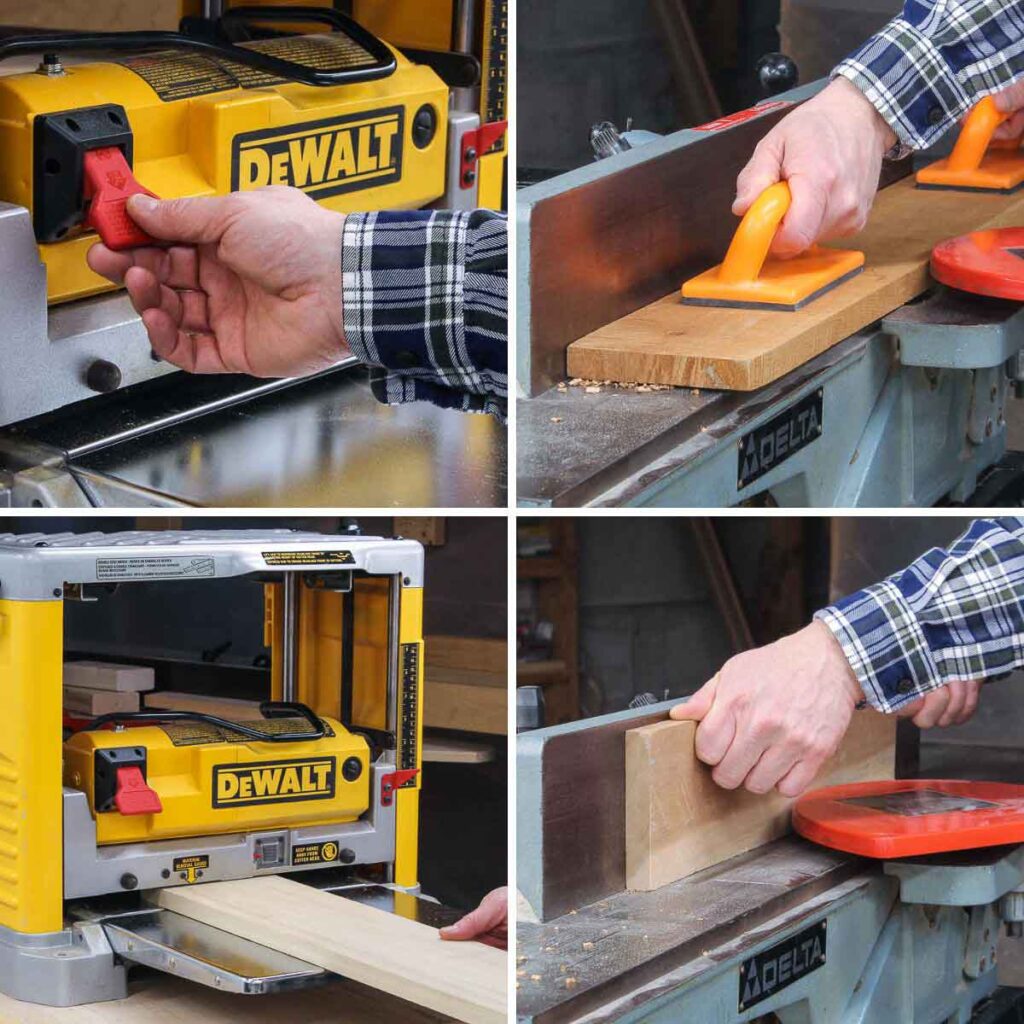
How to Use a Jointer
Here’s a helpful video that shows how to use a jointer.
What is a Planer?
A thickness planer — sometimes called a thicknesser or just a planer — is a woodworking machine that smooths boards and brings them down to a consistent thickness. In simple terms, a planer’s job is to make thick boards thinner.
A planer works a lot like a hand plane — both smooth the surface of a board — but there are a few big differences. A hand plane is a manual tool, while a planer is a power tool that does the work for you.
A planer has a flat bed with the cutter head mounted above it. Rollers pull the board through the machine and under the cutter head, shaving off a thin layer as it passes through.
Planers also have built-in settings that let you dial in a consistent thickness across the entire board. You can achieve that with a hand plane, but it takes a lot more time, effort, and skill.
What Does a Planer Do?
A thickness planer is used to:
- Smooth rough lumber
- Make a board’s second face parallel to the first
- Bring boards down to a precise, consistent thickness
After flattening one face on the jointer, the planer takes over and smooths the opposite face so the two faces end up flat and parallel.
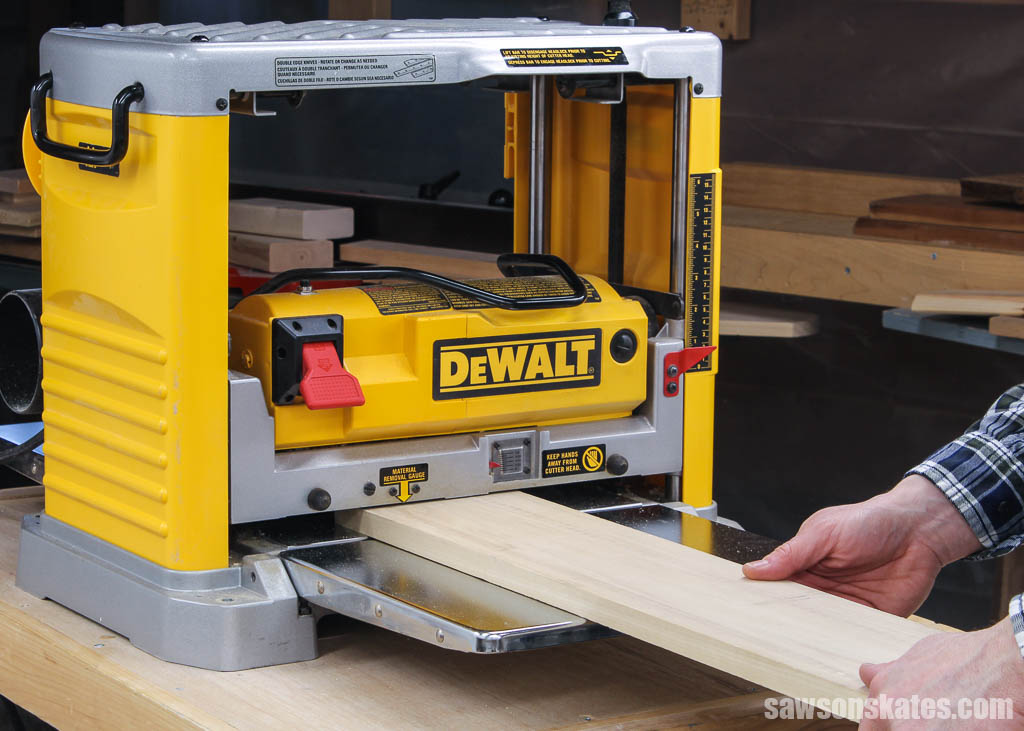
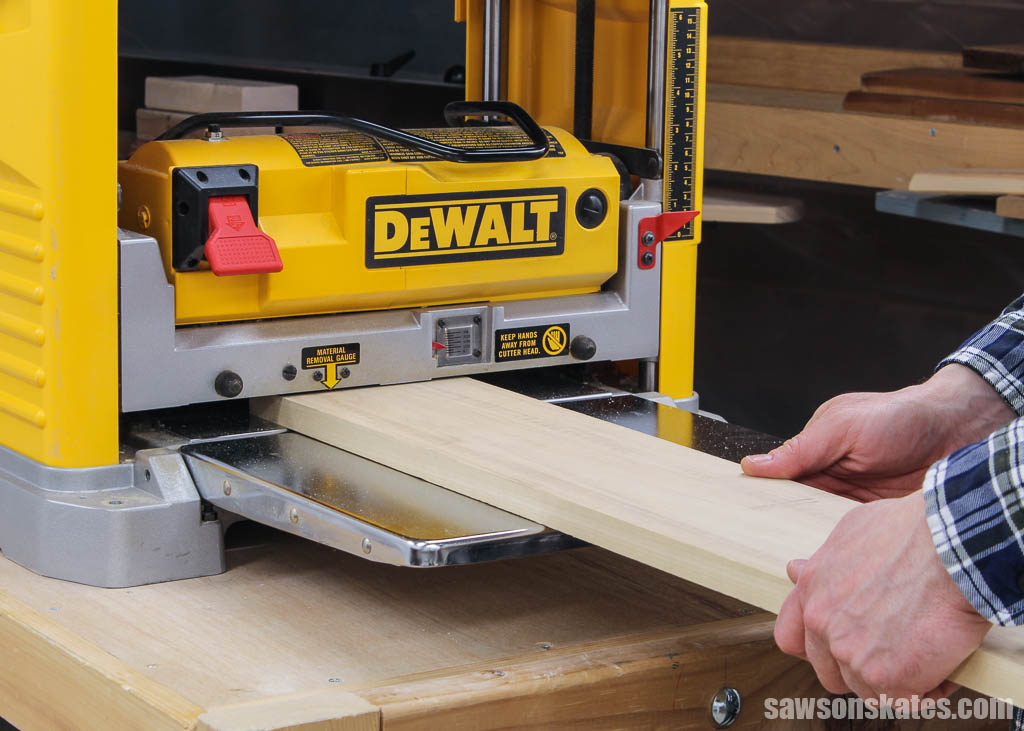
To use it, place the flattened face down on the planer’s infeed table. Rollers pull the board through the machine at a steady speed, feeding it under the cutter head.
The cutter head spans the full width of the machine and holds a series of sharp, straight blades. As the board passes underneath, the blades shave off a thin layer of wood, creating a smooth surface and a uniform thickness parallel to the opposing face.
You can raise or lower the cutter head to control how much material the planer removes with each pass.
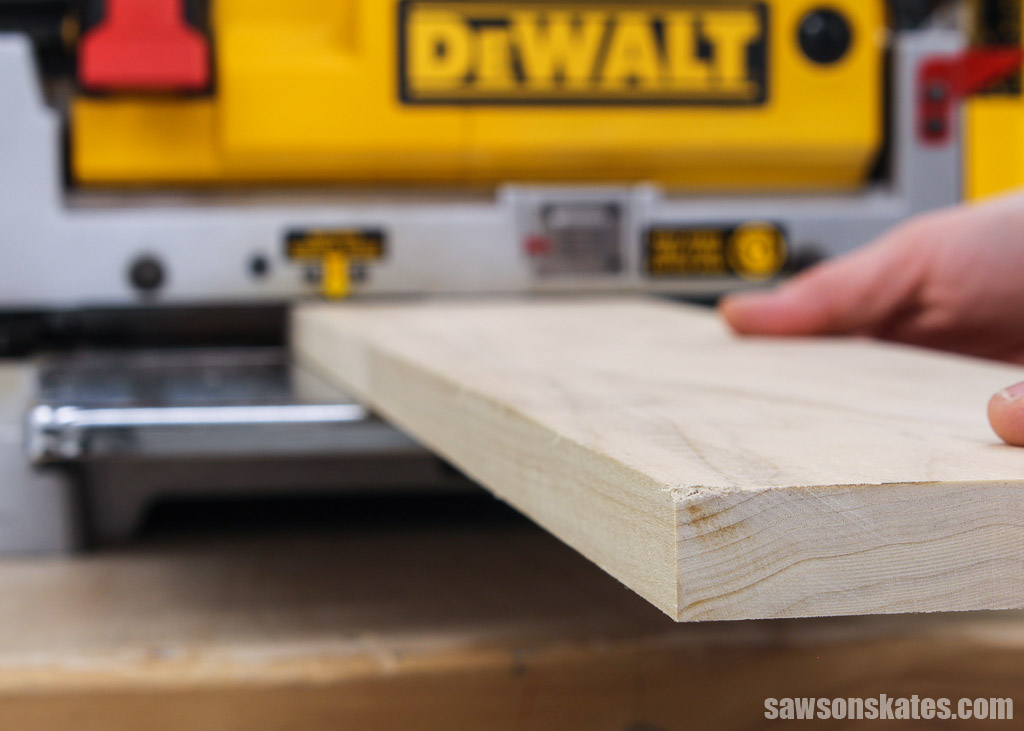
Once a board has two flat, parallel faces, you can use the planer to bring it down to the exact thickness you need for your project. For example, if you have a 1/2″ board but need it closer to 3/8″, you can take off small amounts with each pass until it reaches the right thickness.
And once you’ve dialed in your thickness setting, you can run multiple boards through the planer to mill them all to the same size.
Planers are incredibly useful, but they do have limits. Because the rollers press down on the board as they feed it through, a planer can’t fix defects like warp, cup, bow, or twist. In other words, you’ll still need a jointer to flatten a board before running it through the planer.
Parts of a Planer

Depth Adjustment
The depth adjustment knob raises or lowers the cutter head. The lower you set it, the more material the planer removes with each pass.
Infeed Table
The infeed table is the flat surface where you place the board before it enters the planer. It should sit level with the outfeed table so the board feeds smoothly and evenly through the machine.
Outfeed Table
The outfeed table, which is set level with the infeed table, sits at the end of the planer and supports the board as it exits the machine.
Cutter Head
The cutter head sits above the infeed and outfeed tables and spans the full width of the planer. It holds a series of straight blades that shave off thin layers of wood to create a smooth surface with a consistent thickness.
Depth of Cut Gauge
The depth of cut gauge tells you how much material the planer will remove with each pass. It’s located on top of the cutter head and makes it easy to dial in the exact cut you want.
Dust Collection Port
The dust collection port lets you connect the planer to a ShopVac or dust collector so the shavings get pulled away instead of piling up on the floor.
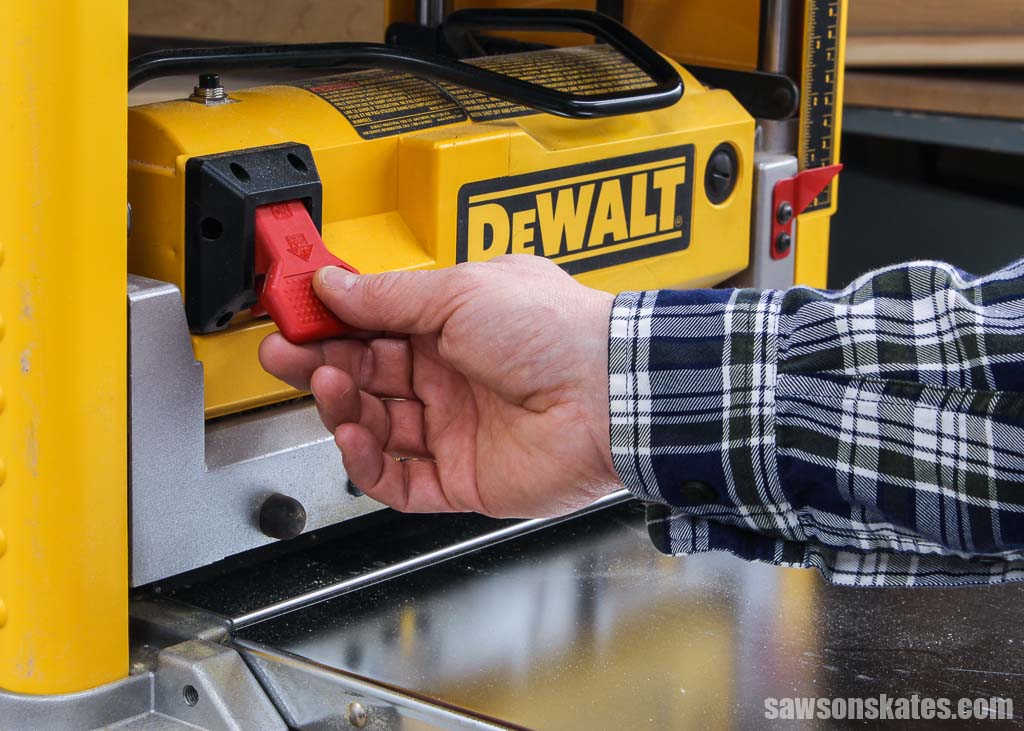
On/Off Switch
The on/off switch is exactly what it sounds like — it turns the planer on and off.
Types of Planers
Benchtop and floor-model planers are the two most common types you’ll see in a workshop. There are also small, handheld electric planers for jobs where a full-sized machine won’t work.
Benchtop Planer
Benchtop planers are a popular choice for DIYers because they’re affordable, compact, and easy to move around. They fit on a workbench and don’t take up much storage space. They’re a great option if you don’t need the extra power or capacity of a larger floor-model machine.
Floor Model Planer
Floor-model planers are built for heavier use. They’re larger, stationary machines with more power and the ability to handle wider boards than benchtop models. These are typically chosen by serious woodworkers or anyone who mills a lot of lumber.
Electric Handheld Planer
Handheld planers come in handy when you can’t run a board through a stationary planer — maybe the piece is too big, too heavy, or awkwardly shaped. They’re useful for smoothing boards and removing material, but they can’t produce a perfectly uniform thickness the way a benchtop or floor-model planer can.
Planer Pros and Cons
Pros
- Smooths and removes blemishes from the surface of boards
- Makes the second face flat and parallel to the first
- Brings boards down to a consistent, uniform thickness
Cons
- Can’t correct defects such as warped, cupped, bowed, or twisted boards
- Can’t square the edges of lumber
How to Use a Planer
Here’s a helpful video that shows how to use a planer.
Main Differences Between Jointer vs Planer
Jointers and planers both smooth and flatten wood, but they’re built to handle different steps in the milling process.
A quick physical difference you’ll notice:
- A jointer’s cutter head sits below the board, and you slide the wood across it.
- A planer’s cutter head sits above the board, and the machine feeds the wood through.
Functionally, the biggest difference is this:
- A jointer makes one face flat.
- A planer makes the opposite face flat and parallel to the first.
Even though they do different jobs, the two tools work hand in hand. In most real-world situations, you’ll use both.
Take rough-cut lumber as an example. You’d start by using the jointer to flatten one face. Then you’d run the board through the planer to flatten the opposite face and bring it to a consistent thickness.
Another key difference is that a jointer can square boards by making the face and an adjacent edge perfectly perpendicular to each other. A planer can’t do that — it only works on faces, not edges.
A planer can bring boards to an exact, uniform thickness. A jointer can’t.
And when it comes to correcting defects like cup, bow, warp, or twist, only the jointer can fix those. A planer won’t remove those imperfections; it will simply make the defects a uniform thickness.
That said, there are workarounds. With the help jigs, you can use a planer to flatten and square boards. I walk through those options in my post: How to Use a Planer Like a Jointer. (LINK)
So as you can see, neither tool does everything. That’s why many woodworkers eventually keep both in their shop — they complement each other, and each solves a different part of the milling puzzle.
Why a Planer Is the Better First Tool for Most Woodworkers
For most of us, buying both a jointer and a planer at the same time isn’t realistic. These machines aren’t cheap, so you want to choose the one that gives you the most capability right away.
In my opinion, that tool is the thickness planer.
When I started woodworking, I bought a planer years before I bought a jointer, and I never regretted it. A planer lets you do more. You can buy dimensional lumber from a home center or a lumberyard and mill it to whatever thickness you need. That alone opens the door to dozens of projects.
A jointer is excellent for flattening one face and squaring an edge, but it stops there. It can’t make the opposite face parallel, control thickness, or mill a stack of boards to match.
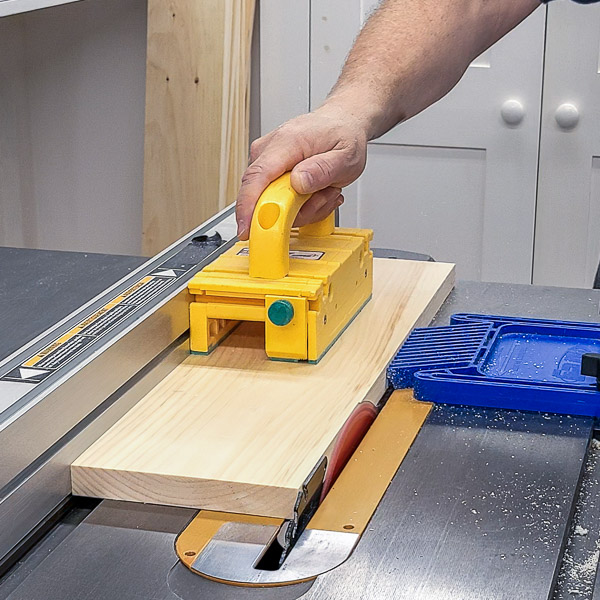
A planer, on the other hand, gives you far more flexibility. Even if you occasionally need to flatten a rough board, you can use simple jigs—like a router sled or a planing sled—to mimic the work of a jointer until you decide to buy one. These methods aren’t as fast as using a jointer, but they work, and they cost far less.
That’s why I recommend investing in a planer first. It gives you the most capability for your money and will carry you through most projects until you’re ready to add a jointer to your shop.
If you’re starting with a planer, I made a separate post that walks you through using it for jointer-type jobs, with videos that show how each one works.
👉 How to Use a Planer Like a Jointer
Final Thoughts
Choosing between a jointer and a planer doesn’t have to be complicated. If you’re working in a small shop, on a budget, or you’re just getting started, a planer will give you far more capability right away. It opens the door to better-fitting parts, consistent thickness, and cleaner builds — even without a jointer.
A jointer is still a useful tool, but it’s not urgent. Start with the planer, learn its strengths, and add a jointer later if your projects call for it.
Thank you for stopping by. If you enjoyed this tutorial, would you please take a moment and pin it to Pinterest? I’d really appreciate it!

Pin This For Later

Hi there – I’m Scott, a woodworking enthusiast and creator of Saws on Skates, a site I started in 2015 to share easy-to-follow tutorials, space-saving shop tips, and project inspiration for DIYers at any skill level. Learn more about my woodworking journey here.
This is exactly the information I have been looking for! Answered so many questions for me! Thank YOU! Wish I could be your apprentice!
You’re welcome, Sheryl. Thank you for the compliments. I’m glad it was helpful for you.
If you do a lot of projects using pallet boards, you’re going to need a planer and a jointer. Pallet wood is wonderful since it’s free and usually a hardwood. But 90% if it is rough cut. Some of it VERY rough cut.
Hey Scott,
As an English major I can say that your explanations are beautifully done, accurate, and very concise and complete!!! Well Done!!!! I appreciate the videos you selected too. They did a fine job of explaining how these two machines are used. This has to be one of the best treatments on this topic, and that is saying a lot!!
Thank you so much for the compliments! You made my day!!!