How to Spray Paint Indoors (Without Making a Mess)
Have you ever wanted to spray paint furniture in your house, apartment or basement but were afraid of making a big mess? What if I told you that you could use your HVLP sprayer indoors without getting paint everywhere? You would think I was crazy, right? Well, you can. Using a paint sprayer indoors is possible, and you can do it without making a mess. I’ll show you how!

This article contains affiliate links. If you purchase from these links, I may earn a small commission at no additional cost to you. Visit my site policies for more information.
I’m in the homestretch of building tool storage cabinets for my small workshop, including Shaker cabinet doors to match the others in my space. All that was left was to paint the cabinets and get them mounted on the wall.
Priming and painting three cabinets and six doors with a brush would have taken ages, so I wanted to spray them with my paint sprayer instead. Painting projects with a paint sprayer is quick and easy. Plus, there are no brush marks, so the paint has a smooth, factory-like finish.
What to Do When You Can’t Spray Paint Outside
I prefer to spray paint my furniture and DIY projects outside, but when my shop cabinets were ready for paint, it was about 20 degrees, and my yard was covered in snow. I needed to get these cabinets installed so I could start organizing my workshop, which meant I would have to spray them indoors.
Warmer weather doesn’t always mean you can paint outside either. Rain and wind can ruin a project pretty quickly.
Sometimes, you just need to get the job done, so you have to use your paint sprayer indoors. But there are several things you need to think about when you spray inside, and one is overspray.
Understanding Paint Overspray: What It Is and How to Control It
When using your paint sprayer, there will always be some overspray, which is paint that sprays beyond your project and lands on nearby surfaces. It can be messy and, in some cases, difficult to remove.
Overspray is something you need to consider whether you’re using your paint sprayer outdoors or indoors. If you’re spraying outside, it can land on houses, cars, and other surfaces. And it can drift pretty far if there’s even a slight breeze. If spraying inside, it can settle on walls, floors, furniture, and anything else in the area.
Unfortunately, overspray is an unavoidable part of using a paint sprayer, but I’ve found ways to control it. Choosing the right sprayer, correctly adjusting its settings, following the proper techniques, and containing the spray area all make a big difference. I’ll go over these strategies in more detail later so you can get a professional finish without worrying about the paint ending up where it shouldn’t.
Choosing the right type of paint to prevent a fire is even more important than controlling overspray, which I will cover next.
What You Need to Know About Paint Types, Safety, and Ventilation
One of the questions I’ve been asked over the years is, “Can I spray paint in my house, basement, apartment, or garage?”
Yes, you can use a paint sprayer indoors, but choosing the right type of paint and taking proper safety precautions are essential. Before spraying in your house, basement, apartment, or garage, here’s what you need to consider.
Water-Based vs. Oil-Based Paints
The type of paint you use indoors makes a big difference in safety:
- Water-Based Paints (Latex or Acrylic) – These are the best choice for indoor spraying. They have low fumes, clean up easily with water, and are non-flammable.
- Oil-Based Paints – While these coatings are more durable, they release strong fumes and are highly flammable, making them a poor choice for indoor use.
Fire Safety First
I do not recommend using oil-based paint indoors. The fumes are strong and flammable, creating a serious fire hazard. The vapors can ignite if exposed to an open flame, pilot light, furnace, water heater, or even a tiny spark.
If you need a more durable finish, look for water-based alternatives like urethane enamel or specialty interior coatings that offer similar durability without the fire risk.
Ventilation is Key
Even spraying water-based paints indoors requires proper airflow to reduce fumes and airborne paint particles. Open windows and doors, set up a box fan to direct fumes outside, and always wear a mask or respirator rated for paint fumes to protect your lungs.
Choosing the Right Paint Sprayer
The type of paint sprayer you use can make a huge difference, especially when spraying indoors. My go-to is an HVLP sprayer.
HVLP stands for High Volume, Low Pressure, meaning it uses a lot of air to spray paint at a lower pressure. This creates a fine paint mist, giving me more control and reducing overspray compared to other sprayers. I love using it for furniture, cabinets, and other detailed projects because it lays down a smooth, even finish without wasting a ton of paint.
Other sprayers, such as airless and pneumatic, are not as ideal for indoor projects because they create a lot more overspray, resulting in a bigger mess.
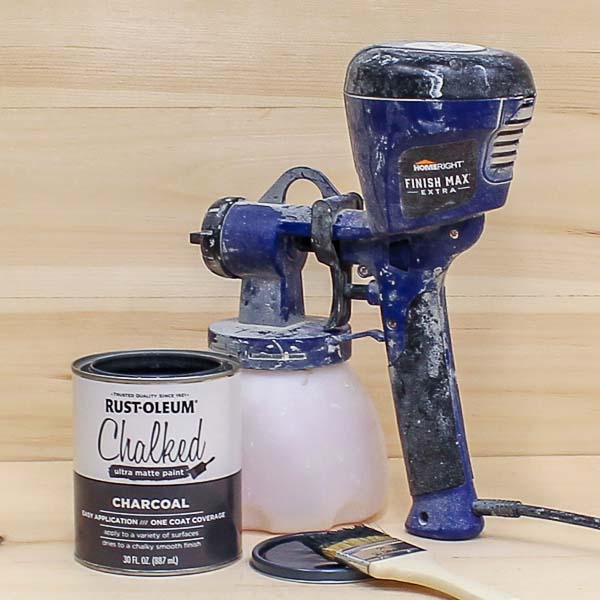
I always reach for my HVLP HomeRight Super Finish Max sprayer. It’s easy to use and clean, and gives me a professional-looking finish without worrying about overspray getting everywhere. Plus, it’s been a huge timesaver for me.
How to Spray Paint Indoors Without it Getting Everywhere
- Choose a Water-Based Paint
- Choose Your Location
- Adjust Your Sprayer to Reduce Overspray
- Prevent Paint from Getting Everywhere with a Spray Shelter
- Protect Floors and Surrounding Objects with Drop Cloths
- Use a Paint Turntable
Before You Begin
As I mentioned earlier, choosing the right type of paint is as important as using the proper spraying techniques. Some paints aren’t suited for indoor use and can cause serious health and fire risks. Before you start spraying, let’s go over which paints work best indoors and which ones to avoid.
Best Paints for Indoor Spraying
I always stick with water-based paints like latex or acrylic for indoor spraying. They have fewer fumes, dry quickly, and clean up easily with soap and water. If I need something more durable, I go for a water-based urethane enamel, which gives a harder finish without the strong fumes and flammability of traditional oil-based paints.
Paints to Avoid
I never recommend spraying oil-based paints, stains, lacquers, or shellac-based primers indoors. Oil-based products contain flammable solvents, which can be a fire hazard anywhere near open flames, pilot lights, or anything that sparks. These are best saved for the outdoors.
Protect Your Lungs
Spraying paint releases fine particles that can irritate your lungs, cause headaches, or more serious health issues. Even with water-based paint, I always wear a mask or respirator rated for paint fumes, keeping my lungs safe while I work. It’s a simple step that makes a big difference.
Now that you know which paints to use (and which to skip), let’s go over how to set up your space.
Step 1. Where Should I Spray Paint Indoors?
The first thing you’ll need to do is choose where you’re going to spray paint. You’ll need a spot large enough to lay out the pieces you’ll be spraying. It’s always a good idea to choose a well-ventilated area with plenty of airflow where you can open windows and doors to create cross-ventilation. Setting up a fan in a window or doorway helps push fumes outside.
For me, that location is my small workshop. Let me show you how I transform my small, mobile workshop into a place where I can spray paint furniture and DIY projects. I’m hoping it will inspire you to think of a location where you can use a sprayer at your place.
Related: My 12×13 Small Woodshop Layout
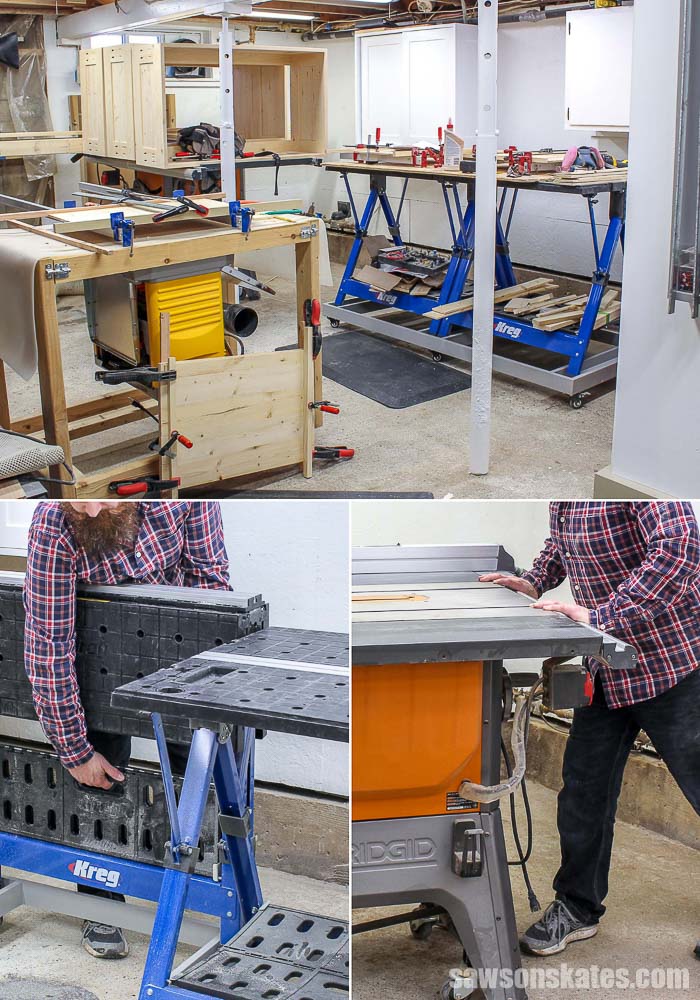
The first thing I do when I need to use my sprayer indoors is clear some floor space. I start by folding and removing my workbench. Then, I roll my table saw out of the way. This leaves me with plenty of floor space to set up for spraying my projects.
Related: How to Make a Folding Workbench
Every time I show this setup, I get tons of questions about it. This workbench is the Kreg Mobile Project Center, and it’s amazing. Unfortunately, Kreg has discontinued it, which is a real shame because it’s such a versatile piece.
Step 2. Adjust Your Sprayer to Reduce Overspray
My go-to paint sprayer is my HVLP HomeRight Super Finish Max. It’s easy to use, easy to clean and always gives me a professional-looking finish.
For expert advice about spraying indoors with the Super Finish Max, I turned to my friends Laura and Makayla at HomeRight.
Makayla’s biggest suggestion is to “dial in your paint sprayer.” She said this will “help reduce overspray and ensure you aren’t outputting too much paint.” She went on to say, “The Super Finish Max doesn’t produce a lot of overspray, to begin with, unlike other sprayers, which might leave you with a big mess.”
A while back, Laura and Makayla also gave me some great tips on avoiding an orange peel texture when using a paint sprayer. Orange peel is the bumpy texture that can sometimes appear on the surface of your projects when using a sprayer. Outputting too much paint can cause overspray and create an orange peel texture.
Related: 7 Ways to Prevent Orange Peel Texture
💡 TIP: To avoid applying too much paint Makayla says “A quick adjustment of the volume control knob will work wonders!”
How can you tell if you’re applying too much paint? Check out 7 Ways to Prevent Orange Peel Texture, where I’ll walk you through how much paint to apply and how to adjust your sprayer for the perfect finish.
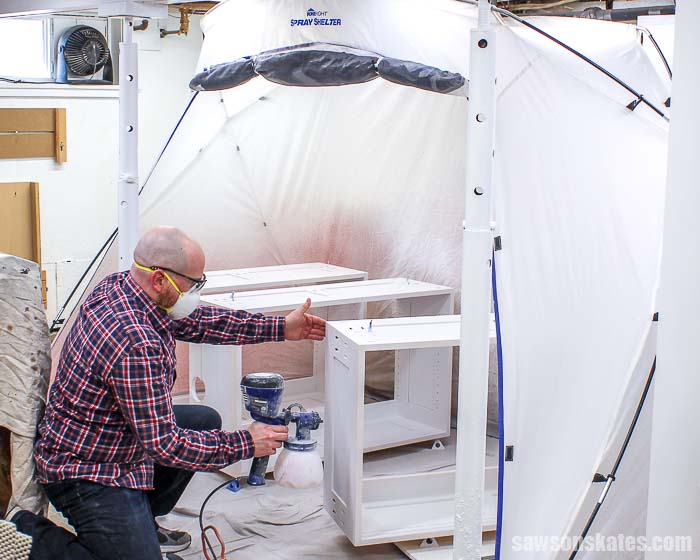
Step 3. Use a Spray Shelter to Avoid a Big Mess
One of the best ways to control overspray and keep your workspace clean is using a paint overspray shield or spray shelter. A spray shelter allows you to paint year-round, no matter the weather, and lets you spray indoors without worrying about paint ending up everywhere.
When the weather’s nice, I’ll also use my spray shelter outside. It keeps overspray from drifting onto houses or cars and helps prevent dust and debris from landing on my project while it dries, giving me a smoother finish.
If you’ve ever set up a dome tent while camping, putting together a spray shelter will feel familiar. It has two shock-corded poles that clip onto it, making assembly quick and easy. Just lay the shelter flat, insert the poles, and it pops up, giving you an instant barrier to keep paint off your walls and surroundings.
Spray shelters come in different sizes depending on the project. When I sprayed my workshop cabinets, I used a large spray shelter, and the medium spray shelter was the perfect fit for spraying Shaker cabinet doors. Having the right size makes a huge difference in keeping my workspace clean and overspray under control.
Step 4. Drop Cloths Protect From Overspray
A tarp or drop cloth is essential for protecting your floors from overspray. I used a plastic tarp in the past, but after a few paint projects, I found it more frustrating than helpful. Every time I folded it for storage, the dried paint would chip off. Then, when I used it again, the air from the sprayer would kick up those flakes, blowing them right onto my project. Definitely not ideal.
That’s why I switched to a canvas drop cloth and haven’t looked back. Unlike plastic, paint doesn’t chip off the canvas, and the best part is I can toss it in the washing machine when it gets too messy. (I can’t be the only one who washes their drop cloths, right?!)
I also use canvas drop cloths to cover any objects in front of my spray shelter. Sometimes, a project is too big to reposition, and I have to aim the sprayer toward the front of the shelter, which means some overspray will escape. Draping a drop cloth over anything in the danger zone keeps it protected and saves me from unwanted cleanup later.
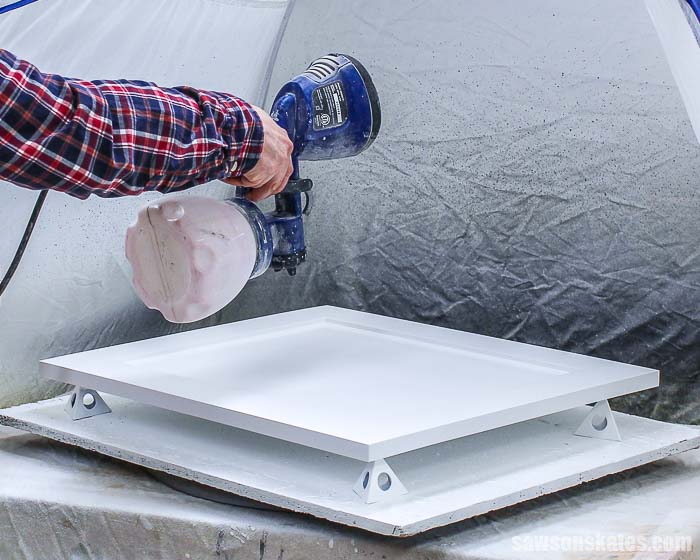
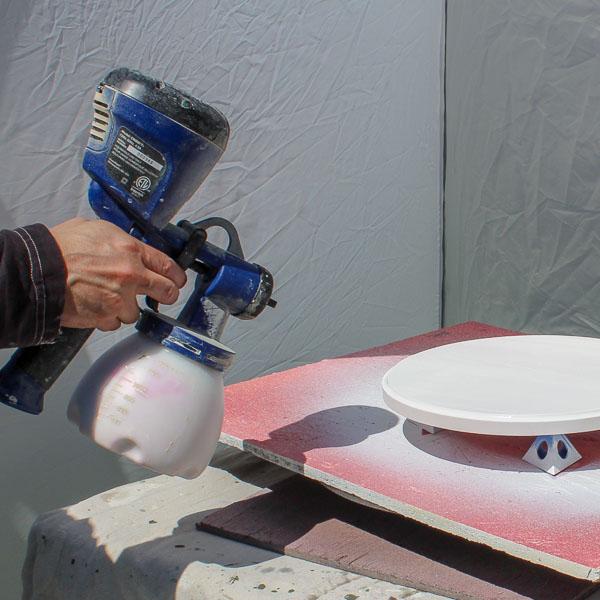
Step 5. Use a Paint Turntable
A paint turntable works like a Lazy Susan for your projects, letting you spin them to reach all sides with your sprayer. It also helps keep overspray contained by allowing you to continuously aim your sprayer into the shelter, preventing paint from getting on surrounding objects.
Related: How to Make a Spray Paint Turntable
How to Get a Smooth as Glass Paint Finish
We all want our spray painted furniture and DIY projects to be as smooth as glass right?! Check out 7 Ways to Prevent an Orange Peel for simple tips to get a smooth paint finish.
Final Thoughts
Spraying paint indoors doesn’t have to be messy if you take the proper steps. Start by choosing a well-ventilated space with windows, doors, and a fan to keep air moving. Use the right sprayer, HVLP sprayers are the best choice for indoor projects since they offer more control and less overspray. Stick with water-based paints, as oil-based ones are fire hazards.
Proper sprayer adjustment is key to avoiding overspray and getting a smooth finish. A spray shelter helps contain paint mist, while drop cloths protect floors and nearby objects. A paint turntable makes it easy to rotate your project so you’re always spraying into the shelter.
With the right setup, you can get a clean, professional finish indoors without messing up your workspace.
Thank you for stopping by. If you found this information helpful, would you please pin it to Pinterest? Other DIYers would appreciate it and I would too! Thank you – Scott
Recommended For You

Pin This For Later

Hi there – I’m Scott, a woodworking enthusiast and creator of Saws on Skates, a site I started in 2015 to share easy-to-follow tutorials, space-saving shop tips, and project inspiration for DIYers at any skill level. Learn more about my woodworking journey here.
Very awesome videos. I am planning to make cabinets for my kitchen and your videos have inspired me to proceed with my plans – which i was having second thoughts about when first researching how-to videos.
Yours are easy to follow and detailed step by step without leaving the viewer with any guess work. Great job and thanks!
I have signed up to your emails and look forward to receiving them as they are all great information, right to my inbox!
Hi Paul – Thank you for stopping by and for the compliments. Good luck with your kitchen cabinets!