Rustic DIY Christmas Village – Half-Hour Holiday Challenge
This rustic DIY Christmas Village was made with scrap wood and finished with chalk paint. It’s an easy project that only takes about 30 minutes to make.

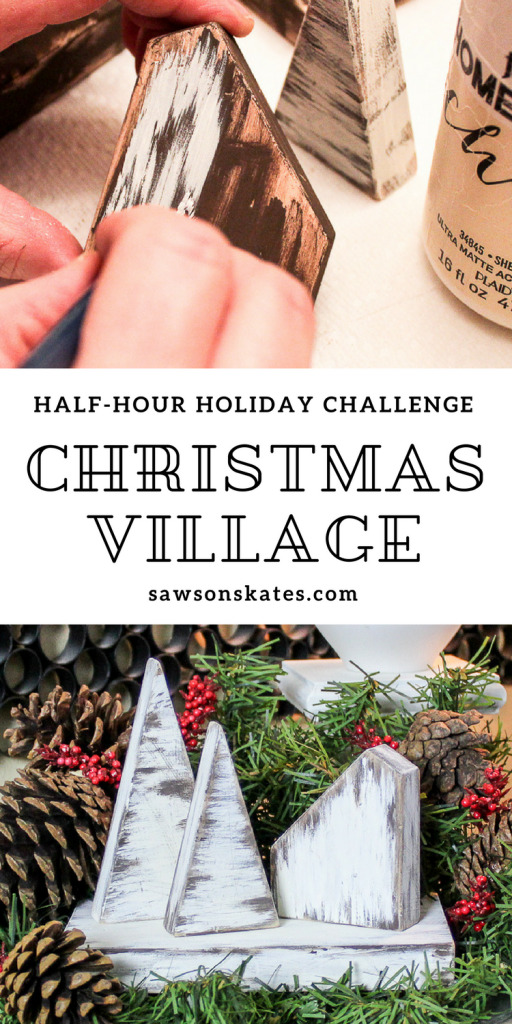
Can you believe this DIY Christmas Village was made with scrap wood? It’s true! Not only that, but it only takes about a half-hour to make!
Dinners with family, parties with friends, kid’s plays, and lots of gifts to buy. We’re approaching the busiest time of the year, right? Who has time to DIY? YOU DO! I’ve teamed up with some of the best DIYers around and we’re challenging ourselves to bring you creative seasonal DIYs that won’t break the bank and will only take 30 minutes or less to make! It’s our first-ever Half-Hour Holiday Challenge!
You might remember a few months ago I attended the Haven Conference. The conference is geared towards DIY bloggers to help us create and develop amazing projects for you. I got the chance to interact with some amazing DIY brands and to check out their latest offerings. One of the companies I met with was HomeRight the maker of the paint sprayer and spray shelter I use to finish my DIY furniture projects. Did you have a chance to check out my 9 Paint Sprayer Mistakes You Don’t Want to Make post?
I also met some amazing DIY bloggers. For this challenge, I teamed up with my friends Shelly at 100Things2Do.ca, Morgan and Sean at Charleston Crafted, Sheri at Hazel + Gold Designs, Vicki and Steph at Mother Daughter Projects, and Ashley at Handmade with Ashley. If you aren’t familiar with them I would encourage you to go check them out and see what they’re DIYing.

Were you following the Half-Hour Holiday Challenge excitement on Instagram? We encouraged you to share some pics of your own quick holiday DIYs using the hashtag #halfhourholiday. We also shared sneak peeks of our projects over the last week and now we’re sharing our final projects!
My DIY Christmas Village was made entirely with scrap wood and was inspired by my West Elm Inspired Stocking Holders. For this project, I only used the “saltbox” house, but you could actually use any or all of the buildings to make a larger village. Are you a fan of vintage Christmas decor like me? Then while you’re here be sure to check out my easy to make wood rosette ornaments inspired by vintage glass Christmas ornaments.
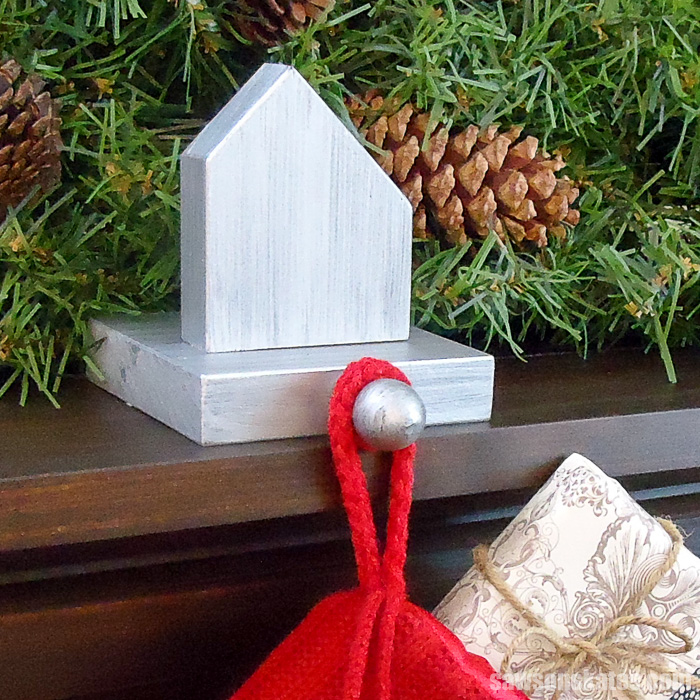
Similar to my chippy paint technique I used chalk paint for the DIY Christmas Village. Chalk paint is perfect for this project because it dries so quickly. But unlike my chippy paint technique, I skipped the petroleum jelly step to save a little time. The best part is you can finish these any way you want. Maybe you’ll want to paint them metallic like my stocking holders. Maybe you’ll want to paint them solid white. Want to make this project even quicker? Then just leave them raw!

Because this project is sooo easy to create it would make a great last-minute gift idea for family, friends, co-workers, neighbors and more. Save even more time by making a big batch of them all at once. Need some gift ideas for the DIYer in your life then don’t miss my Gifts DIYers Actually Want post!
OK, ask Alexa to set a stopwatch were going to have a DIY Christmas Village in about 30 minutes!
Rustic DIY Christmas Village
Supplies
1×3 and 1×4 pieces of scrap wood (or new)
Chalk paint
Artist paint brush
120 grit sandpaper
Tools
Hand saw and miter box or miter saw
Hammer
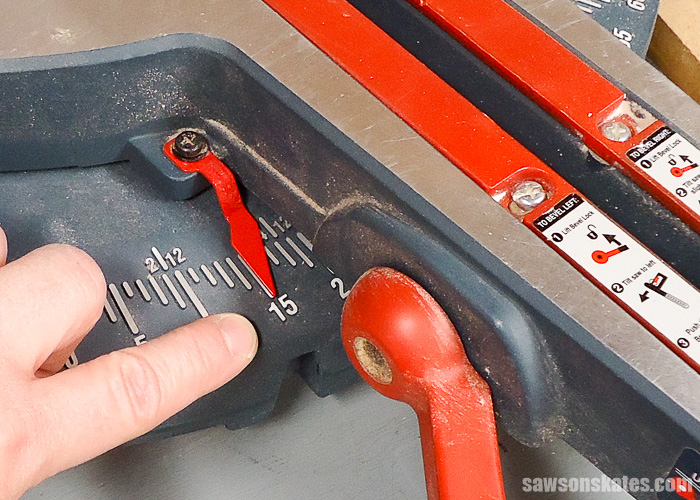
Step 1. Cut the House, Trees, and Base. NOTE: Don’t rush this step. These parts are really small. Please use caution and work safely when cutting. To reduce the risk of injury use long pieces of scrap wood. The base is a 1×4 cut to 6-1/2″. The trees are made from scrap pieces of 1×3 and 1×4. To cut the trees, first set your miter saw to 15 degrees.
Then make a cut.
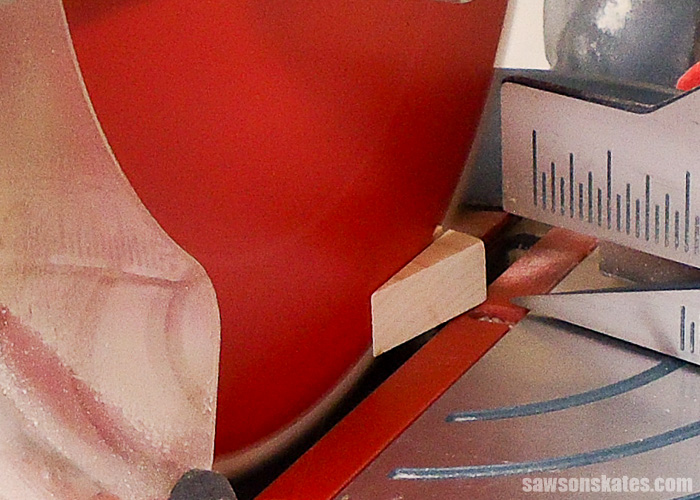
Flip the board front to back.
Then make the second cut.
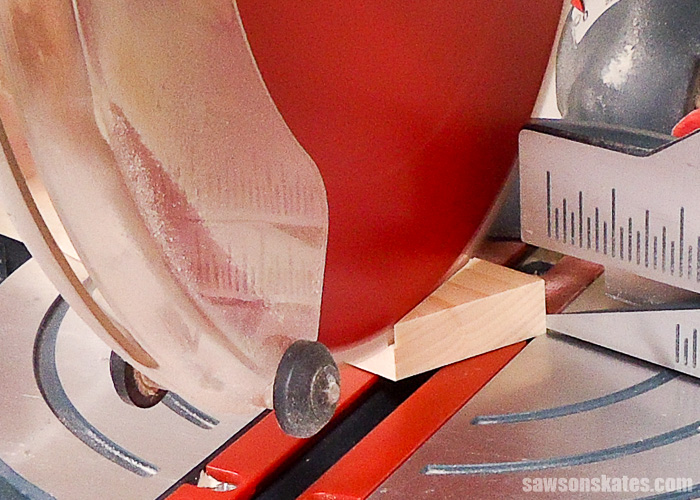
This will form the tree.
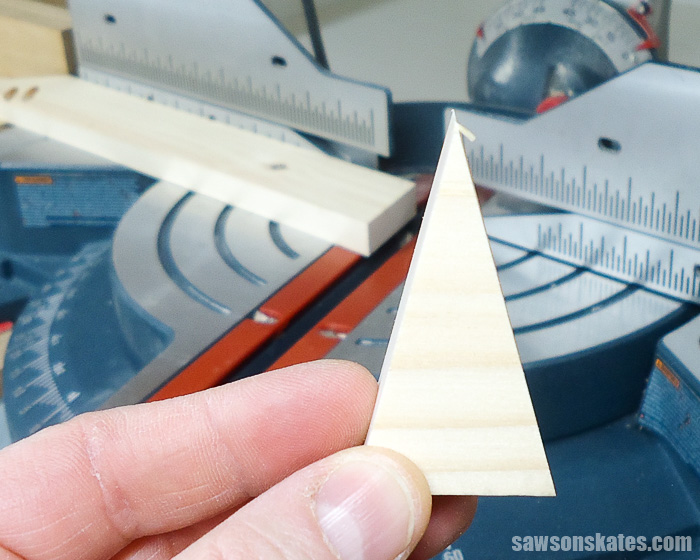
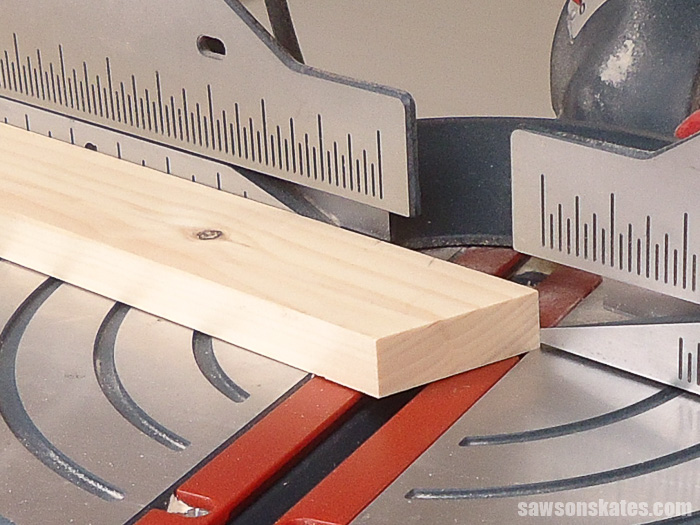
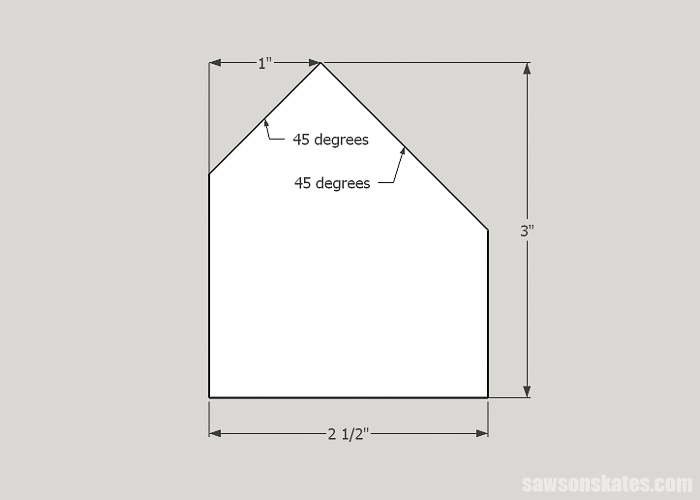
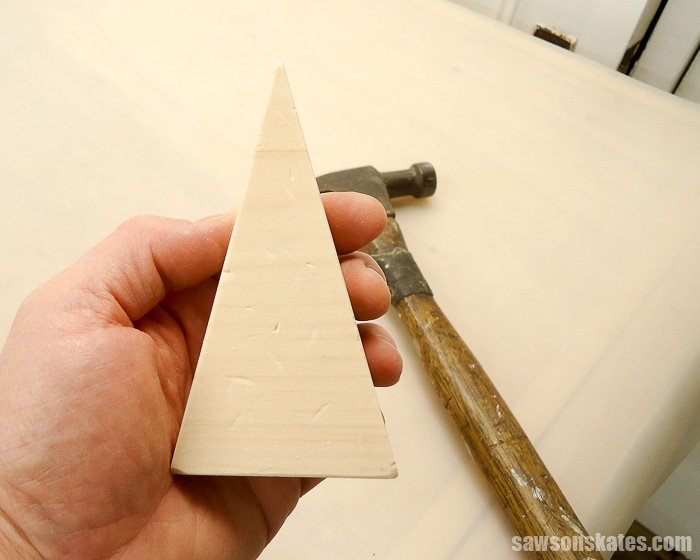
Cut the house. Again, work safely. Use a long piece of scrap wood to keep your fingers away from the blade. First, on a piece of 1×3 measure in 1″ and cut a 45 degree angle at the mark. Flip the piece and make another 45 degree cut. Measure 3″ and cut house to length.
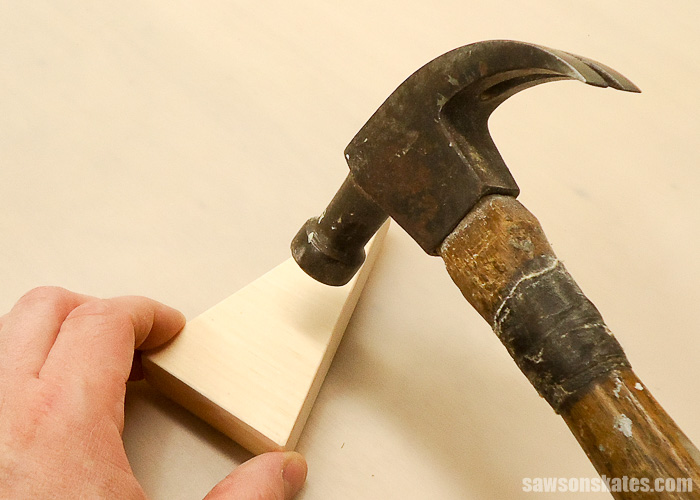
Step 2. Sand and Distress. Lightly sand the edges of all of the pieces.
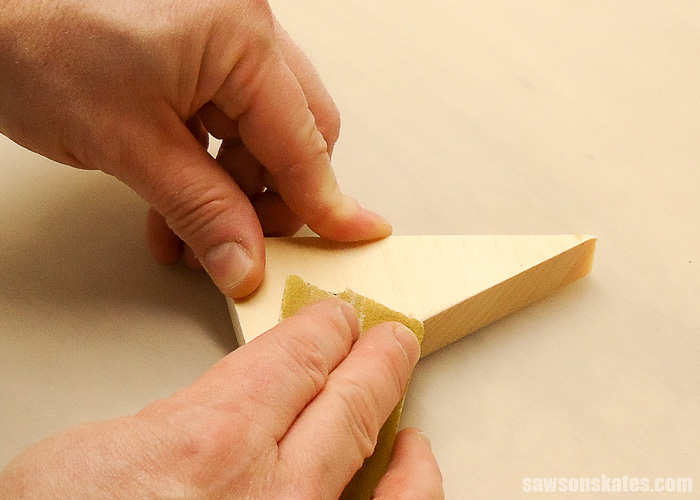
Then lightly distress with a hammer.
Now we’re ready for paint.
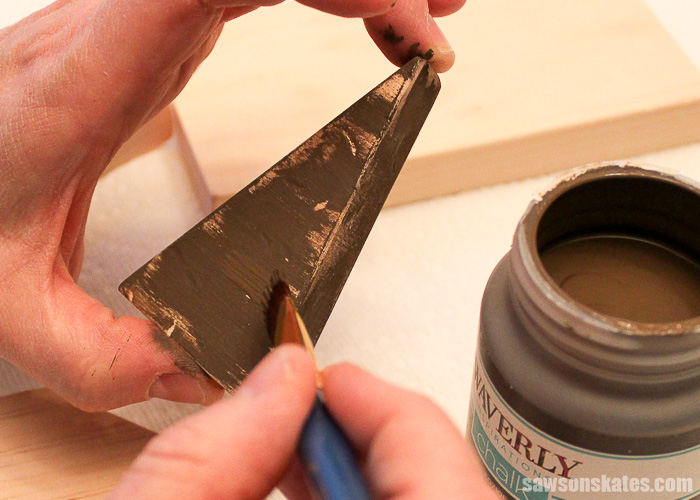
Step 3. Paint the Pieces a Dark Color. Paint the pieces with a dark brown chalk paint. I was going for a rustic look so I didn’t paint them solid. I left gaps in the paint to give the pieces a worn look.
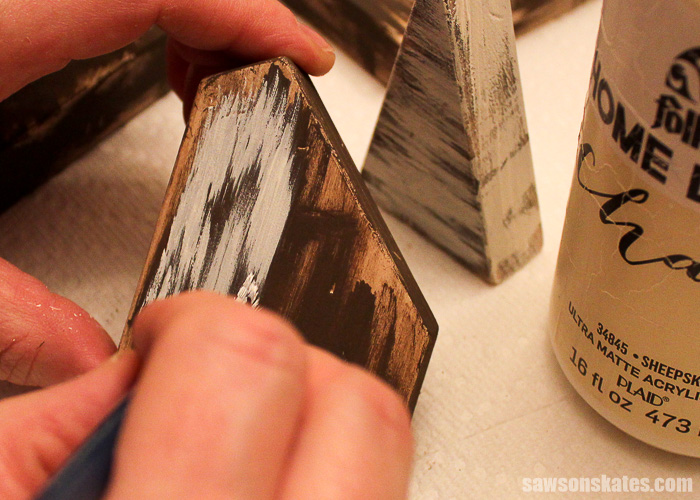
Step 4. Paint the Pieces a Light Color. Paint the pieces with an off-white chalk paint. I didn’t paint all the way to the edges of the pieces because I wanted them to appear worn. I used short brush strokes to fill in the middle of the pieces. This technique layers the paint so some areas are thicker and some are thinner. Again this gives the appearance of being worn. The pieces would naturally wear more around the edges, so you’ll want more paint in the middle of the pieces and less at the edges.
Step 5. Scuff the Pieces (optional). To make the pieces look even more worn lightly scuff the faces of the pieces with 100 grit sand paper to add some scratches.
All that’s left is to display your DIY Christmas Village or wrap it up for an easy gift!
Half-Hour Holiday Challenge
Please skate over to see what my fellow DIYers made for the Half-Holiday Challenge. You won’t be disappointed with their DIY skills!
Christmas Card Display by Shelly at 100Things2Do.ca
Adult Advent Calendar by Morgan and Sean at Charleston Crafted
DIY Customizable Rustic Wooden Advent Calendar by Sheri at Hazel + Gold Designs
Mason Jar Floral Arranger by Vicki and Steph at Mother Daughter Projects
DIY Wooden Snowman by Ashley at Handmade with Ashley
Thank you for stopping by to check out my rustic DIY Christmas Village. If you’re loving the village and the other amazing Half-Hour Holiday projects would you please pin it to Pinterest? I’d really appreciate it! Thank you – Scott
PIN THIS!

this is so cute and is really inspiring me to make a little scrap wood village for our mantel this year. Love it!!
That’s a nice way to use up scraps 🙂 Love the distressed look!