DIY Christmas Village Stocking Holders
Add a festive touch to your mantle with these adorable DIY Christmas village stocking holders. They’re easy to make with scrap wood and this step-by-step tutorial.
What Should I Build Next?
That's the question I help answer.
Every week, I send woodworking ideas to 17,000 DIYers who love building things.
You'd fit right in.
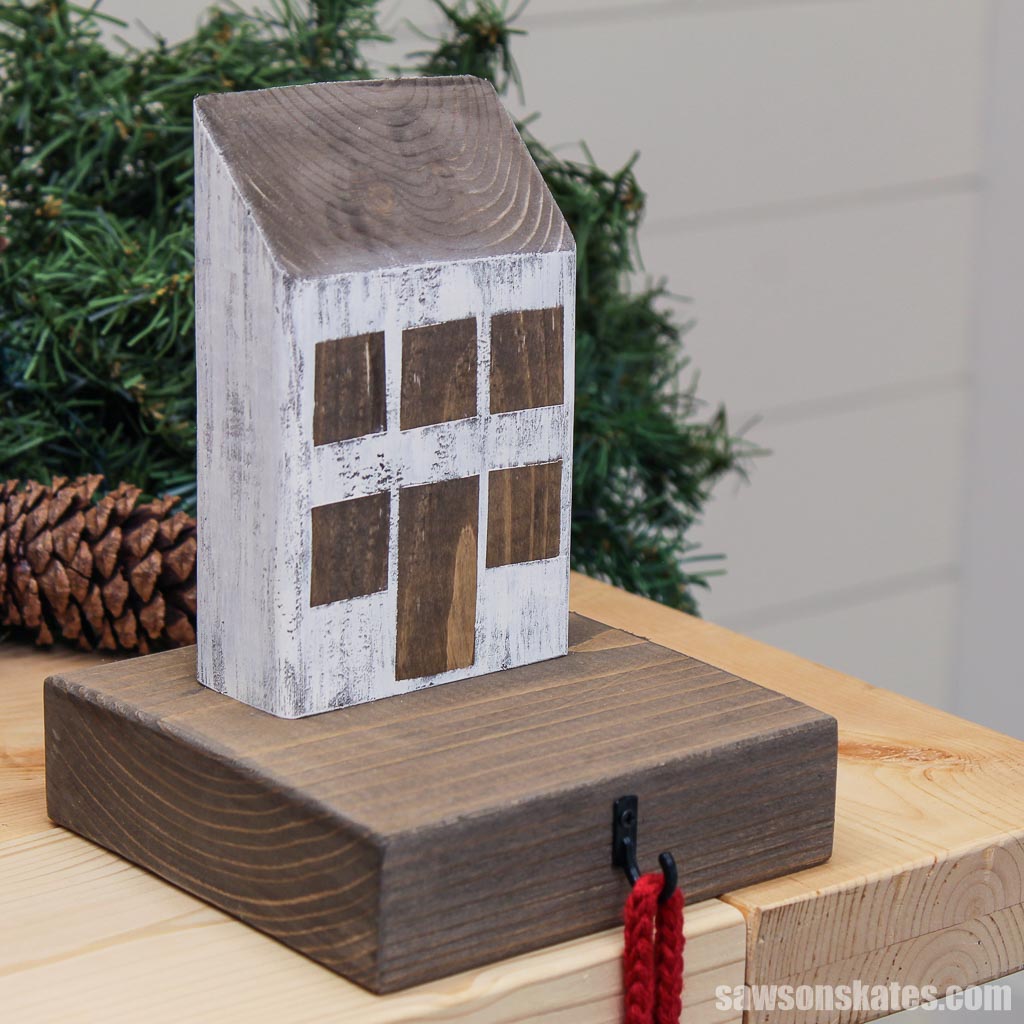
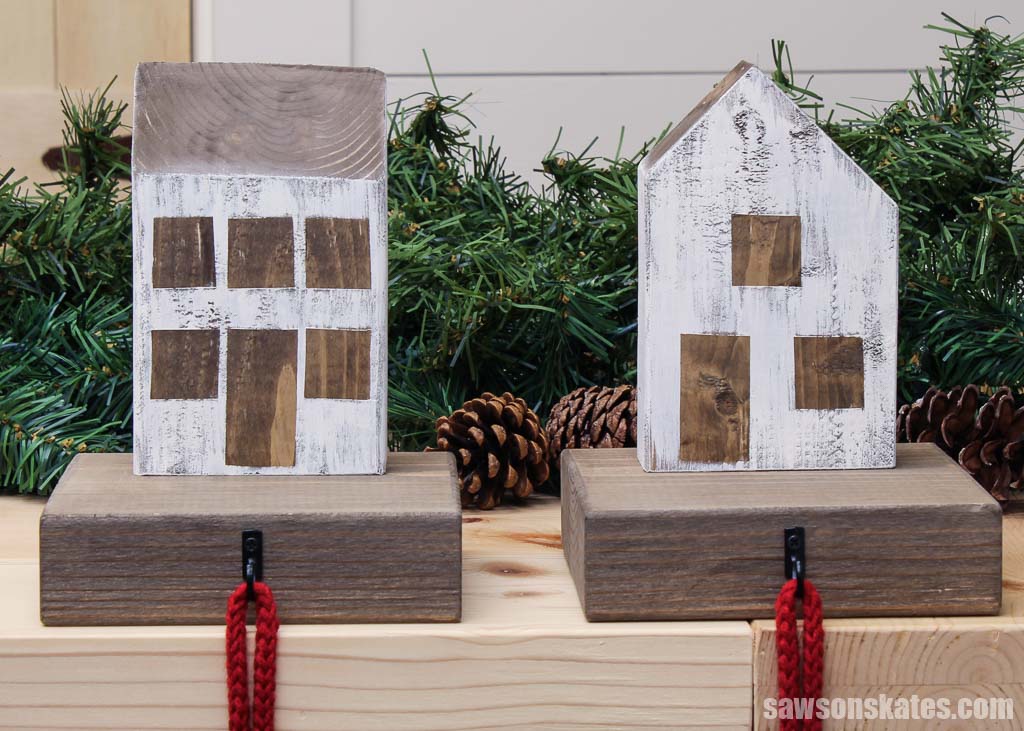
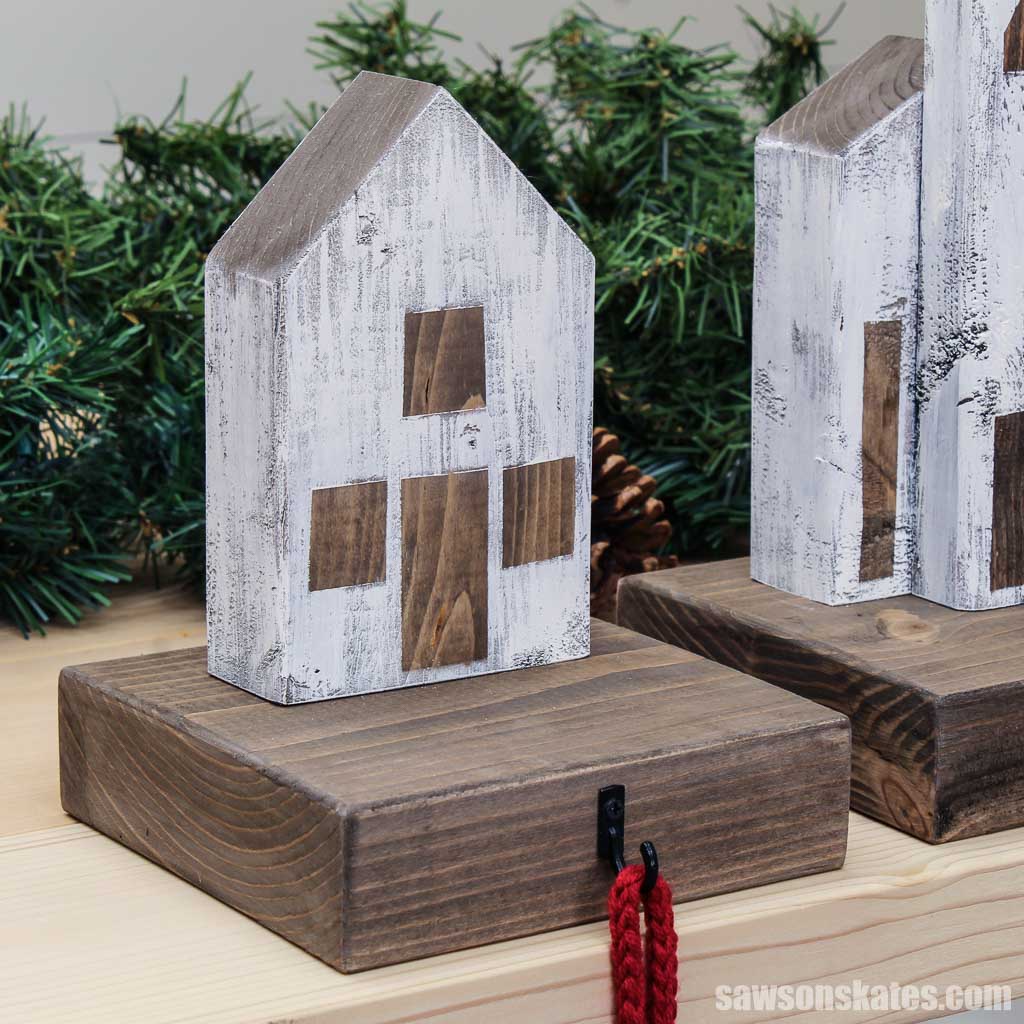
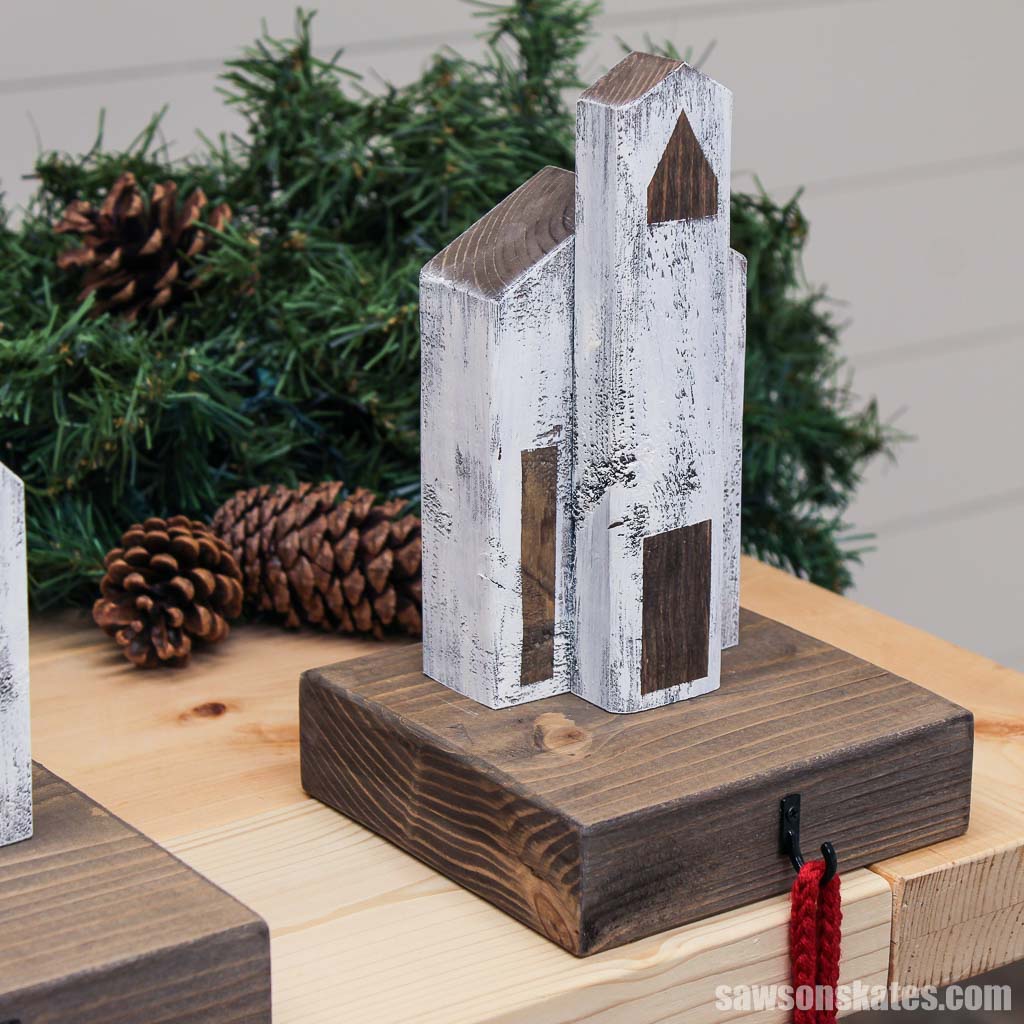
Don’t settle for ordinary, store-bought stocking hangers when you can add a touch of rustic charm to your holiday decor with these easy-to-make Christmas village stocking holders.
With just a few simple supplies and some paint, you can transform scrap wood 2×4s into delightful hangers to hold your stockings in style.
- Scrap wood makes this project practically free
- Requires minimal sanding/prep work
- Water-based products make this project quick and easy
Get ready to spread some festive cheer as I show you how to bring Christmas village magic to your mantle.
Table of Contents
- What Tools Do You Need?
- What Wood Should You Use?
- How Do You Finish the Stocking Holders?
- How to Make DIY Christmas Village Stocking Holders
- Get the Free Plan
This article contains affiliate links. If you purchase from these links, I may earn a small commission at no additional cost to you. Visit my site policies for more information.
Inspiration for These Christmas Village Stocking Holders
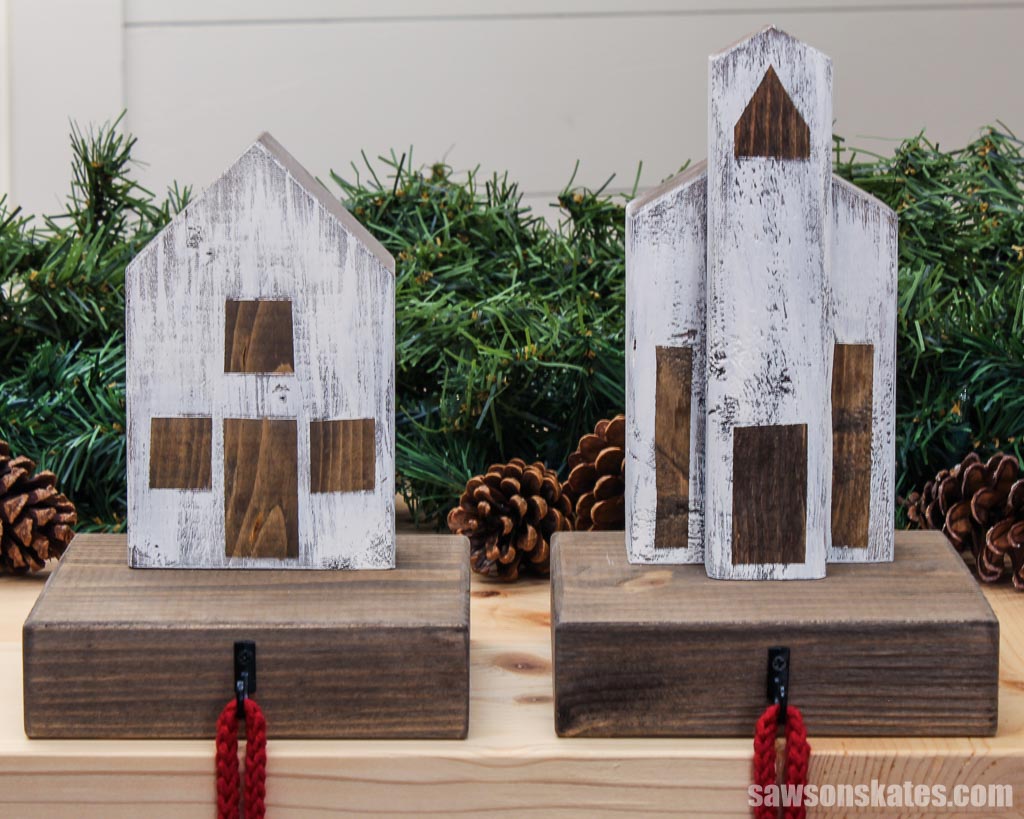
In 2015, when I launched Saws on Skates®, I published plans for a set of tiny Christmas village stocking holders inspired by an online store. While I found them charming, their small size meant they couldn’t hold standard-sized stockings, especially when filled.
To address this issue, I decided to revamp the design. This time, I made the buildings using 2×4 lumber and the bases using sturdy 2×6 lumber. Then, I applied stain and chalk-type paint to give them a rustic farmhouse feel.
What Tools Do You Need?
You’ll only need a few basic tools to make your Christmas village stocking hangers:
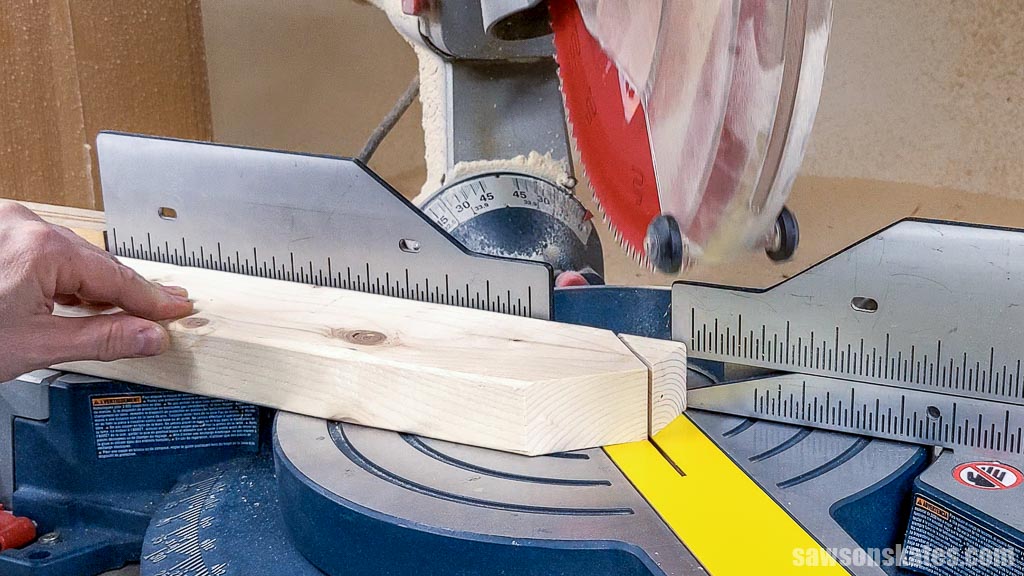
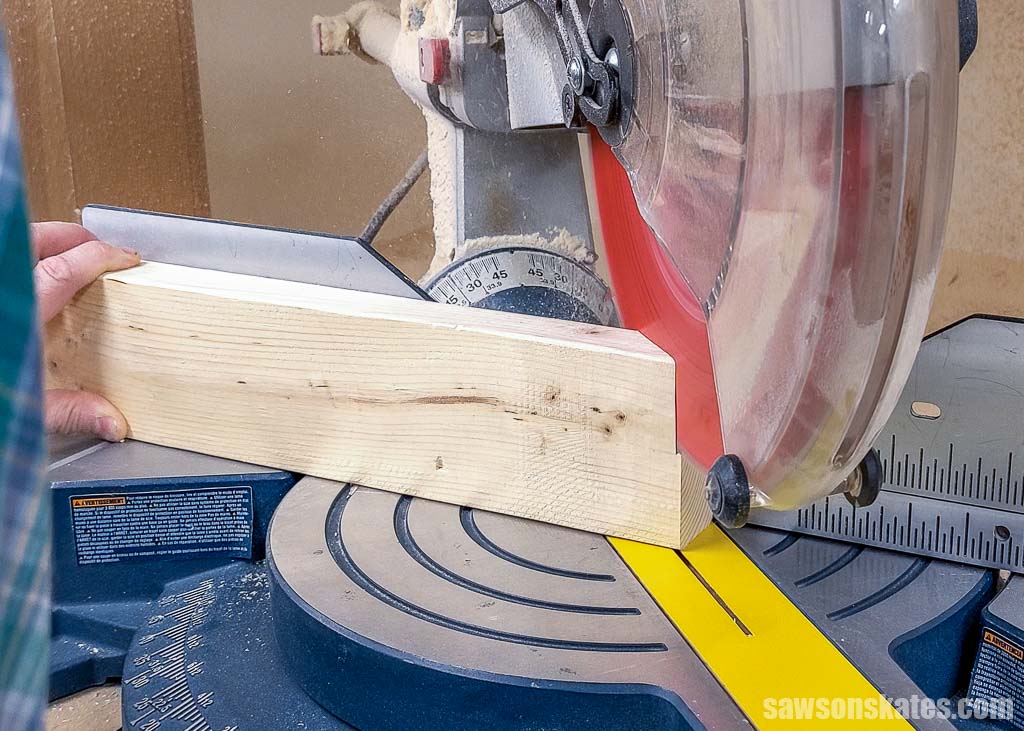
- Miter saw. I used my miter saw to cut all of the parts to length.
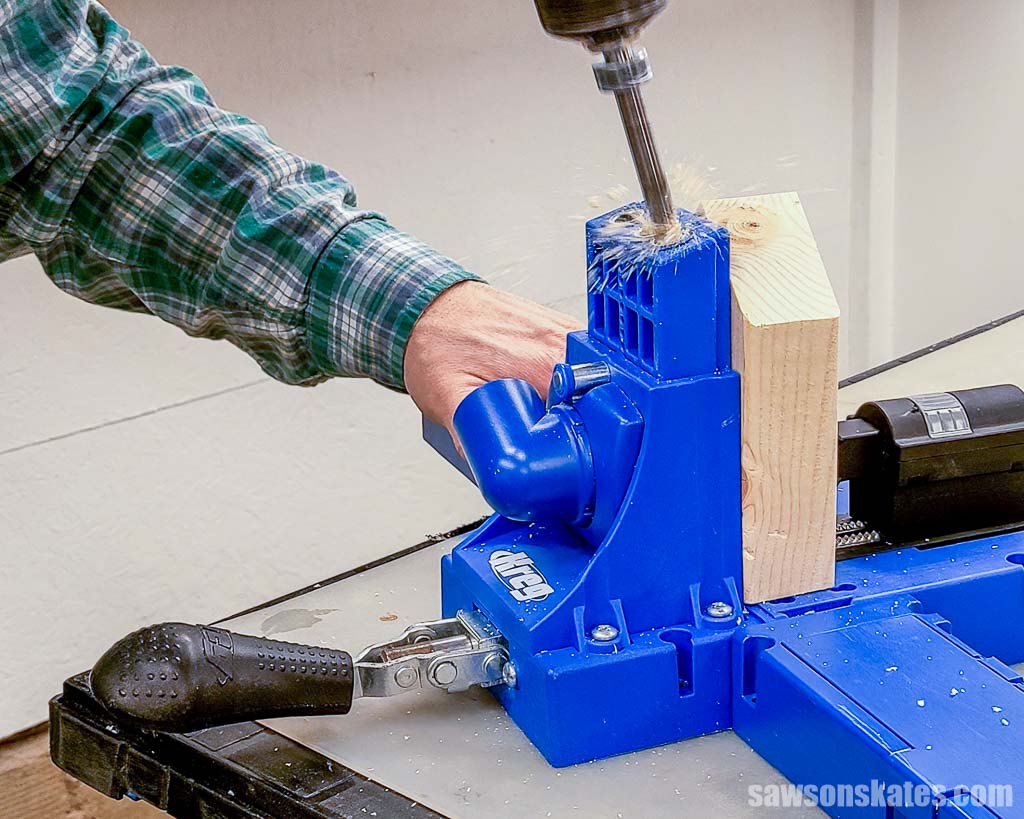
- Pocket hole jig. I made pocket holes that attach the buildings to the bases using my Kreg Jig.
- Drill. I used my drill to make the pocket holes and drive the pocket hole screws.
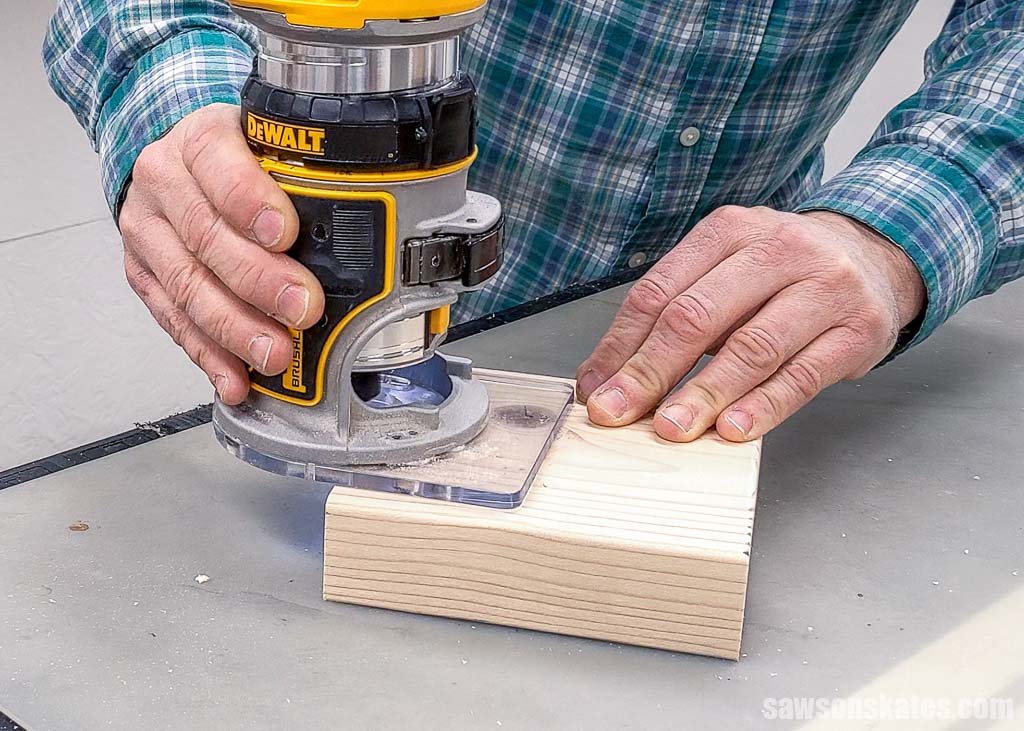
- Handheld router. I used a router and a roundover bit to match the 2×6’s cut edges to their rounded edges, but you can use sandpaper instead.
What Wood Should You Use?
I used scrap pieces of 2×4 and 2×6 to make my stocking holders. If you don’t have scrap wood, these materials are relatively affordable at most home improvement stores
You may also find scrap wood for free at construction sites, Craigslist, or Facebook Marketplace.
Related: 14 Ways to Score Free Wood (Build Even if You’re Broke!)
How Do You Finish the Christmas Village Stocking Holders?
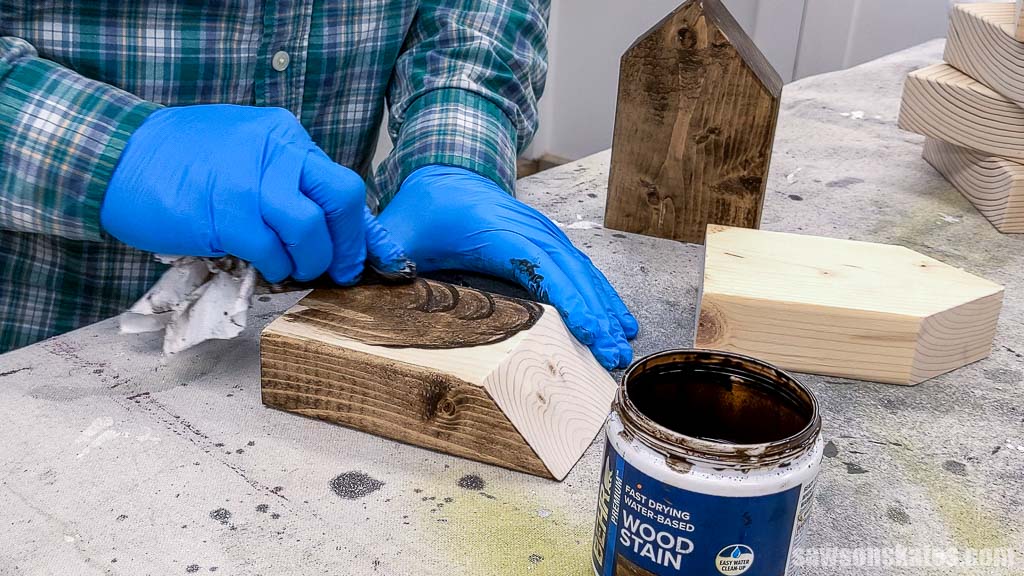
I wanted a rustic look for my village, so I didn’t do a lot of sanding to prepare the wood for stain and paint. The exception was the end grain of the bases.
End grain tends to absorb more stain, resulting in a darker appearance than the other surfaces, so I sanded, closing the pores and minimizing excessive stain absorption. I started sanding with 100 grit and worked my way up, finishing with 220 grit.
I lightly ran sandpaper along the cut edges to soften the building’s sharp roof lines, making one or two passes.
Next, I applied a coat of Behr water-based wood stain in “Dark Walnut” to all the pieces.
I cut painter’s tape to resemble windows and doors and applied it to the buildings.
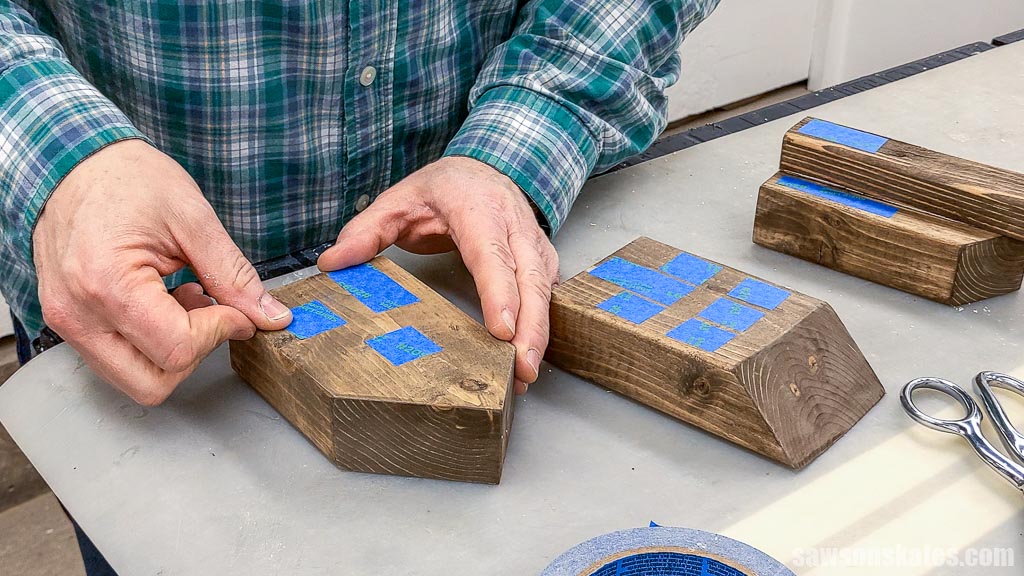
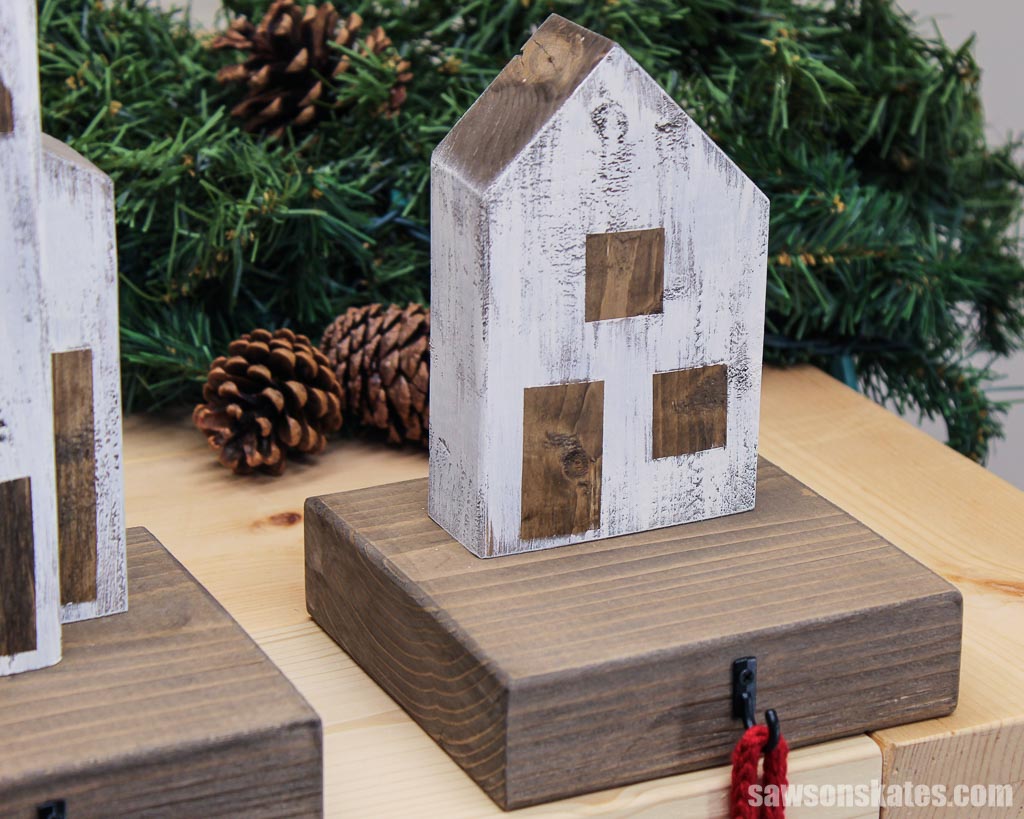
Then, I dry brushed them with an off-white chalk-type paint.
Dry brushing involves minimally loading a paintbrush and removing the excess. Then, gently drag the brush across the surface, leaving some of the wood exposed and creating an aged or weathered appearance.
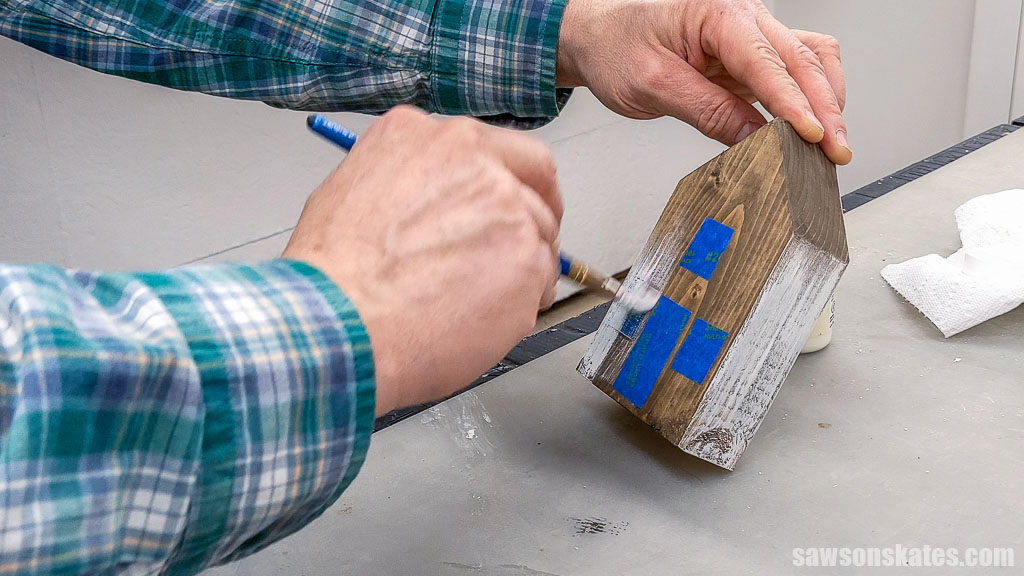
When the paint was dry, I removed the painter’s tape and attached the buildings to the bases.
How to Make DIY Christmas Village Stocking Holders
Printed Plan
Get the FREE plan here (includes detailed instructions, measurements, and bonus tips)
Materials
- Wood (per the printed plan)
- Wood Glue
- 2-½” Pocket Holes
- Hooks
Tools
- Tape Measure
- Kreg Multi-Mark
- Miter Saw
- Pocket Hole Jig
- Drill and Drill Bits
- Router (optional)
- ⅛” Roundover Bit (optional)
Before You Begin
IMPORTANT: Due to the small size of this project’s pieces, it’s best to cut them from a longer board to maintain a safe distance between your hand and the blade.
Step 1. Make the Bases
Cut four pieces of wood to length for the bases.
The cut edges of the bases are sharp, while the other edges have a rounded profile. To make them match, I used a router and a roundover bit. If you don’t have a router, you can use sandpaper to achieve a similar effect.
Step 2. Make the Cottage
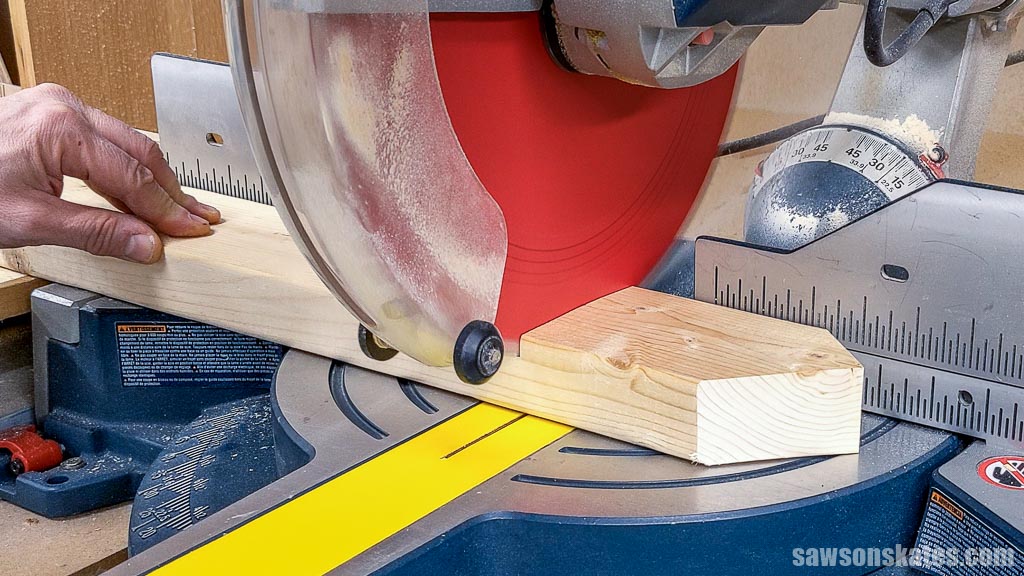
Mark the center of the board and cut a 45-degree angle on either side of the mark.
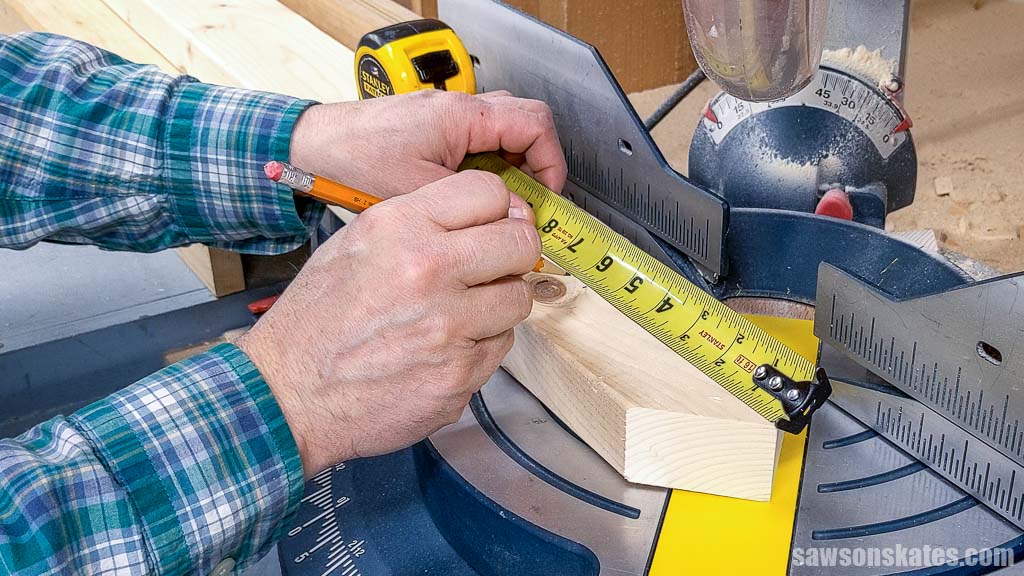
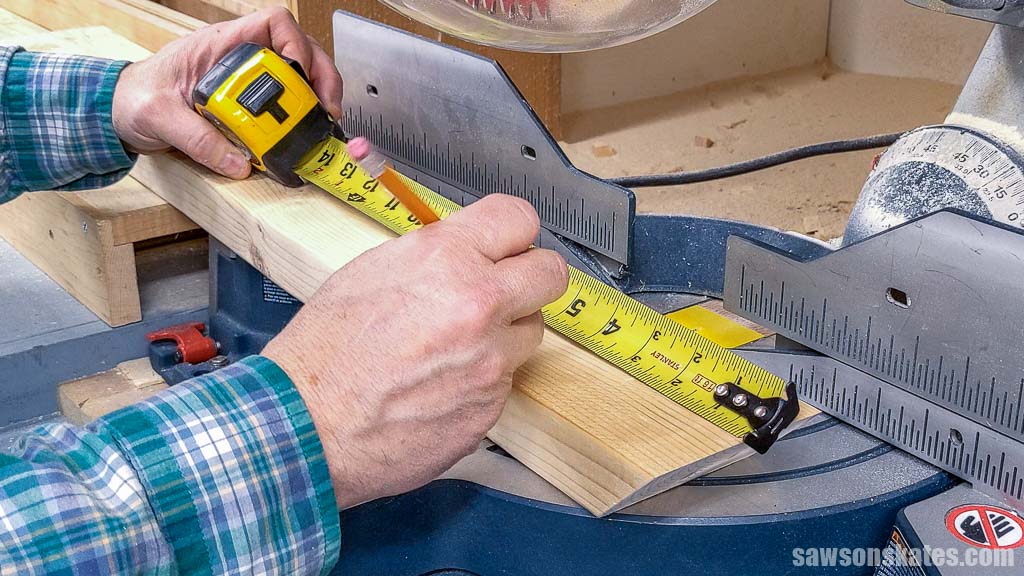
Next, measure from the roof’s peak and make a mark.
Then, cut the cottage to length.
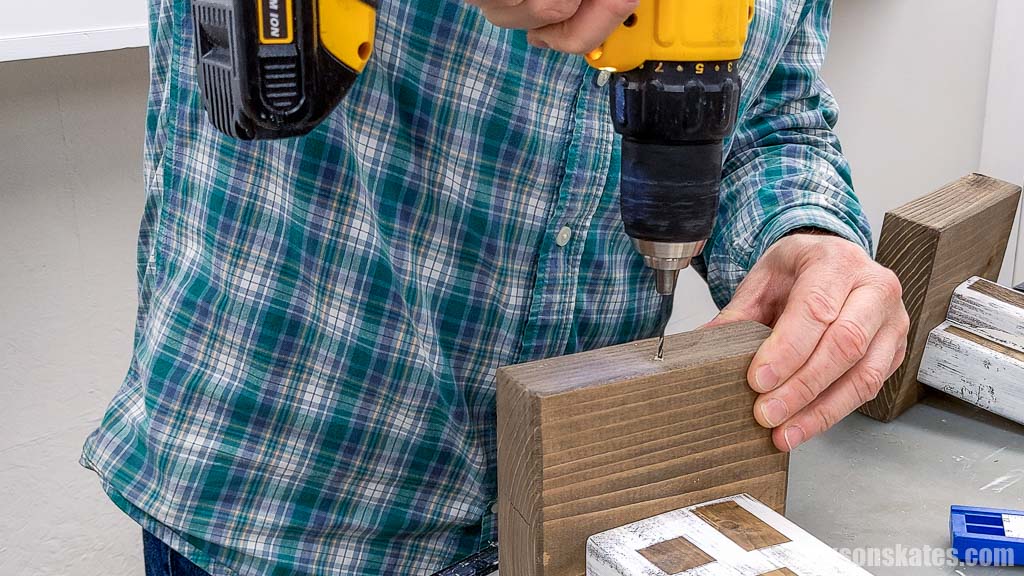
Set your pocket hole jig for 1-½” material and drill two pocket holes on one side.
Related: How to Use a Pocket Hole Jig (& Beginner Pitfalls to Avoid)
Step 3. Make the Saltbox
The saltbox is made in a similar way as the cottage.
Use the diagram in the printed plan to mark and cut the angles. Then cut to length and drill two pocket holes on the backside.
Step 4. Make the Manor
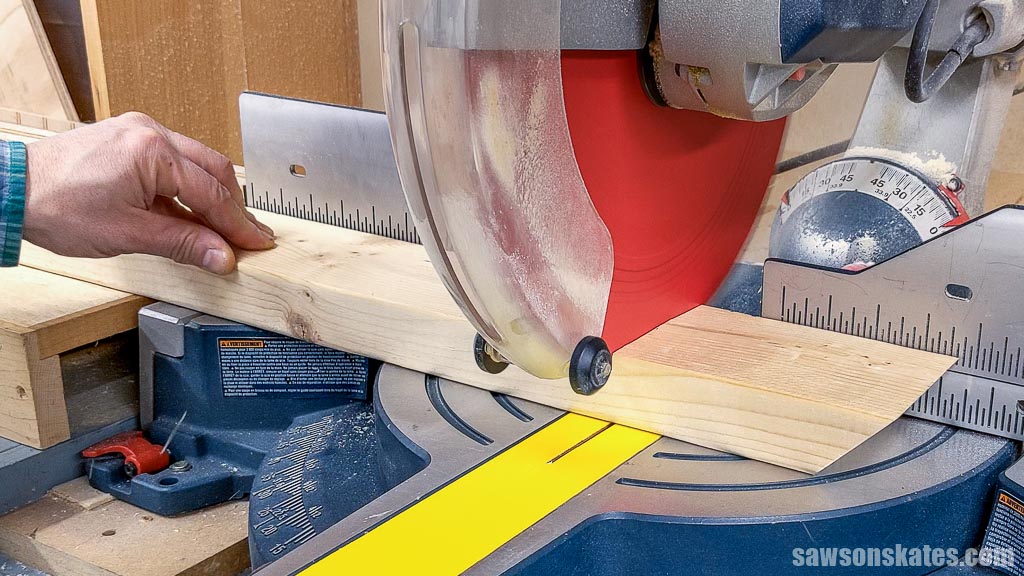
Adjust your miter saw’s angle to 45 degrees and cut a bevel on the end of the board.
TIP: While this method is suitable for making a rustic stocking holder, it’s not ideal for cutting precise bevels. The blade’s tendency to deflect from top to bottom can lead to uneven cuts. When working with moldings or other projects requiring accurate bevels, I recommend adjusting the bevel at the back of the saw rather than the table.
Next, measure from the roof’s peak and make a mark.
Return the saw to 90 degrees and cut to length. Then drill two pocket holes on the backside.
Step 5. Make the Church
Use the diagram in the printed plan to mark and cut the angles for the church’s back, then cut to length and drill two pocket holes on one side.
For the steeple, use the diagram in the printed plan to mark and cut the angles, the cut to length.
Apply glue to the steeple, center on the back and clamp for about 60 minutes or until the glue is dry.

Step 6. Finish the Stocking Holders
I thought it was easier to stain and paint the parts before assembling them. Please How to Finish the Stocking Holders for more information.
Step 7. Attach the Buildings to the Bases
The cottage, saltbox, and manor are set back from the base’s front and centered from side to side.
Position on the base.
And attach using pocket screws.
The church sets back from the base’s front and centered from side to side.
Position on the base and attach using pocket hole screws.
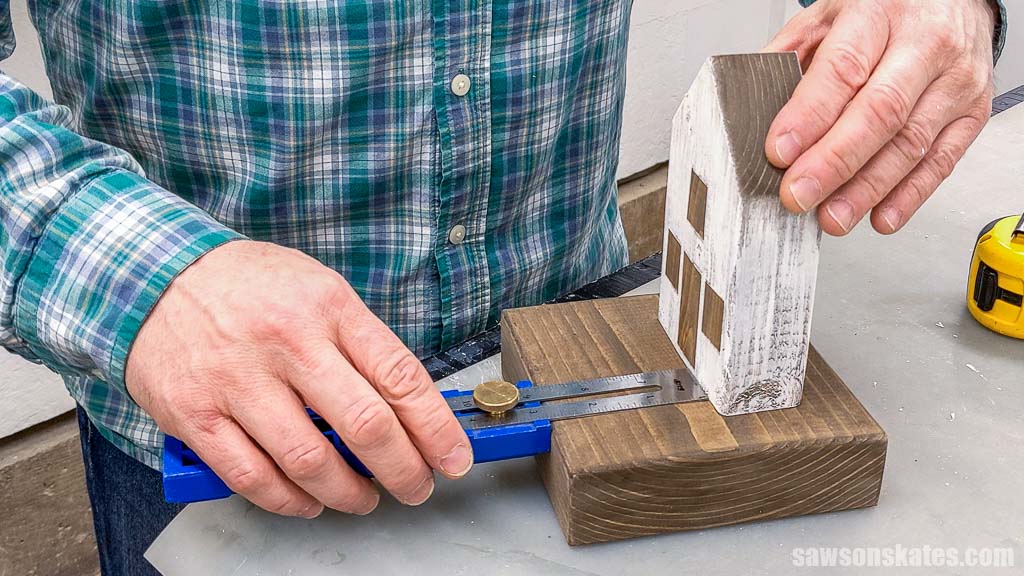
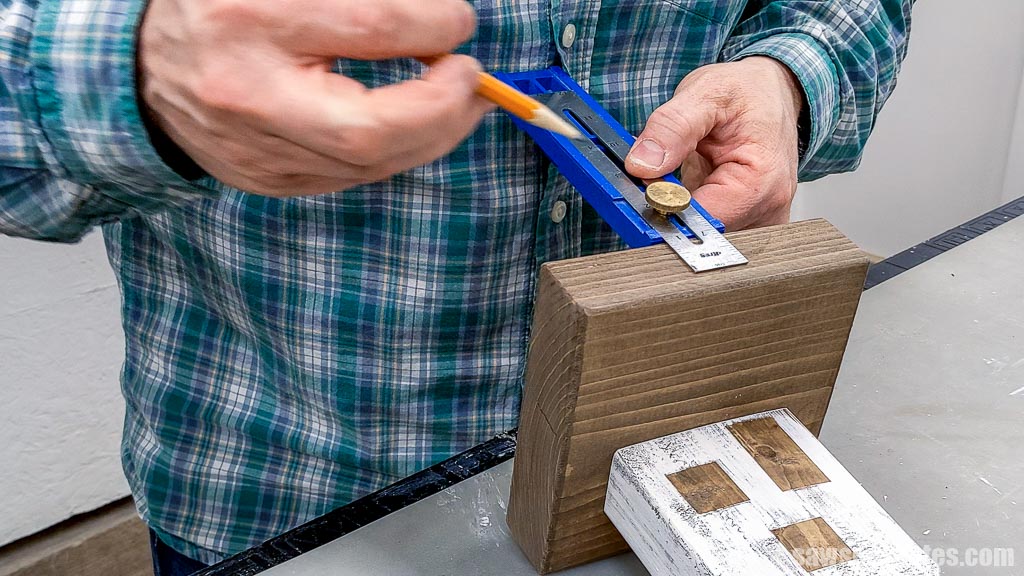
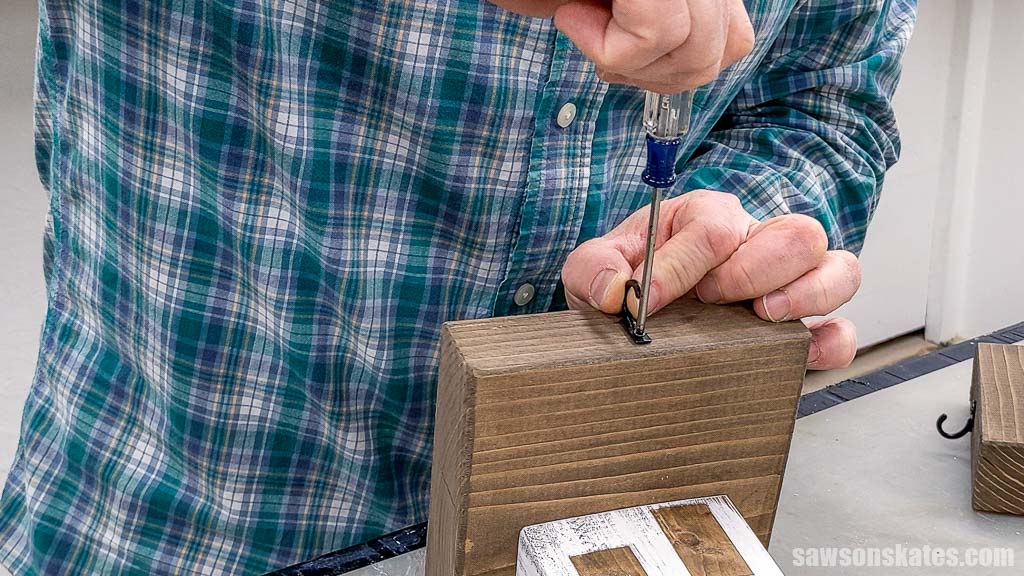
Next, I determined where I wanted to attach the hook on the front of the base.
And used an awl to make a starting point for the drill bit.
Related: What is an Awl? (& How to Use It)
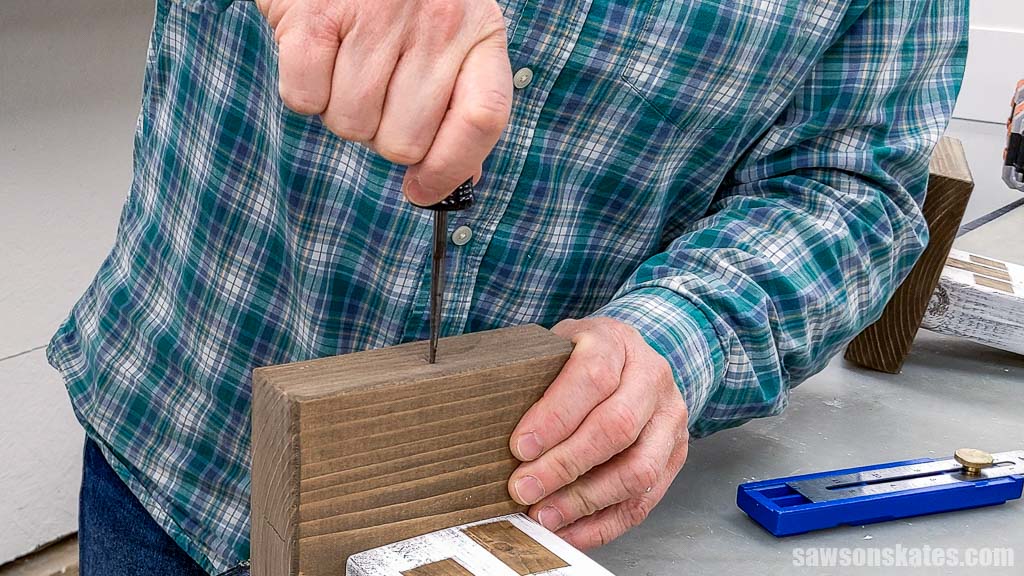
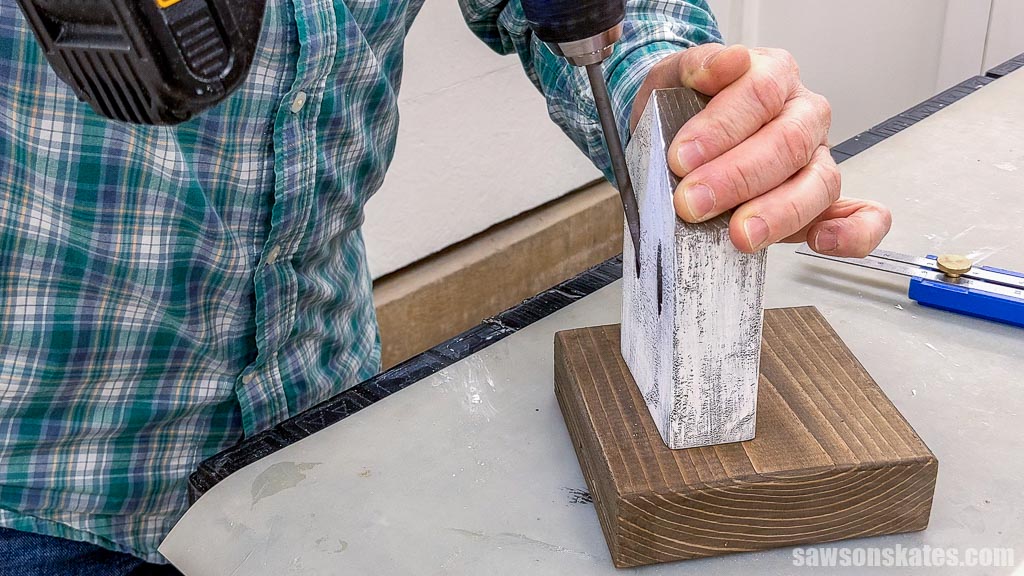
Then, I used a drill bit to make a pilot hole.
Related: How to Drill Pilot Holes (Why, When & Correct Size)
I positioned the hook over the hole and attached it using a screw that came with it.
Repeat these steps for the remaining hooks.
That’s it. Your stocking holders are complete and ready to add a festive touch to your holiday decor.
Final Thoughts
With just a few tools and some scrap 2×4s, you can make your own DIY Christmas village stocking holders. These charming hangers are easy to make and add a touch of holiday cheer to your mantle.
Don’t wait. Get your free plan (including the detailed instructions and measurements) now!
Thank you for stopping by. If you enjoyed this tutorial, would you please take a moment and pin it to Pinterest? I’d really appreciate it!
Recommended For You


Pin This For Later

Hi there – I’m Scott, a woodworking enthusiast and creator of Saws on Skates, a site I started in 2015 to share easy-to-follow tutorials, space-saving shop tips, and project inspiration for DIYers at any skill level. Learn more about my woodworking journey here.
I love these stocking holders! Saving the plan to make it for next year! Thank you! Love all your ideas Scott!