How to Wax Your Table Saw (+ What Wax to Use)
Wax your table saw not only to keep it looking its best but to help reduce oxidation, reduce friction, and to maximize performance.
Why wax your table saw? Waxing keeps your table saw looking its best, makes it easier to clean, reduces the chance of oxidation, and most importantly, reduces friction.
I know, waxing your table saw sounds crazy, right? When I first heard about waxing workshop tools, I thought, “WHAT???!!!”
A while back in this tutorial about buying used tools, I mentioned I once found a tool on craigslist and went to check it out. When I got there, the seller told me he was the shop teacher at the local high school, and the condition of his tools proved it.
He gave me a tour of his woodworking shop, and every one of his tools was in impeccable condition. They were so clean. They looked better than new ones! Seriously, you could eat a meal off of these tools Of course, I had to ask, “How do you keep your tools looking this AMAZING?”
He shared his secret with me. He routinely cleaned and waxed his tools. WHAT???!!! Why didn’t anyone tell me that I needed to wax my tools? He went on to tell me his process. I decided to buy the tool, and he even gave me a can of wax, so I could take care of it just like he did.
This tutorial contains affiliate links to supplies and tools. Purchases made using these links help support the Saws on Skates website and allows me to share more projects and tips with you. There is no cost to you for using these links. Visit my site policies for more information.
Why You Should Wax Your Table Saw
Why should you wax your table saw? There’s more to waxing than just making your table saw look pretty. You should wax your table saw because it will be easier to clean, reduce the chances of oxidation, and perhaps most importantly, reduce friction.
Looks Better
Waxing your table saw is a feel-good thing. Just think about your workshop. Do you feel better when it’s a mess or when it’s picked up, and everything is in its place? It feels better when it’s picked up, right? A clean table saw just looks better and makes your workshop look neater.
Related: How to Organize Tools in a Small Workshop
Easier to Clean
A waxed table saw is easier to clean. Think about it this way. When you wax your car, and then it rains, the water beads up and rolls off the car, right? Waxing your table saw works in a similar way. The wax makes the surface of your table saw slippery. Because the surface is slick, it’s more difficult for sawdust to stick to your table saw.
Reduces Oxidation
My workshop is pretty humid, and my metal tools are prone to oxidizing. Applying a coat of wax to my table saw slows the oxidation process. A coat of wax seals and protects metal surfaces and reduces the chances of oxidation.
Related: My 12×13 Small Woodshop Layout
Reduces Friction
Perhaps the most important reason to wax your table saw is because it reduces friction. Wood contains pitch or resin. Over time these sticky, tar-like substances coat the table and fence of your table saw, which causes friction.
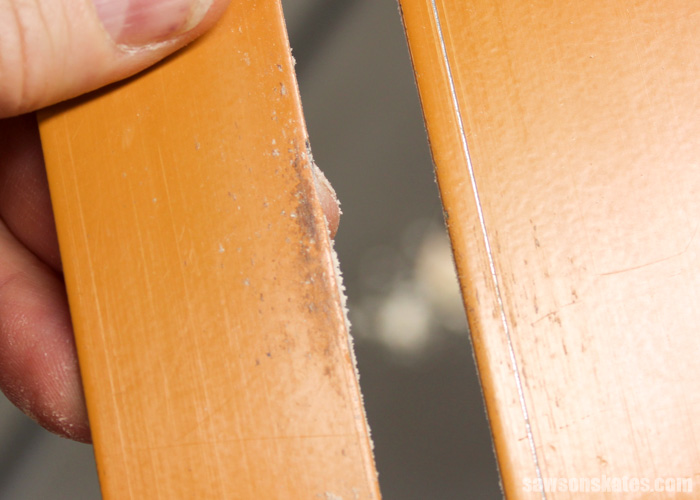
You don’t believe me, do you? Well, take a look at the throat plate, or table insert of my table saw. See all that gunk? That residue not only looks awful but will slow down workpieces as they pass over the table of the table saw.
Related: How to Make a Zero Clearance Insert for a Miter Saw
You still don’t believe me? Try this experiment. You don’t even have to turn your table saw on. Take a piece of wood and slide it across your table saw. Now, follow the waxing procedure below and slide that same wood piece across your table saw. The wood will practically fly across the table!
Waxing your table saw reduces friction, makes it easier for wood to pass over the table and reduces the chances of resin sticking to your table saw. Overall, waxing maximizes the performance of your table saw.
What Kind of Wax
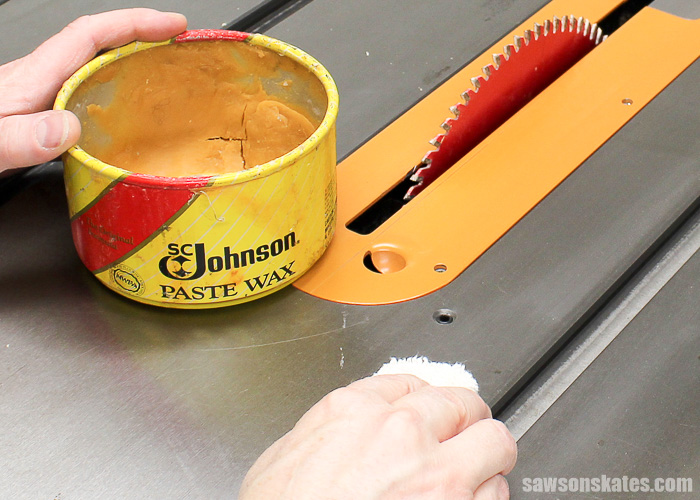
The shop teacher recommended Johnson Paste Wax for waxing tools. Johnson Paste Wax is a good choice because it doesn’t contain silicone. Silicone can contaminate the surface of the wood and cause issues when applying finishes like polyurethane, Polycrylic, etc.
Related: Polycrylic vs Polyurethane: Are They The Same?
Tools to Wax
Should you only wax your table saw? No, tools like a miter saw, bandsaw, planer, and jointer benefit from regular waxing.
Related: 7 Miter Saw Tricks Every DIYer Should Know
What Parts to Wax
What parts of the table saw should you wax? Any place where wood slides – tabletops, fences (and the rails where fence slides). I also wax the body and legs of table saw stands, bandsaws, and miter saws. Again, it makes them easier to clean, reduces oxidation, and it just looks better.
How to Wax Your Table Saw
Supplies
- Johnson Paste Wax
- Rags
- CMT Formula Blade and Bit Cleaner
- Shop-Vac
- 400 Grit Sandpaper
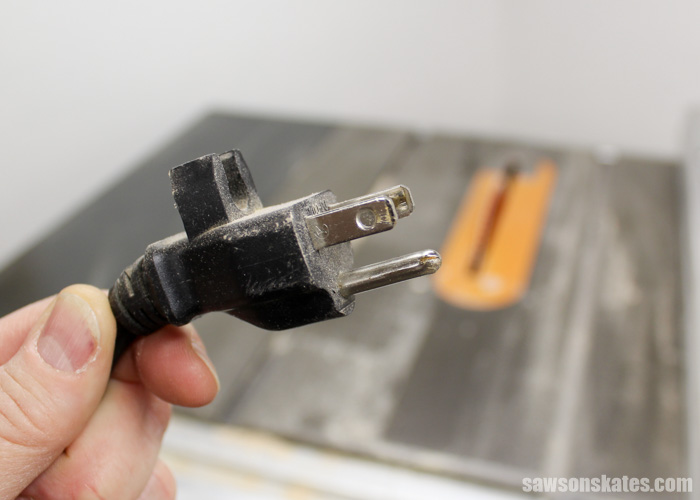
Step 1. Unplug the Saw
Disconnect the power to the table saw.
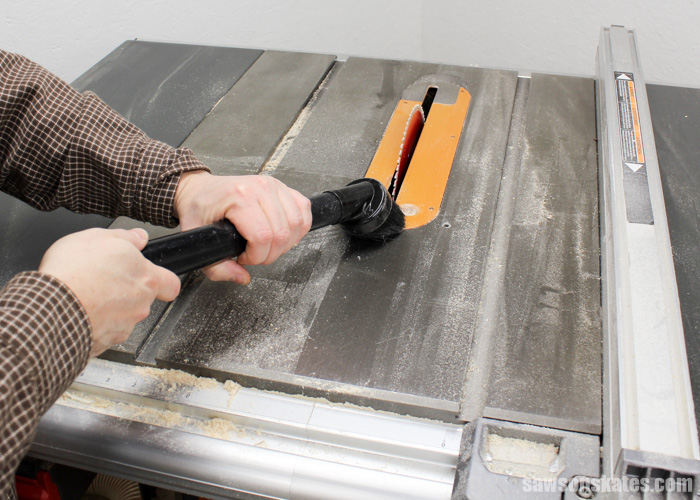
Step 2. Vacuum the Table Saw
Use a Shop-Vac to remove all of the sawdust from the table saw.
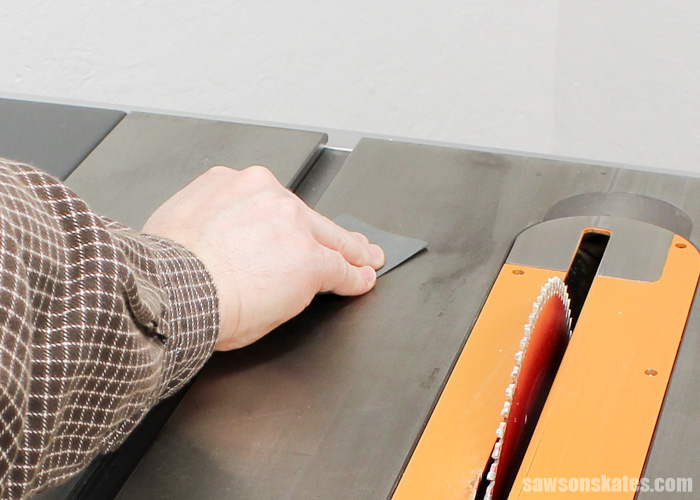
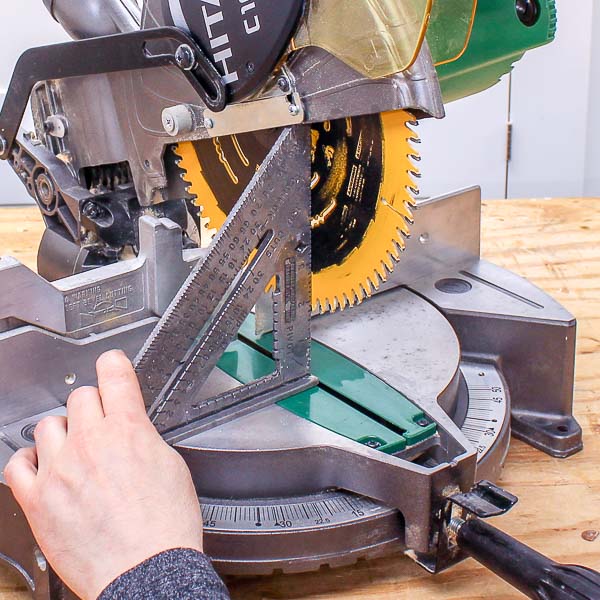
Step 3. Sand Imperfections
I accidentally left a piece of pressure-treated wood on my table saw for an extended time. The moisture in the wood oxidized the table of my saw. Not only that, but it’s pretty humid in my workshop, so metal tends to oxidize quickly. I used 400 grit sandpaper to remove the oxidation and to sand the area smooth.
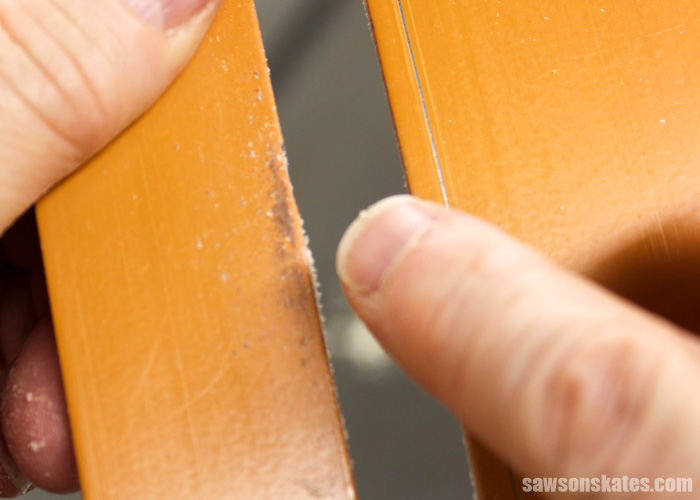
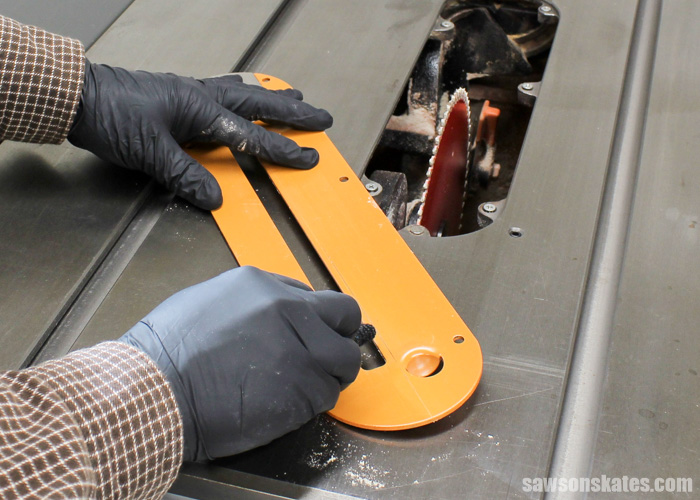
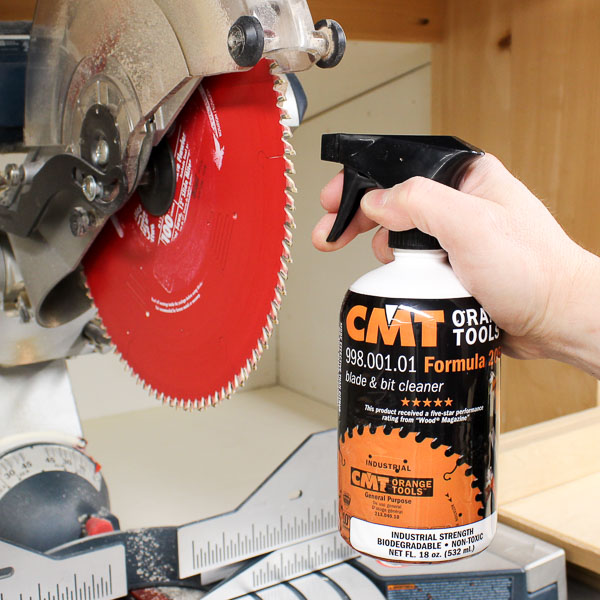
Step 4. Remove Pitch or Resin
I had a build-up of residue on the table insert of my table saw.
To remove this build-up, I use the same pitch and resin remover that I use to clean my saw blades.
Related: How to Clean Saw Blades
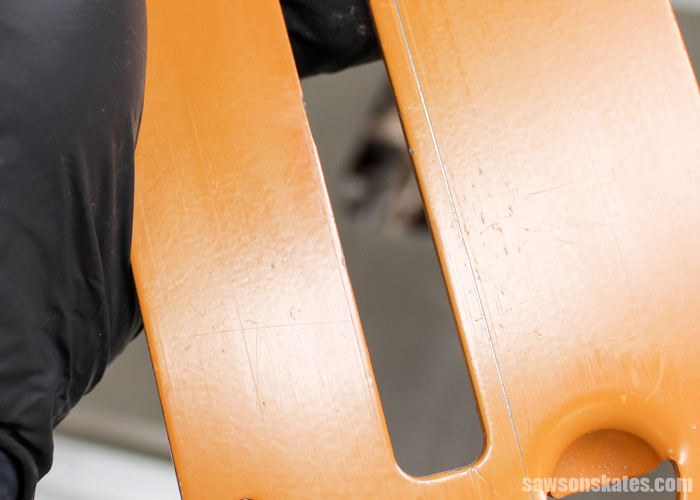
Much better!
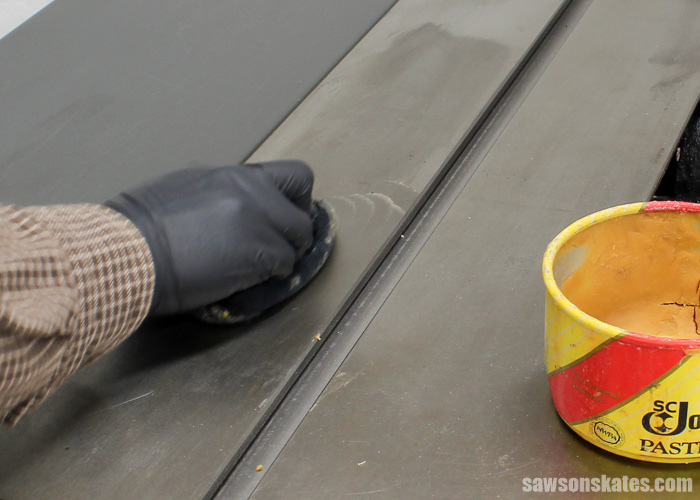
Step 5. Apply the Wax
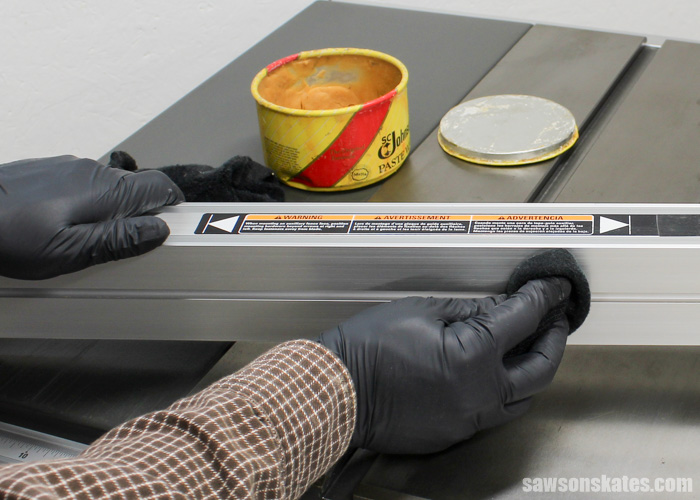
A little goes a long way, so you only need a small amount of wax on the rag. Apply the wax to the table, table extensions, rip fence rails, then buff the wax off with a clean rag.
Apply wax to the sides of the rip fence.
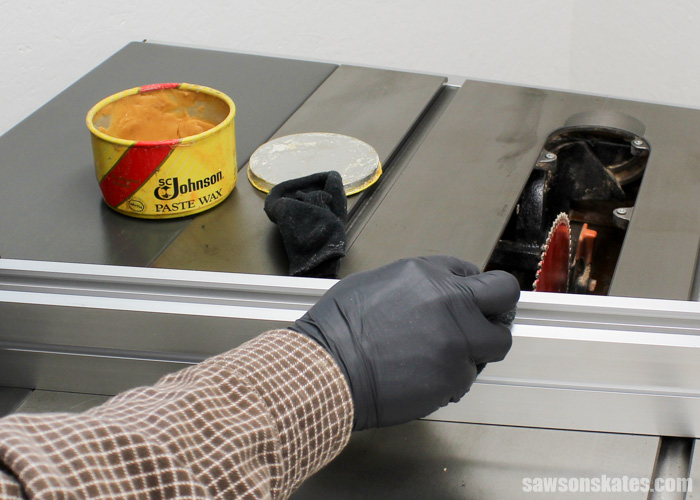
And apply wax to the bottom of the rip fence. It’s not pictured here but you should also apply wax to the miter gauge.
That’s all there is to it. Now just stand back and admire your work!
Final Thoughts
Waxing keeps your table saw looking its best, makes it easier to clean, reduces the chance of oxidation, and most importantly, reduces friction. Plus, it’s such an easy project to keep your table saw operating at peak performance.
If you found this information helpful, would you please pin it to Pinterest? I would really appreciate it! Thank you – Scott
Recommended For You
Pin This For Later

Hi there – I’m Scott, a woodworking enthusiast and creator of Saws on Skates, a site I started in 2015 to share easy-to-follow tutorials, space-saving shop tips, and project inspiration for DIYers at any skill level. Learn more about my woodworking journey here.
Hi Scott, My brother recommended using bowling alley wax for the table saw. What are your feelings about this?
Hi Kathy – I like Johnson’s Paste Wax because it doesn’t contain silicone. Silicone can cause issues when applying finishes to projects. I’m not sure if bowling alley wax contains silicone. If it does, I wouldn’t use it on your tools.
I’m a welder/sheet metal fabricator and my shop is pretty humid sometimes. I use Johnson paste wax about once a month on the shear, roller and brakes. It helps keep rust down.
I’m glad I re-read your article because I was only thinking about my table saw and not the rest of my tools. I’m going to make a schedule for myself to periodically wax ALL my tools. Great information!!!