How to Glaze a Window (Tips from a Pro)
Window glazing makes an airtight, watertight seal between glass and wood sashes. A pro shows how to glaze a window with putty, a putty knife, and glazier points.
Window glazing is necessary to keep our wooden windows weather tight. Windows can be glazed with either oil-based or water-based glazing.
This tutorial contains affiliate links to supplies and tools. Purchases made using these links help support the Saws on Skates website and allows me to share more projects and tips with you. There is no cost to you for using these links. Visit my site policies for more information.
DIY Wood Storm Window
Recently I built a wood storm window. In that tutorial, I confessed I’m not good at glazing a window. The glazing putty always pulls away from the frame when I try to smooth it. It feels like it takes me FOREVER to glaze a window, and it’s frustrating for me.
This time I contacted a local window shop to do the glazing for me. I asked Bill if I could take some pics of the process. Today, I’m sharing with you how an expert glazes a window.
What is Reglazing a Window?
Reglazing a window means removing all of the old glazing putty and adding new glazing putty. I built a new wood storm window, so my project needed to be glazed rather than reglazed.
How to Remove Old Window Glazing
There are several ways to remove old window glazing. You can use a heat gun to soften and remove the old window glazing. You can also use a window glazing removal tool to remove old putty.
I have a word of caution about removing old window glazing. As I mentioned earlier, I’m not good at glazing a window. I’m also not good at removing window glazing. I’ve broken the glass every time I tried to remove old window putty!
Old window glass is fragile, and the glazing points used to hold the glass in place act as a pressure point. One wrong move near those glazing points and CRACK the glass breaks.
Here’s what I do instead of completely removing all of the old window glazing. I simply remove the loose pieces of glazing with a putty knife. Next, I use a ShopVac to remove any residue. Then I just replace the areas of missing window glazing.
Oil and Latex Window Glazing
Bill explained to me that there are two types of window glazing available. The original, old-school oil-based window glazing and the more modern water-based window glazing.
Oil-based window glazing is traditional to old windows, takes longer to dry, and I would be able to take the window with me when he was finished.
The water-based window glazing dries more quickly, but it needs time to set, so I would need to leave the window and pick it up later.
I decided to go with the oil-based window glazing so I could take the window with me.
How Long Does it Take Glaze to Dry?
The drawback to oil-based glazing is the time it takes to dry. Bill told me the directions for the glazing he used on my window recommends allowing it to dry 30 days before painting. 30 DAYS!
That’s a long time! He said that he usually only waits a few days before painting. I waited about 21 days before applying a latex exterior stain to my storm window.
The advantage of water-based window glazing is that it dries quickly. This means it can be painted sooner. After about three days, it can be painted with any exterior latex paint, or after about a week, it can be painted with an exterior oil-based paint.
Window Glazing Tools
There are a few tools we’ll need to glaze a window. We’ll need a glass cutter, a point-setting tool, and a putty knife. We’ll also need glazing points to hold the glass in place.
How to Glaze a Wood Window
- Cut the glass
- Install the glazing points
- Knead the putty
- Push the putty into groove
- Use a putty knife to bevel the glazing between the glass and wood sash
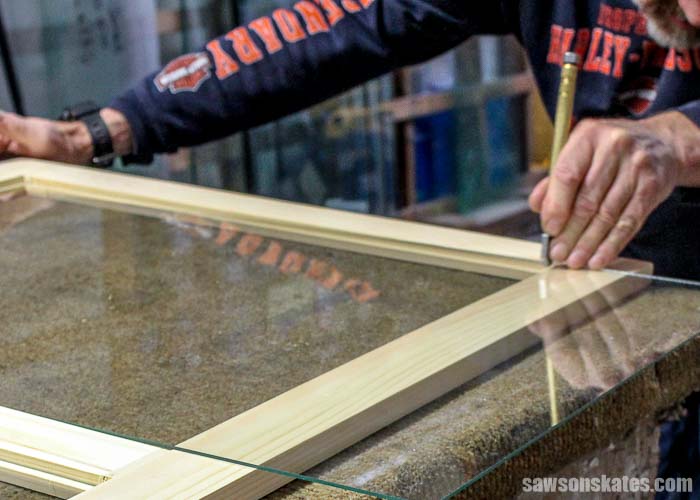
Step 1. Cut the Glass
Bill has more than 30 years of experience working with glass, so he was able to cut the glass for my storm window freehanded. We would probably want to use a straightedge and a glass cutter.
What Should I Build Next?
That's the question I help answer.
Every week, I send woodworking ideas to 17,000 DIYers who love building things.
You'd fit right in.
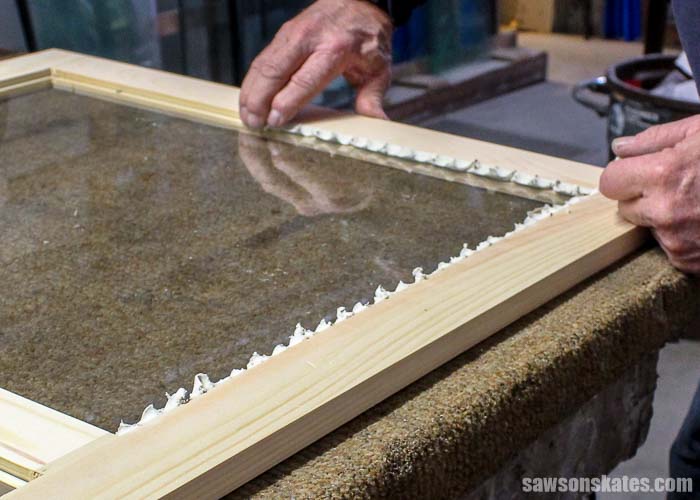
Step 2. Install the Glazing Points
Glazing points hold the glass in the window frame while the glazing putty dries. Bill used a point driver to install the glazing points. We can also use a Push Mate Point Setting Tool.

Step 3. Apply the Putty
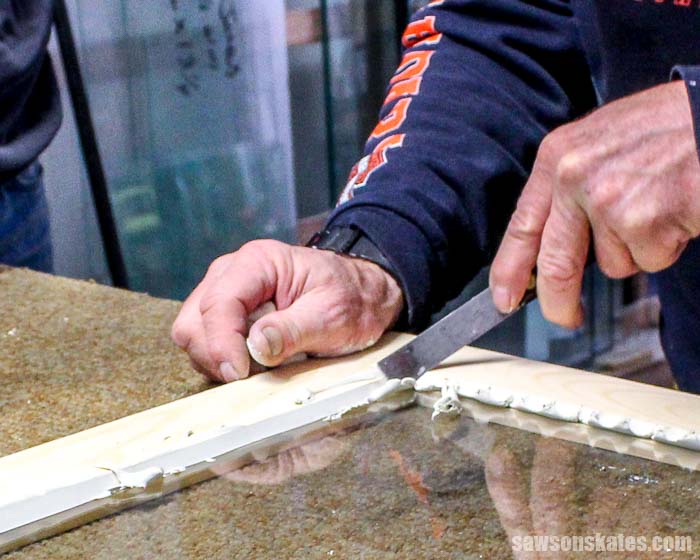
The glazing putty is easier to work when it’s warm. Bill kneaded the putty to warm it up and then pushed the putty into the rabbet with his fingers.
Using a putty knife, he pressed the putty and dragged it to form a bevel between the glass and wood sash.
Step 4. Paint or Stain
The glazing needs to dry before applying paint or stain. I waited about 21 days before applying two coats of latex exterior stain to my storm window.
Final Thoughts
Window glazing is necessary to keep our wooden windows weather tight. Windows can be glazed with either oil-based or water-based glazing. Oil-based glazing is traditional but needs about 30 days before it can be painted. Water-based glazing is modern and dries quickly, so it can be painted sooner.
Thank you for stopping by. If you found this information helpful, would you please pin it to Pinterest? Other DIYers would appreciate it and I would too! Thank you – Scott
More Like This:
Pin This For Later

Hi there – I’m Scott, a woodworking enthusiast and creator of Saws on Skates, a site I started in 2015 to share easy-to-follow tutorials, space-saving shop tips, and project inspiration for DIYers at any skill level. Learn more about my woodworking journey here.