Easy DIY Wood Screen Door (Step-by-Step Plans)
Struggling to find the perfect screen door? Build a custom DIY screen door that fits any size opening or style with this simple step-by-step plan!
What Should I Build Next?
That's the question I help answer.
Every week, I send woodworking ideas to 17,000 DIYers who love building things.
You'd fit right in.
Screen doors are a fantastic way to allow a cool breeze into your home while keeping bugs out, but they can be expensive. And what if you can’t find the size you need or the style you want? I have the solution. Build your own screen door using these easy step-by-step plans.
This project is simple enough for anyone to complete, and you can customize it to fit nearly any style or door opening. Keep reading for the screen door tutorial, and I’ll show you how to build your own in just a few easy steps!
Originally published May 9, 2017, republished March 27, 2023.
Table of Contents
- Why Build a Screen Door Yourself?
- What Tools Do You Need?
- What Kind of Wood Should I Use to Build a Screen Door?
- How Do You Measure the Door Opening?
- How Do You Finish the DIY Screen Door?
- How Do You Install the Screen Door in the Opening?
- How to Make a DIY Screen Door
- Get the PDF Plan
This article contains affiliate links. If you purchase from these links, I may earn a small commission at no additional cost to you. Visit my site policies for more information.
Why Build a Screen Door Yourself?
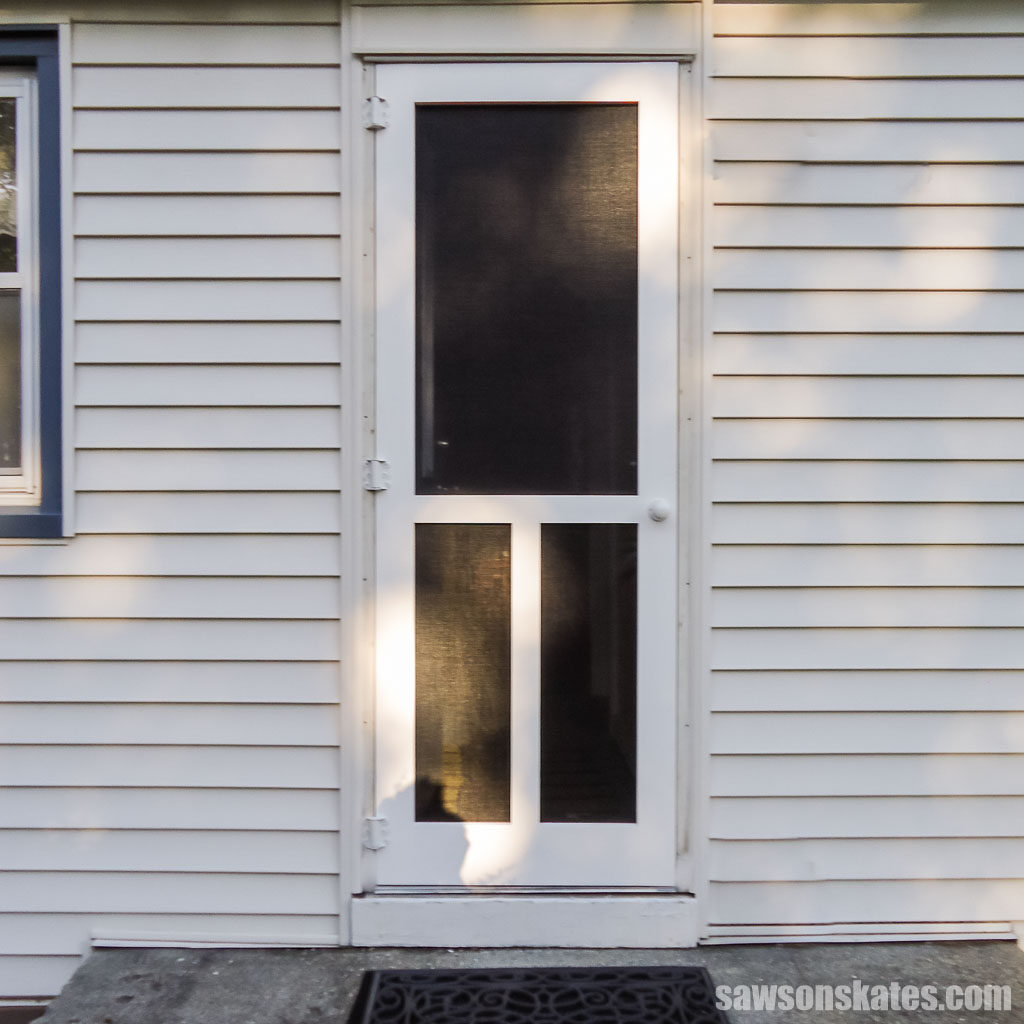
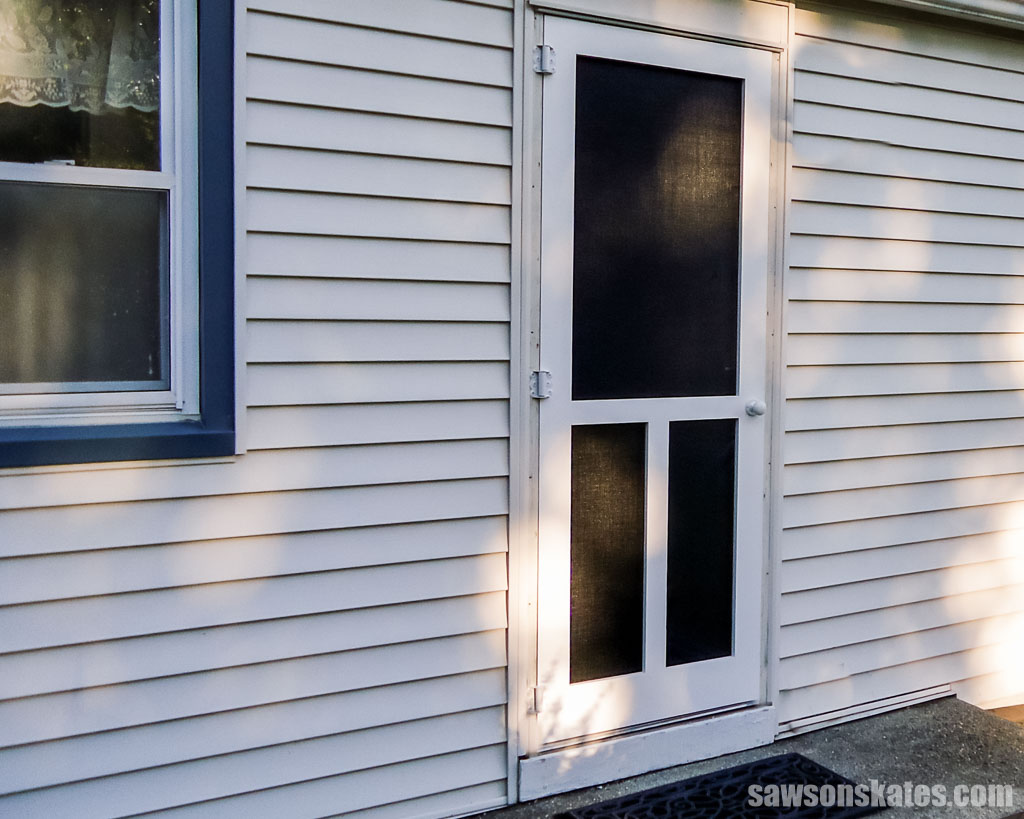
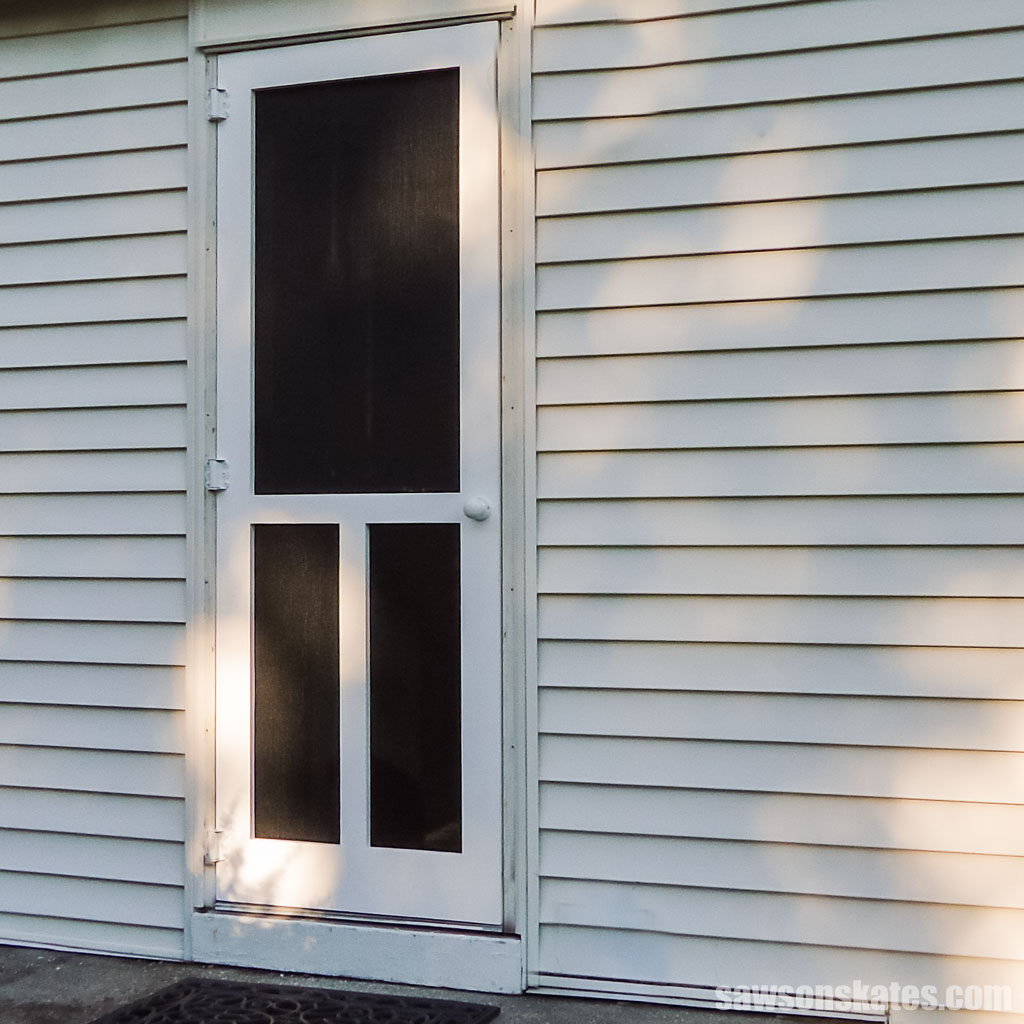
My friend Linda loved that her home had a screen door allowing fresh air in, keeping insects out, and providing her pets with a view of the outdoors. However, after years of service, her old aluminum door had seen better days and desperately needed to be replaced.
She looked into buying a new screen door but ran into several obstacles that I’ll share with you below. Fortunately, my experience constructing window screens and screen doors gave me the knowledge to help her.
Related: How to Make DIY Wood Window Screens
Before we continue, I should mention I built this project in 2012, three years before I launched this site. I apologize in advance for the quality of the photos. I didn’t realize then that I would be posting them on the internet for everyone to see!
Custom Size
The first challenge Linda encountered was her home’s doorway was not a standard size. The opening is so tiny that you almost have to turn sideways to pass through it!
Finding a store-bought screen door was nearly impossible since home improvement stores don’t carry one that fits this unusually narrow space.
Making your own screen door is the perfect solution for both standard and nonstandard-sized doorways because you customize it to fit your opening perfectly.
Durability
Have you ever checked out those cheap screen doors at the home improvement center? They are so weak and flimsy. Years ago, I bought one for my house, and it barely lasted a month! That’s when I decided to make my first screen door.
Building your own screen door is a better option because you can choose durable, better quality materials producing a sturdier, longer lasting result.
Style
I mentioned earlier that I built a handful of screen doors. A few of them I made were for the owner of an early 1900s apartment complex who wanted them to match the building’s historic aesthetic.
When you build your own screen door, you have complete control over the design, making it blend with any style, from modern to farmhouse.
Cost
Linda got a quote from a window and door company to have a screen door custom-made, and it was a pricey proposition. When she researched it in 2012, it was going to cost almost the same amount as her monthly mortgage payment! Making your own screen door is a much more cost-effective way to go.
What Tools Do You Need?
You’ll only need four tools to make this simple screen door: a miter saw, a pocket hole jig, a drill, and a stapler! I also recommend a brad nailer to speed up the building process, but it’s optional.
Miter Saw
I used my miter saw to cut all the screen door parts to length.
Pocket Hole Jig
When I first began making screen doors, my biscuit jointer was my go-to tool for joining the parts. Today I prefer to connect the joints using pocket holes. I use a Kreg Jig, but you can use any brand. If you don’t have one, you could join the door’s pieces with a doweling jig and dowels instead.
Related: Which Kreg Jig Should You Buy? (Here’s the Answer)
Drill
You’ll need a drill to make the pocket holes and drive the pocket hole screws that connect the door’s parts.
Related: How to Use a Drill (Tips & Techniques)
Stapler
You’ll need a stapler to attach the window screen mesh to the door openings.
Brad Nailer (optional)
I recommend a brad nailer to attach the screen molding that will hide the edges of the mesh, but you can use a hammer and nails if you don’t have one.
Related: Brad Nailer vs Finish Nailer (Which to Choose & Why)
What Kind of Wood Should I Use to Build a Screen Door?
I’ve built all of my screen doors with pine; however, it’s not the best wood for outdoor projects because it is not rot or insect resistant. Instead, consider using materials better suited to withstand the elements, such as douglas fir, southern yellow pine, or another rot-resistant wood.
That said, the pine door I made for my home more than 20 years ago still stands strong. Unfortunately, the one I made for Linda is not holding up as well and showing signs of rot. The most significant difference between our homes is the eaves, the part of your roof that overhangs the sides providing protection from the elements.
My home’s eaves overhang about 18 inches, providing my door shelter from the elements, whereas Linda’s eaves extend only a few inches, so hers often gets soaked whenever it rains or snows, causing it to decay prematurely.
If your home has eaves, or you’re making a screen door for a porch or other protected area, you might be able to get away with using pine.
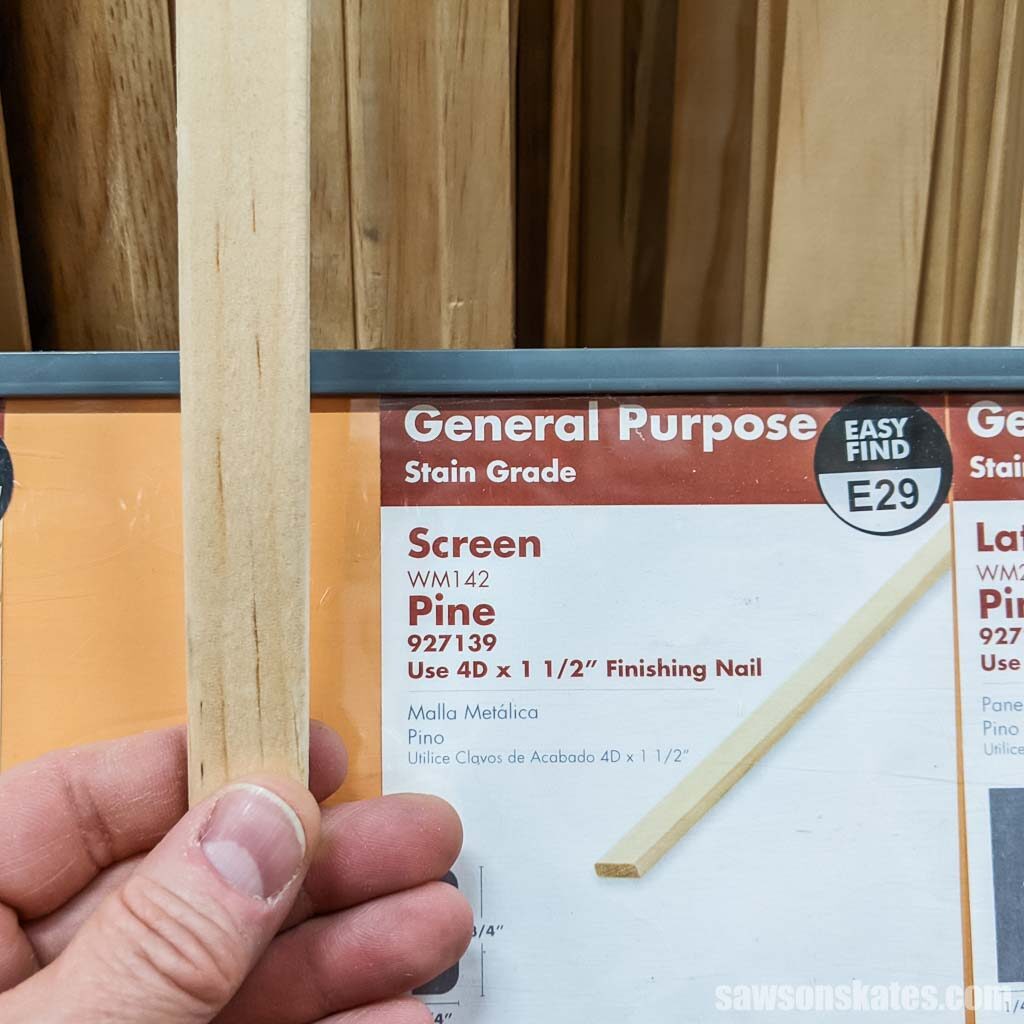
You’ll also need screen molding, narrow trim that hides the edges of the window screen mesh, and the staples that hold it in place, giving your door a finished appearance.
You can find screen molding in the molding and trim area, usually near the lumber section of your home improvement store.
How Do You Measure the Door Opening?
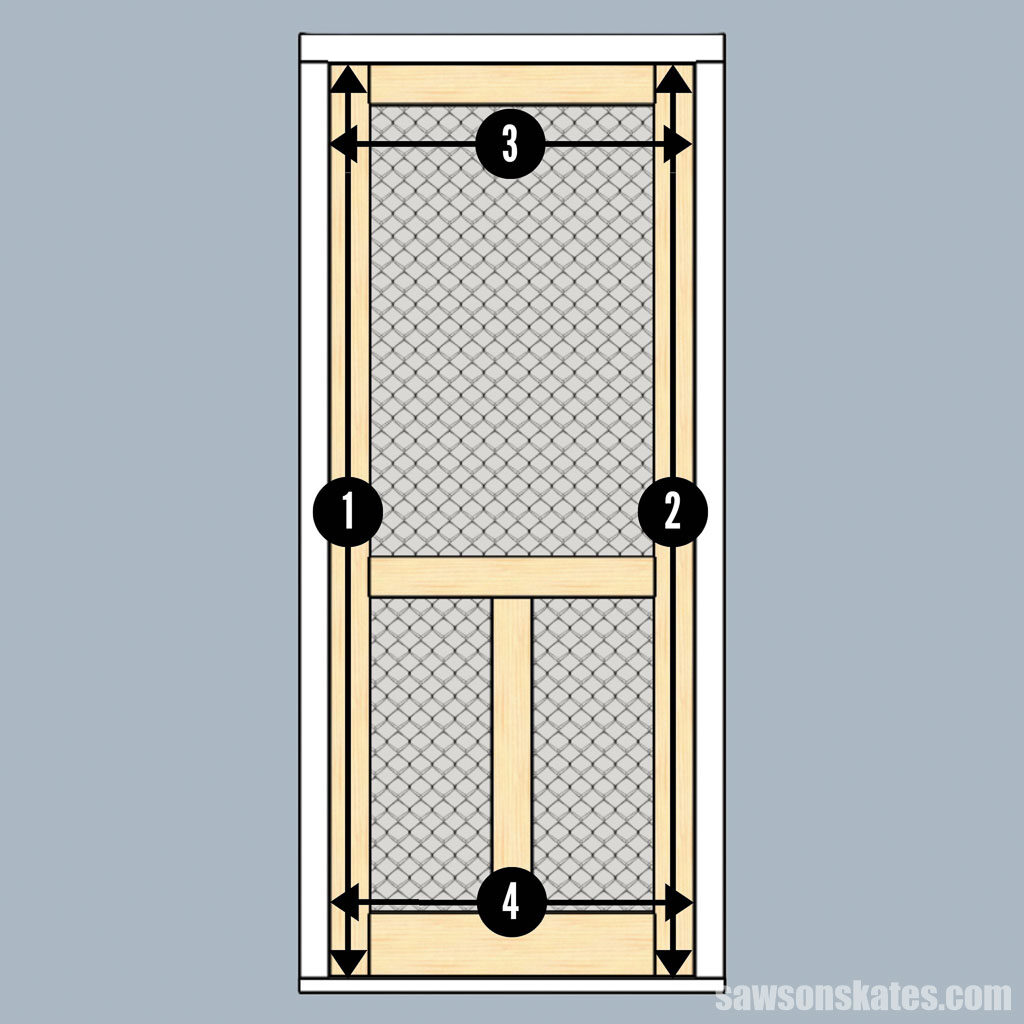
Measuring your door opening is an essential step in building your screen door. Doorways are frequently not square, so I recommend taking four measurements for the best fit.
Height
- Top to bottom on the left side
- Top to bottom on the right side
Width
- Left to right on the top
- Left to right on the bottom
Need help using your tape measure? I’ll walk you through it in the How to Use a Tape Measure Correctly tutorial.
Next, take your smallest height and width measurement and subtract ¼” which will allow ⅛” clearance on either side of the door. For example:
- If your door opening height measures 80-¼” less ¼” equals 80″
- If your door opening width measures 32-¼” less ¼” equals 32″
Then adjust the plan’s measurements to correspond with the dimensions of your door opening.
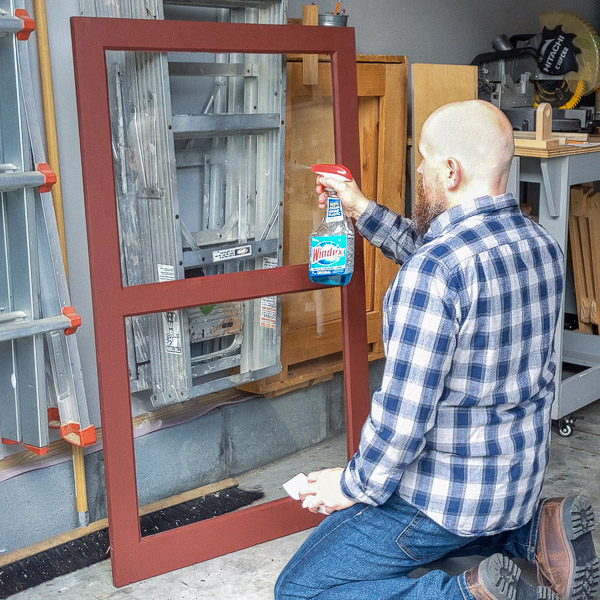
How Do You Finish the DIY Screen Door?
Once you’ve assembled your screen door, you’ll want to protect the wood from the elements.
If you want the wood’s natural beauty to show through, I recommend applying a few coats of spar urethane. This sealer is designed for outdoor use and contains UV blockers that help prevent fading caused by the sun’s damaging rays.
Related: Spar Urethane vs Polyurethane (Differences + Which to Use)
If you want a bit of color, apply several coats of shellac-based primer and finish it with a few coats of exterior-grade paint.
You might also consider sealing your door with a solid outdoor wood stain which has a similar look to paint. I use exterior stain for many of my outdoor DIY projects because I prefer its flat sheen and rustic look while still offering protection for the wood. The drawback is its flat finish seems to attract dirt more easily.
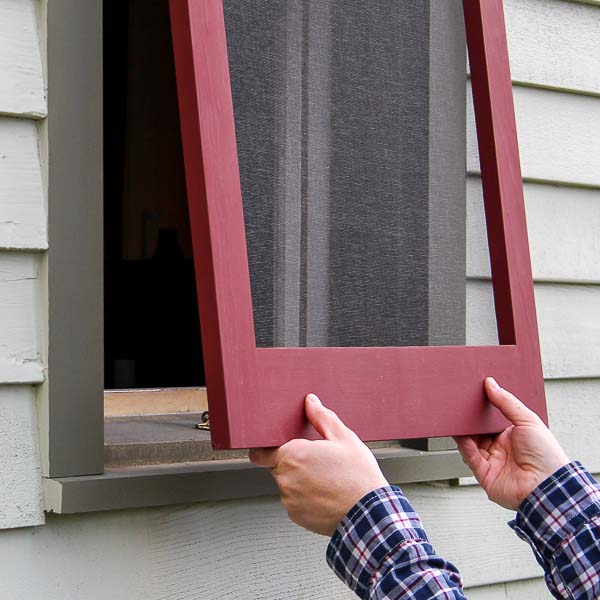
How Do You Install the Screen Door in the Opening?
I use self-closing screen door hinges to mount the door to the opening. You can buy a pack of two hinges or an installation kit, which typically includes the hinges, door handle, and a hook and eye latch to lock the door.
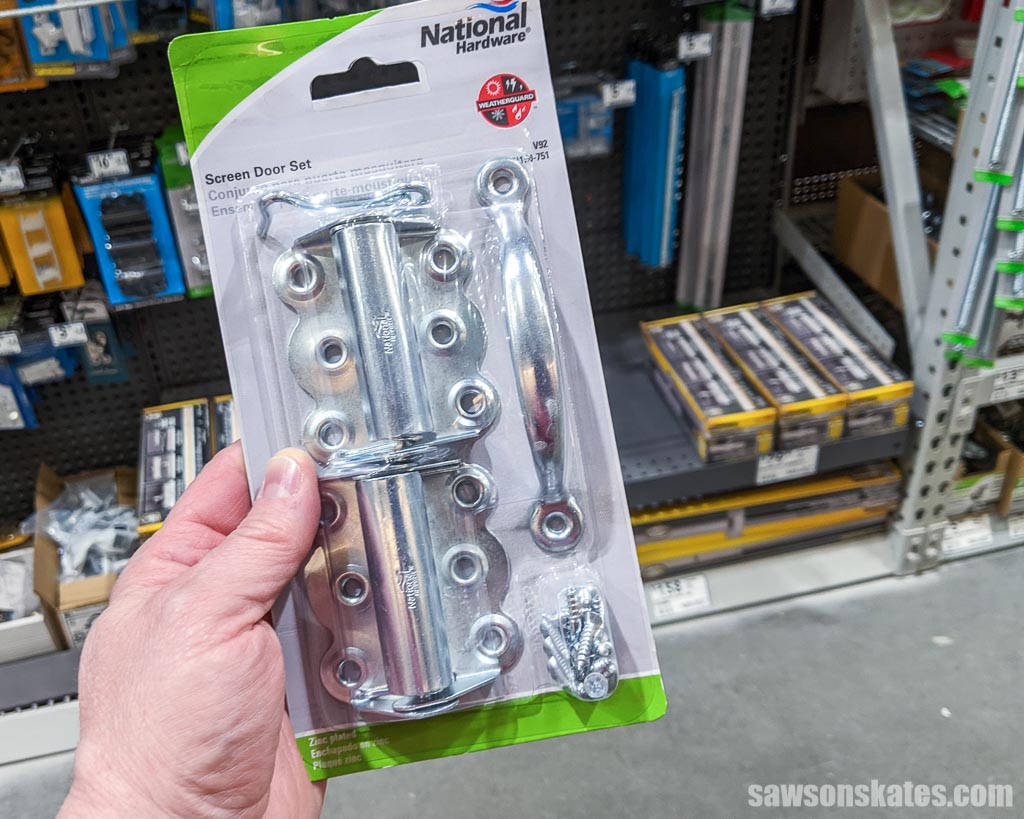
While the hinges are self-closing, the springs are a little too weak for my taste, so I also install a pneumatic door closer because it:
- Does a better job closing the door
- Prevents it from slamming
- Allows you to prop it open if you need to move something in or out of the house
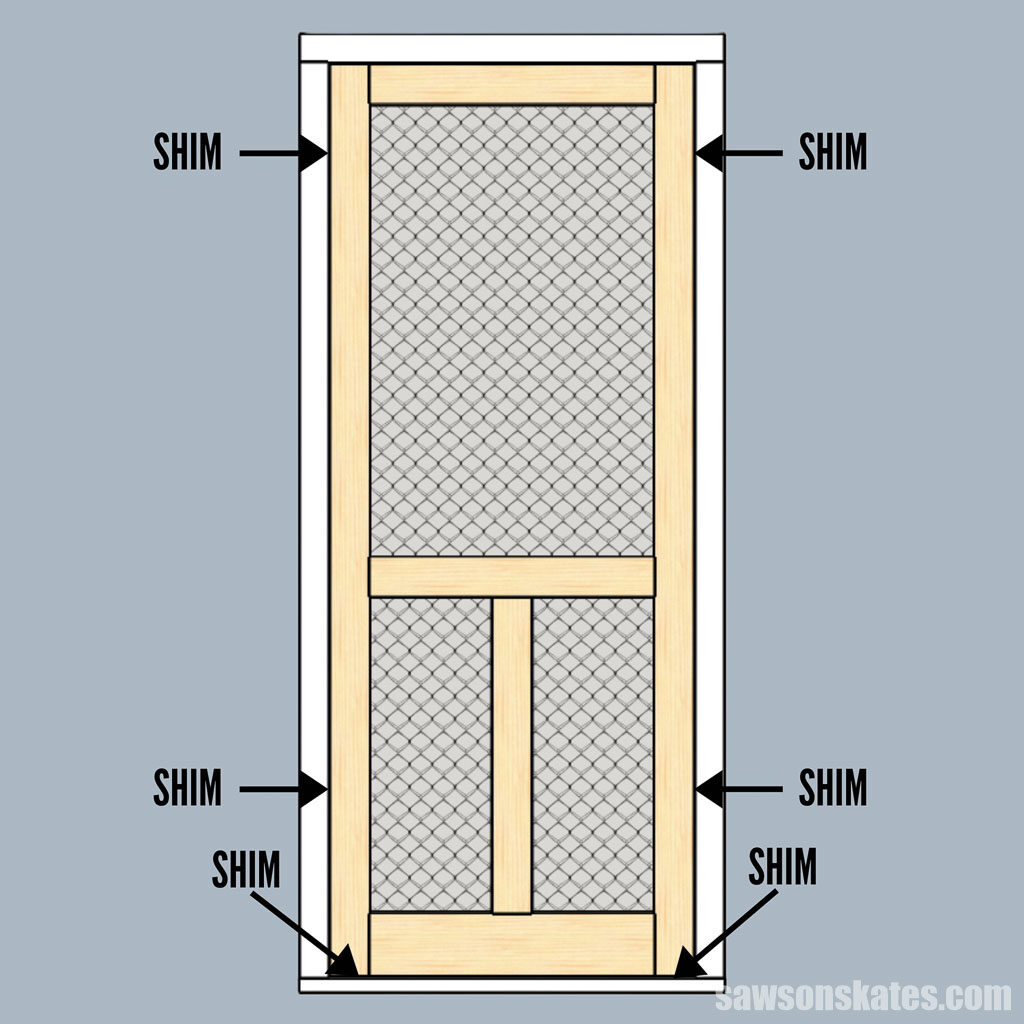
Another thing I use to install the door is six to eight small scrap pieces of ⅛-inch material, such as plywood. Remember, you allowed for ⅛ inch clearance on each side of the door, so I use these scrap pieces as shims to help maintain a consistent gap around all sides when installing the door.
Once I’ve gathered all of the hardware, I place one shim on the bottom left and right side of the opening. Then I position the door on top of the shims and insert shims on the left and right sides at the top and bottom of the door.
With the door in position, follow the hinge’s mounting instructions. Once you’ve installed the hinges, you can attach the handle and the latch. All that’s left is to follow the instructions on the pneumatic door closer to attach it to the inside of the door.
How to Make a DIY Screen Door
Printed Plan
Get the PDF plan here (includes detailed instructions, measurements, and bonus tips)
Supplies
- Wood (per the printed plan)
- Waterproof Wood Glue
- 1-¼” Weatherproof Pocket Screws
- ⅜” Staples
- ½” Brad Nails
- Window Screen Mesh
- Screen Door Hardware Kit
Tools
- Tape Measure
- Miter Saw
- Pocket Hole Jig
- Drill
- Stapler
- Brad Nailer or Hammer
- Utility Knife
Step 1. Measure Your Door Opening
The first step to making your screen door is measuring the opening. See tips for measuring here. Then, adjust the door’s parts to your required dimensions.
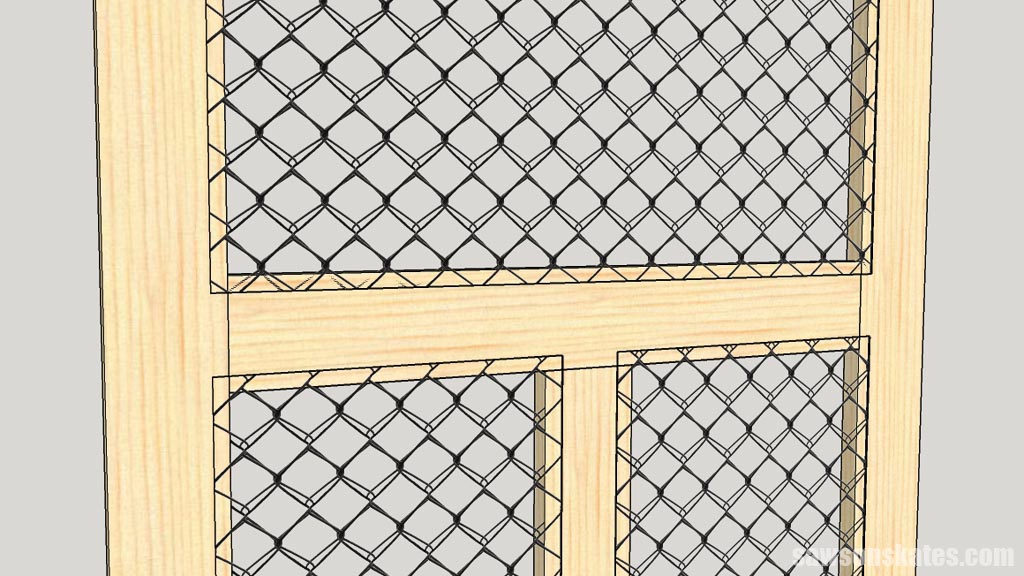
Step 2. Assemble the Screen Door Frame
Cut two pieces of wood to length for the stiles.
Boards can vary in width, so for the best results, I recommend measuring the combined width of your two stiles and subtracting that measurement from the overall width of your screen door.
Next, cut three pieces of wood to length for the rails and drill pocket holes in each end.
Related: How to Use a Pocket Hole Jig (& Beginner Pitfalls to Avoid)
Cut one piece of wood to length for the mullion (vertical bar between the bottom opening) and drill pocket holes in each end.
Layout your door’s parts on a flat surface. I usually build my doors on the garage floor.
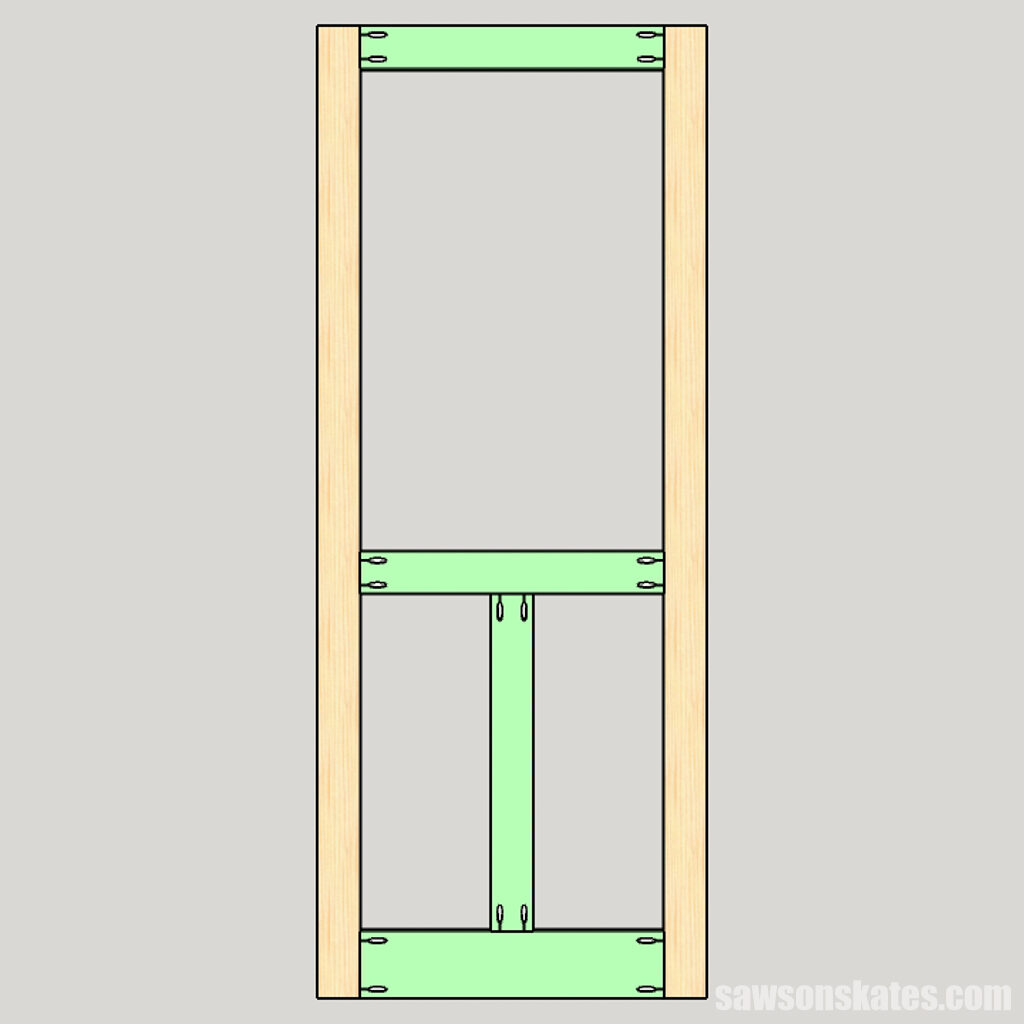
Apply glue to the ends of the mullion and rails, position on the stiles, and clamp. Attach using pocket hole screws.
TIP: I recommend using waterproof wood glue such as Titebond 3.
To hide the pocket holes and give your project a more polished appearance, I recommend filling them with store-bought pocket hole plugs or making your own.
Related: How to Make Pocket Hole Plugs
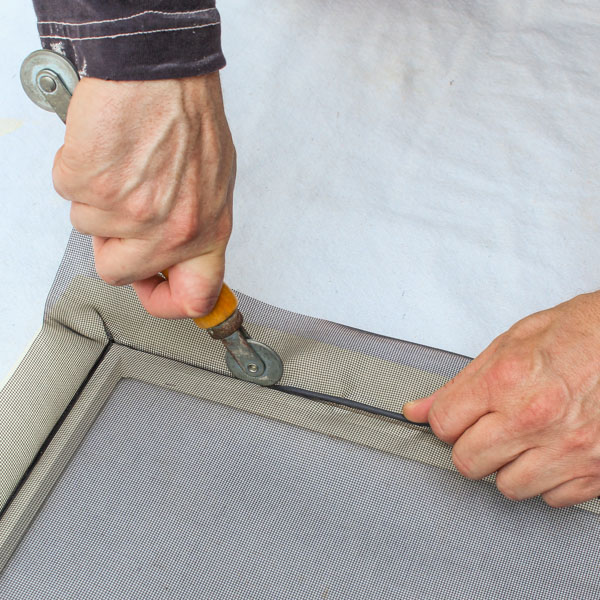
Step 3. Attach the Window Screen Mesh
Cut the window screen mesh using scissors, so it’s about 1 inch larger than your openings. This will allow it to overhang the opening about a ½” on each side. Don’t worry if it overhangs more than that because you can trim off the excess after you install the screen molding in Step 4.
TIP: Roll out the screen, so it curls down, reducing the chances of it curling up while installing it.
After you have rolled out the mesh, use a stapler to tack it in place at the center of the opening’s top.
The screen molding will hide the staples, but it’s not very wide, so you’ll want to keep them near the inside of the opening so they’ll be hidden after you install the molding.
Next, gently pull the screen taught and tack it at the center of the opening’s bottom.
Then, follow this stapling pattern:
- Top left, bottom left
- Top right, bottom right
Continue alternating side to side, top to bottom, until you reach the corners.
On the sides, tack the middle of each side, then work outward just like you did for the top and bottom.
Repeat for the remaining openings.

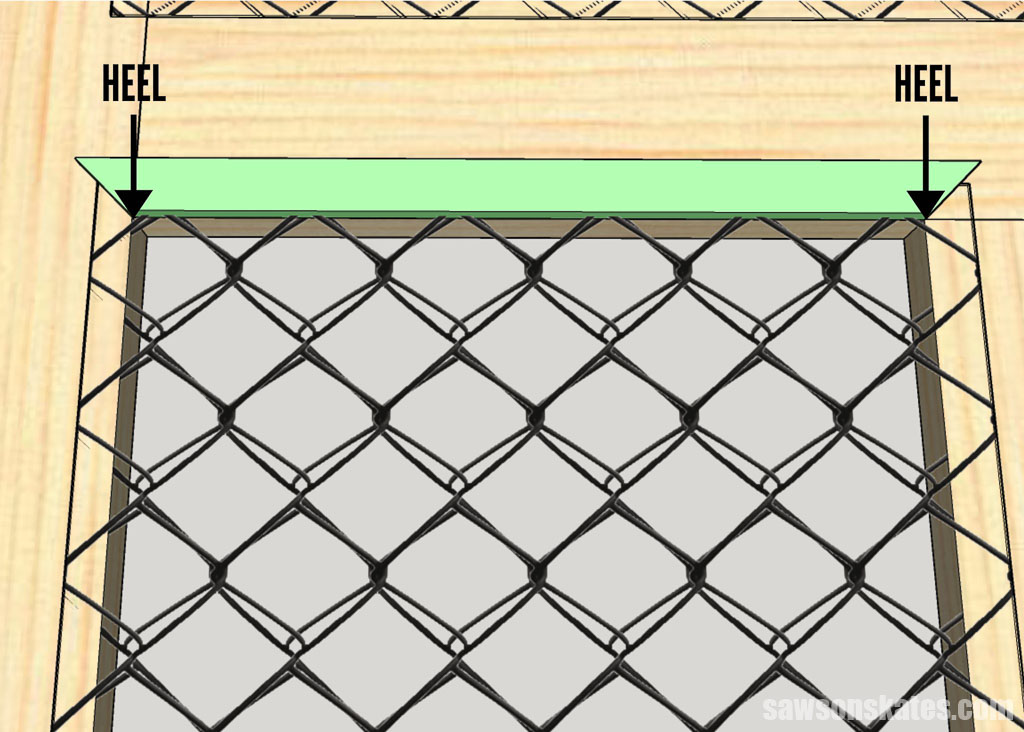
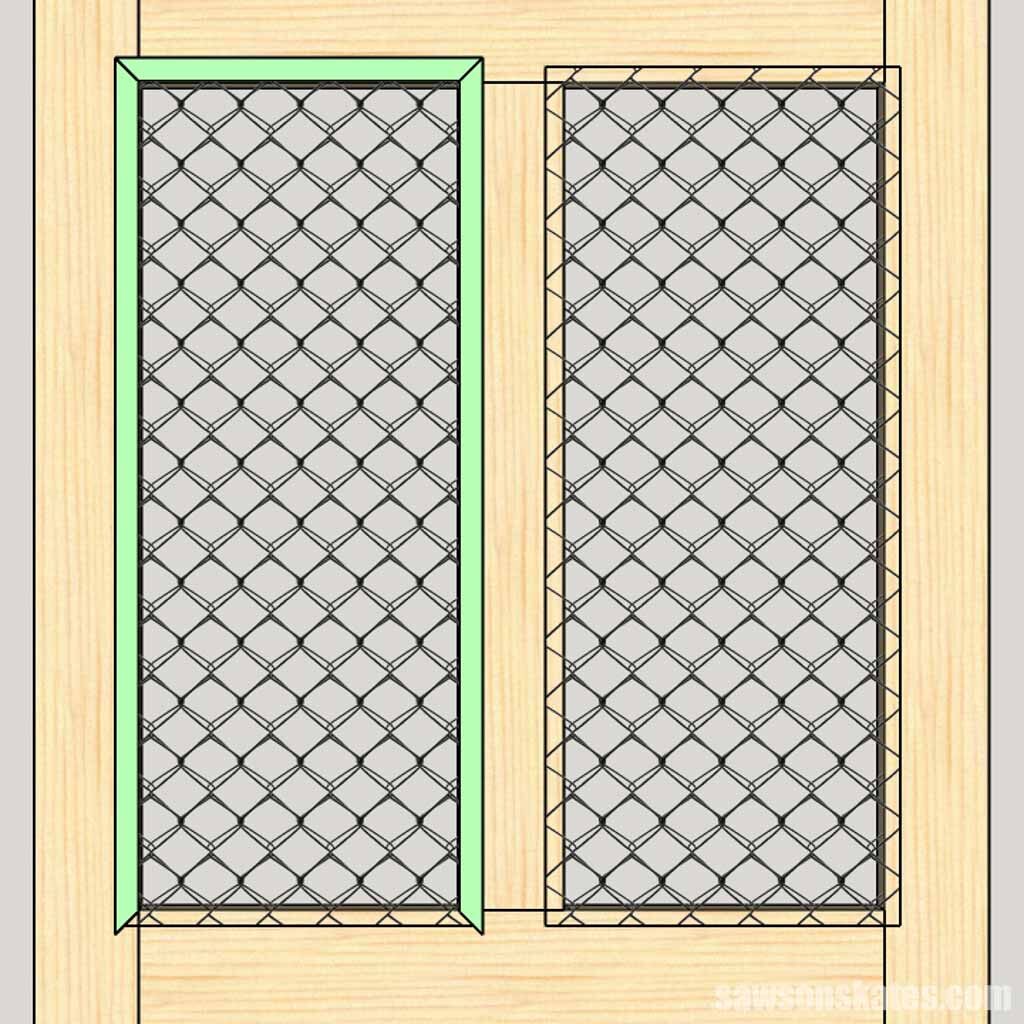
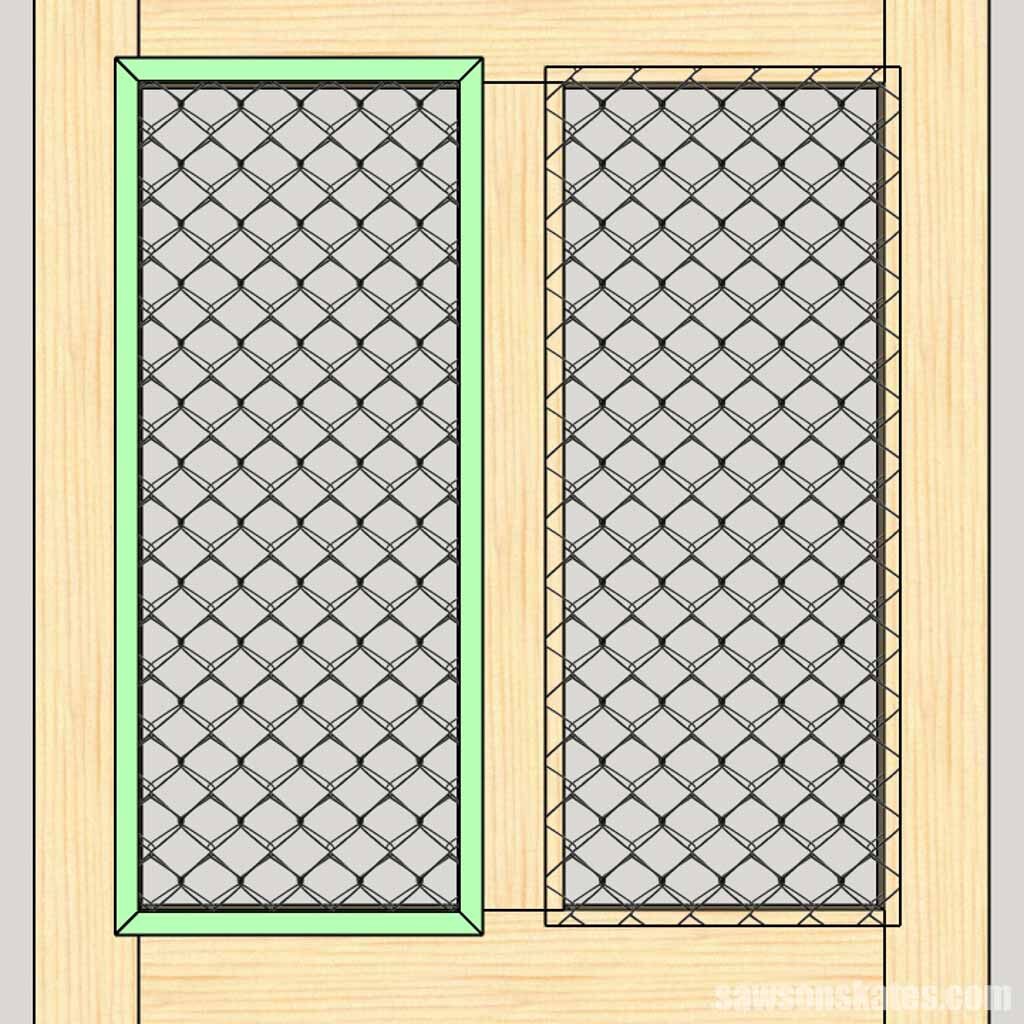
Step 4. Attach the Screen Molding
The screen molding will hide the staples and edges of the mesh giving your door a finished appearance.
You can attach it using a hammer and nails, but a brad nailer is quicker and easier if you have one.
Start by cutting a 45-degree angle on one end. Position the mitered end so the heel intersects with the opening’s corner, then mark the intersection of the opposite corner. I recommend cutting the piece long so that you can “sneak up” on the perfect length by trimming it with your miter saw.
When you’re pleased with the fit, attach it using brad nails, avoiding the stapled areas.
Next, follow the same procedure to install the sides.
You’ll install the bottom in a similar way. Again, I recommend cutting the piece long because you may need to fine-tune the angles to get the bottom piece to fit correctly.
Repeat for the remaining openings.
After the molding is attached, you can trim away any excess screen extending beyond the molding using a sharp utility knife.
Step 5. Finish Your Screen Door
See How Do You Finish the DIY Screen Door for more information.
Step 6. Install the Door in the Opening
See How Do You Install the Screen Door in the Opening for more information.
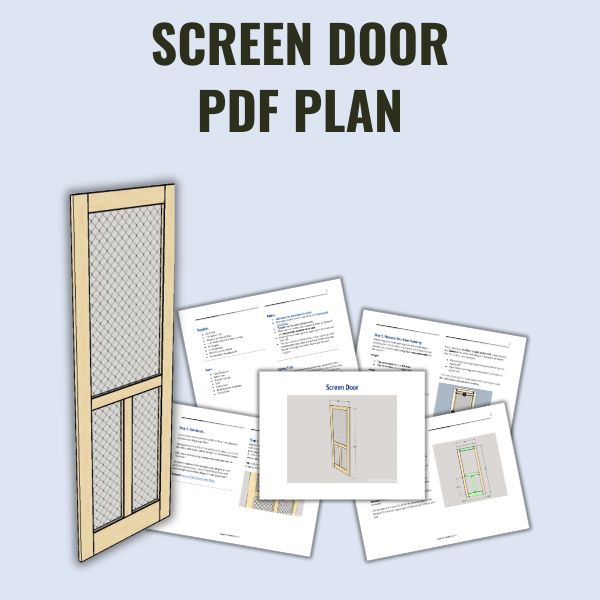
Includes:
- List of tools and materials
- Complete measurements (in inches)
- Easy-to-follow instructions
- Detailed diagrams
Final Thoughts
With a few basic tools and materials and these step-by-step instructions, you can create an attractive and functional wooden screen door that fits your home’s style!
Don’t wait. Get your PDF plan (including the detailed instructions and measurements) now!
Thank you for stopping by. If you enjoyed this tutorial, would you please take a moment and pin it to Pinterest? I’d really appreciate it!
Recommended For You
Pin This For Later

Hi there – I’m Scott, a woodworking enthusiast and creator of Saws on Skates, a site I started in 2015 to share easy-to-follow tutorials, space-saving shop tips, and project inspiration for DIYers at any skill level. Learn more about my woodworking journey here.
nice plan for screen door … thanks
Hi Robert – Thank you for stopping by and the compliment!
Scott, Thanks for the screen door plans. I have a weird opening also as it is taller than a normal door and nope, none of the box stores have anything close. House was built in 1910 when a 2X4 was actually 2X4. Not sure why the door is so tall. Thanks again I now have a working plan of attack.
Scott: True to your word, you got your revised plan up, thank you. Will be starting on this soon. Be great having the screen door so I can get a nice cross breeze.
Paul
Appreciate your plan – many thanks for the precise instructions
Hi Scott I am an lady 88 years old as of yesterday. My son and daughter made the screen door. It’s a tremendous plan. I love it. I wanted to buy you a cuppa coffee but I found the instructions to do that very difficult. Sending a picture. Thanks again
Thanks for the plan.
You’re welcome, Joel!
I made this door!