DIY Wood Storm Windows (Save $ and Prevent Heat Loss)
Keep your home cozy and warm with DIY wood storm windows! Save money and say goodbye to heat loss with this step-by-step tutorial.
What Should I Build Next?
That's the question I help answer.
Every week, I send woodworking ideas to 17,000 DIYers who love building things.
You'd fit right in.
Looking for a simple way to reduce your energy bills and prevent heat loss in your home? DIY wood storm windows are the perfect way to seal drafty old windows and help reduce your winter heating costs.
With a few simple supplies and this step-by-step plan, you can create custom-fit storm windows that will add extra insulation to your home.
Published November 27, 2018, republished September 18, 2023.
Table of Contents
- What Are Storm Windows?
- What Tools Do You Need?
- What Wood Should You Use?
- Should You Use Glass or Plexiglass?
- How to Make DIY Storm Windows
- Get the PDF Plan
This article contains affiliate links. If you purchase from these links, I may earn a small commission at no additional cost to you. Visit my site policies for more information.
What Are Storm Windows?
Storm windows, also known as secondary windows or storm sashes, are additional windows installed on the outside of your existing ones. They improve energy efficiency by preventing heat loss and providing your home’s primary windows with extra protection against rain, snow, hail, or flying branches.
Storm windows are a cheaper alternative to replacements which can be expensive because you must remove the primary windows to install them. If you have older, single-pane windows in your home, storm windows might be a great option for you.
Why Make DIY Storm Windows?
DIY storm windows are a low-cost way to improve the energy efficiency of your home and save money on your heating bills. Additionally, wooden storm windows complement the style of antique homes, which is why I chose to build them for my house.
The previous owners of my 1850s home did an excellent job renovating and preserving the charm of an old house. What looked out of place were the 1950s-style aluminum storm windows.
The house was saying 1850s while the aluminum storm windows screamed 1950s. That aluminum had to go.
A few years ago, I built my own wood storm windows. Recently, I renovated one of the primary windows in my home due to a rotted window sill. The window opening changed slightly during the renovation, and the storm window no longer fit, so I needed to make a new one. I thought this would be an excellent opportunity to share how to build a DIY storm window with you.
What Can You Use Instead of DIY Storm Windows?
There are a few alternatives to DIY storm windows that you can consider. Here are some options:
Window Insulation Kits
Window insulation kits are a good option if you are looking for a quick and easy way to improve your home’s energy efficiency. They are relatively inexpensive, easy to install, and available online and at most hardware and home improvement stores.
Kits typically consist of plastic shrink film that attaches to the inside of your window frame with double-sided tape. Then using a hair dryer, you shrink the plastic sheet, removing any wrinkles and creating a tight seal.
Interior Storm Windows
Interior storm windows are similar to traditional exterior ones, but you install them inside your home instead. They’re more expensive than insulation kits but less expensive than buying new replacement windows.
When to Choose DIY Storm Windows
DIY storm windows can be a good option if you are comfortable with doing some basic woodworking. They can also be a good option if your windows are an unusual shape or size or if you’re like me and want to maintain your home’s antique aesthetic.
The best option for you depends on your budget, skills, and time. If you’re handy and have the time, DIY storm windows can be a good option. However, if you are short on time or don’t have the skills, a window insulation kit might be the better choice.
What Tools Do You Need?
You’ll only need a few tools to make wooden storm windows, such as a miter saw and a drill. Here are a few others you’ll need:
Pocket Hole Jig
When I started making storm windows, I used a biscuit joiner to assemble the parts. However, many DIYers contacted me saying they didn’t have one and asked if they could use pocket holes instead.
Yes, you can use pocket holes instead of biscuit joints to assemble your storm windows. In this updated tutorial, I’m using pocket hole joinery to make it easier for you to follow along.
I used a Kreg pocket hole jig, but you can use any brand. If you don’t have one, you could also join the pieces with a doweling jig and dowels instead.
Related: What Kreg Jig Should You Buy? (Here’s the Answer)
Handheld Router
I used a handheld router to make a rabbet, a recess or groove cut into a workpiece’s edge, creating a lip for the glass pane to sit in.
What Wood Should You Use?
I built my home’s storm windows with pine. While it’s a good choice for indoor projects, pine is prone to rot and insect damage when used outdoors. If you are looking for a more durable option, consider using southern yellow pine, Douglas fir, or another rot-resistant wood.
Should You Use Glass or Plexiglass?
You can use glass or plexiglass for DIY storm windows; however, I prefer to use glass for mine.
Here are the pros and cons of each:
Glass
- Resistant to scratches
- Usually costs less than plexiglass
- Shatters easily
- Can be more difficult to cut
- Heavier than plexiglass
Plexiglass
- Easier to cut
- Shatter-resistant
- Lighter than glass
- Scratches Easily
- Usually costs more than glass
While plexiglass has more advantages, such as being shatter-resistant and easier to cut, I still prefer glass because it’s more resistant to scratches. I used plexiglass for the windows in my DIY truck camper and found they easily scratched when cleaning, making them look dull and old before their time.
How Do You Install the Glass?
Once you’ve decided between glass and plexiglass, you’ll need to install it in your storm windows.
The best way is to use glazing points, small metal clips that attach into the rabbet on the back of the window frame, securing the glass in place.
Next, using a putty knife, you’ll apply window glazing, making an airtight, watertight seal between the glass and wood frame.
Here’s what I’ve learned after building a handful of these wood storm windows. I’m not good at glazing, and it takes me forever.
I didn’t want to become frustrated trying to glaze the new storm window, so I contacted a local glass company. Bill, the owner, has more than 30 years of experience. He cut the glass to size and glazed the window in about 30 minutes. It was well worth the expense to save time and avoid the frustration.
Head over to How to Glaze a Window to see how Bill glazed my wood storm window step-by-step.
How Do You Install Wood Storm Sashes?
There are two ways to install wood storm sashes:
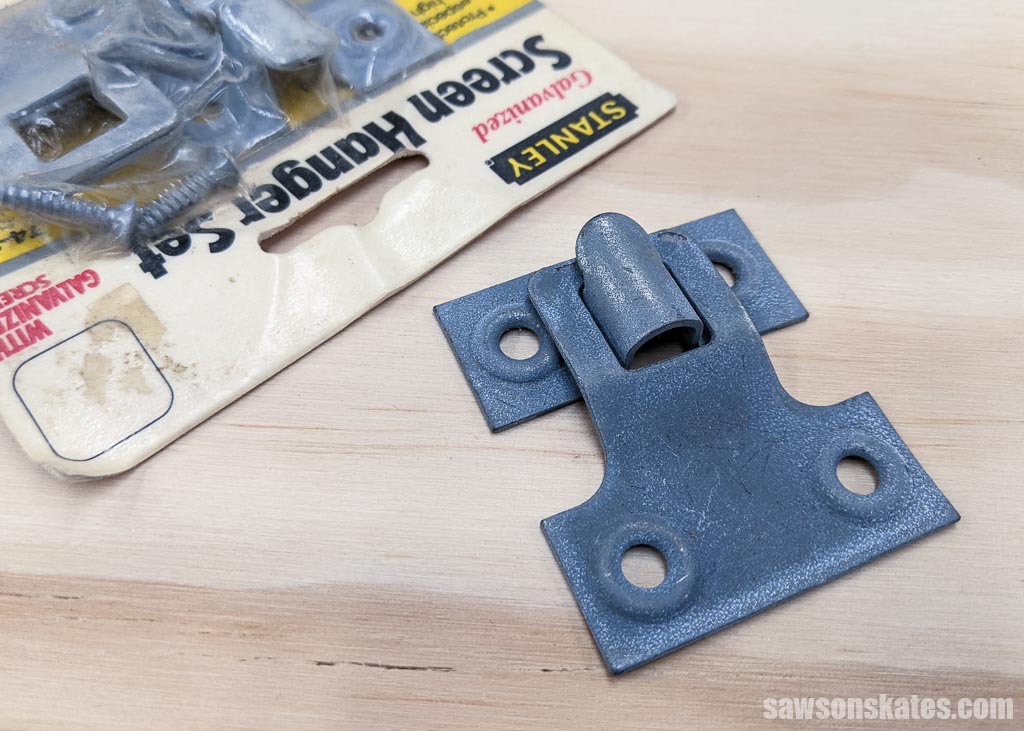
Storm Window Hardware
The most common way to install wood storm windows is with storm window hangers. Two hangers are mounted to the window trim, and two corresponding clips are attached to the wood storm window. The clips slide over the hanger and keep the window in place.
DIY Installation
My aunt is also an old house fanatic, so I shared with her how I planned to install my wood storm windows. She had another idea that would produce a cleaner look.
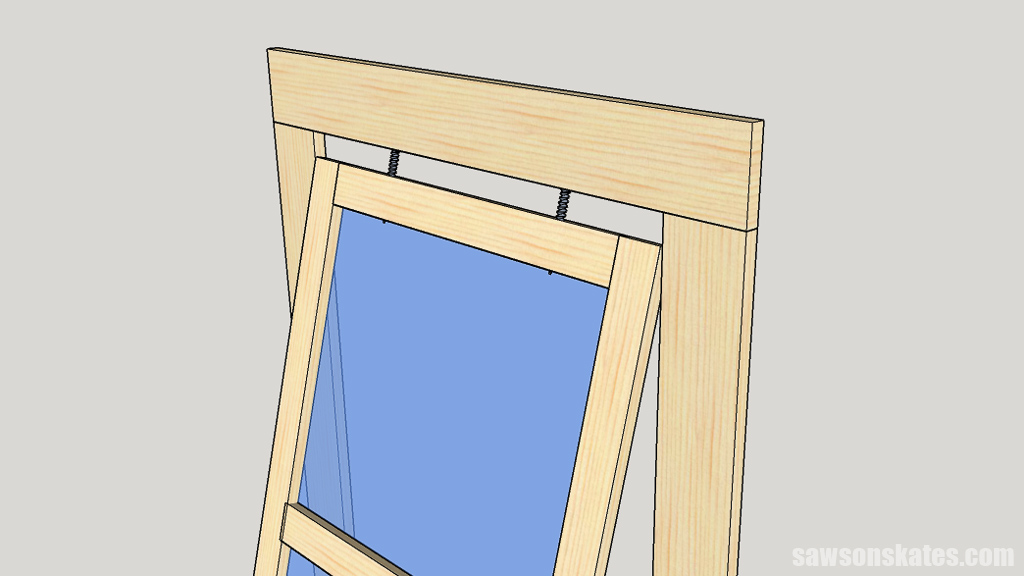
Her suggestion was to drive two screws in the top of the storm window and drill corresponding holes in the underside of the window trim.
The screws extend from the storm window about a ½” and act like pins. The holes in the underside of the trim are drilled about ⅜” deep. The pins are inserted into the holes and lock the top of the storm window in place. Think of it like adding a leaf to an expandable table where the pins of the leaf fit into the holes in the table.
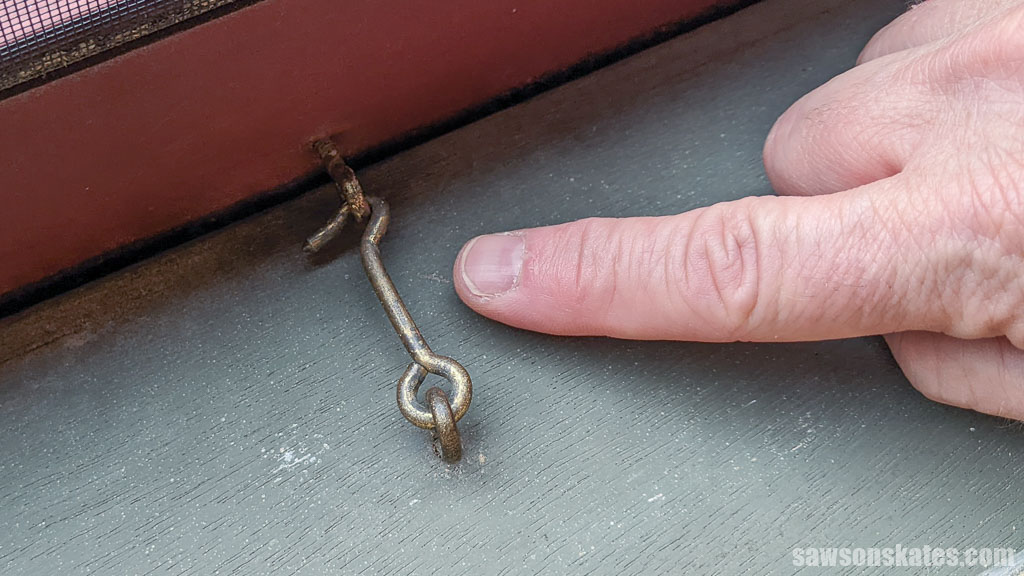
A hook and eye at the bottom locks the wood storm window in place.
I have received many questions about this installation method. I’ve tried taking photos, but it was tricky to properly photograph so that you could see what I was doing.
Instead, I created some sketches. I’ll preface this by saying this is still not as clear as I would like it to be. So please bear with me. If you’re still unsure, I suggest making a jig with some scrap wood and testing it. It may become easier to understand that way.
Make a Jig
I started by making a jig from three pieces of scrap wood.
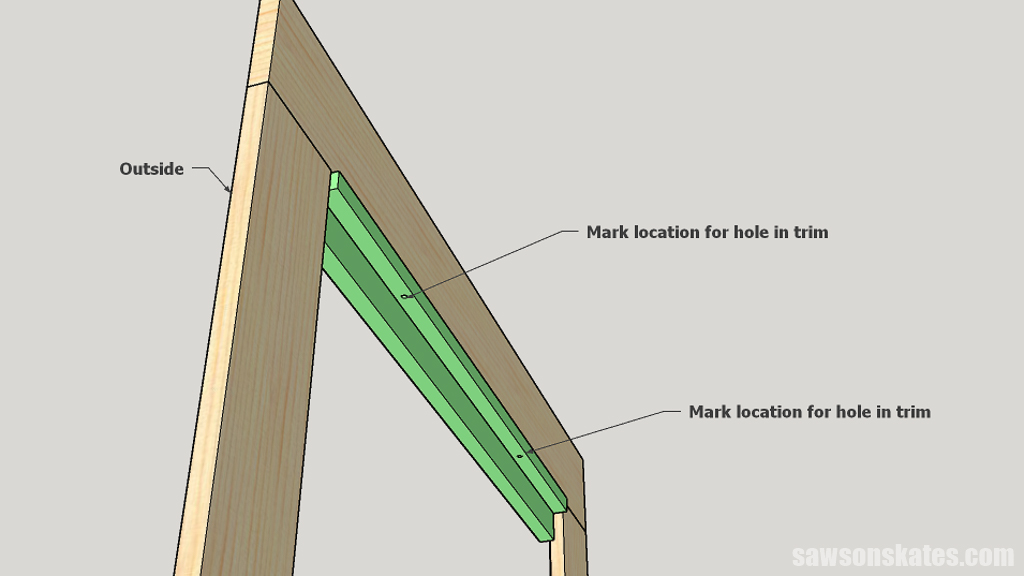
In this sketch, the jig is placed on the outside of the storm window. But in this view, you are looking down and from the inside of the house.
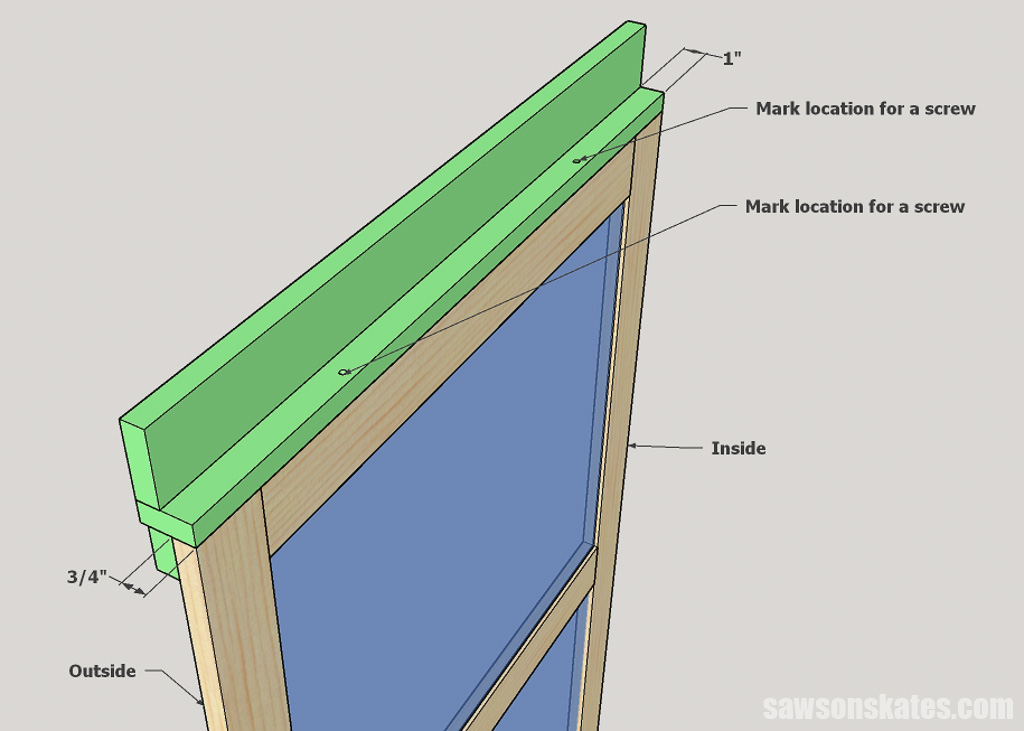
The bottom of the jig is set for ¾”, the thickness of the storm window. The top of the jig is set for 1″, the distance I needed to correctly set the storm window in the opening. Your measurement may be different.
I drilled two holes through the top of the jig that I used to mark the location of the screws that will act like pins. Later, I used them to mark the location for holes on the underside of the trim.
Then, I place the jig on the window trim. In this sketch, you are standing in the yard on the outside of the house.

To see the next step, you must look from inside the house. You can do this step outside, but you need to look up, and from the inside so you see what to do.
Use an awl to mark the center of each hole in the jig on the underside of the trim. Then, use a ¼” Forstner bit (or whatever size bit will fit the screws you are using) to drill a hole ⅜” deep at each location.
Related: What is an Awl (+ How to Use it)
To insert the pins (screws), tilt them slightly into the holes. Once they are in position, push the bottom in.
All that’s left is adding a hook and eye to secure it in place. From inside the house, I attach the hook to the sill and the eye to the back of the frame.
Additional Layer of Protection
There’s one more thing I do after I install the wood storm windows. I use DAP Seal’ N Peel to seal the storm and primary windows.
Seal ‘N Peel is a caulk-like product that goes on clear; however, you can easily peel it off in the spring when it’s time to remove your storm windows.
TIP: Apply Seal’ N Peel to the top and sides of the storm window only, leaving the bottom unsealed and allowing any condensation to drain out.
Here’s one word of caution. Seal ‘N Peel has a stinky, chemical smell. It’s best to use it in the early fall when it’s still warm enough to leave the doors open so the smell can escape.
Here’s another word of caution. Don’t use Seal ‘N Peel to seal emergency exits!
DIY Wood Storm Windows
Printed Plan
Get the PDF plan here (includes detailed instructions, measurements, and bonus tips)
Supplies
Tools
- Tape Measure
- Kreg Multi-Mark
- Miter Saw
- Pocket Hole Jig
- Drill
- Router
- ¼” Rabbeting Bit
- Corner Chisel (optional)
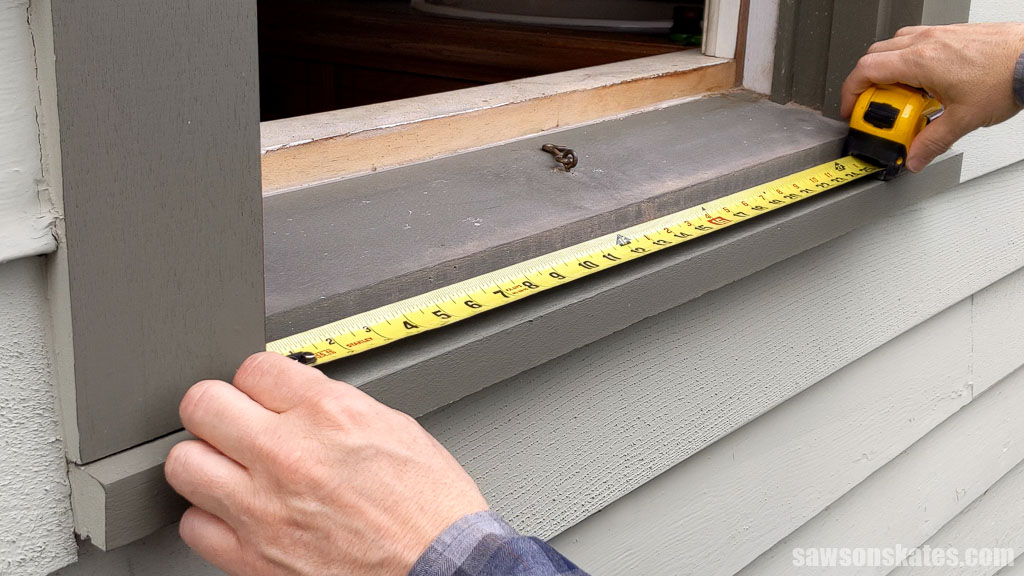
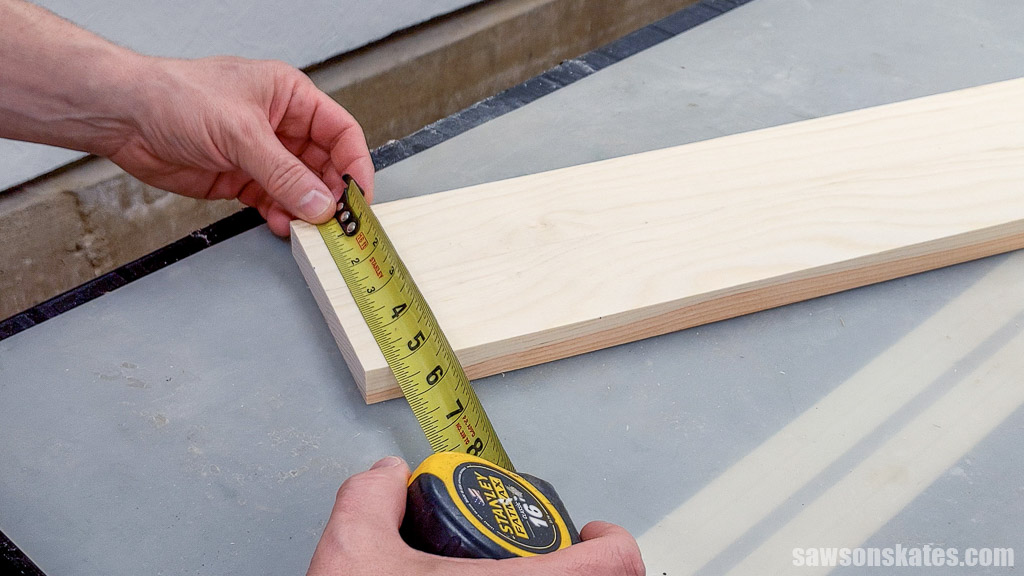
Step 1. Measure the Opening
I started by taking measurements from side to side at the top and bottom of the window opening. Then, I took measurements from top to bottom on the left and right side of the window opening.
I deducted ¼” from the smallest side-to-side dimension and ¼” from the smallest top-to-bottom dimension. These were the dimensions I used to build my storm window. Deducting ¼” will allow for ⅛” of clearance around each side of the storm window.
Related: How to Use a Tape Measure Correctly (Tips for Success)
Step 2. Cut the Stiles
Cut two pieces of wood to length for the stiles.
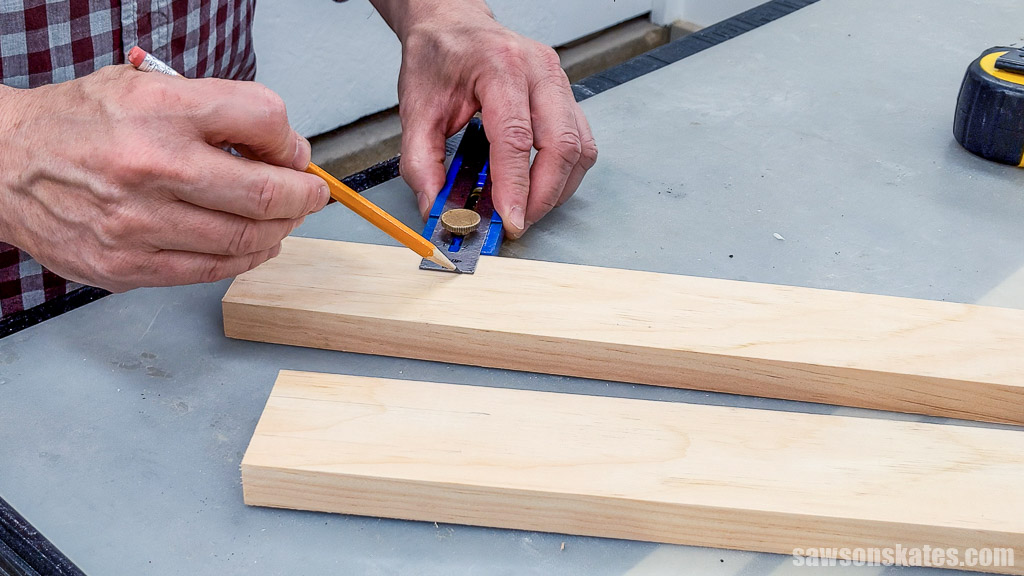
Step 3. Cut the Rails
Boards can vary in width, so for the best results, I recommend placing the stiles side-by-side, measuring their total width, and subtracting it from your window’s required width to arrive at the length for your rails.
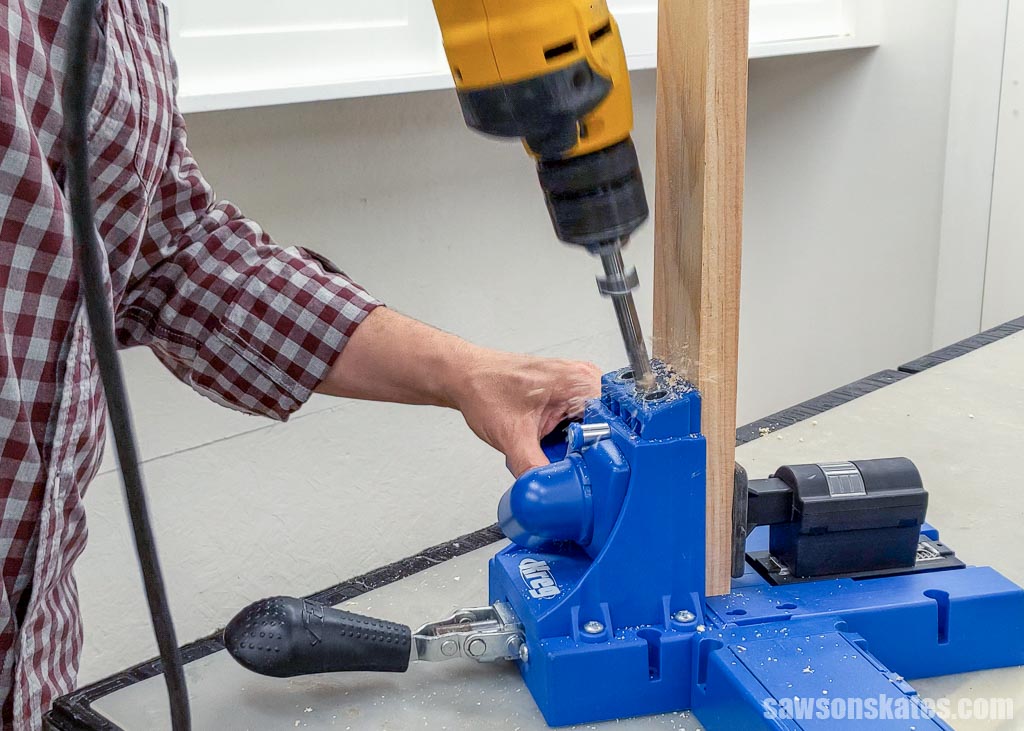
Cut two pieces of wood to length the top rail and mullion (middle rail). Use the diagram in the printed plan to mark the location for pocket holes.
TIP: To avoid damaging your router bit when cutting the rabbet in Step 5, be sure to position the pocket holes as shown in the printed plan.
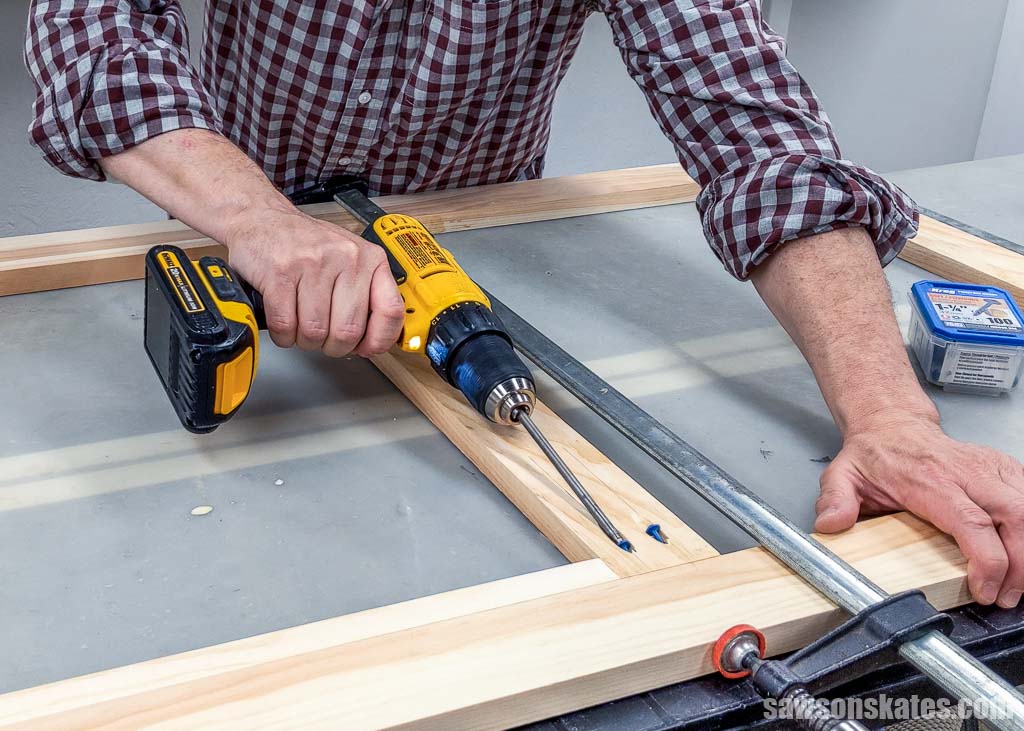
Then, drill pocket holes at each mark.
Related: How to Use a Pocket Hole Jig (& Beginner Pitfalls to Avoid)
Cut one piece of wood to length for the bottom rail.
TIP: Again, to avoid damaging your router bit when cutting the rabbet in Step 5, be sure to position the pocket holes as shown in the printed plan.
Then, drill pocket holes at each mark.
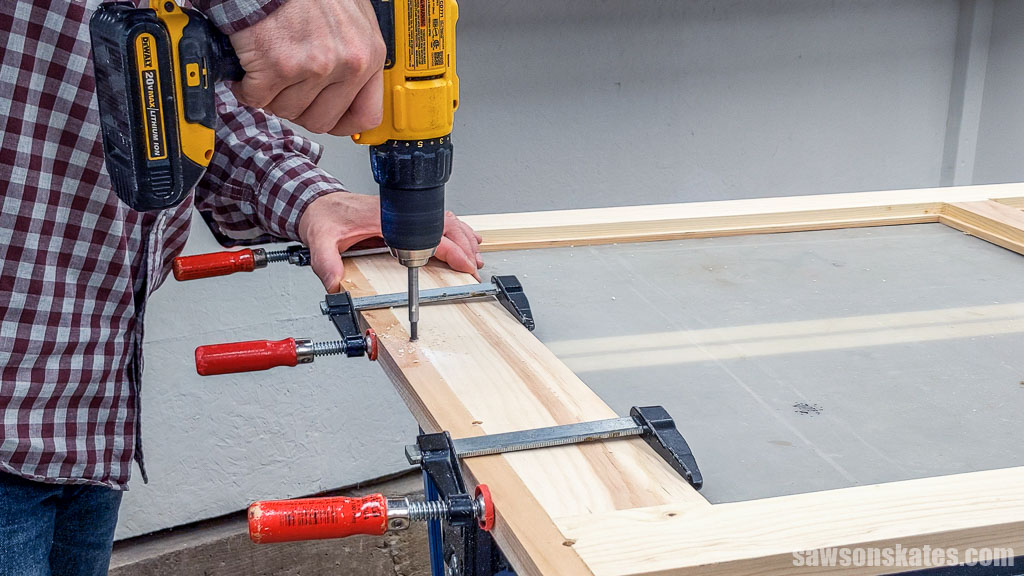
Step 4. Assemble the Storm Window Frame
I cut two pieces of scrap wood to help with the spacing between the bottom rail and mullion (middle rail).
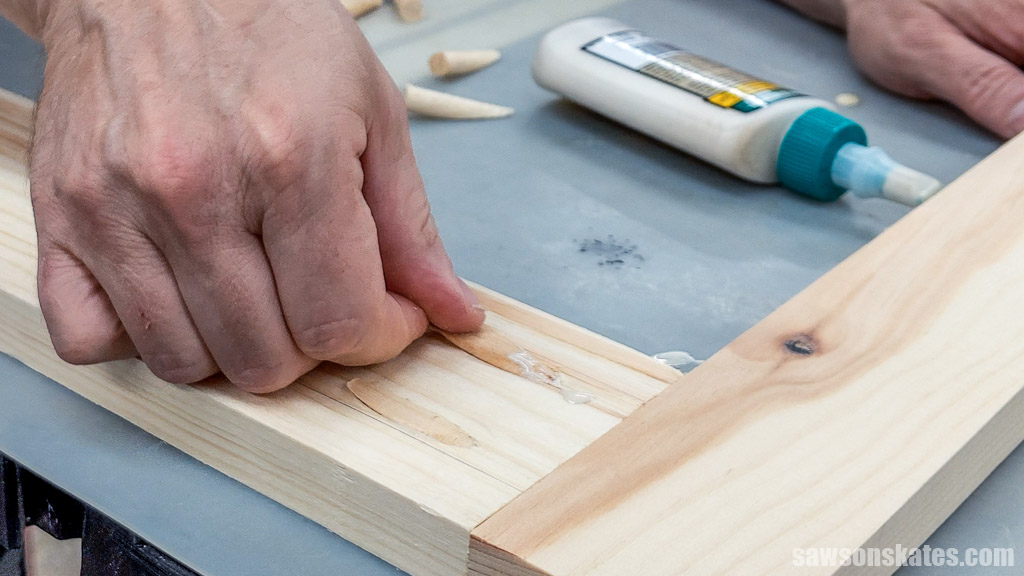
Apply exterior wood glue to the ends of the rails, position on the stiles, and clamp.
TIP: Use waterproof wood glue, such as Titebond 3, for projects exposed to moisture or the elements.
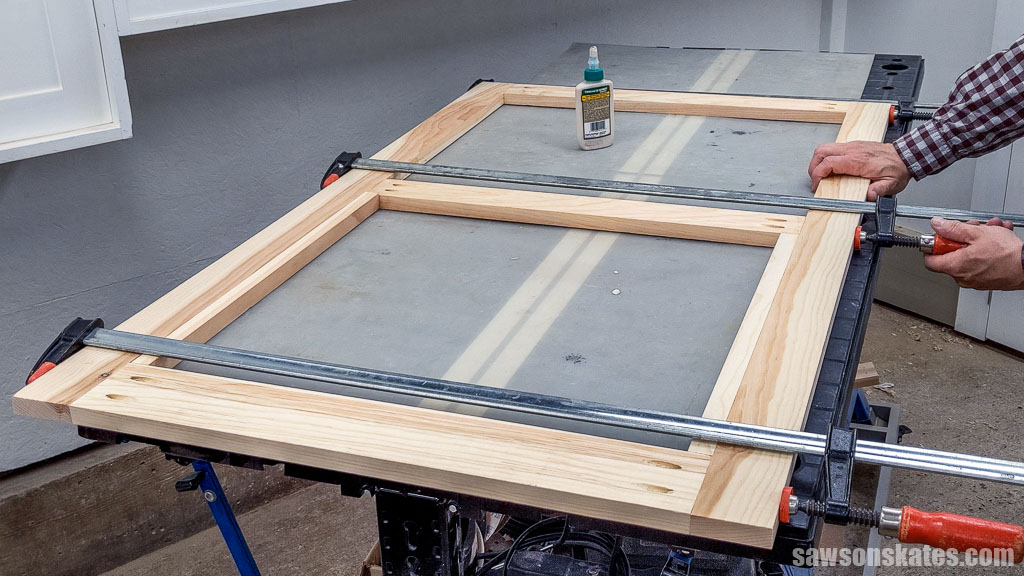
Attach using exterior pocket hole screws.
You can hide the pocket holes and give your project a more professional appearance by filling them with either store-bought plugs or ones you make yourself.
Related: How to Make Pocket Hole Plugs
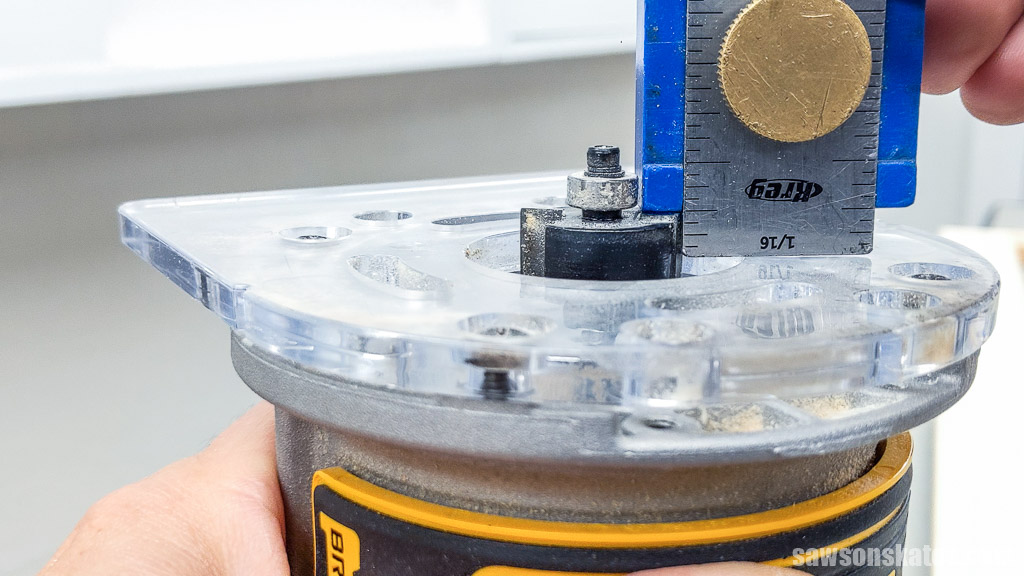
Step 5. Cut the Rabbets
Next, I installed a rabbeting bit in my handheld router.
I recommend making the rabbets in three or four shallow passes to avoid removing too much material all at once.
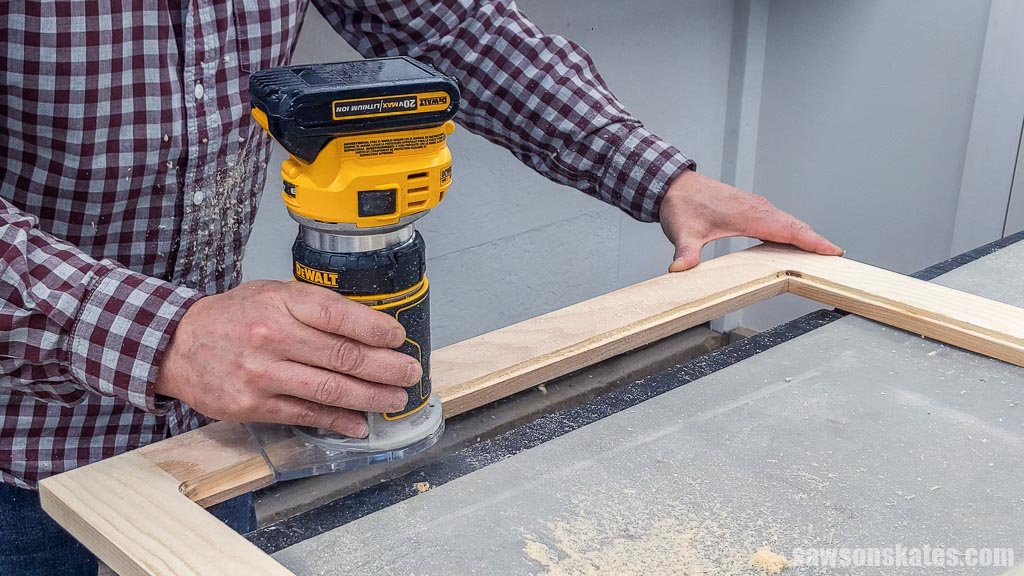
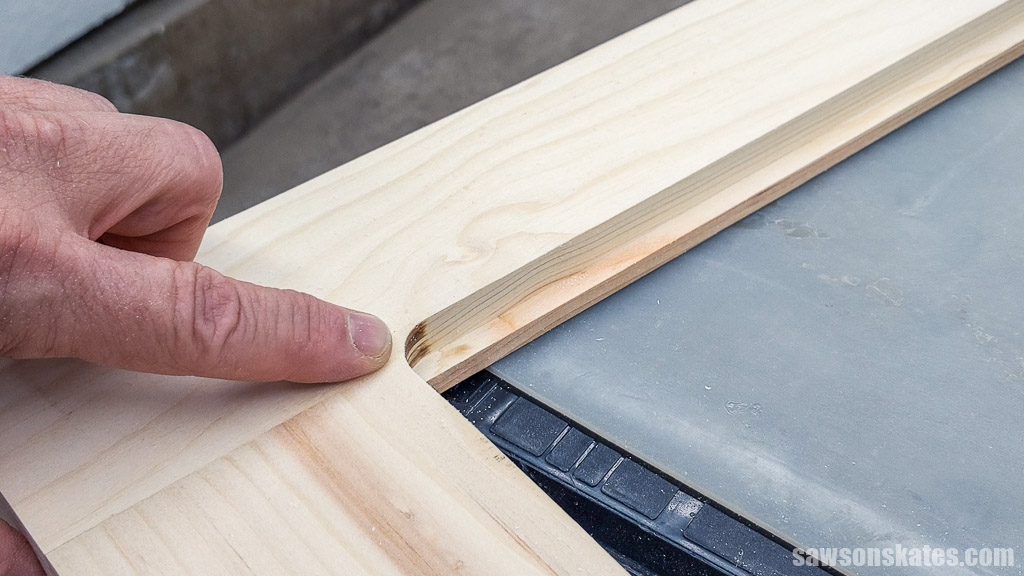
Window glazing (and the rabbets it sits in) faces toward the outside of the house. I prefer the pocket holes to be hidden on the inside. In other words, I wanted to cut the rabbets on the opposite side of the pocket holes, so I placed the frame’s pocket hole side against my workbench.
I set the router bit to the desired depth. Then, I moved the router around the inside of the frame in a clockwise direction. I made several passes, adjusting the bit until I reached a final depth.
TIP: To prevent the router bit from binding, you may have to extend the section you are routing over the edge of your workbench. Always keep your fingers out of the bit’s path!
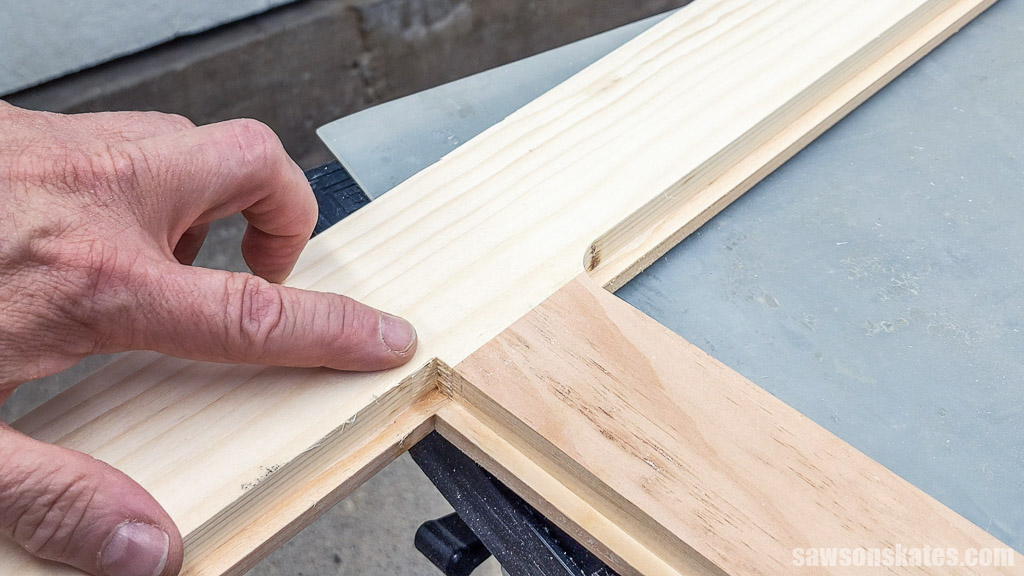
The router bit creates a rounded corner, but the glass needs a square corner.
You can use a corner chisel to square corners. Place the chisel in the corner of the frame and tap it with a hammer two or three times.
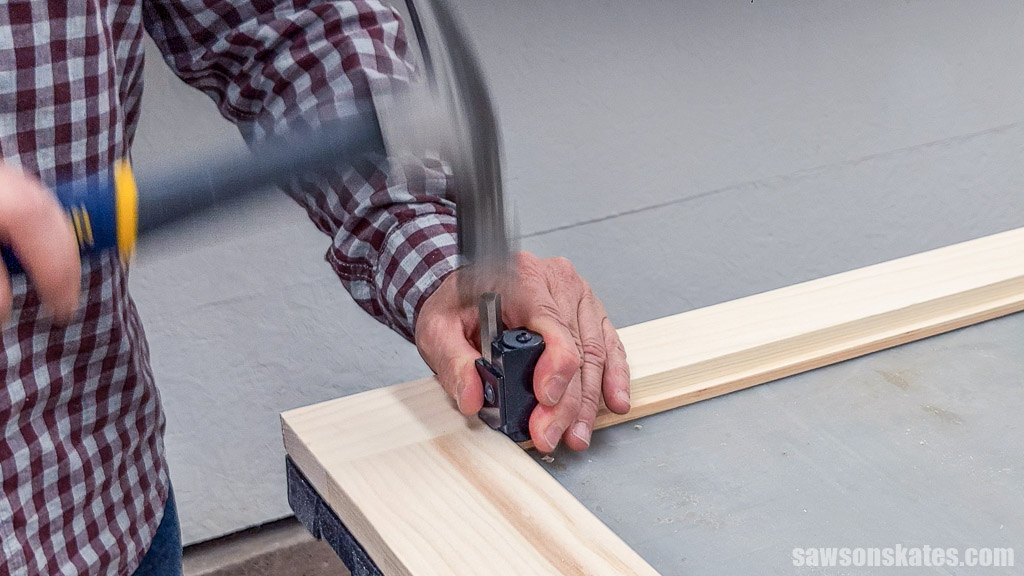
If you don’t have a corner chisel, you can use a flat chisel and hammer instead.
Step 6. Drill the Weep Holes
Weep holes are small holes located at the bottom of storm windows. They allow moisture that collects between the primary and storm windows to drain out, preventing water damage to the window frame and sill.
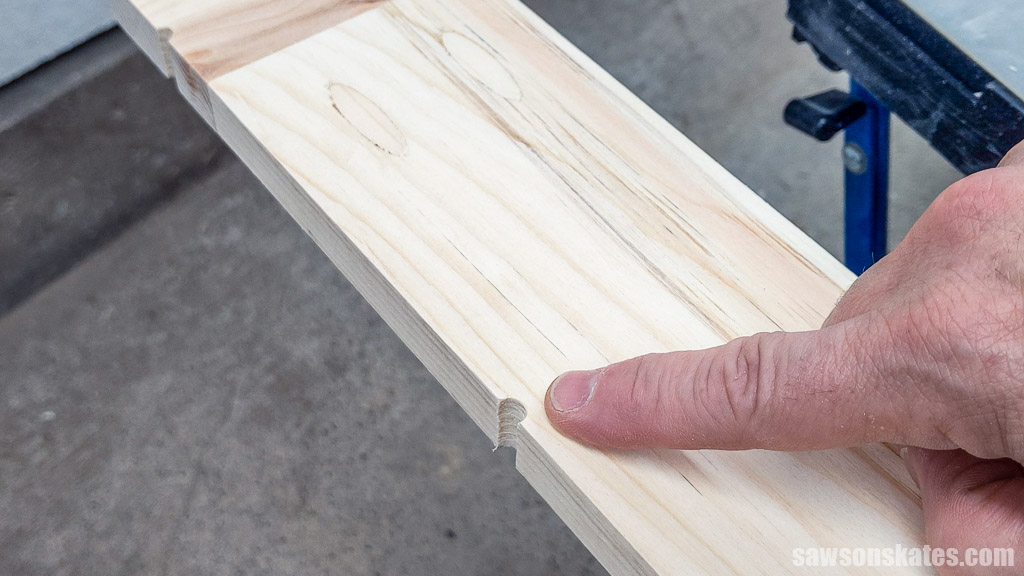
To make the weep holes, I clamped a piece of scrap wood to the bottom of the frame. I used an awl to create a starting point for the drill bit between the frame and scrap wood.
Related: What is an Awl? (+ How to Use It)
Then, I used a Forstner bit to drill five holes in the bottom of the frame.
Related: What is a Forstner Bit? (& How to Use It)
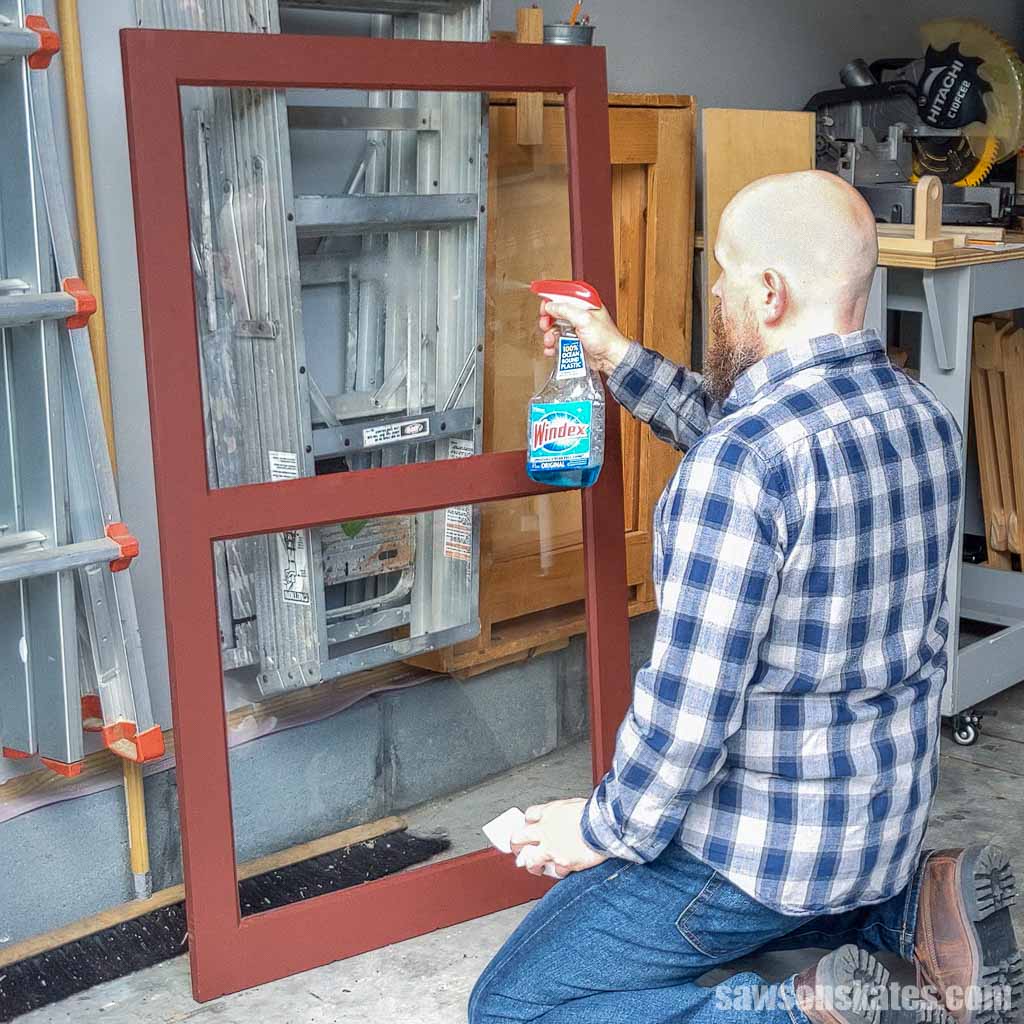
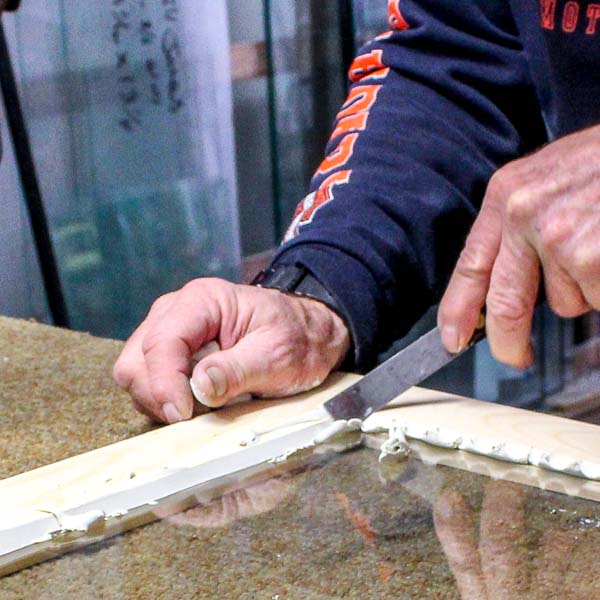
Step 7. Glaze the Window
As I mentioned earlier, I’m not the best at glazing, so I opted to have my storm window glazed by a professional at a local glass shop.”
Related: How to Glaze a Window (Tips from a Pro)
Step 8. Paint or Stain the Frame
I used a paintbrush to apply two coats of exterior stain to my storm window.
Related: How to Clean Paintbrushes (Save Money & Better Results!)
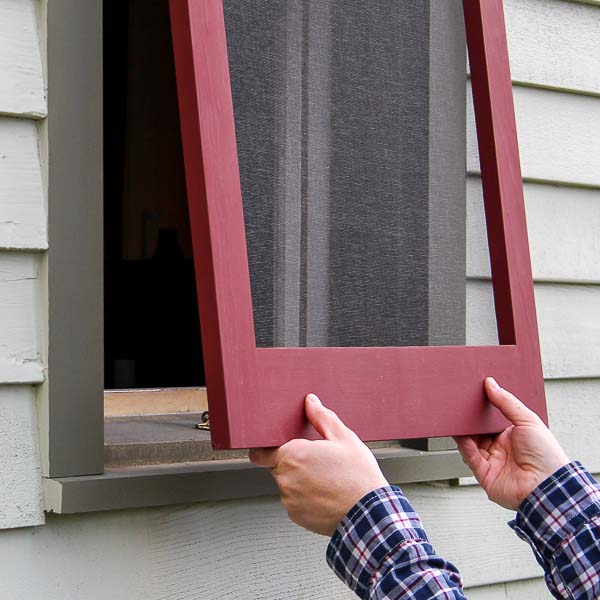
Step 9. Install the Storm Window
You can use store-bought hardware to install the storm window or install the storm window using the DIY method I described above.
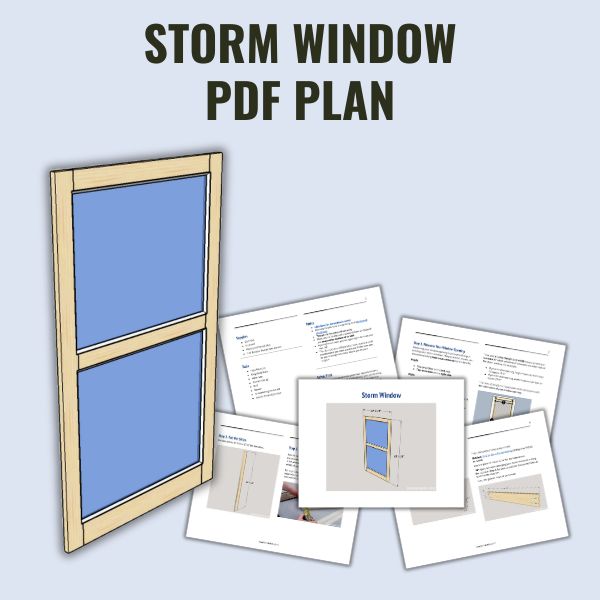
Includes:
- List of tools and materials
- Complete measurements (in inches)
- Easy-to-follow instructions
- Step-by-step photos
- Detailed diagrams
Final Thoughts
Cutting your winter energy costs doesn’t have to be complicated or expensive. DIY storm windows are the perfect way to seal drafty windows and improve your home’s energy efficiency. They’re simple to make, you can customize them to fit nearly any window, and they complement the style of antique homes.
Don’t wait. Get your PDF plan (including the detailed instructions and measurements) now!
Thank you for stopping by. If you enjoyed this tutorial, would you please take a moment and pin it to Pinterest? I’d really appreciate it!
Recommended For You
Pin This For Later

Hi there – I’m Scott, a woodworking enthusiast and creator of Saws on Skates, a site I started in 2015 to share easy-to-follow tutorials, space-saving shop tips, and project inspiration for DIYers at any skill level. Learn more about my woodworking journey here.
I would like to see the final product… in use and more about adapting it for use in my home. Nothing wrong with step by step, but definitely want to see what to expect in the end. Thanks!
Hi Tiana – Thank you for stopping by. I had a difficult time getting “beauty shots” of this project. I had the same problem with my DIY wood window screens. The storm windows just blend into the actual window frames. To me, it wasn’t clear what I was taking a photo of. Not to mention all of the reflections I was getting on the glass. I also tried taking pics of them against a fence, tree and on the ground. It just looked strange having a storm window propped up against a tree! I’ll try some new pics when I install the storm windows again this season.
Why paint after installing the glass? Wouldn’t it be easier the other way around? Maybe I’m missing something 🙂
Great article, thank you for writing it up.
Hi Ben – Thank you for stopping by. The glazing that holds the window in place needs to be sealed with paint when it’s dry. You could paint the frame, glaze it, and then paint the glazing, but this would mean you’re getting out the brush four times – two coats on the frame and two coats on the glazing. I find it easier to paint everything all at once.
Thank you very much. I’m a little confused about what exactly I am seeing? Is this a replacement for my current windows or additional windows that latch over my current ones? If the former, I never see the woodwork needed to install them???
I’m really interested because this looks like it could give me another layer of soundproofing as well as storm protection.
Hi Danny – This is an additional window that latches over a current window. We use storm windows here in the Northeast (and I’m presuming other places where it’s cold) to insulate old single-pane windows for the winter.
I am trying to visualize the holes drilled at the top of the window frame that the screws added to the top of the window slide into and just can’t make the connection. Do you have a photo of it or can you sketch it?
We don’t like the look of the metal 2 piece hangers against the finished window trim and window. Would love to try your grandmothers suggestion but I just can’t wrap my head around it.
Thanks
Hi Sherry – I added some sketches and additional information for the DIY installation here.