DIY Christmas Tree Candle Holder
Make this rustic Christmas tree candle holder using scrap wood. Simple, cozy, and perfect for mantels, sideboards, or holiday gifting.
What Should I Build Next?
That's the question I help answer.
Every week, I send woodworking ideas to 17,000 DIYers who love building things.
You'd fit right in.
Last year, I made a tabletop Christmas tree with lights. When I cut it out of a larger blank, I ended up with two scrap pieces on either side that perfectly mirrored the tree shape. Kind of like using a cookie cutter — you cut out the cookie, and the dough that’s left still looks like the shape you made.
Those “cookie dough” scraps have been sitting in my shop for a year because I knew I could turn them into something useful.
This article contains affiliate links. If you purchase from these links, I may earn a small commission at no additional cost to you. Visit my site policies for more information.
The Simple Idea That Finally Worked
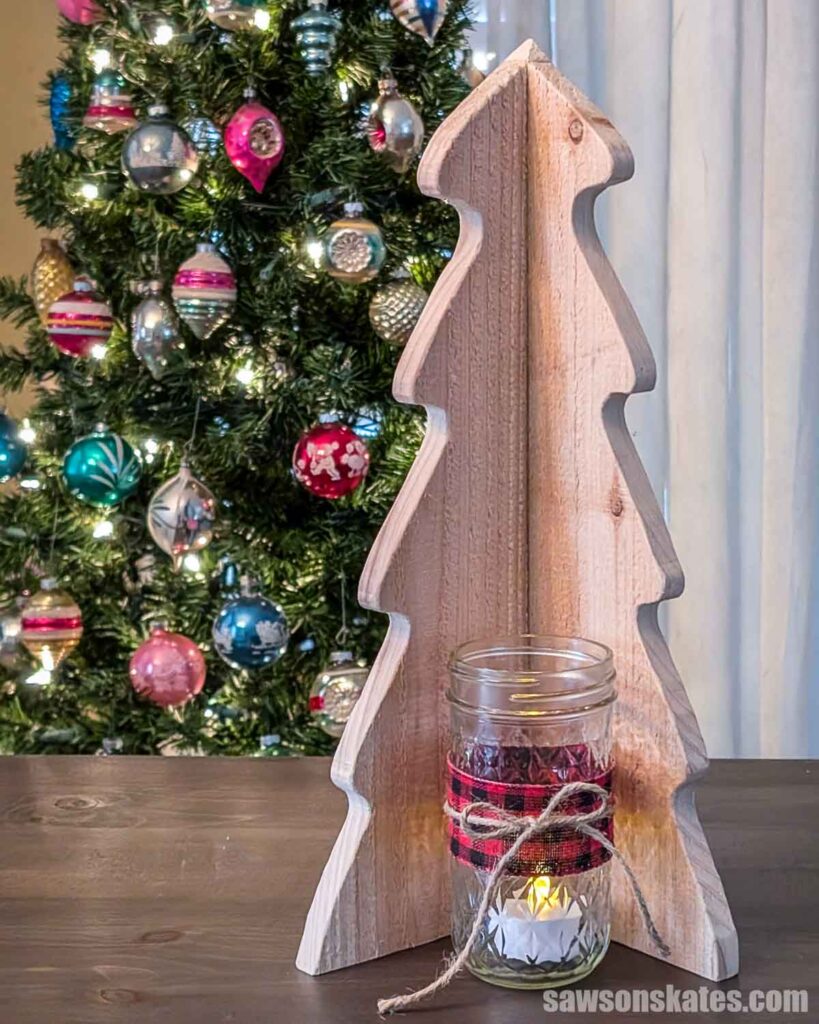
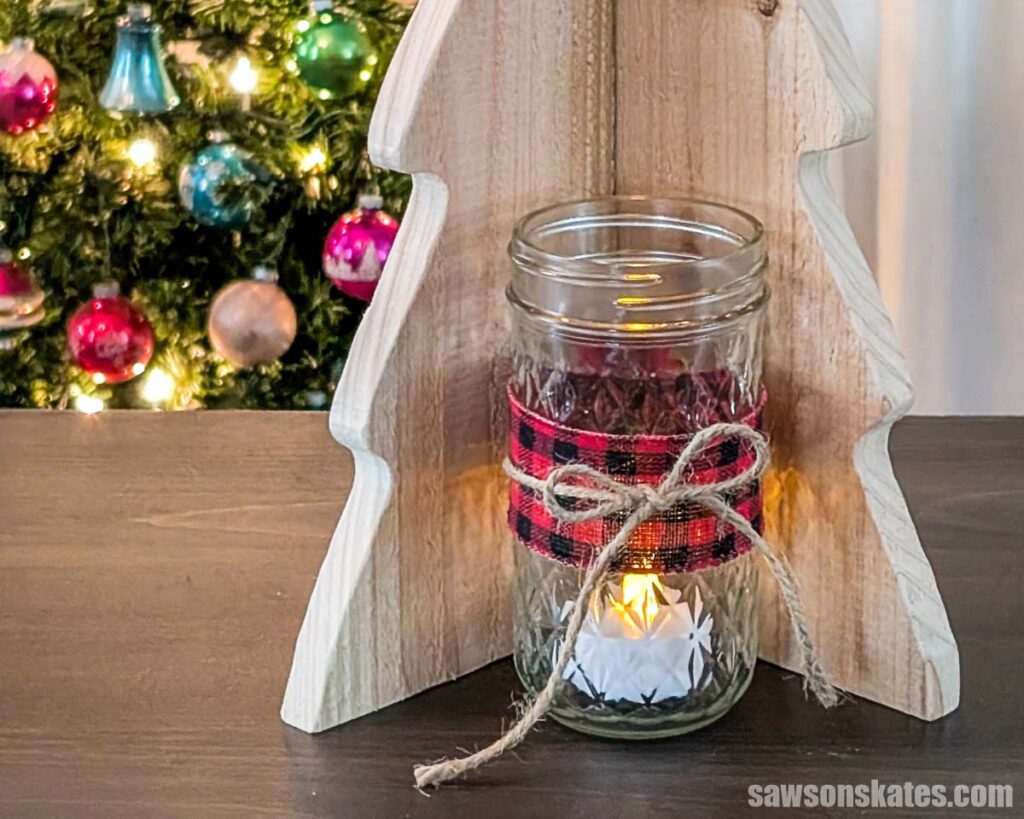
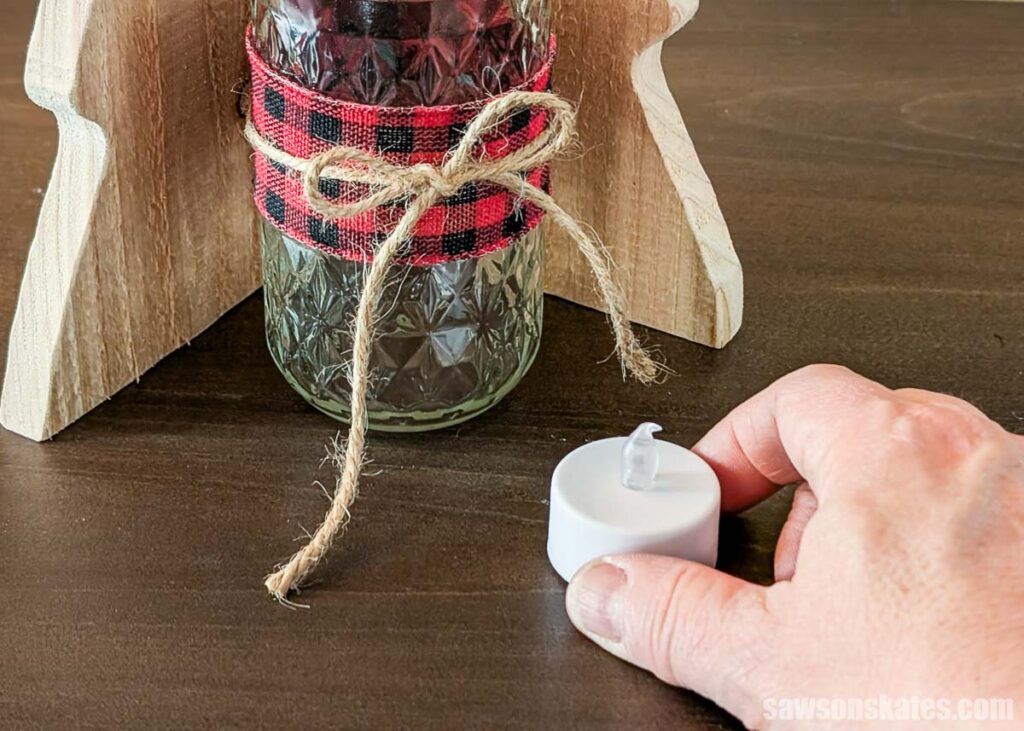
I joined the two pieces at a right angle and created the perfect little backdrop for a mason jar with an LED candle inside. It cost me basically nothing — just scrap wood and a few things I already had at home. It’s simple, rustic, and perfect for a mantel, sideboard, or anywhere you want a soft, cozy candle glow.
The Build Breakdown
If you already have my Tree With Lights plan, you’ll definitely want to make this. If you don’t, you could make something similar by printing (or drawing) a tree shape. Cut it down the middle, trace the halves, and cut your pieces.
Or grab my Tree with Lights plan, make it, and then use the leftover scraps to make this candle holder. It’s like two projects in one!
Materials and Style Ideas
I made my candle holder from leftover cedar pickets and love the rustic, rough-cut texture. I added a red-and-black plaid ribbon to the quilted mason jar (tacked in place with hot glue), then tied a twine bow around it. It’s totally giving cozy Adirondack vibes.
But you can use almost any wood — leave it natural, stain it, or paint it — and finish it off with whatever ribbon or accents fit your style.
Hinged or Solid Construction
Initially, I planned to hinge the two sections so they’d fold for storage, but once I assembled it, I wasn’t in love with the small gap the hinges created. If the gap doesn’t bother you, go for it—tiny hinges, like the kind used for jewelry boxes, would work great.
But for me, I wanted a solid, seamless look, so I joined the two pieces with another cutoff, some glue, and a few pin nails.
Video Overview
Step 1. Prep the Tree Sections
I had these two sections leftover from making my tabletop tree with lights. I saved them because I knew they’d come in handy someday.
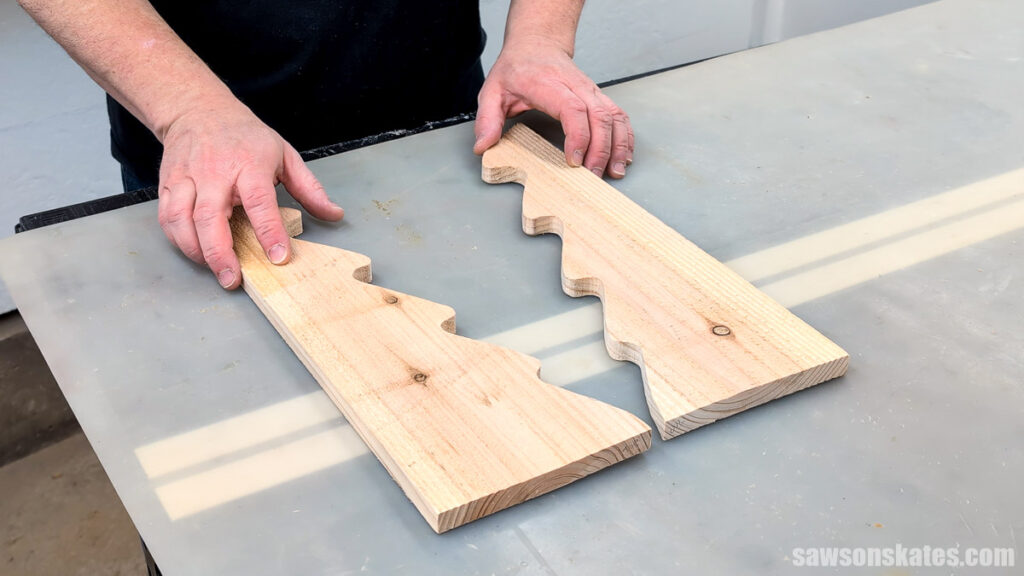
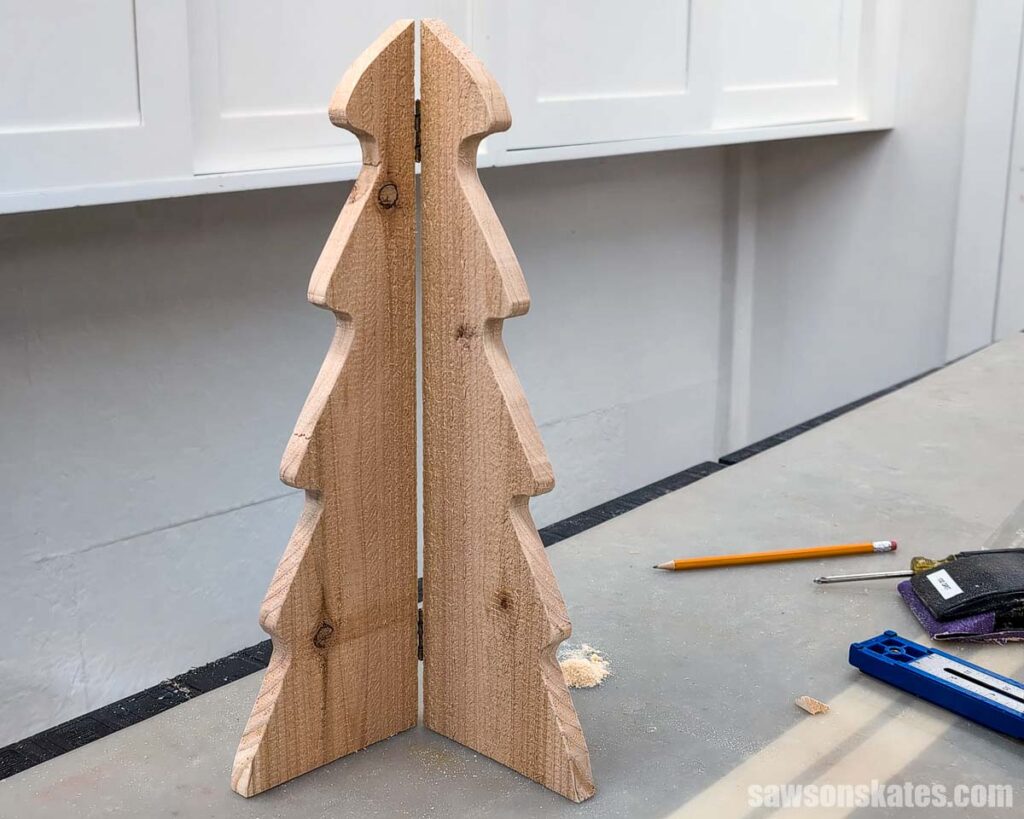
I flipped each piece end-to-end.
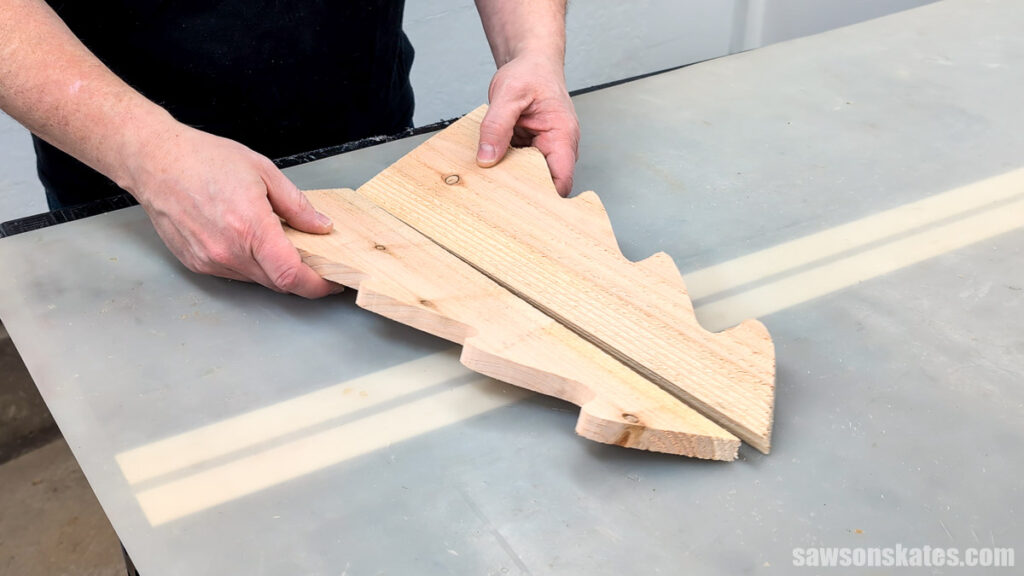
Then, I set them at a 90-degree angle, and instantly thought, “Yup, that’s the perfect backdrop for a candle!”
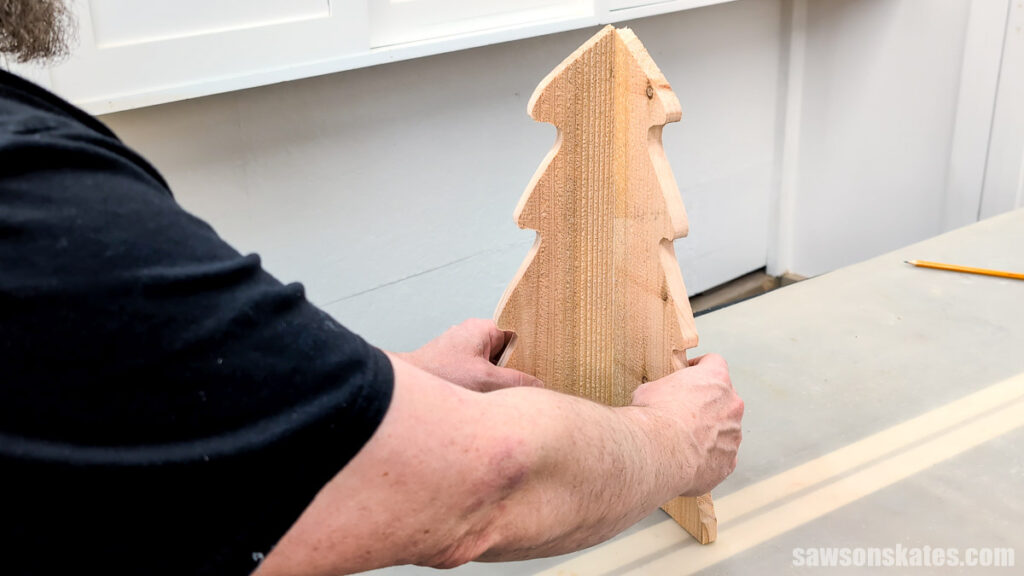
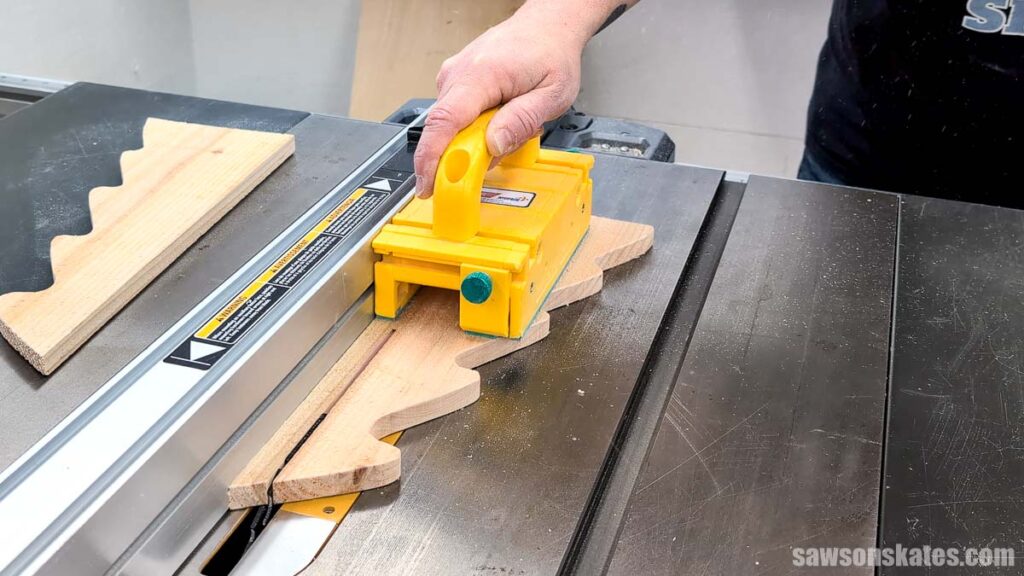
The only thing that bugged me was the width. They looked a little too chunky for a Christmas tree shape. It’s totally optional, but I ripped a little off each piece to slim them down.
Step 2. Join the Sections
My original plan was to hinge the two halves, but the gap between them felt distracting.
So, Plan B: make a solid “connector” piece.
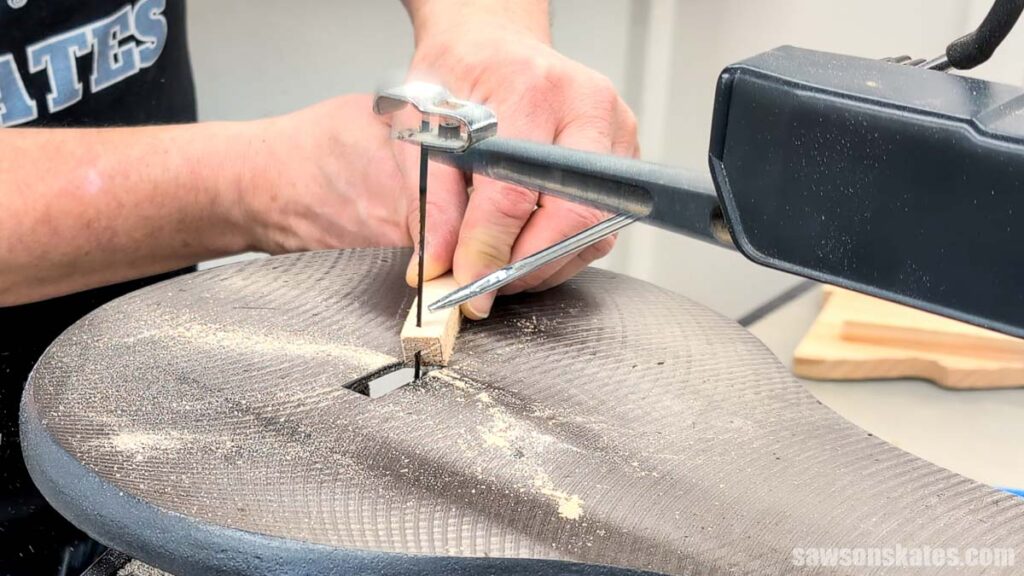
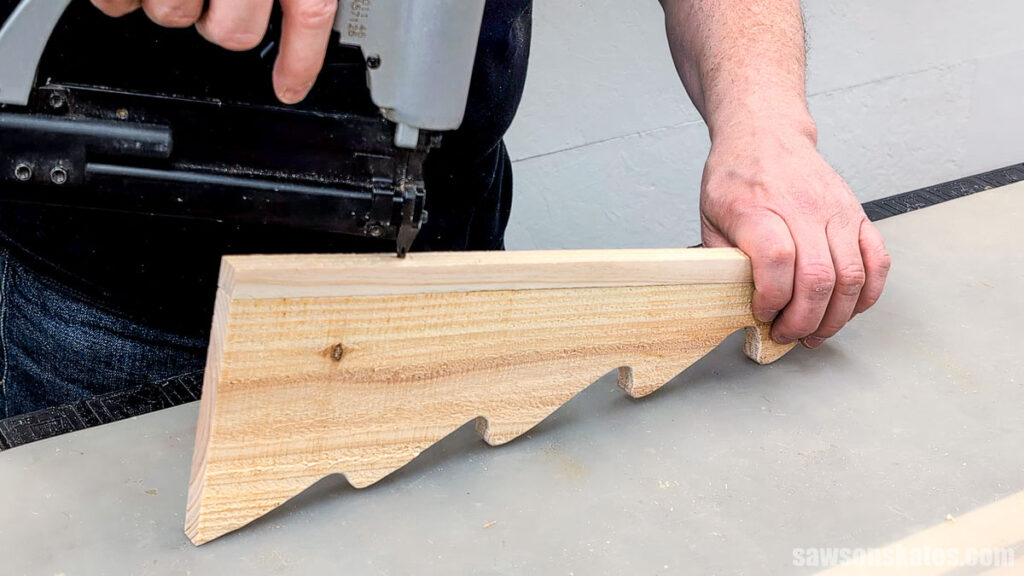
I grabbed the strips I’d just ripped off, placed one on my bench (angled side down), set another on top, and marked the angle.
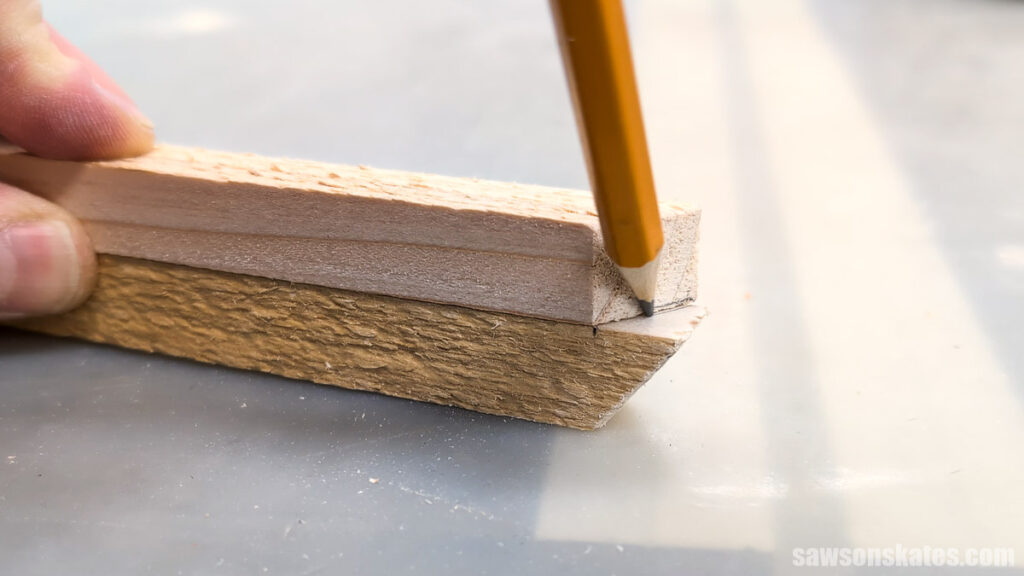
I cut that angle on my scroll saw to create a little “top” piece that bridges the two sides so the tree comes to a point like a real one.
I applied glue to one half of the tree.
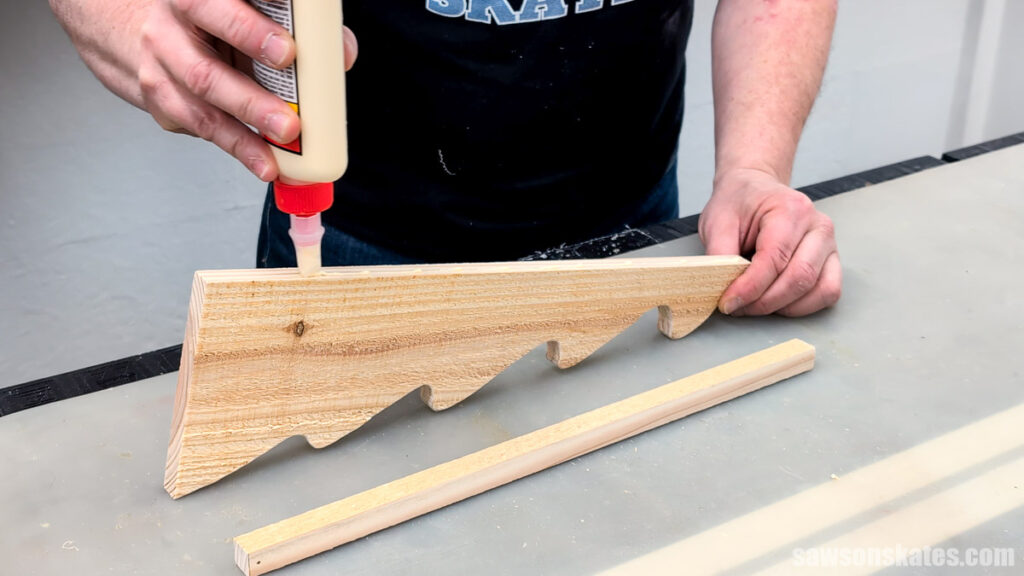
I positioned the “connector piece”.
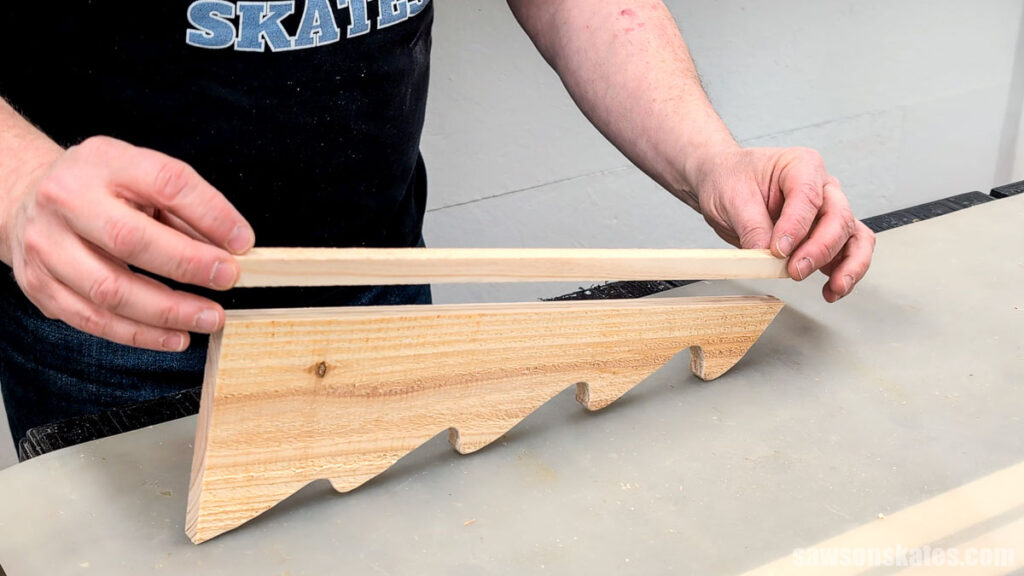
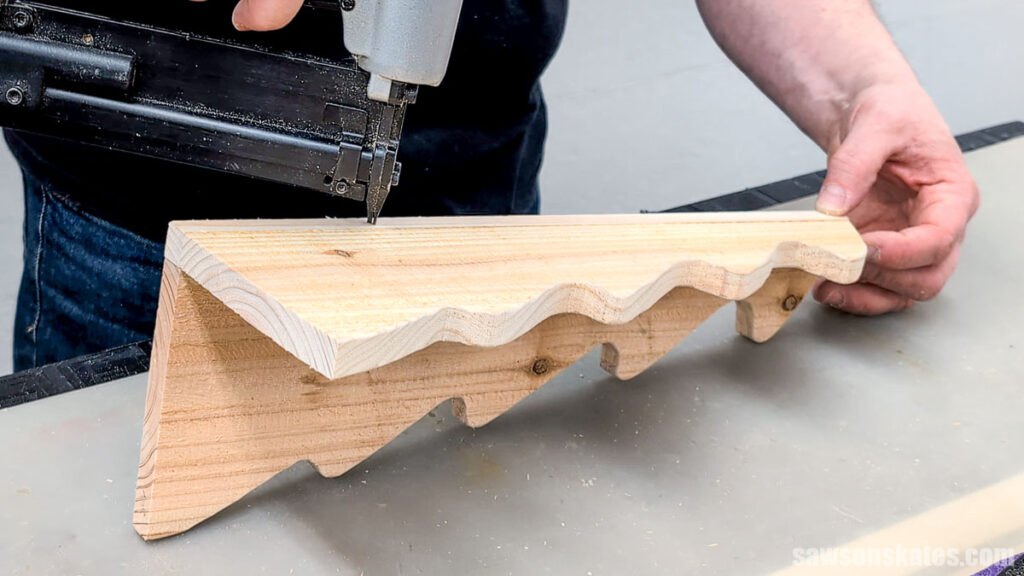
And tacked it in place with 1″ pin nails.
I repeated this step to attach the other half.
Step 3. Add a Base (optional)
I considered adding a half-round base between the two halves.
Honestly? I just didn’t feel like doing it, lol. But it would give the piece a more finished look if you want to add that extra detail.
Final Thoughts
This little candle holder was such a fun way to turn leftover scraps into something cozy and functional. It’s quick, inexpensive, and adds just the right amount of warm holiday glow wherever you set it. If you’ve made my tabletop tree with lights, definitely hang onto those offcuts—I think it will inspire you to look at your scrap wood pile a little differently!
If you’d like to make one, just print or draw a tree shape, cut it down the middle, trace the halves, and cut your pieces. Or—if you want the easiest route—use the template from my Tree With Lights plan, make the tree, and you’ll have the perfect scraps left over to build this candle holder. It’s like two projects in one!
Thank you for stopping by. If you enjoyed this tutorial, would you please take a moment and pin it to Pinterest? I’d really appreciate it!
Recommended For You

Pin This For Later

Hi there – I’m Scott, a woodworking enthusiast and creator of Saws on Skates, a site I started in 2015 to share easy-to-follow tutorials, space-saving shop tips, and project inspiration for DIYers at any skill level. Learn more about my woodworking journey here.